
Every woodworker has a story.
Sometimes it’s about the first flawless dovetail joint or the satisfaction of turning a rough board into a beautiful piece of furniture. Other times, it’s about a moment that lasted only a second—a kickback that came without warning, a wood chip that struck just inches from an eye, or the realization that the ringing in your ears hadn’t faded by morning.
Those moments have a way of changing how you look at your workshop.
It’s easy to believe that safety is something beginners worry about. The longer you work with tools, the more comfortable they become, and comfort often disguises risk. The truth is that most experienced woodworkers don’t stay safe because they’re fearless—they stay safe because they’ve built habits and systems that leave very little to chance.
That’s what this guide is about.
Instead of offering another generic list of safety gear, this roadmap walks you through the process of creating a workshop that protects you as naturally as it supports your craft. Whether you’re setting up a compact garage shop or refining a fully equipped woodworking space, you’ll discover which safety equipment deserves your attention first, where each upgrade delivers the greatest value, and how professional workshops quietly reduce risk through thoughtful design rather than luck.
By the time you’ve finished reading, you’ll know:
- Which woodworking safety equipment belongs in every workshop
- How to prioritize purchases without overspending
- Why professionals invest as much in safety systems as they do in power tools
- Which upgrades make the biggest difference as your workshop grows
- How small daily habits dramatically reduce the chances of injury
A better workshop isn’t defined only by the tools you own. It’s defined by how confidently—and safely—you can use them.
Woodworking Safety Equipment Checklist: The Essentials at a Glance
If you’re looking for the fastest answer, here’s the foundation every woodworking shop should have before any project begins.
Personal Protective Equipment (PPE)
Every woodworker should keep these essentials within easy reach:
- ANSI-rated safety glasses
- Face shield for turning, grinding, or high-impact work
- Hearing protection (earplugs or earmuffs)
- N95 or P100 respirator for dust-producing tasks
- Closed-toe, non-slip footwear
- Well-fitted shop clothing without loose sleeves or dangling drawstrings
These items protect the parts of your body that no machine can replace.
Workshop Safety Equipment
Beyond personal protection, your workspace should include equipment designed to reduce everyday hazards.
Your core workshop safety setup should include:
- ABC-rated fire extinguisher
- Fully stocked first-aid kit
- Dust collection system
- Air filtration unit
- Push sticks and push blocks
- Featherboards
- Bright overhead and task lighting
- Clearly accessible emergency shutoff
A safe workshop isn’t just equipped—it encourages good decisions before you even switch on a machine.
Machine Safety Features
Modern woodworking machines include safety features that should never be treated as optional accessories.
Whenever possible, make sure your tools include:
- Blade guards
- Riving knives
- Splitters
- Anti-kickback pawls
- Emergency stop switches
These components often prevent the kinds of accidents that happen in fractions of a second.
Why Safety Is the First Tool Every Woodworker Should Own
Walk into any professional woodworking shop and you’ll notice something interesting.
The atmosphere feels calm.
Tools are organized. Walkways stay clear. Dust isn’t floating through the air. Machines are maintained. Safety glasses sit exactly where they’re needed.
None of this happens by accident.
Experienced woodworkers understand something that newcomers often discover only after a close call: confidence is valuable, but consistency keeps you safe.
Experience can make you faster. It can make your cuts cleaner and your joinery more precise. Yet experience alone doesn’t prevent injuries. In fact, familiarity sometimes creates the conditions for complacency. The cut you’ve made a thousand times before is often the one that tempts you to skip eye protection or reach a little too close to a blade.
Professional habits aren’t built around assuming everything will go right.
They’re built around preparing for the moment something doesn’t.
Safety also delivers benefits that extend well beyond injury prevention.
A well-organized workshop helps you think more clearly. Better lighting reduces measuring mistakes. Effective dust collection improves visibility and finish quality. Sharp, well-maintained blades require less force, creating smoother cuts while reducing strain on both the machine and the operator.
In other words, safety isn’t separate from craftsmanship.
It supports it.
The cleaner your environment, the easier it becomes to concentrate. The fewer distractions around you, the more attention you can give to grain direction, joinery, and precision. What begins as a commitment to protection often becomes one of the biggest contributors to better woodworking.
That’s why experienced craftspeople rarely talk about safety as an inconvenience.
They see it as part of the craft itself.
Part 1: Building the Beginner Safety Foundation
Every workshop starts with a decision.
Most new woodworkers immediately begin researching table saws, routers, or planers. Those tools are exciting, and it’s natural to want them first.
But before adding horsepower to your workshop, build a foundation that protects the person using it.
The smartest first investment isn’t another machine.
It’s confidence built on preparation.
Eye Protection: Small Investment, Lifelong Value
Vision is one of the most valuable tools you’ll ever bring into your workshop.
A tiny wood chip launched at high speed can end a project instantly—and in some cases, change a life permanently.
That’s why quality eye protection should become as automatic as plugging in a saw.
Look for safety glasses that meet recognized impact standards and offer features such as:
- Wraparound coverage
- Anti-fog lenses
- Scratch-resistant coatings
- Comfortable frames for all-day wear
- Clear optical visibility without distortion
Comfort matters more than many people realize.
If safety glasses constantly slip down your nose or fog over after a few minutes, you’ll eventually find reasons not to wear them. Choosing a pair you’ll actually keep on throughout a project is one of the simplest ways to build lasting safety habits.
An extra pair stored near every workstation is never a bad idea.
The easier safety becomes, the more consistently you’ll practice it.
Hearing Protection: Protect the Sense You Can’t Restore
The sounds of woodworking are satisfying.
The steady hum of a planer, the clean cut of a table saw, and the rhythm of a router all become familiar over time. Unfortunately, so does gradual hearing damage.
Unlike a cut finger or a splinter, hearing loss rarely announces itself in dramatic fashion. It happens quietly, one project at a time, until conversations become harder to follow and ringing ears become part of everyday life.
Many common woodworking machines operate well above noise levels that can damage hearing during extended exposure.
Fortunately, protecting yourself is simple.
Popular options include:
- Disposable foam earplugs
- Reusable silicone earplugs
- Over-ear earmuffs
- Electronic hearing protection that reduces harmful noise while allowing conversation
Choose the style you’ll genuinely wear.
The best hearing protection isn’t necessarily the most expensive model—it’s the one that becomes part of your routine every single time you step into the shop.
Respiratory Protection: The Hazard You Rarely See
Sawdust is easy to sweep off the floor.
The dust that deserves your attention is the kind you can’t see.
Fine airborne particles remain suspended long after machines stop running. They drift through the workshop, settle on every surface, and can be inhaled without you noticing.
Different woodworking tasks create different levels of airborne dust, so your respiratory protection should match the job.
A practical approach looks like this:
- N95 respirators for lighter sanding and shorter projects
- P100 respirators for prolonged sanding or heavy dust production
- Half-face respirators with replaceable filters for regular workshop use or exposure to finishes and certain wood species
Respirators work best when combined with proper dust collection and air filtration. One doesn’t replace the other.
Think of dust management as layers of protection rather than a single solution.
The cleaner your air becomes, the healthier your workshop becomes too.
Clothing and Footwear: Small Details That Prevent Big Problems
Not every workshop hazard comes from a blade.
Loose hoodie strings, oversized sleeves, dangling jewelry, or untied long hair can all become dangerous around spinning machinery.
A few simple choices dramatically reduce those risks.
Wear:
- Fitted, comfortable clothing
- Closed-toe footwear with good grip
- Non-slip shoes designed for long periods of standing
- Hair securely tied back if it’s long enough to reach moving parts
Avoid clothing that could snag on rotating equipment or obstruct your movement while carrying heavy stock.
One point often surprises beginners: gloves aren’t always safer.
While gloves can be useful for handling rough lumber or moving sheet goods, they should generally be avoided around machines with rotating parts where loose material could become entangled. Always follow the safety recommendations provided by the equipment manufacturer before deciding when gloves are appropriate.
Building these habits early means you’ll spend less time thinking about them later.
Eventually, they become second nature—the same way fastening a seatbelt becomes automatic before driving away.
And that’s exactly the goal.
Part 2: Designing a Workshop That Naturally Keeps You Safe
There’s a subtle difference between a workshop that’s merely functional and one that actively protects the person working inside it.
At first glance, the distinction isn’t obvious. Both spaces might have the same table saw, the same workbench, and the same collection of hand tools. Yet one feels effortless to work in, while the other constantly demands your attention. You’re stepping over extension cords, searching for clamps, brushing sawdust off your workpiece, and adjusting your position because the lighting casts shadows exactly where you need clarity.
Those little interruptions matter.
Woodworking accidents rarely begin with one dramatic mistake. More often, they begin with dozens of tiny distractions that slowly chip away at your concentration.
Professional workshops are designed to remove those distractions before they become hazards.
The result isn’t just a safer shop—it’s a place where your attention stays focused on the work instead of the environment around you.
Lighting: See Every Cut Before You Make It
Good lighting isn’t about making your workshop look impressive.
It’s about eliminating uncertainty.
Every measurement, every layout line, every blade adjustment depends on being able to see clearly. Dim corners and heavy shadows force your eyes to work harder, increasing fatigue and making small mistakes far more likely.
If you’ve ever leaned closer to a cut line because you couldn’t quite make it out, you’ve already experienced how poor lighting changes your behavior.
An effective workshop uses layers of light rather than relying on a single overhead fixture.
Consider combining:
- Bright LED overhead lighting for general visibility
- Adjustable task lights above workbenches
- Dedicated machine lighting for precision cuts
- Portable work lights for detailed assembly or finishing
Aim to eliminate shadows around blade areas, fences, and measuring surfaces.
Natural daylight is an excellent supplement when available, but it shouldn’t be your only source of illumination. Projects continue on cloudy days, during winter afternoons, and well after sunset.
Consistent lighting means consistent decisions.
Dust Collection: The Invisible Upgrade That Changes Everything
Ask experienced woodworkers about the best investment they’ve made after buying their core tools, and many will give the same answer:
Dust collection.
At first, it seems like a convenience. Less sweeping. Cleaner surfaces. Easier cleanup.
Then you realize it’s much more than that.
Wood dust affects nearly every part of your workshop.
It settles inside machinery, reducing efficiency. It covers freshly milled lumber before assembly. It interferes with finishes, clouds your air, and quietly becomes one of the most overlooked health risks in woodworking.
The smallest particles are the most concerning because they’re light enough to remain airborne long after visible dust has disappeared.
That’s why effective dust management starts where the dust is created—not after it’s already floating through the room.
A complete dust-control strategy typically includes:
Source Collection
Capture dust directly from machines using:
- Dust collector
- Dust ports
- Flexible collection hoses
- Blast gates
- Machine-specific adapters
Removing dust at the source dramatically reduces the amount that ever reaches the air.
Shop Vacuum
A quality shop vacuum serves a different purpose than a central dust collector.
It’s ideal for:
- Portable power tools
- Router cleanup
- Drill press debris
- Benchtop machines
- Workbench cleanup
Keeping both systems allows each to do what it does best.
Air Filtration
Even excellent dust collection can’t capture every airborne particle.
That’s where ceiling-mounted or portable air filtration systems become valuable.
Rather than replacing dust collection, they work alongside it, continuously filtering the fine particles that remain suspended after cutting and sanding.
Think of dust collection as your first line of defense.
Air filtration is the second.
Together, they create noticeably cleaner air and a far more comfortable workshop environment.
Workshop Layout: Let the Space Work With You
A well-designed workshop feels intuitive.
You don’t have to stop and think about where to place a board before ripping it on the table saw. You aren’t twisting awkwardly to reach a clamp or moving three tools just to access one.
Everything flows.
That flow isn’t accidental.
It’s planned.
When organizing your workspace, focus on how material moves from one operation to the next.
For example:
- Lumber storage
- Milling
- Cutting
- Joinery
- Assembly
- Sanding
- Finishing
If your shop layout follows this natural sequence, you’ll spend less time carrying heavy boards back and forth and more time working efficiently.
Efficiency and safety often improve together.
Keep Walkways Clear
One misplaced offcut might seem harmless.
Until you’re carrying an eight-foot hardwood board across the shop.
Clean walkways reduce:
- Trips
- Slips
- Awkward lifting positions
- Dropped material
- Emergency evacuation hazards
Develop the habit of cleaning as you work instead of waiting until the end of the day.
Professional woodworkers don’t maintain tidy shops because they enjoy sweeping.
They do it because clutter has consequences.
Smart Tool Storage Saves More Than Time
Searching for a tape measure isn’t dangerous.
Searching for one while balancing a freshly cut workpiece can be.
Assign every frequently used tool a permanent location.
Wall-mounted storage, pegboards, French cleats, drawer organizers, and labeled cabinets all make retrieval faster while reducing unnecessary movement around the workshop.
Ask yourself a simple question:
“If someone else walked into my shop, could they return every tool to its proper place?”
If the answer is yes, you’ve created a system rather than simply finding empty spaces to store equipment.
Extension Cords and Electrical Safety
Electricity powers every modern workshop, yet it’s surprisingly easy to overlook.
Take a quick look around your workspace.
Do extension cords cross walking paths?
Are outlets overloaded?
Do cords show signs of cracking or wear?
These are small details until they aren’t.
Protect your workshop by following a few simple principles:
- Avoid daisy-chaining extension cords.
- Use heavy-duty cords rated for your tools.
- Replace damaged cords immediately.
- Keep electrical connections away from standing water.
- Unplug tools before changing blades or performing maintenance.
Electricity is safest when it becomes predictable.
Treat every connection with the same respect you give every spinning blade.
Organization Isn’t About Perfection—It’s About Removing Friction
Some of the safest workshops aren’t spotless.
They’re simply intentional.
There’s a difference.
Wood shavings on the floor during a project are normal.
A pile of scrap blocking your path to the exit isn’t.
The goal isn’t to create a workshop that looks untouched.
The goal is to eliminate the tiny frustrations that interrupt focus.
Every unnecessary decision drains attention.
Where did I leave my square?
Is that chisel under the board?
Can I reach the push stick before this cut?
When your workshop answers those questions automatically, your mind stays on the craft instead of the clutter.
That’s one of the hidden advantages of organization:
It protects your concentration.
Emergency Preparedness: Hoping You’ll Never Need It
Most people don’t enjoy thinking about emergencies.
That’s exactly why preparation matters.
When something unexpected happens, there’s rarely time to search for supplies or decide what to do next.
Preparation should happen long before it’s needed.
Every woodworking shop—regardless of size—should include a dedicated emergency station containing the essentials.
Fire Protection
Woodworking combines combustible dust, powerful motors, electrical equipment, and finishing products that may be flammable.
Fire prevention begins with awareness.
Keep an ABC-rated fire extinguisher in an accessible location—not buried behind lumber or tucked inside a cabinet.
Make sure everyone who uses the workshop knows exactly where it is and understands how to operate it.
Just as important, inspect it periodically to ensure it’s fully charged and ready for use.
First-Aid Supplies
Small cuts happen.
Splinters happen.
Minor burns happen.
Having a well-stocked first-aid kit within easy reach keeps those interruptions from becoming bigger problems.
Include items such as:
- Adhesive bandages
- Sterile gauze
- Medical tape
- Antiseptic wipes
- Burn gel
- Tweezers
- Disposable gloves
- Eye wash solution
Replace supplies as they’re used rather than waiting until the kit is nearly empty.
Emergency Communication
It’s easy to assume your phone is somewhere nearby.
Until it isn’t.
Keep a charged mobile phone accessible whenever you’re working alone, and make sure emergency contacts are easy to find.
If your workshop is detached from your home or located in a basement, consider posting emergency numbers in a visible location.
Seconds matter during an emergency.
Removing uncertainty can make all the difference.
Build Habits Before You Need Them
Preparation isn’t about expecting the worst.
It’s about making the right response automatic.
Know where your fire extinguisher is without looking.
Know how to shut off power quickly.
Know where your first-aid supplies are stored.
Practice those habits often enough that they become part of your normal workflow rather than something you remember only after something goes wrong.
That’s how safe workshops are built.
Not through fear.
Through thoughtful repetition.
Continue Reading
In Part 3, we’ll move from the workshop itself to the machines that demand the greatest respect. You’ll learn how to make table saws, routers, band saws, jointers, and planers significantly safer, along with the professional-level upgrades that transform a good workshop into one that’s built for decades of reliable, confident work.
Part 3: Machine Safety—Where Preparation Meets Precision
Every machine in your workshop has a personality.
A table saw rewards accuracy but punishes hesitation. A router removes material with astonishing speed. A band saw feels forgiving—until it isn’t. Even the quiet rhythm of a drill press can create dangerous situations when attention drifts.
That’s why experienced woodworkers never think of machine safety as a collection of rules.
They think of it as a routine.
The goal isn’t to become afraid of your tools. It’s to understand them well enough that safe operation becomes second nature. Every machine asks something different of you, and every one deserves the same level of respect, whether you’re making your first cut or your thousandth.
Let’s look at the machines found in most woodworking shops and the safety equipment that helps you use them with confidence.
Table Saw Safety: The Heart of the Workshop—and the Tool That Demands the Most Respect
If there’s one machine that deserves your full attention, it’s the table saw.
It’s also the centerpiece of countless workshops, handling everything from rough dimensioning to fine cabinetry. Because it’s used so often, it’s easy to become comfortable with it. That familiarity can quietly lead to shortcuts, and shortcuts around a spinning blade rarely end well.
A safe table saw setup starts long before the motor is switched on.
Essential Safety Equipment
Keep these components in place whenever possible:
- Blade guard
- Riving knife
- Anti-kickback pawls
- Push sticks
- Push blocks
- Featherboards
- Stable outfeed support
Each serves a specific purpose. Together, they dramatically reduce the likelihood of kickback, one of the most dangerous events that can occur on a table saw.
Understanding Kickback
Many new woodworkers focus on the blade itself.
Experienced woodworkers often worry just as much about the board.
Kickback happens when wood becomes trapped between the blade and the fence or twists unexpectedly during the cut. Instead of continuing forward, the workpiece is launched backward with tremendous force.
The solution isn’t simply stronger grip.
It’s proper technique combined with the right safety equipment.
A riving knife helps prevent the kerf from closing behind the blade. Featherboards maintain consistent pressure against the fence. Push sticks allow your hands to stay well away from the blade while maintaining full control over the material.
Small accessories often provide enormous safety benefits.
Before Every Cut
Develop a quick mental checklist:
- Is the blade sharp?
- Is the fence parallel?
- Is the material flat?
- Is the push stick within reach?
- Is the outfeed area clear?
- Can the cut be completed without changing body position?
That entire process takes less than a minute.
It can prevent years of regret.
Router Safety: Small Tool, Serious Power
Routers don’t look intimidating.
That’s part of what makes them easy to underestimate.
At thousands of revolutions per minute, router bits remove material incredibly quickly. Used properly, they leave crisp edges and precise joinery. Used carelessly, they can grab a workpiece just as quickly.
Whether you’re using a handheld router or a router table, stability is everything.
Build Safer Router Habits
Before beginning a cut:
- Confirm the bit is securely tightened.
- Inspect the bit for chips or damage.
- Match router speed to the bit diameter.
- Secure the workpiece firmly.
- Connect dust extraction whenever possible.
Large-diameter bits require slower rotational speeds. Running them too fast creates unnecessary vibration, heat, and risk.
Feed Direction Matters
One of the most common beginner mistakes is feeding stock in the wrong direction.
Always feed the workpiece against the rotation of the bit.
Doing so allows the cutter to remove material gradually instead of pulling the workpiece unexpectedly.
Understanding feed direction isn’t just good technique.
It’s one of the foundations of router safety.
Band Saw Safety: Smooth Cuts Still Require Sharp Focus
Band saws have a reputation for being among the safer stationary woodworking machines.
While that’s generally true, “safer” never means “risk-free.”
A band saw’s continuous downward cutting motion reduces kickback compared to many other tools, but blade contact remains a serious hazard.
The key difference is that accidents often result from inattention rather than sudden machine behavior.
Set the Machine Up Correctly
Before making a cut:
- Check blade tension.
- Inspect blade tracking.
- Adjust upper blade guides.
- Lower the blade guard close to the workpiece.
- Verify that the table is clean and stable.
Proper adjustment improves more than safety.
It also improves cut quality.
Let the Blade Do the Work
If the blade struggles to move through the material, forcing the cut usually makes things worse.
Instead:
- Reduce feed pressure.
- Confirm the blade is appropriate for the stock.
- Replace dull blades promptly.
Smooth, consistent feed rates produce cleaner results and place less stress on both the machine and the operator.
Drill Press Safety: Slow Doesn’t Mean Safe
Because a drill press operates at lower speeds than many woodworking machines, people often lower their guard.
That’s a mistake.
Loose material caught by a spinning drill bit can rotate with surprising force.
Whenever possible:
- Clamp workpieces securely.
- Remove the chuck key before starting.
- Tie back loose clothing and hair.
- Use backing boards to reduce tear-out.
Never attempt to hold small pieces by hand while drilling.
A simple clamp provides far more control than your grip ever will.
Jointer and Planer Safety: Preparing Lumber Without Taking Chances
Few machines transform rough lumber as dramatically as jointers and planers.
They also expose rapidly spinning cutter heads that deserve constant respect.
Safe operation starts before the board reaches the machine.
Inspect Every Board
Carefully examine lumber for:
- Nails
- Staples
- Screws
- Embedded stones
- Loose knots
- Hidden cracks
Foreign objects don’t just damage knives.
They can become dangerous projectiles.
Always Use Push Pads on the Jointer
Push pads keep your hands elevated above the cutter head while maintaining steady pressure throughout the cut.
Using them consistently isn’t simply recommended.
It’s one of the easiest ways to reduce risk during face-jointing operations.
Sharp Knives Are Safer Than Dull Ones
This may seem counterintuitive.
Many people assume sharp blades are more dangerous.
In practice, dull blades often require greater force, increasing the likelihood of slips, kickback, poor control, and unnecessary strain on both the machine and the operator.
Keeping cutting tools sharp improves:
- Surface finish
- Feed consistency
- Motor efficiency
- User control
- Overall safety
Maintenance is one of the most overlooked forms of personal protection.
Stage 4: Professional-Level Safety Upgrades
As your workshop grows, so does the opportunity to improve it.
The difference between a beginner shop and a professional one isn’t measured only by expensive machinery.
It’s measured by how intentionally risk is managed.
Professionals invest in systems that quietly improve every project they complete.
Air Quality Monitoring
Clean air isn’t always visible.
In fact, some of the most harmful airborne particles are impossible to see with the naked eye.
Air quality monitors provide real-time feedback on particulate levels, allowing you to understand how effectively your dust collection and filtration systems are performing.
Instead of guessing, you can make informed decisions about ventilation, respirator use, and filter maintenance.
Good craftsmanship starts with healthy working conditions.
Preventive Maintenance: The Safety Habit Most People Skip
Machines rarely fail without warning.
More often, they offer subtle clues:
A fence no longer locks perfectly.
A blade begins burning cuts.
Bearings become noisier.
Belts start slipping.
Ignoring those signs doesn’t save time.
It simply postpones maintenance until it becomes more expensive—or more dangerous.
Create a maintenance schedule that includes:
- Blade inspection
- Fence calibration
- Belt tension checks
- Lubrication of moving parts
- Dust collector filter cleaning
- Cord and plug inspection
- Fastener tightening
Small adjustments performed regularly keep machines operating predictably, and predictable machines are safer machines.
Fire Prevention Begins Long Before a Flame Appears
Woodworking combines three ingredients that deserve respect:
- Fine wood dust
- Electrical equipment
- Flammable finishes
Managing each one reduces overall fire risk.
Store finishes and solvents in approved containers.
Dispose of oily rags correctly to prevent spontaneous combustion.
Avoid allowing dust to accumulate inside machines, electrical boxes, or hidden corners of the shop.
Most importantly, never overload electrical circuits simply because another outlet isn’t convenient.
Convenience has caused more workshop accidents than many people realize.
Managing Noise for Long-Term Health
Loud machines are part of woodworking.
Permanent hearing damage doesn’t have to be.
Professional workshops reduce overall noise through multiple strategies:
- Well-maintained machines
- Balanced cutter heads
- Quieter dust collection systems
- Compressor isolation
- Acoustic wall and ceiling treatments where practical
Reducing noise isn’t just about comfort.
A quieter shop improves concentration, reduces fatigue, and makes communication easier when working with others.
Building Your Safety Equipment Budget
One of the biggest misconceptions among new woodworkers is that creating a safe workshop requires spending thousands of dollars all at once.
It doesn’t.
The smartest approach is to build your safety systems in stages, adding meaningful improvements as your workshop grows.
Prioritize equipment based on the risks it reduces—not simply its price tag.
Essential Starter Kit
If you’re just getting started, begin with the fundamentals:
- ANSI-rated safety glasses
- Comfortable hearing protection
- N95 or P100 respirator
- Push sticks and push blocks
- Compact first-aid kit
- ABC-rated fire extinguisher
These items provide exceptional value while addressing the most immediate hazards found in almost every woodworking shop.
Intermediate Workshop Upgrades
As your collection of tools expands, your safety systems should evolve with it.
Focus on upgrades that improve the overall environment:
- Dedicated dust collection system
- Ceiling-mounted air filtration
- Featherboards
- Face shield for high-impact work
- High-output LED task lighting
- Better organization and tool storage
These additions reduce physical strain, improve visibility, and create a cleaner, more efficient workspace.
Professional-Level Investments
For advanced hobbyists and professional woodworkers, safety becomes part of the workshop’s infrastructure.
Long-term investments may include:
- Centralized dust collection
- Air quality monitor
- Premium reusable respirator
- Multiple fire extinguishers
- Emergency shutoff switch
- Maintenance tracking system
- Ergonomic anti-fatigue floor mats
These aren’t luxury upgrades.
They’re investments in consistency, longevity, and peace of mind.
Continue Reading
In Part 4, we’ll turn these systems into everyday habits with practical daily, weekly, and monthly safety checklists. We’ll also explore the common mistakes even experienced woodworkers make—and answer the questions readers often ask only after something has gone wrong.
Part 4: Turning Safety Into a Habit: The Checklists That Keep Great Woodworkers Consistent
The safest workshops rarely belong to the people with the most expensive tools.
They belong to the people who follow the same simple routines every time they work.
There’s a reason professional pilots rely on checklists before every flight, even after thousands of hours in the cockpit. Experience doesn’t eliminate the possibility of mistakes—it simply changes the kinds of mistakes you’re likely to make.
Woodworking is no different.
When you’re focused on measurements, grain direction, joinery, or a project deadline, your brain has limited attention to spare. A short, repeatable checklist removes guesswork and frees your mind to concentrate on the work itself.
These routines don’t need to be complicated.
They simply need to become automatic.
Daily Workshop Safety Checklist
Before you plug in a tool or switch on a machine, take one minute to scan your workspace.
That minute may become the most valuable part of your entire project.
Personal Protection
Ask yourself:
- Are my safety glasses clean and on?
- Do I have hearing protection ready?
- Is my respirator appropriate for today’s work?
- Am I wearing fitted clothing without loose sleeves or jewelry?
- Are my shoes stable, closed-toe, and slip-resistant?
If the answer to any of these is “no,” fix it before moving forward.
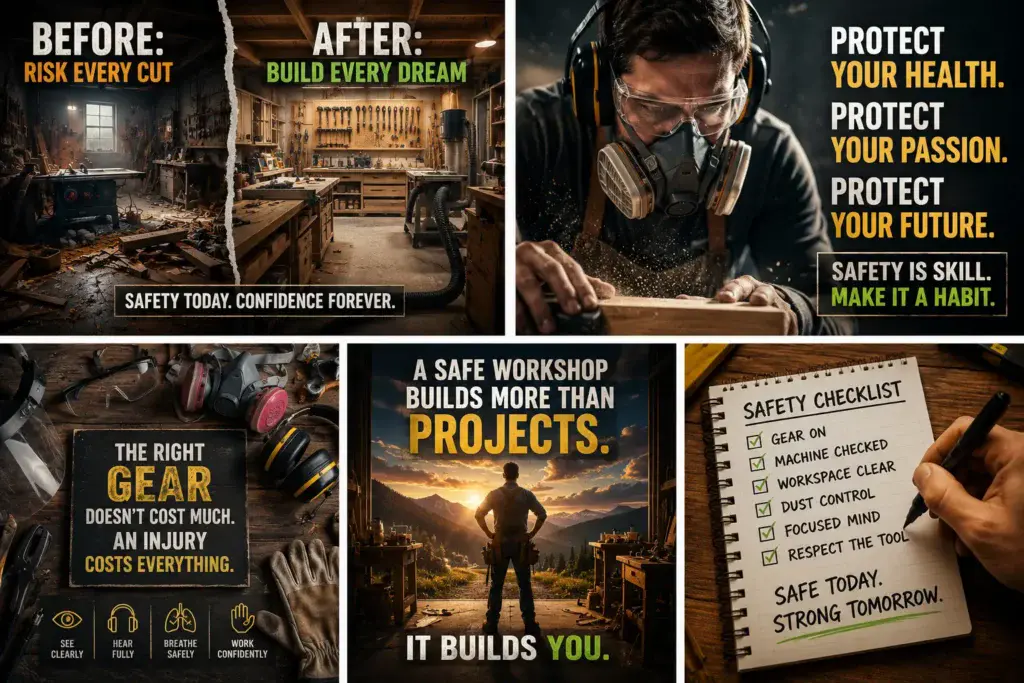
Starting safely is far easier than stopping halfway through a project to correct something you overlooked.
Machine Readiness
Before each machine is powered on, confirm:
- The blade or cutter is sharp.
- Guards are installed correctly.
- The fence is secure and aligned.
- Dust collection is connected.
- Emergency stop access is unobstructed.
- Push sticks and push blocks are within reach.
Avoid treating these checks as optional.
Machines don’t know whether you’re making your first cut or your fiftieth of the day.
Every cut deserves the same level of preparation.
Your Workspace
Look around for anything that could interrupt your movement or concentration.
Check for:
- Offcuts on the floor
- Extension cords in walkways
- Clutter around machine tables
- Poor lighting
- Excessive sawdust buildup
A clean workspace isn’t about appearance.
It’s about removing distractions before they become hazards.
Weekly Workshop Maintenance Checklist
Over time, every workshop begins collecting small problems.
Dust settles where you can’t easily see it.
Blades gradually become dull.
Fasteners loosen from vibration.
None of these issues feel urgent on their own.
Together, they quietly reduce both safety and performance.
Setting aside a few minutes each week helps prevent those small issues from turning into expensive repairs—or preventable accidents.
Every Week, Take Time To:
- Empty dust collection bins before they become overloaded.
- Vacuum dust from machine cabinets and motors.
- Inspect power cords for wear or damage.
- Clean cast-iron machine tops.
- Check blade sharpness.
- Inspect push sticks and featherboards for wear.
- Restock your first-aid kit if supplies have been used.
- Verify that your fire extinguisher remains accessible.
Weekly maintenance isn’t about perfection.
It’s about preventing tomorrow’s problems while they’re still small.
Monthly Workshop Inspection
Think of your monthly inspection as a complete health check for your workshop.
You’re looking beyond obvious issues and examining the systems that keep everything operating safely.
Machine Accuracy
Confirm that:
- Table saw fences remain parallel.
- Miter gauges are properly calibrated.
- Blade alignment is accurate.
- Jointers and planers are cutting evenly.
- Router lifts move smoothly.
Machines that operate accurately are generally easier—and safer—to control.
Dust Collection Performance
Inspect your entire dust management system.
Look for:
- Clogged filters
- Air leaks
- Cracked hoses
- Loose hose clamps
- Reduced airflow
Even excellent dust collectors lose effectiveness if airflow is restricted.
Replacing a filter often restores performance more dramatically than people expect.
Electrical Safety
Take time to inspect:
- Wall outlets
- Power strips
- Extension cords
- Machine plugs
- Switches
Replace damaged components immediately.
Electrical problems rarely improve on their own.
Workshop Organization
Step back and ask an important question:
“Has my shop become more difficult to work in over the past month?”
If tools have begun migrating across benches or lumber piles have expanded into walkways, it’s time for a reset.
Reorganizing isn’t wasted time.
It’s preventative maintenance for your workflow.
The Habits That Quietly Separate Safe Woodworkers From Everyone Else
If you spend enough time around experienced craftspeople, you’ll notice something interesting.
They move deliberately.
There’s very little rushing.
Very little improvisation.
And almost no unnecessary reaching, stretching, or awkward body positioning.
Those habits didn’t appear overnight.
They were built one project at a time.
Safe woodworkers tend to share a few common behaviors.
They stop a machine before making adjustments.
They replace dull blades instead of forcing cuts.
They clean as they work instead of waiting until the end of the day.
They inspect lumber before milling.
And perhaps most importantly, they know when to walk away for a break.
Fatigue has a way of convincing people they’re still paying attention when they’re not.
Sometimes the safest decision you can make is to finish the next cut tomorrow.
Common Woodworking Safety Mistakes That Catch Even Experienced Craftspeople
Nobody sets out intending to take unnecessary risks.
Most accidents begin with ordinary decisions that feel harmless in the moment.
Recognizing those patterns is one of the simplest ways to avoid repeating them.
“It’s Just One Quick Cut”
This may be the most common phrase heard in workshops everywhere.
One quick cut without eye protection.
One quick trim without connecting dust collection.
One quick adjustment without unplugging the machine.
Convenience has a remarkable way of disguising risk.
The cut takes seconds.
The consequences can last far longer.
Removing Guards Because They Feel Inconvenient
Blade guards sometimes make certain operations more awkward.
That frustration leads some people to remove them permanently.
The problem is simple.
The inconvenience disappears.
The protection disappears too.
Whenever a guard can be used safely for the operation you’re performing, leave it installed.
Manufacturers include these features for a reason.
Working With Dull Blades
Sharp tools often feel intimidating.
In reality, they’re usually more predictable.
Dull blades require greater force, increase heat, produce rougher cuts, and encourage operators to push harder than necessary.
Replacing or sharpening blades regularly improves both craftsmanship and safety.
Ignoring Dust Because “It’s Only Wood”
Different wood species produce different kinds of dust, and many contain natural compounds capable of irritating the respiratory system.
The danger isn’t always visible.
Fine airborne particles can remain suspended for hours after sanding or cutting has finished.
A proper respirator, effective dust collection, and good air filtration work together to protect your lungs over the long term.
Letting Fatigue Make Decisions
Woodworking rewards patience.
When you’re tired, distracted, or rushing to finish before dinner, your decision-making changes.
Measurements get skipped.
Body positioning becomes sloppy.
You stop noticing details that would normally catch your attention.
If you’re struggling to focus, the smartest tool you can reach for isn’t another clamp.
It’s the workshop light switch.
There will always be another day to finish the project.
Frequently Asked Questions
I’m only a hobby woodworker. Do I really need all this safety equipment?
It’s a fair question, especially if your workshop only sees occasional weekend use.
The short answer is yes.
Power tools don’t know whether you’re building kitchen cabinets every day or a birdhouse once a month. The same blade spins at the same speed regardless of your experience level or how often you use it.
Starting with quality eye protection, hearing protection, respiratory protection, and basic workshop safety equipment gives you a solid foundation that can grow alongside your skills.
What’s the very first safety purchase I should make if I’m on a tight budget?
If you’re building your workshop one piece at a time, prioritize equipment that protects you before equipment that improves productivity.
A comfortable pair of ANSI-rated safety glasses, dependable hearing protection, an appropriate respirator, and a stocked first-aid kit cost far less than most power tools—and provide protection every single time you step into the shop.
Think of them as part of the tool budget, not separate from it.
Do I need a dust collection system if I already own a shop vacuum?
A shop vacuum is incredibly useful, but it isn’t designed to replace a dedicated dust collection system.
The two serve different purposes.
Shop vacuums excel at cleaning portable tools and work surfaces. Dust collectors move a much larger volume of air, capturing chips and dust directly from stationary woodworking machines.
As your workshop grows, using both together creates a cleaner and healthier working environment.
Why do experienced woodworkers avoid gloves around some machines?
It seems counterintuitive at first.
Gloves protect your hands in many situations, especially when handling rough lumber or moving heavy materials.
Around rotating machinery, however, loose glove material can become entangled, pulling your hand toward moving parts.
That’s why many woodworking machines are operated with bare hands while relying on push sticks, push blocks, featherboards, and proper technique to maintain a safe distance from the cutter.
Always follow the manufacturer’s guidance for the specific tool you’re using.
How often should I replace my safety equipment?
Rather than replacing everything on a fixed schedule, inspect it regularly.
Replace safety glasses when scratches interfere with visibility.
Install new respirator filters according to the manufacturer’s recommendations.
Retire hearing protection that’s worn or no longer seals properly.
Replace damaged extension cords, cracked push sticks, and any safety accessory that no longer performs as intended.
Good equipment lasts longer when it’s cared for—but nothing should stay in service after it stops providing reliable protection.
Part 5: Products, Tools & Resources
Building a safer workshop isn’t about buying everything at once. It’s about choosing equipment that solves real problems, fits the way you work, and grows with your skills over time.
If you’re just beginning, focus on the essentials. As your workshop evolves, invest in systems that improve both safety and efficiency. The goal isn’t to own the most equipment—it’s to create an environment where safe habits become automatic.
Below are the products and resources worth considering as you build your workshop.
Essential Personal Protective Equipment (PPE)
These are the items every woodworker should own before investing in another power tool.
Safety Glasses
Choose impact-rated safety glasses with:
- ANSI certification
- Wraparound protection
- Anti-fog lenses
- Scratch-resistant coating
- Comfortable all-day fit
Consider keeping multiple pairs around the workshop so eye protection is always within reach.
Hearing Protection
Depending on your workflow, consider:
- Disposable foam earplugs
- Reusable silicone earplugs
- Over-ear earmuffs
- Electronic hearing protection for shared workshops
Comfort matters. Hearing protection only works when you actually wear it.
Respiratory Protection
Different projects call for different levels of protection.
Recommended options include:
- N95 disposable respirators for light sanding
- P100 respirators for fine dust
- Half-face reusable respirators with replaceable filters
- Dust masks for basic cleanup tasks (where appropriate)
Pair respiratory protection with effective dust collection rather than relying on PPE alone.
Workshop Safety Equipment
These upgrades improve the entire working environment, not just individual tasks.
Dust Collection System
Look for systems that provide:
- Strong airflow
- Efficient chip collection
- Easy filter maintenance
- Expandability as your workshop grows
A properly sized dust collector is one of the most valuable long-term investments for both cleanliness and respiratory health.
Air Filtration Unit
Even excellent dust collection leaves behind microscopic airborne particles.
An overhead or portable air filtration unit helps:
- Improve indoor air quality
- Reduce lingering dust
- Protect finishes from contamination
- Create a more comfortable workspace
First-Aid Kit
Choose a workshop-specific first-aid kit stocked with:
- Adhesive bandages
- Sterile gauze
- Medical tape
- Antiseptic wipes
- Burn treatment
- Tweezers
- Disposable gloves
- Eye wash solution
Check supplies regularly and replace used or expired items promptly.
Fire Extinguisher
Every workshop should have an easily accessible ABC-rated fire extinguisher.
Store it near the exit rather than beside the highest-risk machine. In an emergency, you should never have to move toward a fire to reach it.
Inspect the pressure gauge periodically and make sure everyone using the workshop knows where it’s located.
Machine Safety Accessories Worth Owning
Small accessories often provide the biggest safety improvements.
Keep these available whenever possible:
- Push sticks
- Push blocks
- Featherboards
- Blade guards
- Riving knife
- Splitters
- Zero-clearance inserts
- Outfeed supports
- Clamps for drill press work
- Bench hold-downs
Most of these tools are inexpensive, but they encourage better body positioning and keep your hands farther from cutting edges.
Workshop Organization Tools
Organization directly supports safety.
Consider adding:
- Wall-mounted tool racks
- French cleat storage systems
- Pegboards
- Drawer organizers
- Magnetic tool holders
- Small-parts bins
- Mobile tool carts
- Lumber storage racks
When every tool has a designated place, your workflow becomes smoother and your attention stays on the project instead of searching for equipment.
Maintenance Supplies
Preventive maintenance is one of the most overlooked safety practices in woodworking.
Keep these supplies available:
- Blade cleaning solution
- Dry lubricant
- Machine wax for cast-iron tables
- Hex key set
- Screwdrivers
- Torque wrench
- Replacement belts
- Dust collector filters
- Shop towels
- Vacuum attachments
Well-maintained machines perform more predictably, require less effort to operate, and contribute to safer woodworking.
Recommended Learning Resources
The best woodworkers never stop learning.
Expand your knowledge through:
- Manufacturer safety manuals
- Power tool operating guides
- Woodworking books focused on machine safety
- In-person woodworking classes
- Community makerspaces
- Professional woodworking associations
- Hands-on demonstrations from experienced craftspeople
Learning new techniques often reveals safer ways to complete familiar tasks.