
Quick Answer
A farmhouse outdoor bench can be built over a weekend with a handful of woodworking tools, weather-resistant lumber, and a straightforward seven-step process. Most DIY builders spend between $75 and $250 on materials, while comparable retail benches often sell for $400 to well over $1,000. When built correctly and protected with the right outdoor finish, a farmhouse bench can remain beautiful and structurally sound for decades, becoming more than outdoor seating—it becomes part of the story of your home.
Part 1: Why Farmhouse Outdoor Benches Never Really Go Out of Style
Some furniture serves a purpose.
Other furniture creates a feeling.
A farmhouse outdoor bench belongs firmly in the second category.
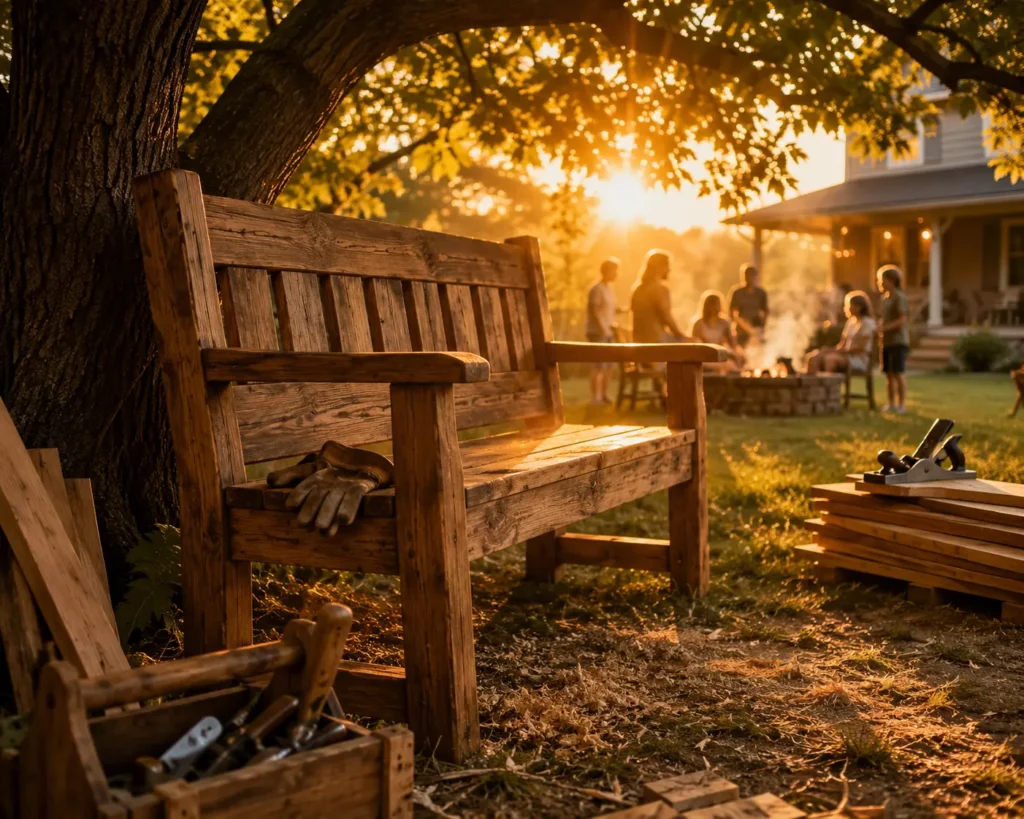
Picture an early summer evening. The light has softened. The yard is quiet except for the distant sound of birds settling into nearby trees. A bench sits beneath a maple tree or beside a garden path—not demanding attention, not trying to impress anyone. Yet somehow it becomes the place everyone gravitates toward.
Someone sets down a cup of coffee.
A child climbs onto it with muddy shoes.
Neighbors pause there during conversation.
Years pass.
The bench remains.
That enduring quality explains why farmhouse outdoor bench woodworking plans continue to attract homeowners, woodworkers, and DIY enthusiasts searching for something increasingly rare: furniture with permanence.
In a world filled with disposable products, the appeal of building something that lasts has become more powerful than ever.
The Rise of the Modern Farmhouse Outdoor Bench
The farmhouse aesthetic has evolved far beyond country décor.
Today, it exists at the intersection of several powerful design movements:
- Rustic craftsmanship
- Outdoor living design
- Sustainable home improvement
- Handmade furniture culture
- Functional minimalism
That combination gives farmhouse benches unusual versatility.
They look just as natural beside a contemporary patio as they do on a traditional front porch.
They complement:
- Backyard fire pits
- Garden walkways
- Outdoor dining spaces
- Covered patios
- Pergolas
- Cottage-style landscapes
Unlike trendy furniture that feels dated after a few seasons, farmhouse design relies on proportions and materials that have worked for generations.
Wood remains wood.
Good craftsmanship remains good craftsmanship.
The visual language doesn’t age because it was never built around trends to begin with.
Why So Many Homeowners Choose to Build Instead of Buy
At first glance, purchasing a ready-made outdoor bench seems easier.
A few clicks.
A delivery truck.
Problem solved.
At least that’s the promise.
The reality often looks different.
Many mass-produced outdoor benches rely on lower-grade lumber, lightweight hardware, and assembly methods designed for manufacturing speed rather than longevity.
The photographs look impressive.
The furniture itself sometimes doesn’t.
That disconnect is exactly why DIY outdoor furniture projects continue gaining momentum.
When you build your own farmhouse outdoor bench, every decision becomes intentional.
You choose the lumber.
You select the hardware.
You determine the dimensions.
You decide whether the finished piece feels rustic, modern farmhouse, traditional, or completely custom.
More importantly, your money goes directly into material quality rather than packaging, shipping, retail markup, and marketing costs.
The result is often surprising.
For less than half the cost of many premium retail benches, homeowners routinely build outdoor furniture that feels heavier, stronger, and more substantial than anything available in a showroom.
Farmhouse Outdoor Bench Project Overview
Before cutting a single board, it helps to understand exactly what you’re building.
The beauty of this project lies in its simplicity.
The structure is uncomplicated enough for beginners, yet sophisticated enough to reward experienced woodworkers who appreciate strong joinery and clean design.
Project Snapshot
| Category | Details |
|---|---|
| Project Type | Outdoor Furniture |
| Style | Farmhouse / Rustic |
| Skill Level | Beginner to Intermediate |
| Build Time | 1–2 Days |
| Estimated Cost | $75–$250 |
| Seating Capacity | 2–4 Adults |
| Expected Lifespan | 10–20+ Years |
| Best Lumber Choices | Cedar, White Oak, Redwood, Pressure-Treated Pine |
Those numbers only tell part of the story.
The real value isn’t measured in dollars or hours.
It’s measured in ownership.
There is a distinct difference between sitting on a bench and sitting on a bench you built with your own hands.
One is furniture.
The other is evidence of craftsmanship.
What Makes a Farmhouse Bench Different From Other Outdoor Benches?
At a structural level, outdoor benches share similar components:
- Legs
- Aprons
- Seat boards
- Fasteners
- Support rails
Yet farmhouse benches possess a character that separates them from modern commercial designs.
The difference comes from three principles.
Honest Materials
Farmhouse furniture celebrates wood rather than hiding it.
Visible grain patterns.
Natural imperfections.
Subtle texture.
Instead of masking these characteristics, farmhouse design treats them as part of the appeal.
A knot in cedar isn’t a flaw.
It’s personality.
Strong Proportions
Farmhouse benches feel grounded.
The legs appear substantial.
The seat looks generous.
The overall structure communicates stability before anyone even sits down.
That visual weight creates a subconscious impression of durability.
People trust furniture that looks capable.
Timeless Simplicity
Many outdoor furniture styles depend on decorative details.
Farmhouse furniture relies on restraint.
Simple lines.
Balanced dimensions.
Practical construction.
The result is furniture that remains attractive regardless of changing design trends.
And that’s precisely why benches built decades ago still inspire modern woodworking plans today.
The Hidden Benefit Nobody Talks About
Most articles focus on cost savings.
And yes, saving hundreds of dollars is real.
But the financial advantage isn’t usually what homeowners remember.
What stays with them is something else.
The process.
There’s a moment during every woodworking project when scattered boards stop looking like lumber and start looking like furniture.
It’s subtle.
Almost impossible to pinpoint.
One minute you’re tightening screws.
The next, you’re standing back and seeing the finished shape emerge.
That moment creates a level of satisfaction difficult to replicate elsewhere.
Because you’re not merely assembling parts.
You’re creating an object that didn’t exist before.
An object that may outlast countless things purchased without thought.
That emotional connection is one reason woodworking continues attracting new generations despite a world increasingly driven by convenience.
People don’t simply want products.
They want participation.
And building a farmhouse outdoor bench delivers exactly that.
Why This Project Is Ideal for Beginners
Many first-time builders assume outdoor furniture requires advanced woodworking knowledge.
The truth is far more encouraging.
A farmhouse outdoor bench teaches foundational skills that transfer directly into larger projects later.
Along the way you’ll learn:
- Accurate measuring
- Lumber selection
- Basic joinery
- Fastener placement
- Sanding techniques
- Exterior finishing methods
Every one of those skills becomes useful when tackling future projects such as:
- Outdoor dining tables
- Garden planters
- Porch swings
- Patio furniture sets
- Storage benches
- Pergolas
In many ways, the farmhouse bench serves as a gateway project.
Simple enough to finish.
Meaningful enough to remember.
Useful enough to enjoy every day.
And that’s exactly where we’ll begin next: choosing the right wood, hardware, and materials that determine whether your bench lasts five years—or twenty.
Part 2: Choosing the Right Wood, Hardware, and Materials for a Bench That Actually Lasts
Before a farmhouse outdoor bench becomes a place for morning coffee, backyard conversations, or quiet evenings beneath the trees, it begins as a series of choices.
Most people assume the build itself determines success.
It doesn’t.
The outcome is often decided long before the first screw is driven.
It happens at the lumber rack.
It happens when selecting fasteners.
It happens while deciding whether to prioritize cost, appearance, durability, or long-term performance.
A beautifully constructed bench built from the wrong materials can deteriorate surprisingly fast.
A thoughtfully planned bench built with the right materials can remain strong and attractive for decades.
This is where longevity begins.
The Most Important Decision: Choosing the Right Wood
Not all lumber is created for outdoor life.
Some species naturally resist moisture, insects, and seasonal expansion. Others require constant maintenance just to survive.
The challenge is finding the balance between durability, appearance, availability, and budget.
Let’s break down the most popular options used in farmhouse outdoor bench woodworking plans.
Cedar: The Sweet Spot for Most Builders
If there were a default recommendation for outdoor furniture, cedar would likely earn the title.
There’s a reason experienced builders return to it again and again.
Cedar possesses natural oils that help protect against:
- Moisture damage
- Rot
- Decay
- Insect activity
Those protective qualities exist within the wood itself.
No chemical treatment required.
No special modifications.
Just natural resilience.
Beyond durability, cedar brings visual warmth.
Its grain patterns create movement across the surface, while its color ranges from light honey tones to rich reddish-browns.
As it ages, cedar gradually develops a soft silver-gray patina that many homeowners intentionally seek.
Why Cedar Works So Well for Outdoor Benches
- Naturally weather resistant
- Lightweight and easy to handle
- Beginner-friendly for cutting and sanding
- Attractive grain patterns
- Widely available
Potential Drawbacks
Like every material, cedar has trade-offs.
Because it’s relatively soft compared to hardwoods, it can dent more easily under heavy use.
For most backyard seating applications, however, the advantages dramatically outweigh the limitations.
Pressure-Treated Pine: Maximum Value for the Budget-Conscious Builder
Not everyone wants to spend premium prices on lumber.
That’s where pressure-treated pine enters the conversation.
For decades, it has remained one of the most commonly used outdoor construction materials in North America.
The treatment process forces preservatives deep into the wood fibers, dramatically increasing resistance to:
- Moisture
- Rot
- Fungal growth
- Insect damage
The result is lumber engineered specifically for outdoor exposure.
Why Builders Choose Pressure-Treated Pine
- Extremely affordable
- Readily available
- Strong structural performance
- Excellent lifespan when maintained
For larger benches or projects where cost control matters, pressure-treated pine often delivers the best value per dollar spent.
One Important Consideration
Fresh pressure-treated lumber frequently contains excess moisture.
Building immediately after purchase can sometimes lead to:
- Shrinkage
- Twisting
- Minor warping
Allowing lumber to acclimate and dry before construction usually produces better long-term results.
Patience here pays dividends later.
White Oak: The Heirloom Choice
Every woodworking project has a premium path.
For farmhouse benches, that path often leads directly to white oak.
White oak has earned legendary status among furniture makers for good reason.
Its cellular structure makes it naturally resistant to water penetration, which is one reason it has historically been used in:
- Boat building
- Outdoor furniture
- Architectural millwork
- High-end cabinetry
This isn’t simply strong wood.
It’s remarkably resilient wood.
Why White Oak Stands Apart
- Exceptional durability
- Dense grain structure
- Superior weather resistance
- High-end appearance
- Potential lifespan measured in decades
A properly maintained white oak bench doesn’t merely survive outdoor conditions.
It ages with dignity.
Every season adds character instead of damage.
The Trade-Off
White oak demands a larger investment.
Material costs can significantly exceed cedar or pine.
Yet for builders seeking true heirloom-quality outdoor furniture, many consider the expense worthwhile.
Redwood: Beauty Meets Performance
In regions where it’s readily available, redwood remains a favorite among outdoor furniture builders.
Its appeal is immediate.
Rich color.
Elegant grain.
Natural resistance to decay.
Unlike many construction materials, redwood often looks refined straight from the lumber yard.
Benefits of Redwood
- Naturally resistant to moisture
- Attractive appearance
- Stable dimensions
- Easy to work with
Many builders describe redwood as one of the most pleasant woods to machine and finish.
It cooperates.
It cuts cleanly.
It rewards attention to detail.
The Limitation
Availability varies dramatically by region.
In some areas, redwood is common.
In others, sourcing quality stock can be difficult and expensive.
Understanding Wood Movement Before You Build
Here’s something many beginners don’t discover until it’s too late:
Wood never stops moving.
Not really.
Even after milling, drying, and finishing, wood continues responding to environmental conditions.
Temperature changes.
Humidity fluctuations.
Rain.
Sun exposure.
All influence how boards expand and contract.
Outdoor furniture experiences these cycles constantly.
That reality explains why successful farmhouse outdoor bench plans always account for movement.
Ignoring this natural behavior leads to:
- Cracks
- Splits
- Warping
- Joint stress
- Premature failure
Respecting wood movement, on the other hand, dramatically increases lifespan.
The best outdoor furniture isn’t built to resist movement.
It’s built to accommodate it.
Hardware Matters More Than Most People Realize
Homeowners often focus entirely on lumber selection while overlooking another critical factor:
Fasteners.
A bench is only as strong as the hardware holding it together.
And outdoor environments are surprisingly unforgiving.
Rainwater finds weaknesses.
Humidity accelerates corrosion.
Seasonal expansion places repeated stress on every connection point.
Cheap hardware eventually reveals itself.
Usually at the worst possible moment.
Stainless Steel Screws
For long-term outdoor performance, stainless steel remains the gold standard.
Benefits include:
- Excellent corrosion resistance
- Long lifespan
- Minimal staining
- Superior appearance
If you’re building a premium farmhouse bench intended to last for years, stainless steel is difficult to beat.
Galvanized Fasteners
Galvanized screws and bolts offer another reliable option.
The protective zinc coating helps defend against rust while keeping costs lower than stainless steel.
Many builders choose galvanized hardware when constructing benches from pressure-treated lumber.
The combination works exceptionally well.
Exterior Pocket-Hole Screws
Pocket-hole joinery has become increasingly popular in outdoor furniture projects.
When paired with exterior-rated screws, it provides:
- Clean appearance
- Strong connections
- Simplified assembly
For farmhouse bench construction, pocket holes frequently strike the perfect balance between strength and efficiency.
Selecting the Right Outdoor Wood Finish
The bench itself may be built in a weekend.
Protecting it is what determines whether it still looks beautiful years later.
A quality finish serves as armor.
Without it, even durable species eventually suffer under constant exposure.
Exterior Stain
Stain enhances natural grain while adding protection.
Many farmhouse-style benches benefit from stain because it preserves the authentic character of the wood.
Popular choices include:
- Natural cedar tones
- Weathered gray finishes
- Rustic walnut colors
- Driftwood-inspired hues
Marine Spar Urethane
For maximum weather resistance, marine-grade finishes provide exceptional protection.
Designed for harsh environments, they offer strong defense against:
- Moisture
- UV exposure
- Seasonal temperature swings
Though more expensive, they often outperform standard coatings outdoors.
Penetrating Oils
Some builders prefer a more natural appearance.
Penetrating oils soak into the wood rather than creating a surface film.
The result feels authentic and tactile.
Maintenance becomes more frequent, but many homeowners appreciate the look.
Complete Materials Checklist for a Standard Farmhouse Outdoor Bench
Before construction begins, gather everything in one place.
Nothing slows momentum faster than multiple trips to the hardware store.
Lumber
- 2×4 boards
- 2×6 boards
- Optional 4×4 leg stock
- Trim boards if desired
Hardware
- Exterior-rated screws
- Stainless steel screws or galvanized fasteners
- Exterior wood glue
- Pocket-hole screws
Finishing Supplies
- Wood filler
- Exterior stain or sealer
- Protective topcoat
- Sandpaper (80, 120, and 220 grit)
Safety Equipment
- Safety glasses
- Hearing protection
- Dust mask
- Work gloves
Essential Tools
- Circular saw
- Miter saw
- Drill
- Impact driver
- Pocket-hole jig
- Orbital sander
- Measuring tape
- Speed square
- Clamps
The Difference Between a Bench That Lasts Five Years and One That Lasts Twenty
When people admire an outdoor bench years after it was built, they’re usually seeing the result of dozens of invisible decisions.
The right lumber.
The right fasteners.
The right finish.
The right preparation.
None of those choices feel dramatic in the moment.
Yet together they determine whether your bench becomes a temporary project or a permanent fixture in your outdoor space.
And now that the materials are selected, the real transformation begins.
The pile of boards in the garage is about to become furniture.
The next step is where measurements become structure, structure becomes form, and the farmhouse bench finally starts taking shape.
Part 3: Project Planning, Bench Dimensions, Tool Setup, and the Preparation Phase Most Builders Rush Through
Every woodworking project has a moment before anything visible happens.
No sawdust.
No assembly.
No satisfying feeling of stepping back and seeing progress.
Just planning.
It’s also the stage most people are tempted to skip.
After all, the exciting part is building.
Cutting lumber feels productive.
Driving screws feels productive.
Watching a bench take shape feels productive.
Measuring the same board twice? Not nearly as exciting.
Yet experienced woodworkers know something beginners often discover the hard way:
Projects are rarely won during construction.
They’re won during preparation.
A farmhouse outdoor bench is simple enough to build over a weekend, but simplicity can be deceptive. Small planning mistakes have a way of multiplying. A cut that’s off by a quarter inch becomes a leg that’s uneven. An uneven leg becomes a wobbling bench. A wobbling bench becomes hours of correction later.
The good news?
Most of those problems are entirely avoidable.
Start With the End in Mind
Before choosing dimensions, before building a cut list, before purchasing additional materials, ask a simple question:
Where will this bench live?
It sounds obvious.
Yet many people build first and decide placement later.
That’s backwards.
A bench designed for a garden path may feel undersized beside a large patio. A bench intended for a fire pit gathering area may look oversized beneath a small front porch.
Context matters.
Walk through your outdoor space.
Look at the surrounding elements.
Notice scale.
Pay attention to traffic flow.
Think about how people will actually use the bench.
Will it become:
- A quiet reading spot?
- Additional patio seating?
- A garden focal point?
- Fire pit seating?
- Front porch furniture?
- Dining-area overflow seating?
The answers influence nearly every dimension that follows.
Choosing the Right Farmhouse Bench Dimensions
There is no single “perfect” size.
Instead, there are dimensions that work best for specific situations.
The goal isn’t simply building a bench.
The goal is building a bench that feels like it belongs exactly where it sits.
Standard Farmhouse Outdoor Bench Dimensions
For most backyard settings, these measurements create comfortable seating while maintaining classic farmhouse proportions.
Length
- 48 inches (2 people)
- 60 inches (2–3 people)
- 72 inches (3–4 people)
A six-foot bench remains one of the most popular configurations because it balances visual presence with practical seating capacity.
Seat Height
- 17–19 inches
This range aligns closely with ergonomic seating standards.
Too low and standing becomes awkward.
Too high and the bench begins to feel uncomfortable during extended use.
Most builders settle around 18 inches.
It’s a proven sweet spot.
Seat Depth
- 15–18 inches
Seat depth affects comfort more than many people realize.
A shallow seat encourages upright posture.
A deeper seat feels relaxed and informal.
For farmhouse benches, 16 to 17 inches often provides the ideal balance.
Overall Width
When adding armrests or decorative trim, total width may increase slightly.
Always account for these features during planning rather than treating them as afterthoughts.
Why Farmhouse Proportions Matter
People often notice beautiful furniture before understanding why it feels appealing.
The reason usually comes down to proportion.
Farmhouse design relies heavily on visual balance.
The legs should feel substantial without appearing bulky.
The seat should appear generous without looking oversized.
The structure should communicate strength without becoming visually heavy.
These subtle relationships create a psychological effect.
When proportions are correct, people perceive quality.
When they’re off, something feels wrong—even if they can’t explain why.
This is one reason farmhouse furniture has remained popular for generations.
Its proportions evolved through practical use rather than temporary trends.
Building a Smart Cut List Before You Cut Anything
One of the easiest ways to waste material is cutting boards as you go.
Professional woodworkers approach projects differently.
They create a complete cut list first.
Think of the cut list as the blueprint behind the blueprint.
It allows you to:
- Maximize lumber efficiency
- Reduce waste
- Maintain consistency
- Minimize mistakes
- Accelerate assembly
Every component should have a clearly defined purpose before the first cut is made.
Typical Bench Components
Most farmhouse outdoor bench woodworking plans include:
Seat Boards
These create the visible seating surface.
Depending on design, you may use:
- 2×4 boards
- 2×6 boards
Spacing between boards allows water drainage and seasonal movement.
Legs
The visual foundation of the bench.
Legs influence both aesthetics and strength.
Common choices include:
- Double 2×4 construction
- 4×4 posts
- Laminated stock
Aprons
Aprons connect the legs and provide structural rigidity.
These horizontal components prevent movement while distributing weight evenly.
Support Rails
Often hidden beneath the seat, support rails dramatically increase load-bearing capability.
Many builders underestimate their importance.
Until the bench starts flexing.
Cross Braces
Cross bracing creates stability and prevents side-to-side movement over time.
They’re rarely the most visible part of a bench.
They’re often among the most important.
The Tool Setup That Makes Everything Easier
There’s a common misconception that quality furniture requires a professional workshop.
In reality, many exceptional farmhouse benches are built using surprisingly modest tool collections.
Skill matters more than machinery.
Planning matters more than complexity.
Still, having the right tools makes the experience significantly smoother.
Essential Tools for Building a Farmhouse Outdoor Bench
Measuring and Layout Tools
Every successful project begins here.
You’ll need:
- Tape measure
- Combination square
- Speed square
- Pencil
- Marking knife (optional)
Accurate layout work creates accurate cuts.
Accurate cuts create clean assembly.
Everything flows from this stage.
Cutting Tools
Most builders can complete the project using:
Miter Saw
Ideal for:
- Crosscuts
- Repeatable lengths
- Accurate angles
A miter saw speeds up production dramatically.
Circular Saw
Versatile and affordable.
Useful for:
- Long cuts
- Breaking down lumber
- Trimming larger boards
Many first-time builders complete entire benches with nothing more than a circular saw and careful measuring.
Jigsaw
Optional but useful.
Helpful for:
- Decorative profiles
- Rounded corners
- Custom detailing
Assembly Tools
Once components are cut, assembly begins.
A few tools become indispensable.
Cordless Drill
The workhorse of nearly every woodworking project.
Used for:
- Pilot holes
- Fastener installation
- Hardware attachment
Impact Driver
Provides additional torque for exterior fasteners.
Particularly useful when working with hardwoods or long structural screws.
Clamps
Few tools improve woodworking results more than clamps.
They hold parts:
- Square
- Aligned
- Stable
During assembly, extra clamps often feel like extra hands.
The Most Overlooked Tool in the Shop
Not a saw.
Not a drill.
Not even a clamp.
Patience.
Woodworking rewards people willing to slow down.
Many mistakes happen because builders feel momentum and begin rushing.
One hurried measurement.
One assumption.
One cut made without verification.
Then comes the realization.
Then the correction.
Then the frustration.
The old saying exists for a reason:
Measure twice. Cut once.
The phrase survives because it continues saving projects every single day.
Preparing Your Workspace Before Construction Begins
A well-organized workspace does more than improve efficiency.
It improves decision-making.
When tools are easy to reach and materials are organized, attention remains focused on the build itself.
Before construction day, prepare:
Lumber Storage Area
Keep boards flat and supported.
Avoid unnecessary twisting or warping.
Cutting Station
Create enough space to safely handle long boards.
Crowded work areas increase mistakes.
Assembly Area
Leave room for the fully assembled bench.
Many builders underestimate the footprint needed during assembly.
Finishing Zone
Dust and fresh finishes don’t mix.
Having a separate finishing area produces cleaner results.
Understanding the Build Before You Build
One habit separates experienced woodworkers from frustrated beginners.
They mentally build the project before physically building it.
They visualize:
- The sequence of assembly
- Component relationships
- Potential challenges
- Joinery locations
- Finishing steps
By the time construction starts, much of the problem-solving has already happened.
The bench exists in their mind before it exists in the workshop.
This simple practice reduces surprises and increases confidence.
And confidence matters.
Because the next stage is where planning becomes reality.
The tape measure is put away.
The saw comes out.
Lumber starts transforming into individual components.
For the first time, the farmhouse outdoor bench stops being an idea and starts becoming something you can actually see taking shape.
Part 4: The Build Begins — Cutting Components, Building the Leg Assemblies, and Constructing the Apron Frame
Every woodworking project has a threshold.
You spend hours planning. You compare lumber species. You measure spaces in the yard. You sketch dimensions on scraps of paper. You imagine how the finished bench will look beside a garden, beneath a tree, or across from a fire pit.
Then comes the moment when preparation ends.
The saw starts.
The first board is cut.
And suddenly the project becomes real.
This stage carries a unique kind of excitement because visible progress finally begins to appear. At the same time, it’s where accuracy matters most. Small inconsistencies introduced early have a way of following a project all the way to the finish line.
The goal isn’t speed.
The goal is precision.
Because every strong farmhouse outdoor bench is built on a foundation of clean cuts, square assemblies, and careful alignment.
That’s where we’ll begin.
Step 1: Cutting the Components That Will Shape the Entire Bench
Before a bench can be assembled, every piece must be prepared.
Think of this stage as gathering ingredients before cooking a meal.
The quality of what happens later depends heavily on what happens now.
Many beginners make the mistake of cutting one board, assembling it, then cutting the next.
Experienced woodworkers typically take a different approach.
They process all components first.
The result is a smoother workflow, better consistency, and fewer surprises during assembly.
Organizing Lumber Before Cutting
Lay out every board you’ll be using.
Take a few moments to inspect each piece carefully.
Look for:
- Severe warping
- Twisting
- Splits
- Large knots in structural areas
- End damage
Even quality lumber can contain imperfections.
Finding them now prevents frustration later.
As you inspect each board, imagine where it might work best.
The straightest stock often belongs in visible areas such as:
- Seat boards
- Front aprons
- Exposed supports
Less visually perfect pieces can often be used in hidden structural locations.
This simple strategy improves the appearance of the finished bench without increasing cost.
Making Accurate Cuts
The temptation during cutting is to focus entirely on speed.
Resist it.
A few extra seconds spent confirming measurements can save hours of corrective work.
Before every cut:
- Verify measurements
- Confirm orientation
- Check cut lines
- Ensure the board is fully supported
Then check again.
One misplaced cut doesn’t just waste lumber.
It interrupts momentum.
And momentum matters in woodworking.
Why Consistency Matters More Than Perfection
Here’s something experienced builders learn over time:
Perfect dimensions aren’t always required.
Consistent dimensions are.
For example:
If one leg measures exactly 18 inches and another measures 17⅞ inches, you’ll eventually feel that difference.
The bench will tell you.
Usually by wobbling.
The goal isn’t mathematical perfection.
The goal is ensuring identical components remain identical.
When matching parts match, assembly becomes dramatically easier.
Label Every Component
As pieces come off the saw, label them immediately.
Not later.
Not after lunch.
Now.
Mark:
- Front legs
- Rear legs
- Side aprons
- Front apron
- Rear apron
- Seat supports
- Cross braces
It may feel unnecessary at first.
Then, two hours later, when multiple boards share nearly identical dimensions, you’ll be grateful you did it.
Professional shops label everything for a reason.
Memory becomes unreliable once dozens of components begin accumulating.
Step 2: Building the Leg Assemblies — The Foundation of Strength
If the seat gets the attention, the legs deserve the respect.
Everything rests on them.
Every pound of weight.
Every shift in temperature.
Every year of outdoor exposure.
The leg assemblies determine whether the bench feels sturdy and confident—or unstable and temporary.
This is where structural integrity begins.
Understanding the Role of the Leg Assembly
Farmhouse benches often appear simple.
Yet the leg assemblies perform several critical functions simultaneously.
They:
- Support vertical loads
- Transfer weight to the ground
- Resist lateral movement
- Maintain alignment
- Establish overall proportions
A beautiful seat means little if the foundation beneath it isn’t solid.
This stage deserves patience.
Creating Identical End Assemblies
Most farmhouse outdoor bench plans rely on two matching leg assemblies.
One for each end.
The word “matching” is important.
Even small variations can introduce problems later.
When assembling the first side:
- Measure carefully
- Check for square
- Confirm spacing
Once the first assembly is complete, use it as a reference for the second.
Many builders place both assemblies side by side before moving forward.
Any differences become immediately visible.
This simple comparison catches mistakes before they spread through the project.
The Importance of Square Corners
Woodworking has a funny way of exposing shortcuts.
A corner that’s slightly out of square may seem insignificant.
Until:
- Aprons don’t align
- Supports don’t fit
- Seat boards drift
- Gaps begin appearing
What started as a tiny error becomes a series of larger problems.
That’s why squares and clamps become invaluable during assembly.
After every connection:
Check.
Verify.
Adjust.
Then tighten.
The extra minute spent here often saves thirty minutes later.
Mechanical Fasteners and Joinery Options
Several assembly methods work exceptionally well for farmhouse outdoor benches.
The best choice depends on your tools and experience level.
Popular options include:
Exterior Screws
Reliable.
Simple.
Strong.
An excellent choice for most builders.
Pocket-Hole Joinery
Clean and efficient.
Pocket holes allow hidden connections while maintaining impressive strength.
They’ve become a favorite among DIY furniture builders for good reason.
Mortise and Tenon Joinery
The traditional gold standard.
Extremely strong.
Visually elegant.
Time-intensive.
Builders seeking true heirloom construction often incorporate mortise and tenon joints into farmhouse furniture.
What You’re Looking For at This Stage
When the leg assemblies are complete, they should feel substantial.
Stable.
Confident.
Almost like miniature structures standing on their own.
If something feels loose, investigate now.
Construction only becomes more complicated from this point forward.
Strong foundations simplify everything that follows.
Step 3: Constructing the Apron Frame — Where the Bench Finds Its Shape
If the legs create the foundation, the apron frame creates the skeleton.
This is the moment when scattered parts begin resembling actual furniture.
For many builders, it’s also the most satisfying stage so far.
The project suddenly gains recognizable form.
You can finally see where it’s headed.
What Is the Apron Frame?
The apron frame consists of the horizontal members connecting the leg assemblies.
Typically this includes:
- Front apron
- Rear apron
- Side aprons
Together, these components create the structural framework supporting the seat.
Think of them as the bridge between strength and functionality.
Without them, the legs remain isolated components.
With them, the bench becomes a unified structure.
Connecting the Assemblies
Position both leg assemblies upright.
At this point, you’ll likely experience a small shift in perspective.
Until now, you’ve been building individual pieces.
Now you’re building furniture.
The difference is surprisingly motivating.
As aprons connect the assemblies, overall dimensions become visible.
The bench begins occupying real space.
The vision you’ve been carrying in your head starts appearing in front of you.
The Importance of Diagonal Measurements
One of the oldest woodworking techniques remains one of the most effective.
Measure diagonally from corner to corner.
Then measure the opposite diagonal.
If both measurements match, the frame is square.
If they don’t, adjustments are needed.
This simple verification prevents countless headaches later.
A square frame ensures:
- Easier seat installation
- Better structural performance
- Cleaner visual lines
- Improved long-term stability
Never assume.
Always verify.
Strength Beyond the Visible Structure
Many beginners see the apron frame as merely a way to connect the legs.
In reality, it performs a far greater role.
The apron frame:
- Distributes weight
- Reduces flexing
- Prevents racking
- Increases rigidity
- Supports the seat structure
Every quality farmhouse bench relies on this hidden strength.
Most people never notice it.
They simply experience the result.
A bench that feels solid.
A bench that doesn’t shift.
A bench that inspires confidence every time someone sits down.
Taking a Moment to Assess Progress
At this stage, something interesting happens.
The project begins generating momentum of its own.
The lumber pile has disappeared.
In its place stands a recognizable framework.
You can walk around it.
Study proportions.
Visualize the finished piece.
Small details become easier to evaluate.
Do the dimensions feel right?
Does the scale match the intended location?
Does the design communicate the farmhouse character you envisioned?
These questions are easier to answer now than after the seat has been installed.
Take a few minutes.
Look carefully.
This is one of the last opportunities to make significant adjustments without major rework.
The Structure Is Standing. The Bench Is Beginning to Reveal Itself.
By now, three critical milestones have been completed:
- Components have been accurately cut.
- Leg assemblies have been built and aligned.
- The apron frame has brought everything together.
What sits before you isn’t finished.
But it no longer resembles raw lumber.
It’s becoming something recognizable.
Something useful.
Something permanent.
In the next phase, the project enters a different stage entirely.
We’ll reinforce the structure, install support systems, attach the seat boards, and transform the framework into a farmhouse outdoor bench that feels every bit as strong as it looks.
Part 5: Reinforcing the Structure and Installing the Seat — The Moment Strength Becomes Visible
Up to this point, you’ve been building the framework.
The skeleton exists.
The proportions are established.
The bench stands on its own.
From a distance, someone unfamiliar with woodworking might even assume it’s nearly finished.
It isn’t.
Not yet.
In fact, some of the most important work is still ahead.
Because this is the stage where appearance and performance finally meet.
A farmhouse outdoor bench should look substantial, but looks alone don’t matter much when three adults sit down at once.
True quality reveals itself under load.
Under years of weather.
Under thousands of everyday uses that slowly test every connection, every support, and every decision made during construction.
This is where the bench earns its longevity.
Step 4: Structural Reinforcement — Building for Decades, Not Seasons
There’s a difference between furniture that survives and furniture that endures.
At first glance, both may look identical.
The difference is hidden beneath the surface.
Inside the structure.
Within the reinforcements most people never notice.
Professional furniture builders understand something casual builders sometimes overlook:
The strongest parts of a piece are often invisible.
They’re not decorative.
They’re not designed for attention.
They’re designed to prevent problems before those problems ever appear.
Why Reinforcement Matters More Outdoors
Indoor furniture lives a relatively comfortable life.
Outdoor furniture doesn’t.
An outdoor bench experiences:
- Rain
- Humidity
- Dry heat
- Freezing temperatures
- Direct sunlight
- Seasonal expansion and contraction
Every one of those forces places stress on the structure.
Over time, even small movements accumulate.
A bench built without proper reinforcement may feel perfectly solid on day one.
Three years later?
That’s when wobble begins.
That’s when joints loosen.
That’s when hidden weaknesses reveal themselves.
Reinforcement exists to prevent that future.
Installing Center Support Rails
One of the most valuable structural upgrades involves adding center supports beneath the seat.
These supports distribute weight across the frame rather than concentrating it in a few locations.
Think about what happens when someone sits directly in the middle of a long bench.
Without adequate support, the seat begins carrying excessive load.
Repeated stress eventually creates:
- Flexing
- Sagging
- Fastener fatigue
- Joint strain
Center support rails dramatically reduce those risks.
They’re simple additions with enormous long-term benefits.
And because they’re mostly hidden from view, they strengthen the bench without altering its farmhouse appearance.
Cross Bracing: The Secret Behind Stability
Have you ever sat on a piece of furniture that seemed sturdy at first but shifted slightly side to side?
That movement is often caused by racking.
Racking occurs when lateral forces gradually distort the frame.
Cross bracing helps eliminate this problem.
By connecting structural members strategically, braces resist movement from multiple directions.
The result feels different immediately.
The bench becomes:
- More rigid
- More stable
- More confidence-inspiring
Good furniture shouldn’t merely hold weight.
It should feel immovable.
Cross bracing helps achieve that sensation.
Corner Blocking and Additional Reinforcement
Builders seeking maximum durability often add corner blocking.
These small triangular or rectangular reinforcement pieces strengthen high-stress connection points.
The benefits include:
- Increased rigidity
- Improved load transfer
- Reduced joint fatigue
- Longer structural lifespan
Corner blocks rarely attract attention.
Yet decades later, they’re often the reason a bench remains standing while lesser furniture has already been replaced.
Understanding Load Capacity
One question appears repeatedly among people researching farmhouse outdoor bench woodworking plans:
How much weight can a bench actually hold?
The answer depends on multiple variables.
Including:
- Lumber species
- Bench dimensions
- Joinery methods
- Support placement
- Fastener quality
A properly reinforced farmhouse bench commonly supports between 500 and 800 pounds.
Some designs exceed that.
The key isn’t simply using thicker lumber.
The key is distributing load intelligently.
Strong furniture isn’t just built heavier.
It’s engineered better.
The Psychology of Strength
Something interesting happens when a bench feels solid.
People trust it.
They sit without hesitation.
They lean back comfortably.
They don’t test it cautiously before committing their weight.
That reaction isn’t accidental.
Humans make rapid judgments based on subtle cues.
When furniture feels rigid, balanced, and stable, we perceive quality almost instantly.
That’s why reinforcement matters beyond structural performance.
It influences experience.
The bench feels dependable because it actually is dependable.
Step 5: Installing the Seat Boards — When the Bench Finally Looks Like a Bench
Every woodworking project contains a moment when everything changes.
For farmhouse benches, this is usually that moment.
The seat boards go on.
Suddenly the structure stops looking like a framework.
It becomes furniture.
Recognizable.
Functional.
Real.
The transformation is immediate.
And surprisingly satisfying.
Selecting the Best Boards for the Seat
Not all boards deserve equal visibility.
The seat becomes the most prominent surface on the entire project.
It’s where eyes naturally land.
It’s where hands make contact.
It’s where people experience the craftsmanship most directly.
Take a few minutes to evaluate your lumber carefully.
Choose boards with:
- Attractive grain patterns
- Consistent color
- Minimal defects
- Straight profiles
Place the best-looking boards where they’ll receive the most attention.
Small choices like this elevate the finished result significantly.
Understanding Proper Board Spacing
One of the most common beginner mistakes involves installing seat boards too tightly together.
At first glance, tight spacing seems logical.
It appears cleaner.
More finished.
More precise.
Unfortunately, wood has other plans.
Remember: wood moves.
Outdoor lumber expands and contracts continuously as humidity levels change.
Without adequate spacing, boards can begin pushing against one another.
The consequences include:
- Buckling
- Warping
- Cracking
- Joint stress
Small gaps allow the material to breathe naturally.
They also improve water drainage.
A bench that sheds moisture dries faster.
And furniture that dries faster generally lasts longer.
Aligning the Seat for Visual Balance
The human eye notices symmetry even when we aren’t consciously looking for it.
That means alignment matters.
Before fastening anything permanently:
- Check overhangs
- Verify spacing
- Confirm centering
- Examine sight lines
Walk around the bench.
View it from different angles.
Look at it from standing height.
Sit in front of it.
Observe how the proportions feel.
Tiny adjustments now create a noticeably more polished final appearance.
Securing the Seat Boards
Once positioning is finalized, installation can begin.
Exterior-rated screws remain one of the most reliable attachment methods.
As you work:
- Pre-drill when necessary
- Maintain consistent spacing
- Keep fastener placement uniform
- Avoid overtightening
Overtightened screws can create unnecessary stress around connection points.
Strong doesn’t require excessive force.
Strong requires proper technique.
Why Seat Construction Affects Comfort
Comfort isn’t determined solely by cushions or accessories.
The seat itself plays a major role.
Factors include:
Seat Width
Wider seating generally feels more relaxed.
Narrow seating encourages upright posture.
Board Layout
Even spacing creates a smoother visual rhythm while supporting proper drainage.
Edge Treatment
Sharp edges feel harsh.
Softened edges feel inviting.
A few minutes spent easing corners with sandpaper can dramatically improve comfort.
These details may seem small individually.
Together, they shape how the bench feels every time someone uses it.
Taking Your First Seat
At some point during this stage, curiosity becomes irresistible.
Most builders do it.
They carefully set down their tools.
Brush away sawdust.
And sit.
Not because the project is finished.
But because they want proof.
Proof that the structure feels solid.
Proof that the dimensions work.
Proof that all those measurements and cuts are becoming something worthwhile.
It’s a brief moment.
Yet it’s one of the most rewarding in the entire process.
For the first time, the bench fulfills its purpose.
Not completely.
Not permanently.
But enough to glimpse what’s coming.
The Bench Has Found Its Form
By now, the transformation is unmistakable.
What began as rough lumber has evolved into functional furniture.
The frame is reinforced.
The supports are installed.
The seat is attached.
The farmhouse silhouette has emerged.
Yet the difference between a good bench and a remarkable bench often appears during the final stages.
The surfaces still need refinement.
The wood still needs protection.
The details still need attention.
And those finishing choices—often underestimated—will determine how the bench looks not just next week, but years from now.
Part 6: Sanding, Surface Refinement, Finishing, and Weatherproofing — Where a Good Bench Becomes an Exceptional One
Most woodworking projects are judged long before anyone understands how they were built.
People don’t immediately notice the joinery hidden beneath the seat.
They don’t inspect support rails or examine structural reinforcements.
What they notice first is simpler.
They notice how the bench feels.
They run a hand across the wood.
They see how light catches the grain.
They sit down and unconsciously register whether every surface feels intentional.
That’s why the final stages of a farmhouse outdoor bench project matter so much.
This is where craftsmanship becomes visible.
Not through complexity.
Through refinement.
Because while structure creates durability, finishing creates experience.
And experience is what people remember.
Step 6: Sanding — The Most Underrated Skill in Woodworking
Ask experienced furniture makers what separates amateur projects from professional-looking furniture.
Many won’t mention expensive tools.
They won’t talk about advanced joinery.
They’ll talk about sanding.
Because no finish, regardless of quality, can hide a poorly prepared surface.
Wood reveals everything.
The scratches.
The uneven edges.
The rushed preparation.
And once stain or sealer is applied, those imperfections often become even more visible.
Sanding isn’t glamorous.
But it’s where furniture develops its personality.
Why Sanding Is About More Than Smoothness
Most beginners think sanding exists solely to make wood feel smooth.
That’s only part of the story.
Proper sanding also:
- Improves finish absorption
- Enhances grain visibility
- Removes milling marks
- Creates visual consistency
- Reduces splinter risk
- Elevates perceived quality
The difference between a decent bench and a premium-looking bench is often measured in preparation rather than construction.
The Three-Stage Sanding Process
Professional results rarely come from a single grit.
Instead, the surface is refined gradually.
Each step removes the marks left by the previous one.
First Pass: 80-Grit Sandpaper
This is the shaping stage.
Its purpose is to:
- Remove rough spots
- Flatten inconsistencies
- Eliminate saw marks
- Blend joints
The goal isn’t perfection.
The goal is establishing a clean foundation.
Think of it as rough sculpting.
Second Pass: 120-Grit Sandpaper
Now refinement begins.
This stage smooths the surface while preserving the character of the wood.
The grain starts becoming more visually pronounced.
Edges feel cleaner.
Transitions become softer.
Many builders notice the bench beginning to look finished during this stage—even though significant work remains.
Final Pass: 220-Grit Sandpaper
This is where the tactile transformation occurs.
Run your hand across properly sanded wood and you’ll immediately understand the difference.
The surface feels intentional.
Comfortable.
Inviting.
The bench stops feeling like construction material and starts feeling like furniture.
The Areas Most People Forget to Sand
Large flat surfaces are obvious.
The hidden details are where quality often reveals itself.
Pay particular attention to:
Seat Edges
This is where hands naturally land.
Sharp edges create discomfort.
Softened edges invite use.
Corners
A subtle round-over dramatically improves both appearance and safety.
Especially around children and high-traffic outdoor spaces.
Leg Assemblies
People frequently overlook lower sections.
Yet visual consistency matters from top to bottom.
Visible End Grain
End grain absorbs finish differently than face grain.
Proper sanding helps create a more uniform final appearance.
Understanding the Emotional Side of Surface Quality
Furniture isn’t experienced visually alone.
It’s experienced physically.
Touch influences perception more than most people realize.
When someone runs their hand across a carefully prepared surface, they subconsciously associate that experience with quality.
They may never comment on sanding.
They’ll simply say the bench feels well made.
That’s the result you’re aiming for.
Step 7: Finishing and Weatherproofing — Protecting the Investment You Just Built
At this stage, the bench looks finished.
But appearances can be misleading.
Without protection, outdoor furniture begins its battle against the elements immediately.
Sunlight.
Rain.
Humidity.
Temperature swings.
Even high-quality lumber eventually yields if left unprotected.
Finishing isn’t the final cosmetic step.
It’s long-term insurance.
What Outdoor Finishes Actually Do
Many people think finishes exist primarily to improve appearance.
While they certainly enhance color and grain, their more important role is protection.
A quality outdoor finish helps defend against:
- Moisture penetration
- UV degradation
- Surface cracking
- Color fading
- Premature aging
In many cases, lifespan differences of ten years or more can be traced directly to finishing decisions.
Choosing the Right Outdoor Finish
Different builders prioritize different outcomes.
The best finish depends on your goals.
Exterior Wood Stain
For many farmhouse outdoor benches, stain remains the most popular option.
Why?
Because it enhances natural character rather than hiding it.
Stain allows grain patterns to remain visible while adding protection and color.
Popular farmhouse-inspired tones include:
- Natural cedar
- Rustic walnut
- Weathered gray
- Driftwood finishes
- Light oak tones
The result feels authentic.
Organic.
Timeless.
Marine Spar Urethane
For maximum protection, marine-grade products are difficult to beat.
Originally developed for demanding marine environments, they perform exceptionally well outdoors.
Benefits include:
- UV resistance
- Moisture protection
- Flexible surface performance
- Enhanced durability
The finish tends to create a richer appearance while offering strong long-term defense.
Penetrating Oils
Some builders prefer a more natural aesthetic.
Penetrating oils soak into the wood rather than forming a heavy surface layer.
Advantages include:
- Natural appearance
- Easy maintenance
- Rich grain enhancement
- Pleasant tactile feel
The trade-off is more frequent reapplication.
Many homeowners gladly accept that compromise because of the visual result.
Applying Finish the Right Way
Good products matter.
Good application matters just as much.
Rushing this stage often undermines hours of careful work.
Step One: Remove Every Trace of Dust
Dust is the enemy of clean finishes.
Before application:
- Vacuum thoroughly
- Wipe surfaces carefully
- Inspect joints and corners
Even tiny particles become surprisingly visible once finish is applied.
Step Two: Apply Thin, Even Coats
Heavy coats often create problems.
Including:
- Drips
- Uneven drying
- Surface imperfections
Thin coats produce stronger, cleaner results.
Patience wins here.
Almost every time.
Step Three: Respect Drying Times
This may be the hardest step of all.
The bench looks finished.
You want to use it.
Yet curing and drying are not the same thing.
Allowing proper cure time dramatically improves durability.
Many finish failures originate not from bad products but from impatience.
Understanding UV Damage
Rain receives most of the attention.
Sunlight often causes more long-term damage.
Ultraviolet exposure gradually breaks down wood fibers.
Effects include:
- Fading
- Surface degradation
- Drying
- Cracking
Even naturally durable species like cedar and redwood benefit from UV protection.
If preserving original color matters, finish selection becomes particularly important.
Weatherproofing Beyond the Finish
Protection extends beyond coatings.
A few additional habits significantly increase lifespan.
Elevate the Bench When Possible
Constant ground contact traps moisture.
Allowing airflow beneath the structure promotes drying.
Dry wood lasts longer.
It’s that simple.
Prevent Standing Water
Design choices matter.
Proper spacing between seat boards encourages drainage.
Water that moves away quickly causes fewer problems.
Inspect Hardware Annually
Even premium fasteners deserve occasional attention.
Checking connections once per year can prevent larger repairs later.
The Moment the Grain Comes Alive
Every woodworker remembers this part.
The finish touches the wood for the first time.
And suddenly everything changes.
The grain deepens.
Colors emerge.
Details hidden beneath sanding dust reveal themselves.
Cedar glows.
White oak gains depth.
Redwood develops richness.
The transformation feels almost instantaneous.
It’s one of the most satisfying moments in the entire build process.
Because for the first time, you see not just the structure.
You see the finished character of the bench.
The piece you’ve been building all along finally introduces itself.
Why Finishing Is Really About Time
Most people think they’re applying a finish for today’s appearance.
They’re not.
They’re making a decision about how the bench will look five years from now.
Ten years from now.
Maybe longer.
The finish becomes a conversation with the future.
A way of protecting today’s effort from tomorrow’s weather.
And once that protection is in place, the bench enters a new phase entirely.
No longer a project.
No longer a workbench experiment.
Now it becomes part of the landscape itself.
The final stage isn’t about construction anymore.
It’s about customization, styling, maintenance, and ensuring the farmhouse outdoor bench continues improving with age rather than simply surviving it.
Part 7: Customization, Styling, Maintenance, FAQs, and Resources
At a certain point, every woodworking project stops being a project.
The tools get put away.
The sawdust disappears.
The finish cures.
The bench moves from the workshop into the world.
That’s when something interesting happens.
For the first time, the farmhouse outdoor bench begins interacting with its surroundings.
It becomes part of the landscape.
Part of the patio.
Part of the daily rhythm of the home.
And while the structure may be complete, the story isn’t.
Because some of the most rewarding decisions happen after the build itself.
This is where function meets personality.
Where craftsmanship meets lifestyle.
Where a bench becomes uniquely yours.
Customizing Your Farmhouse Outdoor Bench
One reason farmhouse outdoor bench woodworking plans remain so popular is their flexibility.
The core design is timeless.
The details are endlessly adaptable.
A single set of plans can produce dozens of completely different results depending on how you personalize the final piece.
Add a Backrest for Everyday Comfort
A traditional bench without a back has undeniable charm.
It’s clean.
Simple.
Versatile.
But for areas designed around lingering conversations and longer periods of relaxation, a backrest changes everything.
Benefits include:
- Increased comfort
- Improved posture support
- More substantial visual presence
- Enhanced farmhouse character
Backrests work particularly well around:
- Fire pits
- Covered patios
- Garden seating areas
- Front porches
The visual effect feels more welcoming and complete.
Build Hidden Storage Into the Design
Outdoor spaces rarely have enough storage.
Fortunately, a farmhouse bench can solve two problems at once.
By incorporating a hinged seat or enclosed compartment, you gain space for:
- Outdoor cushions
- Gardening tools
- Children’s toys
- Patio accessories
- Seasonal decorations
The best storage designs remain visually discreet.
Visitors see a beautiful bench.
You know it’s working twice as hard.
Incorporate Armrests
Armrests often seem like a small upgrade.
They’re not.
They subtly transform how people use the bench.
Armrests create:
- Greater comfort
- Improved accessibility
- Enhanced visual balance
- More furniture-like presence
Particularly for older homeowners, armrests make sitting down and standing up noticeably easier.
Create a Rustic Distressed Finish
Some farmhouse enthusiasts prefer furniture that looks like it has lived a life.
Not damaged.
Experienced.
Distressing techniques can introduce that sense of history.
Popular methods include:
- Edge softening
- Layered paint finishes
- Light sanding after staining
- Antique wax treatments
- Dry-brushing techniques
The goal isn’t perfection.
The goal is character.
Embrace Modern Farmhouse Design
Modern farmhouse style continues influencing outdoor living spaces for a reason.
It balances rustic warmth with contemporary simplicity.
Popular combinations include:
- Natural wood and matte black hardware
- White-painted bases with stained tops
- Clean lines with traditional proportions
- Neutral outdoor textiles
The result feels current without feeling trendy.
And that’s an important distinction.
Trends age.
Timeless design evolves.
Styling Your Farmhouse Outdoor Bench
Construction creates the bench.
Styling creates the atmosphere.
A beautifully built bench deserves thoughtful placement.
The right environment amplifies its impact.
Bench and Garden Path Combinations
Few placements feel more natural.
A farmhouse bench positioned alongside a garden path creates an invitation.
An unspoken suggestion to slow down.
To pause.
To notice the landscape rather than simply pass through it.
The bench becomes a destination rather than an object.
Fire Pit Seating Arrangements
Farmhouse benches excel around fire features.
The long seating surface encourages conversation.
Groups naturally gather.
Stories stretch longer.
Evenings extend.
A simple bench often becomes the most occupied seat in the yard.
Pergola and Arbor Pairings
Overhead structures create intimacy.
They define space.
They frame views.
Positioning a farmhouse bench beneath a pergola transforms simple seating into a dedicated outdoor retreat.
Add climbing plants and the effect becomes even more compelling over time.
Outdoor Dining Extensions
Large gatherings have a way of exposing seating shortages.
A farmhouse bench solves that problem beautifully.
Unlike individual chairs, benches maximize seating flexibility while maintaining visual simplicity.
Guests rarely think about it.
They simply find a place to sit.
The Maintenance Habits That Preserve Beauty for Years
Outdoor furniture doesn’t require constant attention.
It does reward consistency.
A few small habits performed regularly can dramatically extend lifespan.
Think of maintenance as preservation rather than repair.
The goal is preventing problems before they appear.
Spring Maintenance Checklist
Winter often leaves behind debris, moisture, and surface contamination.
As temperatures rise:
- Clean the bench thoroughly
- Inspect all hardware
- Check for finish wear
- Tighten fasteners if needed
- Examine joints for movement
This annual inspection takes very little time and often identifies minor issues before they become major ones.
Summer Maintenance Checklist
Summer introduces intense UV exposure.
Monitor:
- Surface fading
- Finish condition
- Moisture retention after rain
- Structural stability
If the bench receives constant direct sunlight, this is often the season when protective coatings begin showing signs of wear.
Fall Maintenance Checklist
Autumn presents an opportunity to prepare for winter.
Focus on:
- Removing leaves
- Cleaning organic debris
- Checking drainage around the bench
- Performing touch-up maintenance
Moisture trapped beneath leaves or debris can accelerate deterioration over time.
Winter Protection Strategies
The bench was built for outdoor use.
Still, a little protection goes a long way.
Options include:
- Waterproof furniture covers
- Covered storage locations
- Seasonal relocation beneath shelter
- Elevated positioning away from standing water
Even durable species such as cedar and white oak benefit from reduced winter exposure.
Questions Readers Usually Ask After Building Their Bench
“What’s the best wood if I want the bench to last as long as possible?”
If longevity is the priority, white oak consistently ranks among the strongest choices for outdoor furniture.
Its density, moisture resistance, and durability make it a favorite among furniture makers seeking heirloom-quality results.
Cedar remains the most balanced option for most homeowners because it combines affordability, beauty, and natural weather resistance.
“Can a beginner really build this project?”
Absolutely.
In fact, farmhouse outdoor bench woodworking plans are often recommended as first furniture projects.
The design teaches foundational woodworking skills without overwhelming complexity.
Patience matters more than experience.
Careful measuring matters more than expensive tools.
Most successful builds come from consistency rather than expertise.
“How much weight can the finished bench support?”
A properly reinforced farmhouse bench commonly supports between 500 and 800 pounds.
Factors influencing capacity include:
- Lumber species
- Joinery methods
- Bench dimensions
- Reinforcement strategy
- Fastener quality
Well-built benches often exceed expectations in real-world use.
“Should I paint it or stain it?”
That depends on the look you’re pursuing.
Stain highlights natural grain and preserves the authentic character of the wood.
Paint creates greater design flexibility and often complements modern farmhouse aesthetics.
Neither option is universally better.
They’re simply different expressions of the same project.
“How often will I need to refinish it?”
Most outdoor finishes benefit from maintenance every one to three years.
Climate plays a major role.
Furniture exposed to constant sunlight and severe weather typically requires more frequent attention than furniture protected by covered patios or pergolas.
“Will the wood eventually change color?”
Yes.
Every wood species evolves over time.
Even protected lumber gradually develops new tones and character.
Many homeowners find this aging process becomes one of the most appealing aspects of owning handmade outdoor furniture.
The bench doesn’t merely endure the years.
It reflects them.
Products / Tools / Resources
If you’re preparing to build a farmhouse outdoor bench, these are the products, tools, and resources most builders find worthwhile.
Recommended Lumber Options
Cedar
Ideal for homeowners seeking:
- Natural weather resistance
- Attractive grain patterns
- Manageable weight
- Long-term value
White Oak
Best for:
- Heirloom-quality furniture
- Maximum durability
- Premium outdoor projects
Pressure-Treated Pine
Excellent for:
- Budget-conscious builds
- Larger projects
- High structural performance
Redwood
A strong option when available locally, especially for builders prioritizing appearance and natural durability.
Essential Power Tools
Miter Saw
Useful for:
- Accurate crosscuts
- Repeatable dimensions
- Faster project completion
Circular Saw
A versatile choice capable of handling most cutting operations during bench construction.
Cordless Drill and Impact Driver
Together they streamline assembly while improving efficiency and fastener control.
Random Orbital Sander
One of the most valuable tools in the entire project.
Often responsible for the difference between furniture that looks homemade and furniture that looks professionally crafted.
Helpful Woodworking Accessories
- Pocket-hole jig
- Bar clamps
- Speed square
- Combination square
- Moisture meter
- Countersink bit set
- Carpenter’s pencils
These relatively inexpensive additions often improve accuracy and build quality significantly.
Recommended Outdoor Finishes
Exterior Wood Stain
Ideal for preserving visible grain while adding color and protection.
Marine Spar Urethane
A favorite for builders seeking maximum weather resistance.
Penetrating Outdoor Oils
Excellent for those who prefer a natural appearance and easier maintenance cycles.
Future Projects That Pair Well With a Farmhouse Bench
After completing a bench, many builders naturally move toward larger outdoor woodworking projects such as:
- Farmhouse outdoor dining tables
- Garden planter boxes
- Porch swings
- Adirondack chairs
- Pergolas
- Outdoor coffee tables
- Storage benches
- Raised garden beds
The skills developed during this project transfer directly into each of these builds, making the farmhouse outdoor bench one of the most valuable starting points in outdoor woodworking.
By the time the bench settles into its permanent place in the yard, most builders discover something unexpected:
They didn’t just build outdoor furniture.
They built confidence for the next project waiting beyond it.