
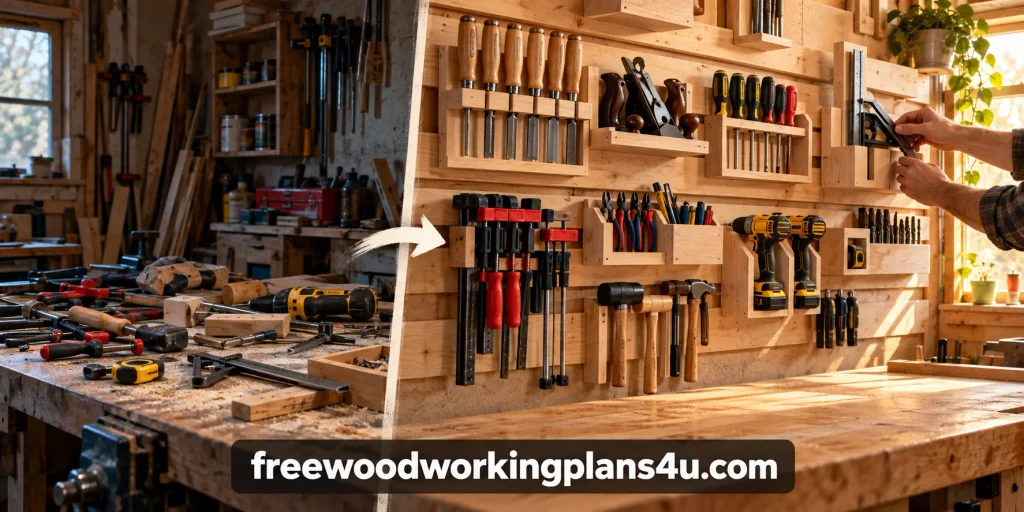
There comes a point when the workshop starts to feel smaller—not because you’ve run out of floor space, but because the tools keep finding their way onto the bench. You put down a square, reach for a driver, and spend a few seconds moving things aside.
A French cleat tool wall can make that space work harder. It uses matching beveled strips to hang removable holders. One cleat attaches to the wall; its partner attaches to a rack, shelf, or cabinet. The holder hooks over the wall cleat, so you can move it when your tools—or the way you work—change.
The best place to start is with the tools you want within reach. Measure the wall, sketch their arrangement, then size the rails and holders around that plan. You’ll have fewer surprises when it’s time to cut.
Why build a French cleat tool wall?
A French cleat system gives different kinds of storage a shared mounting point. Instead of deciding where every tool will live once and for all, you can make individual holders and reposition them as needed.
It’s useful for hand tools, cordless drills, clamps, small shelves, and compact cabinets. Start with one section if that’s all the space you have. Add more rails or holders as your shop grows.
The flexibility comes with one important bit of planning: the wall, fasteners, cleats, and holders all work together.
There’s no single weight rating or set of dimensions that applies to every workshop. Choose an attachment method suited to your wall and follow the instructions for the materials and fasteners you use.
How a French cleat works
A French cleat uses two wood strips with matching bevels. A 45-degree cut is common. The wall cleat is installed with its bevel facing up and sloping back toward the wall; the matching bevel on the holder hooks over it.
Gravity seats the two pieces together. To move the holder, lift it off and place it somewhere else. If a holder could tip or be knocked loose, build in a suitable stop or retention feature.
The angled cleats are only one part of the setup. The wall attachment and the way each holder is built matter too. A neatly cut bevel can’t make an unsuitable wall or fastener safe for a loaded tool rack.
Plan the wall around the tools you own
Before you cut anything, spread out the tools you’d like to store. Arrange them roughly as you imagine they’ll sit on the wall. You may spot a long-handled tool that needs more height, or a clamp that needs more clearance than you first thought.
Measure the usable wall area. Mark studs or other framing, and note outlets, switches, doors, windows, and anything else that could interfere. Check for wiring and pipes before drilling.
Then sketch the layout. It doesn’t need to be fancy; a wall outline and a few rectangles will do. Place the workbench, mark your most-used tools, and leave room to lift holders off their cleats.
A few checks make the drawing more useful:
- Keep everyday tools within comfortable reach.
- Allow enough space above each holder to lift it free.
- Check that clamps, handles, and cabinet doors won’t collide.
- Keep the storage clear of the work surface and moving equipment.
- Leave some open rail space for future holders.
That last bit can be hard to judge when you’re eager to fill the wall. Leave it anyway. The empty spot may become the perfect home for the tool you haven’t bought yet.
French cleat tool wall cut-list template
Your exact dimensions depend on your wall and the holders you want to build. Use this measure-first list to work out the parts before buying materials.
| Part | How to determine the size |
|---|---|
| Backing panel, if used | Measure the planned wall section, then account for fixtures and clearances. |
| Wall cleats | Choose a width for your design and cut the blanks to suit the rail layout. |
| Holder cleats | Match the bevel to the wall cleat and size each piece for its holder. |
| Holder backs and sides | Measure the tools each module will hold and the room they need. |
| Spacers or stops | Size these to keep a holder level, stable, or clear of the wall. |
Many French cleat plans use plywood with a 45-degree bevel, but rail widths and spacing vary. Treat those measurements as design choices. Build your cut list around the wall and the holders you’ve planned.
Materials and tools
For a plywood-based system, you may need:
- Plywood for a backing panel, cleats, and holders
- Fasteners suited to the wall structure and the parts being joined
- A tape measure, pencil, square, and level
- A stud finder or another suitable way to identify wall framing
- A drill and driver
- A saw that can make accurate bevel cuts
- Clamps and spacer blocks for repeatable layout
Some plans use a backing panel; others attach rails directly to suitable framing. Either way, make sure the completed system transfers the tools’ weight to the wall structure using an appropriate method. If you’re unsure what’s behind the wall or which fasteners suit it, get qualified advice before loading the system.
How to build the modular French cleat wall
1. Mark the wall and confirm your layout
Transfer your sketch to the wall. Mark where the rails will sit, then check their height against the tools and holders. Make sure each holder can be lifted off without hitting a rail above it.
Before drilling, check the wall for hidden wiring and pipes. If you’re using a backing panel, plan how it will attach to the framing. If the rails will attach directly, plan their positions around the framing and the fasteners specified for your wall.
2. Prepare the backing panel, if your plan uses one
Cut the panel to fit the section you measured. Mark the framing positions on it so you can keep track of the attachment points during installation.
A backing panel provides a continuous surface for laying out the cleats, but it still needs to be properly attached to the wall. The panel, its fasteners, and the cleats all need to work as one system.
3. Cut matching cleats
Rip your cleat blanks to the width in your plan. Make the bevels consistently so the holder cleats sit properly on the wall cleats. As you cut, label each piece “wall cleat” or “holder cleat.” It’s an easy way to avoid mixing up their orientations during assembly.
If you use a table saw, follow the saw manufacturer’s instructions. Keep your hands out of the cut line, use the guard where applicable, and support the stock. Use a push stick for small pieces or whenever the work calls for one. OSHA’s table-saw guidance also covers guarding, kickback, and safe work practices.
4. Install the panel or wall rails
If your plan includes a backing panel, attach it using the method you’ve chosen for your wall. If you’re mounting the rails directly, follow your plan for locating and fastening them to the structure.
Start with a level reference line. Check each rail as you work; consistent spacing makes it easier to move holders from one row to another. Spacer blocks can help repeat the spacing, provided they match your layout.
Before moving on, check that the rails are firmly attached and that the bevels face the right direction.
5. Build one simple holder first
Start small. A light hand-tool rack or compact shelf is a good first test because you can check the fit before building a whole collection of holders.
Attach a matching beveled cleat to the back of the holder. Hang it on the wall, then check that it seats properly, sits as intended, and lifts off without catching. If it needs support against the wall, add a suitable lower spacer or stop.
Once the first module fits, you’ll have a useful pattern for the next one.
6. Add holders for the tools you use most
Now the wall starts to become your wall. You can shape each holder around a particular tool or group of tools:
- Hand tools: Make a rack with openings or dividers sized for the tools you reach for often.
- Cordless drills and drivers: Add slots for the tools, with room for batteries or bits if your design calls for them.
- Clamps: Size a rack for the clamps you own and support them so they don’t shift.
- Small parts: Use shallow bins or a compact cabinet for screws, bits, and accessories.
- Sanding supplies: Build a shelf for discs, sheets, and sanding blocks.
Before hanging a holder, check that its cleat is securely attached and that its contents can’t slide or fall during normal use. Keep heavier items low, and make sure the complete wall system is suitable for the load.
Test the system before filling the wall
Fit each holder onto its rail and check that the cleats engage fully. See how it sits, and make sure it can be removed without catching on nearby tools or shelves.
Add tools gradually. Watch the holder, cleat, panel, fasteners, and wall for movement or damage. If something shifts, remove the load and fix the problem before using that section again.
There isn’t one weight capacity that fits every French cleat wall. The materials, fasteners, wall construction, rail layout, and holder design all affect how the system performs. Don’t rely on a weight claim unless it applies to the actual design and has been properly verified.
Common mistakes to avoid
Spacing the rails before designing the holders
Rail spacing should suit the holders you plan to hang. Sketch the tallest modules first and leave enough room to lift them off.
Cutting all the cleats before checking the fit
A bevel that’s inconsistent or facing the wrong way can stop a holder from seating properly. Cut a test pair and check it before making the full set.
Forgetting what’s behind the wall
The holder and cleat depend on the wall attachment. Identify the wall construction and choose a suitable method; don’t assume a drywall anchor is appropriate for a loaded tool wall.
Building every holder before testing one
A small test holder can reveal problems with spacing, bevel orientation, or clearance. Make that first, adjust your plan if needed, then build the rest.
French cleat tool wall questions
What angle should I cut for a French cleat?
A 45-degree bevel is a common choice. The wall cleat and holder cleat need opposing bevels that fit together, and the wall cleat must face the correct direction.
How far apart should I space the cleats?
Space them according to the height and clearance your holders need. Sketch the layout or make a spacer block before installing the rails. Check that each holder can lift off without hitting the row above it.
Can I mount French cleats on drywall?
Don’t assume drywall alone can support a tool wall. Choose an attachment method suitable for the wall structure and intended load. If you don’t know what’s behind the drywall or which fasteners to use, get qualified advice.
What can I hang on a French cleat wall?
You can make holders for hand tools, drills, clamps, shelves, and small cabinets, as long as each holder and the wall system are designed for their intended use. Start with a light module, check the fit, and add others gradually.
How much weight can a French cleat wall hold?
There’s no universal capacity. It depends on the materials, fasteners, wall construction, rail layout, and holder design. Follow the guidance for the hardware you choose, and don’t rely on an unverified weight claim.
Can I expand the wall later?
Yes. You can begin with a small section and add compatible holders or rails as your needs change. Leaving a little room in the original layout makes those future additions easier.
Products / Tools / Resources
- Plywood: Use the material and thickness specified in your plan for the backing, cleats, and holders.
- Measuring and layout tools: A tape measure, square, pencil, and level help keep the rows consistent.
- Wall-finding tools: Use a stud finder or another suitable method to identify framing, and check for wiring or pipes before drilling.
- Cutting tools: Choose a saw suited to making accurate bevels, and follow its manual and safe-use guidance.
- Fasteners: Select them for your wall structure and project design. Check the manufacturer’s installation instructions.
- Protective equipment: Use eye, hearing, and dust protection appropriate to your tools and materials.