
Featured Snippet
A solid woodworking bench is the foundation of every productive workshop. With the right dimensions, a stable base, and a thick laminated top, you can build a professional-quality workbench in a single weekend using readily available materials and common woodworking tools. This guide walks you through every step—from selecting lumber to assembling a rigid frame—so you can create a workbench that’s built for accuracy, durability, and decades of dependable use.
Table of Contents
- Why a Great Workbench Changes the Way You Build
- More Than Just Another DIY Project
- Why Professional Woodworkers Invest in Their Benches
- The Hidden Cost of an Unstable Workbench
- What Makes a True Woodworking Bench Different?
- Why Exact Dimensions Matter
- Built for Beginners, Trusted by Experienced Woodworkers
- The Design Philosophy Behind This Bench
- What You’ll Build
- Choosing the Perfect Dimensions for Comfort and Precision
- Recommended Overall Bench Dimensions
- Finding the Ideal Bench Height
- Choosing the Right Width
- Selecting the Best Length
- Why a Thick Bench Top Matters
- Heavy Legs and Structural Stability
- Stretcher Placement and Frame Strength
- Planning Overhangs for Better Clamping
- Storage Shelf Height and Organization
- Adapting the Dimensions to Your Workshop
- Materials, Lumber Selection, and Complete Cut List
- Choosing the Best Wood for a Workbench
- Softwood vs. Hardwood
- How to Select Straight, Stable Lumber
- Understanding Moisture Content
- Grain Direction and Wood Movement
- Complete Lumber List
- Hardware and Fasteners
- Choosing the Right Wood Glue
- Complete Cut List
- Essential Tools for the Build
- Organizing Your Workspace Before Construction
- Exact DIY Woodworking Bench Plans with Dimensions
- Overall Bench Specifications
- Base Footprint and Top Overhang
- Front Elevation Layout
- Side Elevation Layout
- Top View Dimensions
- Bench Top Construction Details
- Leg Placement
- Upper and Lower Stretcher Layout
- Shelf Support Positioning
- Planning for Bench Dogs
- Front Vise Location
- Tail Vise Allowance
- Allowing for Seasonal Wood Movement
- Final Layout and Dry Fit Checklist
- Building a Strong, Square Base
- Preparing the Workspace
- Organizing and Identifying Components
- Verifying Measurements
- Building the End Frames
- Installing Upper and Lower Stretchers
- Using Glue and Structural Screws
- Preventing Wood Splitting
- Connecting the Main Frame
- Squaring the Base
- Tightening and Reinforcing the Frame
- Installing Shelf Supports
- Adding Adjustable Leveling Feet
- Final Inspection and Glue Curing
- Creating a Flat, Heavy-Duty Bench Top
- Why Laminated Tops Perform Better
- Preparing the Boards
- Arranging the Grain Pattern
- Labeling the Boards
- Performing a Dry Assembly
- Gluing and Clamping the Top
- Keeping the Surface Flat
- Removing Clamps and Cleaning Glue
- Flattening the Bench Top
- Trimming the Ends
- Easing the Edges
- Sanding the Surface
- Choosing the Best Finish
- Final Assembly and Structural Reinforcement
- Preparing the Base and Bench Top
- Protecting the Surface During Assembly
- Positioning and Centering the Base
- Measuring the Overhang
- Properly Attaching the Top
- Allowing Natural Wood Movement
- Fastening the Top Securely
- Turning the Bench Upright
- Leveling the Bench
- Checking for Square and Flatness
- Installing the Lower Shelf
- Testing Stability Under Load
- Final Adjustments and Future Expansion
- Professional Upgrades: Vises, Bench Dogs, and Smart Storage Solutions
- Installing a Front Vise
- Choosing the Right Vise
- Bench Dogs and Dog Hole Layout
- Using Holdfasts
- Improving Lower Storage
- Adding Drawers and Cabinets
- Tool Wells
- Integrated Power and Workshop Lighting
- Clamp Storage
- Sacrificial Work Surfaces
- Bench Hooks and Shooting Boards
- Mobile Bases
- Protective Finishes
- Personalizing Your Workbench
- Planning Future Upgrades
- Common Mistakes, Maintenance, and Long-Term Care
- Mistakes to Avoid During Construction
- Understanding Seasonal Wood Movement
- Choosing Better Lumber
- Why Dry Fitting Matters
- Avoiding Glue-Up Mistakes
- Solving Stability Problems
- Planning for Future Upgrades
- Keeping the Design Practical
- Accepting Normal Wear and Tear
- Weekly, Monthly, and Seasonal Maintenance
- Keeping the Top Flat
- Protecting Against Moisture
- Maintaining Hardware
- Developing Good Workshop Habits
- Frequently Asked Questions and Products / Tools / Resources
- Answers to the Most Common Workbench Questions
- Recommended Measuring and Layout Tools
- Essential Clamps and Workholding Equipment
- Recommended Bench Accessories
- Hand Tools Every Woodworker Should Own
- Power Tools That Complement This Bench
- Workshop Storage and Organization
- Essential Safety Equipment
- Books and Learning Resources for Continued Skill Development
Why a Great Workbench Changes the Way You Build
Every memorable woodworking project starts in the same place.
Not with an expensive table saw.
Not with a premium set of chisels.
And certainly not with the latest cordless tool.
It starts with the surface you’re standing in front of.
A dependable workbench quietly influences every measurement you take, every board you clamp, every joint you cut, and every project you complete. It’s easy to overlook because it rarely gets the spotlight, yet it affects almost everything that happens in the workshop.
Spend a day working on a shaky table, and you’ll understand the difference immediately. Boards slide when they shouldn’t. Measurements become frustrating. Chiseling feels awkward. Even simple glue-ups become harder than they need to be.
Now compare that to working on a bench that refuses to move.
The first time you plane a board without the bench shifting beneath you, or tighten a clamp without the frame flexing, you’ll notice something unexpected.
The work feels easier.
Not because you’ve suddenly become a better woodworker, but because your workspace has stopped working against you.
That’s exactly what this project is designed to deliver.
Learn more: Best Woodworking Bench for a Small Workshop: 11 Top Picks for Stability, Storage & Space Efficiency
More Than Just Another DIY Project
Building your own workbench isn’t simply about saving money.
It’s about creating the one tool that improves every other tool you own.
Whether you’re building cabinets, crafting furniture, restoring antiques, or tackling weekend home projects, your workbench becomes the center of every workflow.
It’s where rough lumber becomes clean components.
Where ideas become measurements.
Where loose parts become finished furniture.
Unlike most woodworking projects, this one never truly leaves your workshop. Long after the first bookshelf, coffee table, or cabinet has been completed, your bench remains exactly where it belongs—ready for the next challenge.
That alone makes it one of the most rewarding builds you’ll ever undertake.
Why Professional Woodworkers Invest So Much in Their Benches
Walk into almost any professional woodworking shop and you’ll notice something interesting.
The workbench isn’t an afterthought tucked into a corner.
It’s usually the focal point of the room.
There’s a reason for that.
Professionals understand that accuracy begins long before a saw blade touches wood.
It starts with a stable reference surface.
When your bench doesn’t flex, twist, or vibrate, everything else becomes more predictable.
Cuts are cleaner.
Joinery fits more precisely.
Glue-ups stay aligned.
Hand tools perform exactly as they’re meant to.
That consistency builds confidence, and confidence has a remarkable effect on craftsmanship.
Instead of constantly correcting problems, you spend your time creating.
Recommended reading: Best Woodworking Bench Under $500: 9 Workbenches That Give You the Most for Your Money
The Hidden Cost of an Unstable Workbench
Many beginners begin woodworking on whatever surface happens to be available.
A folding table.
An old desk.
A pair of sawhorses with a sheet of plywood across them.
There’s nothing wrong with starting that way.
Most woodworkers do.
But eventually those temporary solutions begin creating problems that are easy to mistake for a lack of skill.
Imagine trying to hand-plane a hardwood board while the entire bench slides across the floor.
Or carefully marking dovetails while the work surface wobbles every time you lean against it.
Even drilling perfectly vertical holes becomes more difficult when the foundation underneath the project isn’t stable.
The frustrating part is that many people blame themselves.
In reality, they’re asking a temporary workspace to perform a job it was never designed to do.
A proper woodworking bench removes those distractions, allowing you to focus entirely on the craft itself.
Learn more: Before You Buy a Professional Woodworking Bench, Read This First
What Makes a True Woodworking Bench Different?
At first glance, a woodworking bench doesn’t seem particularly complicated.
Four legs.
A thick top.
Maybe a shelf underneath.
Simple enough.
But beneath that straightforward appearance lies decades—if not centuries—of practical design refinement.
Every element serves a purpose.
The heavy legs resist movement.
The stretchers prevent the frame from twisting under pressure.
The thick laminated top absorbs vibration while providing a perfectly flat reference surface.
Even the dimensions have been refined through generations of woodworking experience.
Nothing is arbitrary.
Everything works together.
That’s why a real woodworking bench feels completely different from an ordinary table, even though they may appear similar at first glance.
Why Exact Dimensions Matter
One of the biggest mistakes people make when building a workbench is assuming that “close enough” is good enough.
For decorative furniture, a slight variation may never be noticed.
A workbench is different.
Every dimension influences how comfortably—and accurately—you’ll work.
A bench that’s too tall forces your shoulders upward during long sessions.
One that’s too low encourages poor posture and unnecessary back strain.
If it’s too wide, you’ll constantly stretch across the surface.
Too narrow, and large projects begin to feel cramped.
Over the course of hundreds of hours in the workshop, those seemingly minor differences become surprisingly significant.
That’s why this guide doesn’t simply provide measurements.
It explains the reasoning behind them.
Once you understand why certain dimensions work so well, you’ll also know when—and how—to adjust them for your own workshop.
Built for Beginners, Trusted by Experienced Woodworkers
One of the biggest misconceptions about building a professional-style workbench is that it requires advanced woodworking skills.
It doesn’t.
This design was developed with simplicity in mind.
The structure is intentionally straightforward, relying on strong engineering principles rather than overly complicated joinery.
If you can measure carefully, make accurate cuts, drill pilot holes, and assemble parts patiently, you already have everything needed to build this bench successfully.
At the same time, the finished result is sturdy enough to satisfy experienced woodworkers who expect reliability from their workshop equipment.
That balance is what makes this project so rewarding.
It doesn’t ask you to be an expert before you begin.
It helps you become a more confident woodworker because you’ve built it.
The Philosophy Behind This Design
There are countless woodworking bench plans available online.
Some are massive cabinetmaker’s benches weighing hundreds of pounds.
Others are lightweight portable benches designed for occasional DIY tasks.
Learn more: The Complete Beginner’s Guide to Choosing a Portable Woodworking Workbench That You’ll Never Outgrow
This project aims for something different.
It brings together the best qualities of both.
The result is a workbench that’s substantial enough to stay planted during demanding woodworking operations, yet realistic enough for the average home workshop.
Every decision was guided by four principles.
Strength Without Complexity
A strong workbench doesn’t have to involve intimidating joinery or specialized machinery.
Carefully chosen materials, thoughtful construction, and solid engineering can achieve remarkable results with common tools.
Practical Dimensions
The overall size has been selected to accommodate the vast majority of woodworking projects while remaining manageable in a typical garage or basement workshop.
It’s large enough for furniture building without dominating your workspace.
Room to Grow
Your first workbench doesn’t have to be your last.
This design leaves plenty of opportunities for future improvements, including vises, bench dogs, storage drawers, holdfasts, and other professional accessories.
As your woodworking skills evolve, your bench can evolve with them.
Long-Term Reliability
A well-built workbench shouldn’t need replacing every few years.
With proper care, the one you build from this guide should serve faithfully through thousands of hours of woodworking and countless completed projects.
It becomes less of a project and more of a trusted partner in your workshop.
What You’ll Build
By the time you’ve completed this guide, you’ll have a woodworking bench that combines professional-level stability with approachable construction techniques.
The finished bench features:
- A heavy-duty laminated work surface
- A rigid frame designed to resist twisting
- Comfortable working height for most woodworkers
- Excellent clamping access from multiple sides
- Upgrade-ready construction for future accessories
- Durable materials chosen for long service life
More importantly, you’ll understand why each component has been designed the way it has.
That knowledge is just as valuable as the bench itself.
Because once you understand the principles behind great workbench design, you’ll recognize them every time you build, modify, or improve your workshop in the future.
The next step is deciding on the dimensions that will make your workbench feel like it was built specifically for you. Height, width, length, and top thickness all influence comfort, efficiency, and accuracy in ways that aren’t immediately obvious—but once you experience the difference, you’ll never look at a workbench the same way again.
Next: Part 2 – Choosing the Perfect Dimensions for Comfort and Precision
Part 2: Choosing the Perfect Dimensions for Comfort and Precision
There’s a reason experienced woodworkers can spend an entire day in the shop without constantly shifting their weight, stretching awkwardly, or ending the evening with an aching back.
It isn’t luck.
And it certainly isn’t because they’re more accustomed to discomfort.
More often than not, it’s because their workbench fits the way they work.
A well-designed workbench feels almost invisible. Your hands naturally fall where they need to be. Clamps reach without frustration. Long boards stay supported. Every task—from marking out joinery to assembling furniture—flows more smoothly because the bench is working with you instead of against you.
That’s why choosing the right dimensions is one of the most important decisions you’ll make during this entire project.
These measurements will influence every woodworking session for years to come.
Start With the Way You Actually Work
Before reaching for a tape measure, pause for a moment and think about the projects you enjoy building.
Do you mostly make:
- Small decorative boxes?
- Cabinets?
- Dining tables?
- Shelving?
- Home improvement projects?
- Fine furniture?
Your answer matters because a workbench isn’t simply a flat surface.
It’s a workspace designed around movement.
Someone who spends hours hand-planing hardwood boards may prefer slightly different dimensions than someone who mainly assembles cabinets with power tools.
The goal isn’t finding a universally “perfect” size.
It’s finding the size that’s perfect for the way you work.
The Dimensions Used Throughout This Guide
After balancing ergonomics, stability, available workshop space, and decades of proven woodworking practice, this guide uses the following finished dimensions:
| Component | Recommended Size |
|---|---|
| Overall Length | 72 inches (1830 mm) |
| Overall Width | 30 inches (760 mm) |
| Overall Height | 34 inches (865 mm) |
| Bench Top Thickness | 3 inches (76 mm) |
These measurements have earned their reputation because they work exceptionally well for an enormous variety of woodworking projects.
They provide generous working space without overwhelming an average garage or basement workshop.
Why Bench Height Matters More Than You Think
Ask experienced woodworkers what they’d change about their first workbench, and one answer appears again and again.
“I wish I’d built it at a different height.”
Height affects nearly every movement you make.
A bench that’s only an inch or two too tall can leave your shoulders feeling tense after a long afternoon of sanding or assembly.
One that’s slightly too low encourages you to lean forward constantly, placing unnecessary strain on your back.
Those small differences don’t seem important during a five-minute task.
Over hundreds of hours, however, they become impossible to ignore.
A Proven Starting Point
For general woodworking, a finished height of approximately:
34 inches (865 mm)
is an outstanding all-around choice.
It works well for:
- Measuring
- Layout work
- Assembly
- Sanding
- Routing
- Power tool support
- General shop tasks
For many people, it provides an excellent balance between comfort and control.
Should Your Bench Be Taller?
Some woodworking activities benefit from bringing the workpiece closer to eye level.
If you enjoy:
- Detailed carving
- Fine inlay work
- Intricate joinery
- Model making
- Precision sanding
you may prefer a workbench closer to:
36–38 inches high
The higher surface reduces the need to bend forward during detailed work, helping you maintain a more relaxed posture.
Or Slightly Lower?
On the other hand, traditional hand-tool woodworkers often favor a lower bench.
When using hand planes or chisels, your body naturally applies forward pressure.
A slightly lower work surface—around:
32–33 inches
allows you to transfer that force more efficiently.
It’s one of the reasons many historic cabinetmaker’s benches appear lower than modern assembly benches.
Neither approach is wrong.
They simply support different styles of woodworking.
A Quick Test Before You Build
If you’re uncertain about the ideal height, try this simple experiment.
Stand naturally with your arms resting comfortably at your sides.
Now bend your elbows slightly as though you’re preparing to plane a board or mark a layout line.
Notice where your hands naturally fall.
Many woodworkers discover that this position closely matches a comfortable bench height.
You can even stack scrap lumber or sturdy boxes to create a temporary work surface before committing to the final measurements.
A few minutes of testing today can save years of wishing you’d built the bench differently.
Finding the Right Width
When people first design a workbench, they’re often tempted to make it as wide as possible.
More surface area must be better…
Right?
Not always.
A bench that’s too wide introduces an unexpected problem.
You can’t comfortably reach the opposite side.
Simple tasks suddenly require leaning across the surface, walking around the bench, or constantly repositioning your work.
That’s why professional workbenches are often narrower than people expect.
Why 30 Inches Works So Well
A width of approximately:
30 inches
provides an excellent compromise.
It’s wide enough to support:
- Cabinet doors
- Tabletops
- Drawer assemblies
- Power tools
- Glue-ups
while still allowing most people to reach comfortably across the bench when necessary.
That balance keeps your workflow efficient without wasting valuable shop space.
When a Narrower Bench Makes Sense
Not every workshop has unlimited room.
If you’re working in:
- A single-car garage
- A basement corner
- A shared workshop
- A compact shed
a bench between 24 and 28 inches wide may actually feel more comfortable.
Smaller workshops benefit from improved movement around the bench, and a slightly narrower surface often encourages better organization by limiting clutter.
Choosing the Best Length
Length determines the type of projects your bench can comfortably support.
Fortunately, there’s a sweet spot.
For most woodworkers:
72 inches
offers outstanding versatility.
It’s long enough for:
- Furniture components
- Cabinet assemblies
- Long boards
- Shelving
- Doors
- Glue-ups
yet compact enough to leave room for walking and moving materials around the workshop.
Is a Longer Bench Better?
Sometimes.
If you regularly build:
- Dining tables
- Built-in cabinetry
- Architectural millwork
- Large worktops
an 8-foot bench can be extremely useful.
However, remember that a larger bench also:
- Occupies more floor space.
- Costs more to build.
- Weighs considerably more.
- Requires more room to move around.
For many home workshops, bigger isn’t automatically better.
The best bench is the one that fits both your projects and your workspace.
The Importance of a Thick Top
A workbench top isn’t simply a place to set your projects.
It’s the working surface that absorbs vibration, supports heavy loads, and serves as the reference plane for accurate woodworking.
That’s why thickness matters.
This guide recommends a laminated top approximately:
3 inches thick
The benefits are immediately noticeable.
A thick top:
- Feels incredibly solid.
- Holds clamps securely.
- Resists flexing.
- Dampens vibration.
- Remains flatter over time.
You’ll appreciate those qualities every time you pick up a hand plane or tighten a clamp.
Heavy Legs Create a Stable Foundation
If you’ve ever used a lightweight workbench that rocked back and forth while sanding or sawing, you already understand the value of substantial legs.
For this design, each leg measures approximately:
3½ × 3½ inches
Their job isn’t merely to support weight.
They anchor the entire structure.
Combined with properly installed stretchers, they transform individual pieces of lumber into a rigid framework that resists twisting from every direction.
The Role of Stretchers
Stretchers rarely receive much attention, yet they’re among the hardest-working components in the entire bench.
They connect the legs into one unified frame.
Without them, the bench would rack under side pressure.
With them, the structure behaves as a single solid unit.
For this project, both the upper and lower stretchers use durable 2 × 4 stock, providing excellent stiffness without unnecessary complexity.
Leave Room for Clamps
One small design detail has an enormous impact on usability.
Overhang.
Allowing the top to extend slightly beyond the frame creates valuable space for clamps.
Recommended overhangs include:
- Front: approximately 2 inches
- Ends: 2–3 inches
This simple feature makes countless woodworking tasks easier, from edge sanding to assembling cabinet doors.
Don’t Forget Storage
The space beneath your workbench is valuable.
Rather than leaving it empty, plan ahead.
Position an optional lower shelf roughly:
8–10 inches above the floor
This provides room for:
- Power tools
- Clamps
- Toolboxes
- Lumber
- Storage bins
- Workshop supplies
An added bonus?
The extra weight stored low on the bench further improves overall stability.
Your Workbench Should Fit You—Not the Other Way Around
One of the greatest advantages of building your own workbench is the freedom to tailor it to your needs.
You’re not limited to whatever dimensions happen to come with a factory-built bench.
If you’re exceptionally tall, slightly adjust the height.
If your workshop is compact, shorten the length.
If most of your projects involve small boxes or decorative pieces, reduce the footprint accordingly.
The important thing is understanding why these dimensions work.
Once you understand the principles behind them, making thoughtful adjustments becomes easy.
That’s far more valuable than simply copying someone else’s measurements.
The Foundation for Everything That Follows
By now, you have a clear blueprint for the overall size and proportions of your workbench.
These dimensions aren’t random numbers pulled from a plan.
They’re the result of decades of woodworking experience, refined through countless hours at the bench and shaped by practical workshop needs.
Get these measurements right, and every stage that follows becomes easier.
Your frame will be balanced.
Your top will feel comfortable.
Your workflow will become more natural.
And every future project will begin on a foundation designed to help you do your best work.
Next: Part 3 – Materials, Lumber Selection, and Complete Cut List, where you’ll learn how to choose straight, stable lumber, avoid costly mistakes at the lumberyard, and prepare an efficient cut list that minimizes waste while maximizing strength and durability.
Part 3: Materials, Lumber Selection, and Complete Cut List
Before a single screw is driven or the first joint comes together, there’s one stage that quietly determines whether your workbench will feel rock-solid or become a source of constant frustration.
It starts at the lumberyard.
The quality of the materials you bring home has a greater impact on the finished bench than many people realize. Straight boards simplify every step of construction. Dry lumber produces tighter joints. Thoughtful planning reduces waste, shortens build time, and helps the entire project come together with far less effort.
Professional woodworkers understand this instinctively.
They don’t just buy wood.
They choose it.
That difference shows up in the finished result.
Build the Bench Around Quality Materials, Not Expensive Materials
One of the biggest myths in woodworking is that a great workbench requires premium hardwood from the very beginning.
It doesn’t.
A beautifully engineered bench built from carefully selected construction lumber will almost always outperform a poorly built bench made from expensive hardwood.
Material selection isn’t about chasing the highest price tag.
It’s about understanding what each type of wood brings to the project.
Strength.
Weight.
Stability.
Durability.
Workability.
When those qualities work together, the finished bench feels solid from the very first day.
Choosing the Right Lumber
Several species work exceptionally well for a woodworking bench.
Each has its own personality, strengths, and ideal applications.
Construction Lumber
Common choices include:
- Douglas fir
- Southern yellow pine
- Spruce
- Hem-fir
These woods remain popular for one simple reason.
They deliver outstanding value.
When properly selected and allowed to acclimate, construction lumber can produce an incredibly durable workbench that’s capable of decades of dependable service.
It’s also widely available, making replacement boards easy to find if needed.
Hardwood Options
If your budget allows, hardwood offers several advantages.
Excellent choices include:
- Hard maple
- White oak
- Ash
- Beech
Hardwoods generally provide:
- Greater dent resistance
- Longer wear life
- Excellent screw holding
- Superior edge durability
- Beautiful natural grain
They’ve been the traditional choice for cabinetmaker’s benches for generations.
That said, they’re not essential for building an outstanding bench.
Many experienced woodworkers continue using softwood benches they’ve relied on for twenty years or more.
The Secret Isn’t the Species—It’s the Board
Walk through any lumberyard and you’ll notice something immediately.
No two boards are exactly alike.
Some are perfectly straight.
Others seem determined to twist in every direction imaginable.
Learning to recognize the difference is one of the most valuable woodworking skills you’ll ever develop.
Inspect Every Board Carefully
Never grab the first piece you see.
Take a few extra minutes to examine each board from end to end.
You’re looking for lumber that’s as stable and predictable as possible.
Check for:
Bow
A board that curves along its length.
A slight bow is manageable.
A severe one creates unnecessary work throughout the build.
Twist
Twisted lumber is one of the most frustrating problems you’ll encounter.
Hold one end of the board near eye level and sight down its length.
If opposite corners appear to rise and fall dramatically, choose another piece.
No amount of careful assembly can fully compensate for severely twisted lumber.
Cup
A cupped board curves across its width.
Minor cupping often disappears during lamination.
Large cups, however, require extra milling and increase material waste.
Crook
Crook occurs when one edge curves from one end of the board to the other.
It makes accurate cutting more difficult and reduces the amount of usable material.
Knots
Knots add character to woodworking projects.
On a structural workbench, however, they’re best kept to a minimum.
Avoid placing large knots in critical components such as:
- Legs
- Stretchers
- Major structural joints
Those areas benefit from continuous, uninterrupted wood fibers that maximize strength.
Moisture Content Matters More Than Most Beginners Realize
Wood never completely stops responding to its environment.
Fresh lumber often contains a surprising amount of moisture.
As it dries, it shrinks.
If different parts of the bench shrink at different rates, problems begin to appear.
You may notice:
- Small gaps
- Twisting
- Warping
- Surface movement
- Joint stress
Choosing kiln-dried lumber significantly reduces these risks.
If freshly purchased construction lumber still feels damp, allow it to acclimate inside your workshop before beginning construction.
Patience during this stage pays off for years afterward.
Give the Lumber Time to Settle
Resist the urge to begin cutting immediately after unloading your materials.
Instead:
- Stack the boards horizontally.
- Separate each layer with spacers.
- Allow air to circulate freely.
- Keep the stack off concrete floors whenever possible.
Even a week or two of acclimation helps the wood adjust to your workshop’s temperature and humidity.
The bench you build afterward will be noticeably more stable.
Understanding Grain Direction
Every board tells a story.
Growth rings reveal how the tree developed over many years, and those rings influence how the wood behaves after it’s milled.
When laminating the bench top, alternating the direction of the growth rings helps balance natural movement.
This doesn’t eliminate expansion and contraction completely.
Nothing can.
But it encourages the boards to work together instead of fighting one another as humidity changes throughout the seasons.
It’s a small detail that contributes to a flatter, longer-lasting work surface.
Complete Lumber List
The following materials will build the workbench featured throughout this guide.
Bench Top
- Eight pieces of 2 × 6 × 8-foot lumber
These boards will be laminated into a thick, durable work surface capable of handling demanding woodworking tasks.
Legs
- Four pieces of 4 × 4 lumber, cut to 34 inches
The legs provide the primary structural support and contribute significantly to the bench’s overall stability.
Upper Stretchers
- Two pieces of 2 × 4, cut to 60 inches
- Two pieces of 2 × 4, cut to 21 inches
These components lock the upper portion of the frame together and prevent lateral movement.
Lower Stretchers
- Two pieces of 2 × 4, cut to 60 inches
- Two pieces of 2 × 4, cut to 21 inches
Positioned lower on the frame, these stretchers increase rigidity while supporting the optional storage shelf.
Shelf Supports
- Four pieces of 2 × 4, cut to 21 inches
These create a solid platform beneath the workbench for additional storage.
Optional Shelf
One sheet of ¾-inch plywood cut to fit the frame, or edge-glued solid wood boards if you prefer a traditional appearance.
Hardware You’ll Need
Good hardware often goes unnoticed—which is exactly how it should be.
It quietly holds everything together year after year.
For this project, gather:
- Heavy-duty structural screws
- 2½-inch wood screws
- Wood glue
- Carriage bolts, washers, and nuts (optional for bolted stretchers)
- Adjustable leveling feet (optional)
- Thread-locking compound (optional)
Investing in quality fasteners is inexpensive insurance for a bench that’s expected to last for decades.
Learn more: 25 Best Woodworking Hardware Products Every Serious Woodworker Should Own (Ranked by Performance)
Choosing the Right Wood Glue
Glue is one of the strongest parts of modern woodworking.
When applied correctly, the bond often becomes stronger than the surrounding wood itself.
A quality PVA wood glue is an excellent choice for this project because it offers:
- High bond strength
- Easy cleanup
- Reasonable working time
- Excellent durability
Apply glue evenly rather than excessively.
A thin, continuous film creates stronger joints than large pools of adhesive.
Complete Cut List
Preparing every component before assembly makes the build far more enjoyable.
Label each piece as it’s cut to avoid confusion later.
| Part | Quantity | Finished Size |
|---|---|---|
| Bench Top Boards | 8 | 72 in × 5½ in × 1½ in |
| Legs | 4 | 34 in × 3½ in × 3½ in |
| Long Upper Stretchers | 2 | 60 in |
| Short Upper Stretchers | 2 | 21 in |
| Long Lower Stretchers | 2 | 60 in |
| Short Lower Stretchers | 2 | 21 in |
| Shelf Supports | 4 | 21 in |
| Shelf Panel | 1 | Sized to fit frame |
As each part is completed, mark it with a pencil or painter’s tape.
Simple labels such as “Front Left Leg” or “Upper Long Stretcher” eliminate unnecessary guesswork during assembly.
Tools That Make the Build Easier
You don’t need a shop full of expensive machinery to build a professional workbench.
Most DIY woodworkers already own many of the tools required.
Essential equipment includes:
- Circular saw or table saw
- Miter saw
- Drill and driver
- Random orbital sander
- Tape measure
- Combination square
- Speed square
- Clamps
- Pencil
- Safety glasses
- Hearing protection
- Dust mask
If you have access to a planer or jointer, they’ll simplify material preparation, but they’re by no means mandatory.
Careful layout and patient assembly can achieve excellent results with basic tools.
Organize Before You Build
One habit separates experienced woodworkers from beginners more than almost any other.
Preparation.
Before the first cut:
- Lay out every board.
- Separate lumber by size.
- Arrange clamps within reach.
- Organize screws and hardware.
- Clear enough floor space for assembly.
It may seem like extra work, but an organized workshop allows you to focus entirely on craftsmanship instead of constantly searching for tools or hardware.
Buy Once, Build Once
It’s tempting to save a few dollars by choosing the cheapest boards available.
Sometimes that works.
More often, it creates hours of additional labor.
Straight lumber requires fewer corrections.
Dry lumber produces tighter joints.
Quality materials make the entire project more enjoyable from beginning to end.
Remember, this isn’t just another weekend build.
It’s the foundation for hundreds of woodworking projects you’ll create in the years ahead.
Choosing better materials today is an investment you’ll appreciate every single time you step into your workshop.
With your lumber selected, your hardware organized, and every component carefully planned, the project begins to feel real.
The stack of boards sitting in your workshop is no longer just raw material.
It’s the beginning of a workbench that will soon become the centerpiece of your woodworking space.
Next: Part 4 – Exact DIY Woodworking Bench Plans with Dimensions, where we’ll lay out every critical measurement, explain the structural geometry of the frame, and show how each dimension contributes to the strength, balance, and long-term performance of the finished bench.
Part 4: Exact DIY Woodworking Bench Plans with Dimensions
Every successful woodworking project reaches a moment when planning gives way to precision.
This is that moment.
You’ve chosen your materials. You’ve selected lumber that will stay stable over time. You understand why the recommended dimensions work so well.
Now it’s time to translate all of that preparation into a clear set of woodworking bench plans that you can build with confidence.
Think of this section as the blueprint behind the project.
Every measurement has been chosen with a purpose. Every overhang, every stretcher, and every support plays a role in creating a bench that feels solid under heavy use and remains accurate for years to come.
The goal isn’t simply to build a workbench.
It’s to build one you’ll never wish you’d built differently.
Overall Bench Dimensions
The completed workbench measures:
| Component | Finished Dimension |
|---|---|
| Overall Length | 72 inches (1830 mm) |
| Overall Width | 30 inches (760 mm) |
| Overall Height | 34 inches (865 mm) |
| Bench Top Thickness | 3 inches (76 mm) |
| Estimated Weight | 220–280 pounds |
These proportions strike an ideal balance between stability, usable workspace, and efficient use of floor space.
The bench is large enough to support furniture projects while remaining compact enough for the average garage, basement, or dedicated workshop.
Understanding the Footprint
Although the bench top measures six feet long, the base is intentionally slightly smaller.
This creates a modest overhang around the frame that dramatically improves usability.
The finished footprint of the base measures approximately:
- 60 inches long
- 26 inches wide
That difference between the frame and the top isn’t wasted space.
It’s valuable working space.
The overhang provides easy access for clamps, making edge work and glue-ups far more convenient.
It’s one of those details you’ll appreciate every time you use the bench.
The Front Elevation
Viewed from the front, the workbench has a simple, balanced appearance.
The legs sit near each corner, supporting the thick laminated top while leaving generous working room between them.
Front View Dimensions
- Overall height: 34 inches
- Top thickness: 3 inches
- Leg height: 31 inches (allowing for the top thickness)
- Distance between front legs: 60 inches
- Upper stretcher positioned directly beneath the top
- Lower stretcher approximately 8 inches above the floor
The result is a frame that distributes weight evenly while resisting side-to-side movement.
Side Elevation
Looking at the bench from either end reveals another important design feature.
The legs are set slightly inward rather than being perfectly flush with the edges of the top.
This creates the recommended overhang.
Side View Dimensions
- Overall width: 30 inches
- Base width: 26 inches
- Front overhang: approximately 2 inches
- Rear overhang: approximately 2 inches
That modest extension gives clamps room to grip securely without interfering with the structural frame beneath.
Simple.
Effective.
Used on countless professional benches.
Top View Layout
From above, the design appears wonderfully uncomplicated.
That’s intentional.
An uncluttered work surface is far more versatile than one crowded with unnecessary features.
The laminated top measures:
- 72 inches long
- 30 inches wide
- 3 inches thick
This generous surface provides enough room to:
- Assemble cabinet doors
- Build drawers
- Glue up tabletops
- Lay out furniture components
- Support long boards during cutting and sanding
Even when several tools are sitting on the bench, you’ll still have room to work comfortably.
Bench Top Construction
The strength of this design comes largely from the laminated work surface.
Instead of relying on a single thick slab—which is expensive and difficult to source—the top is created by laminating several boards together.
This approach offers multiple advantages.
It increases mass.
It reduces movement.
It creates exceptional stiffness.
It also makes replacement or resurfacing easier many years down the road.
Each board should be carefully aligned during glue-up to minimize flattening later.
Small adjustments made now save considerable effort after the adhesive cures.
Leg Placement
Heavy legs create the foundation for the entire bench.
Each leg measures:
3½ × 3½ inches
The spacing has been chosen to maximize rigidity without limiting access beneath the bench.
Position each leg:
- Approximately 6 inches from each end of the top
- Flush with the outside of the frame
- Perfectly vertical in both directions
Take your time during this stage.
Even a slight lean becomes much more difficult to correct once the frame is assembled.
Upper Stretcher Placement
The upper stretchers connect the legs directly beneath the work surface.
They perform several critical jobs simultaneously.
They:
- Lock the frame together
- Resist twisting
- Transfer weight evenly
- Support the bench top
The recommended dimensions are:
- Long stretchers: 60 inches
- Short stretchers: 21 inches
Install them so the upper edge sits just beneath the underside of the laminated top.
This creates maximum structural efficiency while preserving generous knee clearance below.
Lower Stretchers
Lower stretchers often receive less attention than they deserve.
Without them, the frame can gradually rack under repeated side pressure.
With them, the entire structure behaves as one rigid assembly.
Position the lower stretchers approximately:
8 inches above the floor
This location creates enough room for storage while significantly increasing the overall stiffness of the bench.
It’s a small detail with a surprisingly large impact.
Shelf Support Layout
If you’re adding a lower shelf, install four support members between the stretchers.
These supports should be:
- Evenly spaced
- Perfectly level
- Securely fastened
Whether you choose plywood or solid wood for the shelf, proper support prevents sagging under heavy loads.
A lower shelf quickly becomes one of the most useful features in the entire workshop.
It naturally fills with clamps, toolboxes, portable power tools, and frequently used accessories.
Bench Dog Hole Planning
Even if you don’t intend to install bench dogs immediately, it’s wise to plan for them now.
Leaving adequate space around future dog hole locations prevents conflicts with stretchers and hardware later.
A common arrangement includes:
- ¾-inch diameter holes
- Approximately 4–5 inches apart
- Running parallel to the front edge
This layout supports future additions such as holdfasts, planing stops, and work-holding accessories without requiring major modifications.
Planning ahead costs nothing.
Changing your mind later often does.
Front Vise Location
The front vise is typically mounted on the left side of the bench for right-handed woodworkers.
Left-handed builders may prefer the opposite arrangement.
Allow enough space between the front leg and the end of the bench to accommodate:
- Mounting hardware
- Jaw movement
- Clamping clearance
Thinking about vise placement during construction is much easier than trying to retrofit one after the bench has been completed.
Recommended reading: Woodworking for Left-Handed People: Tools, Techniques & Workshop Setup for Better Results
Future Tail Vise Space
Not every workbench requires a tail vise from day one.
However, leaving sufficient room at the opposite end of the bench allows for future upgrades without rebuilding the top.
One of the strengths of this design is its flexibility.
You can start with a straightforward bench today and gradually transform it into a highly capable workstation as your woodworking interests expand.
Allow for Wood Movement
Wood is never completely still.
Even after years indoors, seasonal humidity causes boards to expand and contract slightly.
A successful workbench design accepts that reality instead of trying to fight it.
Avoid fastening the laminated top so tightly that natural movement becomes restricted.
Instead, use attachment methods that hold the top securely while still allowing it to move subtly with changing conditions.
That small amount of freedom helps prevent stress cracks, warping, and unnecessary strain on the frame.
Confirm Everything Before Assembly
Once every component has been cut, resist the temptation to start assembling immediately.
Instead, perform one complete dry layout.
Arrange every major part on the workshop floor.
Check:
- Overall length
- Overall width
- Leg spacing
- Stretcher alignment
- Shelf position
- Top overhang
- Clamp clearance
This simple rehearsal often reveals small adjustments that are easy to correct now but frustrating to fix later.
Professional woodworkers rely on dry fitting because it’s faster to move parts than to undo completed joinery.
Why These Dimensions Have Stood the Test of Time
There are countless workbench designs available today.
Some prioritize portability.
Others maximize storage.
Some are built specifically for hand-tool enthusiasts, while others focus on power-tool workflows.
This design succeeds because it avoids extremes.
It combines generous working space with excellent stability.
It supports a wide range of woodworking projects without becoming unnecessarily large or complicated.
Every measurement has been selected to create a bench that feels balanced from the first day you use it—and continues to feel that way years later.
The dimensions aren’t just numbers on a drawing.
They’re the result of generations of practical woodworking experience distilled into a bench that’s straightforward to build, enjoyable to use, and capable of supporting everything from small household repairs to ambitious furniture projects.
With the plans finalized and every measurement confirmed, the next stage is where the stack of lumber finally begins to resemble a real workbench.
The first cuts are already behind you.
Now it’s time to assemble the frame—the structural backbone that gives the entire bench its remarkable strength and unwavering stability.
Next: Part 5 – Building a Strong, Square Base, where you’ll construct a rigid foundation, ensure every corner is perfectly square, and create a framework capable of supporting decades of demanding woodworking projects.
Part 5: Building a Strong, Square Base
Every outstanding workbench has one thing in common.
It starts with a frame that refuses to move.
Long before the laminated top is installed, before the first vise is mounted, and well before the bench becomes the centerpiece of your workshop, the foundation is quietly doing the hardest job of all.
It’s carrying hundreds of pounds of weight.
It’s resisting twisting forces every time you clamp a board.
It’s absorbing vibration from saws, sanders, chisels, and hand planes.
If the base is solid, everything built on top of it becomes easier.
If the base is weak, no amount of expensive hardware or careful craftsmanship will completely compensate for it.
This stage isn’t about working quickly.
It’s about building with precision.
Take your time here, and every step that follows becomes more enjoyable.
Prepare Your Workspace Before Assembly
One of the easiest ways to improve the quality of your build has nothing to do with woodworking techniques.
It’s organization.
Before assembling anything, clear enough floor space to lay out the entire frame.
Gather everything you’ll need within easy reach:
- Tape measure
- Combination square
- Speed square
- Drill and driver
- Clamps
- Structural screws
- Wood glue
- Rubber mallet
- Pencil
- Level
A clean workspace helps you stay focused on accuracy instead of constantly searching for tools.
Professional woodworkers understand that preparation isn’t wasted time.
It’s part of the build.
Identify Every Component
Lay every piece on the floor according to its final position.
Group the parts together:
- Four legs
- Long upper stretchers
- Short upper stretchers
- Long lower stretchers
- Short lower stretchers
- Shelf supports
If you labeled each piece while cutting, this step takes only a few minutes.
If not, now is the perfect time.
Simple markings such as Front Left, Rear Right, or Upper Long Stretcher make assembly smoother and eliminate confusion later.
Double-Check Every Measurement
Before fastening anything together, confirm that every structural component matches the cut list.
Even a difference of an eighth of an inch can introduce unnecessary problems later.
Check:
- Leg length
- Stretcher length
- End stretcher dimensions
- Shelf supports
Consistency is more important than speed.
Once screws and glue are involved, correcting mistakes becomes much more time-consuming.
Begin With the End Frames
The strongest way to approach this build is by assembling the two end frames first.
Each frame consists of:
- Two legs
- One upper stretcher
- One lower stretcher
Lay the components on a flat surface before fastening them together.
Check that every corner forms a true ninety-degree angle.
This simple habit prevents small alignment errors from spreading throughout the rest of the project.
Position the Upper Stretcher
The upper stretcher sits directly beneath the workbench top.
Its placement affects the strength of the entire frame.
Position it so the top edge is flush with the inside faces of the legs.
This creates maximum support for the laminated top while keeping the structure clean and symmetrical.
Before driving any screws, clamp everything securely.
Movement during fastening is one of the most common causes of frames ending up slightly out of square.
Install the Lower Stretcher
Next comes the lower stretcher.
Position it approximately 8 inches above the floor.
This location has two important advantages.
First, it dramatically increases resistance to side-to-side movement.
Second, it creates generous room for an optional storage shelf without sacrificing stability.
Take another moment to verify that both legs remain perfectly parallel before fastening the stretcher permanently.
Use Glue and Screws Together
Many woodworkers wonder whether screws alone are enough.
They’ll certainly hold the frame together.
But combining quality wood glue with structural screws creates a noticeably stronger assembly.
Apply a thin, even layer of glue to the mating surfaces before bringing the pieces together.
You don’t need excessive amounts.
In fact, too much glue often creates unnecessary cleanup without improving strength.
A light, continuous film is all that’s required.
Once the parts are clamped tightly together, drive the structural screws according to the manufacturer’s recommendations.
Prevent Splitting Before It Starts
Large structural screws generate significant pressure as they enter the wood.
Without pilot holes, that pressure can split even high-quality lumber.
Always drill:
- Pilot holes
- Clearance holes where appropriate
- Countersinks if desired
It adds only a few extra minutes, but greatly reduces the risk of damaging carefully selected materials.
This small step also makes driving screws smoother and more accurate.
Build the Second End Frame
Repeat exactly the same process for the opposite side.
Avoid assuming the first frame was perfect.
Measure again.
Square it again.
Clamp it again.
Consistency between the two end assemblies is essential because they’ll determine how easily the remaining stretchers fit.
Small differences now can create larger problems later.
Treat the second frame with the same attention as the first.
Connect the Long Stretchers
With both end frames complete, it’s time for the structure to take shape.
Stand the end frames upright.
Position the long upper stretchers between them.
Then install the long lower stretchers.
At this stage, avoid fully tightening every fastener immediately.
Instead, snug the screws just enough to hold the frame together while still allowing minor adjustments.
This flexibility becomes valuable during the squaring process.
Check for Square the Professional Way
Many beginners rely only on a carpenter’s square.
While that’s useful, there’s an even better method.
Measure the frame diagonally from one corner to the opposite corner.
Then measure the opposite diagonal.
If both measurements are identical, the frame is square.
If one diagonal is longer, gently shift the frame until both measurements match.
This simple technique has been used by furniture makers, cabinet builders, and carpenters for generations because it’s remarkably accurate.
Take your time here.
A perfectly square base makes every remaining step easier.
Tighten Everything Gradually
Once the frame is square, begin tightening the fasteners.
Avoid working randomly.
Instead, move systematically around the bench.
Tighten one connection.
Move to the opposite side.
Then return to the next joint.
Gradual tightening distributes pressure evenly throughout the structure and helps preserve alignment.
After everything is secure, measure the diagonals one final time.
It’s much easier to correct a small shift now than after the top has been installed.
Test the Frame Before Moving On
Set the completed frame upright on a flat floor.
Give it a gentle push from several directions.
It should feel surprisingly rigid.
If you notice movement, don’t ignore it.
Instead, determine the source immediately.
Possible causes include:
- Loose screws
- Misaligned stretchers
- An out-of-square frame
- Uneven leg lengths
Correcting these issues now prevents frustration later.
A workbench should inspire confidence from the moment it’s assembled.
Install the Shelf Supports
If you’re planning to include lower storage, now is the ideal time to install the shelf supports.
Space them evenly across the lower stretchers.
Ensure every support is perfectly level before fastening it permanently.
These supports don’t merely hold a shelf.
They distribute weight across the frame, allowing the storage area to carry heavy toolboxes, machinery, and supplies without sagging.
Future-you will appreciate the extra storage more than you probably expect today.
Should You Add Adjustable Leveling Feet?
Workshops rarely have perfectly flat floors.
Even modern concrete slabs can vary enough to cause a bench to rock slightly.
If your floor isn’t perfectly level, adjustable leveling feet are an excellent upgrade.
They allow you to compensate for uneven surfaces without trimming the legs individually.
If your floor is already flat, they’re optional rather than essential.
Either approach works well, provided the finished bench sits firmly without rocking.
Inspect Every Joint
Before declaring the base complete, spend a few minutes examining every connection.
Look closely for:
- Gaps between joints
- Loose fasteners
- Excess glue squeeze-out
- Minor alignment issues
Small imperfections are much easier to address now than after the laminated top has been attached.
This brief inspection often separates a good build from an exceptional one.
Let the Glue Fully Cure
Patience matters here.
Even though the frame may feel rigid after assembly, wood glue continues gaining strength as it cures.
Avoid placing heavy loads on the frame until the adhesive has reached full strength according to the manufacturer’s recommendations.
Giving the glue enough time to cure properly rewards you with joints that remain strong for years of daily use.
The Backbone of Your Workshop Is Complete
Stand back for a moment and look at what you’ve built.
It may not resemble the finished workbench just yet, but something important has happened.
The project has crossed a turning point.
What began as a stack of individual boards is now a single, unified structure.
You can already feel the stability when you lean against it.
You can already imagine the thick laminated top resting on the frame.
Most importantly, you’ve created the backbone of a workbench that’s designed to support countless future projects without complaint.
The strongest part of the build is now standing right in front of you.
Next comes the feature that transforms this sturdy frame into a true woodworking bench—the heavy laminated top that provides the flat, durable work surface every workshop depends on.
Next: Part 6 – Creating a Flat, Heavy-Duty Bench Top, where you’ll laminate the boards, achieve a perfectly flat surface, and build a workbench top that’s capable of withstanding years of demanding woodworking without losing its strength or accuracy.
Part 6: Creating a Flat, Heavy-Duty Bench Top
If the base is the backbone of your workbench, the top is its heart.
This is where every board will be measured, every joint fitted, every cabinet assembled, and every future project brought to life.
It’s also the part of the bench you’ll touch more than any other.
That’s why it’s worth slowing down.
A well-built top doesn’t just look impressive. It feels different. There’s a reassuring sense of mass when you lean against it. Clamps grip securely without flex. Hand planes glide across stock without the surface bouncing beneath them.
Those qualities aren’t accidental.
They’re built into the top from the very beginning.
Fortunately, creating one doesn’t require exotic materials or advanced woodworking machinery. With careful preparation, patient glue-ups, and attention to detail, you can build a work surface that rivals benches costing several times as much.
Why a Laminated Top Is the Gold Standard
At first glance, using several boards instead of one large slab might seem like a compromise.
In reality, it’s one of the smartest design choices you can make.
Large solid slabs are expensive, difficult to transport, and often continue moving as they respond to seasonal humidity changes.
A laminated top offers a different approach.
By bonding multiple boards together, you create a single, exceptionally rigid structure that’s stronger, more stable, and far more practical to build.
It also makes better use of readily available lumber, allowing almost anyone to construct a professional-quality workbench without searching for oversized specialty timber.
That’s one reason laminated tops have remained the preferred choice for generations of furniture makers and cabinet builders.
Preparing the Boards
The quality of the finished top depends largely on what happens before the glue bottle is even opened.
Lay every board on a flat surface and inspect it carefully.
Look for:
- Minor twists
- Bowing
- Cupping
- Rough edges
- Surface defects
Don’t panic if a board isn’t absolutely perfect.
Small imperfections are expected.
The goal is to arrange the boards so they naturally complement one another rather than exaggerate each other’s flaws.
Take your time during this stage.
A thoughtful layout makes the glue-up far less stressful.
Arrange the Grain Before Gluing
One simple habit can dramatically improve the long-term stability of your bench.
Alternate the direction of the growth rings as you arrange the boards.
Viewed from the end grain, one board’s growth rings should curve upward while the next curves downward.
Repeating this pattern encourages the boards to balance one another as humidity changes throughout the year.
Wood will always expand and contract.
That’s simply part of its nature.
Good planning doesn’t eliminate movement.
It manages it.
Create the Best Surface Possible
Before committing to the final arrangement, spend a few minutes moving the boards around.
Rotate them.
Swap positions.
Flip individual pieces.
You’re looking for more than structural stability.
You’re also creating a work surface you’ll enjoy looking at for years.
Pay attention to:
- Grain flow
- Color consistency
- Knots
- Natural character
A little extra time now often produces a bench top that looks intentionally crafted rather than randomly assembled.
Label the Boards
Once you’re satisfied with the layout, mark every board.
Simple numbers work perfectly.
For example:
- Board 1
- Board 2
- Board 3
- Board 4
Continue until every piece has been identified.
Then draw a large triangle or diagonal line across the entire arrangement.
If anything gets moved accidentally during glue-up, you’ll immediately know how everything fits back together.
It’s a small trick that experienced woodworkers use constantly because it prevents surprisingly common mistakes.
Dry Fit Before Opening the Glue
Never begin a large glue-up without rehearsing it first.
Lay the boards together exactly as they’ll be assembled.
Position all of your clamps.
Make sure they’re within reach.
Practice tightening them.
Check that every board aligns correctly.
If something feels awkward now, it will become even more awkward once glue has been applied and the clock starts ticking.
A dry fit removes uncertainty.
By the time you begin the real assembly, you’ll already know exactly what to do.
Apply Glue Evenly
When it’s finally time to glue the top together, resist the temptation to use too much adhesive.
More glue doesn’t create a stronger joint.
It simply creates more cleanup.
Apply a thin, continuous bead along each mating edge.
Then spread it evenly with a brush, roller, or your finger while wearing appropriate protection.
The objective is complete coverage—not excess.
When the boards are pressed together, a small amount of glue squeeze-out along the joints tells you you’ve achieved good contact.
That’s exactly what you want.
Clamp With Purpose
Proper clamping is about balance, not brute force.
Arrange clamps both above and below the workpiece whenever possible.
Alternating clamp positions distributes pressure more evenly and helps prevent the laminated top from bowing during assembly.
As you tighten the clamps, work gradually from the center outward.
Watch the joints closely.
They should close evenly without forcing one board significantly higher than the next.
Moderate, consistent pressure produces stronger glue joints than excessive force.
Keep the Surface as Flat as Possible
Even with careful preparation, some boards may shift slightly during clamping.
That’s normal.
The goal is to minimize those differences before the glue cures.
As you tighten the clamps:
- Check alignment frequently.
- Tap high boards gently into place with a rubber mallet.
- Use straight scraps across the top if necessary to keep the surface flush.
- Avoid over-tightening one clamp while ignoring the others.
Every minute spent improving alignment now reduces the amount of flattening required later.
Give the Glue Time to Cure
Once everything is clamped securely, step away.
It’s tempting to remove the clamps early and admire your progress.
Don’t.
Wood glue develops strength gradually.
Allow the assembly to cure fully according to the manufacturer’s recommendations before attempting to plane, sand, or move the top.
Patience during this stage protects all the work you’ve already invested.
Removing the Clamps
After the glue has cured, remove the clamps and inspect every joint.
Look for:
- Tight glue lines
- Small gaps
- Areas requiring cleanup
- Excess dried glue
A sharp chisel or cabinet scraper works well for removing hardened squeeze-out without damaging the surrounding wood.
The cleaner the surface becomes now, the easier the next stages will be.
Flattening the Top
This is where the bench truly begins to take shape.
Even with excellent clamping, slight variations between boards are almost inevitable.
Fortunately, they’re easy to correct.
The objective is simple.
Create one continuous flat reference surface.
There are several effective ways to achieve that.
Option One: A Router Sled
If you have access to a router and a simple sled, this method produces excellent results.
The router rides across parallel rails, gradually removing high spots until the entire surface is perfectly level.
It’s especially useful if your boards varied slightly in thickness before glue-up.
Although it takes time, the results can be remarkably accurate.
Option Two: A Hand Plane
Many traditional woodworkers prefer flattening a bench top with a hand plane.
There’s something deeply satisfying about watching thin curls of wood peel away as the surface gradually becomes flatter.
Work diagonally across the grain at first.
Then switch directions.
Finally, finish with light passes following the grain.
Check your progress frequently using a long straightedge.
Patience produces the best results.
Option Three: Belt Sander
If a router sled or hand plane isn’t available, a quality belt sander can also achieve good results.
Keep the sander moving continuously.
Avoid lingering in one area, which can create shallow depressions that are difficult to remove later.
Finish with a random orbital sander to eliminate coarse sanding marks and refine the surface.
Verify Flatness
Don’t rely solely on your eyes.
Instead, use a long straightedge.
Check:
- Lengthwise
- Widthwise
- Corner to corner
Shine a light behind the straightedge if necessary.
Any visible gaps indicate low spots.
Small imperfections aren’t a problem.
Large humps should be corrected before moving forward.
Remember, this surface will become the reference point for every future project you build.
Trim the Ends
Once the top is flat, trim both ends to their final length.
A circular saw guided by a straightedge works extremely well.
The goal is perfectly square ends that align cleanly with the finished dimensions of the workbench.
Take careful measurements before making the cuts.
This is one of the last opportunities to refine the overall appearance of the top.
Ease the Edges
Sharp corners chip easily and aren’t particularly comfortable to work around.
Lightly ease every exposed edge using:
- A block plane
- Sandpaper
- A small round-over router bit
You don’t need dramatic curves.
A subtle break in the edge is enough to improve comfort while helping protect the wood from accidental damage.
It’s a small finishing touch that gives the bench a noticeably more refined appearance.
Sand the Surface
Now it’s time to bring everything together.
Begin with a coarse grit if necessary to remove minor glue residue or tool marks.
Then progress gradually through finer grits.
For most workbenches, sanding to around 120–180 grit provides an ideal balance.
The surface becomes smooth enough for accurate layout work while still retaining enough texture to keep workpieces from sliding unexpectedly.
An overly polished workbench often becomes surprisingly slippery.
Should You Apply a Finish?
Many first-time builders assume a workbench should receive a thick protective coating.
In reality, less is usually more.
Heavy film finishes can become slick, making clamping and assembly more difficult.
Instead, many experienced woodworkers prefer a light application of:
- Danish oil
- Tung oil
- Hard wax oil
- Boiled linseed oil (used according to safety guidelines)
These finishes protect the wood while preserving its natural feel and making future maintenance simple.
Remember, a workbench is meant to be used—not admired from across the room.
A finish that can be refreshed easily is often more practical than one that requires extensive refinishing later.
The Surface You’ll Build On for Years
Set the completed top on a pair of sawhorses and take a moment to appreciate what you’ve created.
What began as a stack of ordinary boards has become a single, massive work surface capable of supporting years—perhaps decades—of woodworking.
Run your hand across it.
Feel the weight.
Notice the solid, reassuring character that only a thick laminated top can provide.
Soon it will be fastened to the base you’ve already built, transforming two separate assemblies into one exceptionally capable workbench.
And from that moment forward, nearly every project in your workshop will begin right here.
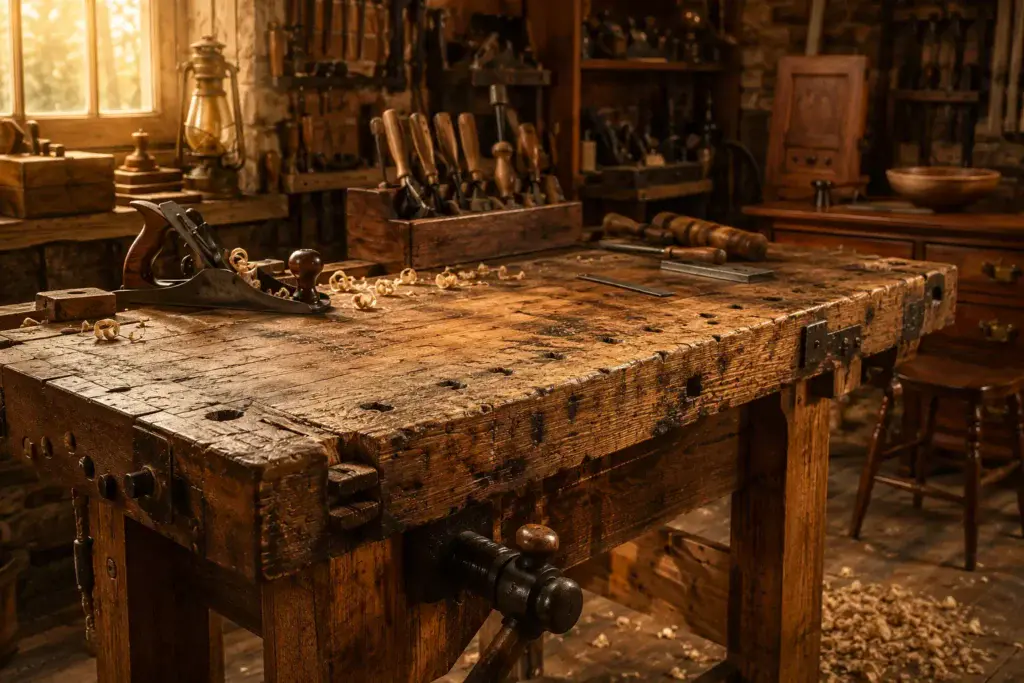
Next: Part 7 – Final Assembly and Structural Reinforcement, where you’ll secure the laminated top to the base, eliminate any remaining movement, verify perfect alignment, and complete the workbench so it’s ready for years of reliable service.
Part 7: Final Assembly and Structural Reinforcement
The project has reached the stage where everything starts to feel real.
Up until now, you’ve been building individual components.
A rigid base.
A thick laminated top.
Carefully prepared parts that each serve an important purpose.
Now those separate pieces come together to form a true woodworking bench.
This is one of the most satisfying moments in the entire build.
As the top settles onto the frame for the first time, the project changes from a collection of lumber into a permanent fixture in your workshop.
Take your time.
The care you invest during this stage will determine how solid, accurate, and dependable the bench feels every time you use it.
Prepare Both Assemblies
Before joining the base and the top, inspect each one separately.
The base should sit firmly on the floor without twisting or rocking.
The top should feel flat and stable with no loose glue joints or visible defects.
This is also an excellent opportunity to remove any remaining pencil marks, dried glue, or rough spots that may have escaped earlier sanding.
Starting with clean, finished components makes the final assembly far more enjoyable.
Protect the Bench Top During Assembly
Although the laminated top is extremely durable, it’s still worth protecting while you’re working.
Lay a clean blanket, sheet of cardboard, or several pieces of scrap plywood on the floor.
Place the bench top upside down on this protective surface.
This gives you unrestricted access while preventing scratches or dents before the bench is even finished.
It only takes a minute, but it helps preserve all the work you’ve already invested.
Position the Base Carefully
With assistance if necessary, lift the completed base and place it upside down on the underside of the bench top.
Avoid dragging it into position.
Instead, lower it gently and center it carefully.
Check that the overhang is consistent on all sides.
For this design, the recommended spacing is approximately:
- 6 inches at each end
- 2 inches along both long sides
These overhangs aren’t simply aesthetic.
They provide valuable clamping space that you’ll appreciate during countless future projects.
Measure Before You Fasten
Even though the dimensions have already been checked several times, measure again.
Confirm:
- Equal end overhangs
- Equal side overhangs
- Parallel alignment between the base and top
Small errors become surprisingly noticeable once the bench is standing upright.
Spending five extra minutes with a tape measure now is much easier than correcting an off-center top later.
Never Glue the Top to the Base
This is one of the most common mistakes first-time builders make.
It seems logical.
After all, glue creates strong joints.
But the bench top should not be permanently glued to the frame.
Wood naturally expands and contracts across its width as humidity changes throughout the year.
If the top is glued rigidly to the base, that movement has nowhere to go.
Eventually it may cause:
- Cracks
- Warping
- Split joints
- Stress within the frame
Instead, the top should be firmly secured while still allowing slight seasonal movement.
That approach protects both the top and the base for many years.
Choose the Right Fastening Method
Several attachment methods work extremely well.
Common choices include:
- Heavy-duty wood screws driven through elongated holes
- Figure-eight fasteners
- Z-clips
- Wooden buttons
For most DIY builders, screws through elongated mounting holes provide an excellent balance of strength, simplicity, and reliability.
The elongated holes allow the top to expand and contract naturally while keeping it securely attached.
Drill Pilot Holes First
Before installing any fasteners, drill pilot holes.
This simple step reduces the risk of splitting the wood and helps each screw drive straight into position.
If you’re using elongated mounting holes, ensure the screw remains centered within the slot rather than tightened hard against one end.
That small amount of freedom is exactly what allows the top to move naturally with seasonal humidity changes.
Tighten Evenly
Avoid fully tightening one corner before installing the remaining fasteners.
Instead, work gradually around the bench.
Install each screw loosely at first.
Once they’re all in place:
- Tighten one corner.
- Move diagonally to the opposite corner.
- Continue working in a balanced pattern.
Even tightening distributes pressure evenly across the frame and helps preserve perfect alignment.
Turn the Bench Upright
This is often the first moment when builders truly appreciate the scale of the project.
Depending on the materials used, the completed bench may weigh well over two hundred pounds.
Whenever possible, ask someone to help.
Lift using your legs rather than your back.
Rotate the bench carefully and lower it gently onto the floor.
As it settles into place, you’ll immediately notice something different.
It feels substantial.
Solid.
Confident.
Exactly as a woodworking bench should.
Check for Rocking
Place both hands on opposite corners of the bench.
Apply gentle pressure.
If the bench rocks, don’t worry.
Minor adjustments are completely normal.
Common causes include:
- Uneven workshop floors
- Slight differences in leg length
- Dust or debris beneath one leg
Determine the source before making corrections.
The goal is complete stability under normal working conditions.
Level the Bench
If you’ve installed adjustable leveling feet, this step is straightforward.
Adjust each foot gradually until the bench sits firmly without movement.
If the legs sit directly on the floor, identify the high corner before making any adjustments.
Resist the temptation to remove material immediately.
Sometimes relocating the bench only a few inches solves the problem completely.
When trimming is necessary, remove only the smallest amount possible and check frequently.
It’s much easier to remove a little more than to replace material that’s already gone.
Confirm the Bench Is Square
Now that the bench is standing upright, perform one final alignment check.
Measure diagonally across the top.
Compare the measurements.
Check the overhangs once more.
Then verify that the legs remain perfectly vertical.
Everything should feel balanced and symmetrical.
A few careful measurements now provide confidence that the bench is ready for years of accurate work.
Test the Surface for Flatness
Even though the top was flattened earlier, it’s worth checking once again after installation.
Place a long straightedge across the bench:
- Lengthwise
- Widthwise
- Diagonally
Minor seasonal movement is perfectly normal.
However, the overall surface should remain consistently flat.
If you discover a small high spot, now is the ideal time to correct it with a few light passes from a hand plane or careful sanding.
This will become the reference surface for countless future projects.
It’s worth getting right.
Install the Lower Shelf
If you’ve included a storage shelf, now is the perfect opportunity to install it.
Position the shelf securely on the supports.
Fasten it according to your chosen design.
Immediately, you’ll notice two benefits.
The first is obvious.
More storage.
The second is less noticeable but equally valuable.
Additional weight positioned low on the bench improves overall stability, making the entire structure feel even more planted during demanding woodworking tasks.
Test the Bench Under Load
Before calling the project complete, spend a few minutes putting the bench through its paces.
Clamp a board along the edge.
Push firmly from different directions.
Lean against the top.
If you own a hand plane, make several practice passes across a scrap board.
Pay attention to how the bench responds.
A properly constructed workbench should feel remarkably stable.
Instead of moving beneath you, it should absorb force and let you concentrate entirely on the work.
That’s exactly what you’ve been building toward.
Fine-Tune the Details
Small refinements often make the biggest difference over time.
Walk around the bench and look for anything that could be improved.
You might decide to:
- Ease another sharp corner.
- Remove a little more dried glue.
- Add felt pads beneath stored tools.
- Touch up the finish.
- Label storage areas beneath the shelf.
These finishing touches don’t take long, but they make the workbench feel complete.
Leave Room for the Future
One of the strengths of this design is that it doesn’t try to do everything at once.
Instead, it gives you a dependable foundation that can grow with your skills.
Months from now, you may decide to install:
- A front vise
- Bench dogs
- Holdfasts
- Drawers
- A cabinet base
- Tool racks
- Additional lighting
Because the structure has been designed with future upgrades in mind, those improvements can be added whenever the need arises.
There’s no pressure to build the ultimate bench on day one.
Build what you need today.
Improve it as your woodworking journey continues.
A Milestone Worth Appreciating
Take a step back and look at what you’ve accomplished.
Not just the bench itself, but the process.
You’ve transformed a stack of ordinary lumber into one of the most valuable tools in any woodworking shop.
This isn’t furniture that sits quietly in the corner.
It’s the place where ideas become measurements, rough boards become finished parts, and future projects begin taking shape.
Every scratch it earns will tell the story of something you’ve built.
Every mark will represent another lesson learned.
And with each passing year, the bench will become more personal—not because it stays perfect, but because it becomes part of your woodworking history.
The structure is complete.
The hard work is behind you.
Now it’s time to explore the professional features that can make an already capable workbench even more versatile, efficient, and enjoyable to use.
Next: Part 8 – Professional Upgrades: Vises, Bench Dogs, and Smart Storage Solutions, where you’ll discover the accessories and enhancements that experienced woodworkers rely on every day to work faster, more accurately, and with greater control.
Part 8: Professional Upgrades: Vises, Bench Dogs, and Smart Storage Solutions
One of the most satisfying things about building your own workbench is knowing it doesn’t have to be finished on the day you tighten the last screw.
In fact, many of the finest workbenches evolve over time.
A woodworker starts with a simple, dependable bench. Months later, a front vise is added. A year after that, bench dogs appear. Eventually, drawers, cabinets, improved lighting, and custom storage transform the bench into a workstation that’s perfectly suited to the way its owner works.
That’s one of the greatest advantages of building rather than buying.
You’re not locked into someone else’s idea of the perfect bench.
You have the freedom to shape it as your skills grow.
The upgrades in this section aren’t mandatory.
Your workbench is already capable of supporting an enormous range of projects.
These enhancements simply make everyday woodworking faster, more comfortable, and more enjoyable.
Upgrade #1: Install a Front Vise
If you add only one accessory to your workbench, make it a quality front vise.
It’s difficult to appreciate how useful a vise is until you’ve worked without one.
Suddenly, tasks that once required awkward clamping become effortless.
Need to plane the edge of a board?
The vise holds it securely.
Cutting dovetails?
The workpiece stays exactly where you need it.
Sanding small components?
No more chasing them across the bench.
A good front vise quickly becomes one of the most frequently used tools in the entire workshop.
Choosing the Right Front Vise
Not every vise is built for woodworking.
Metalworking vises are designed for completely different tasks and can easily damage finished wood surfaces.
Look for a woodworking vise with:
- Smooth operation
- Minimal backlash
- Wide jaw capacity
- Solid mounting hardware
- Replaceable wooden jaw faces
Wooden jaws protect your projects while providing a much larger gripping surface.
It’s a simple feature that makes a tremendous difference.
Where Should the Front Vise Be Installed?
For right-handed woodworkers, the front vise is traditionally mounted on the left front corner of the bench.
This allows long boards to extend naturally across the work surface while leaving the dominant hand free to use hand tools.
Left-handed woodworkers often reverse this arrangement.
The exact location isn’t nearly as important as making sure there’s enough clearance for:
- Full jaw movement
- Clamp access
- Comfortable body positioning
Take a little time to visualize how you’ll use the vise before drilling mounting holes.
Upgrade #2: Bench Dogs
Bench dogs may not look particularly impressive.
They’re simply small pegs that fit into holes in the workbench.
Yet they’re among the most useful work-holding devices ever developed.
Combined with a front or tail vise, they allow you to secure workpieces without clamps covering the top surface.
That means:
- Easier sanding
- Better planing
- More accurate routing
- Improved assembly
Once you’ve used bench dogs for a while, it’s difficult to imagine working without them.
Planning the Dog Hole Layout
A thoughtful layout makes the system much more versatile.
Most woodworkers prefer:
- ¾-inch holes
- Spaced approximately 4 to 5 inches apart
- Running parallel to the front edge of the bench
This arrangement accommodates a wide variety of workpiece lengths while remaining compatible with many commercially available accessories.
Accuracy matters here.
Take time to mark and drill each hole carefully.
A well-planned layout will serve you for decades.
Upgrade #3: Holdfasts
Before modern clamps became common, woodworkers relied heavily on holdfasts.
Centuries later, they remain one of the quickest ways to secure a project.
Insert the holdfast into a bench dog hole.
Tap it lightly with a mallet.
The workpiece locks firmly against the bench.
One quick strike releases it again.
There’s something wonderfully simple about the system.
No handles to turn.
No complicated adjustments.
Just reliable holding power in seconds.
Upgrade #4: A Better Storage Shelf
If you’ve already installed a lower shelf, you’re probably discovering how quickly it fills up.
That’s perfectly normal.
The trick is preventing it from becoming a catch-all for everything in the shop.
Organize the space intentionally.
Reserve areas for:
- Portable power tools
- Frequently used clamps
- Toolboxes
- Sandpaper
- Measuring equipment
- Jigs
Keeping similar items together saves surprising amounts of time during larger projects.
Instead of searching for tools, you’ll simply reach for them.
Upgrade #5: Add Drawers
Open shelves provide flexibility.
Drawers provide organization.
Even two or three shallow drawers can dramatically improve workshop efficiency.
They’re ideal for storing:
- Layout tools
- Chisels
- Router bits
- Marking knives
- Pencils
- Measuring tapes
- Small hardware
Shallow drawers also make it easier to see everything at a glance instead of digging through containers.
The less time you spend searching, the more time you spend building.
Upgrade #6: Build a Cabinet Base
As your collection of tools grows, you may decide to replace the open shelf with a full cabinet beneath the bench.
A cabinet offers several advantages.
It protects tools from dust.
It increases storage capacity.
It adds significant weight to the workbench.
Additional mass reduces vibration and makes demanding hand-tool work even more comfortable.
Cabinets also help create a cleaner, more organized workshop by hiding supplies that don’t need to remain visible.
Recommended reading: The Complete Base Cabinet Woodworking Plans Master Guide (Beginner to Pro)
Upgrade #7: Install a Tool Well
Some traditional workbenches include a recessed tool well running along the back edge.
Opinions vary.
Some woodworkers love them.
Others prefer a completely flat surface.
A tool well keeps frequently used tools close at hand while reducing the chance they’ll roll onto the floor.
Typical items stored there include:
- Chisels
- Combination squares
- Marking gauges
- Pencils
- Screwdrivers
If you often work with many hand tools at once, a tool well may be worth considering.
If you prefer a completely open work surface, you may choose to leave the top uninterrupted.
Neither approach is right or wrong.
It’s simply a matter of working style.
Upgrade #8: Integrated Power
Today’s workshops often rely on more powered equipment than ever before.
Adding a mounted power strip beneath the front edge of the bench helps reduce extension cord clutter.
Position it where cords remain accessible without interfering with clamps or workpieces.
Some woodworkers also include USB charging ports for rechargeable lights, hearing protection, or cordless tool batteries.
These modern conveniences don’t change the bench itself, but they can make daily work noticeably smoother.
Upgrade #9: Improve Workshop Lighting
Even the flattest workbench becomes difficult to use under poor lighting.
Good illumination reduces eye strain while making layout lines easier to see.
Consider installing:
- Adjustable LED task lighting
- Overhead shop lights
- Under-shelf lighting
- Magnetic work lights
Natural daylight is wonderful whenever available, but dependable artificial lighting ensures consistent visibility regardless of the season or time of day.
Upgrade #10: Dedicated Clamp Storage
Clamps seem to multiply the longer you work with wood.
Without an organized storage system, they also become surprisingly difficult to find.
Installing a simple clamp rack on the side or underneath the bench keeps your most frequently used clamps within easy reach.
Popular options include:
- Bar clamps
- F-style clamps
- Spring clamps
- Parallel clamps
- C-clamps
Keeping them close to the bench saves countless unnecessary trips across the workshop.
Upgrade #11: Build a Sacrificial Work Surface
Some projects involve cutting completely through materials, applying heavy finishes, or performing tasks that could damage the main workbench.
Instead of worrying about the top itself, many woodworkers keep a removable sacrificial panel nearby.
This can be:
- MDF
- Plywood
- Hardboard
Place it on the bench whenever extra protection is needed.
When it becomes worn, simply replace it.
Meanwhile, the primary work surface remains in excellent condition.
Upgrade #12: Bench Hooks and Shooting Boards
Not every useful accessory needs to be permanently attached.
Bench hooks and shooting boards are classic examples.
They’re inexpensive to build, require very little storage space, and dramatically improve hand-tool accuracy.
A bench hook makes crosscutting with a hand saw faster and safer.
A shooting board helps produce perfectly square or precisely angled edges with a hand plane.
Together, they expand the capabilities of even a simple workbench.
Upgrade #13: A Mobile Base
A heavy workbench is wonderful while you’re using it.
Moving it is another matter.
If your workshop doubles as a garage or shared workspace, a mobile base may be one of the most practical upgrades you can make.
Choose a design that allows the wheels to lift completely off the floor during use.
That way, the bench remains rock-solid while you’re working but can be moved easily whenever additional floor space is needed.
The best mobile systems provide convenience without sacrificing stability.
Upgrade #14: Protect the Top With a Practical Finish
If you haven’t already applied a finish, now is an excellent time.
Remember, the goal isn’t to create a glossy furniture-grade surface.
Instead, choose something that’s easy to maintain and pleasant to work on.
Many experienced woodworkers prefer:
- Danish oil
- Tung oil
- Hard wax oil
These finishes enhance the wood while preserving the natural grip that makes a workbench so useful.
They’re also simple to refresh whenever the surface begins showing signs of wear.
Upgrade #15: Personalize the Bench
Perhaps the most meaningful upgrade has nothing to do with hardware.
It’s making the bench your own.
Over time, you might add:
- A custom tool rack.
- A magnetic strip for frequently used tools.
- Built-in measuring scales.
- Pencil holders.
- A removable sharpening station.
- Small trays for screws and hardware.
- Dedicated storage for your favorite hand planes.
None of these additions are essential.
Yet together they transform a generic workbench into a workspace that reflects the way you build.
That’s something no factory-made bench can truly offer.
Upgrade Gradually, Not All at Once
One of the biggest mistakes new woodworkers make is trying to build the ultimate workbench immediately.
It’s understandable.
After spending time researching designs, it’s tempting to install every possible feature before the bench has even been used.
A better approach is to let experience guide your decisions.
Build the basic bench first.
Use it.
Pay attention to what slows you down.
Notice which tools you reach for most often.
Discover where additional storage would genuinely help.
Then upgrade one feature at a time.
Every improvement will have a clear purpose because it solves a real problem rather than an imagined one.
By allowing your workbench to evolve naturally, you’ll end up with something far more valuable than a collection of accessories.
You’ll have a workspace that’s perfectly adapted to the way you think, build, and create.
Part 9: Common Mistakes, Maintenance, and Long-Term Care
A woodworking bench is one of the few tools in your shop that’s expected to improve with age.
The first project leaves a tiny scratch.
The tenth leaves a few dents.
After a hundred projects, the surface carries the unmistakable character of real work—faint saw marks, glue stains, worn corners, and countless pencil lines that refused to disappear completely.
Far from ruining the bench, those marks become part of its story.
The benches that last for decades aren’t the ones that stay perfect.
They’re the ones that are built correctly, maintained occasionally, and used without hesitation.
Fortunately, keeping a workbench in excellent condition doesn’t require complicated routines or expensive products.
It comes down to avoiding a handful of common mistakes and developing a few simple habits that protect your investment for years to come.
Mistake #1: Chasing Weight Instead of Stability
Many first-time builders assume the heaviest bench must automatically be the best.
Extra weight certainly helps.
A heavier bench absorbs vibration, resists movement during hand-planing, and feels reassuringly solid.
But weight alone doesn’t guarantee performance.
A poorly designed frame can still wobble or rack even if it’s built from massive timbers.
On the other hand, a well-engineered frame with properly placed stretchers and tight joints often feels incredibly rigid without becoming impossible to move.
The goal isn’t simply to build something heavy.
The goal is to build something that stays absolutely stable under pressure.
When strength, balance, and thoughtful design come together, the bench becomes a reliable partner rather than another challenge to overcome.
Mistake #2: Ignoring Seasonal Wood Movement
Wood is alive in its own quiet way.
Long after a tree has been milled into lumber, it continues responding to changes in humidity.
During humid months, boards expand slightly.
As the air dries, they contract again.
The movement is subtle, but over time it matters.
Builders who try to prevent this natural behavior by fastening the top too rigidly often discover problems later.
These can include:
- Surface cracks
- Warped tops
- Split joints
- Loose fasteners
- Internal stress within the frame
The solution isn’t to stop the wood from moving.
That’s impossible.
Instead, design the bench so it can move naturally without causing damage.
Using elongated screw holes, figure-eight fasteners, or other flexible attachment methods allows the top to expand and contract while remaining securely attached.
Mistake #3: Buying Lumber Without Inspecting It
Not all lumber is created equal.
Two boards may come from the same stack, yet behave completely differently once they’re incorporated into a project.
Before loading your cart, examine every board carefully.
Look for:
- Straight grain
- Minimal twist
- Limited bow
- Small or no structural knots
- Consistent moisture content
Spending a little more time choosing better material often saves hours of frustration during construction.
Good lumber doesn’t guarantee a perfect workbench.
Poor lumber almost guarantees extra work.
Mistake #4: Skipping the Dry Assembly
Excitement has a way of making people rush.
After cutting every component, it’s tempting to grab the glue bottle and start assembling immediately.
Resist that urge.
A complete dry fit is one of the smartest habits you can develop.
Temporarily assemble the frame without glue.
Check every measurement.
Confirm that stretchers align correctly.
Verify that the base sits square.
This rehearsal often uncovers small issues while they’re still easy to correct.
Once glue enters the picture, the clock starts ticking.
A dry assembly removes uncertainty and replaces it with confidence.
Mistake #5: Rushing Through Glue-Ups
Large glue-ups can feel intimidating.
There’s pressure to move quickly before the adhesive begins curing.
Ironically, rushing usually creates the very problems you’re trying to avoid.
Boards slip.
Clamps end up in the wrong places.
Glue coverage becomes uneven.
Instead of working faster, prepare better.
Lay out every clamp beforehand.
Keep a damp cloth nearby for cleanup.
Practice the sequence before opening the glue.
When everything is organized, the actual glue-up becomes surprisingly calm.
Preparation always beats panic.
Mistake #6: Forgetting the Floor Matters
Sometimes a perfectly built bench still rocks.
The instinct is often to blame the construction.
In reality, the floor is frequently the culprit.
Garage slabs, basement floors, and older workshops are rarely perfectly level.
Before trimming a leg, try:
- Sweeping away debris.
- Rotating the bench.
- Moving it to another location.
- Adjusting leveling feet if they’re installed.
Many rocking problems disappear with one small adjustment.
Only remove material from the legs if every other possibility has been ruled out.
Mistake #7: Designing Only for Today’s Needs
When you’re building your first workbench, it’s natural to think about the tools you already own.
But woodworking has a habit of expanding.
Projects become more ambitious.
Skills improve.
Your collection of tools grows.
That’s why it’s wise to leave room for future upgrades.
Even if you don’t install them immediately, consider allowing space for:
- A front vise
- Bench dogs
- Holdfasts
- Additional drawers
- A cabinet base
- Tool racks
- Integrated lighting
Planning ahead costs very little.
Rebuilding the bench later costs much more.
Mistake #8: Making the Bench Too Complicated
The internet is full of elaborate workbench designs loaded with features.
Hidden storage.
Sliding trays.
Fold-out work surfaces.
Specialized fixtures.
Some are genuinely useful.
Others add complexity without improving the woodworking experience.
Remember the purpose of a workbench.
It’s there to support your projects—not compete with them.
Simple, reliable construction often proves more valuable than dozens of features you’ll rarely use.
Build for the way you work, not for the way someone else’s workshop looks online.
Mistake #9: Treating the Bench Like Fine Furniture
There’s a funny moment that almost every woodworker experiences.
The bench is finished.
It looks beautiful.
The grain catches the light perfectly.
And suddenly…
You don’t want to scratch it.
That feeling doesn’t last.
Sooner or later, a dropped clamp leaves a dent.
A chisel slips.
A little glue dries where it shouldn’t.
The bench begins collecting the honest marks of everyday work.
That’s exactly what’s supposed to happen.
A woodworking bench isn’t a museum piece.
It’s a working tool.
Those scratches aren’t flaws.
They’re evidence that you’re building, learning, experimenting, and improving.
Some of the most treasured workbenches in professional shops look wonderfully worn.
Their appearance tells the story of thousands of successful projects.
Mistake #10: Forgetting Simple Maintenance
The good news is that workbenches ask for very little in return.
A few minutes of care now and then is usually all they need.
Ignoring small issues, however, often allows them to become larger ones.
Fortunately, a simple maintenance routine keeps the bench performing at its best.
Weekly Care
At the end of each busy week—or after completing a major project—take a few minutes to clean the surface.
Remove:
- Sawdust
- Wood chips
- Metal filings
- Dried glue
- Pencil marks when practical
A cabinet scraper works well for removing hardened glue without unnecessarily wearing down the bench top.
A clean surface also improves layout accuracy on your next project.
Monthly Inspection
Once a month, give the entire bench a quick check.
Inspect:
- Screws
- Bolts
- Stretchers
- Shelf supports
- Vise hardware
- Moving components
Tighten anything that’s begun to loosen.
Small adjustments now prevent much larger repairs later.
Seasonal Maintenance
Twice a year, especially as humidity changes, spend a little extra time with your bench.
Check for:
- Minor movement
- High spots
- Surface wear
- Finish deterioration
If necessary:
- Lightly re-oil the top.
- Flatten any small high spots.
- Lubricate moving hardware.
- Clean beneath the bench.
These simple tasks take very little time but greatly extend the life of the workbench.
Keep the Top Flat
The top isn’t simply another wooden surface.
It’s your workshop’s primary reference plane.
If you notice slight unevenness developing over time, address it while it’s still minor.
A few careful passes with a hand plane are often enough.
Waiting years before correcting movement usually requires removing far more material than necessary.
Small maintenance performed regularly keeps the bench remarkably accurate.
Protect the Surface From Moisture
Wood and water rarely make good long-term partners.
Occasional spills aren’t a problem.
Standing moisture is.
Whenever glue, finish, or water lands on the bench:
- Wipe it away promptly.
- Dry the surface thoroughly.
- Allow good air circulation.
These habits reduce unnecessary swelling while helping preserve the flatness of the work surface.
Care for Your Hardware
If your bench includes vises, holdfasts, or adjustable leveling feet, remember that they’re mechanical tools as much as woodworking accessories.
Every few months:
- Remove accumulated dust.
- Apply lubricant where appropriate.
- Tighten mounting bolts.
- Inspect wooden jaws for wear.
Smooth-running hardware makes everyday woodworking noticeably more enjoyable.
When Should You Flatten the Top Again?
There’s no fixed schedule.
Some woodworkers reflatten their benches every few years.
Others go much longer.
The bench itself will tell you when attention is needed.
Common signs include:
- A straightedge reveals noticeable gaps.
- Large glue-ups no longer sit flat.
- Hand-planing feels inconsistent.
- Assembly work becomes less accurate.
If everything still fits together perfectly, there’s no reason to remove material unnecessarily.
Maintain the surface only when it genuinely needs attention.
Small Habits That Make a Big Difference
Some of the best maintenance isn’t maintenance at all.
It’s simply developing good workshop habits.
Try to:
- Sweep the bench after every project.
- Use sacrificial boards when cutting through material.
- Clean glue before it hardens.
- Avoid storing wet materials on the surface.
- Return heavy tools to storage instead of leaving them on the bench.
- Protect the top during finishing work.
None of these habits require much effort.
Together, they help your workbench remain dependable for decades.
A Workbench That Evolves With You
One of the most rewarding aspects of woodworking is realizing that your workshop grows alongside your experience.
The bench you’re standing in front of today won’t be exactly the same years from now.
You may add a new vise.
Install custom drawers.
Build a cabinet underneath.
Add better lighting.
Or perhaps you’ll leave it almost unchanged because it already does everything you need.
Either way, the bench gradually becomes something more than a woodworking project.
It becomes part of your process.
Every mark, every repair, and every improvement reflects another chapter in your journey as a maker.
That’s something no factory-built bench can ever provide.
With the construction complete and the maintenance plan in place, there’s only one section left.
Next, we’ll answer the questions woodworkers ask most often after finishing a workbench, share practical advice gathered from years of workshop experience, and finish with a carefully chosen Products / Tools / Resources section to help you get the very best from your new woodworking bench.
Part 10: Frequently Asked Questions and Products / Tools / Resources
You’ve reached the point where the sawdust has settled, the clamps have come off, and your workbench is standing exactly where it belongs.
It’s solid.
It’s flat.
And it’s ready to become the most frequently used tool in your workshop.
For many woodworkers, building the bench marks the beginning of a new chapter rather than the end of a project. Every cabinet, bookshelf, cutting board, chair, and table you build from this point forward will begin on the surface you’ve created with your own hands.
Before you start your first project, let’s answer some of the questions that naturally come up after a workbench is finished.
Many of these are the same questions experienced woodworkers asked when they built their first bench.
Frequently Asked Questions
“Did I make my workbench too big?”
Probably not.
The dimensions recommended throughout this guide were chosen because they comfortably handle the vast majority of woodworking projects without overwhelming an average workshop.
A bench measuring approximately 72 inches long and 30 inches wide provides enough room for:
- Furniture projects
- Cabinet work
- Assembly
- Glue-ups
- General repairs
- Hand-tool woodworking
If you still have comfortable walking space around the bench and enough room to work safely, the size is likely just right.
“Can this bench support heavy woodworking?”
Yes.
The combination of:
- Thick laminated top
- Heavy legs
- Rigid stretchers
- Strong mechanical fasteners
- Proper construction techniques
creates a remarkably stable structure capable of handling demanding woodworking operations.
Whether you’re flattening rough hardwood with a hand plane, assembling large furniture pieces, or clamping heavy workpieces, this design is built to absorb those forces without unnecessary movement.
“Should I install a vise immediately?”
There’s no rush.
Many woodworkers build the bench first, spend several months using it, and only then decide which accessories would genuinely improve their workflow.
This approach has an advantage.
Instead of buying upgrades based on assumptions, you make decisions based on real experience.
Once you’ve worked on the bench for a while, you’ll naturally discover which additions would make the biggest difference.
“What finish is best for a woodworking bench?”
A practical finish almost always outperforms a decorative one.
Most experienced woodworkers avoid thick polyurethane coatings because they create a slippery surface that’s difficult to repair.
Instead, they often choose finishes such as:
- Danish oil
- Tung oil
- Hard wax oil
These products protect the wood while preserving the natural feel that makes a workbench enjoyable to use.
They also make future maintenance quick and straightforward.
“How often should I flatten the top?”
Only when it needs it.
Some benches remain remarkably flat for years.
Others require occasional touch-ups depending on humidity, usage, and wood species.
Rather than following a schedule, rely on observation.
If a long straightedge reveals noticeable high spots—or if large glue-ups no longer sit perfectly flat—it may be time for a light resurfacing.
Otherwise, leave it alone.
Removing material unnecessarily only shortens the life of the top.
“Will construction lumber really last?”
Absolutely.
Countless workbenches built from Douglas fir, Southern yellow pine, and similar construction lumber have served woodworkers faithfully for decades.
Success depends far more on:
- Careful board selection
- Proper drying
- Solid construction
- Regular maintenance
than on choosing the most expensive wood available.
Premium hardwood is wonderful, but excellent craftsmanship matters far more than the price of the lumber.
“Can I add storage later?”
Definitely.
One of the strengths of this design is its flexibility.
You can begin with a simple open shelf and later add:
- Drawers
- Cabinets
- Tool racks
- Clamp storage
- Electrical outlets
- Charging stations
The bench can evolve naturally as your workshop grows.
There’s no need to build every possible feature on the first day.
“Is it normal for my bench to get scratched?”
Not only is it normal—it’s expected.
Every experienced woodworker owns a bench with dents, scratches, glue stains, and tool marks.
Those aren’t signs of failure.
They’re signs of work.
The goal isn’t preserving a flawless surface.
The goal is building projects that you’ll enjoy for years.
Ironically, the benches with the most character are often the ones that have seen the most meaningful work.
“How long should this workbench last?”
With quality materials and occasional maintenance, it’s entirely realistic for this bench to remain in service for several decades.
Many traditional woodworking benches have lasted much longer.
Over time, you’ll probably replace a vise, refresh the finish, or flatten the top once in a while.
But the structure itself should remain strong for countless future projects.
It’s one of the few workshop investments that often becomes more valuable the longer you own it.
Products / Tools / Resources
The workbench itself is only the beginning.
As you spend more time in the workshop, a handful of well-chosen tools and accessories can make every project more accurate, efficient, and enjoyable.
You don’t need to buy everything at once.
Add tools gradually as your skills grow and your projects become more ambitious.
Essential Measuring and Layout Tools
Accurate woodworking begins long before the first cut.
Consider keeping these tools within easy reach:
- 25-foot tape measure
- Combination square
- Speed square
- Precision marking knife
- Mechanical pencils
- Marking gauge
- Steel ruler
- Long straightedge
These simple tools often have a greater impact on project accuracy than expensive machinery.
Clamping Equipment
It’s difficult to have too many clamps.
A versatile collection might include:
- F-style clamps
- Bar clamps
- Parallel clamps
- Spring clamps
- C-clamps
- Corner clamps
- Quick-release clamps
As your woodworking projects become larger, you’ll appreciate having a variety of sizes available.
Bench Accessories
Once you’ve spent time working at the bench, you may decide to add:
- Front woodworking vise
- Bench dogs
- Holdfasts
- Planing stop
- Bench hook
- Shooting board
- Protective bench mat
- Sacrificial work surface
Each accessory expands what your bench can do without requiring major modifications.
Hand Tools Worth Owning
A dependable collection of hand tools complements every woodworking bench.
Excellent additions include:
- Block plane
- No. 5 jack plane
- Chisel set
- Wooden mallet
- Card scraper
- Flush-cut saw
- Cabinet rasp
- Sharpening stones
Well-maintained hand tools often produce cleaner results than power tools for many detailed tasks.
Power Tools That Pair Well With This Bench
Your workbench provides a stable platform for many common workshop tools, including:
- Circular saw
- Router
- Random orbital sander
- Cordless drill
- Impact driver
- Jigsaw
- Trim router
- Biscuit joiner
- Domino joiner (for advanced users)
You don’t need an extensive collection to produce excellent work.
Mastering a few quality tools is usually far more valuable than owning dozens you rarely use.
Workshop Organization
Keeping the area around your bench organized saves time on every project.
Helpful additions include:
- Wall-mounted clamp racks
- Pegboards
- French cleat storage systems
- Magnetic tool holders
- Hardware organizers
- Small parts bins
- Rolling shop carts
- Dust collection hose supports
An organized workshop doesn’t just look better—it helps you work more efficiently and safely.
Safety Equipment
No woodworking setup is complete without proper safety gear.
Keep these essentials close by:
- Safety glasses
- Hearing protection
- Dust mask or respirator
- Push sticks
- First-aid kit
- Fire extinguisher
- Bright task lighting
Developing good safety habits early allows you to enjoy woodworking with greater confidence for many years.
Books and Learning Resources
One of the best investments you can make isn’t another tool.
It’s knowledge.
Reading about joinery, furniture construction, finishing techniques, wood movement, and workshop organization will continue improving your skills long after your workbench is complete.
Every project teaches something new.
The more you learn, the more capable your workbench becomes—not because the bench changes, but because the craftsperson standing in front of it does.
As your confidence grows, your workbench will quietly support every new challenge, every lesson learned, and every project that follows. Over time, it becomes far more than a place to work. It becomes the foundation of your woodworking experience, adapting alongside your skills and serving as the dependable center of a workshop that’s uniquely your own.