
Part 1: Why Rustic Outdoor Furniture Changes the Way You Use Your Deck
Walk onto almost any deck in the middle of summer and you’ll notice the same pattern. A grill sits in one corner. A table that looked great in the showroom now feels a little ordinary. A few chairs have faded from the sun, and the space—despite its potential—doesn’t quite invite you to stay.
Now picture something different.
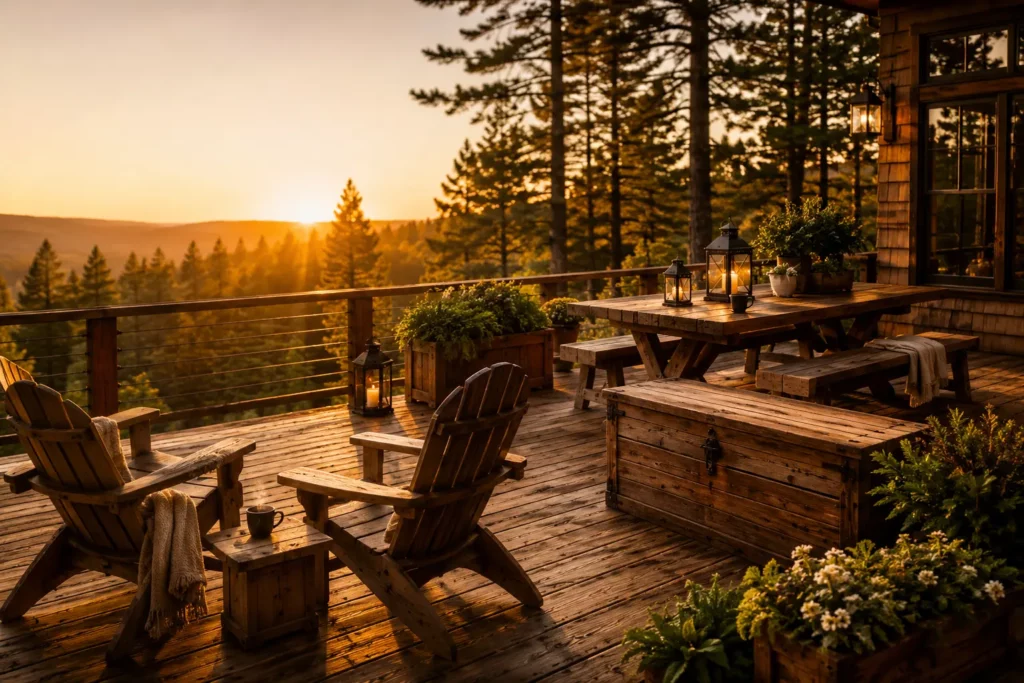
A handcrafted cedar bench warmed by the afternoon sun. An Adirondack chair with softly rounded armrests that fit your hands perfectly because you built them that way. A farmhouse table marked by natural grain instead of factory-made patterns. Every piece belongs, not because it came as part of a matching set, but because it was designed for your deck.
That’s the quiet appeal of rustic outdoor furniture.
It isn’t simply about saving money or learning a new woodworking skill. It’s about creating an outdoor space that feels permanent, personal, and unmistakably yours. Every board tells a story. Every joint reflects the care that went into building it. And over the years, those pieces gather memories just as naturally as they gather character.
This guide brings together 21 rustic outdoor furniture woodworking plans for decks, ranging from beginner-friendly weekend projects to ambitious statement pieces that can transform an ordinary backyard into an outdoor retreat. Along the way, you’ll learn how to choose the right wood, avoid costly mistakes, protect your furniture from the elements, and build with confidence—even if you’re just getting started.
Whether your goal is a single handcrafted bench or a complete collection of custom outdoor furniture, this series is designed to help you build something that lasts.
At a Glance: What’s the Best Wood for Rustic Outdoor Furniture?
If you’re eager to start and simply want the short answer, here’s where experienced woodworkers tend to agree.
| Wood Species | Durability | Maintenance | Cost | Best For |
|---|---|---|---|---|
| Cedar | Excellent | Low | $$ | Chairs, benches, tables |
| Redwood | Excellent | Low | $$$ | Premium outdoor furniture |
| White Oak | Outstanding | Moderate | $$$ | Heirloom-quality projects |
| Cypress | Excellent | Low | $$ | Rustic furniture collections |
| Pressure-Treated Pine | Good | Moderate | $ | Budget-friendly builds |
For most homeowners, cedar offers the best balance of beauty, workability, and natural resistance to insects and moisture. It’s forgiving to cut, pleasant to work with, and ages gracefully whether you apply a finish or allow it to weather into its signature silvery gray.
Why Rustic Furniture Never Feels Out of Place
Design trends have a habit of arriving with excitement and disappearing just as quickly. Rustic furniture follows a different path.
Its appeal comes from materials that people instinctively trust—solid wood, honest joinery, and proportions that prioritize comfort over novelty.
Unlike lightweight furniture made from thin aluminum or molded plastic, handcrafted wooden pieces have presence. They anchor a space. Even before anyone sits down, they communicate warmth and permanence.
That timeless quality explains why rustic furniture works equally well alongside:
- Modern farmhouse homes
- Mountain cabins
- Traditional family houses
- Contemporary decks
- Lakeside cottages
- Woodland retreats
The setting may change, but the feeling remains the same: natural, welcoming, and built to last.
More Than Furniture—It’s an Extension of Your Home
One of the biggest shifts in residential design over the last decade has been the way homeowners think about outdoor living.
A deck is no longer just a place to set a grill.
It’s an outdoor dining room.
It’s a reading corner.
It’s a weekend gathering place.
It’s where birthdays are celebrated, late-night conversations unfold, and quiet mornings begin before the rest of the house wakes up.
When furniture is designed specifically for that space, the entire deck becomes more usable.
Instead of wondering where guests should sit, conversations happen naturally. Instead of bringing folding chairs outside, comfortable seating is already waiting. Instead of replacing inexpensive furniture every few years, you’re investing your time in pieces that can stay with your home for decades.
That’s one of the hidden rewards of woodworking. You’re not just building furniture—you’re shaping the way people experience your home.
Before You Buy Lumber, Start With a Vision
It’s tempting to jump straight into cutting boards, especially when you’re excited about a new project. But experienced builders know the best outdoor spaces begin long before the first piece of lumber reaches the workbench.
Start by asking yourself a few simple questions.
How do you actually use your deck?
Some families spend most evenings eating outdoors. Others use their deck for quiet relaxation. Some love entertaining large groups, while others simply want a comfortable place to enjoy a cup of coffee.
Your answers should guide every furniture decision that follows.
A deck built around conversation needs different furniture than one designed around outdoor dining.
How much room do you really have?
Furniture should make a deck feel inviting—not crowded.
Before building anything, measure:
- Overall deck dimensions
- Door clearance
- Stair access
- Rail height
- Built-in planters
- Existing posts and columns
Leave at least 36 inches of walking space between major furniture pieces whenever possible. That single guideline dramatically improves comfort and traffic flow.
Think in “Zones,” Not Individual Pieces
Professional outdoor designers rarely think in terms of isolated furniture.
Instead, they create zones.
For example:
Dining Zone
- Farmhouse dining table
- Matching benches
- Serving console
Conversation Zone
- Adirondack chairs
- Coffee table
- Fire pit seating
Relaxation Zone
- Lounge chairs
- Side tables
- Planters
- Shade structure
Breaking your deck into functional areas makes future projects easier to plan while helping every addition feel intentional.
Choosing a Rustic Style That Fits Your Home
“Rustic” isn’t a single design style. It’s a broad family of aesthetics, each with its own personality.
Choosing one direction early creates a more cohesive collection as you build additional furniture over time.
Farmhouse Rustic
Simple, welcoming, and practical.
Common characteristics include:
- Thick tabletops
- Straight lines
- X-brace details
- Painted accents
- Warm natural finishes
Perfect for suburban homes and family gathering spaces.
Mountain Lodge
Inspired by traditional timber construction.
Look for:
- Heavy proportions
- Dark wood tones
- Live-edge details
- Large beams
- Bold joinery
Ideal for cabins or homes surrounded by trees.
Modern Rustic
A cleaner interpretation of traditional craftsmanship.
Features often include:
- Black metal hardware
- Crisp lines
- Minimal ornamentation
- Natural wood grain
- Mixed materials
This style pairs beautifully with newer homes while preserving the warmth of handcrafted wood.
Cottage Rustic
Relaxed and inviting.
Think:
- Lighter finishes
- Rounded edges
- Comfortable seating
- Decorative planters
- Soft, weathered textures
Perfect for coastal homes and garden settings.
The Foundation of Every Great Project: Choosing the Right Wood
The quality of your lumber influences almost every aspect of the finished project—from how easily it cuts to how well it handles years of changing weather.
While many wood species can be used outdoors, a handful consistently stand out for their durability and appearance.
Cedar: The Reliable Favorite
Ask experienced DIY builders for one recommendation, and cedar is likely to top the list.
Its natural oils help resist insects and decay without chemical treatments, making it one of the easiest woods to maintain.
Advantages include:
- Lightweight
- Stable in changing weather
- Pleasant to cut
- Naturally rot resistant
- Attractive grain
- Accepts stains and oils beautifully
Cedar is especially well suited for Adirondack chairs, benches, side tables, and outdoor dining sets.
Redwood: Beauty That Lasts
Redwood has long been prized for premium outdoor furniture thanks to its rich color and natural resistance to moisture.
It machines cleanly, holds its shape well, and develops an elegant patina over time.
Although generally more expensive than cedar, many builders reserve redwood for centerpiece projects where appearance is just as important as performance.
White Oak: Built for Generations
White oak occupies a special place in woodworking.
Its dense structure and naturally closed pores make it remarkably resistant to moisture, which is one reason it has been used for everything from furniture to shipbuilding.
It’s heavier and more demanding to work with than cedar, but the payoff is exceptional durability.
If your goal is heirloom-quality outdoor furniture, white oak deserves serious consideration.
Cypress: Naturally Resilient
Cypress grows in wet environments, and its natural oils help protect it against insects and decay.
Its warm appearance and rustic texture make it an excellent choice for farmhouse-inspired furniture and outdoor benches.
Pressure-Treated Pine: Practical and Affordable
For builders working within a tighter budget, pressure-treated pine remains a practical option.
Modern treated lumber performs well outdoors, though it benefits from proper drying before finishing and regular maintenance over its lifetime.
While it may lack the visual warmth of cedar or redwood, thoughtful design and quality finishing can still produce attractive, long-lasting furniture.
One Lesson Every Outdoor Woodworker Learns
Sunlight may fade wood.
Rain may darken it.
But neither is as destructive as trapped moisture.
When water lingers inside joints or collects on flat surfaces, problems begin quietly. Boards swell. Fasteners loosen. Tiny cracks appear. Eventually, the damage becomes impossible to ignore.
That’s why experienced builders think about water before they think about appearance.
A narrow drainage gap between seat slats.
A slight bevel on a tabletop edge.
An extra coat of finish on exposed end grain.
Each decision seems minor on its own. Together, they determine whether a piece lasts five years—or thirty.
In the next part, we’ll move from planning to the workshop, covering the essential tools every woodworker should own before introducing the first collection of rustic outdoor furniture projects designed to transform your deck one build at a time.
Part 2: Building Starts Here — Essential Tools, Smart Planning, and Your First Seven Projects
There’s a moment every woodworker remembers.
The lumber is stacked neatly against the wall. Fresh blades are installed. Plans are spread across the workbench. Before a single cut is made, every project still exists only in your imagination.
Then the first board is measured.
The first cut is made.
And suddenly, you’re no longer looking at lumber—you’re building something that will become part of your home.
That transformation is one of the reasons woodworking remains so rewarding. Every project teaches a new skill, builds confidence, and leaves you with something tangible that improves the way you live.
Before we dive into the first furniture plans, let’s make sure your workshop—and your expectations—are set up for success.
The Right Workshop Isn’t the Biggest One
One of the biggest misconceptions about woodworking is that you need a garage full of expensive machines before you can build quality furniture.
You don’t.
Many beautiful outdoor projects are built every weekend with a handful of reliable tools and a little patience.
Think of tools as investments that grow with your skills rather than purchases you need to make all at once.
The Essential Starter Toolkit
If you’re just getting started, these tools will cover the vast majority of projects in this guide.
Circular Saw
A quality circular saw handles straight cuts in framing lumber, deck boards, and hardwoods with surprising accuracy when paired with a guide.
Cordless Drill and Driver
You’ll use this on nearly every project.
Choose a model with variable speed and enough power to drive exterior screws without struggling.
Random Orbital Sander
No finish can hide poor surface preparation.
A random orbital sander removes milling marks, softens edges, and prepares wood for stain or oil.
Measuring and Layout Tools
Keep these within easy reach:
- Tape measure
- Combination square
- Speed square
- Carpenter’s pencil
- Marking knife
- Chalk line
Accurate layout prevents mistakes that become increasingly difficult to fix later.
Small Tools That Make a Big Difference
Some of the most valuable workshop tools aren’t expensive at all.
Consider adding:
- Spring clamps
- Bar clamps
- Wood chisels
- Rubber mallet
- Countersink bit
- Drill bit set
- Utility knife
These tools improve accuracy and make assembly much easier.
Safety Is Part of Good Craftsmanship
Experienced woodworkers don’t treat safety as an afterthought.
They make it part of every project.
Wear:
- Safety glasses
- Hearing protection
- Dust mask or respirator during sanding
- Non-slip footwear
Keep your workspace well lit, remove offcuts regularly, and never rush a cut simply to save a few minutes.
Good craftsmanship begins with good habits.
Understanding Exterior Hardware
Outdoor furniture places far greater demands on hardware than indoor projects.
Rain, humidity, and seasonal temperature changes gradually weaken ordinary fasteners.
For outdoor builds, choose:
- Stainless steel screws
- Hot-dipped galvanized fasteners
- Exterior structural screws
- Waterproof wood glue
- Corrosion-resistant bolts and washers
These materials cost slightly more but dramatically increase the lifespan of your furniture.
Project 1: Rustic Adirondack Chair
Skill Level: Beginner
Estimated Build Time: One day
Estimated Cost: $80–$180
If there were a symbol for comfortable outdoor living, the Adirondack chair would be it.
Its gently reclined back, broad armrests, and deep seat invite you to slow down—a design that has remained popular for generations because it simply works.
Materials
- Cedar or cypress boards
- Stainless steel screws
- Exterior wood glue
- Outdoor finish
Builder’s Notes
Take your time shaping the back slats and armrests. These curves define both the appearance and comfort of the finished chair.
Small details—smooth edges, even spacing, and careful sanding—make the difference between a homemade chair and one that looks professionally crafted.
Project 2: Rustic Farmhouse Bench
Skill Level: Beginner
Estimated Build Time: Weekend
A farmhouse bench proves that simplicity often creates the strongest visual impact.
Whether placed beside a dining table, under a window, or along a deck railing, it becomes one of the most frequently used pieces of furniture outdoors.
Recommended Features
- Thick seat boards
- Sturdy trestle base
- Decorative X-braces
- Rounded corners for comfort
Build it once, and you’ll likely find yourself wanting another.
Project 3: Outdoor Side Table
Skill Level: Beginner
Estimated Build Time: Half Day
Every chair needs somewhere to set a drink, a book, or a lantern.
That’s what makes the humble side table one of the smartest early projects.
It introduces accurate joinery without overwhelming new builders and provides plenty of opportunities to practice sanding, finishing, and edge treatment.
Consider adding:
- Lower storage shelf
- Slatted top
- Decorative trim
- Hidden fasteners
Project 4: Rustic Coffee Table
Skill Level: Beginner to Intermediate
A coffee table brings an outdoor seating area together.
Instead of thinking about it as another piece of furniture, think of it as the centerpiece around which conversations naturally form.
Popular rustic details include:
- Thick tabletop
- Breadboard ends
- Lower storage shelf
- Heavy legs
- Cross-brace construction
A penetrating exterior oil highlights grain beautifully while remaining easy to maintain year after year.
Project 5: Outdoor Dining Table
Skill Level: Intermediate
Estimated Build Time: Two Weekends
Every memorable backyard gathering has a place where people naturally gather.
Often, it’s the dining table.
Rather than building the largest table possible, choose dimensions that suit your deck while preserving comfortable walking space around all sides.
Design Tips
- Reinforce the base with diagonal braces.
- Leave small expansion gaps between tabletop boards.
- Round over sharp edges.
- Test stability before applying finish.
Project 6: Planter Bench
Some furniture quietly performs two jobs at once.
A planter bench offers comfortable seating while framing your deck with flowers, herbs, or ornamental grasses.
Popular plant choices include:
- Lavender
- Rosemary
- Ferns
- Hostas
- Petunias
- Ornamental grasses
The combination of natural wood and living greenery creates an inviting transition between your deck and garden.
Project 7: Storage Bench
Every outdoor space accumulates items that need a home.
Cushions.
Garden gloves.
Blankets.
Outdoor games.
A storage bench solves that problem while adding valuable seating.
Design Considerations
- Ventilation holes
- Drainage gaps
- Stainless steel hinges
- Soft-close lid supports
- Weather-resistant hardware
Hidden storage keeps the deck organized without sacrificing style.
Build Slowly, Build Well
One of the advantages of woodworking is that your outdoor furniture collection doesn’t need to appear overnight.
Start with pieces you’ll use every day.
Perfect your techniques.
Learn how different woods respond to seasonal weather.
Each completed project makes the next one easier, and before long you’ll notice something unexpected.
Your deck won’t just look different.
It will feel different.
Guests linger longer. Family meals move outdoors more often. Even quiet evenings become more enjoyable because the space reflects your own craftsmanship rather than a showroom display.
Coming Up in Part 3
The next installment introduces projects that take your outdoor living space to the next level, including:
- Outdoor serving console
- Rustic bar cart
- Fire pit seating
- Porch swing
- Lounge chair
- Modular sectional
- Picnic table
We’ll also explore stronger joinery methods, furniture layout strategies, and the design details that give a collection of individual projects the cohesive look of custom-built outdoor furniture.
Part 3: From Functional to Unforgettable — Projects That Turn a Deck Into an Outdoor Destination
By the time you’ve finished a few foundational projects, something begins to change.
You’re no longer building individual pieces of furniture. You’re shaping the personality of your outdoor space.
A side table becomes the place where morning coffee always lands. A handcrafted bench becomes the seat everyone chooses first during family barbecues. Before long, your deck starts to feel less like an extension of the house and more like another room—one without walls, but full of life.
This next collection of projects builds on the skills you’ve already developed. They introduce larger assemblies, more refined joinery, and furniture designed for entertaining, relaxing, and making the most of every square foot of your deck.
Project 8: Rustic Outdoor Serving Console
Skill Level: Intermediate
Estimated Build Time: 1–2 weekends
Estimated Cost: $180–$350
If you’ve ever carried plates, drinks, and serving dishes back and forth between the kitchen and the deck, you already know how useful a serving console can be.
A well-designed console creates a dedicated workspace for outdoor entertaining while adding visual balance to larger decks.
Recommended Features
- Wide work surface
- Lower storage shelf
- Open side compartments
- Decorative cross braces
- Towel bar
- Adjustable feet for uneven decking
Design Tip
Match the leg design and wood finish to your dining table. Repeating these details creates the appearance of a coordinated furniture collection rather than separate DIY projects.
Project 9: Rustic Outdoor Bar Cart
Skill Level: Intermediate
Estimated Build Time: Weekend
Unlike a stationary console, a bar cart moves wherever the gathering naturally shifts.
One evening it may serve drinks beside the dining table. The next, it’s holding snacks near the fire pit.
Mobility makes it surprisingly versatile.
Include
- Locking caster wheels
- Bottle storage
- Stemware rack
- Drawer for utensils
- Lower shelf
- Push handle
Woodworking Focus
This project is excellent practice for building square frames. Even a slight twist becomes noticeable once wheels are installed.
Measure diagonally before fastening the frame permanently.
Project 10: Fire Pit Companion Chairs
Skill Level: Intermediate
Estimated Cost: $90–$180 each
There’s something timeless about gathering around a fire.
People naturally slow down. Conversations stretch longer. Phones disappear into pockets.
Furniture designed specifically for that setting should encourage comfort without making it difficult to stand or interact.
Ideal Features
- Slightly upright seating angle
- Wide armrests
- Reinforced rear legs
- Thick seat slats
- Rounded edges
Build four to six matching chairs, and you’ll create a gathering place that feels intentional rather than improvised.
Designing Spaces That Invite People to Stay
Professional landscape designers rarely arrange furniture randomly.
Instead, they think about how people move through a space.
As you continue adding furniture, ask yourself:
- Where will guests naturally gather?
- Which areas receive afternoon shade?
- What deserves the best view?
- How can conversations flow comfortably?
The answers influence furniture placement just as much as furniture design.
Project 11: Rustic Porch Swing
Skill Level: Intermediate
Estimated Build Time: Two weekends
Few projects transform the atmosphere of a deck quite like a porch swing.
It introduces movement into the space. Even when it’s empty, it suggests rest.
Construction Essentials
- Through-bolted frame
- Heavy-duty chain or marine-grade rope
- Reinforced arm supports
- Comfortable seat angle
- Smooth, rounded armrests
Safety First
Never attach a swing to decorative trim or lightweight framing.
Always anchor into structural beams designed to carry dynamic loads.
Project 12: Outdoor Lounge Chair
Skill Level: Intermediate
Every outdoor retreat deserves at least one chair designed purely for relaxation.
Unlike upright dining chairs, lounge chairs encourage you to settle in with a book, watch the sunset, or simply enjoy a quiet afternoon.
Consider Including
- Adjustable reclining positions
- Pull-out footrest
- Built-in drink shelf
- Hidden hardware
- Thick outdoor cushions
Comfort isn’t accidental.
Take time to test seat angles before cutting expensive lumber.
A few degrees can make a remarkable difference.
Project 13: Rustic Picnic Table
Skill Level: Intermediate
The classic picnic table has earned its reputation through decades of practical use.
But that doesn’t mean it has to look ordinary.
Modern rustic versions often feature:
- Heavy timber construction
- Thick tabletop
- Separate benches
- Decorative joinery
- Chamfered edges
- Concealed fasteners
These upgrades preserve the practicality of the traditional design while giving it a custom-built appearance.
Why Small Design Details Matter
When visitors admire handcrafted furniture, they’re rarely responding to a single feature.
Instead, they’re noticing dozens of thoughtful decisions working together.
For example:
- Softly eased corners instead of sharp edges.
- Consistent spacing between slats.
- Visible wood grain aligned across adjoining boards.
- Hardware placed with precision.
- Smooth transitions where components meet.
None of these details require expensive tools.
They simply require patience.
Project 14: Modular Outdoor Sectional
Skill Level: Advanced
Estimated Build Time: 2–3 weekends
A modular sectional changes the way a deck functions.
Instead of fixed seating, you gain flexibility.
Arrange modules into an L-shape for family movie nights.
Separate them for larger gatherings.
Add an ottoman to create a lounging area.
Or expand the collection over time.
Suggested Modules
- Corner unit
- Center seat
- Ottoman
- Coffee table
- Side table
- End chair
Consistency is critical.
Build every module using identical seat heights, depths, and back angles so the collection feels unified.
The Joinery That Makes Furniture Last
Outdoor furniture experiences constant movement.
Rain.
Heat.
Humidity.
Cold.
Each season asks your joints to flex without failing.
That’s why good joinery matters.
Pocket-Hole Joinery
Perfect for:
- Benches
- Tables
- Hidden structural connections
Fast, reliable, and beginner-friendly when paired with exterior-rated screws.
Mortise and Tenon
One of woodworking’s oldest joints remains one of its strongest.
Ideal for:
- Dining tables
- Chair frames
- Heavy benches
Though slower to build, the long-term strength is exceptional.
Half-Lap Joints
Simple, strong, and visually appealing.
Excellent for:
- Decorative braces
- Table bases
- Bench supports
They’re particularly effective in rustic furniture because the joint itself becomes part of the design.
Hardware Worth Paying More For
The difference between inexpensive hardware and premium exterior hardware often amounts to only a few dollars per project.
Yet that small investment helps prevent:
- Rust streaks
- Loose joints
- Broken fasteners
- Costly repairs
Choose:
- Stainless steel screws
- Exterior structural screws
- Hot-dipped galvanized bolts
- Waterproof wood glue
- Exterior-rated hinges
Quality hardware protects the craftsmanship you’ve invested in every build.
Building a Collection Instead of Random Pieces
The most beautiful outdoor spaces feel connected.
You can achieve that by repeating a handful of design elements across every project.
Consider using the same:
- Wood species
- Stain color
- Leg profile
- Edge treatment
- Hardware finish
- Joinery style
Those repeated choices quietly tie the entire collection together.
Visitors may not consciously notice them.
They’ll simply sense that everything belongs.
Ideas for Future Internal Resources
As your woodworking library grows, these companion articles naturally support this guide:
- How to Build an Adirondack Chair Step by Step
- Cedar vs. Redwood: Which Outdoor Wood Lasts Longer?
- Best Exterior Finishes for Wooden Furniture
- Pocket-Hole Joinery for Beginners
- Outdoor Furniture Maintenance Calendar
- How to Prevent Wood Movement in Exterior Projects
- DIY Fire Pit Area Design Ideas
- Building a Rustic Outdoor Dining Table
These related resources deepen topical authority while helping readers explore each subject in greater detail.
Coming Up in Part 4
The next installment introduces the final seven woodworking projects, including a handcrafted rocking chair, pergola bench, beverage station, garden stool, entertainment center, and several finishing touches that give your outdoor space the appearance of a professionally designed retreat. We’ll also explore the subtle craftsmanship details—surface textures, edge profiles, and finishing techniques—that elevate good furniture into pieces people remember long after they’ve left your deck.
Part 4: The Statement Pieces — Furniture That Gives Your Deck Its Signature Character
Every woodworking journey reaches a point where confidence quietly replaces hesitation.
You stop checking the tape measure three times before every cut. You begin to trust your eye. Grain direction catches your attention without conscious effort. Instead of simply following plans, you start imagining how each project could be adapted to better suit your own space.
That’s where this chapter begins.
The projects ahead aren’t necessarily harder because they require exotic joinery or expensive tools. They’re more ambitious because they ask you to think like both a craftsperson and a designer. These are the pieces people notice first, photograph most often, and remember long after they’ve gone home.
Project 15: Rustic Rocking Chair
Skill Level: Advanced
Estimated Build Time: 2 weekends
Estimated Cost: $180–$350
A rocking chair is one of woodworking’s classic challenges. Every curve serves a purpose, and every angle affects comfort.
Get it right, and the movement feels effortless. Miss by a fraction, and the chair never quite settles into a natural rhythm.
What Makes a Great Rocking Chair?
A successful design balances several elements:
- Smooth rocker profile
- Comfortable recline
- Wide seat
- Reinforced arm supports
- Strong joinery at every stress point
Unlike many outdoor chairs, a rocking chair is constantly in motion. That means every joint must withstand repeated movement without loosening over time.
Builder’s Tip
Create a template for the rocker profile before cutting your final boards. Matching curves are essential for a smooth, predictable motion.
Project 16: Pergola Bench
Skill Level: Intermediate
Estimated Build Time: Weekend
Some furniture looks like it was added later.
A pergola bench feels as though it has always belonged.
Whether wrapped around a pergola post or built along the edge of a covered deck, it creates permanent seating without cluttering the space.
Design Ideas
- Wraparound corners
- Integrated planters
- Hidden storage
- Wide armrests
- Decorative timber brackets
Because the bench becomes part of the surrounding architecture, matching its proportions to the pergola or deck framing creates a polished, built-in appearance.
Project 17: Rustic Garden Stool
Skill Level: Beginner
Estimated Build Time: Half day
Small projects often become the most frequently used.
A simple garden stool moves wherever it’s needed.
Today it holds a watering can.
Tomorrow it supports a tray of drinks.
Next week it becomes extra seating during a family gathering.
Optional Design Details
- Live-edge top
- Tapered legs
- Cross stretcher
- Decorative through-tenons
- Rounded corners
Garden stools are also excellent projects for using quality offcuts from larger builds.
Project 18: Outdoor Beverage Station
Skill Level: Intermediate
Estimated Build Time: Weekend
Entertaining becomes easier when everything has a place.
A dedicated beverage station keeps drinks, glasses, and serving essentials organized while reducing unnecessary trips back inside.
Consider Including
- Ice bucket compartment
- Built-in bottle rack
- Glass storage
- Towel bar
- Drawer for tools
- Lower shelf for coolers or baskets
Choose weather-resistant hardware throughout, especially around moving components such as drawers and cabinet doors.
Project 19: Corner Bench
Skill Level: Intermediate
Corners are often overlooked.
Yet they can become some of the most inviting areas on a deck when used thoughtfully.
An L-shaped bench maximizes seating while preserving open floor space.
Design Suggestions
- Lift-up storage beneath the seat
- Matching planter boxes
- Integrated side table
- Removable cushions
- Slightly angled backrest
A corner bench naturally encourages conversation, making it a perfect addition to entertainment areas.
Project 20: Rustic Outdoor Shelf
Skill Level: Beginner
Estimated Build Time: Afternoon
Not every woodworking project needs to dominate the space.
Sometimes the most useful additions are also the simplest.
Open shelving provides a home for:
- Potted herbs
- Lanterns
- Garden tools
- Outdoor speakers
- Decorative accessories
For a rustic look, leave subtle saw marks visible or lightly wire-brush the surface before finishing. These textures add depth without compromising functionality.
Project 21: Outdoor Entertainment Center
Skill Level: Advanced
Estimated Build Time: Multiple weekends
This is often the centerpiece of a complete outdoor living area.
Designed thoughtfully, an entertainment center can house electronics while blending seamlessly with the surrounding furniture.
Popular Features
- Television enclosure
- Cabinet storage
- Adjustable shelving
- Cable management
- Mini refrigerator compartment
- Decorative barn-style doors
Don’t Forget Ventilation
Electronics generate heat, even outdoors.
Allow generous airflow through discreet ventilation openings to prevent heat buildup and extend the life of your equipment.
The Difference Is in the Details
When people admire handcrafted furniture, they’re rarely responding to the overall shape alone.
More often, they’re noticing the details without realizing it.
The softened edge that feels comfortable beneath a hand.
The way the grain flows naturally across adjoining boards.
The subtle shadow created by a chamfered corner.
These small choices give handcrafted furniture its unmistakable character.
Edge Profiles That Elevate Every Project
Changing the profile of an edge takes only a few minutes, yet dramatically affects how a finished piece feels.
Eased Edge
A light sanding removes sharpness while preserving a clean, contemporary appearance.
Perfect for:
- Tables
- Benches
- Shelves
Roundover
A router with a roundover bit creates a softer profile that’s especially comfortable on armrests and chair backs.
Ideal for:
- Adirondack chairs
- Lounge chairs
- Armrests
- Tabletops
Chamfer
A beveled edge catches light beautifully and pairs well with farmhouse and lodge-inspired furniture.
Use sparingly for subtle visual interest.
Creating Texture That Feels Authentic
Rustic doesn’t mean rough.
Instead, it celebrates natural variation.
Consider incorporating texture through:
- Light wire brushing
- Hand-planed surfaces
- Carefully preserved knots
- Live-edge details (where structurally appropriate)
- Slight sawmill character
Avoid artificial distressing that looks forced. Authentic materials develop their own personality over time.
Thinking Like a Furniture Designer
As your projects become more sophisticated, begin evaluating each one from every angle.
Ask yourself:
- Does this piece feel balanced?
- Will it still look timeless ten years from now?
- Is every detail serving a purpose?
- Could someone comfortably use it for hours?
- Does it complement the rest of the collection?
These questions shift your focus from simply completing projects to creating furniture with lasting appeal.
Choosing Outdoor Fabrics and Cushions
Wood provides structure.
Textiles provide comfort.
Look for outdoor fabrics that offer:
- UV resistance
- Water repellency
- Mold resistance
- Removable covers
- High-density foam inserts
Neutral colors such as charcoal, beige, forest green, and warm gray complement rustic wood tones while remaining versatile across changing décor styles.
Lighting Makes Furniture Come Alive
Furniture doesn’t exist in isolation.
Its appearance changes dramatically with lighting.
Consider layering:
- Warm string lights
- Low-voltage deck lighting
- Solar pathway lights
- Wall-mounted sconces
- Lanterns
- Fire features
Even simple lighting transforms handcrafted furniture into the focal point of evening gatherings.
Designing With the Seasons in Mind
A thoughtfully planned deck feels inviting throughout much of the year.
Arrange furniture to take advantage of:
Spring
Morning sunlight and fresh greenery.
Summer
Shade, airflow, and comfortable entertaining.
Autumn
Fire pit seating and warm afternoon light.
Winter
Covered storage and easy furniture protection.
Planning for all four seasons helps your outdoor space remain functional long after summer ends.
Expanding Beyond Furniture
Once you’ve completed your furniture collection, the same woodworking skills can be applied to larger outdoor projects.
Future ideas include:
- Pergolas
- Privacy screens
- Raised garden beds
- Outdoor kitchen cabinets
- Firewood storage
- Planter boxes
- Garden gates
- Decorative trellises
Each addition strengthens the visual connection between your furniture and the surrounding landscape.
Coming Up in Part 5
The next installment focuses on one of the most overlooked aspects of outdoor woodworking: protecting your investment. You’ll learn professional finishing techniques, weatherproofing strategies, seasonal maintenance routines, repair methods, and the practical habits that help handcrafted furniture withstand years of changing weather while continuing to look better with age.
Part 5: Protecting Your Work — Finishing, Weatherproofing, and the Maintenance Habits That Make Furniture Last for Decades
There’s a quiet satisfaction that comes at the end of every woodworking project.
The final screw has been tightened. The last sanding pass is complete. You step back, brush away the sawdust, and see something that didn’t exist a few days ago.
It’s tempting to call the project finished.
In reality, this is where one of the most important stages begins.
Outdoor furniture doesn’t live in controlled conditions. It spends every season exposed to blazing sunlight, soaking rain, damp mornings, freezing nights, drifting pollen, falling leaves, and constant changes in humidity. Left unprotected, even beautifully crafted furniture will eventually begin to show the effects.
The good news is that lasting durability doesn’t come from complicated techniques. It comes from understanding how wood behaves outdoors and making a handful of smart decisions that protect your work year after year.
The Biggest Threat Isn’t What Most People Think
Ask someone why outdoor furniture wears out, and they’ll probably point to the sun.
Sunlight certainly plays a role, but experienced woodworkers know the real culprit is moisture.
Wood is a living material, even after it’s been milled. It absorbs moisture when the air is damp and releases it as conditions become dry. This natural cycle never truly stops.
Over time, those tiny movements can cause:
- Loose joints
- Surface checking
- Warped boards
- Finish failure
- Mold and mildew
- Rot around end grain
- Corrosion around fasteners
The goal isn’t to stop wood from moving. That’s impossible.
The goal is to build and finish furniture that can move naturally without losing strength or beauty.
Understanding the Three Forces Every Outdoor Project Faces
Moisture
Rain is only part of the story.
Morning dew, humidity, melting snow, and even damp evening air slowly introduce moisture into wood fibers.
Areas where water tends to collect deserve extra attention:
- Horizontal tabletops
- Bench seats
- Chair arms
- End grain
- Legs that sit directly on decking
Good design encourages water to leave the surface quickly rather than remain trapped.
Sunlight
Ultraviolet rays slowly break down the natural compounds that give wood its strength and color.
Without protection, wood gradually becomes:
- Faded
- Dry
- Rough to the touch
- More susceptible to moisture
That’s why finishes with UV protection play such an important role, especially on furniture exposed to full afternoon sun.
Temperature Changes
Wood responds to seasonal shifts in surprising ways.
A dining table that fits perfectly in early summer may expand slightly during humid weather and contract again when cooler, drier air arrives.
Thoughtful construction accounts for that movement through:
- Expansion gaps
- Proper fastener placement
- Floating panels where appropriate
- Strong but flexible joinery
These details often go unnoticed—but they’re one of the reasons quality furniture stays solid for years.
Choosing the Right Finish for Rustic Outdoor Furniture
Walk through any hardware store and you’ll find shelves filled with oils, stains, sealers, and clear finishes.
The best option depends on three things:
- Your local climate
- The appearance you want
- How much maintenance you’re comfortable performing
Let’s look at the most common choices.
Penetrating Exterior Oils
For many woodworkers, exterior oils offer the perfect balance between protection and natural beauty.
Rather than creating a thick surface film, these products soak into the wood fibers and highlight the grain.
Why Builders Like Them
- Easy to apply
- Simple to refresh
- Won’t peel like surface finishes
- Preserve the natural appearance of wood
They’re especially popular on cedar, cypress, and redwood because they enhance the warmth already present in the grain.
Exterior Wood Stains
If you want additional UV protection while still allowing the grain to remain visible, semi-transparent stains are an excellent choice.
Available in a wide range of colors, they can subtly shift the appearance of the wood without hiding its character.
A well-chosen stain also helps tie together multiple furniture pieces, creating a consistent look across your entire deck.
Spar Urethane
Originally developed for marine environments, spar urethane remains flexible enough to handle seasonal movement.
It creates a durable protective layer that performs particularly well on furniture kept beneath covered porches or pergolas.
Because it forms a surface film, it usually requires more preparation when it’s time to refinish, but many homeowners appreciate its rich appearance and moisture resistance.
Exterior Paint
Paint offers outstanding UV protection and works especially well for farmhouse-inspired designs.
A painted base paired with a natural wood tabletop creates a classic look that’s both practical and timeless.
If you choose to paint, apply high-quality exterior primer first and use products specifically formulated for outdoor wood.
Surface Preparation: Where Great Finishes Begin
Even the finest finish can’t compensate for poor preparation.
Take your time during this stage, and every coat that follows will look better and last longer.
Sanding Sequence
A gradual sanding progression creates a smooth, consistent surface.
A common approach is:
- 80-grit to remove milling marks
- 120-grit to refine the surface
- 150-grit for general furniture preparation
- 180-grit before applying most finishes
Don’t rush through the grits. Skipping steps often leaves scratches that become more noticeable after the finish is applied.
Remove Every Trace of Dust
Fine dust settles into corners, joints, and grain patterns.
Before finishing:
- Vacuum every surface.
- Wipe with a clean microfiber cloth or tack cloth.
- Inspect the piece under bright light.
This extra attention prevents rough finishes and improves adhesion.
Don’t Forget Hidden Surfaces
It’s easy to focus on the areas everyone will see.
Professionals don’t.
Apply finish to:
- Undersides
- Inside legs
- Hidden braces
- Bottom shelves
- Interior faces of panels
Balanced protection helps reduce uneven moisture absorption, one of the leading causes of warping.
Why End Grain Deserves Special Attention
If you’ve ever noticed water soaking rapidly into the cut end of a board, you’ve seen end grain at work.
Because the wood fibers are exposed, end grain absorbs moisture much faster than flat surfaces.
Pay special attention to:
- Chair legs
- Bench feet
- Table legs
- Cut ends of rails
- Exposed joinery
Applying an additional coat or two of finish to these areas can dramatically extend the life of outdoor furniture.
Hardware Needs Maintenance Too
Wood isn’t the only material exposed to the weather.
Each spring, take a few minutes to inspect:
- Screws
- Bolts
- Hinges
- Washers
- Drawer slides
- Casters
Look for signs of corrosion, movement, or loosening.
Replacing a single fastener today is much easier than rebuilding a damaged joint later.
A Simple Seasonal Maintenance Routine
Furniture lasts longer when small tasks become regular habits.
Spring
- Wash away dirt and pollen.
- Tighten hardware.
- Check for finish wear.
- Inspect joints for movement.
Summer
- Wipe away standing water after storms.
- Clean spills quickly.
- Brush away leaves and debris trapped beneath furniture.
Autumn
Before winter arrives:
- Deep clean every piece.
- Touch up worn finishes.
- Remove trapped moisture from storage compartments.
- Clean cushions thoroughly.
Winter
If possible, store furniture in:
- A garage
- A shed
- A covered porch
- A dry workshop
If outdoor storage is your only option, use breathable furniture covers rather than plastic tarps, which can trap moisture and encourage mold.
Small Repairs Before They Become Big Ones
Every piece of furniture tells you when it needs attention.
The trick is learning to notice the signs early.
Loose Joint?
Tighten hardware before movement enlarges screw holes.
Hairline Crack?
Lightly sand the area, seal the exposed wood, and monitor it before it spreads.
Faded Finish?
Refresh it before bare wood is exposed to prolonged weather.
Water Stains?
Clean the surface, allow it to dry thoroughly, then refinish only if necessary.
Small repairs completed promptly often take minutes instead of weekends.
Let Your Furniture Age Naturally
One of the defining characteristics of rustic furniture is that it doesn’t need to remain perfectly uniform to remain beautiful.
Over time, you’ll notice:
- Softer color transitions
- Richer grain definition
- Slightly worn edges
- A gentle patina unique to your climate
Those aren’t flaws.
They’re signs that the furniture has become part of your home.
The objective isn’t to freeze wood in time. It’s to preserve its strength while allowing it to mature gracefully.
Professional Builder’s Checklist
Before declaring any project complete, work through this final inspection.
Construction
- All joints are tight and square.
- Furniture sits level without rocking.
- Weight-bearing components feel solid.
- Fasteners are fully seated.
Surface Quality
- Every edge has been eased.
- Sanding scratches have been removed.
- Glue squeeze-out has been cleaned.
- Grain direction has been considered where visible.
Weather Protection
- Drainage gaps are present.
- End grain has been sealed.
- Hidden surfaces have been protected.
- Finish has fully cured before use.
This final review may only take fifteen minutes, but it’s often the difference between furniture that merely looks good on day one and furniture that still performs beautifully many seasons later.
Coming Up in Part 6
The final installment shifts from the workshop to the reader’s perspective. We’ll answer the questions homeowners ask most often, provide practical buying and planning guides, suggest related woodworking resources, and finish with a Products / Tools / Resources section featuring the essential equipment, finishes, books, and accessories that support successful rustic outdoor furniture projects.
Part 6: The Questions Every Builder Eventually Asks
There comes a point in every project when the measuring, cutting, and sanding pause for a moment, and a different kind of question appears.
Did I choose the right wood?
Should I seal it now or wait?
Is this piece going to last?
Those questions aren’t a sign of inexperience. They’re part of the process. Every woodworker—from someone building their first garden bench to someone outfitting an entire backyard—has asked them at one time or another.
This final chapter answers the questions that come up most often, while also pointing you toward the tools, materials, and resources that can make every future project a little easier.
Frequently Asked Questions
“If I could only choose one wood species, which one should it be?”
For most DIY builders, cedar is difficult to beat.
It offers an excellent combination of:
- Natural resistance to rot
- Insect resistance
- Easy machining
- Lightweight construction
- Attractive grain
- Long service life
It’s forgiving enough for beginners while producing furniture that can look exceptional for decades.
If your budget allows and you’re looking for heirloom-quality durability, white oak is another outstanding option.
“Will homemade outdoor furniture really last?”
Yes—provided it’s built with outdoor conditions in mind.
The biggest difference between furniture that lasts five years and furniture that lasts twenty-five isn’t usually craftsmanship.
It’s maintenance.
Furniture that receives:
- Proper drainage
- Quality hardware
- Regular cleaning
- Fresh finish when needed
will almost always outperform neglected furniture, regardless of price.
“Should I stain, oil, or paint my furniture?”
Each approach offers different advantages.
Choose Exterior Oil If You Want
- Natural wood appearance
- Easy maintenance
- Simple refinishing
Choose Exterior Stain If You Want
- Better UV protection
- More color options
- Longer intervals between maintenance
Choose Paint If You Want
- Maximum color flexibility
- Strong UV protection
- Farmhouse-inspired designs
None of these options is universally “best.” The right finish depends on your climate, your design preferences, and how much maintenance you’re comfortable performing.
“Do I need expensive tools to build quality furniture?”
Not at all.
Many of the projects in this guide can be completed using:
- Circular saw
- Cordless drill
- Random orbital sander
- Measuring tools
- Clamps
As your skills grow, you can gradually expand your workshop, but there’s no need to invest in every machine before building your first project.
“How often should I refinish outdoor furniture?”
Inspect your furniture every spring.
Instead of refinishing on a fixed schedule, look for signs that the finish is beginning to wear.
These include:
- Water no longer beading on the surface
- Dull appearance
- Dry-looking wood
- Fading in high-sun areas
Refreshing a finish before it completely fails is faster and usually produces better long-term results.
“Can I leave wooden furniture outside all year?”
That depends on your climate.
Quality outdoor furniture is designed to withstand weather, but prolonged exposure to standing snow, heavy rain, or intense sunlight will increase maintenance requirements.
Whenever possible:
- Store cushions indoors.
- Use breathable furniture covers.
- Elevate furniture slightly off damp surfaces.
- Clean debris away regularly.
These small habits significantly extend the life of your furniture.
Planning Your Next Project
Once you’ve completed one or two pieces, it’s natural to start thinking about what’s next.
Rather than choosing projects randomly, build your collection in stages.
Stage One: Everyday Essentials
Start with furniture you’ll use almost every day.
Recommended projects include:
- Adirondack chairs
- Side table
- Coffee table
- Farmhouse bench
These builds develop core woodworking skills while making an immediate difference to your outdoor space.
Stage Two: Outdoor Dining
Expand your deck into an outdoor dining area with:
- Dining table
- Matching benches
- Serving console
These larger projects introduce more advanced joinery while creating a cohesive entertaining space.
Stage Three: Comfort and Conversation
Now focus on how people experience the space.
Good additions include:
- Fire pit chairs
- Lounge seating
- Corner bench
- Storage bench
This stage transforms your deck from functional to inviting.
Stage Four: Signature Pieces
Finally, tackle the projects that define the personality of your outdoor space.
Examples include:
- Porch swing
- Pergola bench
- Modular sectional
- Outdoor entertainment center
By this point, you’ll have developed the confidence and skills needed to complete more ambitious builds.
Expanding Your Woodworking Skills
Furniture projects naturally lead to larger outdoor improvements.
Once you’re comfortable working with exterior lumber, consider exploring:
- Pergolas
- Privacy screens
- Raised garden beds
- Outdoor kitchen cabinetry
- Built-in planters
- Garden gates
- Trellises
- Potting benches
Each project builds on the same fundamentals you’ve practiced throughout this guide.
Related Articles to Explore
If you’re building a woodworking website or simply planning your next project, these topics naturally complement this guide:
Wood Selection
- Cedar vs. Redwood for Outdoor Furniture
- Choosing Sustainable Lumber for DIY Projects
- Hardwood vs. Softwood: Which Performs Better Outdoors?
Joinery and Construction
- Pocket-Hole Joinery for Beginners
- Mortise and Tenon Techniques Explained
- Strong Outdoor Joinery That Handles Seasonal Movement
Finishing and Maintenance
- How to Apply Exterior Wood Oil
- Exterior Stain vs. Paint: Which Lasts Longer?
- Seasonal Outdoor Furniture Maintenance Checklist
- How to Repair Weathered Wooden Furniture
Individual Project Guides
- DIY Adirondack Chair Plans
- Rustic Farmhouse Bench Tutorial
- Outdoor Dining Table Plans
- Porch Swing Build Guide
- DIY Fire Pit Seating Ideas
Exploring these subjects deepens your skills while helping every new project feel more intentional.
Products / Tools / Resources
The right tools don’t make someone a better craftsperson, but they do make the work more enjoyable and more consistent. Over time, investing in dependable equipment pays for itself through cleaner cuts, smoother finishes, and fewer frustrations.
Recommended Woods
- Cedar for all-around outdoor furniture
- Redwood for premium projects
- White oak for heirloom-quality builds
- Cypress for naturally weather-resistant furniture
- Pressure-treated pine for budget-conscious builds
Essential Power Tools
A small collection of reliable tools is enough to complete most of the projects in this guide.
- Circular saw
- Cordless drill and impact driver
- Random orbital sander
- Miter saw
- Jigsaw
- Router with roundover and chamfer bits
- Pocket-hole jig
Hand Tools Worth Owning
These often become the tools you reach for most.
- Combination square
- Tape measure
- Speed square
- Wood chisels
- Clamps in several lengths
- Block plane
- Marking knife
- Rubber mallet
- Carpenter’s pencils
Outdoor Hardware
Never overlook hardware quality.
Look for:
- Stainless steel screws
- Hot-dipped galvanized fasteners
- Exterior-rated hinges
- Waterproof wood glue
- Marine-grade bolts for swings and heavy seating
Quality hardware protects every hour you’ve invested in the build.
Finishing Products
Choose products designed specifically for outdoor use.
Useful options include:
- Penetrating exterior wood oils
- Semi-transparent exterior stains
- Exterior spar urethane for covered spaces
- High-quality exterior paint and primer
- Wood cleaners and brighteners
- UV-resistant sealers
Safety Equipment
Good safety habits belong in every workshop.
Keep these items within reach:
- ANSI-rated safety glasses
- Hearing protection
- Dust mask or respirator
- Work gloves for material handling
- First aid kit
- Fire extinguisher
Helpful Workshop Accessories
Small upgrades often improve accuracy and efficiency more than large machines.
Consider adding:
- Folding sawhorses
- Mobile workbench
- Shop vacuum
- Moisture meter
- Digital angle gauge
- Corner clamps
- Bar clamps
- LED task lighting
Books Worth Adding to Your Shelf
Learning from experienced craftspeople can accelerate your progress.
Look for books covering:
- Outdoor woodworking techniques
- Furniture design principles
- Traditional joinery
- Wood finishing methods
- Timber framing
- Garden structure design
Even experienced builders return to trusted references for inspiration and new ideas.
Printable Project Binder
As your collection grows, keeping everything organized becomes increasingly valuable.
Create a project binder that includes:
- Cut lists
- Material estimates
- Sketches and measurements
- Finish schedules
- Maintenance records
- Notes from completed builds
- Photos documenting progress
Over time, that binder becomes more than a collection of plans. It becomes a record of your craftsmanship, documenting how your skills evolved with every project and providing a valuable reference for future builds.