
Table of Contents
- Why a Purple Martin Birdhouse Is Unlike Any Other Woodworking Project
- Meet the Purple Martin: Understanding the Bird Before You Build
- Planning a Birdhouse That Lasts for Years
- Choosing the Right Lumber, Hardware, and Tools
- The Blueprint: Purple Martin Birdhouse Dimensions and Design
- Building the Structure Step by Step
- Installing Your Birdhouse the Right Way
- Protecting Your Colony from Predators and Weather
- Seasonal Maintenance That Keeps Birds Coming Back
- Common Mistakes That Leave Birdhouses Empty
- Expanding from a Single House to a Professional Colony System
- Advanced Tips for Long-Term Success
- Frequently Asked Questions
- Products, Tools, and Resources
Part 1. Why a Purple Martin Birdhouse Is Unlike Any Other Woodworking Project
There is something uniquely satisfying about building with a purpose. A bookshelf holds memories. A dining table gathers family. A purple martin birdhouse does something different—it becomes part of a living cycle that repeats every spring, year after year.
At first glance, it may seem like just another woodworking project. After all, you’re cutting lumber, driving screws, checking measurements, and assembling panels. But the moment the house is raised onto its pole, its role changes completely. It stops being a project in the workshop and becomes a habitat in the landscape.
That shift changes everything.
Unlike decorative birdhouses, a purple martin colony house isn’t judged by appearance alone. The birds won’t admire clean joinery or perfectly sanded corners. Instead, they’ll evaluate dozens of subtle details almost instantly. Is the entrance easy to approach? Does the location feel safe? Is there enough room inside? Will the nest stay dry after a storm? Can predators reach it?
Those questions are answered not by ornament but by thoughtful design.
That’s why the best purple martin birdhouse woodworking plans aren’t simply construction drawings. They’re practical solutions shaped by decades of observation, woodworking experience, and an understanding of how these remarkable birds behave throughout the nesting season.
More Than a DIY Project
Many woodworking projects reach their finish line when the last coat dries.
A purple martin birdhouse is different.
Completion doesn’t happen in the workshop—it happens when the first pair circles overhead, lands on the roof, and decides your work is worthy of becoming their home.
That perspective changes the way experienced builders approach every stage of construction.
The goal isn’t to build the fanciest birdhouse in the neighborhood.
The goal is to build one that works.
That means every decision serves a purpose:
- A roof designed to shed heavy rain instead of trapping moisture.
- Compartments sized for comfort rather than decoration.
- Ventilation that keeps nesting chambers cooler during hot summer afternoons.
- Drainage that protects both the birds and the lumber beneath them.
- Access doors that make annual cleaning simple instead of frustrating.
- A sturdy mounting system that stays stable through years of changing weather.
When these features come together, the finished structure becomes far more than an attractive woodworking project—it becomes reliable housing that birds can return to season after season.
Why Precision Matters
Woodworking often rewards creativity, but purple martin housing rewards consistency.
Two panels that differ by only a few millimeters may not seem important on a workbench. Across an entire colony house, however, those small differences can affect compartment alignment, roof fit, airflow, and long-term durability.
Professional builders rarely rush this stage.
They measure carefully.
They dry-fit components before assembly.
They choose materials that will remain stable through changing seasons.
Most importantly, they build with the understanding that the structure must perform outdoors every day of the year—not just look impressive on the day it’s is finished.
That mindset separates a temporary project from one that can serve for decades.
Every Detail Serves a Purpose
One of the most rewarding aspects of building a purple martin birdhouse is discovering that almost every feature has a practical reason for existing.
Roof overhangs help keep rain away from nesting chambers.
Ventilation openings encourage fresh air to circulate during warm weather.
Drainage holes allow moisture to escape before it can damage the wood or nesting material.
Removable access panels make seasonal maintenance faster and less disruptive.
Even the overall shape of the colony house reflects the needs of the birds rather than the preferences of the builder.
As your understanding grows, the plans begin to feel less like a list of measurements and more like a carefully balanced system where every component supports the next.
Thinking Beyond the Build
It’s easy to focus on the excitement of construction—the smell of freshly cut lumber, the satisfaction of perfectly aligned joints, or the moment the roof finally settles into place.
But experienced builders know the real story begins afterward.
The birdhouse will face blazing summer sun, pounding rain, freezing winters, and years of seasonal expansion and contraction. It will need to remain stable on windy days, accessible during maintenance, and comfortable during the busiest weeks of nesting.
Planning for those realities from the very beginning leads to smarter decisions throughout the project.
The result isn’t simply a stronger birdhouse.
It’s a better home.
Building with the Birds in Mind
Every successful colony house shares one common characteristic: it was designed from the birds’ perspective.
Instead of asking, “What’s easiest to build?”, experienced woodworkers ask different questions.
Will this compartment stay dry after a heavy rain?
Can fresh air move naturally through the structure?
Will routine maintenance be straightforward several years from now?
Will the mounting system remain secure through changing seasons?
Thinking this way changes the project entirely. Construction becomes less about assembling wood and more about creating an environment where wildlife can thrive.
And that’s what makes purple martin birdhouse woodworking so rewarding.
Each board, screw, and carefully measured cut contributes to something far more meaningful than a finished project—it creates the possibility for new life, returning migrations, and a colony that may visit your property for years to come.
Part 2. Meet the Purple Martin: Understanding the Bird Before You Build
Long before the first board is cut or the first screw is driven, there’s another blueprint worth studying—the one written by nature.
Purple martins don’t choose a home because it’s beautifully crafted. They don’t care whether every corner is perfectly mitered or every edge has been sanded to furniture-grade smoothness. Their decisions are shaped by instinct, experience, and survival. In a matter of moments, they’ll assess whether a location feels safe enough to raise the next generation.
Understanding those instincts is one of the greatest advantages a builder can have.
The difference between a birdhouse that becomes the center of a thriving colony and one that stands empty season after season often comes down to this simple truth: successful designs begin with the bird, not the lumber.
A Bird That Lives in Community
Unlike many backyard birds that prefer solitude, purple martins are naturally social. They aren’t looking for an isolated nesting box tucked into a quiet corner of the yard. They’re searching for a neighborhood.
That’s why colony housing has become such an important part of purple martin conservation.
Each nesting compartment functions as a private home, yet every pair benefits from having neighbors close by. Multiple birds scanning the sky can detect danger more quickly. A colony also creates a sense of familiarity that encourages new arrivals to investigate available nesting spaces.
This social behavior influences nearly every aspect of birdhouse design.
A single nesting box may be beautifully built, but a thoughtfully planned multi-compartment structure better reflects the environment purple martins instinctively seek.
A Year Built Around Migration
One of the remarkable things about purple martins is that your woodworking project becomes part of a much larger annual journey.
Each year follows a familiar rhythm.
Adult birds return from migration as temperatures begin to warm. The earliest arrivals inspect potential nesting sites while later arrivals continue searching for available housing. Once pairs form, nesting begins in earnest, followed by weeks of incubation, feeding, and raising young before the colony eventually departs again.
From a builder’s perspective, this cycle has practical implications.
The birdhouse shouldn’t still be sitting on the workbench when birds arrive.
Construction, installation, inspections, and repairs are all best completed well before the breeding season begins. A colony house that is clean, stable, and ready to receive visitors has a much better chance of being noticed than one that’s still waiting for its roof or mounting hardware.
Timing, it turns out, is part of good design.
What Purple Martins Notice First
Imagine approaching a new neighborhood from high above.
Before you ever step inside a house, certain impressions form almost instantly. Is the area open? Can you move around easily? Does it feel secure?
Purple martins make similar assessments from the air.
Long before they inspect an entrance hole, they’re reading the landscape.
They notice:
- Wide, open flight paths.
- Clear visibility in every direction.
- Stable structures that stand above surrounding vegetation.
- Easy approaches without branches or obstacles.
- Space to circle comfortably before landing.
Only after those broader conditions feel right do they begin examining the birdhouse itself.
It’s a reminder that placement and design are inseparable. A well-built house in the wrong setting often struggles to attract attention, while a simpler structure positioned in an ideal location may become surprisingly successful.
Home Is More Than Four Walls
Inside the birdhouse, comfort matters just as much as location.
Purple martins spend weeks building nests, incubating eggs, and raising growing chicks within a relatively compact space. During that time, conditions inside each compartment can change dramatically.
A sunny afternoon may bring rising temperatures.
A heavy rain can introduce unwanted moisture.
Several active nestlings generate warmth and humidity that wasn’t present only days before.
Good woodworking anticipates these changes.
Proper ventilation allows fresh air to circulate naturally. Drainage prevents water from lingering where it doesn’t belong. Carefully planned dimensions provide enough room for daily activity without creating excessive open space that’s difficult to regulate.
Every design decision quietly contributes to a healthier nesting environment.
Why Open Spaces Matter So Much
Spend a few minutes watching purple martins in flight, and one thing becomes immediately obvious—they’re built for the open sky.
They sweep across fields with effortless precision, changing direction in an instant as they pursue flying insects. That remarkable agility depends on having room to maneuver.
Dense woodland, narrow backyards crowded with mature trees, or locations boxed in by tall structures interrupt those natural flight patterns.
Open landscapes, on the other hand, complement the birds’ strengths.
Large lawns, agricultural fields, meadows, open parks, and lakeside properties all provide the expansive airspace purple martins naturally prefer.
When choosing a location for your birdhouse, remember that you’re not simply selecting a place to install a pole. You’re choosing the environment that surrounds every approach, departure, and feeding flight throughout the nesting season.
Every Feature Has a Biological Purpose
It’s tempting to view woodworking plans as a collection of measurements.
In reality, those numbers tell a story.
Compartment dimensions influence comfort.
Roof design affects temperature and weather protection.
Ventilation manages airflow.
Drainage protects nesting material.
Access doors make seasonal maintenance practical.
Even the placement of support braces contributes to the long-term stability that birds instinctively recognize.
The deeper you look, the more obvious it becomes that good woodworking is really applied biology.
The structure succeeds because it reflects the needs of the species it was built to serve.
Building Confidence Before Construction
Many first-time builders worry about making mistakes during construction.
Ironically, the most important preparation often has nothing to do with saws, drills, or fasteners.
It begins with understanding why the plans are designed the way they are.
Once you know why compartments require certain proportions, why airflow matters, or why the mounting system plays such a critical role, the construction process becomes much more intuitive.
Instead of blindly following instructions, you’re making informed decisions at every stage of the project.
That confidence carries through every cut, every joint, and every assembly.
A Better Builder Starts with Better Observation
Experienced woodworkers often say the best tool in the workshop isn’t a saw—it’s patience.
The same principle applies to building for wildlife.
The more time you spend observing how purple martins move, where they fly, and what they seem to prefer, the easier it becomes to understand the reasoning behind professional birdhouse designs.
Construction stops feeling like a sequence of mechanical steps.
It becomes an exercise in problem-solving.
You’re no longer asking how to build a box.
You’re asking how to create a place that feels secure, comfortable, and inviting to a bird that has traveled thousands of miles in search of the right home.
That’s a far more rewarding challenge—and one that begins long before the first piece of lumber reaches the workbench.
Part 3. Planning a Birdhouse That Lasts for Years
There’s an old saying among experienced woodworkers: the easiest mistake to fix is the one you never make.
Nowhere is that more true than with a purple martin birdhouse.
The temptation to dive straight into construction is understandable. Fresh lumber is stacked neatly in the workshop. The plans are printed. The tools are waiting. It feels like the project has already begun.
In reality, the most important work happens before the first cut.
Planning isn’t the exciting part of woodworking, but it’s often the difference between a birdhouse that serves a single season and one that stands strong through decades of changing weather, returning migrations, and routine maintenance.
A few thoughtful decisions made now will influence every step that follows.
Start With a Clear Goal
Not every purple martin birdhouse is built for the same purpose.
Some people want a straightforward weekend project that introduces them to outdoor woodworking. Others hope to replace an aging colony house that’s seen better days. Some are planning for expansion from the very beginning, designing a structure that can support a growing colony over time.
Before purchasing materials or marking your first cut, ask yourself one simple question:
What do I want this birdhouse to become five years from now?
Your answer shapes almost everything that follows.
Perhaps you envision a modest colony house that’s easy to inspect each spring.
Or maybe you’re planning a larger installation that will eventually become a centerpiece of your property.
Neither approach is better than the other. What’s important is matching today’s decisions with tomorrow’s expectations.
Think Beyond This Season
It’s surprisingly easy to build only for the present.
A smaller roof may save material.
A fixed pole may reduce initial cost.
Simple access panels may speed up construction.
But what happens after several nesting seasons?
Will cleaning still be convenient?
Can damaged components be replaced without dismantling the entire structure?
Will future repairs require special tools or custom parts?
Experienced builders rarely think in terms of a single project. They think in terms of decades.
That mindset naturally leads to stronger joinery, better hardware, and construction methods that make future maintenance far easier.
Choosing the Right Colony Size
One of the earliest planning decisions involves determining how many nesting compartments your birdhouse will include.
More isn’t always better.
A colony house should reflect your available space, woodworking experience, and willingness to perform regular maintenance.
Smaller Colony Houses
Compact designs are ideal for builders who prefer simplicity.
Advantages include:
- Faster construction
- Lower material costs
- Easier installation
- Reduced overall weight
- Quicker seasonal cleaning
For many first-time builders, a smaller project provides an excellent balance between practicality and long-term performance.
Medium-Sized Designs
As confidence grows, many builders choose a larger layout that offers additional flexibility.
These birdhouses typically provide:
- More nesting opportunities
- Greater room for colony growth
- Improved layout options
- Better long-term value
They require additional planning but often become the sweet spot between ease of construction and colony capacity.
Professional Colony Systems
Larger colony houses introduce another level of engineering.
These projects often include:
- Multiple levels
- Reinforced framing
- Modular compartments
- Larger roof assemblies
- Heavy-duty mounting systems
- Improved maintenance access
Although construction takes longer, these designs reward careful craftsmanship with exceptional durability and easier long-term management.
Let Your Property Guide the Design
The best woodworking plans in the world cannot overcome a poor location.
Before finalizing your design, spend time walking your property.
Observe how sunlight moves throughout the day.
Notice where open airspace begins and where trees interrupt flight paths.
Watch how water drains after rainfall.
Pay attention to prevailing winds.
These observations help determine not only where the birdhouse should be installed but also which design features deserve additional attention.
A windy location may benefit from extra structural reinforcement.
A particularly sunny site may call for enhanced ventilation.
A damp area might require greater attention to drainage and pole stability.
Good planning adapts the design to the environment rather than expecting the environment to accommodate the design.
Build Within Your Skill Level
One of the fastest ways to lose enthusiasm for a project is choosing a design that’s unnecessarily complicated.
The best woodworking plans challenge your skills without overwhelming them.
Beginner Projects
Simple designs emphasize:
- Straightforward cuts
- Standard lumber sizes
- Basic joinery
- Easy assembly
- Practical construction techniques
These projects build confidence while producing a highly functional birdhouse.
Intermediate Builds
As experience increases, many woodworkers begin incorporating features that improve maintenance and durability.
Examples include:
- Hinged compartment doors
- Reinforced roof framing
- Improved ventilation layouts
- Stronger internal supports
- More refined exterior finishes
Each addition teaches new techniques while increasing the quality of the finished structure.
Advanced Construction
Experienced builders often enjoy solving more complex engineering challenges.
These may involve:
- Precision joinery
- Modular construction
- Replaceable structural components
- Advanced pole systems
- Integrated maintenance features
- Custom milling and fabrication
At this level, the birdhouse becomes as much an exercise in craftsmanship as it is a habitat for wildlife.
Create a Budget That Prioritizes Longevity
Every woodworking project has a budget.
The challenge is knowing where quality matters most.
Premium lumber generally delivers better stability over time.
Corrosion-resistant hardware extends service life.
A dependable mounting system reduces future maintenance.
On the other hand, decorative embellishments rarely improve nesting success.
When funds are limited, invest first in the parts that determine structural performance.
Strong framing will always outperform elaborate trim.
Reliable hardware will outlast decorative accents.
Thoughtful engineering is almost always a better investment than visual complexity.
Organize Before You Build
A few hours of preparation can save an entire day of frustration.
Before construction begins:
- Review every measurement.
- Confirm your materials list.
- Inspect each board for defects.
- Label cut pieces as they’re prepared.
- Organize hardware by size.
- Arrange tools where they’re easy to reach.
An orderly workspace encourages careful work.
It also makes mistakes easier to spot before they become permanent.
Build With Maintenance in Mind
One question separates experienced builders from beginners.
Not:
“How do I build this?”
But:
“How will I maintain this five years from now?”
That shift in thinking changes everything.
Suddenly, removable roof sections make sense.
Access doors become more important.
Hardware placement becomes intentional.
Structural reinforcement isn’t added because it’s impressive—it exists because the birdhouse will spend years outdoors facing weather that no workshop can simulate.
Every practical decision made today becomes one less repair tomorrow.
Every Great Project Begins Before Construction
By the time the first board reaches the saw, many of the most important decisions have already been made.
You’ve chosen the size of the colony house.
You’ve evaluated the landscape where it will stand.
You’ve matched the design to your skills, your budget, and your long-term goals.
Most importantly, you’ve shifted your thinking.
You’re no longer building a birdhouse simply to finish a woodworking project.
You’re building a structure designed to weather countless storms, welcome returning birds each spring, and remain dependable long after the excitement of construction has faded.
That’s the kind of planning that turns a good project into one you’ll still be proud of many years from now.
Part 4. Choosing the Right Lumber, Hardware, and Tools
Walk through any lumberyard, and it’s easy to become overwhelmed. Stacks of cedar, pine, plywood, screws, brackets, and fasteners all promise to do the job. At first glance, many of them seem interchangeable.
They aren’t.
A purple martin birdhouse spends every hour of its life outdoors. It doesn’t get moved into a garage when storms arrive or covered when temperatures swing from freezing nights to scorching afternoons. Year after year, it stands exposed to rain, sunlight, humidity, wind, and constant seasonal expansion and contraction.
That reality changes how materials should be selected.
The best builders don’t simply ask, “Will this work?” They ask a better question:
“Will this still be working ten years from now?”
Choosing materials with that mindset creates a birdhouse that ages gracefully instead of demanding constant repairs.
Start With Wood That Can Handle the Outdoors
Wood is the heart of every birdhouse, and its quality influences everything from structural stability to long-term maintenance.
Some species naturally tolerate outdoor conditions. Others require significantly more care to achieve the same lifespan.
Understanding the strengths of each option helps you make an informed decision before the first board is loaded into your truck.
Cedar: The Benchmark for Outdoor Birdhouses
Ask experienced birdhouse builders about their preferred material, and cedar is almost always part of the conversation.
Its reputation isn’t based on appearance alone.
Cedar naturally resists moisture, insects, and decay, making it exceptionally well suited to structures that remain outdoors throughout the year.
It also offers practical advantages inside the workshop.
It cuts cleanly.
It sands easily.
It holds fasteners well.
Perhaps most importantly, it tends to remain dimensionally stable as weather changes. That stability helps maintain tight joints, consistent compartment sizes, and properly aligned access doors long after construction is complete.
While cedar often costs more than basic construction lumber, many builders consider it an investment rather than an expense.
Pine: Affordable and Easy to Work With
Not every excellent birdhouse begins with premium lumber.
Pine has introduced countless woodworkers to outdoor projects because it’s widely available, affordable, and forgiving to work with.
Its softer grain makes cutting and drilling straightforward, even for beginners.
The trade-off is durability.
Without proper protection, pine is more vulnerable to prolonged moisture exposure than naturally rot-resistant species.
That doesn’t make it a poor choice.
It simply means maintenance becomes a more important part of the birdhouse’s long-term care.
For many DIY builders, pine offers an excellent balance between budget and performance.
Exterior-Grade Plywood
Sheet materials often play a supporting role in birdhouse construction.
Exterior-grade plywood can be particularly useful for roof panels, internal dividers, or other components where dimensional consistency is valuable.
Quality matters here.
Exterior-rated products are manufactured to withstand changing weather conditions far better than interior panels.
Choosing the right grade helps reduce the risk of swelling, separation, and premature deterioration over time.
Materials Worth Avoiding
Some products may seem like economical alternatives, but their performance outdoors tells a different story.
Materials that generally perform poorly in long-term outdoor applications include:
- Particleboard
- Medium-density fiberboard (MDF)
- Interior plywood
- Water-damaged lumber
- Severely warped boards
- Lumber with extensive cracking or decay
Saving money at the lumberyard often becomes expensive after only a few seasons of weather exposure.
Starting with sound materials almost always proves more economical over the life of the project.
Thickness Matters More Than Many Builders Expect
The dimensions of each board influence more than appearance.
Wall thickness affects:
- Structural strength
- Temperature stability
- Fastener holding power
- Resistance to warping
- Overall durability
Uniform lumber also simplifies assembly.
When every component shares consistent thickness, roof sections align more accurately, compartments remain square, and joints fit together with far less adjustment.
Good construction begins with predictable materials.
Hardware Is the Skeleton You Never See
Beautiful lumber often receives most of the attention, yet hidden hardware quietly determines how well the entire structure holds together.
A loose hinge.
A rusted screw.
A weakened bracket.
Each has the potential to shorten the life of an otherwise excellent birdhouse.
That’s why experienced builders rarely compromise on hardware quality.
Corrosion-resistant components remain dependable despite years of moisture and changing temperatures.
Recommended hardware typically includes:
- Exterior-grade screws
- Galvanized fasteners
- Stainless steel screws
- Heavy-duty hinges
- Secure latches
- Washers
- Structural bolts
- Durable mounting brackets
While nails certainly have their place in woodworking, screws generally offer greater holding strength and make future repairs much easier.
Don’t Overlook the Roof Hardware
The roof experiences constant stress.
It expands under summer heat.
It contracts during cold weather.
It absorbs rain, resists wind, and protects everything beneath it.
Because of this, roof connections deserve particular attention.
Secure fastening helps prevent movement that can gradually create gaps where water enters the structure.
Many experienced builders also reinforce roof framing so weight remains evenly distributed across the entire birdhouse.
The goal isn’t simply keeping the roof attached.
It’s keeping it reliable after years of exposure.
Access Doors Should Feel Solid
One lesson becomes obvious after the first few seasons of maintenance.
Easy access matters.
Cleaning compartments, inspecting hardware, and making small repairs becomes far more enjoyable when doors operate smoothly and close securely.
Quality hinges and dependable latches make this possible.
When selecting hardware, consider not only today’s installation but hundreds of future openings and closings throughout the life of the birdhouse.
Durability is measured over years, not weekends.
Choosing the Right Pole System
The birdhouse may receive the attention, but the pole carries the responsibility.
Everything depends on it.
A stable support system reduces vibration, withstands strong winds, and provides confidence during seasonal maintenance.
Several options are commonly used:
- Heavy-duty galvanized steel poles
- Aluminum support systems
- Sectional pole assemblies
- Professional raising and lowering mechanisms
The best choice depends on the size of the colony house, local weather conditions, and how frequently the structure will be inspected.
Regardless of the design, stability should always come before convenience.
Equip Your Workshop for Accuracy
Building a purple martin birdhouse doesn’t require a cabinet-making shop filled with expensive machinery.
It does require accuracy.
Reliable measuring tools are every bit as important as cutting tools.
A typical workshop setup includes:
Measuring Equipment
- Tape measure
- Combination square
- Carpenter’s square
- Straightedge
- Marking pencil
Accurate layout work prevents problems that become increasingly difficult to correct during assembly.
Cutting Tools
Clean cuts improve both strength and appearance.
Many builders rely on:
- Table saw
- Circular saw
- Miter saw
- Jigsaw
- Fine-tooth handsaw for adjustments
Choose the tools you’re comfortable using safely rather than chasing unnecessary complexity.
Drilling and Assembly
Strong joints depend on careful preparation.
Helpful tools include:
- Cordless drill
- Drill bit set
- Countersink bit
- Screwdriver set
- Clamps
- Impact driver if desired
Pilot holes remain one of the simplest ways to reduce splitting while improving screw placement.
Surface Preparation
A smoother finish begins before assembly is complete.
Useful finishing tools include:
- Random orbital sander
- Sanding block
- Multiple sandpaper grits
- Wood files
- Dust brush
Thoughtful preparation improves both appearance and long-term durability.
Safety Is Part of Good Craftsmanship
Every experienced woodworker develops habits that become second nature.
Safety glasses go on before the saw starts.
Hearing protection is worn without thinking twice.
Dust is managed before it fills the workshop.
A clean floor stays clear of offcuts.
Good safety practices don’t interrupt woodworking—they support it.
Working confidently and carefully allows greater focus on precision, which ultimately produces better results.
Buy Once, Build With Confidence
There’s a noticeable difference between a birdhouse assembled from whatever happened to be available and one built from carefully selected materials.
The second feels solid.
Doors close with confidence.
Roof panels sit flush.
Fasteners disappear into tight joints.
Nothing seems forced.
That sense of quality begins long before construction.
It starts in the lumberyard, continues through every hardware selection, and follows the project all the way to installation.
Choose dependable materials from the beginning, and the rest of the build becomes far more enjoyable.
Each carefully selected board and every well-chosen fastener becomes another small investment in a birdhouse that’s designed to weather the seasons—not just survive them.
Part 5. The Blueprint: Purple Martin Birdhouse Dimensions and Design
Every memorable woodworking project reaches a moment when ideas become something tangible.
The sketches are finished.
The measurements make sense.
The materials are stacked beside the workbench.
Now it’s time to turn planning into a blueprint.
This stage is where a purple martin birdhouse begins to reveal its personality. Not through decorative trim or elaborate rooflines, but through thoughtful engineering. Every dimension influences the next. Every compartment supports the overall structure. Every opening, support, and panel has a job to do.
A successful colony house isn’t built around guesswork. It’s built around balance.
Strength without unnecessary weight.
Protection without sacrificing airflow.
Accessibility without weakening the frame.
The best woodworking plans quietly solve problems before they ever appear.
Think Like an Engineer, Not Just a Builder
One of the biggest differences between an ordinary birdhouse and a professional colony system is intentional design.
A beginner often asks:
“How do I make this fit together?”
An experienced builder asks:
“How will every part perform after years outside?”
That small shift in perspective changes everything.
Instead of designing one panel at a time, you begin seeing the entire birdhouse as a single working system.
The roof protects the walls.
The walls support the compartments.
The compartments influence airflow.
The mounting system stabilizes the entire structure.
Nothing exists in isolation.
Building Around the Nesting Compartment
If the roof is the birdhouse’s shield, the nesting compartment is its heart.
Everything ultimately revolves around this space.
Each compartment should provide enough room for adult birds to move comfortably while accommodating nesting material and growing young throughout the breeding season.
Just as importantly, every compartment should be consistent.
Uniform dimensions create predictable nesting conditions and simplify construction.
Rather than measuring each compartment individually during assembly, experienced builders often prepare identical components in batches.
The process becomes faster.
The fit becomes more accurate.
And the finished colony house feels intentionally built instead of pieced together.
The Foundation Starts at the Floor
Although it receives little attention after assembly, the floor carries tremendous responsibility.
It supports the nesting chamber.
It anchors every wall.
It distributes structural loads.
It also manages one of woodworking’s oldest enemies—moisture.
A properly designed floor incorporates subtle drainage features that allow water to escape before it can damage wood or nesting material.
Many builders slightly recess the flooring inside the surrounding walls.
It isn’t immediately noticeable, but this small design decision helps shield exposed edges from direct weather while increasing structural strength.
Sometimes the most effective improvements are the ones nobody notices.
Walls That Do More Than Divide Space
It’s easy to think of walls as simple vertical panels.
In reality, they’re responsible for much more.
They maintain compartment dimensions.
They stiffen the overall structure.
They help regulate interior temperatures.
They support the roof.
They provide attachment points for access doors and hardware.
Each wall should sit squarely on the floor assembly and align cleanly with adjoining components.
Tiny gaps today often become larger problems after years of seasonal movement.
Careful fitting during assembly pays dividends long after construction is complete.
Designing the Entrance
The entrance serves as the connection between the outside world and the nesting chamber.
It needs to be accessible without compromising protection.
Positioning should be consistent across every compartment, creating a clean appearance while ensuring equal functionality throughout the colony house.
After cutting each entrance, smooth the surrounding edges carefully.
Sharp splinters or rough fibers offer no benefit and only reduce the overall quality of the finished project.
Attention to details like these reflects the difference between simply completing a build and taking pride in the craftsmanship behind it.
A Roof Built for Every Season
Few components work harder than the roof.
Summer sun beats down for hours.
Autumn storms arrive with driving rain.
Winter brings freezing temperatures.
Spring introduces another cycle of expansion and contraction.
Through all of it, the roof quietly protects everything beneath.
An effective roof design usually includes generous overhangs that direct rain away from walls and entrances.
Some builders prefer a permanently fixed roof.
Others choose removable or hinged designs that simplify inspections and seasonal cleaning.
Neither approach is inherently better.
The right choice depends on how you plan to maintain the birdhouse over the coming years.
Good design always considers tomorrow’s maintenance as carefully as today’s construction.
Airflow Isn’t an Afterthought
Ventilation often receives less attention than framing or roofing, yet it has a tremendous influence on the comfort of occupied compartments.
Warm air naturally rises.
Without a way to escape, temperatures increase quickly inside enclosed spaces.
Well-positioned ventilation openings encourage gentle air movement while minimizing exposure to wind-driven rain.
The objective isn’t to create drafts.
It’s to maintain fresh, balanced airflow throughout the nesting season.
Like many successful design elements, effective ventilation often goes unnoticed precisely because it works so well.
Let Water Leave as Easily as It Arrives
No outdoor structure remains perfectly dry forever.
Rain finds its way into surprising places.
Morning condensation forms even after clear nights.
Humidity changes constantly throughout the season.
Rather than attempting to prevent every drop of moisture, professional woodworking plans focus on helping water leave quickly.
Thoughtfully placed drainage openings prevent standing water while allowing interior spaces to dry naturally.
It’s one of the simplest features in the entire design—and one of the most valuable.
Maintenance Should Never Feel Like a Chore
Ask anyone who has managed a purple martin colony for several years, and they’ll likely tell you the same thing.
Easy maintenance encourages consistent maintenance.
Access doors are a perfect example.
Well-designed doors open smoothly, remain securely closed during storms, and provide comfortable access to each compartment during inspections and cleaning.
Likewise, removable roof panels or modular sections make larger repairs significantly less intimidating.
Designing for maintenance isn’t a luxury.
It’s part of building responsibly.
Reinforcing the Entire Structure
As colony houses grow larger, additional support becomes increasingly important.
Internal reinforcement helps the birdhouse maintain its shape despite years of weather and routine handling.
Strategic braces distribute weight more evenly while reducing stress on major joints.
These structural elements may never be seen once construction is complete, but they’ll quietly contribute to the birdhouse’s longevity every day thereafter.
Strong projects are often defined by the work hidden beneath the surface.
Designing the Mounting Connection
Many builders leave the mounting bracket until the very end.
Experienced builders usually do the opposite.
The connection between the birdhouse and its support pole should be considered from the earliest stages of the blueprint.
Weight needs to remain balanced.
Attachment points should align with structural framing.
Future maintenance should remain straightforward.
Integrating these requirements into the design produces a stronger, more stable installation than adding mounting hardware as an afterthought.
Create a Logical Assembly Plan
Before construction begins, organize the project into a sequence that flows naturally.
A typical order includes:
- Cut and label every component.
- Assemble the floor.
- Install exterior walls.
- Position internal dividers.
- Attach front and rear panels.
- Complete ventilation and drainage features.
- Install access doors.
- Fit the roof.
- Secure the mounting hardware.
- Perform a full inspection before finishing.
Working through the project systematically reduces mistakes while making it easier to maintain consistent quality from beginning to end.
Precision Today Creates Confidence Tomorrow
One of the quiet pleasures of woodworking comes from seeing every carefully measured piece settle exactly where it belongs.
Panels align without force.
Doors swing smoothly.
Roof sections fit cleanly.
Nothing feels improvised.
That’s rarely the result of luck.
It’s the reward for thoughtful planning, accurate measurements, and a blueprint designed with purpose.
Long before the birdhouse is raised onto its pole, those careful decisions have already shaped its future.
What remains is the satisfying work of bringing every carefully planned detail together, one joint at a time, transforming a collection of precisely prepared parts into a finished colony house built to welcome generations of purple martins.
Part 6. Building the Structure Step by Step
Every woodworking project has a moment when planning gives way to action.
The measurements have been checked one last time. The lumber is stacked neatly beside the bench. Blades are sharp, tools are within reach, and the workshop carries that unmistakable scent of freshly cut wood and possibility.
Now the real work begins.
Building a purple martin birdhouse isn’t about racing toward the finish line. In fact, the strongest, most durable colony houses are usually built at an unhurried pace. Each completed step supports the next, and every careful decision made along the way helps create a structure that will spend years standing against weather instead of weeks waiting for repairs.
The goal isn’t simply to assemble a birdhouse.
The goal is to build one that feels solid every time you touch it.
Prepare Your Workspace Before Making the First Cut
A productive workshop isn’t necessarily the largest one. It’s the one that’s organized.
Before turning on a saw, spend a few minutes creating an environment where accuracy comes naturally.
Lay out your lumber.
Group hardware into separate containers.
Clear unnecessary tools from the work surface.
Confirm that every measurement on your plans matches the material you’ve purchased.
These small preparations remove distractions and allow you to focus completely once construction begins.
Just as importantly, they reduce the temptation to rush.
Cut Components in Groups, Not One at a Time
One of the easiest ways to maintain consistency is to work in batches.
Instead of cutting one wall, then one divider, then another wall, prepare all identical pieces together.
The advantages quickly become obvious.
Measurements stay consistent.
Saw settings require fewer adjustments.
Similar parts naturally fit together during assembly.
As each component is completed, label it immediately.
It may seem unnecessary while everything is still spread across the bench.
Several hours later, you’ll be glad you did.
Many parts appear nearly identical until it’s time to install them.
A simple pencil mark can eliminate unnecessary confusion.
Dry-Fit Everything Before Permanent Assembly
Experienced woodworkers have a habit that often surprises beginners.
They intentionally assemble projects twice.
The first assembly isn’t permanent.
It’s a rehearsal.
Every major component is positioned temporarily to verify alignment before screws or fasteners lock anything into place.
During this stage, look for:
- Tight joints
- Square corners
- Even compartment spacing
- Proper roof alignment
- Smooth door clearances
- Balanced overall proportions
If something feels slightly off, this is the moment to adjust it.
Corrections made now usually take minutes.
Corrections made later often require rebuilding entire sections.
Build From the Ground Up
The floor assembly establishes the accuracy of everything that follows.
Treat it as the foundation rather than just another panel.
As the base comes together:
- Confirm diagonal measurements.
- Check every corner for square.
- Verify drainage locations remain unobstructed.
- Tighten fasteners evenly without forcing joints.
A stable foundation naturally guides the remaining components into proper alignment.
Many fitting problems that appear later actually begin here.
Taking your time now prevents frustration later.
Raise the Exterior Walls
Once the base is complete, the structure begins taking shape surprisingly quickly.
Attach each exterior wall carefully, checking alignment after every section rather than waiting until all four sides are installed.
Clamps become particularly valuable during this stage.
Holding panels securely while fastening them helps maintain tight joints and reduces unwanted movement.
After completing each wall, step back for a moment.
Look along the edges.
Check for twisting.
Confirm that everything still sits square.
Small observations made now preserve the accuracy you’ve worked hard to achieve.
Install Interior Dividers With Precision
The compartment dividers may appear simple, but they define the entire colony house.
Every nesting chamber depends on their accuracy.
Install each divider carefully, ensuring it sits perpendicular to the floor and aligns cleanly with neighboring panels.
As you progress, periodically compare compartment dimensions.
Consistency matters far more than speed.
Uniform compartments not only create a cleaner finished appearance but also provide predictable conditions throughout the birdhouse.
It’s one of those details few people notice immediately, yet it reflects the overall quality of the craftsmanship.
Create Smooth, Clean Entrances
If entrance openings haven’t already been prepared, this is the ideal time to complete them.
After cutting each opening:
Remove loose fibers.
Lightly sand rough edges.
Inspect for symmetry.
Brush away dust before continuing.
Clean openings don’t simply improve appearance.
They demonstrate careful workmanship and help maintain the professional finish that distinguishes a thoughtfully built birdhouse from a hurried project.
Complete the Ventilation and Drainage System
Before enclosing the structure completely, pause to inspect the features that will quietly protect the birdhouse for years.
Verify that ventilation pathways remain open.
Confirm drainage openings are unobstructed.
Remove any sawdust or wood chips trapped inside compartments.
These features may never attract attention once construction is complete.
That’s exactly the point.
When ventilation and drainage work properly, they’re almost invisible.
When they don’t, every other part of the birdhouse eventually feels the consequences.
Assemble the Roof Carefully
There’s something deeply satisfying about placing the roof onto a nearly completed structure.
It transforms a framework into something that finally feels complete.
Whether your design includes a fixed roof or a removable section, test the fit before securing anything permanently.
Look for:
- Even overhangs
- Flush contact points
- Smooth operation if hinged
- Proper alignment across every wall
The roof should settle naturally into place.
If excessive force is required, revisit the underlying alignment before moving forward.
Good fits rarely happen by accident.
They’re earned through careful preparation.
Fit the Access Doors
Access doors are used repeatedly throughout the life of the birdhouse.
That makes them worth a little extra attention during construction.
Open each door several times.
Close it again.
Check the hinge movement.
Confirm the latch engages smoothly.
The goal is effortless operation without unnecessary looseness.
Years from now, when seasonal cleaning becomes routine, you’ll appreciate the few additional minutes spent perfecting this step.
Sand With Purpose
Sanding is often misunderstood.
The objective isn’t to remove every trace of texture.
It’s to eliminate problems.
Sharp edges.
Splinters.
Rough transitions.
Uneven surfaces.
Focus especially on exterior edges, roof joints, and door openings.
Inside the nesting compartments, avoid polishing the wood excessively.
A lightly textured surface provides better footing than one that’s been sanded perfectly smooth.
Sometimes restraint produces better results than perfection.
Apply Exterior Protection Thoughtfully
If your chosen lumber benefits from additional weather protection, apply it with patience.
Work under suitable weather conditions.
Allow each coat to cure completely.
Keep ventilation and drainage openings free from buildup.
Protect moving hardware from excess finish.
The objective isn’t simply to improve appearance.
It’s to help the structure withstand years of exposure while preserving the craftsmanship beneath.
Install the Mounting Hardware
Before the completed birdhouse ever leaves the workshop, attach the mounting hardware and inspect every connection carefully.
Verify:
- Weight remains centered.
- Fasteners are fully tightened.
- Reinforcement blocks sit securely.
- Brackets align correctly.
Testing these components while the birdhouse remains at a comfortable working height makes adjustments significantly easier than after installation.
It’s one final opportunity to refine the project before it enters the real world.
Complete a Final Inspection
Professional builders rarely consider a project finished until they’ve inspected it with fresh eyes.
Walk around the birdhouse slowly.
Open every access door.
Check every fastener.
Look along every joint.
Confirm the roof sits evenly.
Ensure ventilation remains open.
Verify drainage is clear.
Sometimes you’ll discover nothing at all.
Sometimes you’ll notice a single screw that needs another quarter turn.
Either outcome makes the inspection worthwhile.
It’s the last quiet conversation between the builder and the project before weather, wildlife, and time begin writing the next chapter.
By now, what started as a carefully planned collection of boards has become something much more substantial—a durable colony house built with patience, precision, and purpose.
The workshop may have played its part, but the next stage unfolds outdoors, where placement, stability, and the surrounding landscape become just as important as the craftsmanship that brought the structure to life.
Part 7. Installing Your Birdhouse the Right Way
There is a moment every builder remembers.
The workshop falls quiet. The sawdust has been swept away. Every hinge has been tested, every screw tightened, every measurement checked one last time. The birdhouse is finished.
Or at least it feels finished.
In truth, one of the most important stages is only beginning.
A purple martin birdhouse doesn’t become successful because it was built well. It becomes successful because it’s placed where purple martins want to live.
That’s an important distinction.
Many beautifully crafted colony houses remain empty year after year, while simpler designs thrive because they’re installed in the right place, at the right height, with the right surroundings.
Installation isn’t the final step of construction.
It’s the first step in creating habitat.
The Landscape Is Part of the Birdhouse
It’s easy to think of the birdhouse as a standalone structure.
Purple martins don’t.
To them, the surrounding landscape is part of the home.
A nesting compartment may offer comfort and protection, but the open sky around it determines how easily birds can arrive, depart, hunt for insects, and watch for danger.
That’s why experienced colony managers spend almost as much time choosing the location as they do building the birdhouse itself.
A carefully selected site quietly solves problems before they ever arise.
Why Open Space Matters
Watch purple martins in flight and you’ll notice something remarkable.
They almost never seem to struggle.
Their movements are smooth, effortless, and incredibly precise.
They sweep across fields, change direction instantly, and climb high above the landscape with almost no wasted motion.
That freedom depends on open air.
Trees, buildings, dense vegetation, and overhead obstacles interrupt the kind of flight these birds naturally prefer.
The most inviting locations usually share one characteristic above all others:
Space.
Large lawns.
Pastures.
Open fields.
Meadows.
Lakeside properties.
Agricultural landscapes.
Places where the sky feels bigger than the structures beneath it.
Those are the environments purple martins instinctively recognize.
Think About the Approach, Not Just the Destination
Imagine driving to a beautiful house that sits at the end of a road too narrow to reach comfortably.
The destination may be perfect, but the journey isn’t.
Purple martins evaluate nesting sites in much the same way.
Long before they enter a compartment, they practice approaching it.
They circle.
They climb.
They descend.
They test different angles.
An ideal installation allows birds to approach from multiple directions without weaving through branches or navigating around nearby obstacles.
The easier those approaches feel, the more inviting the entire location becomes.
Keep Trees at a Comfortable Distance
Trees add beauty to almost every landscape.
For purple martins, however, they introduce complications.
Dense canopies limit visibility.
Branches interrupt flight paths.
They also provide convenient perches for predators that would otherwise struggle to approach an exposed colony.
That doesn’t mean every tree should disappear from the property.
It simply means the immediate surroundings of the birdhouse should remain as open as practical.
Creating generous breathing room around the installation benefits both flight and safety.
Selecting the Right Pole
A colony house is only as dependable as the structure supporting it.
The pole carries the weight of the entire project while enduring constant pressure from wind, weather, and seasonal maintenance.
It’s one of the few components that rarely attracts attention—until it fails.
A quality pole should provide confidence from the moment the birdhouse is installed.
Common choices include:
- Heavy-duty galvanized steel
- Aluminum support poles
- Sectional pole systems
- Reinforced commercial mounting assemblies
The exact material matters less than the overall goal.
The birdhouse should remain stable in changing conditions without excessive movement or vibration.
Fixed Systems or Raising Systems?
Every builder eventually faces the same decision.
Should the birdhouse remain permanently fixed in place, or should it be designed to lower for maintenance?
Both approaches have advantages.
Fixed Pole Systems
These installations are generally:
- Less expensive
- Simpler to assemble
- Easier for smaller projects
For compact colony houses that require only occasional inspection, they can be an excellent solution.
Raising and Lowering Systems
Larger colony houses often benefit from mechanisms that allow the entire structure to move safely up and down the pole.
Their advantages become obvious over time.
Routine cleaning becomes easier.
Repairs are safer.
Annual inspections require less effort.
Builders who anticipate maintaining their birdhouse for many years often appreciate this added convenience.
Sometimes investing in easier maintenance is just as valuable as investing in better materials.
A Strong Foundation Begins Underground
Most people admire the birdhouse.
Few notice what lies beneath it.
Yet the foundation below the surface determines how well everything above performs.
A properly installed pole should remain secure through changing seasons, heavy rain, and strong winds.
Taking extra care during installation pays dividends for years afterward.
Check vertical alignment carefully before final installation.
Confirm stability from several directions.
Allow adequate time for the foundation to settle before placing the full weight of the birdhouse above it.
A little patience here creates enormous confidence later.
Finding the Right Height
Height influences far more than appearance.
A properly elevated birdhouse offers:
- Better visibility
- Safer nesting conditions
- Improved flight access
- Reduced risk from many ground predators
At the same time, maintenance should remain practical.
If inspections become unnecessarily difficult, they’re less likely to happen consistently.
The best installations strike a balance between accessibility for the builder and security for the birds.
Orientation Makes a Difference
Not every direction creates the same environment.
Morning sunlight can help warm nesting compartments after cool nights.
Afternoon exposure may increase interior temperatures during summer.
Prevailing winds influence ventilation.
Seasonal storms often arrive from consistent directions.
Thoughtful orientation takes these factors into account.
Rather than choosing a direction arbitrarily, consider how the birdhouse will experience changing weather throughout the year.
Small adjustments during installation often produce meaningful improvements in comfort over the life of the colony house.
Preparing the Area Around the Pole
The space surrounding the installation deserves attention too.
Keeping the area open provides several advantages.
It simplifies maintenance.
It discourages hidden approaches by predators.
It improves visibility during routine inspections.
It also makes the birdhouse feel more prominent within the landscape—a quality that purple martins naturally appreciate.
Short grass, clear access, and good drainage around the base create a cleaner, safer environment for both birds and builders.
Inspect Before the Season Begins
Once the birdhouse has been installed, resist the temptation to consider the job completely finished.
One final inspection can prevent countless future headaches.
Walk around the structure.
Look upward from different angles.
Confirm that:
- The pole remains perfectly stable.
- The birdhouse sits level.
- Roof panels are secure.
- Doors close properly.
- Ventilation openings remain clear.
- Drainage pathways are unobstructed.
- Mounting hardware is fully tightened.
These checks require very little time, yet they often reveal small issues that are easiest to correct before birds arrive.
When Placement Feels Natural, Everything Else Follows
Some birdhouses seem as though they’ve always belonged exactly where they stand.
The proportions fit the landscape.
The flight paths feel effortless.
The structure catches the eye without dominating its surroundings.
That’s rarely an accident.
It’s the result of thoughtful installation—one that respects both the craftsmanship of the builder and the instincts of the birds.
At this stage, your project has evolved considerably.
It began as rough lumber in the workshop.
It became a carefully engineered colony house.
Now it stands where seasons, weather, and migrating purple martins will determine its true success.
The next challenge isn’t construction or installation.
It’s protection.
Because even the strongest birdhouse benefits from thoughtful defenses against predators, moisture, heat, and the slow wear that every outdoor structure eventually faces.
Part 8. Protecting Your Colony from Predators and Weather
The first storm tells you more about a birdhouse than the day it was finished.
Fresh lumber always looks impressive in the workshop. Every joint feels tight, every screw sits perfectly flush, and the roof seems immovable. But once the birdhouse has spent a few months beneath blazing sun, heavy rain, gusting wind, and wide temperature swings, its true quality begins to reveal itself.
The same is true for the birds that eventually move in.
A purple martin colony doesn’t simply need shelter—it needs security.
Every nesting season presents challenges that can’t be solved with attractive craftsmanship alone. Predators explore new opportunities. Summer heat builds inside enclosed spaces. Moisture finds tiny openings. Hardware slowly loosens as wood naturally expands and contracts.
The strongest birdhouses aren’t the ones that never face these challenges.
They’re the ones designed to handle them before they become problems.
Protection Begins Long Before Danger Appears
Experienced builders rarely think in terms of repairs.
They think in terms of prevention.
A well-designed roof keeps water moving away from vulnerable joints.
Good ventilation limits excessive heat before it becomes harmful.
Quality hardware resists corrosion instead of requiring constant replacement.
Strong mounting systems reduce movement before fasteners begin working loose.
Every thoughtful design choice quietly reduces future maintenance while creating a more dependable home for nesting birds.
Understanding the Risks Around a Colony House
Purple martins spend much of their lives in the air, but their nests remain surprisingly vulnerable.
Eggs and young birds cannot simply fly away when danger approaches.
That makes the birdhouse itself the colony’s primary line of defense.
Threats generally fall into two categories.
The first comes from predators.
The second comes from the environment.
Both deserve equal attention.
Preventing Predator Access
Predators don’t need large openings or dramatic structural failures.
Often, they’re looking for a single weakness.
A loose access door.
An unstable pole.
An easy climbing route.
Closing those opportunities is far easier than responding after damage has occurred.
Well-designed protection doesn’t interfere with the birds.
It simply makes reaching them significantly more difficult.
Pole Guards Make an Enormous Difference
One of the simplest upgrades for any colony house is an effective predator guard.
Installed correctly, it interrupts the climbing path long before animals reach the nesting compartments.
Over time, this simple addition often proves more valuable than many decorative features combined.
Protection begins at the base of the structure—not at the roof.
Secure Doors Build Long-Term Confidence
Access doors exist for maintenance, not for accidental movement.
Each one should remain firmly closed through strong winds while opening easily during inspections.
Loose doors gradually become larger problems.
They allow moisture inside.
They create unnecessary movement.
In some cases, they even provide opportunities for unwanted visitors.
A solid latch may seem like a minor detail during construction.
Several years later, it often becomes one of the most appreciated components on the entire birdhouse.
Weather Never Stops Testing Your Work
Every season presents its own challenge.
Spring brings driving rain.
Summer introduces prolonged heat.
Autumn delivers strong winds.
Winter tests every joint through repeated freezing and thawing.
Unlike indoor furniture, an outdoor birdhouse never gets a break.
Good design accepts this reality rather than fighting it.
Instead of trying to eliminate every environmental challenge, it allows the structure to adapt naturally while remaining strong.
Why Ventilation Matters More Than Many Builders Realize
Heat is surprisingly easy to underestimate.
Step inside a parked vehicle on a sunny afternoon and the difference is immediate.
Enclosed wooden structures behave similarly.
Without adequate airflow, temperatures inside nesting compartments can rise far more quickly than many builders expect.
Thoughtfully positioned ventilation allows warm air to escape naturally while drawing cooler air into the structure.
The result is a more comfortable environment throughout the breeding season.
Good ventilation doesn’t announce itself.
It simply works quietly in the background every day.
Managing Moisture Before It Causes Damage
Rain rarely arrives exactly as expected.
Sometimes it blows sideways.
Sometimes it lingers for days.
Morning dew and changing humidity add moisture even when the forecast remains clear.
For that reason, every birdhouse should assume water will eventually find its way inside.
The real question isn’t whether moisture appears.
It’s how quickly it leaves.
Proper drainage encourages the interior to dry naturally instead of trapping dampness beneath nesting material or against wooden surfaces.
A few carefully placed drainage openings often provide years of protection.
Simple solutions frequently prove the most effective.
Wood Moves—Design for It
Even perfectly dried lumber continues responding to its environment.
Humidity changes.
Temperatures fluctuate.
Wood expands.
Wood contracts.
Ignoring this natural movement eventually leads to stress on joints, hardware, and structural connections.
Building with quality lumber, accurate joinery, and proper fastening techniques allows the birdhouse to move naturally without compromising its overall strength.
Experienced builders understand that wood isn’t static.
Successful designs accommodate that reality rather than resisting it.
Keep Hardware Working as Hard as the Lumber
Wood often receives the attention.
Hardware quietly carries the responsibility.
Every hinge, screw, bolt, and bracket supports repeated cycles of weather, movement, and maintenance.
A yearly inspection should include checking:
- Hinges
- Latches
- Exterior screws
- Mounting brackets
- Structural bolts
- Pole connections
Replacing a single worn fastener today may prevent a much larger repair tomorrow.
Preventive maintenance almost always requires less effort than corrective maintenance.
Roofs Deserve Special Attention
No component experiences more direct exposure than the roof.
It receives constant sunlight.
It absorbs rainfall.
It resists wind.
It protects everything beneath.
During inspections, look carefully for:
- Small cracks
- Loose fasteners
- Warped panels
- Soft spots
- Separation along joints
Addressing minor roof issues early helps prevent moisture from reaching more vulnerable structural components.
A dependable roof quietly extends the lifespan of the entire birdhouse.
Seasonal Inspections Become Easier Over Time
One of the unexpected rewards of maintaining a colony house is learning its personality.
You’ll begin noticing subtle changes from one season to the next.
Perhaps a hinge feels slightly tighter than last year.
Maybe one roof panel needs a small adjustment.
A bracket might require another turn with a wrench.
These observations become easier because you’re already familiar with how the structure normally behaves.
Routine maintenance gradually transforms from a chore into a simple conversation between the builder and the project.
Design for Repairs Before You Need Them
No outdoor structure lasts forever without occasional attention.
That’s why professional woodworking plans often favor modular construction.
Individual roof panels can be replaced.
Access doors can be removed without disturbing neighboring compartments.
Hardware remains accessible.
Structural components can be reinforced without dismantling the entire birdhouse.
Repairs become manageable because the original design anticipated them.
Future maintenance begins with today’s blueprint.
Durability Is Built One Decision at a Time
When people admire a finished purple martin birdhouse, they usually notice the craftsmanship first.
What they don’t immediately see are the countless decisions hidden beneath the surface.
The roof that quietly sheds water during every storm.
The ventilation that keeps nesting chambers comfortable on the hottest afternoons.
The hardware that refuses to loosen despite years of changing weather.
The reinforcement that keeps everything square long after the original construction is forgotten.
Those invisible details are what transform a good woodworking project into a lasting colony house.
Protection isn’t a single feature added at the end of construction.
It’s woven into every stage of the design, ensuring the birdhouse remains as dependable years from now as it was on the day it first left the workshop.
Part 9. Seasonal Maintenance That Keeps Birds Coming Back
The day you install a purple martin birdhouse feels like the finish line.
In reality, it’s the starting point.
From that moment forward, the birdhouse begins a different kind of journey—one measured not in weekends spent building, but in changing seasons. Rain darkens the wood. Summer heat settles across the roof. Autumn winds test every fastener. Winter quietly exposes the strength of every joint.
Then spring returns.
If you’ve cared for the structure well, it stands ready to welcome another generation.
That’s the rhythm experienced purple martin landlords come to appreciate. Building the birdhouse is deeply satisfying, but maintaining it is what gives the project lasting meaning.
Every inspection, every small repair, every careful cleaning becomes part of a cycle that benefits both the birds and the craftsmanship invested in creating their home.
Maintenance Is an Investment, Not a Chore
Many outdoor woodworking projects slowly fade into the background after they’re completed.
A purple martin birdhouse is different.
It asks for your attention a few times each year—not because it’s poorly built, but because it’s actively serving its purpose.
Think of maintenance as preserving two things at once:
- A safe nesting environment.
- Years of woodworking effort.
A loose hinge tightened today may prevent water damage next season.
A cleared drainage hole may keep an entire nesting compartment dry after the next storm.
Small actions accumulate over time, often preventing problems that never become visible.
Follow the Seasons Instead of the Calendar
Rather than thinking about maintenance as a single yearly task, it’s more helpful to view it as a series of seasonal check-ins.
Nature already provides the schedule.
Your job is simply to work with it.
Late Winter: Prepare Before the Birds Arrive
Long before purple martins return, the birdhouse deserves a careful inspection.
This is the ideal time because repairs can be completed without disturbing nesting activity.
Walk slowly around the structure and look for signs of winter wear.
Inspect:
- Roof panels
- Exterior walls
- Mounting hardware
- Pole stability
- Access doors
- Hinges
- Ventilation openings
- Drainage holes
Cold weather often reveals weaknesses that weren’t obvious during warmer months.
Addressing them now creates a fresh start for the coming season.
Early Spring: Make the House Feel Ready
As migration approaches, shift your attention from repairs to preparation.
Every compartment should be clean.
Every door should operate smoothly.
Every fastener should feel secure.
This final inspection isn’t complicated.
It’s about creating confidence.
When the first birds begin exploring potential nesting sites, the colony house should already feel established, stable, and ready to welcome new occupants.
Preparation is rarely dramatic.
Its value becomes obvious only when it has been done well.
Observe More Than You Interfere
Once nesting activity begins, less is often more.
Experienced colony managers spend far more time watching than adjusting.
Regular observations help answer important questions.
Does the structure remain stable during strong winds?
Are access doors still closing properly?
Is water draining after heavy rain?
Has anything shifted unexpectedly?
Many of the best maintenance decisions begin with quiet observation rather than immediate action.
The birdhouse often tells you what it needs—if you take the time to notice.
Learn to Recognize Early Signs of Wear
Woodworking projects rarely fail overnight.
They usually offer subtle warnings first.
Perhaps a roof panel lifts slightly during windy weather.
A hinge begins moving less smoothly.
A screw backs out just enough to become noticeable.
None of these issues seem urgent on their own.
Together, they reveal where attention should be focused before small problems become larger repairs.
Seasonal inspections become easier with experience because you begin recognizing what’s normal—and what isn’t.
Cleaning After the Nesting Season
When the breeding season has ended and the birdhouse stands quiet once again, it’s time for one of the most important maintenance tasks of the year.
Remove old nesting material from every compartment.
Brush away loose debris.
Inspect interior surfaces carefully.
Cleaning serves several purposes at once.
It prepares the structure for next season.
It allows hidden damage to become visible.
It prevents unnecessary moisture retention.
Perhaps most importantly, it gives you an opportunity to examine the birdhouse without disrupting active nests.
It’s one of the few moments each year when every compartment can be evaluated thoroughly.
Inspect the Structure Methodically
Rather than scanning the birdhouse casually, follow a consistent routine.
Start at the roof.
Then move to the walls.
Continue to the floor.
Finish with the hardware.
Checking components in the same order each year makes it easier to notice gradual changes.
Look closely for:
Roof
- Loose fasteners
- Small cracks
- Water damage
- Warping
Walls
- Separation at joints
- Surface deterioration
- Splits
- Movement
Floors
- Moisture damage
- Drainage blockages
- Structural wear
Hardware
- Corrosion
- Loose hinges
- Worn latches
- Mounting stability
Systematic inspections reduce the chance of overlooking something important.
Keep Airflow Working Efficiently
Ventilation requires surprisingly little maintenance.
It simply needs to remain open.
Throughout the year, small obstructions can gradually develop.
Spider webs.
Dust.
Insect nests.
Plant debris.
Clearing these areas takes only a few moments but helps maintain the airflow that keeps nesting compartments comfortable throughout the breeding season.
Sometimes maintenance is simply removing what nature slowly adds.
Don’t Ignore the Pole
Builders naturally focus on the birdhouse itself.
The support system deserves equal attention.
Check that the pole remains:
- Stable
- Straight
- Securely mounted
- Free from excessive corrosion
- Properly connected to the birdhouse
Even a beautifully maintained colony house depends on a dependable foundation.
A few minutes spent inspecting the pole each year protects the entire investment above it.
Keep a Simple Maintenance Record
Memory is helpful.
Written notes are better.
A small notebook—or even a digital record—quickly becomes valuable after several seasons.
Record information such as:
- Inspection dates
- Repairs completed
- Hardware replacements
- Exterior maintenance
- Structural observations
Over time, patterns begin to emerge.
You may notice that one hinge consistently requires adjustment.
Perhaps a particular roof joint deserves closer attention each spring.
These observations help you anticipate maintenance instead of merely reacting to it.
Improve the Birdhouse One Season at a Time
One of the greatest advantages of building your own colony house is that it never has to remain exactly as it was on completion day.
Every season teaches something.
Perhaps you’d like easier access doors.
Better ventilation.
Improved roof reinforcement.
A stronger mounting bracket.
An upgraded predator guard.
These aren’t corrections.
They’re refinements.
The best birdhouses often evolve gradually as their builders gain experience.
Each improvement reflects lessons learned through observation rather than theory.
Good Maintenance Builds Quiet Confidence
There’s a particular satisfaction that comes from lowering a birdhouse after another successful season and finding everything exactly as it should be.
The roof remains solid.
The joints stay tight.
The hardware operates smoothly.
The structure still feels as dependable as the day it was installed.
That confidence isn’t accidental.
It’s earned through consistent care.
A purple martin birdhouse isn’t maintained because it’s fragile.
It’s maintained because it’s valuable.
Every careful inspection protects the time invested in building it, supports the birds that depend upon it, and ensures the project continues doing exactly what it was designed to do—season after season, year after year.
Part 10. Common Mistakes That Leave Birdhouses Empty
Nothing is more discouraging than standing beneath a birdhouse you built with care, only to realize that another nesting season has come and gone without a single resident.
The craftsmanship may be excellent.
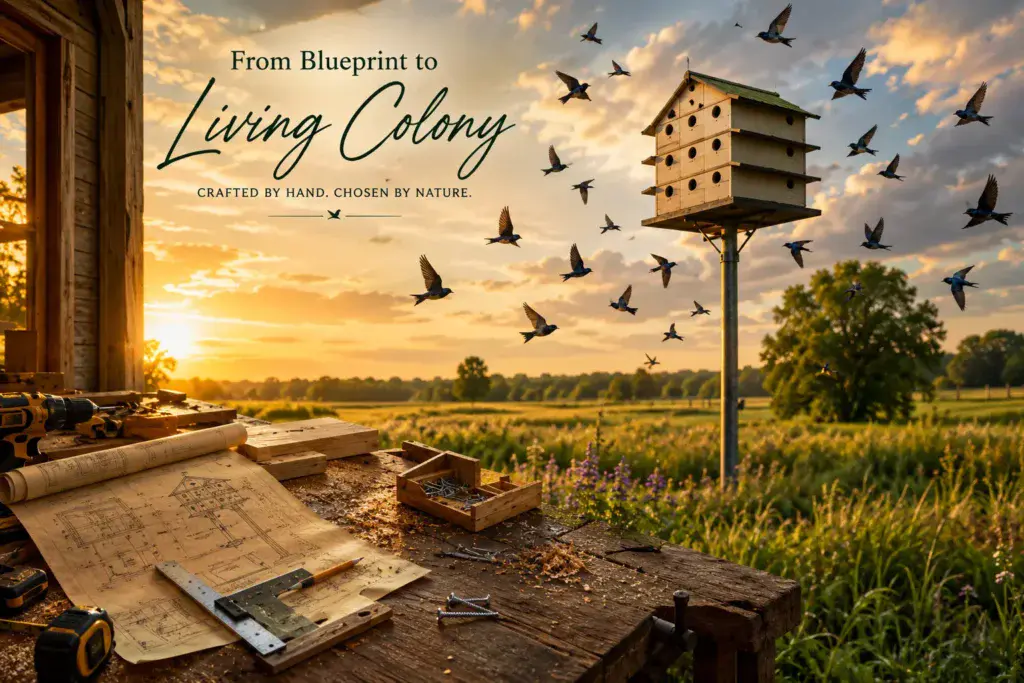
The joinery may be flawless.
The finish may still look new.
Yet the compartments remain empty.
For many builders, the first reaction is to question the woodworking itself. In reality, successful purple martin housing depends on dozens of interconnected decisions, and a few seemingly minor details can have a surprisingly large impact on whether birds decide to stay.
The encouraging news is that most of these problems are preventable.
Better still, many can be corrected without rebuilding the entire structure.
Mistake #1: Choosing the Wrong Location
A professionally built colony house cannot compensate for a poor setting.
Purple martins spend much of their lives in open air, and their nesting preferences reflect that. If a birdhouse is tucked beneath mature trees, surrounded by dense landscaping, or squeezed into a narrow backyard with limited flight space, it may never feel inviting from the birds’ perspective.
Before assuming the birdhouse is the problem, step back and look at the landscape around it.
Ask yourself:
- Are the flight paths open?
- Can birds approach from multiple directions?
- Does the structure stand out clearly against its surroundings?
- Is the immediate area free from unnecessary obstacles?
Sometimes moving the birdhouse only a short distance can completely change how it is perceived.
Mistake #2: Waiting Too Long to Install It
Timing often matters more than first-time builders realize.
Purple martins begin searching for suitable nesting locations soon after returning from migration. If your birdhouse is still sitting in the workshop while those early arrivals are making decisions, you’ve already missed an important opportunity.
One of the best habits you can develop is treating installation as part of your preseason preparation rather than part of your construction schedule.
Finish early.
Inspect everything carefully.
Have the birdhouse standing well before the nesting season begins.
When birds arrive, your work should already be waiting for them.
Mistake #3: Underestimating Ventilation
Heat builds quietly.
You rarely notice it during construction because the birdhouse is sitting in a shaded workshop.
Out in direct sunlight, conditions are very different.
Without adequate airflow, enclosed compartments can become noticeably warmer than the surrounding air.
Thoughtful ventilation helps regulate those temperatures naturally, allowing fresh air to circulate without exposing nesting chambers to excessive wind or rain.
It’s one of those features that’s almost invisible when it works well—and impossible to ignore when it doesn’t.
Mistake #4: Forgetting That Water Always Wins
Every experienced woodworker eventually learns the same lesson.
Water is patient.
Given enough time, it finds weaknesses.
Small gaps.
Poor drainage.
Flat surfaces where moisture lingers.
The most successful birdhouses don’t attempt to keep every drop outside.
Instead, they’re designed so water leaves quickly whenever it enters.
A roof that sheds rain efficiently, unobstructed drainage, and sound construction all work together to keep the interior healthier throughout the nesting season.
Mistake #5: Treating Predator Protection as an Afterthought
Predator guards often receive less attention than they deserve.
Many builders focus heavily on the birdhouse itself while giving only passing thought to the support pole below it.
Unfortunately, predators usually begin their approach from the ground up.
An effective pole guard, secure access doors, and a stable mounting system create multiple layers of protection that work together rather than relying on a single solution.
Prevention almost always proves easier than recovery.
Mistake #6: Choosing Materials Based Only on Price
Every builder appreciates saving money.
The challenge is understanding where savings become compromises.
Lower-cost lumber may require more frequent maintenance.
Inexpensive hardware may corrode sooner.
Inferior fasteners may loosen after repeated exposure to changing weather.
The result isn’t always immediate failure.
More often, it’s a gradual decline that requires additional repairs year after year.
Investing in durable materials at the beginning often reduces both expense and frustration over the long term.
Mistake #7: Ignoring Small Repairs
Most structural problems begin quietly.
A single loose screw.
A roof panel that shifts slightly during high winds.
A hinge that no longer closes as smoothly as it once did.
Individually, these issues seem insignificant.
Collectively, they shorten the life of the birdhouse.
One of the most valuable maintenance habits is responding to small problems while they’re still small.
A few minutes with basic tools today can prevent hours of repair work later.
Mistake #8: Making the Design More Complicated Than It Needs to Be
Woodworking naturally encourages creativity.
There’s satisfaction in adding custom trim, unique rooflines, or intricate joinery.
But every additional feature introduces another opportunity for maintenance, weather exposure, or structural complexity.
Professional colony houses often appear surprisingly simple.
Not because the builders lacked imagination.
Because every component serves a purpose.
Simplicity isn’t the absence of craftsmanship.
It’s the result of disciplined craftsmanship.
Mistake #9: Forgetting Future Maintenance During Construction
It’s easy to think only about completing the project.
The experienced builder thinks about maintaining it.
Will access doors open comfortably after installation?
Can roof sections be removed if repairs become necessary?
Is hardware easy to reach?
Can damaged components be replaced individually?
These questions rarely slow construction.
They simply make ownership far more enjoyable in the years that follow.
Mistake #10: Expecting Instant Results
Perhaps the most common misconception is assuming that a newly installed birdhouse will immediately attract a thriving colony.
Nature rarely works on our schedule.
Purple martins evaluate habitat over time.
Local bird populations vary.
Weather influences migration.
Some locations establish colonies quickly.
Others require patience.
An empty birdhouse during its first season isn’t necessarily a failed project.
It may simply be waiting for the right opportunity.
Builders who remain patient often discover that consistency is rewarded.
Listen to What the Birdhouse Is Telling You
One of the surprising things about maintaining a colony house is that it gradually begins offering feedback.
If water consistently collects in one area, the drainage needs attention.
If hardware loosens every year, reinforcement may be beneficial.
If maintenance feels awkward, future upgrades could improve accessibility.
Every observation becomes information.
Every season becomes another lesson.
The birdhouse quietly teaches the builder how to improve it.
Success Is Usually Built on Small Improvements
Very few colony houses become exceptional because of one dramatic innovation.
Most become exceptional because dozens of small details work together.
A stronger mounting system.
Better ventilation.
Cleaner drainage.
Higher-quality hardware.
Improved placement.
Simpler maintenance.
None of these changes seem revolutionary on their own.
Together, they create the kind of birdhouse that performs reliably year after year.
That’s often the real difference between a structure that simply exists in the landscape and one that eventually becomes home to a thriving purple martin colony.
Part 11. Expanding from a Single House to a Professional Colony System
Every experienced purple martin landlord remembers the first birdhouse.
It may have been modest. A simple design built over a few weekends with basic tools and a careful eye on the plans. At the time, it felt complete.
Then something unexpected happened.
The project didn’t end.
It evolved.
One successful nesting season led to new ideas. A second season revealed opportunities for improvement. Before long, the original birdhouse became the foundation for something much larger—a thoughtfully planned colony system designed not just to house birds, but to support them for years to come.
That’s a natural progression.
The best colony systems rarely appear all at once. They grow the same way good woodworking skills do: one careful improvement at a time.
Think in Terms of a System, Not a Structure
A single birdhouse can certainly provide suitable nesting space, but a professional colony system takes a broader view.
Instead of asking how one structure performs, experienced builders begin considering how every element works together.
The birdhouse.
The pole.
The surrounding landscape.
Maintenance routines.
Future expansion.
Predator protection.
Seasonal access.
Viewed together, these components form an interconnected system where each decision supports the next.
That systems-based mindset often marks the transition from hobbyist to experienced colony manager.
Let Growth Happen Naturally
One of the biggest mistakes builders make is trying to build their “final” colony house on the very first attempt.
Experience has a way of changing priorities.
Features that seemed essential during planning may become less important after a few seasons.
Other improvements—ones you hadn’t even considered—often rise to the top of the list.
Perhaps you’d like larger maintenance doors.
A better roof design.
Improved airflow.
A more stable mounting system.
By allowing your colony to evolve gradually, each upgrade is guided by observation rather than assumption.
The result is almost always a better birdhouse.
Expand Only When Maintenance Remains Practical
Adding more nesting compartments can be exciting.
More space creates greater potential for colony growth.
It also creates additional responsibility.
Every compartment should be:
- Inspected regularly.
- Cleaned after the nesting season.
- Protected from moisture.
- Easy to access.
- Structurally sound.
Expansion makes sense only when maintenance remains manageable.
A smaller, carefully maintained colony house consistently outperforms a larger one that’s difficult to inspect or repair.
Growth should improve quality—not reduce it.
Standardize Your Construction
Professional builders appreciate consistency.
Using the same dimensions, materials, and construction methods across multiple birdhouses offers several long-term advantages.
Replacement parts become easier to make.
Repairs follow familiar patterns.
Future additions match existing structures.
Maintenance routines become more efficient.
Standardization also reduces mistakes during construction because every successful project builds upon the experience gained from the last.
Consistency creates confidence.
Build Every New Version a Little Better
No woodworking project teaches more than the one you’ve already completed.
As your experience grows, you’ll naturally begin refining your designs.
Small improvements often have the greatest impact.
You might:
- Strengthen internal framing.
- Improve roof overhangs.
- Upgrade hinges and latches.
- Simplify access doors.
- Reinforce mounting points.
- Improve drainage.
- Increase structural rigidity.
These aren’t signs that the original design was unsuccessful.
They’re evidence that you’ve become a better builder.
Every project leaves behind lessons that quietly improve the next.
Design for Easier Maintenance
The larger a colony becomes, the more valuable efficiency becomes.
Professional colony systems often prioritize maintenance just as heavily as construction.
That means designing birdhouses that are:
- Easy to inspect.
- Comfortable to clean.
- Simple to repair.
- Convenient to lower if using a raising system.
- Built with accessible hardware.
When maintenance becomes easier, it’s also more likely to happen consistently.
That’s one of the quiet secrets behind long-lasting colony houses.
Strengthen the Infrastructure First
Many builders focus on expanding upward.
Experienced builders often improve the foundation first.
Before adding another birdhouse, evaluate:
- Pole stability.
- Mounting hardware.
- Structural reinforcement.
- Weather resistance.
- Access systems.
A dependable support system benefits every future addition.
Strong infrastructure creates room for confident expansion.
Observe Before You Upgrade
It’s tempting to make multiple changes after every season.
Sometimes the better decision is simply to watch.
Observe how the colony uses the available compartments.
Notice which maintenance tasks require the most time.
Pay attention to how the structure responds to weather throughout the year.
The birdhouse often reveals exactly where improvements will have the greatest value.
Patient observation leads to smarter upgrades than rushed enthusiasm.
Build With Replacement in Mind
Nothing outdoors lasts forever.
The goal isn’t to create a birdhouse that never needs attention.
The goal is to create one that’s easy to maintain when attention becomes necessary.
Professional builders often use modular thinking.
Roof panels can be replaced individually.
Doors can be removed without disturbing surrounding components.
Standard-sized lumber simplifies future repairs.
Accessible fasteners reduce maintenance time.
Repairability is part of durability.
The easier something is to maintain, the longer it’s likely to remain in service.
Create a Maintenance Routine That Scales
As your colony grows, organization becomes increasingly valuable.
Many experienced builders develop simple yearly routines that remain consistent regardless of colony size.
These often include:
- Preseason inspections.
- Hardware checks.
- Cleaning schedules.
- Structural evaluations.
- Weather-related repairs.
- End-of-season maintenance.
Following the same sequence every year reduces the chance of overlooking important details.
Good systems remove guesswork.
Craftsmanship Continues Long After Construction
One of the most rewarding discoveries in woodworking is realizing that projects continue teaching long after they’re finished.
A purple martin birdhouse is no exception.
Every season reveals something new.
A better way to reinforce a roof.
A more efficient maintenance routine.
A hardware upgrade worth making.
A design detail that performed better than expected.
Those lessons accumulate quietly.
Over time, they transform not only the birdhouse but also the builder.
The colony becomes more reliable.
Maintenance becomes easier.
Construction becomes more intuitive.
And what began as a single woodworking project gradually develops into a thoughtfully engineered colony system built on experience rather than assumption.
The journey doesn’t become more complicated.
It becomes more refined.
Part 12. Advanced Tips for Long-Term Success
There comes a point in every builder’s journey when the questions begin to change.
In the beginning, you’re focused on fundamentals.
How should the walls fit together?
What’s the best way to attach the roof?
Which lumber should you buy?
After a few successful projects, however, those questions become more nuanced.
How can this birdhouse stay straighter after ten winters?
What will make annual maintenance faster?
Where can unnecessary weight be removed without sacrificing strength?
How do experienced builders create colony houses that still feel solid after years of constant exposure to the elements?
Those are the questions that separate construction from craftsmanship.
This section explores the quieter details—the refinements that aren’t always obvious at first glance but often determine how well a purple martin birdhouse performs over the long term.
Build With the Future in Mind
One of the defining habits of experienced woodworkers is that they rarely build only for today.
Every project is viewed through the lens of future ownership.
Imagine lowering the birdhouse five years from now for its annual inspection.
Will the roof still come off easily?
Can a damaged panel be replaced without dismantling the structure?
Will the hardware still be accessible?
Can maintenance be completed without frustration?
Thinking several seasons ahead naturally leads to cleaner designs and smarter engineering.
It also reduces the temptation to include features that look impressive but complicate long-term care.
Eliminate Stress Before It Develops
Wood rarely fails without warning.
Stress builds gradually.
It begins with movement.
Repeated expansion.
Repeated contraction.
Small amounts of flexing that occur thousands of times over many years.
Strong birdhouse designs distribute those forces instead of concentrating them.
Balanced framing, solid mounting points, and careful joinery all help reduce localized stress, allowing the structure to age more gracefully.
The objective isn’t to prevent movement altogether.
It’s to control it.
Let Simplicity Do the Heavy Lifting
There’s a common belief that advanced woodworking requires increasingly complex construction.
In reality, the opposite is often true.
Many professional colony houses appear surprisingly uncomplicated.
That’s because unnecessary complexity has been removed.
Every feature has earned its place.
Every component serves a purpose.
Every detail contributes either to durability, maintenance, or structural integrity.
This kind of simplicity isn’t minimalism.
It’s refinement.
Removing unnecessary parts often creates a stronger project than adding more.
Build for Predictable Maintenance
The easiest maintenance routine is the one you actually follow.
That may sound obvious, but it’s one of the most overlooked principles in outdoor woodworking.
If annual cleaning requires awkward disassembly, maintenance tends to be delayed.
If hardware is difficult to reach, inspections become less frequent.
If replacement parts require custom fabrication, small repairs often become larger ones.
Professional builders solve these problems before construction is complete.
Access remains straightforward.
Hardware stays visible.
Components can be serviced individually.
Maintenance becomes part of the design rather than an inconvenience added afterward.
Pay Attention to Weight Distribution
Large colony houses can become surprisingly heavy.
Weight itself isn’t necessarily a problem.
Uneven weight is.
A balanced structure places less strain on mounting hardware, reduces twisting during high winds, and makes raising or lowering systems operate more smoothly.
As projects become larger, experienced builders think carefully about where every major component sits.
The result is a birdhouse that feels stable instead of top-heavy.
Good balance rarely attracts attention.
Poor balance always does.
Refine Your Joinery With Every Build
Precision isn’t something you achieve once.
It’s something you gradually develop.
Each new birdhouse offers another opportunity to improve:
- Cleaner layout work.
- More accurate cuts.
- Better-fitting joints.
- Stronger assemblies.
- More efficient construction methods.
These refinements may save only a few minutes during a single project.
Across many builds, they become the habits that define excellent craftsmanship.
Progress is usually measured in small improvements rather than dramatic breakthroughs.
Standardize What Works
Once you’ve found a design detail that performs exceptionally well, keep it.
Consistency creates reliability.
Whether it’s a particular roof overhang, a preferred hinge location, or a maintenance-friendly access panel, repeating successful solutions produces predictable results.
Professional builders often rely on proven dimensions and familiar construction techniques because experience has already validated them.
Innovation remains valuable.
So does knowing when not to reinvent something that already works.
Trust Observation More Than Assumption
One of the greatest advantages of maintaining your own colony house is the opportunity to learn directly from it.
Watch how water moves after heavy rain.
Notice where sunlight falls throughout the day.
Observe which hardware remains tight year after year.
Pay attention to how easily maintenance tasks are completed.
These real-world observations carry far more value than theoretical improvements.
The birdhouse itself becomes one of your best teachers.
Develop a Builder’s Eye
Experienced woodworkers often notice details others overlook.
A panel that has shifted by only a few millimeters.
A roof joint beginning to open.
A slight change in how an access door closes.
These observations aren’t luck.
They’re the result of familiarity.
The more time you spend building, inspecting, and maintaining colony houses, the more naturally these small details stand out.
That awareness allows problems to be corrected while they’re still simple.
It’s one of the most valuable skills experience provides.
Build With Pride, Not Perfection
Perfection is an appealing goal.
It’s also unrealistic.
Every project teaches something.
Every build includes at least one lesson you’ll carry into the next.
The objective isn’t to create a flawless birdhouse on your first attempt.
It’s to create one that performs well, improves with thoughtful maintenance, and reflects steadily growing craftsmanship.
A carefully built colony house doesn’t need to be perfect to become deeply rewarding.
It simply needs to be built with care.
The Quiet Difference Between Good and Exceptional
If you compare two completed birdhouses from across the yard, they may look remarkably similar.
The real differences often remain hidden.
One roof sheds water a little more efficiently.
One access door opens a little more smoothly.
One mounting system stays slightly more stable in strong winds.
One maintenance routine takes half the time.
These subtle improvements rarely attract attention individually.
Together, they define quality.
They’re the result of thoughtful decisions repeated consistently over many years.
That’s what professional craftsmanship really looks like.
Not dramatic innovation.
Not unnecessary complexity.
Just hundreds of small choices made well.
And those choices continue paying dividends long after the tools have been put away, quietly supporting every nesting season that follows.
Part 13. Frequently Asked Questions
“I’m building my very first purple martin birdhouse. Where should I spend more money—and where can I save?”
If your budget is limited, invest in the parts that determine how long the birdhouse will last rather than how decorative it looks. Quality lumber, corrosion-resistant hardware, a dependable support pole, and well-built access doors provide value year after year. Decorative trim, complex roof details, and purely cosmetic features can always be added later if you choose.
“Is cedar really worth the extra cost?”
For many builders, yes.
Cedar naturally resists moisture, insects, and decay while remaining lightweight and easy to work with. It also tends to stay more stable as weather conditions change, helping the birdhouse maintain tight joints and properly aligned compartments over time.
If cedar stretches your budget, pine remains a practical alternative when it’s properly protected and maintained.
“How long does it usually take to build a purple martin birdhouse?”
That depends on the design and your woodworking experience.
A straightforward project may be completed over a weekend, while a larger colony system with multiple compartments, removable access panels, and reinforced framing may take several days or longer.
Most experienced builders will tell you the same thing:
Rushing rarely saves time.
Careful measuring, dry-fitting components, and checking alignment throughout construction usually produce a better birdhouse with fewer corrections later.
“Should I build a small birdhouse first or go straight to a large colony house?”
A smaller project is often the better choice for first-time builders.
It allows you to learn construction techniques, understand maintenance requirements, and gain confidence before tackling a more ambitious design.
As your experience grows, expanding into a larger colony system becomes much more enjoyable because every improvement is based on practical knowledge rather than guesswork.
“How often should the birdhouse be inspected?”
At a minimum, inspect the structure before the nesting season begins and again after the season has ended.
Many owners also perform quick visual checks throughout the year, particularly after periods of severe weather.
These inspections don’t need to be lengthy. A few minutes spent checking hardware, roof panels, access doors, and the mounting system can identify small issues before they become larger repairs.
“What’s the easiest way to make future maintenance simpler?”
Think about maintenance while you’re still building.
Features such as hinged access doors, removable roof sections, standardized hardware, and clearly organized compartment layouts make annual cleaning and inspections far easier.
Good maintenance starts with thoughtful construction.
“Do I need a raising and lowering pole system?”
Not necessarily.
For smaller birdhouses, a fixed pole can work well when it allows safe access for routine maintenance.
As colony houses become larger and heavier, however, raising and lowering systems become increasingly practical because they simplify inspections, repairs, and seasonal cleaning while reducing the need for ladders.
“Why is my birdhouse still empty?”
This is one of the most common questions among first-time builders.
An unoccupied birdhouse doesn’t automatically indicate a problem with the construction.
Many factors influence occupancy, including habitat, visibility, migration timing, surrounding landscape, local purple martin populations, and seasonal conditions.
Continue maintaining the birdhouse, keep the installation site open and well cared for, and remain patient. Well-built colony houses often reward persistence.
“How long should a well-built purple martin birdhouse last?”
A birdhouse built from quality materials and cared for through regular maintenance can provide many years of dependable service.
Its lifespan depends less on age than on consistent care.
Cleaning, replacing worn hardware, tightening fasteners, and addressing minor weather damage promptly all help preserve the structure for future nesting seasons.
“Can I improve the design after it’s already built?”
Absolutely.
In fact, that’s how many excellent colony houses evolve.
As you gain experience, you may decide to strengthen the roof, improve ventilation, upgrade hardware, simplify maintenance access, or reinforce mounting points.
Each improvement reflects lessons learned through real use, making the birdhouse more practical without requiring a complete rebuild.
Products / Tools / Resources
The right equipment won’t replace careful craftsmanship, but it can make the building process smoother and the finished birdhouse more durable. If you’re assembling your own purple martin colony house, these are the items most builders find themselves reaching for again and again.
Recommended Lumber
- Cedar boards for long-lasting outdoor performance
- Quality pine boards for budget-friendly builds
- Exterior-grade plywood for roof panels and interior partitions
Essential Hardware
- Stainless steel exterior screws
- Galvanized construction screws
- Heavy-duty outdoor hinges
- Weather-resistant latches
- Structural bolts, washers, and locking nuts
- Corrosion-resistant mounting brackets
Measuring and Layout Tools
- Tape measure
- Combination square
- Carpenter’s square
- Straightedge
- Marking pencil
- Layout gauge
Accurate layout work at the beginning of the project prevents many alignment issues during assembly.
Cutting Tools
- Table saw
- Circular saw
- Miter saw
- Jigsaw
- Fine-tooth handsaw for finishing cuts
Choose the tools you’re comfortable using safely and accurately rather than trying to assemble an oversized workshop.
Drilling and Assembly Equipment
- Cordless drill
- Impact driver
- Drill bit assortment
- Countersink bit
- Screwdriver set
- Bar clamps
- Corner clamps
Clamps are often overlooked, but they make keeping assemblies square much easier during construction.
Surface Preparation
- Random orbital sander
- Sanding block
- Assorted sandpaper grits
- Wood files
- Shop vacuum or dust collection system
Smooth surfaces improve both appearance and finishing while making handling more comfortable.
Pole and Mounting Components
- Galvanized steel support poles
- Aluminum pole systems
- Raising and lowering pole mechanisms
- Heavy-duty mounting plates
- Foundation hardware
A strong support system is just as important as the birdhouse itself.
Maintenance Supplies
Keep a small kit dedicated to annual inspections so routine care becomes quick and convenient.
Include:
- Replacement exterior screws
- Spare hinges
- Replacement latches
- Adjustable wrench
- Socket set
- Screwdrivers
- Cleaning brush
- Small hand broom
- Work gloves
- Inspection flashlight
Having these items together encourages regular maintenance and makes small repairs easy to complete before they grow into larger problems.
Workshop Safety Equipment
Every woodworking project deserves the same attention to safety as it does to craftsmanship.
Keep these essentials within reach:
- Safety glasses
- Hearing protection
- Dust mask or respirator
- Work gloves
- Stable workbench
- Adequate workshop lighting
Good habits developed in the workshop carry through every future project, making each build safer, more accurate, and ultimately more enjoyable.