
A standard cupboard assumes the room was built for the cabinet.
Custom work begins with the opposite assumption: the room gets a vote.
The wall may lean. The floor may dip. An old pipe may occupy the exact corner where a perfect cabinet drawing says it should go. That is why the most reliable custom cupboard is not a completely new design every time. It is one proven construction system that can change size without losing its balance.
These custom face frame cupboard woodworking plans use that approach. The cabinet box, face frame, shelves, doors, fillers, and installation details remain connected, while the finished dimensions adapt to the actual kitchen, pantry, workshop, bathroom, or small space where the cupboard will live.
The Plan in One Glance
| Stage | What you decide | What it prevents |
|---|---|---|
| Measure | The real opening, depth, obstacles, and fixing points | Building a cupboard that cannot be installed |
| Choose | Base, wall, pantry, or freestanding construction | Using the wrong structural design |
| Define | Finished face-frame width, height, and depth | Confusing box size with finished size |
| Calculate | Clear opening, door, shelf, and filler dimensions | Doors that bind or gaps that look uneven |
| Build | Carcass first, face frame second | Hiding structural errors under trim |
| Fit | Doors and hardware after the frame is attached | Guessing at final reveals |
| Install | Level, shim, scribe, and secure | Fighting the room instead of fitting it |
Quick answer: To adapt a face-frame cupboard plan, measure the opening first, choose the finished outside dimensions of the face frame, calculate the clear opening and door sizes, then build the cabinet box, face frame, shelves, and doors in that order.
This is a parametric plan, rather than a fixed cabinet with one permanent set of measurements. The method stays steady. The dimensions move.
1. Measure the Room Before You Design the Cupboard
The first cut in a custom cupboard is not made with a saw.
It is made with a tape measure.
A cabinet can be perfectly square on the workbench and still be wrong for the room. Walls are rarely parallel. Floors slope. Trim steals depth. Handles collide. A measurement taken once, in one place, can quietly turn into a week of frustration.
Measure the Width in Three Places
Measure the intended opening:
- At the top
- In the middle
- At the bottom
If the numbers are different, resist the temptation to average them. Use the smallest usable measurement for the cabinet box, or plan deliberately for a filler or scribe strip.
For example, if an opening measures 635 mm at the top, 632 mm in the middle, and 628 mm at the bottom, the lower measurement is the one that controls the initial cabinet width.
The difference does not necessarily mean the project is doomed. It means the room needs to be acknowledged in the design.
Measure the Height From the Correct Reference Point
For a base cupboard, measure from the floor or supporting platform.
For a wall cupboard, measure from the line where the cabinet will hang.
For a pantry cupboard, measure the full available height and inspect the ceiling, crown molding, light fittings, and door swing above it.
Check the height on both sides. A floor or ceiling that slopes may require leveling, shimming, or a scribe detail.
Measure the Available Depth
Depth is more complicated than it looks.
Record:
- The maximum box depth
- The finished depth including doors
- The space required for handles
- The clearance for neighboring doors and drawers
- The position of pipes, outlets, radiators, and trim
- Any obstruction behind the cabinet
A cabinet box may be 300 mm deep, but the finished cupboard may project farther once the face frame, door, handle, countertop, or decorative trim is added.
Find the Structural Fixing Points
Before finalizing a wall-mounted or tall cupboard, locate:
- Wall studs
- Masonry fixing points
- Existing cabinet rails
- Electrical outlets
- Plumbing
- Heating pipes
A wall cupboard should be designed around secure structural attachment, not around hope.
Create a Measurement Worksheet
Write the measurements down before drawing the plan.
| Measurement | Record |
|---|---|
| Opening width at the top | |
| Opening width in the middle | |
| Opening width at the bottom | |
| Opening height on the left | |
| Opening height on the right | |
| Maximum cabinet-box depth | |
| Finished depth including doors and hardware | |
| Floor or wall slope | |
| Trim, pipes, outlets, or other obstacles | |
| Stud or fixing locations | |
| Door-swing clearance |
This worksheet becomes the quiet backbone of the entire build. Every later decision should be traceable back to it.
2. Choose the Cupboard Type Before You Cut
The face-frame method can produce several kinds of cupboards, but each one makes different demands on the structure.
Base Cupboards Need a Stable Foundation
A base cupboard sits on the floor or on a separate support structure.
Plan for:
- A toe kick or recessed base
- Leveling
- Countertop clearance
- Heavy shelf or drawer loads
- Secure attachment to a wall or neighboring cabinets
A base cupboard that rocks by only a few millimeters can make doors appear misaligned and countertops difficult to fit.
Wall Cupboards Need Serious Anchoring
A wall cupboard must be light enough to handle safely but strong enough to carry its intended contents.
Plan for:
- Stud locations
- A strong back or hanging rail
- A temporary ledger during installation
- Safe lifting
- Door and handle clearance
- Anti-tip protection where appropriate
Do not treat drywall anchors as a substitute for structural support when the cupboard will carry dishes, tools, books, or other heavy items.
Pantry Cupboards Need Internal Rigidity
Tall pantry cupboards are vulnerable to racking and shelf sag.
Consider:
- Fixed shelves
- Adjustable shelves
- A center divider
- A strong back panel
- Shorter shelf spans
- Pull-out storage
- Anti-tip hardware
The taller the cabinet, the more important the back and installation become.
Recommended reading: Easy Cupboard Woodworking Plans for Beginners: Build Your First Simple Storage Cupboard
Freestanding Cupboards Must Look Finished Everywhere
A freestanding cupboard may be viewed from the side or behind, so the construction must be attractive beyond the front face.
Plan for:
- Finished side panels
- A suitable back
- A stable base
- Anti-tip protection
- Clean joinery
- A finish that works from every visible angle
3. Let the Face Frame Set the Geometry
The face frame is not merely decorative trim.
It is the visible structure that ties the cabinet box to the doors. It establishes the opening, controls the reveals, protects the front edges, and gives the cupboard its furniture-like character.
The vertical pieces are the stiles. The horizontal pieces are the rails.
Before calculating the cabinet box, define the finished face frame.
Face-Frame Variables
Use these variables consistently:
Wf= finished outside width of the face frameHf= finished outside height of the face frameS= stile widthR= rail widthOw= door overlay on each sideG= gap between a pair of doorsC= inset-door clearance on each side
For a simple frame with equal-width stiles and rails:
Clear opening width = Wf − 2S
Clear opening height = Hf − 2R
If the finished frame is 610 mm wide and each stile is 64 mm wide:
Clear opening width = 610 − 64 − 64
Clear opening width = 482 mm
The same calculation applies to the height.
Overlay Doors
For a single overlay door:
Door width = clear opening width + 2 × side overlay
Door height = clear opening height + 2 × top/bottom overlay
For two doors covering one opening:
Each door width =
(clear opening width + 2 × outside overlay + center gap) ÷ 2
If the cabinet has a center stile, calculate each door from its own opening instead.
Inset Doors
An inset door fits inside the face-frame opening.
Door width = clear opening width − 2 × inset clearance
Door height = clear opening height − 2 × inset clearance
Inset doors reward precision but expose errors quickly. The frame must be square, the opening must be consistent, and the hinges must be adjusted carefully.
Do Not Subtract the Stile Width From Everything
This mistake appears often in custom cabinet projects.
The face frame is generally attached to the front of the cabinet box. It does not automatically mean that the stile width should be subtracted from the box width.
The box dimensions depend on how it is assembled:
- Are the top and bottom panels between the side panels?
- Do the side panels run full height?
- Is the frame flush with the box sides?
- Does the frame overhang the box?
- Are fillers included in the finished width?
Define those relationships before finalizing the cut list.
4. Choose Materials and Tools That Match the Job
A durable cupboard usually combines sheet goods for the carcass with solid wood for the visible frame.
Cabinet-Box Materials
Common choices include:
- Cabinet-grade plywood
- Birch plywood
- Furniture-grade plywood
- High-quality paint-grade sheet material
- Moisture-resistant material for suitable utility spaces
Measure the real thickness of the material. A panel labeled as 18 mm may not measure exactly 18 mm, and that difference matters when cutting dados, rabbets, shelves, and backs.
Face-Frame Materials
Use straight, stable hardwood for the stiles and rails.
Possible choices include:
- Birch
- Beech
- Maple
- Oak
- Poplar for paint-grade work
- Another stable local hardwood
Choose based on:
- Paint or stain
- Grain appearance
- Screw-holding strength
- Moisture exposure
- Availability
- The appearance of existing cabinetry
Back Panels and Structural Support
The back may be:
- A thin panel set into a rabbet
- A thicker structural panel
- A panel captured in dados
- A full rear panel that resists racking
A freestanding cupboard usually benefits from a stronger, more substantial back than a decorative wall cabinet.
Hardware and Consumables
Have the following available before assembly:
- Wood glue
- Cabinet screws
- Pocket-hole screws, if applicable
- Shelf pins
- Hinges
- Handles or pulls
- Drawer slides, if required
- Edge-banding material
- Sandpaper
- Primer or finish
- Shims
- Cabinet screws for installation
- Anti-tip hardware
Recommended guide: 25 Best Woodworking Hardware Products Every Serious Woodworker Should Own (Ranked by Performance)
Essential Tools
You do not need a full professional cabinet shop, but you do need reliable measuring and cutting.
Useful tools include:
- Tape measure
- Combination square
- Long straightedge
- Level
- Clamps
- Circular saw with a guide or track saw
- Table saw, if available
- Drill and driver
- Pocket-hole jig, dowel jig, or router
- Sander
- Router and suitable bits
- Stud finder
- Hinge template
- Sharp pencils or marking knife
A guided circular saw is often enough for accurate sheet-good cuts. The quality of the guide, blade, support, and measurement matters more than the name of the tool.
5. Turn Measurements Into a Real Cut List
A cut list should not be a collection of mysterious numbers. It should explain what each piece does and where its dimension came from.
The following template assumes a simple box in which the top and bottom panels fit between the side panels.
| Component | Quantity | Dimension logic |
|---|---|---|
| Cabinet sides | 2 | Box height × box depth |
| Top and bottom | 2 | Box width minus two panel thicknesses × box depth |
| Back panel | 1 | Adjust for rabbet, dado, or rear overlay |
| Fixed shelves | As required | Clear interior width × usable depth |
| Adjustable shelves | As required | Clear interior width minus shelf clearance × usable depth |
| Face-frame stiles | 2 | Finished frame height × stile width |
| Face-frame rails | 2 | Clear frame width × rail width |
| Center stile | Optional | Clear frame height × stile width |
| Doors | 1 or 2 | Calculated from overlay or inset dimensions |
| Filler strips | As required | Based on the actual opening and installation gaps |
Write the definition of “box width” beside the list. It may refer to:
- The outside width of the carcass
- The inside width between side panels
- The width behind the face frame
- The width excluding fillers
- The complete finished width
That one clarification can prevent an entire sheet of plywood from becoming unusable.
An Illustrative Calculation
Imagine a small wall cupboard with:
- Finished face-frame width: 610 mm
- Finished face-frame height: 762 mm
- Stile width: 64 mm
- Rail width: 64 mm
- Single overlay door
- Door overlay: 13 mm on each side
The clear opening becomes:
Opening width = 610 − 64 − 64 = 482 mm
Opening height = 762 − 64 − 64 = 634 mm
The illustrative door size, before hinge-specific adjustments, becomes:
Door width = 482 + 26 = 508 mm
Door height = 634 + 26 = 660 mm
These figures demonstrate the method. They are not universal cabinet standards. Your actual door should be sized from the finished opening you build, not from an earlier sketch.
6. Build the Cabinet Box Without Losing Square
The cabinet box, or carcass, provides the cupboard’s structure. The face frame can make the front look elegant, but it cannot rescue a badly twisted box.
Mark Every Panel Before Assembly
Mark:
- The inside face
- The front edge
- The top edge
- The reference edge
- The left and right sides
This feels fussy until the moment two similar panels are lying on the bench and one is accidentally turned backward.
Choose the Joinery
Possible methods include:
- Dados and rabbets
- Screws and glue
- Pocket holes
- Dowels
- Confirmat-style cabinet screws
- Biscuits for alignment
Dados and rabbets provide strong mechanical registration. Pocket holes are fast and accessible. Dowels and biscuits help align parts but still depend on accurate drilling.
Choose the method that matches your tools and your tolerance for setup work.
Recommended reading: Woodworking Cabinet Joinery Techniques: 15 Strong, Beautiful Joints Every Cabinet Builder Should Master
Dry-Fit Everything
Before glue touches the joints, assemble the cabinet dry.
Check:
- Panel orientation
- Shelf location
- Back-panel fit
- Door-opening direction
- Face-frame position
- Diagonal measurements
If the two diagonals are equal, the box is generally square. If they differ, correct the box now.
Install the Back
The back panel helps prevent racking and gives the cupboard a more finished appearance.
For a freestanding cabinet, it may be one of the main structural components. For a wall cupboard, it must support secure attachment without relying on a thin decorative panel alone.
7. Build the Face Frame: Where the Box Becomes Furniture
There is a moment in every cupboard build when the project changes character.
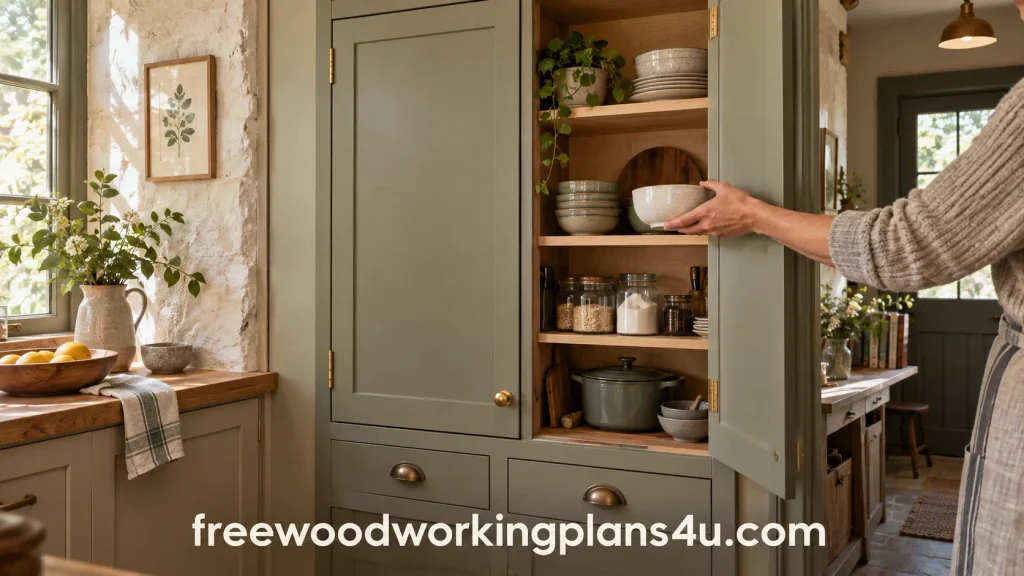
Until then, it is panels, edges, and clamps. Once the face frame is attached, the proportions become visible. The opening makes sense. The doors have somewhere to land.
That transformation is why face-frame construction remains so satisfying.
Prepare the Stiles and Rails
Mill the frame parts to a consistent thickness and width. Cut the stiles to the finished frame height. Cut the rails to fit between them unless your chosen joint requires another arrangement.
Inspect the visible faces for:
- Knots
- Tear-out
- Bowing
- Grain direction
- Color differences
- Defects that will become obvious after finishing
Arrange the best-looking faces toward the room.
Dry-Assemble the Frame
Place the parts on a flat surface and check:
- Overall width
- Overall height
- Diagonal measurements
- Clear opening size
- Center-stile position
- Grain direction
- Door layout
If the frame is wrong on the bench, it will be more wrong after glue, finish, hinges, and installation.
Join the Frame
Pocket holes are efficient for many face frames. Dowels and biscuits provide alignment. Mortise-and-tenon joints offer a traditional, highly durable connection when accurately made.
Apply glue carefully. Remove squeeze-out before it hardens, especially on visible faces that will later be stained.
Attach the Frame to the Box
Position the face frame according to the design:
- Flush with the cabinet sides
- Slightly overhanging the sides
- Recessed behind surrounding trim
- Extended with separate fillers
Clamp the frame and attach it from the inside or through concealed joinery where possible.
Check the frame at the top, bottom, corners, and opening. A frame that was square on the workbench can still shift while it is being fastened to the box.
8. Fit Shelves and Interior Storage
Shelves are often treated as an afterthought. In daily use, they are one of the parts that determine whether the cupboard feels thoughtfully designed or frustratingly cramped.
Adjustable Shelves
Adjustable shelves are useful for pantry, workshop, laundry, and utility storage.
Use:
- Shelf pins
- A shelf-pin jig
- Evenly spaced holes
- A consistent setback from the front edge
Do not place shelf-pin holes so close to the edge that the material becomes weak.
Fixed Shelves
Fixed shelves add rigidity, especially in tall or wide cupboards.
Use them when:
- The cupboard is tall
- The shelf carries heavy items
- The cabinet needs resistance to racking
- A center divider is not being used
- You want a permanent storage zone
Prevent Shelf Sag
To reduce sag:
- Shorten the shelf span
- Increase shelf thickness
- Add a hardwood front edge
- Add a center divider
- Use stronger material
- Reduce the expected load
A shelf designed for folded towels does not need the same structure as one intended for cast-iron cookware or power tools.
Recommended reading: Free Woodworking Shelf Plans: 25 Easy DIY Shelf Projects You Can Build This Weekend
9. Make the Doors Only After the Opening Is Real
Make the final doors after the face frame has been attached.
This order feels slower at first. It is faster in the end.
The finished opening—not the drawing—is what determines the door.
Choose a Door Style
Possible styles include:
- Slab doors
- Shaker doors
- Raised-panel doors
- Glass-front doors
- Beaded or tongue-and-groove doors
Slab doors are usually the simplest. Shaker doors create a classic furniture appearance and pair naturally with a face frame.
Recommended guide: The Complete Cabinet Door Woodworking Plans Guide: Build Beautiful Cabinet Doors That Look Custom Made
Build One Test Door
Before making a complete set, build one test door or a small mock-up.
Confirm:
- Door thickness
- Hinge position
- Frame clearance
- Overlay
- Reveal
- Handle location
- Swing direction
One test piece can save several expensive doors.
Install the Hinges
Follow the hinge manufacturer’s specifications for:
- Cup diameter
- Boring depth
- Mounting distance
- Overlay
- Door thickness
- Adjustment range
Install one pair first. Test the movement. Then repeat the setup.
Adjust the Reveals
A professional cupboard is often judged by the spaces between the doors rather than by the doors themselves.
Look for:
- Even top and bottom gaps
- A consistent center gap
- Alignment with neighboring doors
- Parallel edges
- Smooth closing
- No rubbing against the face frame
Small hinge adjustments can change the entire expression of a cupboard.
10. Finish the Cupboard Without Hiding Its Good Work
Finishing does not repair inaccurate joinery. It reveals it.
Sand Without Rounding the Important Edges
Rounded frame edges can make the doors appear uneven. Keep the stiles, rails, door edges, and reveals crisp.
Remove dust thoroughly before applying primer, stain, or clear finish.
Paint-Grade Finishing
Paint is practical when the frame and cabinet box use different materials.
A good sequence is:
- Fill defects.
- Seal porous edges.
- Apply suitable primer.
- Sand lightly.
- Apply the finish coats.
- Allow adequate curing time.
- Reinstall hardware carefully.
Stain-Grade Finishing
Stain emphasizes the relationship between the face frame, doors, and cabinet box.
Before committing:
- Test the stain on scraps
- Compare the frame and door wood
- Check how edge-banded plywood looks
- Consider a conditioner or washcoat
- Protect the finished surface with a compatible topcoat
Finish the Interior, Too
The inside of the cupboard should be durable and easy to clean. A clear finish or appropriate paint protects the plywood and gives the whole piece a more complete feel.
Recommended reading: Woodworking Finishing Supplies for Beginners: 17 Essentials for a Smooth, Durable Finish
11. Install It Like It Belongs There
Installation is where an accurate woodworking plan meets the irregularity of an actual building.
Base Cupboard Installation
- Prepare the support base or toe-kick platform.
- Check the floor for level.
- Position the cupboard.
- Shim low points instead of forcing the cabinet.
- Secure it to the wall or neighboring cabinets.
- Check the doors again after fastening.
- Add the countertop, trim, or toe kick.
A cabinet that was level before being secured can shift during fastening. Recheck it.
Wall Cupboard Installation
- Locate the wall studs.
- Mark the cabinet’s reference height.
- Install a temporary ledger or other support.
- Lift the cabinet safely.
- Secure it into structural support.
- Check level and plumb.
- Test the doors and hardware.
- Add trim or adjacent cabinets.
For larger cabinets, use a second person or a proper lifting aid.
Pantry and Tall-Cupboard Installation
A tall cupboard should be:
- Level at the base
- Plumb at the sides
- Properly shimmed
- Secured against tipping
- Checked for door clearance
Height adds leverage. Even a stable-looking pantry should be anchored.
Use Fillers and Scribe Strips Without Apology
Scribe strips and fillers are normal tools of custom cabinetmaking.
They solve:
- Uneven walls
- Narrow gaps
- Corner conditions
- Door-clearance issues
- Differences between old and new cabinets
Do not bend a square cabinet to follow a crooked wall. Let the cabinet remain square and let the filler absorb the building’s imperfections.
12. Change the Style, Keep the Structure
Once the dimensions and construction are reliable, the visible style can move in several directions.
Traditional Face-Frame Style
Consider:
- Shaker doors
- Inset doors
- Beaded details
- Oak, beech, or maple
- Brass or aged hardware
Modern Style
Consider:
- Slab doors
- Minimal reveals
- Flat paint colors
- Concealed hinges
- Simple pulls
- Flush side panels
Farmhouse or Utility Style
Consider:
- Painted face frames
- Open shelving
- Black hardware
- Beadboard backs
- Simple, visible joinery
The structure does not need to change every time the visual language changes. Keep the reliable cabinet system and customize the surface.
13. Budget, Time, and Material Waste
The cheapest cupboard is not always the one with the lowest material price.
A wasted sheet of plywood, a badly cut door, or a cabinet that needs to be rebuilt can erase any saving made by choosing inferior materials.
Where to Spend Carefully
Prioritize:
- Straight frame stock
- Accurate sheet-good cuts
- Reliable hinges
- Strong installation hardware
- A good measuring square
- Dust control and safety equipment
Where to Save
You may be able to save by:
- Using a circular saw guide instead of a table saw
- Choosing slab doors
- Building adjustable shelves later
- Using a simple paint-grade finish
- Reusing suitable hardware
- Designing around standard sheet sizes
Allow time for measuring, dry-fitting, sanding, finishing, curing, and installation. Cutting the parts is only one part of the project.
14. When Something Goes Wrong
The Cupboard Does Not Fit the Opening
Do not force it.
Check for:
- An out-of-square wall
- A measurement taken at only one point
- A missing filler allowance
- A face frame wider than planned
- Trim or hardware that was overlooked
The solution may be a scribe strip, filler, trim adjustment, or controlled recut.
The Face Frame Is Not Square
Measure the diagonals while the frame is still loose.
If the glue has cured, decide whether the error affects:
- Door fit
- Installation
- Visual alignment
- Structural integrity
A small cosmetic variation may disappear behind a door or trim. A major error should be corrected before finishing.
A Door Binds
Check:
- Hinge position
- Overlay
- Frame squareness
- Cabinet plumb
- Finish buildup
- Seasonal wood movement
Adjust the hinge before cutting the door. If the opening itself is wrong, fix the opening.
A Shelf Sags
Shorten the span, increase the thickness, add a hardwood front edge, install a divider, or use a stronger material.
The Wall Is Crooked
Use a filler or scribe strip. A square cabinet should not be twisted to match an uneven wall.
The Plywood Chips
Use a sharp blade, support the panel properly, and cut with the correct blade orientation for the tool. A sacrificial backing board can help with fragile sheet goods.
15. Questions You Ask When the Wood Is Already on the Bench
“Can I really adapt one face-frame cupboard plan to any width?”
Usually, yes. Recalculate the box, shelves, doors, and frame rather than stretching one dimension blindly. Very wide cupboards may need a center stile, fixed shelf, divider, or stronger back.
“Should I use plywood or solid wood for the whole cupboard?”
Plywood is commonly practical for the cabinet box because it is stable and comes in large sheets. Solid hardwood is usually better for visible stiles and rails. The right combination depends on the finish, moisture, budget, and materials available locally.
“Does a face frame actually make the cupboard stronger?”
A properly built face frame can add rigidity and protect the front edges of the cabinet box. The overall strength still depends on the carcass joinery, back panel, materials, and installation.
“Are inset doors too difficult for a first project?”
They demand more precision than overlay doors. The frame must be square, the opening must be consistent, and the hinge adjustments must be accurate. Overlay doors are generally more forgiving.
“Can I use pocket holes for the face frame?”
Yes. Pocket holes are a practical option when the joints are positioned accurately, glued properly, and kept out of visible areas.
“Do I need a table saw?”
No. A circular saw with a reliable guide can cut sheet goods accurately. A router, dowel jig, or pocket-hole jig can provide alternative joinery methods.
Recommended reading: Woodworking Without a Table Saw: 9 Better Alternatives for Every Cut, Project, and Workshop
“How much clearance should an inset door have?”
There is no single clearance that suits every door. Material, finish thickness, hinge system, frame accuracy, and seasonal movement all matter. Follow the hinge manufacturer’s specifications and test-fit a sample.
“How do I secure a wall-mounted cupboard?”
Fasten it into suitable structural support with appropriate cabinet screws or a properly designed mounting system. Do not rely on drywall alone for a heavy cabinet.
Products / Tools / Resources
A dependable tape measure and combination square will prevent more problems than an expensive specialty tool. Measure twice, mark clearly, and keep one reference edge on every panel.
For sheet goods, a circular saw with a straightedge guide or track saw is usually the most useful cutting setup. Add a fine-tooth blade and solid panel support before upgrading to larger machinery.
For face-frame assembly, a pocket-hole jig, dowel jig, or router setup can all work well. Choose the method you can repeat accurately. Consistency matters more than complexity.
A good set of clamps, a drill-driver, cabinet screws, wood glue, and a reliable sanding setup will carry most of the project. For doors, a hinge-boring jig or installation template is worth considering, especially when several doors must align.
For installation, keep a level, stud finder, shims, cabinet screws, a temporary ledger board, and anti-tip hardware nearby. These are not glamorous tools, but they are what make a finished cupboard sit securely and look intentional.
Useful resources include a printed measurement worksheet, a cabinet cut-list calculator, test-joint offcuts, hinge manufacturer instructions, and a local lumberyard or sheet-good supplier that can help confirm actual material thicknesses before cutting.