
There’s a particular satisfaction in turning a stack of flat panels into something solid and useful. This first cupboard keeps that process manageable: straight cuts, a simple box, one fixed shelf, and a back panel that helps hold everything square.
These easy cupboard woodworking plans for beginners make an open-front storage cupboard measuring 600 mm wide, 750 mm high, and 300 mm deep.
Add a 6 mm back panel and the overall depth becomes 306 mm. If you’re new to woodworking, the design gives you a clear first build—and room to add a door later.
The first cupboard: what you’re building and why it works
Think of the cupboard as a sturdy box with a shelf across the middle. There are no drawers to fit and no complicated joints to cut. The parts meet at right angles, and screws and glue hold them together.
The open front keeps this first version simple. It also lets you see what you might want to change before making a door: perhaps the shelf needs to move, or the cupboard belongs in a different corner. Build the box first. Decide on the door once you know the finished opening.
| Feature | Plan |
|---|---|
| Finished width | 600 mm (23 5/8 in) |
| Finished height | 750 mm (29 1/2 in) |
| Carcass depth | 300 mm (11 13/16 in) |
| Overall depth with back | 306 mm (about 12 1/16 in) |
| Main material | 18 mm plywood |
| Back panel | 6 mm plywood |
| Shelf | One fixed shelf |
| Front | Open; a door can be added later |
The measurements assume material that is actually 18 mm thick. “Three-quarter-inch” sheet stock may measure differently, so check the thickness before cutting. The metric dimensions are the controlling measurements here; imperial equivalents are rounded to the nearest 1/16 inch.
Materials and cut list
The five main pieces can be cut from a standard 1220 × 2440 mm sheet of 18 mm plywood, as long as you check the sheet size and allow space for the saw kerf. The back panel can come from a smaller piece of 6 mm plywood.
| Part | Quantity | Size |
|---|---|---|
| Side panels | 2 | 750 × 300 mm (29 1/2 × 11 13/16 in) |
| Top | 1 | 564 × 300 mm (22 3/16 × 11 13/16 in) |
| Bottom | 1 | 564 × 300 mm (22 3/16 × 11 13/16 in) |
| Fixed shelf | 1 | 564 × 300 mm (22 3/16 × 11 13/16 in) |
| Back panel | 1 | 600 × 750 × 6 mm (23 5/8 × 29 1/2 × 1/4 in) |
The top, bottom, and shelf fit between the side panels. Their 564 mm width comes from the cupboard’s 600 mm outside width minus two 18 mm sides:
600 − 18 − 18 = 564 mm
If your sheet material is thicker or thinner, adjust those three pieces before cutting. For another outside width, use this formula:
Inside part width = finished outside width − twice the actual side-panel thickness
What you’ll need
- 18 mm plywood for the sides, top, bottom, and shelf
- 6 mm plywood for the back
- Wood screws around 4 × 40 mm, with a few spares
- Wood glue suitable for the materials
- Short panel pins or brads for attaching the back, if desired
- Sandpaper and a paint, stain, or clear finish
- Optional edge banding or thin wood strips for exposed plywood edges
Tools for the build
- Tape measure, pencil, and square
- Circular saw with a guide, or another way to make straight cuts
- Drill and driver bits
- Clamps
- Countersink bit, if suitable for your screws
- Sanding block or sander
- Eye, hearing, and dust protection for cutting and sanding
A full sheet can be awkward to handle on your own. If that’s the part giving you pause, ask the supplier to make the first breakdown cuts. Whether you cut the panels yourself or have them cut, support the material securely, follow the tool maker’s instructions, and keep your hands clear of the blade path.
Lay out the cuts before you start
For a standard 1220 × 2440 mm sheet, one possible layout starts with two strips, each 300 mm wide.
From the first strip, cut:
- Two side panels, each 750 mm long
- One horizontal panel, 564 mm long
From the second strip, cut the remaining two horizontal panels. Before making the first cut, check the layout against your actual sheet and leave room for the blade’s kerf—the material the blade removes.
Label each piece as it comes off the saw: “left side,” “right side,” “top,” “bottom,” or “shelf.” It takes only a moment, and it’s much easier than trying to tell two similar panels apart once glue is on your hands.
For a closer look at planning cuts, see What Is Saw Kerf in woodworking? and Saw Kerf Calculator. If you’re also sorting out which tools are worth buying, Cheapest Way to Start Woodworking is a useful related guide.
Build the cupboard one step at a time
1. Mark the shelf position
Lay both side panels flat with their inside faces up. Measure 375 mm (14 3/4 in) from the bottom edge of each panel and mark the shelf centerline. Use a square to extend each mark across the panel.
Measure from the same reference edge on both pieces. The marks should match; if they don’t, the shelf may sit at an angle.
2. Drill pilot holes
Mark three screw positions for each connection: the top, the bottom, and the shelf. Space the screws along the 300 mm depth, keeping them centered across the thickness of the panel they will enter.
Drill clearance holes through the side panels and pilot holes into the edges of the top, bottom, and shelf. Plywood edges can split if a screw is forced in without a suitable pilot hole. Test the screw and hole size on an offcut first, and follow the screw maker’s guidance.
3. Attach one side
Place one side panel on a flat surface. Apply a thin layer of glue to the ends of the top, bottom, and shelf.
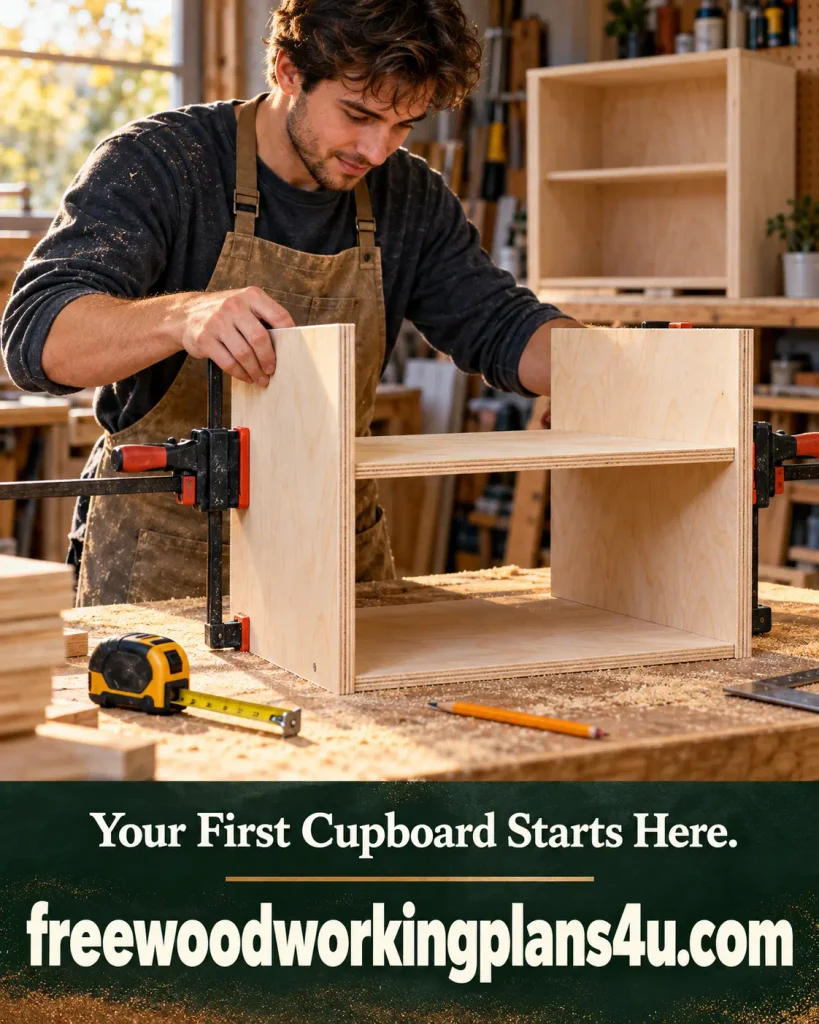
Set the top and bottom between the sides with their front and back edges flush. Align the shelf with the centerline marks. Clamp the pieces in place, then drive the screws through the side panel and into the panel edges.
If glue squeezes out, wipe it away according to the glue maker’s directions.
4. Attach the other side
Apply glue to the exposed ends of the top, bottom, and shelf. Set the second side panel over the joints, lining up its pilot holes with the pieces beneath it.
Clamp the assembly and drive the screws. Check that the front edges and rear edges are flush. Take a breath here and look along both sides of the box: small misalignments are easier to fix before the back goes on.
5. Check the box for square
Measure between opposite outside corners on one diagonal, then measure the other diagonal. The measurements should match or be very close. If they don’t, gently adjust the frame until they do.
This is the check that helps prevent a crooked cupboard. It also makes fitting a door later much easier.
6. Attach the back panel
Lay the cupboard face down on a flat surface. Position the 6 mm back panel over the rear, aligning it with the sides, top, and bottom.
Check the diagonals one more time. When the box is square, attach the back with short panel pins or suitable screws, spaced evenly around the perimeter. Make sure the fixings are short enough not to poke through into the cupboard. The back panel helps keep the shape from shifting, so attach it while the frame is aligned.
7. Sand and finish
Smooth rough edges and corners with sandpaper. Plywood edges can splinter, so take care and don’t remove too much material in one place.
Choose a finish that suits where the cupboard will live. Follow its directions for ventilation, drying time, and recoating. If you want a cleaner look along exposed plywood edges, add edge banding or thin wood strips before applying the finish.
Recommended guides:
Woodworking Finishing Supplies for Beginners: 17 Essentials for a Smooth, Durable Finish
Woodworking Cut List vs Materials List: How to Reconcile Them Before You Buy Lumber
Choosing wood for a beginner cupboard
Plywood suits this box-shaped design because it comes in broad, flat sheets. If you plan to paint the cupboard, small differences in the face veneer matter less. If you prefer a clear finish, choose a sheet with a face you like.
Solid wood can work too, but wide panels may move as humidity changes. MDF has a smooth face for paint, though it is heavier than plywood and its edges need careful finishing. Whatever you choose, check its actual thickness and update the cut list before you begin.
For this first build, keep the shelf fixed. Adjustable shelves are useful, but shelf-pin holes need to be accurately spaced. That’s a good detail to save for the next project.
Estimate the project cost
The sheet material will likely be the largest expense, especially if you have to buy a full sheet for a small cupboard. Before shopping, check whether a supplier can cut the plywood to size or whether suitable offcuts are available.
To estimate the cost, add the plywood, back panel, screws, glue, sandpaper, finish, and any optional edge treatment. Prices vary by location and material grade, so use current local prices. If you already own the basic tools, you may only need to budget for materials and consumables.
When the build doesn’t go quite to plan
The shelf looks uneven
Check that you measured both shelf marks from the same edge of each side panel. If the glue hasn’t set, loosen the clamps and realign the shelf.
The cupboard is out of square
Measure the diagonals before attaching the back. Adjust the frame until they match, then fasten the back while the frame stays in position.
A screw starts to split the plywood
Stop driving it. Check that the pilot hole is suitable and centered in the receiving panel’s edge, and that the screw isn’t too close to an end. Test on an offcut before continuing.
The exposed edges look rough
Sand them carefully, or cover them with edge banding or a thin wood strip. Work evenly along the edge so you don’t leave one section thinner than the next.
Questions that come up on a first cupboard build
“Do I need a table saw to build this?”
No. A circular saw and a straight guide can make the cuts. You can also ask a supplier to cut the pieces, then assemble the cupboard with a drill, driver, square, clamps, and measuring tools.
Recommended reading: Woodworking Without a Table Saw: 9 Better Alternatives for Every Cut, Project, and Workshop
“How can I tell if the cupboard is square?”
Measure from one outside corner to the opposite corner, then compare that diagonal with the other one. Matching measurements show the frame is square. Make the adjustment before attaching the back.
“My plywood isn’t exactly 18 mm. What should I change?”
Recalculate the width of the top, bottom, and shelf. Subtract the actual thickness of both side panels from the finished outside width. Check the updated measurements before cutting.
Recommended reading: How to Modify Woodworking Plan Dimensions Safely: What You Can Resize, What Must Stay Fixed, and How to Rebuild the Cut List
“Can I put a door on later?”
Yes. Build and square the open cupboard first, then measure the finished opening. Door size depends on the hinge and whether the door overlays the front or fits inside the opening. Follow the hinge maker’s measurements rather than guessing.
Recommended reading: The Complete Cabinet Door Woodworking Plans Guide: Build Beautiful Cabinet Doors That Look Custom Made
“Should I secure the cupboard to the wall?”
Consider its height, what you’ll store in it, and where it will stand. For extra stability—especially around children or heavy items—use an anti-tip restraint suitable for the cupboard and wall, with appropriate fixings.
Products / Tools / Resources
You don’t need specialty hardware for this simple storage cupboard. A few dependable basics will do:
- 18 mm plywood: for the side panels, top, bottom, and fixed shelf
- 6 mm plywood: for the back panel
- 4 × 40 mm wood screws and wood glue: for the simple box joints
- Circular saw with a guide: or supplier-cut panels if handling sheet stock is difficult
- Drill, driver, square, and clamps: for accurate assembly
- Sandpaper and a suitable finish: to smooth and protect the cupboard
- Optional edge banding: for a tidier plywood edge
- Anti-tip restraint: if the cupboard’s location or contents call for extra stability
- More project ideas: Browse the site’s free woodworking plans when you’re ready to choose your next build.