
The cut looked right. The part wasn’t.
If you are working from free woodworking plans or building from your own sketch, that small difference can be surprisingly hard to explain.
The measurements on the page may be correct. Your ruler may be accurate. The saw may have followed the line exactly. And yet, by the time the last piece is cut, something is short.
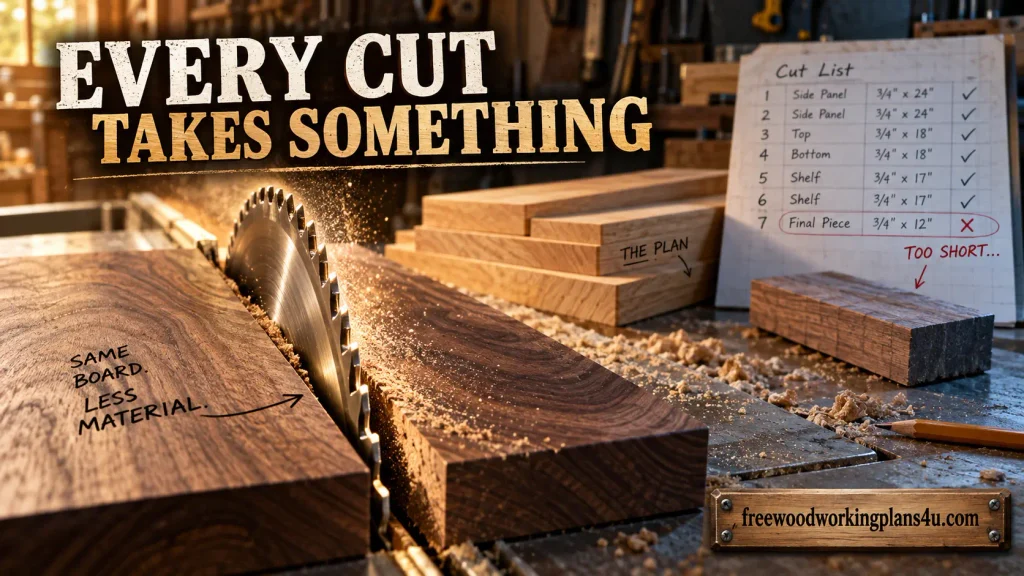
Often, the missing measurement is saw kerf.
Saw kerf is the width of material removed by a saw blade as it cuts through wood. A blade with a 1/8-inch kerf removes roughly 1/8 inch of wood every time it passes through a board.
That narrow strip becomes sawdust, but on a project with many cuts, those narrow strips add up quickly.
Kerf is easy to overlook because it disappears. The board does not announce that it has given up another fraction of an inch. It simply becomes a little shorter, a little narrower, and—occasionally—not quite large enough for the final part.
The quick answer: What is saw kerf?
Saw kerf is the width of the slot left in wood by a saw blade. It measures the material removed by the teeth, not just the thickness of the steel blade. For accurate woodworking, use the actual kerf of the blade when planning cut lists, repeated parts, joinery, and lumber yield.
The useful points are these:
- A full-kerf woodworking blade often removes about 1/8 inch of material.
- A thin-kerf blade removes less, often around 3/32 inch, though the actual measurement depends on the blade and setup.
- The teeth are usually set wider than the blade plate, so the finished cut can be wider than the steel body.
- Every material-removing cut consumes wood.
- The most dependable way to know a blade’s kerf is to test it on scrap.
That is the definition. The practical meaning is more important: kerf belongs in the same mental category as the finished length, the width of the stock, and the allowance for squaring an end. It is part of the material your project needs.
The hidden cut inside every cut
A saw cut gives you the part you want, but it also takes something away.
Suppose you need four pieces, each 12 inches long. On paper, that sounds like 48 inches of finished material. If three cuts separate those pieces and the blade removes 1/8 inch at each cut, the saw uses another 3/8 inch.
The minimum calculation becomes:
48 inches of finished parts + 3/8 inch of saw kerf = 48 3/8 inches
That is before you square a rough end, trim a defect, or allow for a cut that wanders slightly. A board that is exactly 48 3/8 inches long is technically enough for the arithmetic, but it is not a comfortable starting point.
The last piece is usually where the truth appears. The first three cuts look fine. The final part is the one that reveals whether the cut list accounted for the material that vanished between the lines.
Kerf is a planning issue, not just a blade detail
Woodworkers sometimes discuss kerf as though it belongs only in a blade catalogue. In practice, it touches nearly every stage of a project:
- choosing the length of rough stock
- laying out parts on a board or sheet
- cutting matching components
- calculating how many strips can be ripped
- fitting box joints and splines
- resawing lumber
- creating kerf-bent curves
- estimating how much material will become waste
Once you see kerf as part of the project plan, the calculations become much less mysterious. You are simply accounting for every place where material is removed.
What saw kerf measures—and what it does not
The word kerf refers to the cut or slot made by a saw and, more specifically, the width of that cut. The number that matters to a woodworker is the width left in the material after the teeth have passed through it.
The blade plate is not the finished cut
A saw blade has a steel body, often called the plate. The cutting teeth sit along its edge, and those teeth may extend outward from the centerline of the plate.
If you measure only the plate, you may record a number that is too small. The teeth are what establish the actual cutting path. That path—not the thickness of the steel—is the kerf you need for a cut list.
This distinction matters when comparing thin-kerf and full-kerf blades. A thin-kerf blade has a narrower cutting path, but its advertised measurement still needs to be checked against the real cut.
Tooth set creates room for the blade
Tooth set is the slight side-to-side arrangement of the teeth. Some teeth lean one way, others the other way, creating a channel wider than the blade plate.
That channel gives the blade room to move. Without enough clearance, the wood could pinch the blade, increase friction, or make the cut difficult to control.
Tooth design also influences the cut. A blade intended for fast ripping may remove material differently from a fine-tooth crosscut blade. Two blades with similar plate thicknesses can produce different kerfs because their tooth shape, set, grind, and intended use are not the same.
The real kerf can change in the workshop
The number printed on a blade package is a useful starting point. It is not a promise that every cut will be identical under every condition.
Actual kerf can be affected by:
- blade runout or wobble
- a damaged or bent blade
- movement at the arbor
- a loose insert
- tooth wear
- resin or dust buildup
- feed pressure
- blade deflection
- the density and thickness of the wood
- movement of the workpiece during the cut
A stable saw, a sharp blade, and well-supported stock give you a more predictable kerf. A poor setup can leave a cut wider than the blade specification suggests.
Why the last piece exposes a bad cut list
A cut list tells you the dimensions of the parts you want to keep. It does not automatically tell you how much stock must be available before the saw begins removing material.
Recommended guide: Woodworking Cut List vs Materials List: How to Reconcile Them Before You Buy Lumber
A useful planning formula is:
Required starting stock = total finished dimensions + total kerf loss + trim allowance
And:
Total kerf loss = number of material-removing cuts × actual kerf
The phrase “material-removing cuts” is important. The count is not always one fewer than the number of finished parts.
You may also need to:
- square one or both ends
- cut away a defect
- establish a straight reference edge
- remove a damaged corner
- separate a waste section
- make a second pass for accuracy
Example: four equal blocks from one board
You need four blocks that will finish at 12 inches each. Your measured blade kerf is 1/8 inch. The layout requires three cuts to separate the four pieces.
- Finished material: 4 × 12 = 48 inches
- Kerf loss: 3 × 1/8 = 3/8 inch
- Minimum before trimming: 48 3/8 inches
If the board is exactly that long, there is no practical margin. A rough end or a small mistake can take away the space needed for the final block.
A longer board gives you room to square the stock and clean up the ends. That extra length is not waste in the careless sense. It is insurance against the realities of working with wood.
Example: ripping four narrow strips
Imagine a board that is wide enough to produce four 2-inch strips. The finished strips require 8 inches of width. Three kerfs at 1/8 inch consume another 3/8 inch.
The theoretical minimum is:
8 inches of finished strips + 3/8 inch of kerf = 8 3/8 inches
That still leaves questions about the starting edge, the opposite edge, the actual board width, and whether either edge needs to be trimmed. If the board is sold by a nominal dimension, measure its real width before making the plan.
Cutting order can save more than kerf alone
A good cutting sequence protects usable offcuts and puts defects where they will do the least harm. It can also prevent you from turning a long, valuable piece into several awkward scraps.
For repeated crosscuts, a stop block can make the parts consistent. For sheet goods, a simple layout drawing can show where the blade paths will fall. For narrow strips, the order of operations may determine whether the remaining material stays wide enough to use.
Kerf is only a fraction of an inch, but a thoughtful layout makes every fraction work harder.
How to measure the actual kerf in your shop
The best kerf measurement belongs to a specific blade, saw, and material. A table saw blade can behave differently in oak than it does in pine. A bandsaw blade can leave one result while resawing a thick board and another while cutting a thin curve.
Use a repeated-cut scrap test
Take a piece of stable scrap similar to the material in your project. With the blade installed and the saw adjusted as it will be for the real work, make a series of consistent test cuts.
Measure the combined width of the material removed. Divide that total by the number of cuts.
For example:
1.20 inches of total removed material ÷ 10 cuts = 0.12-inch actual kerf
A repeated-cut test averages small variations and is usually more dependable than trying to judge a single dusty slot by eye.
The test should be made with a controlled setup. Support the stock properly, keep hands away from the blade, and follow the saw manufacturer’s instructions. Accuracy is not improved by making an unsafe test.
Test the blade on the same kind of material
A cut in soft pine is not always a good prediction for a cut in dense hardwood. Plywood introduces its own concerns, including splintering, layered construction, and the way the panel is supported.
For a demanding project, test the blade on material that matches the final work as closely as possible. Use the same insert, fence, feed style, and general setup.
Record the measurement
A small blade reference chart can save time later. Record:
- saw type
- blade model
- tooth count
- stated kerf
- measured kerf
- material tested
- date of the test
- notes about burning, deflection, or cut quality
The point is not to create paperwork for its own sake. It is to stop making the same guess every time a blade goes on the saw.
When a single-slot measurement is misleading
A single cut may look wider because of tear-out, crushed fibers, or a blade that moved during the cut. If the edges are rough, measuring the slot with a ruler can give you a false sense of precision.
A repeated test with clean, controlled cuts gives a more useful working number. If the project is tight or the material is expensive, plan with a small upward margin rather than pretending the measurement is exact to the last thousandth.
Typical saw kerf by saw type
There is no universal woodworking saw kerf. The blade, tooth pattern, saw, material, and setup all matter. These are practical starting points, not replacements for a test cut.
Table saw blades
Many full-kerf table saw blades are built around a 1/8-inch cut. Thin-kerf table saw blades remove less material and can be useful when lumber is limited or the saw has modest power.
The saw still needs a stable fence, a suitable insert, and proper support. A narrow kerf does not compensate for poor alignment.
Miter saw blades
Miter saw blades commonly sit near the full-kerf range, though the exact value depends on the blade. Kerf becomes noticeable when cutting several frame pieces, trim blocks, or other short parts that must match.
A stop block may control length, but it does not make the material loss disappear. The cut still consumes a strip of wood each time.
Circular saw blades
Circular saw blades vary considerably. A thin blade may reduce waste and require less power, while a heavier blade may offer greater stiffness.
When cutting plywood, kerf is only one part of the result. Support beneath the panel, blade deflection, tooth geometry, and splintering can affect the finished part. A narrow kerf is helpful only when the cut remains controlled.
Bandsaw blades
Bandsaw blades often leave a narrow kerf, which is valuable when resawing lumber or producing veneer. The blade can still drift, flex, or wander if the tension, tracking, guide setup, or feed direction is not right.
For book-matched pieces, the material saved by a narrow kerf matters—but so does the accuracy of the cut.
Handsaws and Japanese pull saws
Handsaws and Japanese pull saws can produce very narrow cuts, especially in fine joinery and flush-cutting work. Their kerf depends on the tooth pattern and the pressure used by the operator.
When a hand-cut groove must accept a spline, shim, or delicate fitting piece, test the blade on scrap first.
Jigsaws
A jigsaw blade can flex as it follows a curve, so the cut width may vary along the path. For rough shapes, that may not matter. For a template or close-fitting component, leave cleanup room and test the blade before cutting the final material.
Thin-kerf or full-kerf: which blade makes sense?
The smallest kerf is not automatically the best choice. Blade width is part of a larger decision involving saw power, stability, material, tooth geometry, and the finish you want.
When thin kerf earns its place
A thin-kerf blade can:
- reduce material loss
- preserve more expensive lumber
- place less demand on the saw motor
- help when working with narrow stock
- make repeated cuts more economical
That can be useful on a portable saw, a lower-powered machine, or a project where every strip matters.
When full kerf may be the better fit
A full-kerf blade can offer:
- greater stiffness
- resistance to deflection
- stable cutting on a powerful saw
- a broad range of heavy-duty designs
- predictable performance in demanding material
The best blade is the one that matches the machine and the job. If a thin blade flexes, burns, or wanders, the material saved in kerf may be lost again through poor cuts and discarded parts.
Look at the whole blade, not just the number
Tooth count, tooth grind, hook angle, plate quality, and blade balance affect the cut as much as kerf width. A narrow blade with the wrong tooth pattern may leave a rough surface. A wider blade in a stable setup may produce a more useful result.
Kerf answers one question—how much material does the cut remove? Blade selection answers several more.
Where kerf appears in joinery
Kerf is obvious when a saw separates a board, but it also influences several precision operations where a narrow difference can change the fit.
Box joints and finger joints
Some box-joint jigs use the saw blade as part of the indexing system. In that setup, kerf affects the width of the fingers and the spacing between them.
If the jig was built around one blade and a different blade is installed later, the fit can change. Test the setup before cutting the actual project parts.
Dados and grooves
A single saw kerf is not automatically the correct width for a dado or groove. If a panel must fit inside the slot, measure the panel and sneak up on the final width with test cuts.
A dado blade, router bit, or multiple-pass setup may be necessary. The finished fit matters more than the number printed on the blade.
Splines and thin inlays
A spline groove that is slightly too wide can leave a loose joint. A groove that is too narrow can crush the insert or force it into place.
This is a good situation for a test piece. Use the same blade, same stock thickness, and same cutting method before committing to a visible edge.
Kerf bending
Kerf bending uses a row of closely spaced cuts to make a board flexible enough to curve. Here, kerf affects the amount of wood removed, the spacing between cuts, the thickness of the remaining web, and the final bend radius.
Cut depth is critical. Leave enough uncut material for strength, and test the pattern on scrap before attempting the final curve. A kerf-bent piece can look delicate even when it is sound; a cut that goes too deep can make it fragile very quickly.
Resawing and veneer
When a bandsaw divides a thick board into thinner sections, every fraction of an inch lost to kerf reduces the material available for finished faces or matched veneers.
A sharp, properly tensioned blade and a stable feed path help protect yield. A narrow kerf helps, but a wandering blade can waste more material than the blade width alone suggests.
A kerf-aware workflow for accurate cuts
Kerf does not need to become a complicated engineering exercise. A short routine before cutting is enough for most projects.
1. Start with the finished dimensions
Write down the sizes the parts must have after cutting and cleanup. Do not begin with the rough board dimensions and hope the pieces will emerge correctly.
2. Count the cuts
Include crosscuts, rip cuts, trimming cuts, defect removal, and reference-edge cuts. If the process takes material away, it belongs in the plan.
3. Measure the blade
Use the actual blade whenever possible. If the blade is new or the project is precise, make a scrap test rather than relying on a general 1/8-inch assumption.
4. Add kerf to the stock requirement
Multiply the number of material-removing cuts by the measured kerf. Then add a separate allowance for squaring, cleanup, and defects.
5. Lay out the stock
Mark the reference edge and the waste side of each line. Place defects in waste areas, protect useful offcuts, and think through the cutting order before switching on the saw.
6. Cut one test part
Before batch-cutting all the matching components, make one part and check its length, square, and fit. A correction at this stage can save an entire board.
7. Repeat with a stable setup
Use a stop block, sled, fence, or other repeatable arrangement when the project calls for identical pieces. Check the setup periodically rather than assuming it cannot move.
Mistakes that cost more than a blade
Measuring the plate instead of the cut
The steel body may be narrower than the path made by the teeth. Use the completed cut as the reference.
Adding kerf to every finished dimension
Kerf is not a universal amount to add to every part. It belongs in the stock and cut-sequence calculation. Where the material is removed and how the part is referenced determine the correct allowance.
Forgetting the cuts that square the stock
The first cut may be made simply to create a reliable reference edge. If it is absent from the plan, the available stock can be overstated before the real parts are even started.
Cutting the whole batch before checking one piece
A wrong setup does not become right through repetition. Make one component first. Measure it. Fit it if possible. Then continue.
Trusting nominal lumber dimensions
A board sold under a familiar size may have smaller actual dimensions after dressing. Measure the stock itself before calculating how many parts will fit.
Treating every discrepancy as a kerf problem
A short part may also come from an out-of-square end, a wandering cut, blade deflection, fence misalignment, or a mark made on the wrong side of the line. Kerf is one part of the accuracy system, not the explanation for every mistake.
When the cut does not match the number on the package
Unexpected results are useful clues.
The parts are consistently too short
Check the side of the line on which the cut was made. Confirm that the kerf was included in the stock calculation and that the board was squared before layout.
Then measure the real cut. If the measured kerf is wider than expected, inspect the blade, insert, arbor, and alignment.
Recommended reading: How to Read Woodworking Cut Lists Without Costly Mistakes: Dimensions, Kerf, Grain Direction, and Cutting Order Explained
The blade burns or binds
Burning and binding can indicate a dull blade, incorrect tooth configuration, poor alignment, inadequate support, or feed pressure that does not suit the material.
Do not treat a burning cut as a normal kerf measurement. Stop, correct the setup, and then test again.
The first piece is right but later pieces drift
Look at the stop block, fence, miter gauge, workholding, and reference edge. A small change in how each piece is positioned can create cumulative error even when the kerf calculation is perfect.
The kerf is wider than expected
Look for tooth damage, blade wobble, runout, deflection, or movement in the workpiece. Resin and dust can also change how the blade runs.
Measure under normal working conditions and record the observed result. That is more useful than defending a catalogue number that does not match the cut in front of you.
Safety belongs in the measurement plan
A precise cut list is not worth much if the cutting setup is unstable.
Use the guard, splitter, riving knife, push tools, eye protection, hearing protection, and dust control recommended for your saw and material. Support long stock. Keep hands away from the blade. Follow the manufacturer’s instructions.
Plan the sequence so an offcut cannot become trapped between the blade and a fence. If the setup feels awkward or the stock wants to twist, stop and correct it before making another cut.
The safest cut is also usually the more accurate one. Stable stock and controlled movement make the actual kerf more predictable.
The questions that come after the first ruined part
“I measured the blade. Why is my cut still wider?”
The blade plate may be thinner than the tooth set, or the blade may be flexing, wobbling, or deflecting during the cut. Measure several controlled cuts in scrap and use the average rather than judging one rough slot.
“Do I need to account for kerf when making only one cut?”
It depends on the starting dimension. If you are cutting one finished part from a much larger board, the kerf may not affect whether the part fits. If the material is barely long enough, even one cut can matter.
“Is 1/8 inch the standard saw kerf?”
It is a common reference point for many full-kerf woodworking blades, but it is not a universal standard. Thin-kerf blades, circular saws, bandsaws, jigsaws, and handsaws can all produce different widths.
“Will a thin-kerf blade always save enough wood to matter?”
It can reduce waste, especially across many repeated cuts or during resawing. The benefit depends on the number of cuts and the value of the material. Blade stability and cut quality still matter.
“Does saw kerf matter with a handsaw?”
Yes. A handsaw removes material too. The effect is most noticeable in fine joinery, narrow stock, spline grooves, and projects where several parts must be cut from limited material.
“Is a saw kerf the same thing as a dado width?”
No. A dado or groove may be wider than one saw kerf and may require a dado blade, router bit, or several passes. Measure the part that must fit and test the cut.
“How do I account for saw kerf in a cut list?”
Add the finished dimensions of the parts, then add the actual kerf for every cut that removes material. Include a separate allowance for trimming, squaring, defects, and cleanup.
“What is the smallest kerf for woodworking?”
There is no single smallest kerf for every job. Handsaws, thin-kerf circular blades, and bandsaw blades can be narrow, but the useful choice depends on the saw, material, cutting operation, and required accuracy.
“Why does kerf matter so much in box joints?”
If a jig indexes from the blade or uses the blade width to establish finger spacing, a change in kerf changes the joint geometry. Use the same blade for setup and production, or recalibrate the jig.
Products / Tools / Resources
You do not need a workshop full of specialized equipment to work with saw kerf intelligently. A few dependable basics are enough:
- A steel tape measure or rigid rule: Use a readable scale for stock dimensions and rough layout.
- A combination square: Helpful for checking whether an end is square before you begin measuring parts.
- Digital calipers: Useful for checking blade thickness, panel thickness, groove width, and small differences between test pieces.
- A reliable scrap board: Keep offcuts for kerf tests instead of sacrificing project material.
- A blade kerf reference chart: Record the measured kerf of each blade you use, along with the saw and material.
- A thin-kerf blade: Worth considering when lumber yield, portable-saw power, or repeated cuts is the priority.
- A full-kerf blade: Often a sensible choice when stiffness and stability matter on a suitable saw.
- A zero-clearance insert: Can support fibers near the blade and reduce tear-out around narrow cuts; match it to the blade and saw.
- A cut-list worksheet or calculator: Useful for adding finished dimensions, kerf loss, trimming, and waste before cutting.
- The blade manufacturer’s specifications and saw manual: Keep them available for tooth configuration, compatibility, safe operation, and maintenance guidance.
- Eye, hearing, and respiratory protection: Use the protective equipment appropriate for the saw, material, and workshop conditions.