
The board shifts just as the plane settles into its stroke.
It is a small movement. Barely visible. But you feel it immediately: the change in pressure through your shoulders, the slight hesitation in the cut, the shaving that comes away thinner on one side than the other. You stop, reset the board, tighten the vise, and try again.
After a while, woodworking begins to feel like an argument with the furniture.
That is why the right woodworking bench for hand tool woodworking matters so much. It is not simply a table where tools happen to rest.
It is the surface that receives your force, returns it, and keeps the workpiece in the position you chose.
When the bench is stable, a plane feels more obedient. A chisel feels more precise. A handsaw follows the line instead of negotiating with the setup.
Quick answer: The best woodworking bench for hand tool woodworking is stable enough to resist planing, chiseling, and sawing forces; flat enough to provide a trustworthy reference; comfortable for your body; and equipped with workholding that matches your projects. A front vise, dog holes, a planing stop, holdfasts, and a bench hook usually matter more than drawers, polished hardware, or a fashionable design.
Table of Contents
- Why the Bench Controls More Than You Think
- Match the Bench to the Forces of Hand Tools
- The Anatomy of a High-Performance Hand-Tool Bench
- Build a Workholding System That Actually Works
- Choose the Right Dimensions and Bench Design
- Build, Buy, or Retrofit Your Woodworking Bench
- Test, Tune, and Use the Bench Like a Craftsperson
- Frequently Asked Questions
- Products / Tools / Resources
Part 1: Why the Bench Controls More Than You Think
A plane never cuts against empty space
Every hand tool has a conversation with resistance.
The plane pushes forward, and the wood pushes back. A chisel enters a mortise under the steady shock of a mallet. A backsaw moves through a joint with a push, a pull, and a rhythm that only works when the workpiece stays put. Even the apparently gentle act of paring a shoulder produces enough leverage to spoil a joint if the timber shifts at the wrong moment.
The bench receives all of that force.
It is the quiet partner beneath the visible work. You notice it most when it fails. A bench that slides, racks, twists, or flexes steals effort from every stroke. You press harder. You grip tighter. You start correcting for movement before you have even made the cut.
That compensation is tiring because it asks your body to do two jobs at once: control the tool and stabilize the workshop.
Three jobs hidden inside one bench
A useful hand-tool workbench performs three related jobs.
| Bench system | The question it answers | Typical components |
|---|---|---|
| Support | Will the bench stay where it is? | Weight, legs, stretchers, base, feet, leveling |
| Reference | Can I trust this surface and edge? | Flat top, straightedge, winding sticks, stops |
| Workholding | Will the timber stay where I put it? | Vise, bench dogs, holdfasts, planing stop, bench hook |
The best bench does not have to be historically pure. It has to be honest under pressure.
A Roubo bench, a Nicholson bench, an English joiner’s bench, a Scandinavian-style bench, and a well-modified commercial workbench can all be successful. Their shapes differ, but their purpose is remarkably consistent: give the woodworker a stable reaction point and a practical way to control the workpiece.
The trap of the beautiful, useless bench
Some benches look convincing until a plane meets a stubborn board.
The photograph shows a thick-looking top, a row of drawers, perhaps a pegboard and a glossy vise. What the photograph cannot show is the top flexing under pressure, the base swaying during a mortise, or the casters allowing the entire bench to creep across the floor.
Watch for the details that reveal a general-purpose table rather than a hand-tool workbench:
- A top that bends when you lean into the plane.
- A base that shifts diagonally when you chop.
- A vise mounted too low to support broad stock.
- Dog holes that do not line up with the vise or planing direction.
- A narrow surface that leaves long boards unsupported.
- Drawers and rails that block clamps beneath the top.
- Casters that make movement easy but resisting movement difficult.
None of these problems is dramatic on its own. Together, they change the character of the work. The bench begins to feel like an object you must manage rather than a tool that helps you.
The calmer promise of a proper bench
There is a particular pleasure in setting a board on a good bench. You hear the vise close. You feel the workpiece settle against the dog or stop. The plane enters the cut with a clean, even resistance. Your attention moves to grain direction, blade depth, and the sound of the shaving.
That is the real benefit of a woodworking bench for hand tool woodworking. It gives your mind one less problem to solve.
The bench becomes part of your technique. Not the most glamorous part. The part you trust without thinking about it.
Recommended guide: How to Build a Woodworking Bench Without a Table Saw: The Complete Beginner-Friendly Guide
Part 2: Match the Bench to the Forces of Hand Tools
Choosing a workbench becomes much clearer when you stop beginning with style. Start with the work instead. Ask what the board, tool, and your body will demand from the bench.
Face planing: forward pressure and downward force
Face planing looks peaceful from a distance. The plane glides. Shavings curl. The surface gradually takes on a new character.
Up close, the motion is more physical. You are pushing forward and down while keeping the plane aligned across the board. Difficult grain adds sideways resistance. A board that is not held securely begins to creep, and the first instinct is usually to tighten the vise harder.
That is rarely the complete answer.
For face planing, the bench needs:
- Enough mass or floor grip to resist sliding.
- A flat surface that supports the reference face.
- A planing stop, vise-and-dog arrangement, or another reliable restraint.
- Enough length for the board to remain supported through the stroke.
- A height that lets you use your body rather than only your forearms.
Good workholding spreads the force. It does not ask one screw, one jaw, or one small clamp to carry the entire operation.
Recommended guide: 25 Woodworking Projects With Hand Tools That Build Real Skills (Beginner to Advanced)
Edge jointing: leverage along the front edge
Edge jointing exposes a different weakness. The board may stand vertically in the front vise while the plane travels along its edge. The farther the board extends, the more leverage it creates against the bench.
The bench should provide:
- A vise jaw that holds without bruising or bowing the timber.
- Support below the board.
- A front edge clear of the plane’s travel.
- A board jack, sliding support, or auxiliary stand for long stock.
- A base that remains firm when the workpiece is offset from the center.
A small bench can be perfectly capable for boxes, drawer parts, and short components. The same bench may feel suddenly inadequate when you try to joint a long table edge. That is not a contradiction. It is the force pattern revealing itself.
Chiseling and mortising: shock without racking
Chiseling sends impact through the workpiece and into the bench. The bench does not need to be indestructible, but it cannot behave like a loose card table.
For chopping mortises or paring joinery, prioritize:
- Rigid leg-to-stretcher connections.
- A top that does not bounce noticeably.
- A vise or holdfast positioned close to the work.
- Clear space for your mallet hand.
- A surface that can accept ordinary dents and bruises.
If the bench rocks diagonally while you chop, adding another layer to the top may not solve the real problem. Racking often begins in the base. Look at the legs, stretchers, joints, braces, and contact with the floor.
Handsawing: controlled movement in two directions
Hand sawing asks for a curious combination: the workpiece must be held firmly, but your arm needs a clear, natural path. A bench hook, front vise, doe’s foot, or holdfast may be more useful here than a complicated tail-vise arrangement.
For sawing, look for:
- A clean, accessible front edge.
- A stable place for a bench hook.
- Enough top overhang for clamps or holdfasts.
- Support for the far end of a board.
- A workholding method that keeps your fingers away from the saw path.
The safest setup is often the one that makes the right hand position feel obvious. When the workpiece is naturally supported, you do not have to improvise with a knee, a loose scrap, or a pile of tools that happens to be within reach.
Paring, marking, and fine joinery: small movement becomes visible
Fine joinery is quiet, but it is not forgiving. A fraction of movement while you pare a hinge mortise or establish a shoulder can become a gap that sanding will only disguise.
For detail work, the bench needs:
- A clean, flat reference surface.
- A vise that closes parallel to the work.
- Fast repositioning through dogs, holdfasts, or a responsive vise.
- Good light and uncluttered access.
- A working height that does not force you to fold over the project.
A bench optimized only for heavy planing can feel awkward during dovetails or small cabinet work. The strongest setup is not always the most comfortable one. A good hand-tool bench balances resistance with access.
The force-to-feature map
| Operation | What is trying to move? | Bench response |
|---|---|---|
| Face planing | Board forward; bench backward | Mass, planing stop, dogs, flat top |
| Edge jointing | Board sideways or downward | Front vise, support below, rigid base |
| Mortising | Workpiece and base under impact | Racking resistance, close workholding |
| Crosscutting | Workpiece under push-pull movement | Bench hook, vise, clear front edge |
| Dovetailing | Small parts under precise strokes | Flat top, accurate vise, visibility |
| Glue-up | Pieces sliding under pressure | Level surface, open access, easy cleanup |
This is more useful than a list of fashionable bench features. If a feature does not improve support, reference, or workholding, it is an option—not the foundation.
Part 3: The Anatomy of a High-Performance Hand-Tool Bench
The phrase “woodworking bench” covers a family of designs. What makes one work is not its silhouette. It is the relationship between its top, base, vise, reference features, and access around the work.
The benchtop: your primary reference surface
The benchtop carries more responsibility than any other single part. It supports the workpiece, receives the vise and dog holes, provides a place to mark out joinery, and becomes the reference plane for operations that depend on accuracy.
A useful top should be:
- Flat enough to support accurate work.
- Thick or structurally stiff enough to resist noticeable flex.
- Durable enough for vise bolts, dog holes, and ordinary abuse.
- Repairable when a project leaves a scar.
- Large enough for the projects you genuinely build.
Solid wood, laminated construction lumber, beech, maple, ash, and other dense woods are all workable choices. A laminated top can be a remarkably good value because stiffness comes from structure and thickness rather than from buying expensive, wide, flawless boards.
A plywood or torsion-box design can also make sense when weight and portability matter. The tradeoff is that a lighter bench usually needs a more deliberate way to resist movement—anchoring, clamping, a low center of gravity, or a workholding design that does not depend on sheer mass.
The material is not the whole decision. The finished structure has to answer the forces created by your tools.
Flatness without turning the bench into a shrine
A hand-tool bench does not need a museum-quality surface. It needs a trustworthy one.
There is a useful difference between:
- Flat enough to support the work.
- Flat enough to serve as a reference while you check a board with winding sticks.
- Perfectly polished and free of every mark.
The first two are practical. The third is mostly vanity.
A working bench will gather pencil lines, glue spots, dents, finish, and the occasional plane track. That is not evidence that it has failed. It means it has been used. A sacrificial hardboard cover can protect the top during glue-ups, finishing, or messy repairs, provided you remove it when you need the real reference surface.
The base: where movement is either stopped or invited in
The base transfers force from the top to the floor. It includes the legs, stretchers, aprons, braces, joinery, feet, leveling hardware, and sometimes a lower shelf.
Look for:
- Stable leg geometry.
- Strong connections between legs and stretchers.
- Little side-to-side sway.
- Feet that sit securely on the actual floor.
- A way to correct an uneven floor without making the bench unstable.
A lower shelf can add useful mass. It can also become a wall of obstructions. Before filling the space beneath the bench with drawers and cabinets, test how you will clamp across the top, reach vise hardware, fit a board jack, and use a holdfast.
Storage is helpful only when it leaves the bench free to work.
The vise: powerful, but never the entire system
The vise is often the first thing people notice when they shop for a woodworking bench. It is important, but it is not a substitute for a stable top and thoughtful workholding.
Common arrangements include:
- Front or face vise: Useful for edge work, small assemblies, and boards held against dogs.
- Leg vise: Offers deep clamping and excellent traditional access.
- Tail vise: Works with a row of dog holes to secure boards along the bench.
- Wagon vise: Puts a moving dog into the top while keeping the surface relatively clean.
- Shoulder vise: Provides strong front-edge access but asks for careful construction.
The best vise is the one that fits the work, the bench, and the woodworker. A premium vise mounted out of alignment is still a poor workholding solution. Hardware cannot repair a bad reference surface.
Dog holes: small openings with a surprisingly large job
Bench dogs let a row of holes become a flexible set of stops and clamping points. One dog can stop a board during planing. Another, working with the vise, can press the board down and back against the bench.
When laying out dog holes, consider:
- Alignment with the vise.
- Distance from the front edge.
- Spacing across the useful length of the top.
- Round versus square dogs.
- The clearance beneath the top.
- The workpieces you expect to hold.
Do not drill the holes because a drawing happens to show them there. Establish the vise position, flatten the top, choose a reference edge, and lay out the pattern from a system you can reproduce.
Accuracy here pays you back every time you plane a board.
Planing stops and bench hooks
A planing stop may be a fixed block, a removable stop, a toothed stop, or a feature built into the end of the bench. It earns its place by keeping a board from traveling forward without forcing you to clamp the work more tightly than necessary.
A bench hook is even simpler—and often more useful than a beginner expects. Its lip catches the front edge of the bench while the upper fence supports the workpiece during sawing or chiseling. It creates a repeatable station from scraps, not from expensive hardware.
Some of the best workholding solutions are not the most impressive ones. They are the ones you reach for without thinking.
Holdfasts and middle-of-bench clamping
Holdfasts carry the bench’s reach beyond the vise. They can secure wide boards, irregular pieces, carving blanks, temporary guides, and work placed near the center of the top.
Their performance depends on:
- A top suited to the holdfast design.
- Correct hole diameter and depth.
- Enough clearance around the workpiece.
- A striking or screw mechanism you can control.
The ability to hold work in the middle of the bench is one of the clearest differences between a purpose-built hand-tool bench and a basic table.
The underside: the place where ambition creates obstacles
The underside of a bench rarely appears in the finished photograph. It should be part of the design conversation from the beginning.
You may need access for:
- A clamp across the width.
- A holdfast mechanism.
- Vise hardware.
- A board jack.
- A temporary fixture or support.
If the underside is crowded, the bench can look beautifully organized and become less useful in practice.
Part 4: Build a Workholding System That Actually Works
Workholding is not a contest to see how tightly you can crush a board. The goal is quieter and more precise: hold the work securely, keep it accessible, and avoid distorting it while you cut.
Start with the workpiece, not the hardware catalog
Before choosing a vise or drilling a dog-hole row, picture the timber you expect to handle.
Narrow boards for edge jointing. Wide panels for face planing. Short components for dovetails. Long rails and stiles. Cabinet sides. Carving blanks. Small repair parts that disappear inside a large vise.
Every shape asks for a slightly different grip.
A vise that feels perfect for a narrow board may be awkward for a wide panel. A tail vise that shines during long-board planing may not help much with a small irregular part. A versatile bench is not one with every accessory. It is one that gives you more than one sensible way to secure the work.
The front vise and the first reference edge
For many woodworkers, the front vise becomes the most-used feature on the bench. It should be mounted so the moving jaw lines up with the top and the workpiece can be supported without a pile of improvised packing.
Pay attention to:
- Jaw alignment with the benchtop.
- Jaw width.
- Vertical depth for the stock you use.
- Smooth travel and a secure lock.
- Clearance for your hands and the plane.
If the vise jaw sits below the top, thin boards can bow when you tighten the screw. If the jaw projects too high, it becomes an obstacle. If the hardware sits where your legs or clamps need to go, the vise may be strong and still badly placed.
Dog holes and the planing chain
A classic setup combines a vise or tail vise with a row of bench dogs. The top supports the board. One dog stops it. The vise or moving dog applies pressure from the opposite end.
The sequence is simple:
- The flat top supports the board.
- The dog stops forward movement.
- The vise or second dog prevents the board from retreating.
- The reference face remains open to the plane.
The system works because each component has a role. You are no longer asking one clamp to solve every direction of movement at once.
Do you really need a tail vise?
A tail vise is useful when you regularly plane long boards, work with repeated stock dimensions, or want a built-in moving dog. It is not a moral requirement for serious woodworking.
You may be perfectly well served by:
- A front vise and a row of dog holes.
- A removable planing stop.
- Holdfasts.
- A bench hook.
- Simple wedges and auxiliary stops.
The right question is not “What does a traditional bench have?” It is “What keeps my work still with the least fuss?” A simpler system that is finished and used will beat a complicated system that remains a future project.
Holdfasts for fast, flexible clamping
Holdfasts are useful when the work does not fit naturally in the vise:
- Wide boards.
- Odd-shaped pieces.
- Carving blanks.
- Temporary guides.
- Work near the center of the bench.
Place the holes where the holdfast can reach the working zones you actually use. A perfectly regular grid may look comprehensive, but a smaller, intentional pattern is often easier to drill accurately and easier to live with.
Bench hooks for sawing and small work
A bench hook turns the front edge of the workbench into a repeatable sawing station. It is quick to build, easy to replace, and simple to adapt for a particular saw or workpiece.
Reach for it when:
- The part is too small for the vise.
- You need a fast, repeatable position.
- You want your free hand away from the blade path.
- You are cutting small components or joinery parts.
Inspect the hook’s lip from time to time. A loose bench hook is not merely annoying. It changes the safety and accuracy of the whole operation.
Supporting long boards
Long stock has a way of exposing every missing feature. Held at one end, it sags, twists, or rotates. A board jack, sliding deadman, auxiliary stand, or temporary support can make the same bench feel entirely different.
The support should:
- Sit at the correct height.
- Keep the board aligned with the vise or top.
- Stay clear of the plane’s travel.
- Adjust without turning every setup into a project.
The room matters too. A bench does not exist alone; the floor, wall, end clearance, and space around it all participate in the workholding system.
Workholding for left-handed and right-handed users
Handedness affects vise placement, dog-hole direction, planing motion, and the side from which you approach the work.
Right-handed conventions are common because many traditional benches were built around them. They are not laws of woodworking. If you are left-handed, arrange the bench around the motion that feels natural: clear tool travel, relaxed shoulders, a good view of the reference edge, and no awkward reach across the work.
The bench belongs to the person using it.
A practical workholding checklist
Before you call the bench complete, ask whether you can:
- Hold a narrow board vertically for edge jointing.
- Secure a wide board for face planing.
- Clamp work near the middle of the top.
- Saw a small piece without improvising support.
- Hold long stock without excessive sag.
- Release the work quickly without over-tightening.
- Reach the vise, dogs, and holdfasts without clearing half the bench.
If one answer is no, you may not need a new workbench. You may need one missing feature.
Part 5: Choose the Right Dimensions and Bench Design
There is no single perfect workbench dimension. There is a bench that suits your body, your room, and the stock you actually touch.
Bench height: make a mockup before you make a commitment
Bench height changes leverage, posture, visibility, and fatigue. A lower surface often feels better for heavy planing. A higher surface may feel better for marking, carving, and fine joinery.
Before cutting the legs, make a temporary mockup from stacked boards, a sacrificial top, or a sturdy table. Try three movements:
- Push a plane forward as though flattening a board.
- Hold a chisel vertically for chopping.
- Mark and pare a small joint.
Notice what your shoulders, wrists, and lower back are telling you. The right height is usually a compromise between forceful work and precision work.
Do not copy a famous bench dimension without testing it against your own body. A beautiful bench built for someone much taller or shorter can create fatigue in every session.
Length: support without losing the work
A long bench supports more stock and gives you space to leave tools beside an active project. It also consumes floor space, changes how far you reach, and may invite you to spread a project beyond comfortable control.
Ask:
- What is the longest material I actually work with?
- Do I need to leave a project assembled overnight?
- Can I walk around the ends?
- Will the bench sometimes come away from the wall?
- Can the base stay rigid at the length I want?
In a small workshop, a shorter bench with excellent workholding often outperforms a long bench that blocks movement.
Depth: useful surface versus unreachable surface
Depth gives a panel somewhere to rest, but excessive depth can make the far edge a place you can no longer work comfortably. The surface area looks generous until your shoulders tell you that you are reaching across too much timber.
The useful question is not “How deep should a traditional bench be?” It is “Where can I reach while keeping the work secure and the tool controlled?”
The main bench design families
Roubo-style bench: mass with a purpose
A Roubo-style bench emphasizes a thick top, substantial legs, and serious workholding. It suits woodworkers who expect to do a lot of hand planing, chopping, and furniture work.
Its appeal is not only historical. The design makes a clear promise: the bench will meet force with force. The cost is weight, material, construction time, and limited portability.
For a permanent shop and demanding hand-tool work, that trade can be worthwhile. For a temporary space, it may be more bench than life currently allows.
Nicholson-style bench: practical, open, and forgiving
A Nicholson bench uses a straightforward structure that can be built from accessible materials. It attracts beginners for good reason: it offers a useful top, apron structure, and room for practical workholding without requiring elaborate joinery everywhere.
It can be made robust, modified easily, and repaired without drama. It may not have the sculpted appearance of a traditional laminated bench, but its value is measured where the plane meets the board.
English joiner’s bench: front-edge control
An English joiner’s bench usually emphasizes front-edge access, a substantial vise arrangement, and a layout suited to furniture joinery. It can be an excellent fit when edge work, small components, and precise positioning dominate your projects.
The danger is trying to reproduce every traditional feature before you have a working bench. Start with the workholding you need. Add the refinements when your hands tell you why they matter.
Scandinavian-style bench: flexible precision
Scandinavian-style benches often balance traditional hand-tool work with thoughtful ergonomics and flexible clamping. They can suit woodworkers who want a refined, adaptable platform without committing to the full bulk of a monumental bench.
The name alone tells you very little. Inspect how the design resists racking, where the vise sits, how the dog holes work, and whether the bench can be repaired or adjusted.
Moravian or knockdown bench: a bench that can travel
A Moravian or other knockdown bench makes sense when the workshop is rented, shared, temporary, or reached through a narrow doorway. Portability is the attraction, but rigidity is the test.
The joints must lock together firmly enough that the assembled bench behaves like a permanent structure. “Portable” should describe the journey between workshops, not the sensation under a plane.
Hybrid bench: hand tools with modern compromises
A hybrid bench combines a hand-tool top and workholding system with features borrowed from modern workbenches: a replaceable top, mobile base, modular accessories, or power-tool support.
It is often the practical choice for a mixed workshop. Just be suspicious of mobility that undermines resistance. If the bench rolls easily when you are planing, convenience has become a liability.
Design comparison table
| Bench design | Best suited to | Main advantage | Main tradeoff |
|---|---|---|---|
| Roubo-style | Heavy hand-tool furniture work | Mass and rigidity | Expensive or slow to build |
| Nicholson-style | Beginners and practical builders | Simple, adaptable construction | Less refined appearance |
| English joiner’s | Joinery and edge work | Excellent front access | More complex layout |
| Scandinavian-style | Flexible precision work | Balance of features and ergonomics | Details vary widely between designs |
| Moravian/knockdown | Shared or temporary workshops | Portable and repairable | Joints must be very rigid |
| Hybrid | Mixed hand and power tools | Versatility | Mobility can reduce stability |
How much weight does a hand-tool bench need?
There is no magic weight number. Floor grip, base geometry, top thickness, and workholding all influence behavior. A lighter bench can perform well if it is anchored, clamped, or deliberately designed around the forces it will meet. A massive bench can still be irritating if it racks or lacks a useful way to hold the work.
Test the behavior instead:
- Does the bench move when you plane?
- Does it sway when you chop?
- Does the workpiece shift inside the vise?
- Does it remain stable when the force is offset from the center?
Buy or build for the answer you need, not for a specification that looks impressive in a listing.
Part 6: Build, Buy, or Retrofit Your Woodworking Bench
The right ownership path depends on what you want woodworking to give you now. Sometimes the bench is the project. Sometimes it is the thing standing between you and the project you actually want to build.
Build your own bench when the making matters
Build when you want:
- A custom height or footprint.
- A bench shaped around an unusual room.
- Control over vise and dog-hole placement.
- Practice with cut lists, squareness, lamination, and hardware.
- A long-term project that grows with your skills.
A bench build teaches more than bench building. It teaches you to establish a reference, check a base before it is hidden, fit hardware patiently, and correct small errors before they become structural ones.
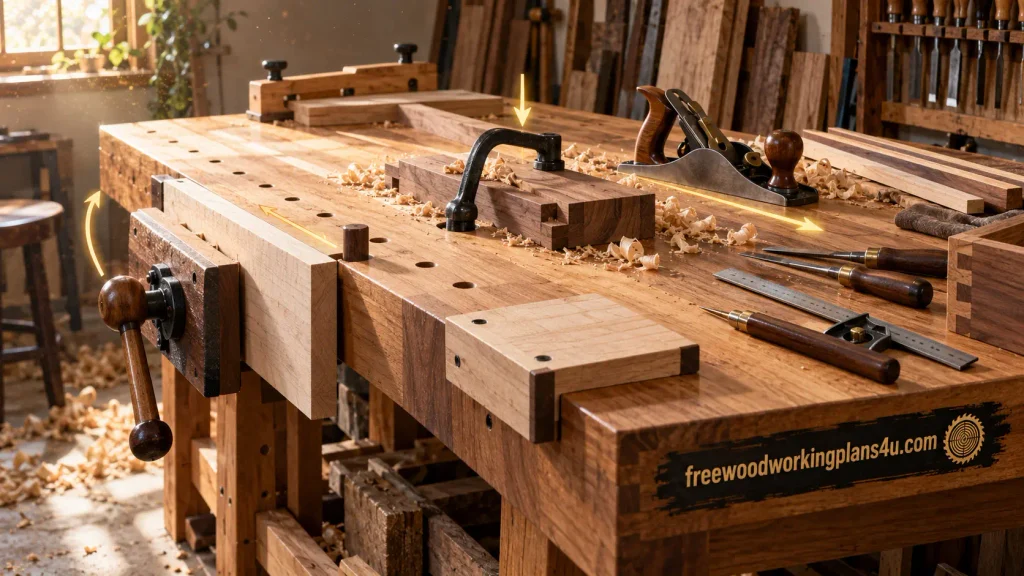
The danger is postponement. A half-built bench in the corner cannot hold a board. Keep the first version functional. Decorative details can wait for a weekend when you want them.
Buy when time and momentum are the real priorities
Buying can be the intelligent choice when:
- You want to begin working immediately.
- You do not yet have the tools to build a rigid bench.
- Your workshop situation may change.
- You are still discovering which features matter to you.
- You would rather spend your time on furniture than workshop furniture.
When inspecting a commercial bench, let your hands distrust the phrase “heavy-duty” until you have checked the top, base, vise, leveling, and underside clearance. A photograph cannot show you whether the bench walks across the floor.
Retrofit a basic bench instead of throwing it away
Retrofitting often makes the most sense. A general-purpose bench may already have a useful footprint and base. Improve it in the order that real work demands:
- Eliminate rocking and improve floor contact.
- Add useful mass without blocking clamps.
- Reinforce or replace the top.
- Install a suitable front vise.
- Add a modest, accurate dog-hole pattern.
- Build a planing stop and bench hook.
- Add holdfast holes if the top supports them.
Every upgrade should remove a specific frustration. That keeps money and effort connected to actual woodworking rather than to an endless search for the perfect workshop.
A simple build sequence for a functional bench
Step 1: Define the work before defining the dimensions
Write down the operations you expect to perform most often: planing, edge jointing, mortising, sawing, carving, assembly, or repair. Then list the longest, widest, and smallest workpieces you need to hold.
This short exercise prevents a common mistake: building a bench for an imaginary future shop while ignoring the work waiting in the present one.
Step 2: Build a base that refuses to rack
Start with square legs, reliable stretchers, and a structure that resists diagonal movement. Dry-fit the base. Push it from both directions. If it moves now, the top will not perform a miracle later.
Treat the base as a working component, not as something that disappears beneath the top.
Step 3: Add the top with movement and repair in mind
The top needs enough thickness or structural stiffness for the workholding hardware you plan to use. Attach it securely, but respect the seasonal movement of solid wood. A top that cannot move may split, bow, or pull hardware out of alignment.
Step 4: Flatten the working surface
Flatten the top before drilling dog holes. Establish a reference edge. Check with a straightedge and winding sticks. Remove high spots gradually rather than trying to force the entire surface perfect in one heroic session.
The goal is a reliable working plane, not a story about how much material you removed.
Step 5: Install the primary vise
Mount the vise so its jaw aligns with the top and its hardware does not interfere with legs, clamps, or tool travel. Test thin and thick stock before you commit to the final installation.
The vise should feel like an extension of the bench, not an accessory bolted onto its side.
Step 6: Lay out dog holes and stops
Use the vise position, the reference edge, and your typical workpieces to establish the layout. Drill accurately. Clean the holes. Add a planing stop or bench hook so the bench can hold work without depending on one method.
Step 7: Test before adding refinements
Plane scrap. Saw a joint. Chop a shallow mortise. Clamp something awkward. The first real session will tell you more than another week of looking at drawings.
Materials that make sense for a first bench
You do not need rare lumber to build a capable woodworking bench. Laminated construction lumber can produce a durable top when the boards are selected, acclimated, assembled, and flattened carefully. Dense hardwoods offer wear resistance and a refined feel, but stability does not belong exclusively to expensive species.
Useful choices include:
- Accessible construction lumber for the structure.
- Laminated boards for a thick top.
- Replaceable hardboard or plywood for messy work.
- Hardwood for vise jaws and bench dogs.
- Appropriate structural fasteners or through-bolts.
- Replaceable wear strips where the bench takes repeated damage.
The best material is one you can work accurately and repair without hesitation.
Tools for building the bench
A basic build may call for:
- A measuring rule and combination square.
- A marking knife or sharp pencil.
- A handsaw or circular saw.
- A drill and suitable bits.
- Chisels and a mallet.
- Clamps.
- A plane, router, or sanding equipment for flattening.
- A straightedge and winding sticks.
The exact list depends on the build method. Your bench should expand the workshop, not demand every possible tool before it can exist.
Recommended guide: What Woodworking Tools Can You Buy for $250, $500, or $1,000? Three Complete Beginner Setups
The cost of overbuilding
Overbuilding feels safe. It can also produce a bench that is too expensive, too difficult to move, and too intimidating to alter.
You do not have to build the final bench for every project you may someday imagine. Build a stable platform for the next level of work. Add capability when a real project proves you need it.
Part 7: Test, Tune, and Use the Bench Like a Craftsperson
A workbench is not finished when the last bolt is tight. It is finished when you stop compensating for it.
The four-minute stability test
Use a piece of scrap and run four quick tests.
Test 1: Push test
Stand where you normally work and push firmly against the top from several directions. Watch for sliding, rocking, and delayed movement. A bench can feel solid under a fingertip and move when your body gets behind it.
Test 2: Diagonal racking test
Push one corner down while pulling the opposite corner up. Repeat on the other diagonal. Movement here often points to stretchers, braces, fasteners, or uneven floor contact rather than a problem with the top alone.
Test 3: Workholding test
Secure a board in the vise. Use a dog or stop. Try to move the board by hand. Test thin stock, thick stock, and a piece held near the end of the bench.
Test 4: Real tool test
Plane an edge, saw a joint, and chop a shallow mortise. The bench should remain quiet while the tool creates the movement.
Diagnose the bench before blaming the tool
When a cut goes wrong, resist the urge to buy a new plane immediately. Walk through the setup.
| Symptom | Possible bench cause | First correction |
|---|---|---|
| Board creeps while planing | Weak stop or poor dog alignment | Improve the stop or dog position |
| Bench walks forward | Insufficient floor grip or useful mass | Level, anchor, clamp, or add mass |
| Bench sways during chopping | Base racking | Reinforce stretchers and joints |
| Board bows in the vise | Jaw misalignment or excess pressure | Check jaw height and packing |
| Long stock drops or twists | Missing support | Add a board jack or auxiliary support |
| Plane catches unexpectedly | Workpiece movement or poor reference | Improve hold and recheck the surface |
| Fine joinery feels awkward | Bench too high, low, or cluttered | Test a temporary height adjustment |
This diagnostic habit protects your confidence. Not every problem is a skill problem. Not every problem is a tool problem. Sometimes the workbench is quietly asking for one adjustment.
A five-minute bench setup ritual
Before a serious operation:
- Clear unrelated tools from the surface.
- Identify the reference face and edge.
- Choose the simplest secure workholding method.
- Check that the vise, dogs, and stop will not interfere with the tool.
- Make one controlled test cut.
The ritual creates a threshold between preparation and work. Once the board is supported and the tool is set, the workshop becomes quieter in your mind.
Keep the top useful, not precious
Protect the bench from needless abuse, but do not treat every mark as a personal failure. A workbench is a tool. Tools acquire evidence.
Useful habits include:
- Clear shavings before they hide a small part.
- Remove glue before it hardens into a high spot.
- Use a sacrificial cover for finishing or messy repairs.
- Check the top periodically with a straightedge.
- Flatten only the areas that need correction.
- Use wax or finish sparingly enough that the work does not slide.
A glossy, slippery top may photograph beautifully and work badly. The bench should hold the work, not turn it into a moving platform.
Maintain the workholding hardware
Inspect:
- Vise jaw alignment.
- Loose mounting bolts.
- Damaged bench dogs.
- Cracked holdfast holes.
- Worn bench-hook lips.
- Board-jack height and stability.
- Seasonal changes in the top.
Small maintenance prevents the gradual erosion of trust that comes when every setup feels slightly unreliable.
Upgrade in the order your hands request
The most useful upgrade is usually the one that removes a repeated frustration.
If boards move, improve workholding.
If the bench sways, strengthen the base.
If your back hurts, test the height.
If long boards sag, add support.
If the top is damaged, create a replaceable working layer.
If tools disappear under clutter, improve organization without blocking access.
The bench should evolve with the work. Let your hands make the requests.
Frequently Asked Questions
What is the best woodworking bench for hand tool woodworking, really?
The best bench is the one that stays put, gives you a trustworthy reference surface, feels comfortable for your body, and holds the work without making every setup complicated. A heavy Roubo-style bench is excellent for demanding hand-planing and furniture work, while a Nicholson-style, hybrid, or retrofitted bench may be the better answer for a beginner or a small workshop.
Do I actually need a tail vise?
Not necessarily. A front vise combined with dog holes, a planing stop, holdfasts, and a bench hook can handle a large range of work. A tail vise becomes more valuable when you frequently plane long boards or want a built-in moving dog.
How thick should the top of a hand-tool workbench be?
It should be thick or structurally stiff enough that it does not flex noticeably during your normal work and can accept the workholding hardware you plan to use. Thickness helps, but the base, floor contact, and layout of the workholding system matter just as much.
How high should my woodworking bench be?
Bench height depends on your body and your work. A lower surface often gives better leverage for heavy planing, while a higher one can suit detail work and marking. Build a temporary mockup and test the movements you actually perform before cutting the legs.
How heavy does a workbench need to be for hand tools?
It needs to be heavy or securely anchored enough to resist the forces you create. Weight helps, but a rigid base, good floor contact, and effective workholding can make a lighter bench perform very well.
Can I use an ordinary workbench for hand tool woodworking?
Yes—if it is stable and has room to be improved. Check for flex, racking, vise compatibility, dog-hole options, and access beneath the top. A basic bench with a better vise, useful mass, and a planing stop can become a capable hand-tool platform.
Are dog holes essential?
Dog holes are not mandatory, but they greatly expand the ways you can hold boards for planing and other work. If you leave them out, provide another reliable system such as holdfasts, a planing stop, or a well-designed vise arrangement.
Can a portable workbench be stable enough for planing?
Yes, but portability needs an honest stability strategy. A knockdown bench needs rigid connections. A mobile bench may need locking casters, a low center of gravity, or a way to brace itself when you lean into a plane.
Recommended guide: The Complete Beginner’s Guide to Choosing a Portable Woodworking Workbench That You’ll Never Outgrow
Where should the vise go?
Place it where it supports your dominant working motion, keeps the work accessible, and aligns with the dog-hole or stop system. Right-handed conventions are common, but left-handed woodworkers should design around their natural tool travel rather than inherit an awkward layout.
Is a Roubo bench worth building?
A Roubo bench can be worth the effort if you enjoy building workshop furniture, need substantial mass, and expect to do demanding hand-tool work for years. It may be the wrong first choice if you need a usable bench quickly or work in a temporary space.
Should I build a bench before buying more hand tools?
Often, yes. A stable bench improves the performance of the tools you already own and makes it easier to judge sharpening, plane setup, chisels, and saws. A better platform may reveal that a tool needs adjustment rather than replacement.
Products / Tools / Resources
Choose these by fit and purpose, not by the size of a shopping list. A hand-tool workshop becomes more capable one useful piece at a time.
- Bench structures: Roubo-style, Nicholson-style, English joiner’s, Scandinavian-style, Moravian, knockdown, and hybrid benches.
- Workholding: Front vise, leg vise, tail vise, wagon vise, bench dogs, holdfasts, planing stop, bench hook, doe’s foot, deadman, and board jack.
- Reference tools: Straightedge, winding sticks, combination square, marking knife, and a reliable measuring rule.
- Hand tools: Jack plane, jointer plane, smoothing plane, block plane, chisels, mallet, backsaw, dovetail saw, tenon saw, and coping saw.
- Construction materials: Laminated construction lumber, hardwood for vise jaws and dogs, plywood or hardboard for sacrificial surfaces, structural fasteners, and leveling feet.
- Maintenance supplies: Scrapers, plane irons, sharpening stones, a small amount of paste wax, replacement vise hardware, and clean shop rags.
- Related resources: Beginner woodworking tools, woodworking bench plans, woodworking vise types, bench dog-hole layout, how to read woodworking plans, how to check woodworking plans for mistakes, and how to modify woodworking plan dimensions.