
Snippet
A great woodworking bench does more than support your projects—it supports every skill you’ll develop over a lifetime in the workshop. In this complete guide, you’ll discover how to design and build a heavy-duty woodworking bench with a vise and dog holes that delivers exceptional stability, effortless workholding, and decades of reliable service. From choosing the ideal dimensions and lumber to planning the perfect vise and dog hole layout, this guide covers everything you need to build a bench you’ll never want to replace.
Table of Contents
- Why Every Great Workshop Starts with a Great Bench
- What Separates an Average Bench from an Exceptional One
- The Vise: The Hardest-Working Part of Your Workbench
- Choosing the Right Woodworking Vise
- Dog Holes: The Simple Feature That Changes Everything
- Planning the Perfect Dog Hole Layout
- Finding the Right Workbench Dimensions
- Choosing the Best Wood for a Lifetime Workbench
- Building a Professional Workholding System
- Building Your Lifetime Workbench, One Step at a Time
- Frequently Asked Questions
- Bonus: 15 Professional Upgrades That Make a Great Workbench Even Better
- Products / Tools / Resources
Why Every Great Workshop Starts with a Great Bench
Spend enough time around experienced woodworkers and you’ll notice something interesting.
Ask them about their favorite tool, and many won’t mention a table saw, a router, or a premium hand plane.
They’ll point to the workbench.
That answer surprises beginners, but it makes perfect sense once you’ve spent a few weekends wrestling with boards that refuse to stay still or trying to cut clean joinery on a surface that flexes every time you lean into it.
A good bench disappears into the background.
You stop thinking about how to hold the wood and start thinking about the craft itself.
That’s when woodworking becomes enjoyable.
A bench with a solid vise and a well-planned pattern of dog holes isn’t simply another piece of shop furniture. It becomes the center of your workshop—the place where rough lumber slowly turns into furniture, cabinets, keepsakes, and heirlooms.
Every accurate cut begins there.
Every successful glue-up begins there.
Every project you proudly carry into your home starts on that surface.
That’s why building a quality bench isn’t just another project to cross off your list.
It’s an investment in every project that follows.
More Than Just a Heavy Table
At first glance, a woodworking bench looks simple.
Four legs.
A thick top.
Maybe a vise mounted to one side.
Yet every part has a purpose.
The weight keeps the bench planted firmly on the floor.
The thick top absorbs vibration before it reaches your tools.
The vise locks workpieces in place without bruising the wood.
Dog holes let you clamp boards almost anywhere across the surface, turning the entire bench into a flexible workholding station.
Remove any one of those elements and the experience changes dramatically.
You’ll spend more time adjusting clamps.
More time chasing boards across the shop.
More time fixing mistakes that could have been avoided.
A thoughtfully designed bench quietly removes those frustrations before they happen.
Precision Begins Long Before the First Cut
One of the biggest misconceptions in woodworking is that accuracy comes from expensive tools.
Quality machinery matters.
Skill certainly matters.
But none of them can compensate for a workpiece that’s constantly moving.
Imagine trying to hand-plane a long hardwood board while your bench slides across the floor.
Or chopping a mortise while the top bounces slightly beneath every mallet strike.
Even tiny movements have a way of multiplying into visible mistakes.
A stable bench gives every tool the opportunity to perform at its best.
Planes glide more smoothly.
Chisels bite more cleanly.
Handsaws track straighter.
Those small improvements build on one another until the entire woodworking process feels calmer, more controlled, and far more satisfying.
The Bench That Grows Alongside You
One of the most rewarding things about a traditional woodworking bench is that it doesn’t become obsolete.
In fact, it often becomes more valuable with time.
The first few scratches stop bothering you surprisingly quickly.
Before long, they’re reminders of projects you’ve completed rather than flaws to hide.
A small dent might remind you of the first dining table you built.
A dark glue stain might bring back memories of a cabinet assembled late into the evening.
The surface slowly develops a history that no brand-new bench can match.
Unlike many tools that eventually wear out or get replaced, a well-built workbench tends to stay.
It adapts.
You add another row of dog holes.
Upgrade the vise.
Build a custom jig.
Install a sliding deadman.
Each improvement reflects the way your skills have evolved.
In many workshops, the bench becomes the one constant while everything around it changes.
What Separates an Average Bench from an Exceptional One
Not every heavy bench performs well.
Likewise, not every expensive bench deserves its price tag.
The best benches share a handful of design principles that have remained remarkably consistent for generations.
Interestingly, none of them are complicated.
They’re simply thoughtful.
Weight Is an Advantage, Not a Problem
People often worry that a heavy bench will be difficult to move.
They’re absolutely right.
That’s precisely the point.
Once a workbench is in place, you want it to stay there.
Mass is one of the greatest allies a woodworker can have.
A heavier bench absorbs vibration, resists twisting, and stays firmly planted during aggressive hand-planing or chiseling.
Instead of fighting the bench, you’re able to put your full attention into the work itself.
Many traditional hardwood benches weigh several hundred pounds, and there’s a good reason they’ve been built that way for centuries.
A Thick Top Changes Everything
The benchtop carries far more responsibility than simply supporting your project.
It anchors the vise.
It holds the dog holes.
It absorbs impacts from chisels and mallets.
It provides the flat reference surface that every project depends on.
That’s why serious workbenches usually feature tops between three and five inches thick.
That extra thickness isn’t about appearance.
It creates rigidity, improves workholding, and leaves enough material to flatten the surface many times over the years.
A thinner top may save money today, but a thicker one rewards you every time you step into the workshop.
Strength Starts at the Base
Even the finest benchtop can’t compensate for a weak foundation.
The base must resist racking in every direction while supporting tremendous weight.
Traditional mortise-and-tenon joinery has earned its reputation because it creates an incredibly rigid structure, but carefully engineered modern hardware can perform equally well when properly installed.
Regardless of the construction method, the goal remains unchanged.
When you push against one corner of the bench, the entire structure should respond as though it were carved from a single block of wood.
That feeling of absolute solidity inspires confidence before the first tool ever touches the workpiece.
Great Workholding Is Invisible
Perhaps the highest compliment you can give a woodworking bench is that you rarely think about it while you’re working.
The vise operates smoothly.
The dog holes are exactly where you need them.
Boards stay put without constant adjustments.
Nothing interrupts your rhythm.
That’s what separates exceptional benches from merely adequate ones.
They allow you to focus entirely on the wood in front of you rather than the equipment beneath it.
When every component works together naturally, the bench fades into the background—and your craftsmanship takes center stage.
Part 2
The Vise: The Hardest-Working Part of Your Workbench
If the benchtop is the foundation of your workshop, the vise is the feature you’ll reach for more than anything else.
It’s easy to underestimate its importance until you’ve worked without one.
Trying to edge-plane a board that’s constantly shifting, cutting dovetails while balancing a workpiece against improvised supports, or sanding a panel that insists on sliding away quickly turns simple jobs into frustrating ones.
A good vise changes all of that.
Turn the handle, tighten the jaws, and suddenly the wood becomes part of the bench. It stays exactly where you need it, allowing your full attention to move from holding the workpiece to shaping it.
That small shift in focus is one of the biggest improvements a woodworker can experience.
Why a Vise Matters More Than Most Beginners Realize
Every woodworking operation creates force.
A hand plane pushes forward.
A backsaw pulls and twists.
A chisel drives downward with repeated impacts.
Even sanding introduces constant movement.
Without reliable workholding, every one of those forces is transferred into the wood, causing it to creep, vibrate, or shift at exactly the wrong moment.
The vise removes that uncertainty.
Instead of fighting the workpiece, you begin working with it.
Cuts become cleaner.
Joinery becomes more consistent.
Measurements stay accurate because nothing moves between marking and cutting.
Perhaps most importantly, woodworking becomes noticeably less tiring.
You stop wasting energy stabilizing the board and start putting that energy into producing better results.
What Makes a Quality Woodworking Vise?
At first glance, most vises look fairly similar.
A handle.
Two jaws.
A large screw.
But the difference between an average vise and an excellent one becomes obvious after only a few hours of use.
The best vises operate with very little effort.
They move smoothly from fully open to fully closed.
Pressure feels even across the entire jaw.
Nothing binds, rattles, or flexes.
They simply do their job without demanding attention.
That kind of reliability becomes surprisingly addictive.
The Fixed Jaw
The fixed jaw is mounted directly to the workbench and becomes part of the bench’s structure.
Because it doesn’t move, it provides the stable reference point against which every workpiece is clamped.
Its strength depends not only on the hardware but also on how securely it’s integrated into the bench itself.
A properly installed fixed jaw should feel absolutely solid, no matter how much pressure is applied.
The Moving Jaw
The moving jaw does exactly what its name suggests.
As you turn the handle, it travels toward or away from the fixed jaw, applying controlled pressure to the workpiece.
Most woodworkers cover the metal face with hardwood liners.
These liners serve two purposes.
First, they protect delicate timber from dents and clamp marks.
Second, they create additional friction, allowing the vise to grip firmly without excessive tightening.
It’s a simple upgrade, but one you’ll appreciate every time you’re working with finished hardwood.
The Lead Screw
Hidden behind the smooth operation of every vise is the lead screw.
This threaded shaft converts a simple turn of the handle into remarkable clamping force.
A well-machined lead screw feels precise.
It turns easily under light pressure but has the strength to secure even heavy stock without slipping.
Cheaper screws often develop play over time, making it difficult to achieve consistent clamping.
Quality hardware, on the other hand, can perform flawlessly for decades with only occasional cleaning and lubrication.
Guide Bars Keep Everything Aligned
Without guide bars, the moving jaw would twist every time you clamped a board off-center.
That’s why most modern woodworking vises include heavy steel guide rods alongside the lead screw.
These rods keep the jaw perfectly aligned as it travels.
The result is smooth movement, even pressure, and significantly less wear over the life of the vise.
It’s one of those engineering details that’s easy to overlook—but impossible to appreciate once it’s missing.
Choosing the Right Vise for Your Workbench
Not every woodworker works the same way.
Someone building handcrafted dining tables has very different needs than someone making jewelry boxes or kitchen cabinets.
Fortunately, woodworking vises come in several proven designs, each with its own strengths.
Understanding what each type does best makes it much easier to choose a setup that fits your workflow.
Face Vise: The Reliable All-Rounder
For many woodworkers, the face vise is where everything begins.
Mounted near the front edge of the bench, it handles an enormous variety of everyday tasks with ease.
Need to saw a tenon?
Clamp a drawer side vertically?
Shape the edge of a tabletop?
A face vise is perfectly suited to all of them.
Its versatility explains why it’s found on everything from beginner benches to professional cabinetmaker workstations.
If you’re building your first serious bench, a quality face vise is often the single best investment you can make.
Perfect For
- Edge planing
- Cutting dovetails
- Chiseling joints
- Carving
- General assembly
- Holding narrow boards vertically
For many workshops, this one vise will handle the majority of daily work.
Leg Vise: Built for Serious Hand Tool Work
Few workholding systems have earned as much respect as the traditional leg vise.
Integrated directly into one of the bench legs, it offers remarkable strength with surprisingly simple mechanics.
One of its biggest advantages is the amount of support it provides.
Because the jaw extends nearly to the floor, even long or heavy boards remain stable while being worked.
If hand planes, drawknives, and chisels make up a large part of your woodworking routine, a leg vise is difficult to beat.
It has remained a favorite among traditional furniture makers for centuries for one very simple reason:
It works.
Best Suited To
- Hand-tool woodworking
- Chairmaking
- Timber framing
- Large furniture components
- Heavy joinery
Tail Vise: The Perfect Partner for Bench Dogs
Where the face vise grips the edge of a board, the tail vise works differently.
Its real strength comes from the way it interacts with dog holes.
Instead of squeezing the workpiece between jaws, it pushes one bench dog toward another, trapping the board securely across the benchtop.
That means no clamps sticking up.
No hardware blocking your plane.
No awkward workarounds.
Just a perfectly supported board ready for flattening, scraping, sanding, or finishing.
It’s an elegant solution that has stood the test of time.
Why Furniture Makers Love Tail Vises
Large tabletops, cabinet sides, and wide panels become much easier to manage when they’re held flat against the bench.
The pressure is even.
The workpiece stays stable.
Every inch of the surface remains accessible.
For anyone who spends a lot of time building furniture, this type of workholding quickly becomes second nature.
End Vise: Flexible and Practical
An end vise offers many of the same advantages as a tail vise while often being easier to install and maintain.
Positioned at the end of the bench, it works beautifully with rows of dog holes and adapts to a wide range of clamping accessories.
Its flexibility makes it a popular choice for modern woodworking benches, especially those used for both hand-tool and power-tool work.
Twin-Screw Vises: When Size Matters
There are times when a standard vise simply isn’t wide enough.
Large cabinet doors, broad drawer fronts, and oversized panels can rack inside a conventional jaw.
That’s where a twin-screw vise shines.
Using two synchronized screws, it applies pressure evenly across wide workpieces, keeping everything square and stable.
Although they’re larger and more expensive, many furniture makers consider them indispensable for large-scale projects.
Quick-Release Vises: Small Feature, Big Difference
If you’ve ever opened a traditional vise dozens of times in a single afternoon, you’ll immediately appreciate a quick-release mechanism.
With the push of a lever, the jaw slides freely into position.
A quick turn of the handle locks everything securely.
That small convenience saves an incredible amount of time over the course of a project.
It’s one of those features you rarely think about until you’ve used it—after that, it’s difficult to imagine going back.
Matching the Vise to the Way You Build
The “best” vise isn’t necessarily the most expensive one.
It’s the one that fits the work you enjoy doing most.
If your passion is fine furniture, combining a face vise with a tail or end vise creates a wonderfully versatile setup.
If traditional hand tools are your focus, a robust leg vise may become the centerpiece of your entire bench.
If you’re building cabinets and working with large panels, a twin-screw vise offers unmatched stability.
The important thing is remembering that a vise doesn’t work in isolation.
Its real value comes from the way it interacts with the rest of the bench—particularly the dog holes that transform a single clamping point into a complete workholding system.
That’s exactly where we’re headed next. In the following section, you’ll discover why a row of simple holes drilled into a benchtop has become one of the most enduring innovations in woodworking history.
Part 3
Dog Holes: The Simple Feature That Changes Everything
If you’ve never worked at a traditional woodworking bench, it’s easy to overlook the neat row of holes running across the benchtop.
They don’t look impressive.
There’s no polished hardware, no moving parts, and nothing about them suggests they’re one of the most useful features on the entire bench.
Yet ask experienced furniture makers what they would never build a workbench without, and bench dog holes almost always make the list.
Why?
Because they turn a heavy bench into a remarkably flexible workholding system.
Once you understand how they work, you’ll wonder how anyone manages without them.
More Than Just Holes in a Benchtop
A dog hole is a precisely positioned opening designed to accept a variety of workholding accessories.
The best known of these is the bench dog, a removable peg that rises slightly above the surface of the bench.
On its own, a bench dog doesn’t do very much.
Paired with a woodworking vise, however, it becomes incredibly powerful.
Imagine placing one bench dog in your end vise and another farther along the bench.
Set a board between them, tighten the vise, and the wood is held securely across its full length.
No clamps hanging over the edges.
No hardware blocking your plane.
Nothing getting in the way of your work.
Just a clean, stable surface that lets you focus entirely on shaping the wood.
It’s an elegant solution that’s remained virtually unchanged for centuries because it solves a problem so effectively.
Why Bench Dog Holes Matter
Anyone can clamp a board to a table.
The real question is how quickly, how securely, and how comfortably you can do it.
That’s where dog holes make such a noticeable difference.
Instead of spending several minutes adjusting clamps every time the size of the workpiece changes, you simply move a bench dog to another hole.
The entire setup takes seconds.
That may sound like a small improvement, but over dozens—or even hundreds—of projects, those saved moments become hours of uninterrupted woodworking.
More importantly, the work becomes more enjoyable.
There’s less frustration.
Less stopping and starting.
Less wrestling with awkward clamp positions.
The bench simply works with you instead of against you.
A Cleaner Way to Hold Your Work
Traditional clamps certainly have their place, but they often introduce new problems.
Clamp bars can block a plane.
Handles get in the way of a saw.
Large clamps force you into uncomfortable working positions.
Bench dogs avoid those issues almost completely.
Because they sit flush with the benchtop, they leave the entire surface open.
That means you can plane, scrape, sand, or rout across a board without constantly adjusting your setup.
It creates a smoother rhythm—one where your attention stays on the project instead of the hardware holding it in place.
Stability Builds Confidence
Woodworking rewards precision.
Precision depends on stability.
When a workpiece shifts unexpectedly, even slightly, the results are rarely good.
A chisel can wander.
A saw can drift away from the line.
A hand plane can catch the edge of the board.
Bench dogs help eliminate those problems by holding the work securely and evenly.
That stability doesn’t just improve accuracy—it builds confidence.
Instead of hesitating before every cut, you begin trusting both your tools and your bench.
How Bench Dogs Work with a Vise
One of the biggest misconceptions among beginners is that dog holes replace a vise.
In reality, the two are designed to work together.
Think of the vise as the source of pressure.
Think of the bench dogs as the points that direct that pressure exactly where it’s needed.
As the vise closes, one bench dog moves toward another.
The workpiece is trapped neatly between them.
Because the force is spread across the length of the board rather than concentrated at the edges, the wood remains flat, stable, and fully supported.
It’s a beautifully simple system that handles everything from narrow rails to wide table panels with remarkable ease.
Round or Square Dog Holes?
Spend enough time talking with experienced woodworkers and you’ll eventually hear this debate.
Should dog holes be round or square?
Both have been used successfully for generations, and both continue to appear on modern workbenches.
The best choice depends less on tradition and more on how you plan to use your bench.
Round Dog Holes
Round holes are by far the most common today.
They’re straightforward to drill, compatible with a huge range of accessories, and work exceptionally well with modern holdfasts and surface clamps.
Most are drilled to a standard diameter of 3/4 inch (19 mm), making it easy to find compatible accessories from virtually any woodworking supplier.
Why They’re So Popular
- Easy to drill accurately
- Accept most commercial accessories
- Perfect for holdfasts
- Simple to clean
- Easy to expand later
- Ideal for modern benches
For most woodworkers, round holes offer the greatest flexibility with the least effort.
Square Dog Holes
Square dog holes have deep roots in traditional European workbench design.
Although they’re more time-consuming to build, many hand-tool enthusiasts appreciate their distinctive advantages.
Because the dog can’t rotate inside the opening, it always maintains the same orientation.
Some woodworkers also prefer their classic appearance and historical authenticity.
Their Biggest Strengths
- Prevent bench dogs from twisting
- Strong traditional design
- Excellent grip
- Timeless appearance
- Favoured on many classic cabinetmaker benches
Building them requires more patience, but many craftsmen feel the extra effort is well rewarded.
Why 3/4-Inch Holes Have Become the Standard
If you’re designing a new bench, there’s one measurement you’ll encounter again and again.
Three-quarter inch.
That size has become the unofficial standard throughout the woodworking world.
There’s a practical reason for that.
Almost every major workholding accessory is designed around it.
Bench dogs.
Holdfasts.
Surface clamps.
Bench anchors.
Many shop-made jigs.
By sticking with the standard, you leave the door open for future upgrades without worrying about compatibility.
It’s one of those decisions that quietly pays off for years.
Finding the Right Spacing
Once you’ve decided on the hole size, the next question naturally follows.
How far apart should they be?
There’s no universal answer, but there is a proven range.
Most experienced builders place dog holes roughly 4 to 6 inches apart.
That spacing provides enough flexibility for both small and large workpieces while preserving plenty of strength in the benchtop.
Around 5 inches has become a popular compromise.
It’s close enough to handle short boards efficiently without filling the entire bench with unnecessary holes.
Choosing a Layout That Matches the Way You Work
The layout you choose has a surprisingly large impact on everyday woodworking.
A thoughtfully planned pattern makes workholding feel almost effortless.
A poorly planned one can leave you reaching for clamps more often than you’d like.
A Single Row
Simple, clean, and effective.
One straight row running parallel to the front edge of the bench is enough for a remarkable range of projects.
For many home workshops, it’s all that’s needed.
Two Parallel Rows
Adding a second row greatly expands your options.
Wide panels become easier to secure.
Large cabinet parts receive better support.
Furniture components can be positioned more precisely.
It’s a small addition that dramatically increases versatility.
Offset Rows
Instead of placing every hole directly opposite the next, offset rows stagger their positions.
This creates more possible clamping combinations while improving flexibility for irregularly shaped workpieces.
Furniture makers often appreciate the extra adjustment this layout provides.
Grid Patterns
Some contemporary benches use a grid extending across much of the work surface.
The result is extraordinary versatility.
Panels, templates, routing jigs, and assembly fixtures can all be positioned almost anywhere on the bench.
The trade-off is a more complex layout and additional drilling during construction.
Through Holes or Stopped Holes?
Another decision that often surprises first-time builders is whether the holes should pass completely through the benchtop.
Both approaches work well.
Each has its own advantages.
Through holes are easy to clean because sawdust and shavings simply fall through.
They also work exceptionally well with holdfasts.
Stopped holes create a cleaner appearance and keep debris from collecting beneath the bench, although they require occasional cleaning to remove compacted dust and glue.
Neither option is inherently better.
It simply comes down to personal preference and the type of work you do most often.
Small Accessories That Unlock Big Possibilities
One of the most rewarding things about standard dog holes is discovering just how many accessories can use them.
Over time, your bench becomes more capable without changing its basic design.
Common additions include:
- Bench dogs
- Holdfasts
- Surface clamps
- Planing stops
- Bench anchors
- Routing supports
- Carving fixtures
- Assembly stops
- Custom shop-made jigs
Many of these accessories are surprisingly simple, yet they have a remarkable effect on efficiency.
As your skills grow, your workholding system grows with you.
And that’s one of the defining qualities of a truly great workbench—it never reaches a point where it can no longer improve.
Part 4
Finding the Right Dimensions: Build a Bench That Fits You, Not the Other Way Around
One of the easiest mistakes to make when building a woodworking bench is assuming there’s a universal “perfect size.”
There isn’t.
A bench that’s ideal for a cabinetmaker who spends hours hand-planing hardwood may feel completely wrong to someone who mainly builds small boxes with power tools. Likewise, a bench designed for a spacious workshop may become frustratingly oversized in a single-car garage.
The best woodworking bench isn’t the biggest one you can build.
It’s the one that feels natural every time you walk up to it.
The right height encourages good posture.
The right width keeps everything within comfortable reach.
The right length gives you enough room to work without dominating the entire shop.
When those dimensions come together, something interesting happens.
You stop noticing the bench.
Your attention stays where it belongs—on the wood in front of you.
Start with the Height
If you could only fine-tune one measurement, make it the height.
It has a greater impact on comfort than any other dimension.
A bench that’s too low forces you to hunch forward all day, putting unnecessary strain on your back and shoulders.
A bench that’s too high can make hand-planing feel awkward because you lose the ability to lean naturally into the stroke.
Neither extreme is enjoyable, especially during longer woodworking sessions.
The goal is to find a height that lets you work comfortably while maintaining complete control over your tools.
A Time-Tested Way to Find Your Ideal Height
Long before measuring tapes and online calculators, cabinetmakers used their own bodies as a guide.
Stand upright with your arms relaxed at your sides.
Notice where your wrists naturally fall.
For many woodworkers, that’s an excellent starting point for bench height.
It’s simple, surprisingly accurate, and easy to adjust based on the kind of work you enjoy most.
Think of it as a foundation rather than an unbreakable rule.
Lower Benches for More Power
If you spend a lot of time using hand planes, a slightly lower bench offers an important advantage.
It allows you to put more of your body weight behind each stroke instead of relying only on your arms.
That extra leverage makes flattening wide boards noticeably easier and far less tiring.
Traditional hand-tool benches often sit toward the lower end of the height range for exactly this reason.
Taller Benches for Fine Detail
Detailed joinery, carving, and assembly often benefit from a higher working surface.
Bringing the work closer to eye level reduces bending and makes it easier to focus on precise cuts or delicate fitting.
Many woodworkers who rely heavily on routers, sanders, and other power tools also prefer a slightly taller bench because these operations require less downward force.
Choosing the Right Length
Length influences more than the size of the projects you can build.
It also affects workflow.
A bench that’s too short can feel restrictive.
Large glue-ups become awkward.
Long boards require makeshift supports.
Tool placement becomes cramped.
On the other hand, an excessively long bench may consume valuable floor space that could be better used elsewhere.
The ideal length balances capability with practicality.
Compact Benches
Benches around 5 feet (150 cm) long work surprisingly well in smaller workshops.
They’re ideal for:
- Hobby woodworking
- Apartment garages
- Small furniture
- Boxes and decorative projects
- General home repairs
Their smaller footprint also makes it easier to move around the shop without feeling crowded.
The Versatile Six-Foot Bench
Ask experienced woodworkers to recommend a practical all-purpose size, and many will point toward a bench around 6 feet (180 cm) long.
It’s large enough for most furniture projects while remaining manageable in an average workshop.
Drawer construction.
A bench of this size comfortably handles them all.
For many people, it’s the sweet spot.
Long Benches for Serious Furniture Work
Once you move into larger projects, additional length becomes increasingly valuable.
Benches between 7 and 8 feet (210–240 cm) provide generous support for long rails, table tops, and full-size cabinets.
They also create multiple working zones, making it easier to move naturally from one task to the next without constantly clearing space.
If your workshop allows it, building slightly longer than you think you’ll need is rarely a decision you’ll regret.
Width: More Isn’t Always Better
It’s tempting to think a wider bench automatically provides a better workspace.
In reality, width is one of the easiest dimensions to overdo.
If you have to stretch to reach the opposite edge, part of the bench becomes inconvenient to use.
Over time, that constant reaching becomes surprisingly tiring.
The most comfortable benches allow you to reach across the surface without leaning excessively.
A Practical Width
Most traditional woodworking benches measure somewhere between 22 and 30 inches (56–76 cm) wide.
That range offers plenty of space for woodworking while keeping everything comfortably within reach.
Narrow Benches
Around 22 to 24 inches wide.
Ideal if you:
- Prefer hand tools
- Have a compact workshop
- Want excellent reach
- Frequently work on long boards
Despite their smaller size, narrow benches are incredibly efficient because every part of the surface remains easily accessible.
Medium Width
A width of roughly 26 to 28 inches strikes an excellent balance.
It provides enough room for furniture components and larger assemblies while still feeling comfortable during everyday work.
It’s no surprise that many classic cabinetmaker benches fall within this range.
Wider Benches
Around 30 inches or slightly more.
Useful when you regularly build:
- Large cabinets
- Wide table tops
- Built-in furniture
- Complex glue-ups
Just remember that extra width is only helpful if you can comfortably use it.
Why a Thick Benchtop Makes Such a Difference
The thickness of the benchtop affects far more than appearance.
A substantial top feels different from the moment you begin working.
There’s less vibration.
Less flex.
More confidence.
Heavy hand-plane strokes feel solid.
Chiseling produces a satisfying sense of stability.
Even sanding becomes smoother because the bench absorbs movement instead of amplifying it.
How Thick Should It Be?
Most professional woodworking benches feature tops between 3 and 5 inches (75–125 mm) thick.
That range provides several important advantages.
A thick top:
- Supports heavy vises
- Holds dog holes securely
- Works exceptionally well with holdfasts
- Resists warping
- Increases overall bench weight
- Can be flattened many times over its lifetime
It’s one of those features that pays you back every single time you use the bench.
Don’t Overlook the Base
While the top usually receives most of the attention, the base quietly determines how stable the entire bench feels.
Wide, sturdy legs reduce movement.
Heavy stretchers resist racking.
Thoughtful joinery keeps everything square year after year.
Many traditional benches position the front legs almost perfectly flush with the edge of the top.
That design isn’t simply aesthetic.
It allows long boards clamped vertically in the face or leg vise to receive direct support from the legs themselves, dramatically increasing rigidity during demanding work.
It’s a subtle detail, but one you’ll appreciate every time you clamp a long workpiece.
Think Beyond Today’s Projects
One of the smartest decisions you can make while designing a workbench is leaving room for the future.
Very few woodworkers use their benches exactly the same way ten years later.
Skills improve.
Projects become more ambitious.
New techniques are learned.
What feels unnecessary today may become indispensable later.
When planning your bench, consider allowing space for future additions such as:
- A second vise
- Extra rows of dog holes
- Holdfasts
- A sliding deadman
- Storage beneath the bench
- Custom workholding jigs
- Planing stops
- Tool trays
Adding these features later is much easier when the original design anticipates them.
A lifetime bench should have room to evolve, just as the woodworker using it does.
Part 5
Choosing the Best Wood for a Lifetime Workbench
Every memorable woodworking project begins with a simple decision.
Which wood should I use?
When you’re building a bookshelf or a coffee table, that choice mostly affects the finished appearance.
A workbench is different.
Here, the lumber becomes part of every project you’ll build for years—perhaps even decades—to come.
The wood you choose influences how solid the bench feels under a hand plane, how well it resists dents, how stable it remains through changing seasons, and how much maintenance it will need over time.
This isn’t about finding the most expensive species.
It’s about choosing material that matches the purpose of the bench.
Because once it’s finished, your workbench won’t simply sit in the corner.
It will become the place where ideas take shape.
What Makes a Wood Species Suitable for a Workbench?
Not every strong wood makes a good workbench.
Likewise, not every beautiful hardwood belongs in a workshop.
A great bench wood combines several qualities that work together.
Stability Comes First
Wood is always moving.
Humidity rises.
Temperatures change.
The seasons come and go.
Even in a climate-controlled workshop, timber naturally expands and contracts throughout the year.
A stable species keeps those movements to a minimum, helping the benchtop remain flatter over time.
That means fewer adjustments, less maintenance, and a more accurate working surface year after year.
Weight Is an Asset
In furniture making, lighter pieces are often easier to move.
A workbench follows the opposite philosophy.
Weight is your friend.
A heavier bench absorbs vibration, stays firmly planted on the floor, and gives hand tools a more solid platform to work from.
When flattening a rough hardwood board or chopping deep mortises, that extra mass becomes immediately noticeable.
Instead of shifting under pressure, the bench simply stands its ground.
Durability Matters Every Single Day
Unlike a dining table that’s carefully protected from scratches, a workbench is expected to live a hard life.
You’ll drop chisels.
Slide rough lumber across the top.
Clamp projects with considerable force.
Spill glue.
Accidentally strike the surface with a mallet.
That’s not misuse.
That’s woodworking.
A suitable bench wood should be able to absorb years of honest wear while remaining structurally sound.
The occasional dent isn’t a failure.
It’s evidence that the bench is doing exactly what it was built to do.
Easy to Work Before It Goes to Work
It’s easy to focus on how the finished bench will perform, but remember—you still have to build it.
Some hardwoods are extremely dense and demanding to machine.
Others are pleasant to cut, plane, and glue without sacrificing strength.
Many experienced woodworkers deliberately choose species that balance durability with workability, making the building process more enjoyable from start to finish.
Hard Maple: The Benchmark for Workbench Performance
If woodworking benches had a traditional standard, hard maple would almost certainly hold the title.
For generations, professional cabinet shops, trade schools, and furniture makers have trusted maple because it consistently delivers excellent performance.
Its tight grain creates a smooth working surface.
Its hardness resists dents without becoming difficult to maintain.
Its weight contributes to a wonderfully solid feel under hand tools.
Perhaps most importantly, maple ages gracefully.
Over time, the pale surface develops a warm honey-colored patina that reflects years of craftsmanship rather than wear.
Why So Many Woodworkers Choose Maple
- Outstanding durability
- Excellent dimensional stability
- Smooth, tight grain
- High resistance to everyday wear
- Long service life
- Beautiful natural aging
It isn’t the least expensive option, but when you’re building a bench intended to last a lifetime, many woodworkers consider the investment worthwhile.
European Beech: A Time-Honored Favorite
Walk into an old woodworking school or traditional cabinet shop in Europe and there’s a good chance you’ll find benches made from beech.
There’s a reason this species has remained popular for centuries.
Beech is dense enough to provide excellent stability while remaining pleasant to work with.
Its grain is fine and uniform, making it comfortable for everyday woodworking and ideal for accurately machined joinery.
Many premium European workbenches still rely on beech today because it continues to perform exceptionally well.
What Makes Beech So Appealing?
- Strong and reliable
- Naturally stable
- Smooth working surface
- Attractive appearance
- Proven performance over generations
Like all wood, it benefits from sensible care and a reasonably stable workshop environment, but when treated well, beech can serve for decades.
Ash: Strong, Practical, and Often Overlooked
Ash rarely receives the same attention as maple or beech, yet it’s one of the finest choices for a woodworking bench.
Its strength is impressive.
Its shock resistance makes it especially comfortable when using chisels and mallets.
Its bold grain also gives the finished bench a distinctive character without compromising performance.
Many woodworkers who choose ash wonder why they didn’t consider it sooner.
Ash Offers
- Excellent strength
- Good impact resistance
- Reliable stability
- Attractive grain
- Pleasant machining characteristics
Availability varies depending on location, but where it can be sourced responsibly, ash deserves serious consideration.
White Oak: Built for Heavy Work
Few domestic hardwoods communicate strength quite like white oak.
It’s dense.
Heavy.
Exceptionally durable.
A bench built from white oak feels substantial from the moment you place your hands on it.
Its closed cellular structure also offers excellent resistance to moisture, making it a practical choice in workshops where humidity fluctuates.
Why White Oak Works So Well
- Extremely tough
- Outstanding wear resistance
- Heavy enough for demanding hand-tool work
- Long-lasting
- Beautiful natural character
Its more open grain can make glue cleanup slightly less convenient than smoother woods, but many builders happily accept that trade-off for its remarkable durability.
Southern Yellow Pine: Proof That Performance Doesn’t Have to Be Expensive
One of the biggest surprises for first-time bench builders is learning that some outstanding workbenches are built from construction lumber.
Southern yellow pine has earned a loyal following for good reason.
When laminated into a thick benchtop, it becomes remarkably rigid while remaining affordable and widely available.
No, it isn’t as hard as maple.
Yes, it will collect dents more easily.
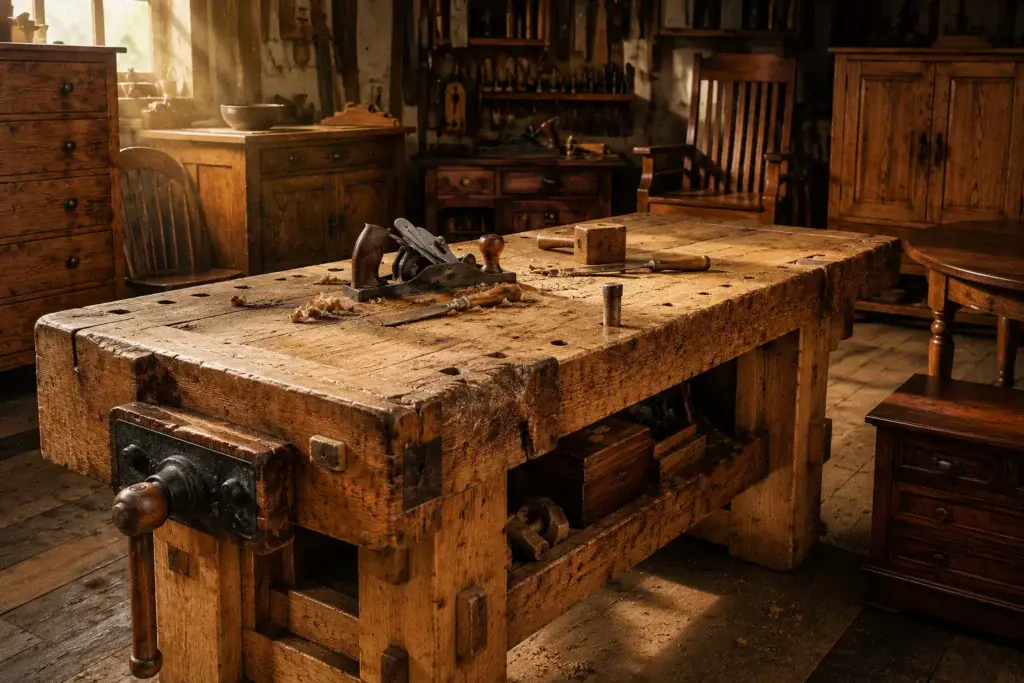
But those dents rarely affect performance.
In fact, many experienced woodworkers appreciate a surface that’s slightly kinder to their projects and easier to repair if damaged.
Southern Yellow Pine Delivers
- Excellent value
- Good weight for a softwood
- Wide availability
- Straightforward machining
- Strong performance for the cost
For anyone building their first serious workbench, it’s one of the smartest choices available.
Douglas Fir: A Reliable Alternative
Douglas fir occupies an interesting middle ground.
It isn’t quite as dense as many hardwoods, yet it’s significantly stronger than many people expect.
Selected carefully, straight-grained Douglas fir produces a stable, dependable bench that’s comfortable to build and enjoyable to use.
Its excellent strength-to-weight ratio has made it a trusted structural timber for generations, and those same qualities translate well into workbench construction.
Laminated Tops or a Solid Slab?
After choosing the species, another important decision remains.
Should the benchtop be laminated from multiple boards or built from one massive slab?
Each approach has its strengths.
Why Laminated Tops Are So Popular
Most modern workbenches use laminated construction.
Individual boards are glued edge to edge until they form one thick, stable top.
This approach offers several advantages.
The narrower boards help balance seasonal movement.
Quality lumber is easier to source.
Construction costs are usually lower.
Repairs are simpler if damage ever occurs.
When properly built, a laminated top is incredibly strong and often more stable than a single massive slab.
There’s a reason so many professional workbenches are built this way.
The Appeal of a Solid Slab
A one-piece hardwood slab has undeniable presence.
The uninterrupted grain creates a dramatic appearance that few laminated tops can match.
There’s also a certain romance in working on a bench carved from a single tree.
That said, slabs come with challenges.
They’re expensive.
Heavy to move.
Difficult to source.
And because they’re so large, they require careful attention to drying and seasonal wood movement.
For many woodworkers, laminated construction offers a more practical balance of beauty, stability, and cost.
Don’t Rush the Lumber
One of the most overlooked steps in building a great bench happens before construction even begins.
Give the wood time to acclimate to your workshop.
Even kiln-dried lumber benefits from resting in the environment where it will eventually live.
That extra patience allows moisture levels to stabilize, reducing the risk of unexpected movement after assembly.
It’s one of those quiet decisions that rarely gets noticed—but often makes the difference between a bench that stays flat for years and one that demands unnecessary correction.
Choosing a Finish That Works With You
A workbench isn’t a dining table.
It doesn’t need a thick, glossy finish.
In fact, a highly polished surface often works against you by making boards more likely to slide during use.
Most experienced woodworkers prefer finishes that protect the wood without hiding its natural feel.
Popular choices include:
- Boiled linseed oil
- Danish oil
- Hard wax oil
- Oil-and-wax blends
These finishes help resist moisture and glue while preserving enough grip to keep workpieces under control.
They’re also easy to renew, allowing the bench to age gracefully instead of requiring complete refinishing.
The goal isn’t perfection.
It’s practicality.
A workbench should invite you to use it every day—not worry about keeping it flawless.
Part 6
Building a Workholding System That Feels Effortless
A thick benchtop gives you stability.
A quality vise gives you clamping force.
Dog holes give you flexibility.
Bring them together with the right accessories, and something remarkable happens.
Your workbench stops feeling like a piece of furniture and starts feeling like an extension of the way you work.
That’s the difference between simply owning a woodworking bench and having a workholding system that quietly supports every project from start to finish.
Professional woodworkers rarely spend time wondering how to hold a board.
Their benches have already solved that problem.
Every accessory has a purpose.
Every tool has a place.
Every movement feels intentional.
The result isn’t just greater efficiency.
It’s a workshop that feels calmer, smoother, and far more enjoyable to work in.
Good Workholding Makes Good Woodworking Look Easy
Watch an experienced furniture maker at work.
You’ll notice something almost immediately.
There isn’t a constant struggle with clamps.
There isn’t a frantic search for another support block.
There aren’t repeated adjustments every few minutes.
The workpiece stays exactly where it needs to be while the craftsperson focuses entirely on shaping the wood.
That’s the quiet advantage of a well-designed workholding system.
It removes unnecessary distractions.
Every tool performs better because the wood remains stable.
Every cut feels more controlled because nothing shifts unexpectedly.
When your work is secure, your confidence grows naturally.
Three Principles That Guide Every Great Workholding System
No matter what style of woodworking you enjoy, successful workholding follows three simple ideas.
Keep the Workpiece Absolutely Still
Movement is the enemy.
Even the slightest shift can affect accuracy.
A board that slides while being planed develops uneven surfaces.
A workpiece that twists during sawing creates joints that don’t fit as well as they should.
The goal is complete stability without damaging the wood itself.
When the workpiece feels like part of the bench, you’re ready to begin.
Keep Your Tools Moving Freely
Holding the wood securely is only half the challenge.
You also need clear access.
Nothing is more frustrating than stopping halfway through a hand-plane stroke because a clamp is in the way.
The best workholding systems secure the wood while leaving the working surface open.
That freedom allows you to concentrate on smooth, uninterrupted movements rather than constantly adjusting hardware.
Make Adjustments Fast
Woodworking naturally moves from one operation to the next.
You flatten a board.
Cut joinery.
Test the fit.
Trim an edge.
Sand a surface.
Glue everything together.
A good bench keeps pace with those changes.
You shouldn’t need five minutes to reposition the work every time you switch tasks.
The faster your bench adapts, the more enjoyable the entire woodworking process becomes.
Bench Dogs: Small Tools with a Huge Impact
It’s remarkable how much versatility comes from something so simple.
A bench dog is little more than a sturdy peg designed to fit into a dog hole.
Yet together, they create one of the most flexible workholding systems ever developed.
Move the dog to another hole and you’ve instantly changed the clamping position.
Need to secure a longer board?
Shift the dog.
Working on a narrow drawer side?
Move it again.
There’s no complicated setup.
No extra hardware.
Just quick, reliable adjustments that become second nature after a short time.
Wooden or Metal Bench Dogs?
Both styles perform exceptionally well.
Choosing between them often comes down to personal preference.
Wooden Bench Dogs
Many woodworkers enjoy making their own.
A hardwood bench dog is gentle on finished surfaces, inexpensive to replace, and easy to customize for specific projects.
Some even create different heights or profiles for specialized tasks.
Metal Bench Dogs
Metal versions are exceptionally durable and extremely consistent.
Many include spring mechanisms that hold them securely at different heights inside the hole.
They require virtually no maintenance and are well suited to busy workshops where they’re used every day.
Neither option is objectively better.
Many experienced woodworkers keep both on hand and simply use whichever suits the task.
Holdfasts: One of Woodworking’s Most Brilliant Ideas
Few tools demonstrate the beauty of simple engineering quite like the holdfast.
At first glance, it looks almost primitive.
A curved steel arm.
A long shaft.
Nothing more.
Yet with one firm tap from a wooden mallet, it grips a workpiece with astonishing strength.
Another tap releases it instantly.
No threads.
No handles.
No adjustments.
Just quick, dependable clamping.
Despite centuries of technological progress, the holdfast remains one of the fastest ways to secure wood to a workbench.
That says everything about how well the design works.
Where Holdfasts Shine
Holdfasts excel whenever you need quick, temporary clamping.
They’re particularly useful for:
- Hand-planing
- Routing
- Chiseling
- Sanding
- Carving
- Assembly work
Because they can be repositioned in seconds, they encourage a smooth workflow that keeps you focused on the project rather than the setup.
The Planing Stop: A Small Feature You’ll Use Constantly
Some of the most valuable workbench features are also the simplest.
A planing stop is little more than a raised edge or adjustable block positioned near the front of the bench.
Place a board against it, and forward pressure from your hand plane keeps the wood securely in place.
In many situations, that’s all you need.
No vise.
No clamps.
No complicated setup.
Simply place the board, start planing, and move on to the next one.
For repetitive work, it’s incredibly efficient.
Supporting Long Boards with a Sliding Deadman
Long workpieces present a unique challenge.
Clamp one end in a face vise and the opposite end tends to sag under its own weight.
That’s where the sliding deadman earns its unusual name.
Mounted along the front of the bench, it moves sideways and provides adjustable support wherever it’s needed.
Whether you’re shaping a bed rail, trimming a door stile, or working on a long table apron, the sliding deadman keeps everything level and stable.
Once you’ve used one, it’s difficult to imagine working without it.
Bench Hooks: The Unsung Hero of Hand Tool Woodworking
Every workshop should have at least one bench hook.
Better yet, several.
They’re quick to build, inexpensive, and endlessly useful.
Resting against the front edge of the bench, a bench hook creates a stable platform for cutting smaller pieces safely and accurately.
They’re ideal for:
- Crosscutting
- Fine trimming
- Small joinery
- Cutting moldings
- Precision hand-saw work
Many woodworkers end up making several versions for different tasks because they prove useful so often.
Surface Clamps Keep the Top Clear
Modern surface clamps are designed to work directly with standard 3/4-inch dog holes.
Instead of wrapping around the edge of the bench, they apply pressure straight down.
That leaves the edges completely free.
For routing, sanding, drilling, and detailed shaping, it’s a significant advantage.
The work stays secure while your tools move freely across the entire surface.
Custom Jigs Make Your Bench Uniquely Yours
One of the pleasures of building your own workbench is that it never has to stay exactly as it was on the day you finished it.
Over time, many woodworkers begin creating custom accessories designed around the projects they build most often.
These might include:
- Routing templates
- Assembly stops
- Shooting boards
- Doweling guides
- Carving supports
- Repeat-cut fences
- Drawer assembly fixtures
- Specialty sanding platforms
Some of these jigs take less than an hour to build.
Others evolve gradually over many years.
Together, they transform an already capable bench into a workstation that’s perfectly suited to your own way of working.
No two experienced woodworkers have exactly the same setup.
That’s part of the beauty of a lifetime workbench.
It grows with you, adapting quietly as your skills, projects, and ambitions continue to expand.
Part 7
Building Your Lifetime Workbench, One Step at a Time
There comes a moment in every woodworking project when planning gives way to sawdust.
The drawings are complete.
The lumber has acclimated.
The hardware is waiting on the bench.
Now it’s time to start building.
Creating a woodworking bench isn’t about rushing toward the finish line. In many ways, it’s the opposite.
Every careful measurement, every accurately cut joint, and every patient adjustment adds up to something you’ll rely on for years, perhaps even decades.
Unlike a bookshelf or a garden planter, this isn’t a project you’ll simply admire once it’s finished.
You’ll use it almost every time you walk into the workshop.
That’s why it deserves your best work.
Step 1: Build a Base That Won’t Flinch
Every great workbench begins with a rock-solid foundation.
The base carries the weight of the benchtop, the vise, the projects you’re building, and every force created while sawing, planing, chiseling, or assembling.
If the base flexes, the entire bench loses accuracy.
The goal is simple.
Build a frame that feels as though it were carved from one enormous piece of timber.
Whether you choose traditional mortise-and-tenon joinery, heavy-duty bolts, or a combination of both, rigidity should always come first.
A typical base includes:
- Four substantial legs
- Upper stretchers
- Lower stretchers
- Cross supports where needed
- Optional storage shelf or cabinet
- Optional adjustable feet for uneven floors
Before moving any further, place the base on a flat surface and check it carefully.
It should sit without rocking or twisting.
Taking a few extra minutes here saves countless headaches later.
Step 2: Create a Benchtop That Will Last for Decades
The benchtop is where almost every woodworking operation will take place.
It’s worth taking your time.
Most builders create the top by laminating multiple boards together.
Besides being easier to source than one massive slab, laminated tops are incredibly stable and remarkably strong.
Arrange the boards thoughtfully before applying glue.
Alternate the growth rings where practical to help balance seasonal movement.
Once everything is aligned, spread the glue evenly, apply steady clamping pressure, and allow the assembly to cure completely.
Patience matters here.
Trying to rush the process rarely ends well.
Flattening the Surface
Even the best glue-up usually needs a little refinement.
The objective is a surface that’s genuinely flat—not simply one that looks flat.
Depending on your tools, you might use:
- A jointer plane
- A router sled
- A wide-belt sander
- A precision straightedge to identify high spots
This stage often feels slow, but it’s one of the most satisfying parts of the build.
With every pass, the bench becomes more accurate, and every future project benefits from that extra care.
Step 3: Join the Top and Base
Bringing the two largest components together is an exciting milestone.
Suddenly, the workbench begins to look exactly as you imagined it.
As you fasten the top, remember one important fact.
Wood never completely stops moving.
Even after years of drying, seasonal humidity changes cause slight expansion and contraction.
For that reason, the benchtop should be attached in a way that allows natural movement while remaining firmly secured.
Many builders use elongated mounting holes or specialized tabletop fasteners that accommodate these subtle changes.
It’s a small detail, but one that helps protect the bench over the long term.
Step 4: Install the Vise with Care
A woodworking vise deserves careful installation because you’ll interact with it countless times.
Take the time to position it accurately.
The jaws should close evenly.
The hardware should move smoothly without binding.
The handle should have plenty of clearance.
Rushing this step often leads to years of minor annoyances that could have been avoided.
Positioning the Face Vise
For most right-handed woodworkers, the face vise is mounted on the front left corner of the bench.
That arrangement supports long boards extending toward the right side of the bench.
Left-handed woodworkers often reverse the layout.
Neither choice is better.
The important thing is selecting the arrangement that feels most natural for the way you work.
Learn more: The Left-Handed Woodworker’s Tool Guide — What Actually Matters Before You Buy
Add Hardwood Jaw Liners
Before calling the installation complete, consider fitting hardwood liners to the vise jaws.
These liners provide two valuable benefits.
They protect finished workpieces from metal marks.
They also create additional grip, allowing the vise to hold firmly without excessive pressure.
Hard maple, beech, ash, and oak are all excellent choices.
Many builders leave the liners slightly proud, then plane them perfectly flush with the benchtop after installation for seamless support.
Step 5: Lay Out and Drill the Dog Holes
This is one of the defining moments of the entire build.
The dog hole pattern determines how flexible your workholding system will be for years to come.
Before drilling anything, spend time checking your layout.
Measure.
Measure again.
Then check it one more time.
It’s much easier to adjust pencil lines than drilled holes.
Keep the Holes Perfectly Vertical
Accuracy matters.
Even a slight angle can affect how well bench dogs and holdfasts perform.
Whenever possible, use equipment that helps maintain perfectly vertical holes, such as:
- A drill press
- A portable drill guide
- A plunge router with a guide jig
Slow, steady drilling usually produces cleaner results than rushing through the process.
Ease the Edges
After drilling, lightly chamfer each opening.
This simple touch reduces splintering and makes inserting accessories noticeably smoother.
It’s one of those finishing details that makes the bench feel thoughtfully built rather than simply assembled.
Step 6: Flatten the Bench One Final Time
Once the top, base, vise, and dog holes are complete, perform one last flattening.
Minor stresses introduced during assembly can create tiny inconsistencies that are easy to remove now.
Use a reliable straightedge to check the surface.
Look for:
- High spots
- Twist
- Slight unevenness
- Glue residue
- Raised grain
A final tuning pass leaves you with a work surface ready for precise woodworking from day one.
Step 7: Apply a Practical Finish
A workbench doesn’t need a glossy furniture finish.
In fact, highly polished surfaces often make woodworking more difficult by reducing grip.
Most experienced woodworkers choose finishes that protect the wood while preserving its natural feel.
Popular options include:
- Boiled linseed oil
- Danish oil
- Hard wax oil
- Oil-and-wax blends
These finishes help resist moisture and glue while remaining easy to renew as the bench ages.
Instead of hiding wear, they allow the bench to develop character naturally.
Step 8: Fine-Tune Every Detail
Construction may be complete, but this final stage is what transforms a solid bench into an exceptional one.
Work through each feature carefully.
Open and close the vise several times.
Insert your bench dogs.
Test your holdfasts.
Clamp a long board.
Plane a short board.
Look for anything that feels slightly awkward or inconsistent.
Often, the smallest adjustments make the biggest difference in everyday use.
Mistakes That Are Easy to Avoid
Every experienced woodworker has learned valuable lessons while building a workbench.
Fortunately, many of the most common mistakes can be prevented with a little extra planning.
Making the Bench Too Light
A lightweight bench often moves when you least want it to.
Whenever practical, choose more mass rather than less.
Installing the Vise Before Planning the Dog Holes
The vise and dog holes should work together as one system.
Always confirm the vise location before drilling the bench.
Ignoring Seasonal Wood Movement
Wood expands and contracts naturally.
Allowing for that movement during construction helps prevent unnecessary stress and potential cracking later.
Rushing the Flattening Process
A perfectly flat bench pays dividends on every future project.
Take the time to get it right.
You’ll rarely regret extra care at this stage.
Keeping Your Bench Performing Like New
One of the pleasures of owning a traditional woodworking bench is that maintaining it is refreshingly simple.
Once or twice each year, take a few minutes to inspect everything.
Check that the vise operates smoothly.
Clean accumulated sawdust from the dog holes.
Tighten any hardware that has worked loose.
Remove hardened glue before it builds up.
If the finish begins looking dry, apply another light coat of your preferred oil.
Every few years, place a straightedge across the benchtop.
If you notice minor unevenness, flatten the surface again.
Because the top was designed with generous thickness, this maintenance can be repeated many times throughout the life of the bench.
A well-built woodworking bench isn’t something you eventually replace.
It’s something you continue refining, improving, and relying on as your woodworking journey unfolds.
Part 8
Frequently Asked Questions
I’m building my first serious workbench. Do I really need both a vise and dog holes?
If your goal is to build a bench you’ll enjoy using for many years, the answer is yes.
A vise gives you reliable clamping power, but its usefulness expands dramatically when it’s paired with well-positioned dog holes. Together, they allow you to secure everything from narrow drawer sides to full-size table tops without covering your work surface with clamps.
Could you build a bench without dog holes?
Absolutely.
Would you eventually wish you had them?
Most woodworkers do.
They add so much versatility that they’re often considered one of the defining features of a traditional woodworking bench.
How many dog holes should I drill?
There’s no magic number.
A better question is whether your layout supports the kind of projects you build most often.
A single row works beautifully for many benches.
A second row provides greater flexibility for wide panels and larger assemblies.
The good news is that you’re not locked into your first decision.
Many woodworkers begin with a practical layout and add additional holes later as they discover new ways of working.
Your bench can evolve just as your skills do.
Is a 3/4-inch dog hole really the best choice?
For most workshops, yes.
A 3/4-inch (19 mm) hole has become the standard because it works with an enormous range of accessories.
Bench dogs.
Holdfasts.
Surface clamps.
Bench anchors.
Shop-made jigs.
By choosing the standard size, you make future upgrades simple while giving yourself the widest possible choice of workholding accessories.
Can I add dog holes to an older workbench?
You certainly can.
In fact, many experienced woodworkers breathe new life into older benches by upgrading the workholding system rather than replacing the entire bench.
Before drilling, check beneath the benchtop for hardware or braces that could interfere with the layout.
Take your time marking the positions and think about how the holes will work with your existing vise.
A carefully planned upgrade can make an old bench feel surprisingly modern.
Is one vise enough for most woodworking?
For many people, it is.
A quality face vise combined with a thoughtful dog hole layout will comfortably handle the majority of woodworking projects.
As your interests grow, you may decide to add an end vise or tail vise, particularly if you begin building larger furniture or working extensively with hand tools.
The important thing isn’t owning the greatest number of vises.
It’s having a workholding system that suits the way you naturally work.
Which wood makes the best workbench?
Several species have earned outstanding reputations over the years.
Among the most popular are:
- Hard maple
- European beech
- White oak
- Ash
- Southern yellow pine
- Douglas fir
Each has strengths.
Some are heavier.
Some are more affordable.
Some are easier to machine.
Ultimately, the best choice is the one that balances durability, stability, availability, and your budget.
A thoughtfully designed bench built from good-quality lumber will almost always outperform a poorly designed bench made from premium wood.
Should I build my own workbench or buy one?
That depends on what you value most.
Buying a bench saves time and gets you working immediately.
Building your own gives you something very different.
You decide the height.
The width.
The vise position.
The dog hole layout.
The wood species.
The storage options.
Every detail reflects the way you like to work.
Many woodworkers eventually say their workbench was one of the most satisfying projects they ever built—not because it was the most complicated, but because they continued benefiting from it every single day afterward.
How heavy should a woodworking bench be?
In general, heavier benches perform better.
As a rough guide:
- 150–250 pounds works well for lighter hobby woodworking.
- 250–400 pounds provides excellent stability for most furniture making.
- 400 pounds or more offers exceptional performance for demanding hand-tool work.
More weight means less vibration, less movement, and greater confidence during challenging operations.
It’s one of the few situations in woodworking where adding mass almost always improves performance.
How often should I flatten the benchtop?
There’s no schedule you have to follow.
Instead, let the bench tell you.
If you begin noticing uneven glue-ups, slight rocking, or low spots developing across the surface, it’s probably time for a light flattening.
For many hobby woodworkers, this might only happen every few years.
Professionals who use their benches daily may perform this maintenance more frequently.
The important thing is not to wait until the surface becomes noticeably inaccurate.
Small corrections are easier than major repairs.
Bonus: 15 Professional Upgrades That Make a Great Workbench Even Better
One of the best things about a traditional woodworking bench is that it never feels truly finished.
As your skills improve, your bench can improve with you.
Many of the most useful upgrades are surprisingly simple, yet they make everyday woodworking smoother, faster, and more enjoyable.
1. Install a Sliding Deadman
Support long boards with confidence while edge-planing, cutting joinery, or fitting doors and table aprons.
2. Add a Second Row of Dog Holes
Increase your clamping options for wide panels, cabinet sides, and complex glue-ups.
3. Upgrade Your Bench Dogs
Replace basic dogs with precision brass, stainless steel, or hardwood versions that offer smoother operation and greater durability.
4. Fit Replaceable Jaw Liners
Hardwood or leather-lined jaws improve grip while protecting delicate workpieces from clamp marks.
5. Build Several Bench Hooks
Keep different sizes ready for crosscutting, trimming, and fine joinery work.
They’re quick to build and incredibly useful.
6. Add a Planing Stop
Speed up repetitive hand-planing by holding boards securely without reaching for clamps.
7. Store Holdfasts Within Reach
A simple rack beneath the benchtop keeps your most-used workholding tools exactly where you need them.
8. Build a Lower Storage Cabinet
Besides organizing tools, the added weight improves the overall stability of the bench.
9. Add Adjustable Leveling Feet
If your workshop floor isn’t perfectly flat, leveling feet help eliminate unwanted rocking.
10. Make Dedicated Assembly Stops
Simple removable stops make assembling drawers, cabinets, and frames faster and more consistent.
11. Create Custom Routing Fixtures
Use your dog holes as anchor points for jigs that improve routing accuracy and repeatability.
12. Install Better Workshop Lighting Above the Bench
Excellent lighting reduces eye strain and makes layout lines, grain direction, and fine joinery much easier to see.
13. Keep a Bench Maintenance Kit Nearby
Store a straightedge, winding sticks, lubricant, a small brush, and your preferred bench oil together so routine maintenance becomes quick and convenient.
14. Label Your Custom Jigs
As your collection grows, discreet labels help you find the right fixture quickly, especially if several serve similar purposes.
15. Keep a Workshop Notebook
Record bench dimensions, dog hole spacing, vise adjustments, successful jig ideas, and lessons learned from each project.
Over the years, those notes become an invaluable reference—and a fascinating record of your progress as a woodworker.
Products / Tools / Resources
If you’re planning to build a woodworking bench with a vise and dog holes, having the right tools and materials from the beginning makes the entire project smoother and more enjoyable.
Here are some of the most useful products and resources to consider:
- Heavy-duty woodworking face vise
- Tail vise or end vise hardware kit
- Bench dogs (3/4-inch hardwood or brass)
- Traditional holdfasts
- Hard maple, European beech, white oak, ash, Southern yellow pine, or Douglas fir lumber
- Waterproof wood glue for laminating the benchtop
- Long pipe clamps or parallel clamps
- Precision combination square
- Marking gauge
- Tape measure
- Carpenter’s pencils
- Drill press or portable drill guide
- 3/4-inch brad-point or Forstner drill bit
- Chamfer bit or countersink
- Router and straight bit
- Router sled for flattening large surfaces
- Jointer plane for final flattening
- Cabinet scraper
- Random orbital sander
- Boiled linseed oil, Danish oil, or hard wax oil finish
- Leather or hardwood jaw liner material
- Adjustable leveling feet
- Straightedge and winding sticks
- Safety glasses
- Hearing protection
- Dust mask or respirator
- Wooden mallet
- Bench hook
- Shooting board
- Clamping squares
- Workshop notebook for recording measurements, improvements, and future upgrade ideas
These tools and resources don’t all need to be purchased at once. Start with quality essentials, build your bench, and expand your setup gradually. Much like the bench itself, a well-equipped workshop develops over time, with each addition making your woodworking experience more efficient, more enjoyable, and more rewarding.