
There is a strange moment many left-handed woodworkers recognize almost immediately.
You pick up a tool that everybody else seems to use without thinking. The grip feels fine. The weight feels fine. Then you reach for the safety switch and your thumb has to stretch. Or the motor housing blocks exactly the part of the cut you want to see. Or the dust seems to be blowing toward you instead of away.
Nothing is dramatically wrong.
It just feels… off.
That small feeling matters more than people think.
Woodworking has always been a physical craft. You don’t simply operate tools. You lean into them, guide them, brace against them, reach around them, and develop habits so deeply that eventually your hands seem to know what to do before your conscious mind catches up.
For a left-handed woodworker, the goal isn’t to hunt down an entirely separate universe of “left-handed tools.”
Most of the time, you don’t need them.
What you need are tools that work naturally with the way you move.
That means paying attention to things that rarely make the front of the box: control placement, blade visibility, grip shape, trigger access, safety switches, balance, reversible handles, dust ports, belt hooks, fences, and the position of your body relative to the tool.
Those small details determine whether a tool disappears into the work or reminds you, over and over, that it was designed around somebody else’s dominant hand.
This guide is about learning to tell the difference before you spend your money.
Quick Answer: What Are the Best Woodworking Tools for Left-Handed People?
The best woodworking tools for left-handed people are tools that can be operated safely and comfortably with either hand, or tools whose controls, grips, blade orientation, and accessories suit a left-handed working position.
The most useful features to look for include:
- Ambidextrous switches and controls
- Reversible belt hooks
- Adjustable auxiliary handles
- Clear blade or cutting-line visibility
- Symmetrical or neutral grip shapes
- Accessible safety releases
- Flexible dust extraction
- Adjustable guides and fences
- Good balance in the left hand
- Controls that don’t force awkward wrist or thumb movement
Plenty of woodworking tools are already naturally ambidextrous. Sanders, drills, chisels, mallets, clamps, planers, and many stationary machines usually work just as well from either side.
Handedness becomes more important when a tool relies heavily on blade position, line-of-sight, asymmetric controls, directional movement, or body placement.
That distinction is the key to buying well.
Recommended guide: Left-Handed Woodworking Tips: Which Tools Need a Left-Handed Version—and Which Don’t?
Left-Handed Woodworking Isn’t Harder — But Some Tools Quietly Assume You’re Right-Handed
Being left-handed is not a woodworking disadvantage.
That is worth stating plainly.
Wood does not behave differently because your dominant hand happens to be your left. Grain direction doesn’t change. A sharp edge still cuts cleanly. A square joint is still square. A dovetail still fits because of accuracy, patience, and technique—not because of which hand held the saw.
The friction comes from somewhere else.
It comes from the interface between you and the tool.
Imagine holding a cordless tool where every important control falls naturally beneath your fingers. You can see exactly where the cutter meets the wood. The battery doesn’t bump your forearm. The motor clears your body. The cord or hose trails away from your working position instead of looping across it.
You don’t stop and congratulate the manufacturer.
You just work.
Now imagine those same details being slightly wrong.
Your thumb has to reach farther than it wants to.
You tilt your head to see the cut.
Your wrist turns a little more than feels natural.
You adjust.
Then you adjust again.
One awkward movement is nothing. Repeat it for hours and suddenly ergonomics stops being a minor detail.
It becomes part of the work.
Why Some Woodworking Equipment Feels Right-Handed
Most tool design follows the habits of the majority, and the majority of people are right-handed.
That can show up in surprisingly subtle ways:
- Trigger locks positioned for a right thumb
- Blade orientation that favors a right-handed sightline
- Safety switches that are easier to reach from one side
- Dust ports placed where a left-handed user may find the hose intrusive
- Belt hooks mounted for right-side carrying
- Auxiliary handles positioned asymmetrically
- Cord routing that crosses a left-handed stance
- Fence controls that are easier to manipulate from one direction
None of these automatically makes a tool unsuitable.
That is important.
Sometimes a supposedly right-handed tool feels perfectly natural in the left hand. Sometimes the difference is barely noticeable.
And every so often, one small design choice makes a tool frustrating enough that you know within seconds it isn’t for you.
That is why the best buying decision begins with something more useful than labels:
How does the tool behave in your hands?
“Left-Handed Tool” and “Left-Handed-Friendly Tool” Are Not the Same Thing
This distinction can save you a lot of unnecessary shopping.
A left-handed tool is specifically manufactured or configured differently for a left-handed user.
A left-handed-friendly tool is simply designed in a way that works well from either side.
For most woodworking, that second category is where the real opportunity lies.
Take a random orbital sander.
Your hand sits above the pad. The tool moves across the surface beneath you. The basic cutting action doesn’t dramatically change depending on which hand is dominant.
Now pick up a circular saw.
Everything shifts.
Suddenly you are thinking about:
- Which side the blade sits on
- Whether you can see the cut line
- Which side of the workpiece is supported
- Where the motor sits
- Where the dust goes
- How your body lines up with the saw
Handedness matters more because the tool itself is more directional.
A simple way to think about it is this:
The more a woodworking tool depends on asymmetric controls, visibility, or body position, the more carefully a left-handed user should evaluate it before buying.
That principle matters far more than whatever happens to be printed on the packaging.
15 Best Types of Woodworking Tools for Left-Handed People
There is no perfect “left-handed woodworking tool kit.”
There is something better: a collection of tools chosen because they fit the way you actually work.
Here are the categories worth paying closest attention to.
1. Ambidextrous Cordless Drills and Drivers
A cordless drill or impact driver is one of the easiest tools for a left-handed woodworker to live with.
Most modern models already work beautifully from either side.
The forward/reverse selector usually passes through the body of the drill, making it reachable with either thumb or index finger. Trigger placement is centered. Battery packs are generally neutral.
Still, the details matter.
Look for:
- A grip that feels natural in your left hand
- A trigger you can reach without stretching
- Forward/reverse controls accessible from both sides
- A reversible belt hook
- Balanced weight distribution
- Easy clutch and speed adjustments
One detail people often dismiss is the belt hook.
It seems trivial until you’re climbing a step ladder, carrying lumber, moving around a workshop, or repeatedly clipping the drill to your belt.
Then suddenly, which side that hook lives on matters quite a bit.
What Matters Most?
Balance.
Pick up the drill with your left hand and stop analyzing.
Just hold it.
Does the weight settle naturally?
Or do you immediately feel your wrist making a small correction?
Your body often notices bad ergonomics before your brain puts words to it.
2. Jigsaws With a Clear View of the Cut
A jigsaw should feel almost like an extension of your hand.
That makes visibility especially important.
Some jigsaws give you an open, clean view of the blade. Others hide the action behind guards, housings, blowers, or bulky front sections.
Hold the saw naturally in your left hand and look toward the blade.
Can you see:
- The cutting line
- The blade
- The front of the shoe
- The precise place where blade and wood meet
Then look at the controls.
Where is the orbital-action selector?
Where is the speed control?
Where is the trigger lock?
Can you release the blade without an awkward grip?
None of these things seems significant when you’re comparing spec sheets.
During a long project, they become very significant.
3. Circular Saws With the Blade Orientation That Suits Your Technique
Circular saws are where left-handed woodworking advice often becomes overly simplistic.
You’ve probably seen the argument.
Blade-left is better.
No, blade-right is better.
A left-hander should always choose this.
A left-hander should never choose that.
The truth is less tidy.
And more useful.
The right circular saw depends on:
- Your stance
- Your preferred sightline
- How you support the material
- Which side of the workpiece becomes the offcut
- Motor clearance
- Dust direction
- Saw balance
- The kind of cuts you make most often
Some left-handed woodworkers immediately prefer one blade orientation.
Others prefer the opposite.
What matters is not matching a label.
It is finding a saw that lets you make controlled, supported cuts while following the manufacturer’s safe operating procedure.
We’ll go deeper into blade-left versus blade-right later, because this is one tool where the details genuinely deserve attention.
4. Random Orbital Sanders
There is something refreshingly uncomplicated about a good random orbital sander.
Most models simply don’t care which hand you favor.
Your palm sits over the motor. The pad works beneath it. The movement is largely neutral.
But comfort still varies.
Pay attention to:
- Grip diameter
- Vibration
- Switch placement
- Speed controls
- Dust collection
- Cord location
- Battery position
A sander that feels perfectly acceptable for thirty seconds can become irritating after twenty minutes.
That is why low vibration and a comfortable grip often matter more than a headline specification.
5. Palm and Trim Routers
Compact routers are one of those tools that become more useful the longer you own them.
Edge profiles.
Flush trimming.
Grooves.
Templates.
Small joinery work.
Because trim routers are generally compact and fairly symmetrical, many work comfortably for both left- and right-handed users.
Look closely at:
- Power switch location
- Grip shape
- Depth adjustment
- Visibility around the bit
- Cord or battery position
- Base locking mechanism
One important point: your dominant hand does not change the physics of routing.
Proper feed direction still matters.
Always follow the manufacturer’s instructions and established routing technique rather than reversing the direction simply because working from the other side feels instinctive.
6. Plunge Routers With Balanced Handles
A full-size plunge router is typically a two-handed tool.
That alone makes handedness less pronounced.
What can matter is where the secondary controls live.
Put both hands on the router as though you’re about to make a cut.
Can you comfortably reach:
- The plunge lock
- The power switch
- Depth controls
- Speed controls
Now imagine controlling that router while also watching a layout line.
If your fingers have to leave the handles constantly just to access basic functions, you’ll notice it every time you use the machine.
The best router isn’t one designed for left-handed people.
It is one whose controls stop demanding your attention.
Recommended reading: 10 Router Basics Every Woodworker Must Master Before Their First Project
7. Oscillating Multi-Tools
Oscillating multi-tools are naturally adaptable because of their narrow, inline body.
They can be held from different angles, which makes them useful in awkward spaces where larger tools simply won’t fit.
Typical woodworking jobs include:
- Flush cutting
- Detail sanding
- Trimming
- Plunge cutting
- Removing old material
- Working inside corners
For a left-handed user, the main things to check are grip diameter, switch location, vibration, and whether the battery or cord interferes with your normal hand position.
8. Track Saws
A track saw changes the relationship between your eye and the cut.
Instead of guiding the blade entirely by watching a pencil line, you position a rail and let that rail define the cut.
For some left-handed users, that can feel wonderfully controlled.
Evaluate:
- Plunge mechanism
- Trigger safety
- Blade visibility
- Dust hose routing
- Track clamp access
- Motor clearance
- Natural stance beside the rail
Track saws are especially appealing when breaking down sheet goods, making long straight cuts, or working in shops where a large table saw isn’t practical.
9. Miter Saws With Controls You Can Reach Naturally
Because a miter saw sits in one place, handedness usually matters less than it does with handheld tools.
But handle design can still favor one side.
Stand in front of the saw.
Don’t just look.
Pretend you’re about to make a cut.
Reach for the handle naturally.
Can you operate the safety release without twisting your hand?
Can you squeeze the trigger comfortably?
Can you hold the workpiece according to the manufacturer’s safe operating instructions while maintaining a stable stance?
Those questions matter far more than whether the machine is marketed toward one hand or another.
10. Table Saws With Simple, Accessible Controls
Left-handed beginners sometimes worry that a table saw itself must somehow be right-handed.
Generally, that is the wrong problem to solve.
A table saw is a system.
You have the fence, blade, guard, switch, workpiece, push tools, outfeed area, and your own body position all interacting at once.
What matters is whether the machine can be operated safely and comfortably within the manufacturer’s intended procedure.
Look at:
- Power switch location
- Fence adjustment
- Blade tilt
- Miter gauge
- Blade visibility
- Outfeed support
- Dust collection
- Access to push sticks and safety equipment
Don’t invent mirrored techniques simply because you’re left-handed.
Good table-saw habits should be built around safe material control and manufacturer guidance, not dominant-hand assumptions.
11. Thickness Planers
A thickness planer is a good example of a tool where handedness barely matters.
You feed the stock in the intended direction.
The cutterhead does the work inside the machine.
Your left or right hand has little influence on the cutting geometry.
Instead, focus on:
- Capacity
- Feed quality
- Depth adjustment
- Dust collection
- Snipe
- Cutter or blade availability
- Build quality
This is a useful reminder:
Not every woodworking purchase needs to become a left-handed woodworking purchase.
12. Drill Presses
Drill presses are similarly neutral.
Some machines place feed handles or adjustment controls on one particular side, but the actual drilling operation is not inherently tied to dominant hand.
Pay attention to:
- Feed-handle position
- Table adjustment
- Power switch
- Depth stop
- Chuck access
- Workholding
Good clamping and accurate setup matter much more here than being left- or right-handed.
13. Marking and Measuring Tools
This is one category where tiny annoyances can quietly pile up.
You may use a saw a few times during a project.
You may use a tape, square, pencil, marking gauge, or rule dozens of times.
That repetition changes the equation.
Look at:
- Tape measure readability
- Rule orientation
- Combination square markings
- Marking gauges
- Sliding bevels
- Marking knives
- Layout tools
Can you read measurements without turning the tool around?
Can you register the marking knife naturally against a straightedge?
Can you hold the square and mark with your dominant hand without crossing yourself up?
These are small things.
But woodworking is full of small things repeated hundreds of times.
14. Hand Planes
A well-set hand plane is one of woodworking’s great pleasures.
The whisper of a thin shaving coming off a board is almost absurdly satisfying.
And thankfully, most standard bench planes can be used effectively with either hand.
Your stance may change.
Your grip may change.
Your preferred bench position may change.
But the tool itself is usually flexible.
Handedness becomes more important with specialty planes that include fences, lateral projections, or asymmetric bodies.
Before spending serious money on one, ask:
Does this plane work naturally from the side I actually use?
For ordinary bench planes, focus first on:
- Sharpness
- Sole flatness
- Iron adjustment
- Comfortable tote and knob
- Proper setup
A razor-sharp standard plane that fits your hands will serve you better than a dull specialty tool with the “correct” handedness.
15. Hand Saws
Hand saws are personal.
Very personal.
Two saws with nearly identical specifications can feel completely different because of handle shape, wrist angle, balance, and cutting action.
Some saws are effectively ambidextrous.
Others are shaped in a way that strongly favors one hand.
Try to notice:
- Handle comfort
- Wrist position
- Grip angle
- Balance
- Visibility
- Cutting style
Japanese pull saws can be particularly interesting because their pulling action and generally simple handle forms feel natural to many woodworkers.
But again, there is no universal answer.
Hold the saw.
Move it through the air.
Your hand usually knows.
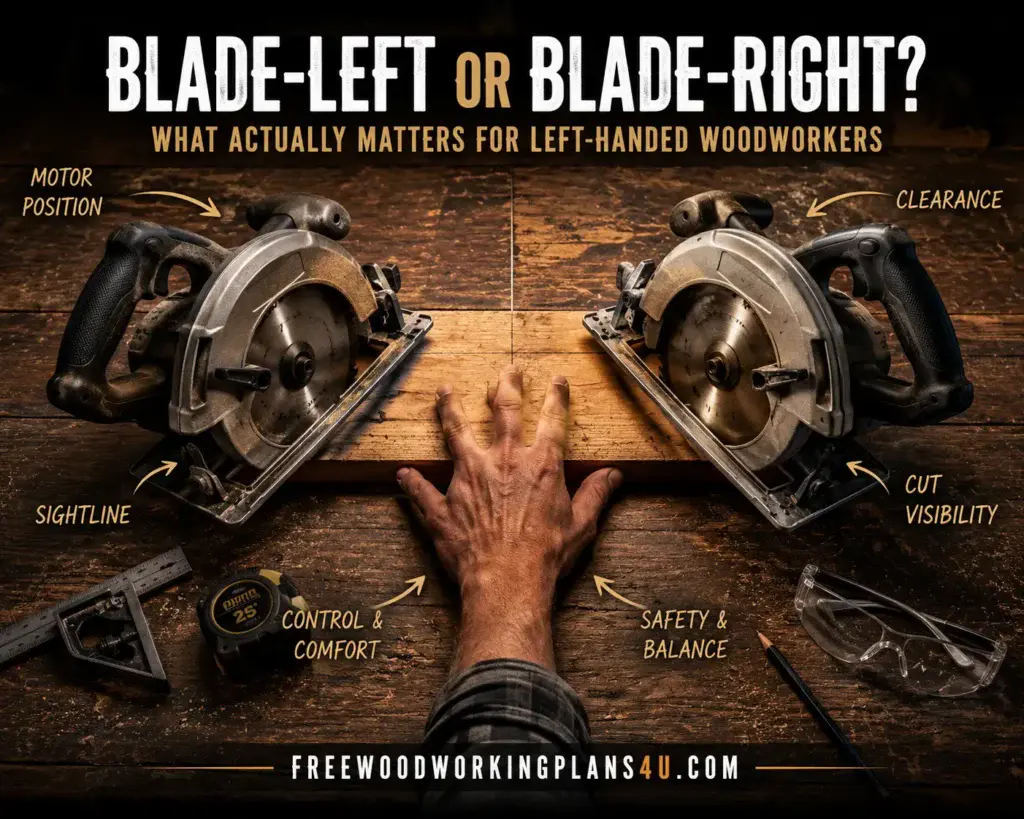
Circular Saws for Left-Handed Woodworkers: Blade-Left vs. Blade-Right
This is where people love absolute rules.
Unfortunately, absolute rules are rarely useful here.
A circular saw is not just a motor attached to a blade.
It is an entire relationship between the operator, the saw, the supported workpiece, the offcut, the cut line, and the direction of movement.
That is why blade orientation needs context.
Blade Visibility Can Change Everything
Seeing where the blade meets the line can make a saw feel more intuitive.
Depending on your hand and the saw’s blade position, one design may provide a much clearer view.
That visibility can be comforting, especially when you’re still developing confidence.
But visibility is only one variable.
Motor Clearance Matters Too
Circular saw motors take up space.
A configuration that gives you a beautiful view of the blade may place the motor in a position that feels awkward relative to your arm, body, or the supported material.
Balance matters.
Clearance matters.
The supported side of the cut matters.
The entire system has to make sense.
And Then There Is Sawdust
Where does the debris go?
A saw can give you great sightline visibility while also directing dust somewhere you’d rather it didn’t.
Eye protection is essential regardless, but dust direction still affects comfort and visibility.
Think About the Workpiece, Not Just the Saw
This is where many buying discussions go wrong.
The saw isn’t floating in space.
It is cutting a board.
One side is supported.
One side may become waste.
Your body occupies a particular position.
So evaluate the whole chain:
Body → hands → saw → blade → cut line → supported material → offcut
If one part of that chain forces you into poor technique, the configuration isn’t helping.
So Which Circular Saw Is Best for a Left-Handed Person?
There is no single correct answer.
The best saw is the one that lets you maintain:
- Proper workpiece support
- Stable control
- Clear enough visibility
- Comfortable body position
- Safe clearance
- Predictable movement
If possible, physically handle both blade-left and blade-right configurations before buying.
This is one of those rare cases where thirty seconds in your hands can tell you more than twenty product reviews.
The Power Tool Features Left-Handed Woodworkers Should Notice First
Once you stop searching for products specifically labeled “left-handed,” buying becomes much easier.
Instead, look for flexibility.
Ambidextrous Controls
Controls that work equally well from either side are gold.
Pay special attention to:
- Safety releases
- Trigger locks
- Forward/reverse switches
- Paddle switches
- Speed controls
Reversible Belt Hooks
A small feature with a surprisingly large impact.
If you’re carrying a drill or driver around the workshop all day, the ability to move the hook can make the tool feel like it belongs to you rather than somebody else.
Adjustable Auxiliary Handles
Side handles on drills, grinders, and similar tools should ideally be mountable in more than one position.
That allows you to choose the stance that gives you the most control.
Neutral Grip Shapes
An aggressively sculpted right-handed grip may look ergonomic until you hold it in your left hand.
Sometimes the simplest shape works best.
Clear Sightlines
You shouldn’t have to crane your neck just to understand what the tool is doing.
Sightlines matter particularly with:
- Circular saws
- Jigsaws
- Routers
- Detail cutting tools
Good visibility reduces awkward body movement and makes accurate work feel more natural.
Hand Tools Left-Handed Woodworkers Should Choose With a Little More Care
Power tools get all the attention.
But sometimes the most genuinely handed tools are the small ones.
Marking Knives
Some marking knives use single-bevel or asymmetric designs.
That can affect how the knife registers against a square or straightedge.
If you’re doing precise joinery, this is one tool worth evaluating carefully.
Scissors and Snips
These are classic examples of genuinely handed tools.
Blade overlap and handle geometry can affect both visibility and cutting action.
A dedicated left-handed version can make a real difference.
Carving Tools
Carving is a dance between grain direction, tool shape, pressure, hand position, and body movement.
That makes comfort highly individual.
Don’t assume a set will suit you simply because it has good reviews.
If possible, try individual handles and profiles first.
Specialty Planes
Shoulder planes, plow planes, rabbet planes, and fenced specialty tools may have asymmetric elements.
Those deserve more scrutiny than a standard bench plane.
The Tools That Usually Don’t Care Which Hand You Use
This may be the section that saves you the most money.
You do not need to rebuild your workshop around specialized equipment.
Many tools are effectively hand-neutral, including:
- Most chisels
- Mallets
- Many hammers
- Clamps
- Random orbital sanders
- Many drills and drivers
- Thickness planers
- Drill presses
- Bench grinders
- Scrapers
- Files
- Rasps
- Many squares
- Standard bench planes
If the tool feels good, works safely, and doesn’t interfere with your natural motion, there is no reason to replace it because you’re left-handed.
Sometimes the smartest left-handed tool choice is simply a good ordinary tool.
Your Workshop Layout May Matter More Than Your Tool Collection
This is the part many people miss.
A left-handed woodworker can spend hours comparing saws, drills, routers, and hand tools while ignoring something that affects every single project:
the workshop itself.
Think about how often you move through the same sequence.
Reach for the square.
Grab a pencil.
Clamp a board.
Step toward the vise.
Pick up the drill.
Return the drill.
Move to the saw.
Grab the mallet.
Those repeated movements become invisible after a while.
And that is exactly why workshop layout matters.
Workbench Orientation
Traditional woodworking books tend to show benches arranged in familiar ways.
That doesn’t mean you have to copy them exactly.
Stand at your bench.
Pretend you’re planing.
Then sawing.
Then chiseling.
Then marking.
Where do you naturally want to stand?
Which direction do your arms want to travel?
Where does your dominant hand want the workpiece?
Your bench should serve those movements.
Not a diagram.
Vise Positioning
Many traditional benches place the face vise in a location that assumes a particular working orientation.
A left-handed woodworker may prefer the mirrored position.
Or may not.
Before drilling permanent holes into an expensive bench, simulate the work.
Clamp a scrap board temporarily.
Try planing, sawing, and chiseling.
You’ll learn more from five minutes of movement than from a dozen rules.
Tool Storage
Where do your hands naturally reach?
That’s where frequently used tools should live.
It sounds almost insultingly obvious.
Yet workshops rarely evolve deliberately. Hooks get added wherever there is space. Tools migrate. Shelves fill. Before long, you’re reaching across yourself fifty times a day without noticing.
Pay attention for a week.
Then rearrange.
Lighting
Left-handed users sometimes cast shadows differently over their work.
A lamp placed perfectly for one stance may put your own hand directly between the light and the pencil line.
Move the light.
Simple.
Cheap.
Sometimes transformative.
Dust Collection
Dust hoses and power cords have an annoying ability to end up exactly where you don’t want them.
If the hose repeatedly crosses your natural path, change the routing.
You may discover that the “awkward tool” was never actually awkward.
The workshop around it was.
The 60-Second Left-Handed Tool Test
Before you buy a tool, do this.
It takes about a minute.
And it may save you years of mild irritation.
1. Pick It Up Without Thinking
Use your left hand naturally.
Don’t adjust to the tool.
Let the tool reveal itself.
Does it feel balanced?
2. Reach for Every Important Control
Without changing your grip dramatically, find:
- Trigger
- Safety release
- Speed control
- Lock
- Depth adjustment
- Blade or bit release
If one control already feels annoying in the store, imagine using it for five years.
3. Look Where the Cut Would Be
Imagine a pencil line on a board.
Can you see the relevant reference point without bending your neck or rotating the tool?
4. Mimic the Real Movement
Without powering the tool, move through the intended motion.
Notice your:
- Wrist
- Elbow
- Shoulder
- Stance
Does anything feel forced?
5. Look for Interference
Check the:
- Motor
- Battery
- Guard
- Cord
- Hose
- Fence
- Auxiliary handle
Is anything occupying the exact place your body wants to be?
6. See What Can Be Reversed
Can you move:
- Belt hooks
- Side handles
- Fences
- Dust ports
- Guides
Adaptability is often more valuable than a “left-handed” label.
7. Ask One Last Question
If nobody had told me whether this tool was right- or left-handed, would I still want it?
That question cuts through a lot of marketing.
Beginner Mistakes Left-Handed Woodworkers Can Avoid
Mistake #1: Assuming You Need Special Equipment
Usually, you don’t.
Start with good standard tools.
Build things.
Pay attention.
Your actual experience will tell you where specialized equipment would help.
Mistake #2: Trusting Labels More Than Your Hands
“Left-handed-friendly” is not a guarantee.
Neither is “ergonomic.”
Your hands are not the same size as everybody else’s. Your arm length, grip strength, posture, and technique are your own.
Try the tool whenever possible.
Mistake #3: Copying Right-Handed Technique Without Understanding It
Learn why a technique is performed a certain way.
Then distinguish between what is a safety requirement and what is simply ergonomic habit.
Some things can be adapted.
Others should not be.
Manufacturer safety procedures come first.
Mistake #4: Reversing Everything Just Because You’re Left-Handed
This is the mirror image of the first problem.
You don’t need to flip your entire shop.
Some standard layouts will work perfectly.
Change what genuinely feels wrong.
Leave the rest alone.
Mistake #5: Treating Left-Handedness Like a Limitation
This one can quietly hold beginners back.
You are not starting with a woodworking handicap.
You are simply learning which arrangements suit your body.
Eventually, the movements become automatic.
You stop thinking about which hand should go where.
The drill lands in your palm.
The chisel finds the line.
The saw settles into the cut.
At that point, you are no longer adapting.
You are woodworking.
How to Buy Woodworking Tools Without Regretting It Later
Woodworking tools have a way of becoming expensive quickly.
One shiny upgrade leads to another.
Then another.
Before long, you’re comparing specifications for a machine you didn’t even know existed six months ago.
A little discipline helps.
Ask these questions before buying.
Can I Operate It Comfortably?
Comfort isn’t indulgence.
A stable, natural grip supports better control.
If the tool already feels awkward while switched off, that is worth noticing.
Can I See What Matters?
You shouldn’t need perfect visibility everywhere.
But you should be able to see the important reference points when the operation requires it.
Are the Controls Where I Need Them?
Safety releases, triggers, depth controls, and adjustments should not demand strange hand positions.
Can the Tool Adapt?
Reversible handles, movable belt hooks, adjustable fences, and flexible dust collection add enormous real-world value.
Am I Paying for a Problem I Don’t Actually Have?
This is the dangerous one.
Specialized tools are easy to justify when they sound as though they were designed specifically for you.
But if an ordinary tool already works beautifully, there is nothing to fix.
Building a Left-Handed-Friendly Beginner Tool Kit
If you’re new to woodworking, don’t overcomplicate this.
A capable starter workshop could include:
- Cordless drill/driver
- Random orbital sander
- Jigsaw
- Circular saw or track saw
- Combination square
- Tape measure
- Marking knife or pencil
- Chisels
- Mallet
- Clamps
- Hand saw
- Basic workbench
Notice how normal that list looks.
That’s the point.
Nearly everything there can be used effectively by either hand.
You don’t need a specialized workshop before you have enough experience to know what you actually prefer.
Start building.
The work itself will teach you.
What Matters More Than Handedness
After enough time in a workshop, tool obsession gives way to something quieter.
You begin noticing the fundamentals.
A sharp chisel matters more than the label on the handle.
A flat board matters more than which side of the bench you stand on.
Solid workholding matters more than an extra feature.
Lighting matters.
Grain direction matters.
Setup matters.
Practice matters.
A beautifully designed left-handed tool cannot compensate for poor technique.
A perfectly ambidextrous saw cannot make unsupported material safe.
A premium drill doesn’t make an inaccurate layout accurate.
Choose tools thoughtfully.
Then use them enough that they become ordinary.
Frequently Asked Questions About Woodworking Tools for Left-Handed People
“Do I Actually Need Special Left-Handed Woodworking Tools?”
Usually, no.
Most common woodworking tools are either ambidextrous or usable from both sides with little difficulty.
Specialized left-handed designs are more relevant when blade geometry, asymmetric handles, controls, or visibility create a real problem.
The best approach is to identify specific friction points rather than assuming every tool needs a left-handed version.
“Are Left-Handed Power Tools Really a Thing?”
Some power-tool configurations can feel distinctly better for left-handed users, but most major categories do not require a special left-handed model.
Drills, sanders, routers, planers, oscillating tools, and many stationary machines can usually be used comfortably regardless of dominant hand.
Circular saws deserve more careful evaluation because blade position, motor clearance, and visibility vary.
“Which Circular Saw Should I Use If I’m Left-Handed?”
There is no universal winner.
Some left-handed woodworkers prefer blade-left.
Others prefer blade-right.
The better choice depends on how you support the material, where you stand, what you can see, where the motor sits, where the dust travels, and how the saw balances in your working position.
Handle both if possible.
“Can a Left-Handed Person Use a Table Saw Safely?”
Yes, provided the saw is used according to the manufacturer’s instructions and established safe operating practices.
Your dominant hand does not override proper workpiece support, guards, push tools, body positioning, or safe feed technique.
Avoid simply mirroring a method if that puts you into an unsafe position.
“Should I Mount My Workbench Vise on the Other Side?”
Maybe.
A left-handed woodworker may find a mirrored vise position more comfortable for planing, sawing, or chiseling.
But don’t make the decision from theory.
Simulate your normal workflow first.
The correct position is the one that lets you work naturally without compromising the bench’s function.
“Are Hand Planes Made for Left- or Right-Handed People?”
Most standard bench planes work well for either.
Specialty planes may include fences or asymmetric controls that make handedness more relevant.
For ordinary planes, sharpness, setup, and comfort matter far more than dominant hand.
“Are Japanese Saws Good for Left-Handed Woodworkers?”
Many are.
The straight handles and pulling action of Japanese saws can feel natural from either hand.
Individual designs still vary, so comfort and technique matter more than a blanket rule.
“What Should I Buy First If I’m a Left-Handed Beginner?”
Start with flexible, ordinary tools that work naturally from either side.
A drill/driver, jigsaw, sander, measuring tools, clamps, chisels, a suitable saw, and a basic bench can take you remarkably far.
Don’t spend extra money solving ergonomic problems you haven’t encountered yet.
Products / Tools / Resources
If you’re building a left-handed-friendly workshop, the smartest place to begin isn’t with a shopping spree. It’s with categories of tools that give you room to work naturally.
Cordless drill/driver: Look for a balanced grip, reversible belt hook, easy forward/reverse selector, and controls that don’t force your thumb into a strange position.
Random orbital sander: Prioritize low vibration, a comfortable palm grip, easy switch access, and dust collection that doesn’t crowd your working hand.
Jigsaw: Choose one that gives you a genuinely clear view of the blade and cutting line from your natural stance.
Circular saw: Compare blade-left and blade-right designs in person if you can. Don’t buy based on handedness alone. Check sightlines, motor clearance, dust direction, balance, and how naturally you can support the workpiece.
Track saw: Worth considering if you often cut sheet goods and want a guided system that reduces the need to visually chase a pencil line.
Combination square: One of the most-used tools in a workshop. Choose markings you can read comfortably from your normal working position.
Marking knife: If you do joinery, check whether the bevel configuration suits the way you register the knife against a square or straightedge.
Chisel set: Most chisels are naturally ambidextrous. Spend your attention on steel quality, handle comfort, and sharpening rather than handedness.
Hand saw or Japanese pull saw: Handle shape matters enormously. Try different designs if possible rather than assuming a traditional saw will automatically suit you.
Workbench vise: Before permanently mounting one, test the position with scrap stock and simulate planing, sawing, and chiseling from your natural stance.
Task lighting: Often overlooked, but surprisingly important. Position lighting so your dominant hand doesn’t cast a shadow directly over layout lines and detail work.
Dust collection accessories: Flexible hoses, swivel adapters, and sensible routing can make an otherwise awkward tool feel completely different.
Useful deeper reading topics:
- Beginner woodworking tools
- Circular saw selection
- Track saws
- Woodworking power equipment
- Hand planes
- Woodworking benches
- Bench vise installation
- Workshop organization
- Woodworking safety
- Measuring and marking tools
- Essential carpentry skills
- Woodworking machines for beginners