
Snippet
Choosing the best woodworking machines for beginners isn’t about filling your workshop with expensive equipment. It’s about investing in a handful of reliable machines that help you work safely, accurately, and with confidence from day one. In this guide, you’ll discover the seven machines that offer the greatest value, learn which ones deserve a place in your workshop first, and avoid the costly buying mistakes that leave many beginners with tools they rarely use.
Table of Contents
- Every Great Workshop Starts With One Good Decision
- What Makes a Woodworking Machine Truly Beginner-Friendly?
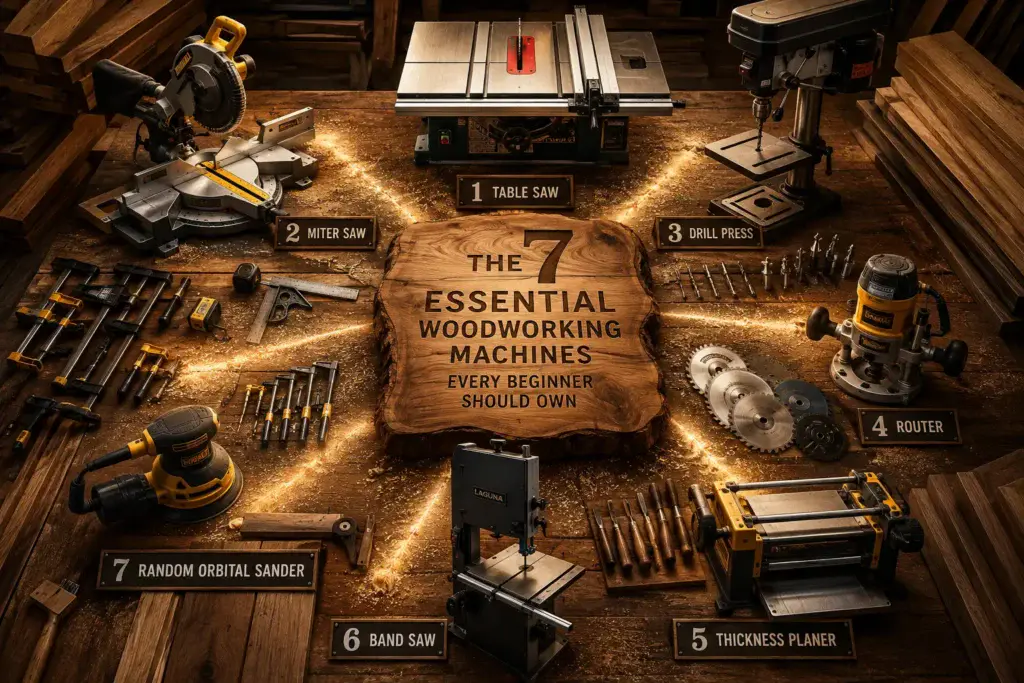
- Machine #1: The Table Saw – The Machine That Changes Everything
- Machine #2: The Miter Saw – Fast, Clean, and Surprisingly Addictive
- Machine #3: The Drill Press – Precision You Can Feel
- Machine #4: The Router – Small Machine, Endless Possibilities
- Machine #5: The Thickness Planer – The Secret Behind Beautiful Lumber
- Machine #6: The Band Saw – Where Straight Lines Give Way to Creativity
- Machine #7: The Random Orbital Sander – Where Good Projects Become Great Ones
- Which Woodworking Machine Should You Buy First?
- The Features Worth Paying For
- The Buying Mistakes That Cost Beginners the Most
- Building a Workshop on Any Budget
- Essential Workshop Safety Habits
- Frequently Asked Questions
- Bonus: A Beginner’s Workshop Growth Roadmap
- Products / Tools / Resources
Every Great Workshop Starts With One Good Decision
Spend a few minutes scrolling through woodworking videos online and it’s easy to believe that everyone owns a dream workshop.
Towering cabinet saws.
Industrial jointers.
Rows of perfectly organized machines stretching from one wall to the other.
Everything looks polished. Everything looks effortless.
Then you glance at your own garage—or maybe a corner of the basement—and suddenly woodworking feels far more expensive than you imagined.
Here’s the truth that rarely makes it into those videos.
Almost every experienced woodworker started exactly where you are now.
One machine.
A head full of ideas.
And absolutely no certainty that the first project would turn out the way they hoped.
That uncertainty isn’t a weakness.
It’s the beginning of the journey.
The workshop you’re dreaming about won’t appear overnight. It grows the same way every handcrafted piece of furniture grows—one careful cut, one smart decision, and one successful project at a time.
The machines you buy today should make that journey easier, not more expensive.
That’s why this guide isn’t about finding the biggest machine or the most impressive one.
It’s about finding the machines you’ll still be glad you bought five or ten years from now.
The ones that earn their place every single weekend.
The ones that quietly become part of almost everything you build.
Buying Machines Is Easy. Buying the Right Ones Is the Challenge.
There’s a strange moment that nearly every beginner experiences.
You decide to buy your first woodworking machine.
You search online.
Ten minutes later you’ve opened twenty browser tabs.
Every review recommends something different.
One expert insists a table saw is absolutely essential.
Another claims you should never start without a band saw.
Someone else says a router is the most versatile tool ever invented.
Then a video appears showing a workshop filled with twenty machines, all described as “must-haves.”
Instead of becoming more confident, you become overwhelmed.
Ironically, the woodworking industry has never offered more choices, yet beginners have never found it harder to decide.
The problem isn’t a lack of information.
It’s the sheer volume of it.
Some advice comes from furniture makers.
Some comes from contractors.
Some comes from hobbyists.
Some comes from companies trying to sell another machine.
Each recommendation makes perfect sense inside its own world.
The challenge is figuring out what makes sense for yours.
Your Workshop Doesn’t Need to Impress Anyone
There’s a quiet pressure that creeps into almost every hobby.
Cyclists compare bicycles.
Photographers compare cameras.
Musicians compare instruments.
Woodworkers compare workshops.
Before long, it’s easy to believe that your ability somehow depends on the number of machines you own.
It doesn’t.
Walk into the workshop of an experienced craftsperson and you’ll often notice something unexpected.
Nothing feels excessive.
Every machine has a purpose.
Every tool has earned its place.
There isn’t much that sits unused simply because it looked exciting in a catalog.
That’s the mindset worth adopting from the very beginning.
Rather than asking,
“What else should I buy?”
Ask,
“What will genuinely help me build my next project?”
That single question changes everything.
The Difference Between Collecting Tools and Building Furniture
Owning woodworking machines and building woodworking projects are two completely different hobbies.
One fills shelves.
The other fills homes.
It’s surprisingly easy to spend months researching machines without actually making anything.
Specifications become entertainment.
Product comparisons replace sawdust.
Shopping becomes the hobby.
Real progress begins when your focus shifts back to the wood itself.
Every finished project teaches lessons that no review video ever can.
You’ll discover which cuts feel awkward.
Which tasks take the longest.
Which operations you’d gladly make easier next time.
Those experiences naturally reveal which machine deserves to be purchased next.
Instead of guessing what you’ll need someday, your own projects begin answering the question for you.
It’s a far less expensive way to build a workshop.
And a far more satisfying one.
Why the Best Workshops Rarely Happen All at Once
Think about the furniture in your home.
None of them appear from a single piece of lumber.
Each begins with preparation.
Measurements.
Careful cuts.
Assembly.
Small improvements repeated over and over until everything fits together.
A workshop grows in exactly the same way.
Each machine solves a different challenge.
One improves accuracy.
Another speeds up repetitive cuts.
Another produces cleaner joinery.
Another transforms rough lumber into perfectly consistent boards.
Over time, those individual improvements begin working together.
That’s when woodworking starts feeling effortless.
Not because the projects become easier, but because your equipment supports the way you work instead of slowing you down.
More information: Best Woodworking Equipment for a Home Workshop: The Complete Setup Guide for Every Budget
Expensive Doesn’t Always Mean Better
There’s a common belief that buying the most expensive machine is the safest choice.
Sometimes that’s true.
Often it isn’t.
Professional shops purchase equipment for reasons that have little to do with beginner woodworking.
Production speed.
Daily commercial use.
Industrial durability.
Maximum efficiency.
Those are worthwhile investments when your livelihood depends on finishing dozens of projects every month.
If you’re building furniture on evenings and weekends, your priorities are different.
Accuracy matters.
Safety matters.
Reliability matters.
Ease of use matters.
Many mid-range woodworking machines deliver all of those qualities without carrying a professional price tag.
The goal isn’t to own industrial machinery.
It’s to own equipment that encourages you to build more often.
Every Machine Should Solve a Real Problem
The smartest woodworking purchases happen after frustration—not before it.
Imagine you’re halfway through building a bookshelf.
Everything is going well until you realize cutting perfectly identical shelves takes far longer than expected.
Suddenly, a table saw begins making a lot more sense.
Or perhaps you’ve built several tables and notice every edge still looks slightly unfinished.
Now the router feels like the logical next step.
The machine isn’t solving an imaginary future problem.
It’s solving one you’ve already experienced.
That’s exactly how experienced woodworkers quietly build remarkable workshops.
Each new purchase removes an obstacle that slowed down the previous project.
Eventually, every machine has a purpose.
Nothing collects dust simply because it looked impressive.
Woodworking Rewards Patience More Than Perfection
There’s something wonderfully honest about working with wood.
It doesn’t care how many machines you own.
It responds only to the quality of your work.
Measure carefully.
Cut accurately.
Take your time.
Pay attention to the grain.
Correct small mistakes before they become large ones.
Those habits matter infinitely more than owning another expensive machine.
Ironically, beginners often believe professionals work faster because they own better equipment.
The opposite is usually true.
Experienced woodworkers appear fast because they rarely rush.
Every movement has purpose.
Every setup is deliberate.
Every cut has already been imagined before the blade ever touches the wood.
That level of confidence doesn’t arrive with your first machine.
It grows quietly with every project you complete.
Building Skills That Last Longer Than Any Machine
Machines eventually wear out.
Motors fail.
Belts stretch.
Blades become dull.
Technology changes.
The skills you develop, however, stay with you forever.
Learning how to read grain direction.
Understanding why wood expands and contracts.
Recognizing the sound of a clean cut.
Developing patience during assembly.
Those lessons never become obsolete.
In many ways, the machines in your workshop are simply teachers.
Each one introduces a new skill.
Each project reinforces it.
Long before your workshop becomes impressive, your craftsmanship begins to improve.
And that’s ultimately what this guide is about.
Not buying more.
Buying smarter.
So the workshop you build over the coming years becomes one that inspires you to create—not one that quietly reminds you of expensive purchases you never really needed.
In the next section, we’ll look beyond price tags and horsepower to answer a more important question:
What actually makes a woodworking machine beginner-friendly, and why do some machines continue earning their place in a workshop long after others have been replaced?
Part 2: What Makes a Woodworking Machine Truly Beginner-Friendly?
It’s easy to be impressed by horsepower numbers, oversized cast-iron tables, and glossy marketing photos.
Manufacturers know that.
Big machines look capable. Heavy machines feel professional. Extra features promise better results.
But once the excitement of unboxing fades, something far more important determines whether you’ll actually enjoy using a machine.
Does it help you become a better woodworker?
That’s the question worth asking.
A beginner-friendly woodworking machine doesn’t just complete a task. It teaches good habits. It builds confidence. It encourages accuracy instead of frustration. Most importantly, it makes you want to start the next project rather than dread it.
Some machines seem determined to remind you how much you still have to learn.
Others quietly guide you through that learning process.
The difference isn’t always obvious on a specification sheet.
You discover it the first time a perfectly straight cut comes together. Or when two boards fit so cleanly that they almost seem to pull themselves into alignment.
Those moments matter.
They’re what keep people coming back to the workshop.
The Best Machine Is the One That Doesn’t Fight You
Think back to the first time you learned to drive a car.
Imagine starting in an old sports car with an unforgiving clutch, heavy steering, and an engine that stalled every time you hesitated.
You probably would have spent more time fighting the vehicle than learning how to drive.
Woodworking machines can feel exactly the same.
A machine that’s difficult to adjust, constantly slips out of alignment, or vibrates with every cut demands your attention for all the wrong reasons.
Instead of learning woodworking, you’re learning how to compensate for poor equipment.
Good machines almost disappear while you work.
They respond predictably.
Adjustments stay where you put them.
Cuts become repeatable.
The machine stops being the challenge.
The wood becomes the focus.
That’s exactly where your attention belongs.
Confidence Is Built One Accurate Cut at a Time
Most beginners don’t lose motivation because woodworking is difficult.
They lose motivation because nothing seems to fit together.
A shelf ends up slightly too short.
A cabinet side isn’t perfectly square.
Two boards refuse to meet cleanly.
After enough small frustrations, it’s easy to assume the problem is a lack of talent.
More often, it’s simply inconsistent equipment—or rushing through the setup.
Reliable woodworking machines remove that uncertainty.
When a fence locks exactly where you expect…
When a blade cuts precisely along your layout line…
When measurements remain consistent from one piece to the next…
Your confidence starts growing almost automatically.
Accuracy creates momentum.
Momentum keeps you building.
Simplicity Is an Underrated Feature
Walk through any woodworking showroom and you’ll find machines loaded with adjustments.
Digital displays.
Micro-adjustment wheels.
Programmable controls.
Complex guide systems.
Some are incredibly useful.
Others simply add another layer of complication.
Early in your woodworking journey, simplicity is often your greatest advantage.
You don’t need dozens of settings.
You need clear controls.
Logical adjustments.
Reliable performance.
A machine should never require thirty minutes of preparation before making a five-minute cut.
The less time you spend decoding controls, the more time you spend improving your craftsmanship.
Simple doesn’t mean basic.
Simple means intuitive.
There’s a difference.
Accuracy Will Always Beat Raw Power
It’s tempting to compare machines by motor size.
More horsepower sounds impressive.
But here’s something experienced woodworkers understand.
Most beginner projects don’t fail because the motor wasn’t powerful enough.
They fail because measurements drifted.
Cuts wandered.
Fences shifted.
Boards weren’t square.
Precision transforms projects.
Power simply helps you cut harder materials more easily.
A perfectly aligned one-and-a-half horsepower machine will almost always produce better furniture than a poorly adjusted three-horsepower machine.
That’s why experienced buyers often pay more attention to fence quality, table flatness, and adjustment mechanisms than motor specifications.
The details you don’t notice in the store become the details you appreciate every weekend.
A Machine Should Earn Its Space
Workshop space is valuable.
Whether you’re working in a dedicated building or half of a garage, every square foot matters.
Before buying any woodworking machine, ask yourself something surprisingly practical.
How often will I actually use this?
The answer usually reveals whether the purchase makes sense.
A versatile machine that supports nearly every project earns its place quickly.
A highly specialized machine may spend months sitting untouched.
The goal isn’t to fill your workshop.
It’s to fill it with machines that contribute regularly to the way you build.
When every tool has a purpose, the entire shop feels more efficient.
Versatility Creates Better Value
Some woodworking machines excel at one task.
Others seem to reinvent themselves every time you learn a new technique.
Those are the machines beginners should pay close attention to.
Take the router, for example.
At first, you might buy it to round over sharp edges.
A few months later you’re cutting dadoes.
Then mortises.
Then decorative profiles.
Later you’re using templates to duplicate complex shapes.
One machine.
Dozens of possibilities.
That kind of versatility stretches your budget much further than buying several single-purpose tools.
The more ways a machine can solve problems, the more valuable it becomes over time.
Maintenance Shouldn’t Feel Like a Chore
No woodworking machine stays perfect forever.
Blades dull.
Belts wear.
Dust accumulates.
Bearings need attention.
Maintenance is simply part of ownership.
The question is whether the machine makes that maintenance easy—or unnecessarily frustrating.
Look for designs that allow:
- Quick blade changes
- Easy access to moving parts
- Straightforward adjustments
- Readily available replacement components
- Simple cleaning
Machines that are easy to maintain tend to stay accurate longer because owners actually take care of them.
The easier maintenance becomes, the less likely you’ll postpone it.
Dust Collection Is More Important Than Most Beginners Realize
There’s a moment every new woodworker experiences.
You finish cutting a few boards.
You look around.
Everything is covered.
The bench.
The floor.
The machines.
Even the coffee cup you left across the room somehow has sawdust floating on top.
Woodworking creates an astonishing amount of fine dust.
Beyond the obvious mess, airborne dust affects your health, your visibility, and even the quality of your finishes.
Machines designed with efficient dust collection ports are worth serious consideration.
Even connecting a simple shop vacuum can make a dramatic difference.
As your workshop grows, you’ll appreciate every machine that helps keep dust under control.
Stable Machines Produce Stable Results
Vibration is the enemy of precision.
When a machine shakes excessively, accuracy suffers.
Cuts become rougher.
Measurements become less predictable.
Operating the machine feels less controlled.
Heavier construction often helps reduce vibration, but weight alone isn’t the whole story.
Good engineering matters just as much.
Rigid frames.
Well-balanced motors.
Quality bearings.
Thoughtful design.
All contribute to smoother operation.
You don’t necessarily need the heaviest machine available.
You need one that feels planted and dependable every time you turn it on.
Think Beyond Today’s Projects
One of the smartest buying habits you can develop is looking just a little further ahead.
Not five years.
Not ten.
Just the next stage of your woodworking journey.
Ask yourself questions like:
- Will this machine still meet my needs after twenty projects?
- Can I upgrade parts instead of replacing the entire machine?
- Does it accept common accessories?
- Are replacement blades and parts easy to find?
- Will it grow with my skills?
A machine that continues improving alongside you almost always delivers better long-term value than one you’ll outgrow within a year.
The Quiet Difference Between Cheap and Inexpensive
These words sound similar.
They’re not.
A cheap machine often sacrifices quality where it matters most.
Weak fences.
Poor bearings.
Inconsistent adjustments.
Limited durability.
An inexpensive machine, on the other hand, simply avoids unnecessary luxury features while still delivering reliable performance.
Learning to recognize that distinction can save you a considerable amount of money.
You’re not searching for the lowest price.
You’re searching for the highest value.
Those two things rarely mean the same.
Build a Workshop That Feels Natural
Spend enough time in a well-designed workshop and you’ll notice something difficult to describe.
Everything flows.
Boards move naturally from one machine to the next.
Measurements remain consistent.
Tools are exactly where they’re needed.
Nothing feels forced.
That experience doesn’t happen because someone bought every machine available.
It happens because each machine was chosen with intention.
Each one supports the next step in the process.
Each one solves a genuine problem.
As your workshop grows, you’ll begin seeing your machines less as individual purchases and more as members of a team.
Together, they transform rough lumber into finished furniture.
And that’s when woodworking becomes something more than a hobby.
It becomes a craft.
In the next section, we’ll take a close look at the machine many woodworkers consider the foundation of that craft—the table saw—and explore why it continues to earn its reputation as the centerpiece of countless beginner workshops around the world.
Part 3: Machine #1 – The Table Saw: The Machine That Changes Everything
There comes a moment in almost every woodworker’s journey when things begin to click.
Measurements become more accurate.
Cuts start looking cleaner.
Projects fit together with less effort.
The difference isn’t always greater experience.
Sometimes it’s simply the arrival of the right machine.
For countless woodworkers, that machine is the table saw.
If a workshop had a heartbeat, this would be it.
Not because it’s the largest machine in the room.
Not because it’s the most expensive.
But because so much of woodworking begins here.
Long before a tabletop is glued together, a cabinet assembled, or a bookshelf filled with novels, every board has to become the right size.
Straight.
Square.
Consistent.
Repeatable.
The table saw does those jobs better than almost any other woodworking machine, which is why it has earned its reputation as the centerpiece of workshops around the world.
For beginners, it’s often the single purchase that unlocks more projects than any other.
Why the Table Saw Becomes the Center of the Workshop
Imagine trying to build a cabinet without accurately sized panels.
Or a dining table with boards that vary slightly in width.
Small differences become big problems.
One panel sits proud.
Another leaves a visible gap.
Suddenly you’re sanding, trimming, and adjusting parts that should have fit together from the beginning.
That’s what makes the table saw so valuable.
It introduces consistency.
Once it’s properly set up, every cut becomes repeatable.
Need six shelves that are exactly the same width?
No problem.
Need cabinet sides that match perfectly?
Easy.
Need identical parts for multiple drawers?
The table saw turns what would otherwise be careful guesswork into a routine process.
Instead of constantly correcting mistakes, you’re building with confidence.
What Exactly Is a Table Saw?
At first glance, a table saw looks surprisingly simple.
A circular blade rises through a flat tabletop.
The motor sits underneath.
The wood moves across the surface while the blade remains fixed.
That simplicity is deceptive.
Within that straightforward design lies one of the most versatile machines in woodworking.
By adjusting the blade height, changing the blade angle, and positioning the fence, the same machine can perform dozens of different operations.
That’s one of the reasons experienced woodworkers continue relying on it year after year.
It grows alongside your skills.
The more you learn, the more useful it becomes.
The First Time You Use One
Most beginners remember their first successful table saw cut.
There’s usually a little nervousness.
A quick double-check of the measurements.
One last look at the fence.
The motor starts.
The blade spins.
You guide the board forward carefully.
Then it happens.
The cut is perfectly straight.
The edge is smooth.
The measurement is exactly what you planned.
It feels different from using handheld tools.
There’s a sense of precision that’s difficult to appreciate until you’ve experienced it yourself.
Suddenly, projects begin feeling much more achievable.
What Can a Table Saw Actually Do?
Many people assume a table saw simply cuts boards.
In reality, it’s capable of much more.
A quality table saw can perform:
- Rip cuts
- Crosscuts with a miter gauge
- Bevel cuts
- Miter cuts using jigs
- Dados
- Rabbets
- Grooves
- Tenon shoulders
- Box joint preparation
- Panel sizing
- Hardwood ripping
- Sheet goods breakdown
- Taper cuts with specialized jigs
That’s an impressive amount of versatility from a single machine.
It’s one reason many woodworkers recommend purchasing the best table saw your budget comfortably allows.
You’ll likely use it on nearly every project.
Choosing the Right Type of Table Saw
Not every table saw serves the same purpose.
Understanding the differences helps you avoid paying for capacity you’ll never use—or buying a machine you’ll outgrow too quickly.
Jobsite Table Saws
These compact models are designed for portability.
They’re ideal for:
- Small garages
- Shared workshops
- Basements
- Home renovations
- DIY projects
Advantages include:
- Affordable pricing
- Easy storage
- Lightweight construction
- Standard household power
- Simple transportation
While smaller than larger saws, modern jobsite models are remarkably capable.
For many beginners, they’re the perfect starting point.
Contractor Table Saws
Contractor saws occupy the middle ground between portable machines and industrial equipment.
They typically offer:
- Larger tables
- Better stability
- More accurate fences
- Stronger motors
- Improved cutting capacity
If woodworking becomes a long-term hobby, many people find a contractor saw provides everything they need for years.
It’s often viewed as the sweet spot between affordability and performance.
Cabinet Table Saws
Cabinet saws represent the professional standard.
These heavy machines are built for daily production work.
Their advantages include:
- Exceptional accuracy
- Outstanding durability
- Powerful enclosed motors
- Heavy cast-iron construction
- Minimal vibration
- Large cutting capacity
They’re wonderful machines.
They’re also expensive, heavy, and often unnecessary for someone just starting out.
Buying a cabinet saw before you’ve completed your first few projects is a little like buying a race car before learning to drive.
The capability is impressive.
The timing usually isn’t.
The Parts You’ll Quickly Become Familiar With
Learning the basic components makes operating the saw much less intimidating.
The Blade
This is where the cutting happens.
Different blades are designed for different materials and cutting styles.
Choosing the right blade often has more impact on cut quality than upgrading the machine itself.
The Rip Fence
The fence guides wood during rip cuts.
A quality fence should lock firmly, remain parallel to the blade, and move smoothly.
If there’s one feature worth paying for, it’s this.
An accurate fence creates accurate projects.
The Miter Gauge
Mounted in slots on the tabletop, the miter gauge supports wood during crosscuts and angled cuts.
While basic factory gauges work reasonably well, many woodworkers eventually upgrade to improve precision.
Blade Height Adjustment
This controls how much of the blade extends above the tabletop.
Proper blade height improves both safety and cut quality.
A common guideline is allowing the blade to rise only slightly above the thickness of the workpiece.
Blade Tilt
Tilting the blade allows bevel cuts for projects requiring angled edges.
Quality adjustment mechanisms make these changes smooth and repeatable.
One Blade Doesn’t Do Everything
Many beginners assume the blade included with the saw is all they’ll ever need.
It’s a reasonable assumption.
It’s also one of the quickest ways to limit the machine’s potential.
Blades are specialized tools.
Different designs excel at different tasks.
Combination Blades
Excellent all-around performers.
Ideal for beginners who want versatility without constantly changing blades.
Rip Blades
Designed to cut quickly along the grain.
Perfect for preparing hardwood stock.
Crosscut Blades
Produce exceptionally clean cuts across the grain with minimal tear-out.
Excellent for furniture projects.
Fine Finish Blades
Ideal when appearance matters.
These blades leave crisp edges on hardwood, plywood, and veneered materials.
A premium blade often transforms an average saw into an outstanding performer.
It’s one of the smartest upgrades you’ll ever make.
Safety Begins Long Before the Blade Spins
Few woodworking machines demand as much respect as the table saw.
Fortunately, modern designs include several features that dramatically improve safety.
Look for:
- Riving knives
- Blade guards
- Anti-kickback pawls
- Large emergency stop switches
- Stable fence systems
- Smooth adjustment controls
These aren’t marketing extras.
They’re important safety features that help prevent common accidents.
Whenever possible, leave them installed.
Good habits developed now will stay with you for life.
Understanding Kickback
Ask experienced woodworkers about table saw safety, and one word appears again and again.
Kickback.
It happens when the wood becomes trapped between the blade and the fence, causing the spinning blade to throw the workpiece back with tremendous force.
Fortunately, kickback is largely preventable.
Good practices include:
- Keeping the rip fence properly aligned
- Using a riving knife
- Supporting long boards
- Standing slightly to one side of the blade
- Feeding material at a steady pace
- Never forcing a cut
Respect for the machine—not fear—is what keeps woodworking enjoyable.
Common Beginner Mistakes
Almost everyone makes a few mistakes early on.
Fortunately, they’re easy to correct.
Using Dull Blades
A dull blade doesn’t simply produce rough cuts.
It requires more force, increases burning, and places greater strain on both the motor and the operator.
Measuring in a Hurry
The old saying remains true.
Measure twice.
Cut once.
Wood removed by mistake is difficult to put back.
Forgetting to Check the Fence
Even a slight fence movement affects every cut that follows.
Take a moment to verify it’s locked securely before each operation.
Rushing Through Cuts
The blade doesn’t need encouragement.
Allow it to work at its own pace.
Forcing material almost always produces poorer results.
Ignoring Material Support
Long boards become difficult to control without proper infeed and outfeed support.
Supporting the workpiece properly improves both safety and accuracy.
Keeping Your Table Saw Performing Like New
Fortunately, maintaining a table saw doesn’t require hours of work.
A few simple habits make a remarkable difference.
Regularly:
- Vacuum accumulated sawdust
- Clean resin from blades
- Wax the tabletop
- Check blade alignment
- Verify fence accuracy
- Lubricate moving mechanisms
- Inspect electrical cords
- Replace dull blades promptly
These small routines preserve both performance and reliability.
Many well-maintained table saws continue producing accurate work for decades.
Why It Deserves to Be Your First Major Machine
If someone asked experienced woodworkers to build an entire workshop around one machine, many would begin with the table saw.
Not because it’s perfect.
No machine is.
But because it supports such an enormous range of woodworking projects.
It teaches precision.
Rewards patience.
Encourages consistency.
And quietly becomes part of almost everything you build.
It’s more than a machine.
It’s the foundation upon which countless woodworking skills are built.
In the next section, we’ll look at two more workshop essentials—the miter saw and the drill press—and discover how they make everyday woodworking faster, more accurate, and considerably more enjoyable.
Part 4: Machine #2 – The Miter Saw & Machine #3 – The Drill Press
Once you’ve spent some time working with a table saw, another pattern begins to emerge.
Not every cut belongs there.
Sometimes you simply need to trim a board to length—quickly, cleanly, and without setting up a complicated fence or jig.
Other times, you’re drilling holes that absolutely must be straight. A slight angle is enough to throw off an entire project, leaving shelves crooked, drawer slides misaligned, or hardware that refuses to sit flush.
Those moments introduce two machines that quietly become some of the hardest-working tools in any workshop.
The miter saw brings speed and repeatable accuracy to crosscuts.
The drill press delivers perfectly positioned holes with a level of precision that’s difficult to achieve by hand.
Neither machine tries to replace the table saw.
Instead, they complement it beautifully.
Together, they make woodworking feel smoother, more predictable, and far less frustrating.
Machine #2: The Miter Saw – Fast, Clean, and Surprisingly Addictive
There’s something satisfying about using a miter saw.
Measure the board.
Make a mark.
Lower the blade.
A second later, you’re holding a perfectly clean cut.
It’s simple, efficient, and incredibly consistent.
After using one for a while, you’ll begin reaching for it almost automatically whenever a project calls for repeated crosscuts.
It’s one of those machines that quietly saves time all day long.
What Is a Miter Saw?
Unlike a table saw, where the wood moves through a stationary blade, a miter saw works the opposite way.
The board stays in place while the blade pivots downward through the material.
That simple difference changes the entire experience.
It feels controlled.
Comfortable.
Intuitive.
Because the workpiece remains supported against the fence throughout the cut, many beginners find a miter saw less intimidating than other large woodworking machines.
It’s an excellent confidence builder.
Why It Earns a Place in So Many Workshops
Think about how many woodworking projects involve cutting boards to a specific length.
Bookshelves.
Coffee tables.
Garden planters.
Picture frames.
Cabinet face frames.
Outdoor furniture.
The list goes on.
A miter saw excels at these jobs.
It doesn’t just make straight cuts quickly—it makes identical cuts repeatedly.
When every leg on a table measures exactly the same length, assembly becomes easier.
When every rail fits perfectly between two stiles, joinery feels effortless.
That consistency is where the real value lies.
Projects Where a Miter Saw Truly Shines
Although it’s useful for almost any woodworking project, a miter saw is particularly valuable when building:
- Workbenches
- Shelving units
- Furniture frames
- Outdoor benches
- Raised garden beds
- Pergolas
- Deck furniture
- Wooden planter boxes
- Birdhouses
- Picture frames
- Trim and molding
- Cabinet face frames
If your projects involve dimensional lumber, chances are this machine will see regular use.
Choosing the Right Type of Miter Saw
Several variations are available, and understanding the differences makes choosing much easier.
Standard Miter Saw
A standard miter saw performs straight cuts and angled miter cuts.
It’s compact, affordable, and perfectly capable for many beginner projects.
If your work mainly involves narrower boards, this may be all you need.
Compound Miter Saw
Compound models add the ability to tilt the blade, allowing bevel cuts as well as miters.
This greatly expands your options.
Furniture making, trim work, and many decorative projects become easier because one machine now handles compound angles with accuracy.
For many beginners, this represents the best balance between capability and price.
Sliding Compound Miter Saw
Sliding models allow the blade to move forward and backward on rails.
This increases cutting capacity dramatically.
Wide shelving.
Large panels.
Broad hardwood boards.
All become easier to manage.
They’re more expensive, but if you expect to work with larger stock regularly, the additional versatility can be well worth the investment.
Small Features You’ll Appreciate Every Weekend
Specifications tell only part of the story.
It’s the everyday details that determine how enjoyable a machine is to use.
Look for features such as:
- Positive angle stops
- Easy-to-read scales
- Smooth sliding rails
- Comfortable operating handle
- Effective dust collection
- Stable base
- Quick blade changes
- Accurate fence alignment
These details may seem minor in the showroom.
Months later, you’ll appreciate every one of them.
A Better Blade Makes an Immediate Difference
Many beginners judge a saw by its factory blade.
That’s understandable.
It’s also slightly unfair.
Most included blades are designed to perform reasonably well across many materials rather than exceptionally well on one.
Installing a premium carbide-tipped blade often transforms the machine overnight.
Cleaner cuts.
Less tear-out.
Reduced burning.
Longer blade life.
It’s one of the simplest upgrades you can make.
Mistakes That Are Easy to Avoid
Like every woodworking machine, the miter saw rewards careful habits.
Watch out for these common beginner mistakes.
Lifting the Blade Too Soon
Allow the blade to stop spinning before raising it.
Doing so helps prevent loose offcuts from being caught and thrown unexpectedly.
Forgetting Material Support
Long boards require support on both sides of the saw.
Without it, the weight of the board can affect accuracy.
Rushing Measurements
The cut itself takes only seconds.
Measuring carefully takes slightly longer.
Always invest the extra time.
It’s far easier than correcting a board that’s now an inch too short.
Forcing the Cut
Sharp blades should move through wood smoothly.
If the saw struggles, let the blade work at its own pace.
Patience usually produces cleaner results.
Keeping It Accurate
Routine maintenance takes very little effort.
A few regular habits include:
- Cleaning sawdust from moving parts
- Checking fence alignment
- Cleaning resin from blades
- Lubricating sliding rails
- Tightening loose hardware
- Replacing dull blades
Consistency in maintenance leads to consistency in your projects.
Machine #3: The Drill Press – Precision You Can Feel
If the miter saw is about making perfect cuts, the drill press is about making perfect holes.
At first glance, that may not sound particularly exciting.
Then you build your first cabinet.
Or install shelf pins.
Or drill dowel holes that actually line up.
Suddenly, precision drilling feels surprisingly important.
It’s one of those machines that quietly improves almost every project without drawing much attention to itself.
What Makes a Drill Press Different?
Most beginners already own a cordless drill.
It’s incredibly useful.
But it depends entirely on the person holding it.
Even the steadiest hands struggle to drill perfectly vertical holes every time.
A drill press removes that variable.
The bit travels straight down.
The workpiece remains supported.
Depth can be controlled with precision.
The result is a cleaner, more repeatable operation that quickly becomes indispensable for many types of woodworking.
Why Straight Holes Matter More Than You Think
Woodworking is full of small details that affect the finished project.
A slightly crooked hole may seem insignificant.
Until:
A shelf leans.
A hinge binds.
Drawer slides refuse to align.
Dowels don’t meet correctly.
Hardware sits unevenly.
Tiny inaccuracies have a habit of multiplying during assembly.
The drill press eliminates much of that uncertainty.
Instead of hoping each hole is straight, you know it is.
That confidence changes the entire building process.
More Than Just a Drilling Machine
Despite its name, the drill press handles far more than basic drilling.
With the proper accessories, it can perform:
- Precision drilling
- Repeatable depth drilling
- Counterboring
- Countersinking
- Large Forstner bit drilling
- Hole saw cutting
- Drum sanding
- Mortising with attachments
- Dowel drilling
- Circle cutting using jigs
It’s a surprisingly versatile addition to any workshop.
Benchtop or Floor Model?
For most beginners, the choice comes down to available space.
Benchtop Drill Press
Compact and affordable, benchtop models fit comfortably on a sturdy workbench.
Advantages include:
- Small footprint
- Lower cost
- Easy installation
- Excellent accuracy
- Plenty of capability for most woodworking projects
For home workshops, they’re often the most practical option.
Floor Drill Press
Larger floor-standing models provide:
- Greater drilling depth
- More power
- Larger work tables
- Increased stability
- Better capacity for oversized workpieces
Unless you’re regularly building large furniture or working with thick hardwood, many beginners find a benchtop model perfectly adequate.
Features Worth Looking For
A quality drill press should make adjustments quick and predictable.
Useful features include:
- Adjustable depth stop
- Variable speed settings
- Smooth feed handles
- Solid cast table
- Easy belt access
- Accurate chuck
- Stable column
- Good lighting around the work area
These improvements simplify every project.
Don’t Overlook Your Drill Bits
A precision machine deserves precision cutting tools.
Quality drill bits produce:
- Cleaner holes
- Less burning
- Reduced wandering
- Longer service life
- Better accuracy
A well-rounded collection typically includes:
- Brad point bits
- Twist bits
- Forstner bits
- Spade bits
- Hole saws
Together, they prepare you for almost any woodworking project.
Common Beginner Mistakes
Fortunately, they’re easy to correct.
Holding the Workpiece by Hand
Always secure the wood properly.
A spinning drill bit can grab material unexpectedly.
Using Excessive Pressure
Sharp bits should cut naturally.
Forcing them often creates rough holes and unnecessary heat.
Forgetting Backing Boards
Supporting the exit side of the cut helps prevent tear-out.
It’s a simple habit that greatly improves hole quality.
Ignoring Drill Speed
Different bit sizes and wood species require different speeds.
Taking a moment to adjust the machine produces cleaner, safer results.
A Machine That Rewards Precision
The drill press isn’t flashy.
It doesn’t dominate the workshop.
It simply performs one task exceptionally well, over and over again.
And that’s exactly why experienced woodworkers continue relying on it.
Accurate drilling doesn’t attract attention.
Inaccurate drilling certainly does.
In the next section, we’ll explore two machines that often transform ordinary projects into furniture-quality work: the router, with its incredible versatility, and the thickness planer, the machine that turns rough boards into beautifully consistent lumber ready for fine woodworking.
Part 5: Machine #4 – The Router & Machine #5 – The Thickness Planer
Every woodworker reaches a point where their projects begin to fit together beautifully.
The measurements are accurate.
The joinery is improving.
The cuts are cleaner than ever before.
And yet…
Something still feels unfinished.
The furniture is functional, but it doesn’t quite have the character you admire in handcrafted pieces.
The edges feel a little sharp.
The details look plain.
The lumber doesn’t always fit together as seamlessly as you imagined.
This is often the moment when woodworking stops being just about building things.
It becomes about refining them.
That’s where the router and the thickness planer begin to earn their reputation.
One adds elegance.
The other creates consistency.
Together, they quietly transform ordinary woodworking into fine craftsmanship.
Machine #4: The Router – Small Machine, Endless Possibilities
Few woodworking machines surprise beginners as much as the router.
It doesn’t dominate the workshop.
It isn’t especially heavy.
At first glance, it almost looks modest compared to larger machines.
Then you start using it.
A simple edge becomes beautifully rounded.
A plain cabinet door suddenly looks custom made.
Joinery that once seemed complicated becomes remarkably achievable.
Before long, you begin wondering how you ever built projects without one.
That’s the magic of a router.
Its size has very little to do with its capability.
What Is a Router?
A router uses a powerful electric motor to spin specially shaped cutting bits at extremely high speeds.
Instead of slicing through wood like a saw blade, the bit removes material gradually, allowing you to shape, trim, groove, and join wood with exceptional precision.
The real strength of the router isn’t the machine itself.
It’s the enormous variety of router bits available.
Change the bit, and you’ve essentially changed the machine.
One moment you’re cutting a groove.
The next you’re creating decorative molding.
A few minutes later you’re trimming laminate perfectly flush.
Very few woodworking machines can reinvent themselves so completely.
Why It Quickly Becomes One of Your Favorite Tools
There’s something deeply satisfying about watching a sharp router bit glide along an edge.
In seconds, a square corner softens into a smooth, elegant curve.
The project immediately feels different.
Not dramatically different.
Just… better.
More finished.
More intentional.
It’s often the smallest details that separate beginner projects from pieces that look professionally crafted.
The router specializes in those details.
Once you begin noticing what it can do, you’ll start seeing routed edges almost everywhere—in tables, cabinets, shelves, picture frames, and furniture throughout your home.
One Machine That Solves Dozens of Problems
The router is often called the most versatile woodworking machine for good reason.
It can perform an incredible range of operations, including:
- Decorative edge profiling
- Round-overs
- Chamfers
- Rabbets
- Dados
- Grooves
- Mortises
- Flush trimming
- Pattern routing
- Circle cutting
- Inlay work
- Sign carving
- Hinge mortising
- Box joints
- Dovetail joinery with jigs
- Raised panel work
- Template duplication
That’s an extraordinary amount of capability packed into one relatively compact machine.
For beginners trying to stretch their budget, few purchases offer as much long-term value.
Choosing Between a Fixed Base and a Plunge Router
Most beginners eventually compare these two designs.
Each has strengths.
Fixed Base Router
A fixed base router locks the cutting depth before the cut begins.
It’s simple, stable, and exceptionally accurate.
It’s ideal for:
- Edge profiling
- Router table work
- Flush trimming
- General routing
- Decorative details
Many beginners appreciate its straightforward operation.
There’s less to think about, allowing you to focus on technique.
Plunge Router
A plunge router allows the bit to move vertically into the wood while the motor is running.
This opens the door to many additional operations.
It’s particularly useful for:
- Mortises
- Stopped grooves
- Inlays
- Interior cutouts
- Template routing
Although slightly more complex, it’s also more versatile.
Combination Router Kits
Some manufacturers offer one motor with both fixed and plunge bases.
These kits provide exceptional flexibility without purchasing two complete routers.
If woodworking becomes a long-term passion, many people consider this one of the smartest investments available.
Router Bits: Where the Real Creativity Begins
Owning a router is only the beginning.
Its true personality comes from the bits you choose.
Every bit has a specific purpose.
Over time, your collection naturally grows alongside your skills.
Some of the most useful include:
Straight Bits
Perfect for grooves, dadoes, and general joinery.
Flush Trim Bits
Used with templates to produce perfectly identical parts.
An essential choice for repeatable work.
Round-Over Bits
Among the first bits many beginners buy.
They soften sharp edges and instantly make projects feel more refined.
Chamfer Bits
Create clean angled edges that add subtle elegance to furniture.
Rabbeting Bits
Excellent for cabinet construction, drawer backs, and many joinery applications.
Cove Bits
Ideal for decorative profiles that bring character to otherwise simple designs.
Pattern Bits
Designed for precision template work where consistency matters.
Why a Router Table Is Worth Considering
Although handheld routing is incredibly useful, mounting the router beneath a dedicated table changes how the tool behaves.
Suddenly, small pieces become easier to control.
Repeatable cuts become simpler.
Edge work becomes safer.
A router table also allows the fence to guide the workpiece, improving consistency during many operations.
For furniture builders especially, it’s one of those upgrades that continues paying dividends year after year.
Common Router Mistakes Beginners Make
Like every precision tool, the router rewards patience.
Fortunately, most mistakes are easy to avoid.
Trying to Remove Too Much Material
Large cuts create unnecessary strain.
Several shallow passes almost always produce cleaner, safer results.
Feeding the Wood Too Quickly
A router bit spins incredibly fast.
Allow it to remove material at its own pace.
Smooth movement creates smoother edges.
Using Dull Router Bits
Sharp carbide bits leave crisp, clean profiles.
Dull bits burn wood and increase tear-out.
Forgetting to Clamp the Workpiece
Movement during routing rarely ends well.
Secure the wood before turning the router on.
Buying Cheap Bits
A quality router deserves quality cutters.
Premium carbide bits often stay sharp dramatically longer while producing noticeably cleaner results.
Keeping Your Router in Excellent Condition
Fortunately, routine maintenance is simple.
Regularly:
- Clean the collet
- Remove pitch from bits
- Inspect bearings
- Lubricate plunge mechanisms
- Store bits carefully
- Check power cords
- Replace damaged cutters immediately
These small habits preserve both accuracy and safety.
Machine #5: The Thickness Planer – The Secret Behind Beautiful Lumber
Walk into the workshop of an experienced furniture maker and you’ll notice something.
The lumber looks different.
Flatter.
Cleaner.
Perfectly consistent.
That’s rarely an accident.
More often than not, it’s the work of a thickness planer.
For many beginners, this machine feels like a luxury.
Then they use one.
Suddenly rough boards become silky smooth.
Uneven stock becomes perfectly uniform.
Glue joints close effortlessly.
The entire woodworking experience changes.
What Does a Thickness Planer Actually Do?
A thickness planer removes thin layers of wood from the surface of a board.
Its primary purpose isn’t simply making wood thinner.
Its real job is creating lumber with a perfectly consistent thickness from end to end.
That consistency affects almost everything you build.
Cabinets assemble more accurately.
Tabletops glue together more smoothly.
Drawers slide better.
Shelves line up more precisely.
Uniform lumber produces uniform furniture.
Why So Many Woodworkers Eventually Buy One
Construction lumber is convenient.
It’s also surprisingly inconsistent.
Two boards labeled exactly the same size may vary enough to create frustrating assembly problems.
Hardwood suppliers often sell rough lumber that requires preparation before use.
That’s where the planer shines.
Instead of adapting your project to uneven material, you shape the material to fit your project.
It’s a subtle shift that dramatically improves results.
The Advantages Go Beyond Smooth Boards
Owning a planer opens new possibilities throughout your workshop.
It allows you to:
- Buy rough hardwood at lower prices
- Prepare reclaimed lumber
- Remove weathered surfaces
- Match board thickness perfectly
- Improve glue joints
- Reduce sanding time
- Create furniture-grade stock
- Maximize lumber yield
Over time, many woodworkers discover that the savings on hardwood alone help justify the investment.
One Important Misunderstanding
There’s one point that often confuses beginners.
A thickness planer does not flatten warped lumber.
It creates one surface that is perfectly parallel to the opposite surface.
If a board is twisted, bowed, or badly cupped, those defects generally remain.
Experienced woodworkers often flatten one face first—using a jointer or specialized sled—before sending the board through the planer.
Understanding this prevents a great deal of disappointment.
Features Worth Looking For
A beginner-friendly planer should make setup straightforward and operation predictable.
Useful features include:
- Easy depth adjustment
- Stable feed rollers
- Accurate thickness scale
- Quick blade replacement
- Effective chip ejection
- Reliable locking mechanism
- Smooth crank operation
- Dust collection compatibility
Machines designed with these features are simply more enjoyable to use.
How to Get Better Results Every Time
A planer performs best when you let it work gradually.
Take light passes.
Pay attention to the grain direction.
Inspect boards between passes.
Avoid rushing the process.
You’ll spend slightly more time preparing the lumber, but you’ll gain smoother surfaces, cleaner cuts, and far less tear-out.
Like so many aspects of woodworking, patience usually wins.
Mistakes That Can Shorten a Planer’s Life
Fortunately, they’re easy to avoid.
Removing Too Much Material
Heavy cuts increase strain on the motor and reduce surface quality.
Several light passes are always preferable.
Ignoring Hidden Metal
Old nails, screws, staples, or gravel hidden inside reclaimed lumber can damage planer knives instantly.
Always inspect boards carefully before feeding them through the machine.
Forgetting Dust Collection
Thickness planers produce astonishing amounts of wood chips.
Good dust extraction isn’t simply convenient.
It’s almost essential.
Continuing With Dull Knives
Sharp knives leave glass-smooth surfaces.
Dull knives leave rough grain and increase the effort required from the motor.
Replace or rotate them before quality begins to suffer.
Two Machines That Quietly Raise the Standard of Every Project
The router and the thickness planer improve woodworking in very different ways.
The router adds character.
The planer creates precision.
One shapes the visible details people notice immediately.
The other prepares the invisible accuracy that makes furniture fit together beautifully.
Together, they move your projects beyond simple construction and into genuine craftsmanship.
And perhaps more importantly, they help your workshop evolve in exactly the right direction—not by adding unnecessary complexity, but by making every board, every joint, and every finished piece just a little better than the last.
In the next section, we’ll complete our collection of essential beginner machines with two more workshop favorites: the band saw, beloved for its creative freedom, and the random orbital sander, the finishing tool that gives every project the smooth, professional surface it deserves.
Part 6: Machine #6 – The Band Saw & Machine #7 – The Random Orbital Sander
By now, your workshop has started to take on a rhythm.
You can size lumber accurately.
Crosscuts are clean and repeatable.
Holes land exactly where they should.
Edges are crisp, and boards are consistently milled.
Then something interesting happens.
You stop thinking only about building furniture.
You begin thinking about designing it.
Straight lines are no longer enough.
You want graceful curves.
Gentle arches.
Unique shapes.
You notice the subtle details that make one piece feel ordinary and another feel handcrafted.
At the same time, you realize that even the best joinery can be overshadowed by a rough surface.
A beautifully built table still feels unfinished if your hand catches tiny scratches every time it glides across the top.
That’s where the final two machines on this list come into their own.
One expands your creativity.
The other refines everything you’ve built.
Together, they help transform solid woodworking into truly satisfying craftsmanship.
Machine #6: The Band Saw – Where Straight Lines Give Way to Creativity
The first time you use a band saw, you’ll probably notice how different it feels.
It’s quieter than you expected.
Smoother.
Almost calm.
Instead of forcing wood through a spinning circular blade, you’re guiding it through a thin ribbon of steel that seems to slice almost effortlessly.
There’s very little drama.
Just steady progress.
And before long, you’ll discover something wonderful.
You’re no longer limited to straight lines.
What Is a Band Saw?
A band saw uses a long, continuous blade that travels around two large wheels inside the machine.
Only a short section of the blade is exposed above the table.
Unlike a table saw, where the blade rotates toward you, the band saw’s blade moves downward through the workpiece.
That simple design provides remarkable control.
It also allows you to make cuts that would be difficult—or impossible—using many other woodworking machines.
Curves become natural.
Tight corners become achievable.
Delicate work suddenly feels much less intimidating.
Why So Many Woodworkers Love the Band Saw
There’s a reason experienced woodworkers speak so highly of this machine.
It encourages exploration.
Instead of feeling restricted to straight cuts, you begin thinking in shapes.
Chair legs.
Decorative brackets.
Curved shelves.
Live-edge furniture.
Templates.
Custom signs.
The possibilities expand dramatically.
Even simple projects begin taking on more personality.
Many woodworkers eventually discover that the band saw is the machine that inspires them to experiment.
More Versatile Than Most Beginners Expect
Although curved cuts receive most of the attention, a band saw is capable of much more.
It can handle:
- Straight ripping
- Cutting curves
- Resawing thick lumber
- Making veneers
- Preparing bowl blanks
- Shaping cabriole legs
- Cutting circles
- Trimming irregular edges
- Pattern cutting
- Creating decorative brackets
- Breaking down rough stock
- Cutting small joinery components
Once you become familiar with its capabilities, you’ll likely find yourself reaching for it far more often than you imagined.
Understanding Band Saw Size
When shopping for a band saw, you’ll often see references to throat capacity.
This measurement describes the distance between the blade and the vertical frame of the machine.
A larger throat allows you to work with wider pieces of wood.
For most beginner workshops, a medium-sized band saw offers an ideal balance.
Large enough to tackle furniture projects.
Compact enough to fit comfortably in a home workshop.
Powerful enough to grow alongside your skills.
One Machine, Many Different Blades
Just as with table saws and routers, the blade dramatically affects performance.
Changing blades completely changes what the machine does best.
Narrow Blades
Excellent for:
- Tight curves
- Scrollwork
- Decorative cutting
- Intricate shapes
Their flexibility makes them ideal for detailed work.
Wide Blades
Designed for:
- Straight ripping
- Resawing
- Thick hardwood
- Larger workpieces
Because they’re stiffer, they track straighter during long cuts.
Tooth Configuration
Coarser teeth remove material quickly.
Finer teeth leave smoother surfaces.
Matching the blade to the project often improves results more than upgrading the machine itself.
Why Resawing Is Such a Valuable Skill
One feature that surprises many beginners is the band saw’s ability to resaw lumber.
Resawing means slicing a thick board into two thinner boards.
This allows you to:
- Create bookmatched panels
- Produce your own veneers
- Maximize expensive hardwood
- Build lighter furniture components
- Improve lumber efficiency
Although it takes practice, resawing opens possibilities that dramatically expand your woodworking options.
Common Beginner Mistakes
The band saw is wonderfully forgiving, but a few habits make a noticeable difference.
Using the Wrong Blade
Trying to cut tight curves with a wide blade usually leads to frustration.
Always choose a blade designed for the job.
Forcing Tight Turns
The blade naturally follows gentle curves.
Twisting the wood too aggressively often causes the blade to drift.
Smooth, patient movements produce cleaner results.
Ignoring Blade Tension
Proper tension affects both accuracy and blade life.
Checking it before each project quickly becomes second nature.
Forgetting Blade Tracking
A properly tracked blade runs smoothly and cuts accurately.
Learning this adjustment is time well spent.
Letting Sawdust Build Up
Dust accumulates around guides, wheels, and moving components.
Routine cleaning keeps the saw operating smoothly while extending its lifespan.
Looking After Your Band Saw
Maintenance is refreshingly straightforward.
Regularly:
- Remove sawdust
- Inspect blade guides
- Check blade tension
- Verify tracking
- Clean resin from blades
- Lubricate moving components
- Replace worn blades promptly
Small routines like these help preserve both performance and accuracy.
Machine #7: The Random Orbital Sander – Where Good Projects Become Great Ones
If woodworking has a secret ingredient, it might be sanding.
It’s rarely the part people look forward to.
Few woodworkers proudly announce they spent the afternoon sanding.
Yet it’s often the difference between furniture that simply looks good and furniture people instinctively reach out to touch.
That silky smooth surface isn’t an accident.
It’s the result of careful preparation.
And few tools accomplish that better than a random orbital sander.
What Is a Random Orbital Sander?
Unlike older finishing sanders that move in predictable patterns, a random orbital sander combines two motions at once.
The sanding pad spins.
At the same time, it moves in tiny random orbits.
This prevents obvious sanding scratches while producing remarkably even surfaces.
Instead of leaving visible swirl patterns, it gradually refines the wood until it’s ready for finish.
The result feels natural.
Almost effortless.
Why Every Workshop Benefits From One
Every project reaches a stage where cutting and assembly are complete.
Now the focus shifts.
You’re no longer shaping the wood.
You’re preparing it to be seen.
And touched.
The random orbital sander excels here.
It smooths joints.
Blends surfaces.
Removes pencil marks.
Eliminates tiny imperfections.
It quietly improves almost everything you’ve built.
Projects That Benefit Most
The answer is surprisingly simple.
Almost all of them.
Whether you’re building:
- Dining tables
- Shelves
- Cabinets
- Chairs
- Picture frames
- Wooden toys
- Cutting boards
- Workbenches
- Decorative boxes
- Outdoor furniture
- Signs
- Coffee tables
Proper sanding dramatically improves the finished appearance.
It’s one of the few tools you’ll likely use on nearly every project.
Choosing the Right Sandpaper
The machine matters.
The abrasive matters just as much.
Different grits serve different purposes.
Coarse Grit (40–80)
Ideal for:
- Removing saw marks
- Leveling uneven surfaces
- Heavy stock removal
Medium Grit (100–150)
Perfect for:
- General smoothing
- Preparing for finer sanding
- Removing shallow imperfections
Fine Grit (180–220)
Excellent before applying stain or finish.
Produces smooth, furniture-ready surfaces.
Extra Fine Grit (320 and Above)
Often used between coats of finish to achieve exceptionally smooth results.
Progressing gradually through grit levels creates noticeably better surfaces than skipping directly to fine abrasives.
Let the Sandpaper Do the Work
One of the most common beginner mistakes is pressing harder.
It feels logical.
More pressure should remove material faster.
In reality, the opposite usually happens.
Too much pressure:
- Slows the sanding pad
- Creates swirl marks
- Wears abrasives prematurely
- Generates unnecessary heat
- Produces uneven surfaces
A light touch allows the machine to work exactly as it was designed.
Guide it steadily.
Be patient.
The results speak for themselves.
Dust Collection Isn’t Just About Cleanliness
Sanding creates incredibly fine dust.
Much finer than most cutting operations.
Without proper collection, that dust settles everywhere.
Modern random orbital sanders often include dust bags or vacuum connections for good reason.
Effective dust collection:
- Improves visibility
- Extends sandpaper life
- Creates cleaner finishes
- Protects your lungs
- Reduces workshop cleanup
It’s one of those improvements you’ll appreciate every single time you sand.
Common Sanding Mistakes
Almost every beginner encounters these at some point.
Skipping Grit Levels
Each grit removes scratches left by the previous one.
Skipping several stages often leaves marks that become painfully obvious after finish is applied.
Moving Too Quickly
Slow, overlapping passes create a much more consistent surface.
Rushing almost always leaves uneven areas behind.
Ignoring End Grain
End grain absorbs finish differently.
Spending a little extra time sanding it helps create a much more uniform appearance.
Using Worn-Out Sandpaper
Once abrasives stop cutting efficiently, replace them.
Fresh sandpaper often works faster than applying more pressure.
Forgetting to Remove Dust Between Grits
A quick vacuum or wipe prevents loose abrasive particles from creating fresh scratches during the next sanding stage.
It’s a small habit that makes a noticeable difference.
Caring for Your Sander
Like every quality tool, a random orbital sander performs best with basic maintenance.
Regularly:
- Empty the dust bag
- Clean ventilation openings
- Inspect the backing pad
- Check power cords
- Store abrasives properly
- Remove dust from hook-and-loop surfaces
These simple habits keep the tool working efficiently for years.
Two Machines That Complete the Workshop
The band saw encourages creativity.
The random orbital sander rewards patience.
One allows you to create shapes that weren’t possible before.
The other reveals the beauty hidden beneath careful craftsmanship.
Together, they complete a beginner workshop capable of tackling an astonishing variety of projects—from practical home improvements to elegant furniture built to last for generations.
By now you’ve explored all seven of the essential woodworking machines that consistently deliver the greatest value for beginners.
The next question is one every new woodworker eventually asks:
Which machine should I actually buy first, and what is the smartest order for expanding my workshop without wasting money?
That’s exactly what we’ll answer in the next section.
Part 7: Which Woodworking Machine Should You Buy First?
If you’ve read this far, you already know something important.
There isn’t a single “perfect” woodworking machine.
Every tool in your workshop exists for a reason.
The real question isn’t which machine is the best.
It’s which machine will make the biggest difference right now.
That answer is different for every woodworker.
Someone building farmhouse tables doesn’t have the same needs as someone making jewelry boxes.
A homeowner tackling renovation projects won’t buy equipment in the same order as a furniture maker.
The mistake many beginners make is assuming there’s one universal shopping list.
There isn’t.
The smartest workshop is built around the projects you actually want to create—not the ones you might build five years from now.
Start With Your Vision, Not Your Wishlist
Before comparing brands, reading reviews, or filling an online shopping cart, pause for a moment.
Imagine your next five projects.
Not your dream projects.
Your realistic ones.
Will you be building shelves for the garage?
A coffee table for the living room?
A workbench?
A set of outdoor chairs?
Picture those projects sitting finished in your home.
Now work backwards.
What machines would genuinely make building them easier?
This simple exercise prevents one of the biggest beginner mistakes: buying equipment for imaginary future projects while struggling with today’s.
The Machine That Usually Comes First
For most people, that first major purchase is the table saw.
And there’s a good reason.
Almost every woodworking project begins by transforming rough material into accurately sized parts.
Whether you’re cutting hardwood boards, trimming plywood, or preparing lumber for joinery, the table saw handles the kind of work that appears again and again.
It becomes part of your routine.
Not occasionally.
Constantly.
The more projects you complete, the more obvious its value becomes.
Instead of adapting your design to your tools, your tools begin supporting your ideas.
That’s a subtle but important shift.
When a Miter Saw Makes More Sense
Of course, there are exceptions.
If your projects revolve around:
- Deck building
- Pergolas
- Garden structures
- Outdoor furniture
- Home remodeling
- Interior trim
- Framing
- Construction lumber
A compound miter saw may deserve the first spot in your workshop.
Why?
Because these projects involve countless crosscuts.
Instead of ripping large panels, you’re repeatedly cutting boards to precise lengths.
A miter saw excels at exactly that.
It makes repetitive work feel almost effortless.
For homeowners and DIY enthusiasts, it often becomes one of the busiest machines in the shop.
Working With Limited Space
Not everyone has room for a dedicated workshop.
Some people share half a garage.
Others work in a basement corner or even on a folding workbench that disappears after each project.
That’s perfectly fine.
Great woodworking isn’t measured in square footage.
In smaller spaces, flexibility becomes incredibly valuable.
Prioritize machines that are:
- Compact
- Portable
- Easy to store
- Compatible with mobile stands
- Multi-purpose
- Simple to move when needed
A thoughtfully organized small workshop often feels far more productive than a large workshop filled with poorly arranged equipment.
Space matters.
Planning matters even more.
Don’t Buy for the Person You’ll Be Someday
One of the easiest traps to fall into is shopping for your future self.
You watch someone building intricate dining tables.
Suddenly you’re researching industrial cabinet saws.
You admire handcrafted rocking chairs.
Now you’re convinced you need a large band saw.
There’s nothing wrong with dreaming.
Dreams are part of what keeps woodworking exciting.
Just don’t let tomorrow’s ambitions dictate today’s purchases.
Your workshop should grow naturally.
Each completed project reveals what comes next.
Trying to skip several stages usually leads to expensive machines sitting quietly in the corner while you continue learning the basics.
Build Around Skills, Not Equipment
Think of your workshop as a reflection of your experience.
Every new machine should arrive because you’ve earned a reason to own it.
Maybe you’ve built enough furniture to appreciate the speed of a planer.
Maybe repetitive drilling has convinced you it’s time for a drill press.
Perhaps shaping curved furniture has made a band saw the obvious next step.
These purchases feel different.
They’re no longer guesses.
They’re solutions.
And solutions almost never become regrets.
A Buying Order That Makes Sense
Every woodworker’s path is unique, but many experienced builders follow a surprisingly similar progression.
Here’s a practical roadmap.
Stage One: Build the Foundation
Focus on learning core woodworking skills.
A solid starting setup includes:
- Table saw
- Random orbital sander
- Cordless drill and driver
- Quality measuring tools
- Clamps
With these tools, you can complete an impressive variety of beginner projects while learning essential techniques.
Stage Two: Expand Your Capabilities
As projects become more ambitious, you’ll begin appreciating additional precision.
This is a great time to add:
- Compound miter saw
- Router
- Drill press
These machines dramatically increase both efficiency and creative possibilities.
You’ll notice projects becoming cleaner, faster, and more refined.
Stage Three: Improve Your Materials
Once you’ve developed confidence, the quality of your lumber begins to matter more.
Now consider adding:
- Thickness planer
- Band saw
- Better dust collection
These upgrades allow you to work with rough hardwood, create custom stock, and explore more advanced furniture designs.
Stage Four: Invest in Specialization
Only after years of woodworking do many builders begin adding highly specialized machines.
Examples include:
- Cabinet saw
- Jointer
- CNC router
- Drum sander
- Wood lathe
- Oscillating spindle sander
- Dedicated mortising equipment
These are wonderful machines.
They’re simply not essential for learning the craft.
By waiting until your work genuinely demands them, you’ll make far more informed purchasing decisions.
Spend Your Budget Wisely
One mistake appears again and again.
A beginner spends nearly every dollar on one impressive machine.
The saw arrives.
It looks incredible.
Then reality sets in.
There isn’t enough money left for:
- Quality blades
- Router bits
- Clamps
- Safety equipment
- Dust collection
- Measuring tools
- Lumber
Suddenly the workshop feels incomplete.
Instead, think in terms of balance.
Every machine relies on accessories to reach its full potential.
A modest table saw with an excellent blade often performs better than an expensive saw equipped with a poor one.
The same principle applies throughout your workshop.
Should You Buy New or Used?
It’s a question every beginner eventually asks.
The answer depends less on the machine and more on your confidence.
Buying new offers peace of mind.
You receive:
- A warranty
- Modern safety features
- Reliable customer support
- Known maintenance history
- Easy access to replacement parts
Buying used, however, can stretch your budget considerably.
Many older woodworking machines were built with incredibly durable cast-iron components and remain wonderfully accurate decades later.
If you choose the used route, inspect carefully for:
- Excessive rust
- Damaged castings
- Fence alignment
- Bearing noise
- Motor condition
- Missing safety guards
- Excessive vibration
Whenever possible, see the machine running before making a decision.
A few minutes of careful inspection can prevent years of frustration.
Resist the Urge to Upgrade Too Soon
Woodworking has an interesting way of encouraging “just one more tool.”
It’s easy to believe the next machine will suddenly make everything easier.
Sometimes it does.
Often it doesn’t.
Experience has a way of exposing the real bottlenecks in your workshop.
Until then, focus on learning what your current equipment can truly do.
You may be surprised how capable it already is.
Some of the finest furniture ever built came from workshops far simpler than the ones many beginners assemble today.
Let Your Projects Lead the Way
Every completed project teaches something valuable.
Perhaps you discover your cuts are taking too long.
Maybe repetitive sanding has become tedious.
Or perhaps preparing rough lumber is slowing every build.
Those moments quietly point toward your next purchase.
The machine practically chooses itself.
That’s the beauty of building a workshop slowly.
Instead of accumulating equipment, you’re building a collection of solutions.
Every addition has a story.
Every machine has earned its place.
And over time, your workshop begins to feel less like a room filled with tools and more like a workspace designed specifically for the way you build.
In the next section, we’ll look at the features that are genuinely worth paying for—and expose several surprisingly common buying mistakes that quietly cost beginners hundreds, and sometimes thousands, of dollars without improving the quality of their woodworking.
Part 8: The Features Worth Paying For & The Buying Mistakes That Cost Beginners the Most
Walk into a tool store and it’s easy to become distracted.
Every machine promises more power.
More precision.
More features.
More reasons to believe it’s the one you need.
On paper, many woodworking machines appear almost identical.
The specifications line up.
The cutting capacity looks similar.
The motors seem equally capable.
Then you use them.
One feels solid and predictable.
The other constantly asks for adjustments.
One quietly disappears into your workflow.
The other reminds you of its shortcomings every time you switch it on.
That’s why experienced woodworkers rarely buy machines based on horsepower alone.
They pay attention to the details that reveal themselves after hundreds of projects—not just during the first week of ownership.
Knowing which features deserve your money—and which are mostly marketing—can save you far more than simply chasing the lowest price.
Not Every Premium Feature Is Worth Paying For
Some upgrades genuinely improve the woodworking experience.
Others simply make a specification sheet look more impressive.
Learning the difference is one of the fastest ways to spend your budget wisely.
The best investments usually aren’t the most obvious ones.
They’re the features you’ll appreciate every single weekend without even thinking about them.
A Quality Fence Is Worth Every Penny
If you’re buying a table saw, don’t let the motor distract you.
Look at the fence.
Then look at it again.
The fence determines whether your measurements remain consistent from one cut to the next.
A good fence should:
- Slide smoothly
- Lock securely
- Stay perfectly parallel to the blade
- Resist flexing under pressure
- Adjust easily without drifting
When a fence performs well, woodworking feels effortless.
When it doesn’t, frustration appears almost immediately.
Tiny inaccuracies compound throughout an entire project.
Cabinets stop fitting together.
Shelves become uneven.
Panels require unnecessary trimming.
It’s one feature that’s almost impossible to appreciate until you’ve used a poor one.
Flat Tables Build Better Furniture
Wood doesn’t forgive uneven support.
If a machine’s table isn’t flat, every operation becomes more difficult.
The workpiece rocks.
Measurements become inconsistent.
Cuts vary slightly.
These small imperfections quickly spread throughout a project.
Look for machines with:
- Flat machining surfaces
- Rigid construction
- Stable support
- Minimal vibration
- Consistent alignment
You may never think about the tabletop again after buying the machine.
That’s exactly the point.
Good equipment quietly does its job.
Smooth Adjustments Save Time Every Day
Woodworking involves constant adjustment.
Blade height.
Fence position.
Depth of cut.
Angle settings.
Bit changes.
Machines with rough or awkward controls make every project take longer than necessary.
Smooth adjustment mechanisms encourage accuracy because they’re pleasant to use.
Instead of settling for “close enough,” you’ll naturally fine-tune every setup.
That extra precision often shows up in the finished project.
Dust Collection Is More Valuable Than It Looks
Few purchases seem less exciting than dust collection.
Until you’ve worked without it.
Fine wood dust has a remarkable ability to cover absolutely everything.
Machines.
Benches.
Shelves.
Lighting.
Even projects you’ve already finished.
More importantly, airborne dust isn’t something you want to breathe day after day.
Machines equipped with effective dust ports make the workshop cleaner, healthier, and easier to maintain.
Good dust collection also:
- Improves visibility
- Extends machine life
- Reduces cleanup time
- Produces cleaner finishes
- Protects motors from excessive buildup
It isn’t the most glamorous upgrade.
It may be one of the smartest.
Reliable Motors Matter More Than Powerful Ones
Manufacturers often compete by advertising horsepower.
It’s easy to assume bigger numbers automatically mean better woodworking.
In reality, reliability usually matters more.
A dependable motor should:
- Start smoothly
- Maintain consistent speed
- Resist overheating
- Operate quietly
- Deliver steady performance over time
Most beginner projects simply don’t require industrial levels of power.
They require consistency.
And consistency is what separates dependable equipment from disappointing purchases.
Easy Maintenance Pays You Back
Every woodworking machine eventually needs attention.
Blades dull.
Belts wear.
Dust accumulates.
Machines designed with maintenance in mind make these routine jobs surprisingly painless.
Look for equipment that offers:
- Easy blade replacement
- Accessible moving parts
- Straightforward adjustments
- Available replacement parts
- Clear maintenance procedures
Machines that are simple to maintain are far more likely to remain accurate for years.
Good Build Quality Feels Different
Some qualities can’t be measured with numbers.
You notice them the first time you switch on the machine.
Controls move smoothly.
The machine starts without excessive vibration.
Nothing rattles.
Nothing flexes.
Everything feels deliberate.
Solid construction inspires confidence.
Confidence improves accuracy.
Accuracy improves woodworking.
It’s a simple chain reaction.
Features Beginners Often Overpay For
Not everything with a premium price tag delivers premium value.
Many features exist for production shops rather than home workshops.
Examples include:
- Industrial-sized motors
- Extremely large cast-iron extensions
- Automated feed systems
- Production-level capacities
- Commercial mobility systems
- Digital controls you’ll rarely use
- Oversized cutting capacities
Professional cabinet shops may depend on these upgrades.
Most beginners won’t.
Buying capability you’ll never use simply reduces the budget available for the things that actually improve your projects.
Mistake #1: Buying Too Many Machines Too Soon
Perhaps the most expensive mistake isn’t choosing the wrong machine.
It’s buying too many of them.
Every woodworking magazine.
Every video.
Every workshop tour.
Each one introduces another “essential” tool.
Before long, beginners find themselves surrounded by equipment they barely understand.
A better approach is surprisingly simple.
Build.
Learn.
Notice what’s slowing you down.
Then buy the machine that solves that specific problem.
Your projects become the shopping list.
Mistake #2: Forgetting the Hidden Costs
Buying the machine is only the beginning.
Soon you’ll also need:
- Quality blades
- Router bits
- Drill bits
- Sandpaper
- Push sticks
- Featherboards
- Clamps
- Measuring tools
- Dust extraction hoses
- Extension cords
- Safety equipment
Ignoring these additional costs often creates frustration later.
A balanced budget nearly always outperforms one spectacular purchase.
Mistake #3: Shopping by Brand Instead of Performance
Brand loyalty exists in every hobby.
Woodworking is no exception.
Certain manufacturers have earned excellent reputations.
That’s well deserved.
But no company makes the best machine in every category.
Instead of asking:
“What’s the best brand?”
Ask:
“Which machine best fits the way I build?”
That small shift usually leads to much better decisions.
Mistake #4: Underestimating Workshop Space
Machines require more room than many beginners expect.
Not because of their footprint.
Because of the wood passing through them.
Long boards need space before and after the blade.
Sheet goods require room to maneuver.
Planers need unobstructed feeding paths.
Before buying, imagine using the machine—not simply placing it in the room.
A thoughtful layout prevents countless headaches later.
Mistake #5: Ignoring Electrical Requirements
Large woodworking machines sometimes require more power than a standard outlet provides.
Nothing is more frustrating than discovering your exciting new purchase also requires expensive electrical work.
Always confirm:
- Voltage requirements
- Circuit capacity
- Extension cord limitations
- Breaker compatibility
A few minutes of planning can save considerable expense.
Mistake #6: Buying Cheap Blades
This mistake deserves special attention.
Many beginners blame the machine.
The real problem is often the blade.
A premium blade improves:
- Cut quality
- Accuracy
- Safety
- Motor performance
- Surface finish
It’s one of the highest-value upgrades in woodworking.
Never underestimate the importance of the part that actually touches the wood.
Mistake #7: Treating Safety Equipment as an Optional Extra
It’s easy to spend hundreds on machinery while hesitating over protective equipment.
That mindset is backwards.
Every workshop should include:
- Safety glasses
- Hearing protection
- Dust mask or respirator
- Push sticks
- Push blocks
- First-aid kit
- Fire extinguisher
These are not accessories.
They’re part of the machine.
Working safely allows you to enjoy woodworking for decades.
That’s an investment worth making.
Mistake #8: Constantly Chasing the Next Upgrade
Woodworking companies release new products every year.
Some represent meaningful improvements.
Many simply create the feeling that your current equipment is somehow outdated.
Ask yourself one question before upgrading:
Will this machine allow me to build something I genuinely cannot build today?
If the answer is no, your money may produce greater value elsewhere.
Perhaps in quality hardwood.
Perhaps in a woodworking class.
Perhaps in simply building another project.
Experience has a remarkable way of revealing which upgrades truly matter.
Spend Less Time Shopping and More Time Building
It’s surprisingly easy to spend weeks comparing specifications.
Watching reviews.
Reading forums.
Researching machines.
Meanwhile, the lumber in the corner of the workshop quietly waits.
Woodworking isn’t learned by collecting tools.
It’s learned by making mistakes.
Correcting them.
Trying again.
Every project teaches something the internet never can.
Eventually, you’ll notice something interesting.
The best machine purchases are rarely emotional.
They become obvious.
You’ve encountered a limitation.
You understand exactly why it matters.
And when you finally bring that new machine into the workshop, it immediately begins solving a problem you’ve already experienced.
Those are the purchases you’ll never regret.
In the next section, we’ll put everything together by building practical workshop setups for different budgets, exploring smart shop layouts, and covering the safety habits that help you enjoy woodworking with confidence for years to come.
Part 9: Building a Workshop on Any Budget & The Safety Habits That Last a Lifetime
One of the most reassuring truths about woodworking is this:
You don’t need a dream workshop to build beautiful things.
That may sound surprising after spending time online, where enormous shops filled with gleaming machines often dominate videos and magazine covers.
But step inside the workshops of many experienced craftspeople and you’ll notice something different.
They didn’t begin there.
Most started with a modest space.
A basic workbench.
A handful of dependable tools.
And a willingness to keep learning.
Their workshops grew because their projects grew.
Not the other way around.
That’s an important distinction.
Your workshop should evolve naturally, becoming more capable as your confidence and skills expand.
Whether your budget is a few hundred dollars or several thousand, you can create a space that inspires you to build—without feeling like you’re constantly playing catch-up.
A Small Budget Can Still Build Big Skills
It’s easy to assume that expensive equipment automatically leads to better results.
In reality, limitations often teach valuable lessons.
When you own only a few machines, you naturally become more creative.
You learn to think ahead.
You improve your measuring.
You find better ways to solve problems.
Those habits stay with you long after you’ve upgraded your equipment.
A practical starter workshop might include:
- Jobsite table saw
- Random orbital sander
- Cordless drill and driver
- Circular saw
- Shop vacuum
- Measuring tape
- Combination square
- Speed square
- Utility knife
- Marking knife
- A small collection of clamps
- Basic chisels
- Safety equipment
With this setup, you can build an impressive variety of projects.
Shelves.
Coffee tables.
Storage cabinets.
Garden planters.
Cutting boards.
Simple bookcases.
Outdoor furniture.
A sturdy workbench.
The workshop may be modest.
The possibilities certainly aren’t.
The Workshop That Grows With You
Eventually, something changes.
You’re no longer wondering if you enjoy woodworking.
You know you do.
Projects become more ambitious.
Accuracy becomes more important.
Efficiency begins to matter.
That’s when expanding your workshop starts making sense.
A balanced mid-range setup often includes:
- Contractor table saw
- Compound miter saw
- Router
- Router table
- Drill press
- Thickness planer
- Random orbital sander
- Dust collection system
- Larger workbench
- Better lighting
- More clamps
- Precision measuring tools
At this stage, you’re equipped to build almost anything the average home workshop is likely to tackle.
Cabinets.
Dining tables.
Bookshelves.
Entertainment centers.
Bedroom furniture.
Outdoor structures.
Custom storage.
The workshop has matured alongside your skills.
That’s exactly how it should happen.
Building the Workshop You’ve Always Imagined
Years from now, your interests may become more specialized.
Perhaps you begin building heirloom furniture.
Maybe you start selling custom pieces.
Or perhaps woodworking simply becomes your favorite way to spend a quiet Saturday.
Only then do highly specialized machines begin making sense.
Examples include:
- Cabinet saw
- Large band saw
- Jointer
- CNC router
- Drum sander
- Wood lathe
- Oscillating spindle sander
- Sliding table attachments
- Air filtration system
- Dedicated finishing area
- Lumber storage racks
Notice something about this list.
None of these machines are required to become a skilled woodworker.
They’re refinements.
Not prerequisites.
Buying them too early rarely improves your work.
Buying them when the time is right often transforms it.
A Good Workshop Is More Than Machines
Equipment matters.
Layout matters just as much.
Imagine trying to cook in a kitchen where every ingredient is stored in a different room.
You’d spend more time walking than cooking.
The same thing happens in a poorly planned workshop.
If every machine interrupts the natural flow of a project, woodworking becomes unnecessarily tiring.
Instead, think about how wood moves through the shop.
It arrives rough.
It’s measured.
Cut to size.
Drilled.
Shaped.
Sanded.
Assembled.
Finished.
When your machines support that sequence, every project feels smoother.
Almost effortless.
Good workshop design isn’t about perfection.
It’s about reducing unnecessary movement.
Give Your Machines Room to Breathe
A surprisingly common mistake is measuring only the machine itself.
The wood often needs much more space than the equipment.
Consider a table saw.
A long board requires room before the blade.
And after it.
The same applies to a planer, miter saw, and band saw.
Always think about the entire journey of the workpiece—not just where the machine will sit.
This simple habit prevents your workshop from feeling cramped before you’ve even completed your first project.
Lighting Changes Everything
Woodworking is filled with tiny details.
A faint pencil line.
A slight gap in a joint.
The direction of the grain.
The sheen of a freshly sanded surface.
Poor lighting hides those details.
Good lighting reveals them.
Whenever possible, combine natural daylight with bright overhead fixtures and focused task lighting.
Quality lighting helps you:
- Measure more accurately
- Notice tear-out sooner
- Spot glue squeeze-out
- Evaluate sanding quality
- Apply finishes more evenly
- Work more safely
Few workshop upgrades provide as much value for so little investment.
Organization Is an Investment in Your Time
Every project introduces dozens of small items.
Router bits.
Drill bits.
Pencils.
Squares.
Clamps.
Fasteners.
Sandpaper.
Before long, it’s easy to lose track of everything.
Organization isn’t about making the workshop look tidy.
It’s about protecting your momentum.
When every tool has a home, projects flow naturally.
Simple storage solutions make a remarkable difference.
Consider using:
- Pegboards
- French cleat systems
- Wall cabinets
- Rolling tool carts
- Drawer organizers
- Small hardware bins
- Vertical lumber storage
The less time you spend searching, the more time you spend building.
Safety Is Built Through Repetition
Ask experienced woodworkers about safety, and you’ll rarely hear dramatic stories first.
Instead, they’ll talk about habits.
Small routines repeated so often they become automatic.
Checking blade height.
Confirming fence alignment.
Putting on hearing protection.
Removing loose offcuts before the next cut.
Safe woodworking isn’t usually the result of one brilliant decision.
It’s the result of hundreds of ordinary ones.
Dress for the Workshop, Not the Occasion
Loose sleeves.
Dangling jewelry.
Open shoes.
Long hair left unsecured.
These details may seem harmless.
Around spinning machinery, they deserve attention.
Before switching on any machine, take a quick moment to prepare.
Wear:
- Safety glasses
- Hearing protection
- A dust mask or respirator
- Closed-toe shoes
- Comfortable clothing that won’t catch on moving parts
Those few seconds become part of your routine remarkably quickly.
Build the Habit of Checking Everything Twice
Experienced woodworkers rarely rush to start a machine.
Instead, they pause.
The blade.
The fence.
The workpiece.
The measurement.
The cutting path.
It only takes a few moments.
Yet those moments prevent countless mistakes.
Eventually, this quiet pause becomes second nature.
It’s one of the simplest habits you can develop—and one of the most valuable.
Sharp Blades Are Safer Blades
It’s easy to overlook blade maintenance.
After all, the machine still cuts.
But there’s a difference between cutting and cutting well.
Sharp blades:
- Require less effort
- Produce cleaner edges
- Reduce burning
- Lower kickback risk
- Place less strain on the motor
- Improve accuracy
If a machine suddenly feels like it’s working harder than usual, the blade is often trying to tell you something.
Listen to it.
Slow Down Just Enough
Woodworking rewards patience in ways few hobbies do.
Every rushed measurement.
Every hurried cut.
Every skipped setup.
Eventually demands extra time to correct.
Ironically, slowing down often makes you faster.
Projects fit together sooner.
Mistakes become less frequent.
Confidence grows.
The workshop becomes a place of calm rather than frustration.
That’s one of the reasons so many people fall in love with woodworking.
For a while, the rest of the world fades into the background.
There’s only the wood.
The tools.
And the quiet satisfaction of creating something with your own hands.
Keep Your Workshop Ready for Tomorrow
Cleaning at the end of a project rarely feels exciting.
Neither does putting tools away.
Or emptying the dust collector.
Yet walking into a clean workshop the following morning feels completely different.
The next project begins immediately.
Not after twenty minutes of searching for clamps or clearing off the bench.
A few minutes of cleanup today become an invitation to build again tomorrow.
Learn One Machine Before Chasing the Next
Perhaps the most valuable advice in this entire guide is surprisingly simple.
You don’t need to master every woodworking machine this month.
Or this year.
Take your time.
Become comfortable with one.
Learn what it does well.
Understand its limitations.
Experiment.
Make mistakes.
Then move on to the next.
Woodworking isn’t a race.
The skills you build slowly are usually the ones that stay with you the longest.
In the final section, we’ll answer the questions nearly every beginner eventually asks, share a practical workshop growth roadmap you can follow for years, and finish with a carefully selected Products / Tools / Resources section to help you choose quality equipment with confidence.
Part 10: Frequently Asked Questions
No matter how many books you read or videos you watch, there comes a point where every beginner starts asking the same questions.
Usually, it happens after the first few projects.
You’ve built something you’re genuinely proud of.
You’ve also made a few mistakes.
Now you’re wondering what comes next.
That’s exactly where these questions tend to appear.
Do I Really Need All Seven Machines?
Not at all.
In fact, very few people buy all seven at once.
The purpose of this guide isn’t to convince you to fill your workshop overnight.
It’s to help you understand which machines continue delivering value as your skills grow.
Many woodworkers build outstanding furniture with only three or four of these machines.
The others simply make certain jobs faster, easier, or more precise.
Your workshop should expand because your projects ask it to—not because someone else’s workshop looks larger.
Can I Build High-Quality Furniture Without Expensive Equipment?
Absolutely.
Beautiful furniture is built with skill long before it’s built with machines.
Accurate measuring.
Careful planning.
Sharp blades.
Patience during assembly.
Attention to grain direction.
Those things influence quality far more than an oversized motor or an expensive brand name.
Professional equipment often increases efficiency.
It doesn’t replace craftsmanship.
Should I Buy New or Used?
There’s no universal answer.
New machines provide peace of mind.
You receive a warranty, modern safety features, and the reassurance that every component begins its life with you.
Used machines, however, can offer exceptional value.
Many older woodworking machines were built to an incredibly high standard and continue performing beautifully decades later.
If you decide to buy used, inspect carefully.
Pay attention to:
- Fence alignment
- Bearing noise
- Excessive vibration
- Rust
- Missing safety guards
- Cracked castings
- Electrical condition
Whenever possible, watch the machine run before making your decision.
A few careful minutes can reveal far more than photographs ever will.
Which Machine Will Improve My Projects the Most?
That depends on where your current limitations are.
If you’re struggling with accurate sizing, the table saw usually delivers the biggest improvement.
If your furniture feels plain, a router often transforms its appearance.
If your surfaces require endless sanding, a thickness planer may become your favorite purchase.
If you’re preparing every project by hand, a random orbital sander saves remarkable amounts of time.
Every machine solves a different problem.
The best next purchase is usually the one that removes your biggest frustration.
Is a Small Workshop Enough?
More than enough.
Some remarkable furniture has been built inside one-car garages, small sheds, basement workshops, and even spare bedrooms.
Good organization often matters more than extra space.
Mobile workstations.
Wall storage.
Fold-away benches.
Thoughtful layouts.
All allow surprisingly compact workshops to feel productive.
Don’t underestimate what can be accomplished in a well-planned space.
Should I Upgrade My Machines or Keep Building?
Whenever you’re uncertain, build another project.
Projects reveal limitations more honestly than catalogs ever will.
After each build, ask yourself:
What slowed me down the most?
What operation felt awkward?
What task would I gladly make easier next time?
The answers usually point directly toward your next machine purchase.
It’s a far more reliable strategy than buying equipment simply because it’s popular.
How Important Is Dust Collection?
Much more important than most beginners expect.
Fine wood dust doesn’t just settle on benches.
It settles in the air you breathe.
It also affects:
- Machine performance
- Surface preparation
- Finishing quality
- Workshop cleanup
- Overall comfort
Even connecting a simple shop vacuum to your machines makes a noticeable difference.
As your workshop grows, investing in dedicated dust collection becomes one of the smartest improvements you can make.
How Long Does It Take to Build a Good Workshop?
There’s no finish line.
Some people gradually build their shops over three or four years.
Others enjoy refining them over decades.
The pace doesn’t matter.
The purpose does.
Every machine should improve the way you work.
If it doesn’t, it probably wasn’t the right purchase.
A workshop built patiently almost always becomes more satisfying than one assembled all at once.
What If I Make the Wrong Decision?
Here’s some encouraging news.
Almost every experienced woodworker has purchased a machine they later realized wasn’t the perfect fit.
It’s part of learning.
The important thing is that one less-than-perfect purchase won’t define your workshop.
The skills you gain along the way are always more valuable than the equipment itself.
Good craftsmanship has a remarkable way of adapting.
Bonus: A Beginner’s Workshop Growth Roadmap
Instead of wondering what to buy next every few months, follow a simple progression that allows your workshop to evolve naturally.
Phase One: Learn the Fundamentals
Focus on accuracy before complexity.
Suggested equipment:
- Table saw
- Random orbital sander
- Cordless drill and driver
- Shop vacuum
- Measuring tools
- Clamps
Projects to build:
- Birdhouse
- Step stool
- Shop shelves
- Storage crate
- Cutting board
- Small workbench
Primary goal:
Develop confidence with measuring, cutting, assembly, and finishing.
Phase Two: Expand Your Skills
Once the basics feel comfortable, begin adding machines that increase precision and versatility.
Suggested additions:
- Compound miter saw
- Router
- Drill press
Projects to build:
- Coffee table
- Bookcase
- Blanket chest
- Outdoor bench
- Picture frames
- Simple cabinets
Primary goal:
Improve joinery, efficiency, and overall craftsmanship.
More information: The 25 Best Woodworking Joinery Books Every Woodworker Should Own (From Beginner to Master Craftsman)
Phase Three: Work With Better Lumber
As your confidence grows, you’ll naturally begin exploring hardwoods and more refined furniture.
Suggested additions:
- Thickness planer
- Band saw
- Improved dust collection
Projects to build:
- Dining table
- Hardwood workbench
- Display cabinet
- End tables
- Entertainment center
- Fine storage furniture
Primary goal:
Produce furniture-quality work using carefully prepared materials.
Phase Four: Specialize
Only after years of experience should you begin considering machines designed for highly specific tasks.
Possible additions include:
- Cabinet saw
- Jointer
- CNC router
- Drum sander
- Wood lathe
- Oscillating spindle sander
- Air filtration system
- Dedicated finishing station
At this stage, every purchase should solve a problem you’ve personally encountered.
That’s how workshops become truly personal.
Products / Tools / Resources
The following tools and resources complement the machines covered in this guide and help create a safer, more enjoyable woodworking experience.
Essential Measuring Tools
- Tape measure
- Combination square
- Speed square
- Precision marking knife
- Sliding bevel gauge
- Digital angle finder
- Steel ruler
Must-Have Clamps
- F-style clamps
- Parallel clamps
- Quick-grip clamps
- Spring clamps
- Corner clamps
- Bar clamps
A workshop can rarely have too many clamps.
Recommended Safety Equipment
- ANSI-rated safety glasses
- Over-ear hearing protection
- N95 or P100 dust respirator
- Push sticks
- Push blocks
- First-aid kit
- Fire extinguisher
- Anti-fatigue floor mats
Helpful Router Accessories
- Round-over bit set
- Flush-trim bit
- Chamfer bit
- Straight bit collection
- Rabbeting bit
- Dovetail jig
- Edge guide
- Router table
Table Saw Accessories
- Combination blade
- Fine-finish blade
- Crosscut sled
- Featherboards
- Zero-clearance insert
- Outfeed support
- Digital caliper
- Blade cleaning solution
Sanding Supplies
- Sanding discs from 60 to 320 grit
- Sanding block
- Detail sanding pads
- Tack cloths
- Shop vacuum filters
- Dust separator
Workshop Organization
- Pegboard storage
- French cleat wall system
- Rolling tool cabinet
- Magnetic tool holders
- Small parts organizers
- Lumber storage rack
- Hardware bins
- Mobile machine bases
Lumber Worth Practicing With
If you’re still developing your skills, these woods are excellent choices:
- Pine
- Poplar
- Spruce
- Cedar
- Birch plywood
As your confidence grows, explore:
- Oak
- Maple
- Cherry
- Walnut
- Ash
Each species teaches something different about grain, hardness, machining, and finishing.
Learning Resources
One of the best investments you’ll ever make isn’t another machine.
It’s time spent learning.
Continue building.
Experiment with new joinery techniques.
Practice different finishes.
Study wood movement.
Try projects that stretch your abilities just a little beyond your comfort zone.
The workshop you dream about isn’t created by buying every tool available.
It’s built one thoughtful project at a time, with every completed piece quietly teaching you something the next one will need.