
There are few woodworking projects that continue paying you back every day the way a well-built wall cabinet does.
Long after the sawdust has been swept away and the finish has fully cured, that cabinet is still working for you. It keeps tools within reach, clears clutter from busy workspaces, protects valuable equipment, and turns unused wall space into practical storage. More than that, it quietly reminds you that something useful—and built to last—came from your own hands.
That’s what makes cabinet building different.
A bookshelf can display your favorite books. A coffee table becomes part of the room. But a thoughtfully designed wall cabinet changes the way you use a space. Whether it’s mounted in a workshop, garage, laundry room, kitchen, home office, or utility room, it brings order where there was once wasted space.
At first glance, building a cabinet may seem intimidating. There are measurements to calculate, materials to choose, hardware to install, and doors that must align with remarkable precision. Yet once you understand the process, cabinetmaking becomes surprisingly logical. Every step builds on the one before it, and every decision serves a purpose.
That is exactly what this guide is designed to teach.
Rather than handing you a collection of dimensions and expecting everything else to fall into place, this guide walks through the complete cabinet-building process—from selecting materials and planning dimensions to assembling a perfectly square cabinet box, installing professional hardware, applying durable finishes, and mounting the finished cabinet securely.
Whether you’re tackling your very first woodworking project or refining skills developed over years in the workshop, you’ll find techniques here that improve both your craftsmanship and your confidence.
By the time you reach the final section, you’ll understand not only how to build a wall cabinet but why experienced cabinetmakers make certain choices at every stage of construction.
What You’ll Learn
This guide explores every major stage of building a professional-quality wall cabinet, including:
- Choosing the right wall cabinet woodworking plans for your project
- Selecting lumber, plywood, hardware, and fasteners
- Measuring your space accurately
- Creating efficient cut lists
- Building a strong cabinet box
- Installing shelves and cabinet doors
- Adjusting concealed hinges
- Mounting the cabinet safely
- Applying long-lasting finishes
- Avoiding common cabinet-building mistakes
- Using professional cabinetmaking techniques to achieve cleaner results
Instead of treating these as isolated topics, you’ll see how they connect into a complete workflow—the same workflow skilled cabinetmakers rely on every day.
Who This Guide Is Written For
One of the biggest misconceptions about cabinetmaking is that it’s reserved for professionals with industrial workshops and expensive machinery.
It isn’t.
If you can measure carefully, work patiently, and follow a logical sequence, you can build an exceptional wall cabinet.
This guide is designed for several types of woodworkers.
Beginners
If you’ve built only a few projects—or none at all—you’ll learn the essential principles that make cabinet construction approachable instead of overwhelming.
You’ll discover how to avoid common beginner mistakes before they happen and develop habits that will improve every future woodworking project.
DIY Homeowners
Perhaps you aren’t interested in becoming a cabinetmaker.
You simply need storage that actually fits your space.
Building your own cabinet allows you to customize every measurement while often spending less than you would on comparable ready-made options.
Experienced Hobbyists
If you’ve already built furniture or shelving, this guide helps refine the details that elevate good work into exceptional craftsmanship.
You’ll explore workflow improvements, cabinet engineering principles, material selection, and finishing methods that consistently produce cleaner, more professional results.
Workshop Builders
Garages and workshops rarely stay organized by accident.
Purpose-built wall cabinets provide durable storage for tools, hardware, finishes, safety equipment, and supplies while freeing valuable floor space.
Many of the techniques covered here are especially useful for shop cabinetry that must withstand years of heavy use.
Why Wall Cabinets Are Worth Building
Storage is only part of the equation.
A custom-built wall cabinet solves problems that mass-produced furniture often cannot.
Instead of adapting your belongings to fit standardized dimensions, you create storage around the items you actually use.
Need deeper shelves for power tools?
Want narrow compartments for finishing supplies?
Need adjustable shelving for changing storage needs?
Building your own cabinet gives you complete control over:
- Width
- Height
- Depth
- Shelf spacing
- Door style
- Wood species
- Hardware
- Finish
- Mounting method
That flexibility often becomes the greatest advantage of all.
What Makes a Cabinet Feel Professional?
Two cabinets can look similar from across the room yet feel completely different when used.
One door closes smoothly.
The other sticks.
One shelf remains perfectly level under heavy weight.
Another slowly begins to sag.
One cabinet feels solid every time it’s opened.
The other develops looseness after only a short period of use.
Those differences rarely come from expensive materials alone.
Professional-quality cabinetry is built on five fundamental principles.
Structural Strength
Every component should contribute to the cabinet’s long-term durability.
Strong joinery, careful assembly, and secure mounting ensure the cabinet performs as well years from now as it does on installation day.
Precision
Cabinetmaking rewards accuracy.
Small errors accumulate quickly, making careful measurement one of the most valuable woodworking skills you can develop.
Practical Design
Beautiful cabinets should also be easy to use.
Shelf spacing, door swing, cabinet depth, and hardware selection all influence everyday functionality.
The best cabinet isn’t necessarily the most elaborate—it’s the one that serves its intended purpose effortlessly.
Reliable Hardware
High-quality hinges, shelf supports, mounting screws, and handles contribute directly to how a cabinet feels in daily use.
Good hardware often goes unnoticed because it simply works.
Durable Finish
A properly applied finish protects the wood while enhancing its appearance.
Whether you prefer painted cabinetry or the natural warmth of hardwood, careful surface preparation and thoughtful finishing dramatically extend the cabinet’s lifespan.
The Mindset Behind Every Successful Cabinet
Experienced cabinetmakers approach projects differently than most beginners.
Before making the first cut, they pause.
They picture the finished cabinet hanging on the wall.
They imagine loading it with tools, dishes, supplies, or collectibles.
They think through the order of assembly, where clamps will go, how shelves will fit, and whether future adjustments might be needed.
That quiet planning stage often determines the quality of the finished project.
Instead of reacting to problems, they prevent them.
It’s a simple shift in perspective, but one that changes everything.
Throughout this guide, you’ll learn to think the same way—not just as someone assembling parts, but as someone designing a cabinet that will remain useful, reliable, and attractive for many years.
Table of Contents
Part 1 — Introduction
- Why Build a Wall Cabinet?
- What You’ll Learn
- Who This Guide Is Written For
- Why Wall Cabinets Are Worth Building
- What Makes a Cabinet Feel Professional?
- The Mindset Behind Every Successful Cabinet
Part 2 — Why Build Your Own Wall Cabinet Instead of Buying One?
- Looking Beyond the Price Tag
- A Cabinet That Fits Your Space Instead of Fighting It
- Storage Designed Around Real Life
- Better Materials Mean Better Cabinets
- Strength That Lasts
- Every Detail Serves a Purpose
- Building Skills Along the Way
- The Satisfaction You Can’t Buy
- Common Concerns That Stop People From Starting
- You Don’t Need a Commercial Workshop
- Think Beyond One Project
- Why So Many Woodworkers Keep Building Their Own Cabinets
Part 3 — Choosing the Right Wall Cabinet Woodworking Plans
- Start with the Right Blueprint
- Define the Cabinet’s Purpose
- Matching the Cabinet to Its Environment
- Workshop Wall Cabinets
- Garage Storage Cabinets
- Kitchen Wall Cabinets
- Bathroom Cabinets
- Display Cabinets
- Choosing a Plan That Matches Your Skill Level
- Face-Frame vs. Frameless Cabinets
- Understanding Cabinet Dimensions
- Fixed Shelves vs. Adjustable Shelves
- Planning for Future Expansion
Part 4A — Essential Tools & Measuring Equipment
- Building Your Workshop One Tool at a Time
- Measuring Tools
- Tape Measure
- Combination Square
- Speed Square
- Straightedge or Cutting Guide
- Marking Knife and Carpenter’s Pencil
- Essential Power Tools
- Circular Saw
- Table Saw
- Miter Saw
- Drill and Driver
- Random-Orbit Sander
- Router
- Hand Tools Every Cabinetmaker Needs
- Developing Better Workshop Habits
Part 4B — Materials, Hardware, Finishing Supplies & Safety
- Choosing Cabinet-Grade Plywood
- Hardwood Selection
- Cabinet Hardware
- Fasteners
- Wood Glue
- Edge Banding
- Finishing Supplies
- Organizing the Workspace
- Essential Workshop Safety
Part 5A — Planning the Cabinet
- Measuring Your Space
- Recording Accurate Dimensions
- Finding Wall Studs
- Determining Cabinet Width, Height & Depth
- Planning Door Swing
- Designing Around Daily Use
- Sketching the Cabinet
- Preparing for Construction
Part 5B — Cut Lists, Material Optimization & Layout
- Creating an Accurate Cut List
- Organizing Cabinet Components
- Optimizing Plywood Layout
- Grain Direction
- Planning Joinery
- Reference Faces and Edges
- Dry Layout
- Hardware Planning
- Preparing for Assembly
Part 6 — Building the Cabinet Box
- Preparing the Workspace
- Inspecting Materials
- Breaking Down Plywood
- Cutting Cabinet Components
- Labeling Every Part
- Machining Joinery
- Dados
- Rabbets
- Pocket-Hole Joinery
- Dry Assembly
- Checking for Square
- Glue-Up and Clamping
- Installing the Cabinet Back
- Final Structural Inspection
Part 7 — Shelves, Doors & Hardware
- Installing Fixed Shelves
- Building Adjustable Shelving
- Preventing Shelf Sag
- Building Cabinet Doors
- Slab Doors
- Shaker Doors
- Raised Panel Doors
- Installing Concealed Hinges
- Hanging and Adjusting Doors
- Installing Handles and Hardware
- Optional Interior Storage Features
- Final Function Test
Part 8 — Mounting the Cabinet & Applying a Professional Finish
- Preparing the Installation Area
- Finding Wall Studs
- Establishing a Level Reference
- Choosing the Right Mounting Height
- French Cleat Systems
- Direct Mounting Methods
- Installing the Cabinet
- Surface Preparation
- Sanding
- Paint vs. Clear Finish
- Applying Stain
- Protective Topcoats
- Final Quality Inspection
Part 9 — Common Cabinet-Building Mistakes
- Measurement Errors
- Material Thickness Mistakes
- Reference Face Mistakes
- Assembly Sequence Errors
- Glue-Up Problems
- Out-of-Square Cabinets
- Clamping Errors
- Wood Movement
- Shelf Design Mistakes
- Hardware Installation Errors
- Surface Preparation Mistakes
- Finishing Problems
- Installation Mistakes
- Final Inspection
Part 10 — Professional Cabinetmaking Techniques
- Building with Intention
- Precision Habits
- Thinking in Systems
- Story Sticks
- Repeatable Workflows
- Cleaner Edges
- Hidden Fasteners
- Grain Matching
- Better Sanding
- Interior Organization
- Planning for Maintenance
- Shop-Made Jigs
- Recording Lessons for Future Projects
Part 11 — Frequently Asked Questions
- Choosing the Right Materials
- Essential Tools
- Cabinet Dimensions
- Fixed vs. Adjustable Shelves
- Preventing Shelf Sag
- Door Alignment
- Finishing Questions
- Mounting Questions
- Maintenance
- Improving Your Woodworking Skills
Part 12 — Products, Tools & Resources
- Essential Hand Tools
- Recommended Power Tools
- Measuring & Layout Equipment
- Cabinet Hardware
- Wood & Sheet Goods
- Adhesives & Finishing Supplies
- Workshop Organization
- Dust Collection & Safety Equipment
- Recommended Books
- Shop-Made Jigs
- Essential Consumables
- Projects to Build Next
- Why Experience Is Your Greatest Tool
Every great cabinet begins long before the first board is cut. It starts with understanding the purpose of the project, choosing the right plan, and approaching each stage with patience instead of urgency.
In the next section, we’ll explore why building your own wall cabinet often delivers greater value than buying one—and why the benefits continue long after the project is finished.
Part 2 — Why Build Your Own Wall Cabinet Instead of Buying One?
Walk into almost any home improvement store and you’ll find rows of wall cabinets lined up under bright lights. They look clean, convenient, and ready to install. Browse online and the selection becomes even larger. Different colors. Different finishes. Different price tags. At first glance, buying one seems like the obvious choice.
Then you start looking closer.
The dimensions aren’t quite right for your wall.
The shelves aren’t spaced the way you need them.
The material feels lighter than expected.
The hardware works, but only just.
Suddenly, “good enough” starts to feel like a compromise.
That moment is often where cabinet building begins—not with a desire to save money, but with the realization that the perfect cabinet probably isn’t sitting in a warehouse waiting to be shipped. It’s waiting to be built.
A custom wall cabinet gives you something mass-produced furniture never can: complete control. Every measurement has a reason. Every shelf serves a purpose. Every detail reflects the way you actually use your space.
That’s the real value of building instead of buying.
Looking Beyond the Price Tag
Cost is usually the first comparison people make, and it’s an important one. But focusing only on the purchase price misses the bigger picture.
A factory-built cabinet includes far more than wood and hardware. By the time it reaches a customer, its price also reflects manufacturing, transportation, warehousing, packaging, marketing, distribution, and retail markup.
When you build your own cabinet, your investment is much more direct.
You’re paying for materials.
You’re paying for hardware.
You’re paying for the finish.
Most importantly, you’re investing your own time.
The result is a cabinet whose value comes from quality rather than mass production.
If you already own basic woodworking tools, the savings can be significant—especially when building several cabinets for a workshop, garage, or utility room. Even when using premium plywood and high-quality hinges, a custom-built cabinet often compares favorably with much more expensive commercial alternatives.
And unlike store-bought furniture, the tools you purchase don’t disappear after one project. They become part of every future build.
A Cabinet That Fits Your Space Instead of Fighting It
Every home has awkward spaces.
A narrow wall between two windows.
An alcove beside the washing machine.
An empty section above a workbench.
A sloped ceiling in an older home.
Manufactured cabinets are designed around standard dimensions because factories depend on repeatability. Homes, however, rarely follow those standards perfectly.
That’s where custom woodworking plans shine.
Instead of asking, “Which cabinet will fit here?”
You begin asking a far better question:
“What should this cabinet be?”
That shift changes everything.
You choose the width.
You decide the depth.
You determine how tall it should be.
You place shelves exactly where they’ll be useful.
The finished cabinet doesn’t merely occupy space—it belongs there.
Storage Designed Around Real Life
Think about the items you reach for most often.
Power tools.
Cleaning supplies.
Coffee mugs.
Paint cans.
Gardening equipment.
First-aid supplies.
Camera gear.
Each collection has different storage requirements.
Deep shelves work beautifully for large storage bins but waste space when holding small jars or hand tools.
Narrow shelves keep frequently used items visible, while adjustable shelves provide flexibility as your needs evolve.
A custom cabinet begins with your belongings rather than generic assumptions.
That simple difference often transforms storage from something merely functional into something genuinely convenient.
Better Materials Mean Better Cabinets
Material selection is one of the greatest advantages of building your own furniture.
Mass-produced cabinets frequently rely on lower-cost materials to meet competitive pricing.
That doesn’t necessarily make them poor products, but it does require compromise.
When building your own cabinet, you choose exactly where quality matters most.
Cabinet-grade plywood provides exceptional strength and stability.
Hardwood edging protects shelves from dents and wear.
Premium hinges operate smoothly year after year.
A durable finish protects against moisture, scratches, and daily use.
Every decision becomes intentional.
Instead of accepting someone else’s cost-cutting choices, you build according to your own priorities.
Strength That Lasts
Cabinets spend their lives carrying weight.
Sometimes it’s only a few dishes or books.
Other times they’re expected to support heavy power tools, paint supplies, or workshop equipment.
Over time, weak construction reveals itself.
Shelves begin to sag.
Doors drift out of alignment.
Fasteners loosen.
Cabinet backs separate.
These problems rarely happen overnight. They develop gradually because the original construction wasn’t designed for long-term demands.
Building your own cabinet allows you to reinforce areas that matter most.
You can choose stronger joinery.
Install thicker shelves.
Add hardwood edging.
Use a more robust mounting system.
Small decisions made during construction often determine whether a cabinet lasts five years—or thirty.
Every Detail Serves a Purpose
One of the pleasures of custom woodworking is discovering how thoughtful design improves everyday life.
Imagine opening a cabinet where every shelf sits at exactly the right height.
The door swings smoothly without rubbing.
Frequently used items are always within easy reach.
Nothing feels accidental.
That experience doesn’t happen by chance.
It’s the result of dozens of small design decisions made long before the cabinet is assembled.
A little extra planning creates years of effortless use.
Building Skills Along the Way
Perhaps the greatest hidden benefit of building a wall cabinet is what you learn during the process.
Cabinetmaking introduces many of the foundational skills used throughout woodworking.
You’ll practice:
- Reading woodworking plans
- Measuring accurately
- Creating cut lists
- Breaking down plywood safely
- Cutting precise joinery
- Assembling square structures
- Installing hardware
- Applying finishes
- Solving small construction challenges
Each skill becomes part of your growing experience.
The first cabinet teaches the basics.
The second feels more comfortable.
By the third, many techniques that once required careful concentration begin to feel natural.
Confidence grows quietly through repetition.
The Satisfaction You Can’t Buy
There is something deeply satisfying about opening a cabinet you built yourself.
It isn’t just pride.
It’s familiarity.
You remember selecting the plywood.
You remember laying out the shelves.
You remember adjusting the doors until every gap looked exactly right.
Those memories become part of the finished project.
Years later, the cabinet still carries them.
Mass-produced furniture rarely creates that kind of connection.
A handmade cabinet tells a story every time you use it.
Common Concerns That Stop People From Starting
Many first-time builders hesitate before beginning.
The concerns are understandable.
“What if I don’t have enough experience?”
“What if I make expensive mistakes?”
“What if the cabinet doesn’t look professional?”
These questions are nearly universal.
The encouraging news is that successful cabinetmaking depends far more on patience than perfection.
Most errors happen because builders rush.
They skip measurements.
They ignore preparation.
They hurry the finishing process.
Working carefully solves far more problems than expensive equipment ever will.
You Don’t Need a Commercial Workshop
Professional cabinet shops contain impressive machinery.
Large table saws.
Industrial dust collection.
Wide belt sanders.
Precision panel saws.
While those tools improve efficiency, they are not prerequisites for building an excellent cabinet.
Many woodworkers produce outstanding results using:
- A circular saw
- A drill
- A router
- A random-orbit sander
- A few reliable clamps
- Careful measuring tools
Skill grows from practice—not from square footage.
A modest workshop used thoughtfully often outperforms a larger one used carelessly.
Think Beyond One Project
It’s easy to view your first cabinet as a single weekend project.
In reality, it often becomes the beginning of something much larger.
One cabinet leads to another.
Storage improves.
The workshop becomes more organized.
New projects become easier because every tool finally has a place.
Eventually, many builders realize they are no longer simply making cabinets.
They are designing better spaces.
That shift in thinking changes the way you approach woodworking.
Instead of solving today’s storage problem, you’re creating systems that will continue serving your home for years to come.
Why So Many Woodworkers Keep Building Their Own Cabinets
Ask experienced woodworkers why they continue building cabinets instead of buying them, and the answers are remarkably similar.
Some appreciate the freedom to customize every detail.
Others value stronger construction.
Many enjoy working with quality materials.
Nearly all mention the satisfaction of creating something that perfectly fits its intended space.
The cabinet itself is only part of the reward.
The real reward is knowing exactly how it was built, why each decision was made, and having complete confidence in its strength and durability.
Once you’ve experienced that level of control, it’s difficult to return to settling for “close enough.”
The next step is choosing a wall cabinet woodworking plan that matches both your goals and your experience. The right plan doesn’t simply tell you what to build—it gives you a clear path from raw materials to a finished cabinet that feels purposeful, balanced, and built to last.
Part 3 — Choosing the Right Wall Cabinet Woodworking Plans: Start with the Right Blueprint
Every successful cabinet begins long before the first sheet of plywood is cut.
It starts with a decision.
Not about which saw to use or what finish to apply, but about choosing the right plan.
That choice shapes everything that follows. It determines how efficiently materials are used, how easily the cabinet comes together, how much weight it can safely support, and how satisfying the finished project feels when it’s finally hanging on the wall.
It’s tempting to pick the first plan that looks attractive. Beautiful photographs have a way of convincing us that we’ve already found the perfect project.
But experienced woodworkers know better.
A great woodworking plan isn’t simply one that produces an attractive cabinet. It’s one that matches your space, your tools, your experience, and the way you intend to use the cabinet every day.
When those pieces fit together, the build feels natural. Challenges become manageable. Progress becomes steady. And the finished cabinet feels as though it was designed specifically for its home—because it was.
Begin with a Simple Question: What Will This Cabinet Store?
Before thinking about dimensions, joinery, or door styles, think about the contents.
This may sound obvious, yet it’s one of the most overlooked steps in cabinet design.
A cabinet designed to hold paint cans shouldn’t be built the same way as one displaying family heirlooms.
A workshop cabinet has different demands than a bathroom cabinet.
A kitchen cabinet serves a different purpose than one mounted in a laundry room.
The items inside determine almost every design decision that follows.
Ask yourself:
- Will I store heavy or lightweight items?
- Do I need quick daily access?
- Will the contents change over time?
- Should everything be visible or hidden?
- Is appearance just as important as function?
Those answers become the foundation of your woodworking plan.
Matching the Cabinet to Its Environment
Every room presents its own opportunities and challenges.
Designing with the room in mind creates a cabinet that feels intentional rather than added as an afterthought.
Workshop Wall Cabinets
In a workshop, efficiency matters.
The best workshop cabinets are designed to reduce unnecessary movement. Frequently used tools should be easy to reach, while less common items can be stored higher or farther back.
Look for plans that include:
- Adjustable shelving
- Reinforced shelves
- Durable plywood construction
- Wide-opening doors
- Strong wall-mounting systems
Clean lines are often more valuable than decorative details in a workspace where practicality comes first.
Garage Storage Cabinets
Garages often experience temperature swings, dust, and heavier storage demands than interior living spaces.
A good garage cabinet should emphasize durability.
Consider plans that allow space for:
- Automotive supplies
- Paint containers
- Gardening tools
- Power tools
- Seasonal decorations
- Safety equipment
If heavy loads are expected, choose designs that include fixed shelves or internal dividers for additional support.
Kitchen Wall Cabinets
Kitchen cabinets work harder than almost any other cabinetry in the home.
They’re opened countless times each week and are constantly exposed to steam, cooking oils, and changing humidity.
Look for woodworking plans that prioritize:
- Efficient storage
- Easy-to-clean finishes
- Durable hardware
- Adjustable shelves
- Accurate dimensions
Because kitchen cabinets are often installed side by side, precision becomes especially important. Small errors can become surprisingly noticeable across an entire wall.
Bathroom Cabinets
Bathrooms usually offer limited wall space while introducing higher moisture levels.
Plans designed for bathrooms often benefit from:
- Shallower cabinet depth
- Moisture-resistant finishes
- Compact storage layouts
- Easy-to-clean surfaces
A well-designed bathroom cabinet can dramatically improve organization without making the room feel crowded.
Display Cabinets
Not every cabinet exists simply for storage.
Some are designed to showcase collections, books, glassware, or decorative objects.
Display cabinets often include features such as:
- Glass-panel doors
- Adjustable shelves
- Decorative molding
- Interior lighting
- Premium hardwood finishes
Here, craftsmanship becomes part of the display itself.
Be Honest About Your Skill Level
Ambition is valuable in woodworking.
So is realism.
There’s nothing wrong with choosing a challenging project—but the challenge should encourage learning, not create unnecessary frustration.
One completed cabinet teaches more than three unfinished ones.
If You’re New to Cabinetmaking
Choose plans with straightforward construction.
Look for features such as:
- Rectangular cabinet boxes
- Straight cuts
- Slab doors
- Basic shelving
- Pocket-hole joinery
- Minimal decorative trim
Simple projects help you build confidence while developing the precision cabinetmaking demands.
If You Have Some Experience
Once you’re comfortable building square cabinet boxes, you can begin introducing additional techniques.
Intermediate plans often include:
- Face frames
- Adjustable shelving systems
- Decorative edge treatments
- Concealed hinges
- Dado or rabbet joinery
These projects reward careful work without becoming unnecessarily complex.
If You’re Ready for Advanced Work
Experienced builders often seek projects that emphasize craftsmanship as much as function.
Advanced woodworking plans may feature:
- Raised-panel doors
- Inset door construction
- Custom molding
- Furniture-grade hardwoods
- Traditional joinery
- Integrated lighting
- Decorative interiors
These projects require greater patience, but the finished results can rival custom cabinetry found in high-end homes.
Face Frame or Frameless?
One of the first structural decisions you’ll encounter is whether to build a face-frame cabinet or a frameless cabinet.
Both approaches are excellent. They simply solve different design goals.
Face-Frame Cabinets
A face frame is built from solid wood and attached to the front of the cabinet box.
This design offers several advantages.
It increases rigidity.
It hides plywood edges.
It provides strong mounting points for hinges.
It creates the classic appearance associated with traditional cabinetry.
Face-frame construction is especially forgiving for newer builders because the frame can conceal minor variations along the cabinet front.
Frameless Cabinets
Frameless cabinets eliminate the front frame entirely.
Doors mount directly to the cabinet box, creating a clean, modern appearance with greater interior accessibility.
This style is popular in contemporary kitchens and minimalist interiors.
Because there is no frame to disguise inaccuracies, precision becomes even more important.
A perfectly square cabinet box is essential.
Understanding Cabinet Dimensions
Dimensions should never be chosen at random.
Every measurement should support the way the cabinet will actually be used.
Cabinet Width
A wider cabinet increases storage capacity, but it also increases structural demands.
Long shelves naturally experience greater deflection under heavy loads.
If you’re designing a wide cabinet, consider incorporating:
- A center divider
- Fixed shelves
- Hardwood shelf edging
- Additional shelf supports
Strength and capacity should always grow together.
Cabinet Height
Height is often influenced by the surrounding room.
Think about:
- Ceiling clearance
- User reach
- Nearby windows
- Countertops
- Existing cabinetry
The tallest possible cabinet isn’t always the most practical.
A cabinet that’s comfortable to use every day is usually the better choice.
Cabinet Depth
Depth should match the items being stored.
Deep cabinets may seem appealing until small items disappear behind larger ones.
On the other hand, cabinets that are too shallow may limit what they can hold.
Whenever possible, measure the actual items you plan to store before deciding on cabinet depth.
Real measurements almost always outperform assumptions.
Fixed Shelves or Adjustable Shelves?
Shelf design influences both strength and flexibility.
The right choice depends on how predictable your storage needs are.
Fixed Shelves
Fixed shelves create a stronger cabinet because they tie the cabinet sides together.
They’re ideal when:
- Heavy loads are expected.
- Shelf positions won’t change.
- Additional structural support is beneficial.
Many cabinetmakers intentionally include at least one fixed shelf, even in cabinets with adjustable interiors.
Adjustable Shelves
Storage needs rarely stay the same forever.
Adjustable shelves allow the cabinet to evolve alongside those changing needs.
They make it easy to accommodate:
- Larger containers
- Different tools
- Seasonal supplies
- New equipment
For many builders, this flexibility becomes one of the cabinet’s most valuable features.
Think Beyond Today’s Project
The best woodworking plans don’t simply solve today’s storage problem.
They leave room for tomorrow.
As you review potential plans, ask yourself:
Could I build matching cabinets later?
Will this style fit other rooms in the house?
Can I expand this storage system over time?
Will replacement hardware remain readily available?
Thinking ahead often leads to better design decisions from the very beginning.
Choose a Plan That Makes You Want to Build
Technical details matter.
Accurate dimensions matter.
Strong joinery matters.
But there is one final consideration that deserves equal attention.
Choose a project that genuinely excites you.
Woodworking is at its best when curiosity and craftsmanship work together.
The cabinet you’ll use for years should also be one you enjoy building.
That enthusiasm makes careful measuring feel worthwhile, encourages patience during assembly, and helps carry you through the slower stages of sanding and finishing.
With your woodworking plan selected, the next step is turning drawings into reality. Before a single panel is cut, you’ll need the right combination of tools, materials, hardware, and safety equipment. Careful preparation at this stage lays the groundwork for every accurate cut, every clean joint, and every confident step that follows.
Part 4A — Tools & Measuring Equipment: Setting Yourself Up for a Better Build
Spend enough time around experienced woodworkers, and you’ll notice something interesting.
They rarely rush to turn on a saw.
Instead, they spend the first few minutes checking measurements, organizing materials, sharpening blades, arranging clamps, and making sure everything they need is within easy reach. It may not look exciting, but it’s one of the biggest reasons their projects come together so smoothly.
Cabinetmaking rewards preparation more than speed.
Every accurate cut begins with a reliable measurement. Every clean joint depends on a properly adjusted tool. And every cabinet that feels solid and precise starts long before the first piece of plywood reaches the workbench.
You don’t need a professional cabinet shop filled with industrial machines to build an exceptional wall cabinet. What you do need is a thoughtful collection of dependable tools, a basic understanding of what each one does, and the discipline to use them carefully.
The goal isn’t to own everything.
The goal is to own what matters.
Build Your Workshop One Useful Tool at a Time
It’s easy to fall into the trap of believing that better woodworking comes from buying more equipment.
In reality, the opposite is often true.
A small workshop built around reliable, well-maintained tools usually produces better work than a crowded space filled with expensive equipment that rarely gets used.
Whenever you’re considering a new tool, ask yourself three questions.
- Will this improve my accuracy?
- Will I use it on future projects?
- Will it make my work safer or more efficient?
If the answer is yes to all three, it’s probably a worthwhile addition to your workshop.
If not, your money may be better spent on higher-quality materials or hardware for the project in front of you.
Measuring Tools: The Quiet Heroes of Cabinetmaking
If there’s one lesson every cabinetmaker eventually learns, it’s this:
Wood is surprisingly forgiving.
Measurements are not.
Cabinets depend on precision. A mistake that’s barely noticeable while cutting a single panel can become painfully obvious once doors are installed or cabinets are mounted side by side.
That’s why measuring tools deserve more attention than almost any power tool in the shop.
Tape Measure
The tape measure will likely become the tool you reach for more than any other.
Look for one with:
- Clear, easy-to-read markings
- A strong locking mechanism
- A blade that stays rigid when extended
- Comfortable grip and smooth operation
An often-overlooked tip is to use the same tape measure throughout an entire project.
Different manufacturers occasionally produce slight variations, and even tiny inconsistencies can affect the fit of precision work.
Consistency is your friend.
Combination Square
If the tape measure gathers information, the combination square confirms it.
Few tools earn their place in a cabinetmaker’s apron more consistently.
It helps you:
- Check ninety-degree corners
- Mark layout lines
- Verify saw blade alignment
- Measure material thickness
- Inspect assembled parts for accuracy
Its versatility means it remains useful from the first layout marks until the final inspection.
Speed Square
Although commonly associated with framing, the speed square has earned a permanent place in many woodworking shops.
Paired with a circular saw, it becomes a quick guide for accurate crosscuts.
It’s also useful for:
- Confirming panel squareness
- Marking perpendicular lines
- Checking machine setup
- Verifying cabinet corners during assembly
Simple tools often prove to be the most dependable.
Straightedge or Cutting Guide
Breaking down large sheets of plywood can feel intimidating, especially in a smaller workshop.
A straightedge transforms that process.
Used correctly, it guides a circular saw with remarkable accuracy, producing clean, repeatable cuts that rival much larger stationary equipment.
For many DIY builders, a quality cutting guide eliminates the need for a large panel saw while delivering excellent results.
Marking Knife and Carpenter’s Pencil
Not every mark serves the same purpose.
A carpenter’s pencil is ideal for rough layout, reference notes, and cut labels.
A marking knife creates crisp, fine lines that improve cutting accuracy and reduce tear-out, particularly when working with hardwoods or visible joinery.
Many experienced woodworkers use both, choosing whichever tool best suits the task at hand.
Power Tools That Make Cabinet Building Easier
Power tools don’t replace craftsmanship.
They amplify it.
Used thoughtfully, they increase consistency, reduce physical effort, and allow you to repeat accurate cuts throughout an entire project.
The key is understanding what each tool does best.
Circular Saw
Few tools offer as much versatility for cabinet construction.
With a sharp blade and a reliable guide, a circular saw can:
- Break down plywood sheets
- Rip long panels
- Crosscut cabinet components
- Trim shelves
- Cut mounting cleats
For many home workshops, it serves as the primary cutting tool.
Combined with careful measuring, it is capable of producing excellent cabinetry.
Table Saw
If cabinetmaking becomes a regular part of your woodworking, a table saw often becomes the center of the workshop.
Its greatest strengths are consistency and repeatability.
Once properly adjusted, it excels at:
- Straight rip cuts
- Repetitive panel sizing
- Accurate joinery preparation
- Producing identical parts
The more cabinets you build, the more valuable those qualities become.
Miter Saw
While it isn’t typically used for cutting large plywood panels, a miter saw shines when working with solid wood.
It’s especially useful for:
- Face-frame components
- Hardwood edging
- Trim
- Cleats
- Decorative moldings
Fast, accurate crosscuts help maintain clean joints throughout the project.
Cordless Drill and Driver
Every cabinet requires holes.
Pilot holes.
Hardware holes.
Mounting holes.
Pocket-hole screws.
Hinges.
Handles.
A reliable drill quickly becomes indispensable.
Many woodworkers eventually keep both a drill and an impact driver nearby, allowing one tool to drill while the other drives screws.
It may seem like a small convenience until you’ve changed bits fifty times in one afternoon.
Random-Orbit Sander
Few stages of woodworking transform a project more dramatically than sanding.
A random-orbit sander removes machining marks while preparing surfaces for stain or paint.
More importantly, it creates consistency.
Cabinets reflect light across large, flat surfaces.
Even subtle imperfections become noticeable once a finish is applied.
Taking time here pays dividends later.
Router
If there’s one tool that continually surprises new cabinetmakers, it’s the router.
Compact yet remarkably capable, it can perform an impressive range of tasks.
Use it to:
- Cut dadoes
- Form rabbets
- Flush-trim edge banding
- Shape decorative edges
- Trim laminate
- Prepare hinge recesses
As your woodworking skills develop, the router often becomes one of the most frequently used tools in the shop.
Hand Tools Still Matter
Power tools remove material quickly.
Hand tools refine the work.
They provide the control needed for adjustments that machines simply can’t match.
Professional cabinetmakers rely on them every day.
Clamps
Ask ten experienced woodworkers how many clamps are enough, and you’ll probably hear the same answer.
“Just one more.”
Clamps do far more than hold pieces together.
They help:
- Keep assemblies square
- Maintain pressure during glue-up
- Prevent movement while drilling
- Hold work securely for routing or sanding
A small collection of quality clamps will serve you on nearly every woodworking project.
Chisels
Sharp chisels are precision tools.
They’re used for:
- Cleaning joints
- Trimming small areas
- Removing dried glue
- Fine-tuning hardware recesses
- Making careful adjustments
They aren’t used constantly, but when they’re needed, nothing else does the job quite as well.
Keep them sharp, and they’ll reward you with clean, controlled cuts.
Block Plane
Sometimes a door needs just a whisper of adjustment.
Perhaps a shelf edge feels slightly proud.
Maybe a corner needs softening before finish is applied.
A block plane handles these small corrections beautifully.
It removes thin shavings with remarkable control, leaving a surface that often requires very little sanding.
Rubber Mallet
Unlike a steel hammer, a rubber mallet delivers force without damaging delicate surfaces.
It’s ideal for:
- Seating joints
- Aligning cabinet parts
- Adjusting assemblies during glue-up
Used gently, it helps persuade components into place without leaving unwanted marks.
A Better Workshop Begins with Better Habits
There’s a noticeable rhythm to experienced woodworkers.
Before making a cut, they check the measurement one more time.
Before drilling, they confirm the layout.
Before applying glue, they arrange every clamp they’ll need.
These aren’t complicated techniques.
They’re habits.
And over time, those habits become one of the greatest tools a cabinetmaker owns.
With your measuring equipment organized, cutting tools prepared, and workshop ready for the project ahead, the next step is selecting the materials that will determine how your cabinet looks, feels, and performs. From cabinet-grade plywood and hardwood choices to premium hardware, adhesives, and finishing supplies, every material plays a role in transforming a stack of flat panels into a cabinet built to serve for years to come.
Part 4B — Materials, Hardware, Finishing Supplies & Safety: The Details That Shape a Great Cabinet
If tools determine how you build a cabinet, materials determine what that cabinet becomes.
This is where many projects quietly separate into two very different paths.
One cabinet feels solid every time the door opens. The shelves stay straight. The finish ages gracefully. Years later, it still looks like something worth keeping.
The other begins showing its weaknesses almost immediately. Shelves flex under weight. Hinges loosen. Edges chip. Moisture leaves its mark.
The difference often has little to do with woodworking skill.
It comes down to choices made before construction even begins.
The good news is that building a durable cabinet doesn’t require exotic hardwoods or premium-priced materials across the board. It simply requires understanding where quality matters most and investing wisely in the parts that carry the greatest responsibility.
Choosing the Right Plywood
Walk through the sheet goods aisle at any lumberyard and you’ll quickly notice that not all plywood is created equal.
At first glance, many sheets appear similar.
Look closer, however, and important differences begin to emerge.
Surface quality changes.
Core construction changes.
Weight changes.
Even the way a panel machines can vary dramatically.
For cabinetry, these differences matter.
Cabinet-Grade Plywood
For most wall cabinet projects, cabinet-grade plywood is the material against which everything else is measured.
It’s engineered specifically for furniture and cabinetry, offering an excellent balance of strength, stability, and appearance.
Quality cabinet-grade plywood typically provides:
- Smooth, consistent veneer faces
- Minimal internal voids
- Reliable thickness
- Strong screw-holding ability
- Stable construction that resists warping
Because plywood is built from alternating layers of wood veneer, it expands and contracts far less than wide solid wood panels. That stability is one of the reasons it has become the preferred material for cabinet boxes throughout the woodworking industry.
Birch Plywood
Birch has earned a loyal following among cabinetmakers for good reason.
Its surface is smooth, its veneer is attractive, and it machines cleanly with sharp tools.
Birch plywood works equally well beneath paint or a clear protective finish, making it an excellent choice for workshops, utility rooms, and living spaces alike.
For many builders, it strikes an ideal balance between performance and value.
Maple Plywood
Maple plywood offers a lighter, cleaner appearance that suits both modern and traditional interiors.
Its subtle grain allows paint finishes to look exceptionally smooth while also showcasing the natural beauty of the wood under clear coatings.
If your goal is a bright, refined cabinet with a contemporary feel, maple deserves serious consideration.
Oak Plywood
Oak has a personality all its own.
Its bold grain brings warmth and texture to a room, making it a favorite for traditional, farmhouse, and Craftsman-inspired cabinetry.
Oak also stands up well to everyday use, which explains why it has remained popular for generations.
Walnut Plywood
Walnut occupies a different category altogether.
Rich color, elegant grain, and unmistakable character make it a favorite for premium furniture and display cabinetry.
Because of its higher cost, many builders reserve walnut for highly visible surfaces while using more economical plywood for interior or concealed components.
That combination delivers luxury where it matters most without dramatically increasing the project’s overall budget.
Where Solid Hardwood Makes the Biggest Difference
Plywood excels in large panels.
Hardwood shines in the details.
Rather than building an entire cabinet from solid lumber, professional cabinetmakers often combine the strengths of both materials.
Face Frames
A hardwood face frame strengthens the front of the cabinet while creating a clean, finished appearance.
It also provides excellent support for hinges and helps conceal plywood edges.
Maple, oak, cherry, and walnut are all popular choices depending on the desired style.
Cabinet Doors
Doors receive constant attention.
They open.
They close.
They absorb daily wear from hands, moisture, and movement.
Solid hardwood handles that workload exceptionally well while offering crisp edges and beautiful grain.
Shelf Edging
Adding hardwood edging to plywood shelves accomplishes two things at once.
It protects the shelf from impact damage and significantly increases its resistance to sagging.
It’s a small upgrade with lasting benefits, especially in cabinets expected to carry heavier loads.
Hardware Is More Than Decoration
Cabinet hardware is often chosen near the end of a project.
In reality, it deserves attention from the very beginning.
Hardware affects how a cabinet feels every time it’s used.
The difference between average and exceptional is often measured not in appearance but in experience.
Concealed Hinges
Modern concealed hinges have become the standard for a reason.
Once installed, they allow precise adjustment in multiple directions, making it possible to create even reveal lines and smooth door movement.
Many also include soft-close mechanisms that prevent doors from slamming shut.
The improvement may seem subtle until you use them every day.
Traditional Hinges
Visible hinges remain an excellent choice for period-style cabinetry, rustic furniture, and farmhouse designs.
Rather than hiding the hardware, they celebrate it.
When chosen thoughtfully, exposed hinges become part of the cabinet’s overall character.
Shelf Supports
Small components often carry surprising responsibility.
Shelf supports must remain dependable under constant load while allowing shelves to stay level over time.
Metal shelf pins generally provide greater durability than plastic versions, particularly in cabinets expected to support heavier items.
Handles and Knobs
Handles are one of the few parts of a cabinet people interact with directly.
Comfort matters.
So does durability.
Choose hardware that feels substantial in the hand and complements the cabinet’s overall design rather than competing with it.
Timeless designs tend to age more gracefully than overly decorative styles.
Fasteners Worth Trusting
Every cabinet relies on fasteners, but not every screw belongs in cabinetry.
Choosing the correct fastener improves structural integrity while making assembly easier.
Quality wood screws provide dependable holding power in hardwood and plywood alike.
Pocket-hole screws simplify hidden joinery.
Confirmat screws excel in engineered wood products where strong mechanical connections are required.
Whatever style you choose, remember one simple principle:
The correct fastener makes the joint stronger.
The wrong one often creates problems that appear much later.
Wood Glue: The Hidden Strength
Most people notice screws.
Few notice glue.
Yet in many cabinet joints, properly applied wood glue contributes more strength than the fasteners themselves.
A thin, even layer across clean mating surfaces creates an exceptionally strong bond.
More glue isn’t better.
Better coverage is.
Remove squeeze-out before it hardens, and your finishing work becomes considerably easier.
Why Edge Banding Makes Such a Difference
Exposed plywood edges immediately reveal how a cabinet was constructed.
There’s nothing structurally wrong with that, but many builders prefer a cleaner appearance.
Edge banding solves the problem elegantly.
Whether using real wood veneer, solid hardwood strips, or durable PVC products, covering exposed edges creates a finished look while protecting vulnerable corners from everyday wear.
Once trimmed and sanded, quality edge banding almost disappears into the surrounding wood.
Preparing for a Beautiful Finish
A finish doesn’t hide poor workmanship.
It reveals it.
That’s why experienced cabinetmakers spend so much time preparing surfaces before opening a can of paint or stain.
Keep these essentials close at hand:
- Sandpaper in progressive grits
- Wood filler
- Tack cloths
- Clean lint-free cloths
- Quality brushes or foam rollers
- Mixing sticks
- Disposable gloves
The finish only looks as good as the surface beneath it.
Organize the Workspace Before You Begin
An organized shop isn’t simply pleasant to work in.
It improves accuracy.
Arrange your workspace so materials naturally flow through each stage.
Sheet goods arrive first.
Panels are cut.
Joinery is machined.
Assemblies are glued.
Surfaces are sanded.
Finishes are applied.
Reducing unnecessary movement allows you to focus on the work rather than searching for misplaced tools or hardware.
Even a modest workshop feels larger when it’s thoughtfully organized.
Safety Is Part of Good Craftsmanship
It’s easy to think of safety as something separate from woodworking.
In reality, the two are inseparable.
Careful woodworkers tend to produce better work because they’re focused, deliberate, and fully in control of their tools.
Protect yourself with:
- Safety glasses
- Hearing protection
- A properly fitted dust mask or respirator
- Push sticks for table saw work
- Secure clamping whenever possible
Take a few extra seconds to position a workpiece correctly instead of trying to hold it by hand.
Replace dull blades before they become dangerous.
Keep the workshop floor clear of offcuts and cords.
These habits don’t interrupt good woodworking.
They support it.
Preparation Is an Investment, Not a Delay
When people imagine woodworking, they often picture sawdust flying through the air or freshly cut boards coming together into a finished cabinet.
What they don’t see is the quiet preparation beforehand.
Checking every sheet of plywood.
Sorting hardware into small containers.
Sharpening a chisel.
Testing a finish on scrap wood.
Organizing clamps before the glue bottle is opened.
Those moments rarely appear in photographs, yet they have an enormous influence on the finished project.
Preparation reduces stress.
Preparation reduces mistakes.
Preparation builds confidence.
With your workshop organized, your materials selected, and every essential tool within reach, you’re ready to move from planning into construction. The next stage transforms drawings and measurements into real components as you learn how to measure your space accurately, create efficient cut lists, optimize plywood layouts, and prepare every part for a cabinet that goes together with precision from the very first joint.
Part 5A — Planning the Cabinet: Measuring Your Space, Determining Dimensions & Creating an Accurate Layout
Every cabinet you’ve admired—whether it hangs in a custom kitchen, an organized workshop, or a beautifully finished home office—has one thing in common.
It wasn’t built by accident.
Long before the first sheet of plywood was lifted onto a workbench, someone spent time thinking through the project. They measured. They sketched. They questioned their assumptions. They imagined how every door would open, where every shelf would sit, and how the cabinet would feel years after installation.
That’s the stage you’re entering now.
Planning isn’t the pause before woodworking begins.
Planning is woodworking.
The quality of every cut, every joint, and every finished surface depends on the decisions made here. Take your time now, and the entire project becomes smoother. Rush this stage, and even the best tools in your shop will struggle to compensate for mistakes made on paper.
Experienced cabinetmakers understand that planning isn’t about delaying the build.
It’s about making sure every hour spent in the workshop moves the project forward instead of correcting problems that never needed to happen.
Start by Looking at the Room, Not the Cabinet
It’s natural to focus on the project itself.
How wide should the cabinet be?
How many shelves should it have?
Which door style looks best?
Those questions matter, but they’re not the first questions.
Instead, stand back and study the room.
Notice how people move through the space.
Look at nearby furniture.
Observe how light falls across the wall throughout the day.
Think about how the cabinet will interact with everything around it.
A cabinet shouldn’t feel like an object attached to a wall.
It should feel as though it belongs there.
When you begin with the room rather than the cabinet, design decisions become much easier.
Measure the Space with Purpose
Most people measure a wall once and consider the job finished.
Professional cabinetmakers rarely trust a single measurement.
Walls aren’t always perfectly straight.
Corners drift slightly out of square.
Floors settle.
Ceilings vary.
Even newly constructed homes contain small inconsistencies that influence cabinet installation.
That’s why every important dimension deserves to be verified more than once.
Measure:
- Overall wall width
- Available height
- Distance from nearby trim
- Clearance from windows and doors
- Existing shelving or cabinetry
- Electrical outlets and switches
- Light fixtures
- Baseboards and crown molding
Then measure again.
Not because you expect the tape measure to change its mind, but because careful verification prevents costly surprises later.
Record Every Measurement Immediately
Confidence has a way of creating mistakes.
It’s easy to think,
“I’ll remember that.”
Most of the time, you won’t.
Professional builders write everything down the moment it’s measured.
A dedicated notebook, printed planning sheet, or digital project file quickly becomes one of the most valuable tools in the workshop.
Include notes such as:
- Finished wall dimensions
- Ceiling height
- Stud locations
- Obstructions
- Desired cabinet size
- Planned mounting height
- Material thickness
- Hardware requirements
These notes become your reference throughout the build.
When questions arise days later, you won’t need to measure the room all over again.
Find the Studs Before You Design Around Them
Wall cabinets are only as secure as the structure supporting them.
Knowing where the framing is located early in the planning stage opens up better design options.
Mark each wall stud clearly.
Measure the spacing between them.
Think about how the cabinet will attach to those structural points.
A cabinet that’s designed with mounting in mind often installs faster, requires fewer adjustments, and distributes weight more effectively.
Planning around the wall structure is much easier than trying to adapt the cabinet after it’s has already been built.
Decide What Success Looks Like
Before deciding on dimensions, picture the cabinet fully loaded and in daily use.
Ask yourself questions that go beyond appearance.
Will it hold heavy tools?
Will children need to reach the lower shelves?
Will frequently used items be stored inside?
Should the cabinet blend quietly into the room or become a visual focal point?
The clearer your answers become now, the fewer compromises you’ll face during construction.
Good design isn’t simply attractive.
Good design solves problems before they appear.
Determining the Right Cabinet Dimensions
One of the greatest advantages of building your own cabinet is freedom.
You’re no longer limited to standard factory sizes.
That freedom, however, comes with responsibility.
Every measurement should have a purpose.
Finding the Ideal Width
A wider cabinet offers more storage, but it also introduces new engineering challenges.
Long shelves experience greater stress.
Large doors become heavier.
Installation becomes more demanding.
Instead of asking how wide the cabinet can be, ask how wide it should be.
Choose a width that balances storage capacity with structural strength.
If additional space is needed, two smaller cabinets often provide greater flexibility than one oversized unit.
They are easier to build, easier to install, and simpler to modify later if your storage needs change.
Choosing a Comfortable Height
Height should always reflect how the cabinet will be used.
A storage cabinet mounted above a workbench has different requirements than one installed in a laundry room or home office.
Think about:
- Eye level
- Reach without a step stool
- Ceiling clearance
- Nearby lighting
- Future accessibility
A cabinet that looks impressive but requires awkward stretching every day quickly becomes frustrating.
Comfort deserves as much attention as appearance.
Determining the Best Depth
Depth influences more than storage capacity.
It affects visibility.
Accessibility.
Weight distribution.
Even the way a room feels.
Cabinets that are too deep encourage clutter because smaller items disappear behind larger ones.
Cabinets that are too shallow may limit what can be stored.
One simple exercise often helps.
Gather the largest items you expect the cabinet to hold.
Measure them.
Then add enough clearance for comfortable access rather than forcing everything into the tightest possible space.
The cabinet should support your routine—not complicate it.
Think About Door Swing Before Building
A beautiful cabinet loses much of its value if the doors cannot open comfortably.
Before finalizing dimensions, imagine opening both doors completely.
Will they strike a nearby wall?
Will another cabinet interfere?
Will the handles be easy to grasp?
Can large objects be removed without obstruction?
These questions take only minutes to answer during planning.
Correcting them after installation can require rebuilding an entire cabinet.
Plan Around Daily Habits
One of the easiest ways to improve cabinet design is to think less like a builder and more like the person who will use it.
What do you reach for every morning?
What gets used only once a month?
Which items deserve the easiest access?
Frequently used tools belong near eye level.
Heavier equipment often works best lower in the cabinet where lifting feels safer.
Seasonal items can occupy higher shelves because they require less frequent access.
Good organization begins with thoughtful planning rather than clever storage accessories.
Sketch Before You Cut
Your drawings don’t need to look like architectural blueprints.
Simple hand sketches are often enough.
The goal isn’t artistic perfection.
The goal is clarity.
Draw:
- Front view
- Side view
- Interior shelf layout
- Door openings
- Mounting position
Add dimensions as you work.
The process of sketching often reveals small design issues that measurements alone might miss.
Many experienced woodworkers discover their best ideas while drawing rather than while cutting.
Leave Room for Small Adjustments
Perfect conditions rarely exist.
Walls move.
Materials vary slightly.
Hardware tolerances differ.
Good planning leaves space for these realities.
Allow reasonable clearance around doors.
Avoid designing shelves that require impossibly tight fits.
Think about how hinges will adjust after installation.
Small allowances built into the design make final assembly significantly easier without affecting the finished appearance.
Visualize the Build in Order
Before cutting a single panel, mentally build the cabinet from start to finish.
Imagine yourself standing in the workshop.
Which panel will you cut first?
Where will you place it?
When will you machine the joinery?
How will you clamp the cabinet during assembly?
Can every step be completed comfortably with the tools you own?
Professional cabinetmakers often rehearse projects this way.
By mentally walking through the sequence, they identify obstacles while they’re still easy to solve.
It’s one of the simplest ways to reduce frustration once construction begins.
Planning Creates Confidence
There’s a noticeable shift that happens once thoughtful planning is complete.
Uncertainty begins to disappear.
Measurements feel intentional.
Material choices make sense.
The cabinet exists first as a clear vision, then as a drawing, and only afterward as a woodworking project.
That progression matters.
It transforms construction from a series of guesses into a series of deliberate decisions.
With the cabinet’s dimensions established, the installation area measured, and every major design choice recorded, the next stage becomes far more efficient. Instead of wondering what comes next, you’ll begin converting those plans into an accurate cut list, optimizing each sheet of plywood, organizing grain direction, and preparing every component before the first cut is made.
Part 5B — Planning the Cabinet: Creating Cut Lists, Optimizing Materials & Preparing for Precision
By now, your cabinet exists in more than just your imagination.
You’ve measured the room, determined the overall dimensions, considered how the cabinet will be used, and visualized how it will fit within the space. The project has moved from an idea to a plan.
This is where careful planning becomes practical preparation.
Many woodworkers are eager to start cutting as soon as they bring home a stack of plywood. The excitement is understandable. Fresh materials have a way of making every project feel as though it’s already halfway finished.
But experienced cabinetmakers know something that beginners often discover the hard way.
The fastest path to a finished cabinet is rarely the fastest path to the first cut.
Taking another hour—or even an afternoon—to organize parts, verify dimensions, and create a detailed cut list often saves an entire weekend of correcting mistakes later.
Good planning doesn’t slow progress.
It protects it.
Why a Cut List Matters More Than You Think
Imagine trying to bake a complicated recipe without measuring the ingredients first.
You might eventually produce something edible, but the process would be filled with unnecessary guesswork.
Cabinetmaking works the same way.
A cut list transforms scattered measurements into a logical building sequence.
Instead of wondering which panel comes next, every component already has a purpose.
A complete cut list typically includes:
- Part name
- Quantity
- Length
- Width
- Material thickness
- Material type
- Grain direction
- Notes for joinery or edge treatment
Once every component has been documented, uncertainty begins to disappear.
Each cut becomes intentional.
Think in Parts, Not Sheets
One of the easiest mistakes to make is looking at an entire sheet of plywood and deciding where to start cutting.
Professionals approach it differently.
They stop thinking about plywood sheets and start thinking about cabinet components.
Instead of seeing one large panel, they see:
- Two cabinet sides
- A top
- A bottom
- Fixed shelves
- Adjustable shelves
- A back panel
- Door components
- Face-frame material
- Mounting cleats
Breaking the project into individual parts makes layout decisions much easier and dramatically reduces the chance of overlooking an important component.
Label Every Part Before It’s Cut
There’s a surprising psychological benefit to naming every component before it exists.
Once each piece has a label, the project feels organized rather than overwhelming.
Simple labels such as:
- Left Side
- Right Side
- Top Panel
- Bottom Panel
- Fixed Shelf
- Adjustable Shelf A
- Back Panel
- Face Frame Rail
- Face Frame Stile
prevent confusion throughout construction.
A pencil mark on the back of each finished piece takes only seconds but can save considerable time during assembly.
Plan Your Plywood Layout Carefully
Plywood is one of the most valuable materials in cabinetmaking.
Every unnecessary cut increases waste.
Every poorly planned layout increases cost.
Before turning on a saw, study each sheet carefully.
Look for:
- Surface defects
- Veneer patches
- Color variation
- Factory edges
- Areas best reserved for hidden components
Whenever possible, position the most visible cabinet parts on the cleanest sections of the sheet.
Interior shelves and concealed structural pieces can often be cut from areas with minor cosmetic imperfections.
Thinking ahead allows the best material to appear where it matters most.
Make Every Sheet Work Harder
Professional cabinet shops become remarkably efficient because they maximize every sheet they purchase.
That mindset is worth adopting even for a single cabinet.
Arrange components so offcuts remain useful.
Long narrow strips may become:
- Shelf edging
- Cleats
- Internal supports
- Spacer blocks
- Future shop jigs
Small leftover pieces often prove surprisingly valuable during later stages of the project.
Waste isn’t always unavoidable.
Sometimes it’s simply unplanned.
Respect Grain Direction
Wood has movement.
It has character.
It also has direction.
Grain orientation influences both appearance and strength.
On visible cabinet components, consistent grain creates a calm, balanced appearance that immediately feels more refined.
Imagine cabinet doors where one grain runs vertically while the next runs horizontally.
Nothing is technically wrong.
Yet something feels visually unsettled.
Maintaining consistent grain direction creates subtle harmony that most people notice without consciously recognizing why.
Grain Direction on Cabinet Sides
Vertical grain generally emphasizes height and creates a clean, elegant appearance.
Because cabinet sides are among the largest visible surfaces, consistent grain orientation contributes significantly to the finished cabinet’s visual balance.
Grain Direction on Doors
Doors naturally attract attention.
Matching grain across adjacent doors creates continuity that immediately elevates the appearance of the project.
If your plywood includes particularly attractive figure or color variation, reserve it for these highly visible components.
Interior Components
Hidden shelves and structural panels don’t always require perfect grain matching.
Function comes first here.
However, maintaining a consistent orientation still makes construction easier because every component follows the same reference direction during machining and assembly.
Plan Joinery Before Cutting
One of the most common planning mistakes is cutting every panel to finished size before thinking about joinery.
Joinery affects dimensions.
Dados remove material.
Rabbets change overall measurements.
Face frames influence clearances.
Back panels require rebates or grooves.
These details should be incorporated into the layout from the beginning rather than adjusted afterward.
Ask yourself:
- Where will shelves connect?
- Will the cabinet back fit inside a rabbet?
- Are face frames covering plywood edges?
- Which joints require glue?
- Which components need pilot holes?
Answering these questions now creates cleaner construction later.
Build Around a Reference System
Professional cabinetmakers rarely measure every part independently.
Instead, they establish one reference face and one reference edge for each component.
Every layout line begins from those same references.
This simple habit minimizes cumulative error.
If a measurement is taken from different edges each time, tiny variations begin to compound.
Working from consistent reference surfaces keeps every component aligned throughout the project.
Double-Check Before the First Cut
There’s a moment every woodworker experiences.
The saw is ready.
The guide is clamped.
The blade is spinning.
Then a small voice asks,
“Did I measure that correctly?”
Listen to that voice.
Take one final look.
Verify the measurement.
Confirm the cut list.
Check the orientation of the panel.
Those few seconds are among the most productive in the entire project.
Organize Components as They’re Cut
As pieces come off the saw, resist the temptation to stack everything into one pile.
Create separate areas for:
- Cabinet sides
- Shelves
- Structural panels
- Face-frame stock
- Door material
- Offcuts for future use
A well-organized workshop reduces mistakes because every component remains easy to identify throughout construction.
It also prevents unnecessary handling that can damage freshly cut edges.
Dry Layout Before Dry Assembly
Before any joinery is machined, arrange every component on a flat surface exactly as it will appear in the finished cabinet.
Without using glue or screws, position:
- Cabinet sides
- Top and bottom panels
- Shelves
- Back panel
- Face-frame components
This simple exercise often reveals issues that measurements alone fail to expose.
Perhaps a shelf feels too close to another.
Maybe the cabinet appears taller than expected.
Perhaps an adjustment to shelf spacing would improve storage.
Changes are effortless now.
Later, they’ll require rebuilding finished parts.
Plan for Hardware Early
Hardware should never feel like an afterthought.
Long before installation, think about:
- Hinge locations
- Handle placement
- Shelf-pin holes
- Mounting rails
- French cleats if used
- Door clearances
Planning hardware alongside the cabinet itself ensures every component works together rather than competing for space.
Leave Yourself Room to Improve
One characteristic shared by experienced woodworkers is flexibility.
They rarely become attached to every original idea.
If a better solution appears during planning, they adopt it.
Perhaps a shelf should move.
Perhaps a cabinet could become slightly wider.
Perhaps adding another adjustable shelf would improve storage.
Planning remains valuable precisely because it allows thoughtful revisions before material has been removed.
Changing a drawing costs nothing.
Changing finished plywood is another story.
Confidence Comes from Preparation
There is a quiet confidence that develops once every measurement has been verified, every panel has been labeled, every cut has been planned, and every component has a clear place within the project.
At that point, woodworking begins to feel less like problem-solving and more like following a carefully considered sequence.
Nothing is rushed.
Nothing is guessed.
Each decision supports the next.
That is the rhythm professional cabinetmakers strive for on every build.
With the planning complete and every component accounted for, the project reaches one of its most satisfying milestones. In the next section, sheets of plywood become real cabinet parts as you’ll learn how to cut panels accurately, machine clean joinery, assemble a perfectly square cabinet box, and build the structural foundation that determines the strength and longevity of everything that follows.
Part 6 — Building the Cabinet Box: Where Planning Becomes Craftsmanship
There comes a point in every woodworking project when the drawings, measurements, and notes give way to something far more satisfying.
The first panel is cut.
A perfectly straight edge catches the light.
Individual parts begin collecting on the workbench instead of existing only on paper.
It’s an exciting stage, but it’s also where discipline matters most.
A cabinet box may appear simple—a collection of rectangular panels joined together—but it is the structural heart of the entire project. Every shelf, every door, every hinge, and every piece of hardware depends on the accuracy established here.
If the cabinet box is square, the rest of the build becomes far more enjoyable.
If it isn’t, you’ll spend the remainder of the project correcting problems instead of making progress.
Professional cabinetmakers understand this well.
They don’t rush through the cabinet box because it’s hidden behind doors or mounted against a wall.
They treat it as the foundation upon which everything else depends.
That’s exactly how we’ll approach it.
Prepare the Workspace Before Making the First Cut
Before lifting a sheet of plywood onto the cutting surface, take a moment to prepare the workshop.
It may feel like a delay, but it’s one of the most productive habits you can develop.
Clear unnecessary tools from the workbench.
Vacuum away dust and offcuts.
Check that extension cords won’t interfere with movement.
Arrange clamps where they’re easy to reach.
Gather the measuring tools you’ll use throughout the session.
A clean workspace encourages accurate work.
More importantly, it allows you to focus entirely on the cabinet instead of constantly searching for misplaced equipment.
Inspect Every Sheet One Last Time
Even carefully selected plywood deserves another inspection before cutting.
Lay each sheet flat and examine both faces.
Look for:
- Minor dents
- Veneer imperfections
- Factory damage
- Color variation
- Grain orientation
Confirm that your layout still places the most attractive sections on the cabinet’s visible surfaces.
Sometimes rotating a panel just a few degrees creates a noticeably better result.
This is the last opportunity to make those adjustments before cutting begins.
Breaking Down Large Panels
Handling a full sheet of plywood can be one of the most physically demanding parts of cabinetmaking.
The goal isn’t simply to cut accurately.
It’s to do so safely and with complete control.
Support the sheet fully throughout the cut.
Whether using a cutting table, foam insulation boards, or sturdy sawhorses, make sure the material remains stable from beginning to end.
Movement during a cut often creates more problems than an inaccurate measurement.
Take your time.
Let the saw do the work.
Smooth, steady motion almost always produces cleaner edges than trying to force the blade through the material.
Cut the Largest Components First
Professional cabinetmakers typically begin with the largest structural parts.
These include:
- Left cabinet side
- Right cabinet side
- Top panel
- Bottom panel
- Fixed shelves
- Back panel
Starting with these major components creates reference pieces that simplify every later measurement.
As each panel is completed, compare it against your cut list before moving on.
Finding an error immediately is far easier than discovering it after several additional cuts.
Label Every Component Immediately
Freshly cut plywood panels often look remarkably similar.
That similarity can quickly become confusing.
As soon as each piece is cut, label it clearly on a concealed surface.
Include information such as:
- Part name
- Orientation
- Reference face
- Reference edge
- Joinery location
These simple markings eliminate unnecessary guesswork during assembly.
Professionals rarely rely on memory when organization works better.
Check Every Cut Before Moving Forward
A successful cabinet isn’t built through one perfect measurement.
It’s built through hundreds of small confirmations.
After every important cut:
- Measure length.
- Measure width.
- Verify squareness.
- Inspect edge quality.
Developing this rhythm dramatically reduces the chance of repeating an unnoticed mistake across multiple components.
Machine the Joinery with Patience
Once the major panels have been prepared, attention turns to joinery.
This is where individual boards begin developing relationships with one another.
Every groove, shoulder, and recess should support both strength and accurate alignment.
Whether you’re cutting dadoes, rabbets, or preparing pocket-hole joinery, consistency matters more than speed.
Whenever possible:
- Test settings on scrap material.
- Verify depth before cutting finished parts.
- Keep reference faces consistent.
- Machine matching parts together.
Small adjustments now produce cleaner assembly later.
Cutting Dados
Dados provide excellent support for fixed shelves while increasing the cabinet’s resistance to racking.
When cutting them:
- Measure from consistent reference edges.
- Maintain uniform depth.
- Test shelf fit using offcuts before machining every panel.
A properly fitted dado should feel snug without requiring excessive force.
Forming Rabbets
Rabbets commonly receive the cabinet back or strengthen corner joints.
Accuracy is especially important because inconsistent rabbets often reveal themselves during assembly.
Inspect each cut carefully before proceeding.
Clean shoulders contribute to tighter joints and a more professional finished appearance.
Preparing Pocket-Hole Joinery
Pocket-hole construction remains popular because it combines strength with efficient assembly.
Before drilling:
- Mark hidden surfaces.
- Confirm screw length.
- Clamp workpieces securely.
- Maintain consistent spacing.
Careful preparation produces cleaner joints while preventing unnecessary repairs later.
Dry Fit the Entire Cabinet
Before reaching for glue, assemble the cabinet without adhesives or fasteners.
This dry fit is one of the most valuable quality-control steps in cabinetmaking.
Position:
- Cabinet sides
- Top
- Bottom
- Fixed shelves
- Back panel
- Face-frame components if applicable
Inspect every joint.
Nothing should feel forced.
If adjustments are needed, this is the ideal time to make them.
Dry fitting removes uncertainty from final assembly.
Confirm the Cabinet Is Square
A cabinet box has one non-negotiable requirement.
It must be square.
Fortunately, checking this is straightforward.
Measure diagonally from one corner to the opposite corner.
Repeat for the other diagonal.
If both measurements match, the cabinet is square.
If they differ, make small adjustments before moving forward.
Never assume the cabinet is square simply because individual panels were cut accurately.
Assembly introduces new variables that deserve verification.
Organize the Glue-Up Before Opening the Bottle
Glue has a limited working time.
Once it’s applied, every minute matters.
Before opening the adhesive:
- Arrange clamps.
- Position fasteners.
- Gather drills and drivers.
- Prepare a damp cloth for squeeze-out.
- Confirm assembly order.
Many experienced woodworkers rehearse the glue-up one final time.
That small investment reduces stress considerably once the adhesive is applied.
Apply Glue Thoughtfully
A stronger joint doesn’t require more glue.
It requires better coverage.
Apply a thin, even film across the mating surfaces.
Avoid excessive squeeze-out, which creates unnecessary cleanup and can interfere with finishing later.
As each joint comes together, check alignment before tightening clamps fully.
Patience at this stage produces cleaner, stronger construction.
Clamp with Balance
Clamps do far more than hold pieces together.
They influence alignment.
Uneven pressure can pull panels slightly out of position, especially during larger glue-ups.
Distribute clamps evenly around the cabinet.
Tighten gradually.
Alternate from one side to the other rather than fully tightening one clamp at a time.
Balanced pressure keeps the assembly stable while reducing distortion.
Remove Glue Squeeze-Out Early
Fresh glue is far easier to remove than cured glue.
After clamping, inspect every visible joint.
Wipe away excess adhesive using a lightly damp cloth.
Be careful not to flood the joint with water.
The goal is simply to remove surface residue before it hardens.
Later sanding becomes much easier when glue cleanup happens immediately.
Install the Cabinet Back
Many people think of the back panel as little more than a cover.
In reality, it performs an important structural function.
Once installed correctly, it helps lock the cabinet into square while increasing rigidity.
Position the back carefully.
Verify the cabinet remains square.
Only then should permanent fasteners be installed.
Work gradually around the perimeter rather than fastening one entire side before the others.
This helps maintain alignment throughout installation.
Inspect Before Moving On
With the cabinet assembled, resist the urge to celebrate too quickly.
Take a few minutes to inspect every detail.
Look for:
- Flush joints
- Even panel alignment
- Proper clamp pressure
- Clean glue lines
- Square corners
- Secure fasteners
Run your hand along every edge.
Sometimes your fingertips notice small inconsistencies before your eyes do.
These are the moments when small corrections make the greatest difference.
Let the Cabinet Rest
One of the hardest lessons in woodworking is knowing when to stop.
Glue needs time to cure.
Resist the temptation to install shelves or hardware immediately.
Allow the cabinet to remain clamped for the recommended period, then let the adhesive reach full strength before placing the structure under additional stress.
Patience here protects every hour you’ve already invested.
The Cabinet Has Found Its Shape
There is something deeply satisfying about standing back and seeing the cabinet box fully assembled for the first time.
Only hours earlier, it was a collection of individual panels.
Now it has structure.
It has presence.
For the first time, the project begins to resemble the cabinet you’ve imagined since the planning stage.
More importantly, it now has the strength and precision needed to support everything that follows.
In the next section, attention shifts from structure to function as you’ll install shelves, build and fit cabinet doors, mount concealed hinges, and make the careful adjustments that give a custom-built cabinet its smooth, professional feel.
Part 7 — Shelves, Doors & Hardware: Turning a Cabinet Box into a Cabinet You’ll Love Using
There’s a noticeable shift that happens once the cabinet box is complete.
Until now, nearly every task has focused on structure. You’ve measured carefully, cut accurately, assembled the cabinet square, and created a foundation strong enough to last for years.
Now the project begins to feel personal.
Shelves give the cabinet purpose.
Doors define its personality.
Hardware determines how it feels every time someone reaches for the handle.
These details may seem secondary compared to the cabinet box itself, yet they’re often the features people notice first. A cabinet can be beautifully constructed, but if the doors bind, the shelves sag, or the hardware feels loose, the overall impression changes immediately.
On the other hand, when doors close effortlessly, reveal lines remain perfectly even, and shelves feel solid beneath your hand, the cabinet communicates quality before anyone consciously realizes why.
This stage isn’t about adding finishing touches.
It’s about transforming a sturdy structure into furniture that’s a pleasure to use every single day.
Begin with the Interior
Before focusing on doors or decorative details, complete the cabinet’s interior.
It’s much easier to work inside an open cabinet than one with doors already installed.
Take a moment to clean away any remaining dust from assembly.
Inspect the interior carefully.
Run your hand along each surface.
Look for:
- Dried glue residue
- Sharp edges
- Minor splinters
- Uneven joints
- Pencil marks that should be removed
Small imperfections are much easier to correct now than after finishing.
This quiet inspection often reveals details that were easy to overlook during assembly.
Installing Fixed Shelves
If your design includes fixed shelves that weren’t permanently installed during the cabinet box assembly, this is the time to fit them.
Fixed shelves do much more than divide storage space.
They strengthen the cabinet by tying the side panels together, reducing movement and increasing overall rigidity.
In larger cabinets, they also help distribute weight more evenly across the structure.
Before installation:
- Confirm each shelf fits comfortably.
- Check that all mating surfaces are clean.
- Verify the cabinet remains square.
- Dry fit every shelf one final time.
Once satisfied, apply a thin, even layer of wood glue and position each shelf carefully.
Allow the joinery to guide the shelf into place rather than forcing it.
A properly machined joint should feel precise, not tight.
Building Flexibility with Adjustable Shelves
One of the greatest advantages of custom cabinetry is the ability to adapt as storage needs change.
What fits perfectly today may not fit next year.
Adjustable shelving solves that problem elegantly.
Instead of committing every shelf to a permanent position, you create a cabinet that evolves alongside your workspace or home.
Whether you’re storing paint cans, cookware, books, camera equipment, or power tools, flexibility often proves just as valuable as storage capacity.
Drilling Shelf Pin Holes
Consistency matters here more than speed.
Shelf pin holes should align perfectly on both cabinet sides so every shelf remains level regardless of its position.
A shelf-pin jig simplifies this process considerably.
If you don’t have one, take extra care during layout.
Mark every location before drilling.
Then verify the spacing one more time.
Small errors become surprisingly noticeable once shelves are installed.
Accuracy here creates confidence later.
Choosing Reliable Shelf Supports
Shelf supports rarely attract attention, and that’s exactly how they should perform.
Good supports simply do their job.
Metal shelf pins remain the preferred choice for most cabinetry because they combine durability with a clean appearance.
When selecting supports, consider:
- Expected load
- Ease of installation
- Long-term durability
- Compatibility with shelf thickness
The strongest shelf still depends on dependable support beneath it.
Preventing Shelf Sag Before It Starts
Nothing undermines a cabinet’s appearance quite like a shelf that slowly bows under its own contents.
Fortunately, preventing sag is much easier than correcting it.
Several design choices work together to increase stiffness.
Add Hardwood Front Edging
A strip of hardwood along the front edge serves two purposes.
It protects the plywood edge from wear.
It also dramatically increases the shelf’s resistance to bending.
This small addition has been used by cabinetmakers for generations because it works remarkably well.
Reduce Unsupported Spans
Wide shelves naturally flex more than shorter ones.
If your cabinet design includes substantial width, consider adding:
- A center divider
- Additional fixed shelves
- Intermediate supports
Breaking one long span into two shorter spans significantly improves load capacity.
Match Shelf Thickness to Its Purpose
Not every shelf carries the same responsibility.
Display shelves holding lightweight décor require far less support than workshop shelves storing heavy tools.
Choose shelf thickness according to expected use rather than appearance alone.
Strong cabinetry begins with realistic expectations.
Building Cabinet Doors
Doors become the public face of your cabinet.
Even if the cabinet box is beautifully built, uneven doors or inconsistent gaps quickly draw attention.
The good news is that careful preparation makes door installation surprisingly straightforward.
Slab Doors
Simple doesn’t mean ordinary.
Slab doors remain popular because they offer clean lines, efficient construction, and timeless versatility.
They work especially well in:
- Modern interiors
- Workshops
- Garages
- Utility rooms
- Contemporary home offices
Their simplicity also makes them an excellent choice for first-time cabinet builders.
Shaker Doors
Few cabinet styles have remained as consistently popular as the Shaker design.
Its appeal comes from balance.
The frame provides visual definition.
The recessed center panel adds depth without unnecessary ornamentation.
Shaker doors feel equally at home in traditional kitchens, modern homes, and custom workshops.
It’s a style that rarely goes out of fashion.
Raised Panel Doors
Raised panel construction introduces another level of craftsmanship.
Profiles catch light differently throughout the day, creating subtle shadow lines that add character and depth.
Although these doors require additional tools and techniques, they reward careful workmanship with a furniture-quality appearance.
Many experienced woodworkers view raised panel doors as an opportunity to showcase precision as much as design.
Prepare Every Door Before Installation
Before attaching hinges, inspect each door individually.
Check:
- Overall dimensions
- Squareness
- Flatness
- Surface quality
- Edge consistency
Lightly ease the sharp edges with fine sandpaper.
The difference may feel almost imperceptible, yet softened edges are more comfortable to touch, less likely to chip, and often accept finish more evenly.
These subtle refinements contribute to a cabinet that feels thoughtfully made.
Installing Concealed Hinges
Modern concealed hinges have changed cabinetmaking for the better.
Their greatest advantage isn’t simply appearance.
It’s adjustability.
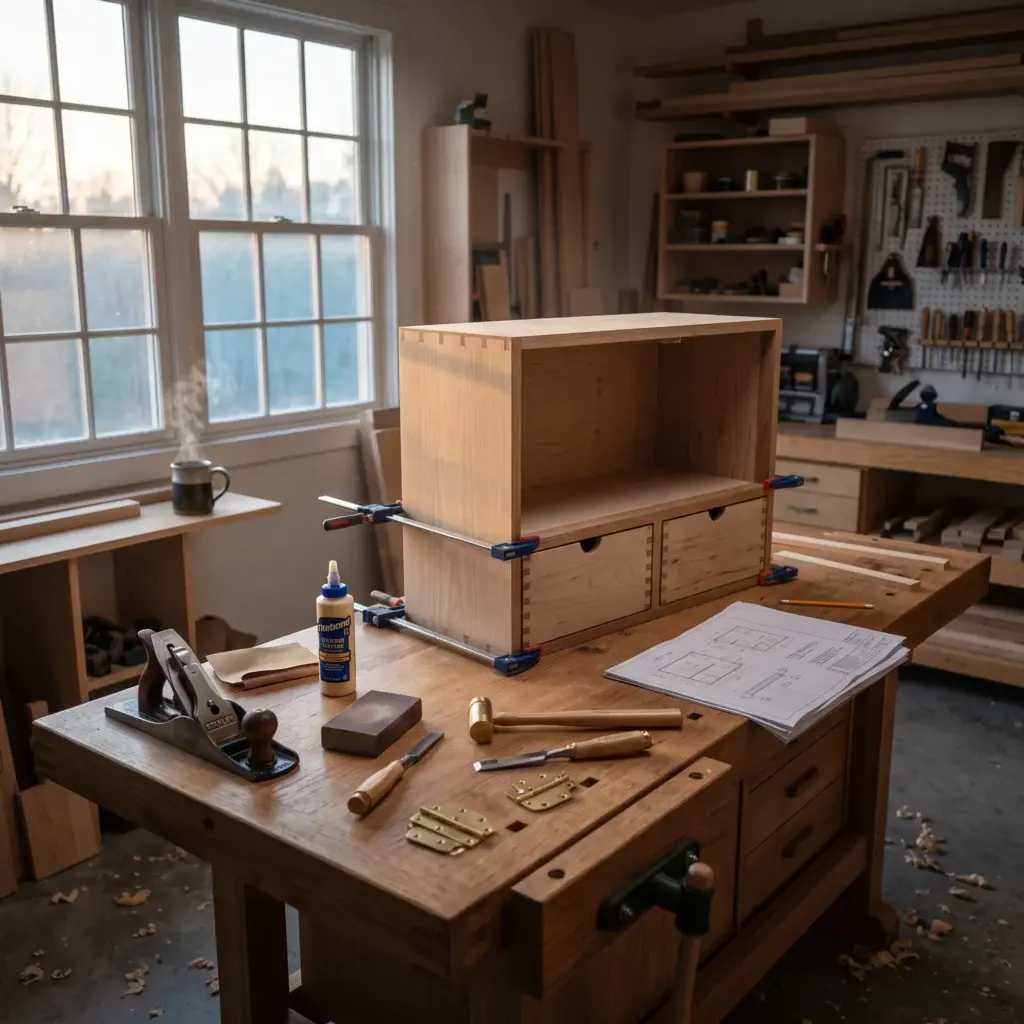
Unlike older hinge designs that allowed little room for correction, concealed hinges provide fine adjustments after installation.
This flexibility transforms what might have been a frustrating alignment process into a series of small, manageable refinements.
Use a hinge jig whenever possible.
Accurate cup placement makes every later adjustment easier.
Take your time drilling.
A precise hole today saves considerable effort tomorrow.
Hanging the Doors
Once the hinges are attached, mount the doors loosely at first.
Avoid tightening every screw immediately.
Leaving a small amount of adjustment available allows you to fine-tune alignment once both doors are hanging.
Step back frequently.
Rather than focusing on one hinge at a time, look at the cabinet as a whole.
Does everything appear balanced?
Do the reveal lines look even?
Does one door seem slightly higher than the other?
Your eyes often notice relationships that a tape measure cannot.
Fine-Tuning Reveal Lines
Professional cabinetry is full of details that most people never consciously notice.
Reveal lines are one of them.
The narrow, even gaps surrounding cabinet doors create visual rhythm across the entire project.
When those gaps remain consistent, the cabinet immediately appears more refined.
When they’re uneven, something feels subtly unsettled.
Fortunately, concealed hinges make correction straightforward.
Adjust gradually.
Work in small increments.
Reevaluate after every adjustment.
Patience almost always produces better results than chasing perfection through large corrections.
Choosing and Installing Hardware
Handles and knobs influence both appearance and everyday comfort.
They’re among the few parts of the cabinet touched every time it’s used.
Take time deciding where they belong.
Before drilling permanent holes:
- Tape hardware temporarily in place.
- Open and close the doors.
- Test comfort from different angles.
- Confirm visual symmetry.
Many experienced cabinetmakers build or purchase simple drilling templates so every handle remains perfectly consistent.
The result is subtle but unmistakably professional.
Considering Soft-Close Hardware
It’s difficult to appreciate soft-close hinges until you’ve lived with them.
Then it becomes difficult to imagine cabinetry without them.
Instead of allowing doors to slam shut, soft-close mechanisms gently guide them into position.
The benefits extend beyond convenience.
They reduce wear.
Protect hinges.
Minimize noise.
Improve the overall experience of using the cabinet.
They’re a modest upgrade that delivers value every single day.
Optional Interior Upgrades
Once the cabinet is functioning well, consider whether a few thoughtful additions would improve daily use.
Depending on its purpose, you might include:
- Vertical dividers for trays or cutting boards
- Charging shelves for cordless tools
- Small-parts organizers
- Pull-out storage trays
- Interior lighting
- Tool holders
- Labeling systems
- Removable storage bins
The best storage solutions rarely depend on size alone.
They depend on thoughtful organization.
Perform a Complete Function Test
Before moving on to sanding, finishing, or installation, spend time simply using the cabinet.
Open every door.
Close every door.
Move each adjustable shelf.
Check every handle.
Listen for rubbing, clicking, or unexpected resistance.
Confirm that:
- Doors swing freely.
- Shelves sit level.
- Hardware remains secure.
- Reveal lines stay consistent.
- Nothing binds or shifts.
This final inspection isn’t about searching for flaws.
It’s about ensuring the cabinet performs exactly as you intended.
Where Precision Becomes Experience
Many first-time builders believe cabinetmaking ends once every screw is tightened.
Experienced cabinetmakers know otherwise.
Some of the finest improvements happen after assembly is technically complete.
A hinge receives one final adjustment.
A shelf edge is lightly sanded.
A handle shifts by a fraction of an inch.
One reveal line becomes just a little more even.
None of these changes seem dramatic on their own.
Together, they transform a well-built cabinet into one that feels calm, balanced, and confidently made.
The structure is now complete.
The cabinet functions exactly as it should.
The next stage focuses on protecting that craftsmanship for years to come as you’ll learn how to mount the cabinet securely, prepare every surface for finishing, and apply durable coatings that enhance both beauty and longevity.
Part 8 — Mounting the Cabinet & Applying a Professional Finish: The Final Steps That Define the Project
For weeks—or perhaps over the course of a focused weekend—your attention has been on measurements, joinery, and careful assembly.
Now the cabinet stands complete.
The doors open smoothly.
The shelves fit perfectly.
Every panel is square.
It’s tempting to think the project is finished.
In reality, you’re approaching two of the most influential stages of the entire build.
The first determines how safely the cabinet will perform for years to come.
The second determines how beautifully it will age.
Installation and finishing rarely receive the same excitement as cutting joinery or assembling the cabinet box, yet they’re often the stages people remember most. A cabinet that hangs perfectly level and feels rock solid immediately inspires confidence. A smooth finish that catches the light evenly elevates the entire project, making even simple cabinetry look thoughtfully crafted.
Neither process benefits from rushing.
Slow, careful work now protects every hour you’ve already invested.
Prepare the Installation Area Before Lifting the Cabinet
Before picking up the cabinet, spend a few minutes preparing the wall.
Remove anything that may interfere with installation.
That may include:
- Existing shelving
- Decorative items
- Wall-mounted organizers
- Extension cords
- Nearby furniture
Clean the wall thoroughly.
Dust, loose paint, or debris can prevent the cabinet from sitting perfectly flush against the surface.
If you’re replacing an older cabinet, inspect the wall carefully before covering it.
Small repairs completed now are far easier than correcting hidden problems later.
Locate Every Wall Stud
No matter how well the cabinet has been built, its long-term performance depends on what supports it.
Wall studs provide the structural strength necessary to carry the cabinet and everything stored inside it.
Use a reliable stud finder, then verify each location by measuring standard framing intervals or using another confirmation method.
Once you’ve located the studs:
- Mark each one clearly.
- Extend the marks above and below the planned cabinet location.
- Double-check spacing before installation begins.
These simple reference marks make positioning the cabinet much easier once it’s off the ground.
Establish a Perfectly Level Reference Line
Floors can slope.
Ceilings can drift slightly out of level.
Walls are rarely as straight as they appear.
That’s why experienced cabinetmakers never use surrounding surfaces as installation guides.
Instead, they establish their own reference.
Using a long spirit level or laser level, draw a horizontal guideline across the wall at the desired installation height.
This line becomes the visual foundation for the entire installation.
Everything else aligns from here.
Choosing the Right Mounting Height
The correct height depends less on tradition and more on function.
Think about how the cabinet will actually be used.
Questions worth asking include:
- Who will use it most often?
- How frequently will the contents be accessed?
- Will the cabinet sit above a workbench or countertop?
- Is there enough clearance for the doors to open fully?
- Can the highest shelf be reached comfortably?
Designing around everyday use creates a cabinet that feels intuitive instead of inconvenient.
Comfort should always influence placement.
French Cleats: One of Woodworking’s Smartest Mounting Systems
Few mounting methods have earned as much respect among cabinetmakers as the French cleat.
It’s elegantly simple.
One beveled strip attaches securely to the wall.
A matching strip fastens to the cabinet.
When the two meet, gravity locks everything together while spreading the cabinet’s weight across multiple wall studs.
The benefits are considerable.
A French cleat offers:
- Outstanding strength
- Excellent weight distribution
- Easier leveling
- Simplified installation
- Straightforward removal for future maintenance
For larger cabinets or workshop storage systems, it’s difficult to find a more dependable solution.
Direct Mounting Through the Cabinet
Many smaller wall cabinets are installed by driving screws directly through the cabinet back or dedicated mounting rails into wall studs.
When using this approach:
- Pre-drill all mounting holes.
- Countersink screw heads if necessary.
- Use appropriately sized cabinet screws.
- Tighten gradually rather than all at once.
Adding washers beneath screw heads helps distribute pressure and protects the cabinet material from unnecessary stress.
Lifting the Cabinet Safely
A finished cabinet often weighs considerably more than expected.
Solid hardware, shelves, and thicker plywood add weight quickly.
Whenever possible:
- Ask for assistance.
- Lift with your legs rather than your back.
- Support the cabinet evenly.
- Avoid lifting by the doors or hardware.
If working alone, a temporary ledger board installed beneath the reference line can provide valuable support while positioning the cabinet.
Sometimes the simplest solutions make the biggest difference.
Check Level Before Tightening Anything
Once the cabinet is resting in position, resist the urge to tighten every fastener immediately.
Instead, pause.
Check:
- Horizontal level
- Vertical alignment
- Distance from nearby walls
- Door clearance
- Overall appearance
Minor adjustments remain easy while screws are only partially tightened.
Those same corrections become much more difficult once everything is fully secured.
Secure the Cabinet Gradually
With alignment confirmed, tighten the mounting screws in stages.
Move from one fastener to another rather than fully tightening a single point.
This balanced approach keeps pressure distributed evenly across the cabinet.
If the wall contains slight irregularities, use shims where necessary instead of forcing the cabinet against the surface.
A cabinet should remain square after installation—not become distorted to match the wall.
Test Stability Before Loading the Cabinet
Before placing anything inside, test the installation carefully.
Apply gentle pressure in several directions.
The cabinet should feel completely secure.
Look for:
- Movement
- Flexing
- Unusual sounds
- Loose fasteners
If anything feels uncertain now, it certainly won’t improve once the cabinet is filled with heavy objects.
Correct small issues immediately while access remains easy.
Preparing the Cabinet for Finish
With installation complete—or with the cabinet temporarily removed for finishing—the focus shifts toward protecting the wood itself.
Exceptional finishes begin long before the first coat is applied.
Inspect every visible surface under bright lighting.
Search for:
- Sanding scratches
- Glue residue
- Small dents
- Pencil marks
- Minor gaps
- Sharp corners
Correct each imperfection now.
Finish has an uncanny ability to highlight details that seemed invisible moments earlier.
Sanding: Where Patience Pays Off
Sanding is one of those woodworking tasks that rarely feels exciting.
Yet it’s impossible to overstate its importance.
A beautifully sanded cabinet feels different.
It reflects light differently.
It accepts finish more evenly.
It simply looks better.
Work progressively through finer grits, removing scratches from the previous stage before moving on.
Always sand with the grain on solid wood components.
Between sanding stages, remove dust completely.
A clean surface is essential for an even finish.
Paint or Clear Finish?
There’s no universally correct answer.
The best finish depends on the cabinet’s purpose, the surrounding space, and your personal style.
Painted Cabinets
Paint creates a clean, uniform appearance while offering excellent protection.
It’s especially well suited for:
- Utility rooms
- Laundry rooms
- Modern kitchens
- Workshops
- Contemporary interiors
A properly prepared painted cabinet can appear remarkably refined while concealing minor variations in grain.
Natural Wood Finishes
If you’ve selected attractive hardwood or premium plywood, allowing the grain to remain visible can be deeply rewarding.
Clear finishes celebrate the wood itself rather than covering it.
Popular choices include:
- Water-based polyurethane
- Oil-based polyurethane
- Hardwax oil
- Wiping varnish
Each provides a different balance of appearance, durability, and maintenance requirements.
Choose the one that best matches how the cabinet will be used.
Applying Stain Successfully
If staining the cabinet, patience becomes even more important.
Before touching the cabinet itself:
- Test the stain on an offcut from the same material.
- Evaluate the color under the room’s lighting.
- Adjust application technique if needed.
Once satisfied, apply stain evenly and wipe away excess before it begins drying.
Working methodically across the surface helps maintain consistent color throughout the project.
Building Protection One Coat at a Time
Durable finishes rarely come from one heavy application.
Instead, they develop through multiple thin coats.
Allow each coat to dry fully before lightly sanding if recommended by the finish manufacturer.
This gradual approach creates:
- Better adhesion
- Greater durability
- Smoother texture
- More consistent sheen
It’s another example of how patience quietly improves craftsmanship.
Inspect the Finish Under Different Light
A finish that looks flawless beneath workshop lights may reveal small imperfections in daylight.
Move around the cabinet.
View it from different angles.
Examine it in:
- Natural daylight
- Overhead lighting
- Side lighting
Look for:
- Dust nibs
- Runs
- Uneven gloss
- Missed edges
- Thin spots
Most imperfections become much easier to correct before the finish has fully cured.
Reinstall Hardware Carefully
If doors, shelves, or hardware were removed before finishing, reinstall them once the protective coating has cured completely.
Work methodically.
Check every hinge.
Tighten every handle.
Confirm each shelf remains level.
Small adjustments are perfectly normal after reassembly.
The goal isn’t simply to put everything back together.
It’s to ensure everything performs as well as it looks.
A Final Quality Inspection
Professional cabinetmakers rarely declare a project finished immediately after the last screw is tightened.
They step back.
They inspect.
They operate every moving part.
They look for opportunities to improve.
Take a few quiet minutes to evaluate your work.
Open each door.
Close it again.
Run your hand across the finish.
Check the reveal lines.
Confirm the cabinet still sits perfectly level.
These final moments often separate a very good project from an exceptional one.
Protecting the Work You’ve Already Done
Building a cabinet requires planning, patience, and careful execution.
Installation and finishing protect that investment.
They ensure the cabinet not only looks impressive on the day it’s completed but continues performing beautifully through years of everyday use.
At this point, the project is functionally complete.
The cabinet is mounted.
The finish has been applied.
The craftsmanship is visible in every detail.
The next section shifts from construction to refinement as we’ll explore the most common cabinet-building mistakes, why they happen, and the practical habits experienced woodworkers rely on to avoid them before they become problems.
Part 9 — The Mistakes That Separate Frustration from Fine Craftsmanship
Every woodworker remembers a project that taught an unforgettable lesson.
Sometimes it was a panel cut on the wrong side of the line.
Sometimes a cabinet door that refused to align.
Sometimes a finish that looked flawless until the afternoon sunlight revealed every sanding scratch.
These moments can be frustrating, but they’re also valuable.
Ask an experienced cabinetmaker about their best work, and chances are they’ll tell you it was built on lessons learned from earlier mistakes. Skill doesn’t come from avoiding every error. It comes from recognizing patterns, developing better habits, and preventing the same problem from happening twice.
The encouraging part is this:
Most cabinet-building mistakes are predictable.
That means they’re preventable.
The following are the issues that appear most often in cabinet construction—not because woodworking is difficult, but because it’s a craft built on precision. Understanding these common pitfalls will help you work with greater confidence and produce results that look and perform like professionally built cabinetry.
Mistake #1 — Treating Measurements as “Close Enough”
Cabinetmaking has very little tolerance for approximation.
A measurement that’s only a few millimeters off might seem insignificant while cutting a panel, yet that same error can create uneven doors, visible gaps, or shelves that refuse to fit.
Small inaccuracies rarely stay small.
They accumulate.
Professional woodworkers develop a simple habit.
They verify every critical measurement before making a cut.
Not because they doubt themselves.
Because they trust the process more than memory.
Whenever possible:
- Measure from the same reference point.
- Confirm dimensions against the cut list.
- Check material orientation before cutting.
- Pause before turning on the saw.
Those extra seconds often save hours of rework.
Mistake #2 — Forgetting That Materials Have Real Dimensions
Plywood is often sold by nominal thickness.
Actual thickness, however, can vary slightly depending on the manufacturer.
Those differences matter.
A dado cut for one sheet may feel loose with another.
Face-frame alignment can shift.
Shelf spacing may change just enough to become noticeable.
Before machining joinery, measure the actual material with a reliable rule or calipers.
Then build every dimension around the material you have—not the dimension printed on the label.
Mistake #3 — Losing Track of Reference Faces
Cabinet parts usually look similar.
After several cuts, it’s surprisingly easy to rotate a panel or machine joinery from the wrong side.
That’s why experienced builders establish reference faces and reference edges before machining begins.
Simple pencil marks prevent surprisingly expensive mistakes.
Every measurement starts from the same face.
Every layout line follows the same orientation.
Consistency eliminates confusion.
Mistake #4 — Building Before Thinking Through the Assembly
Many problems begin long before glue enters the picture.
A cabinet may be beautifully cut, yet still become difficult to assemble because the construction sequence wasn’t considered.
Before reaching for adhesive, rehearse the process.
Ask yourself:
Which panel goes together first?
Where will the clamps fit?
Can every joint be reached comfortably?
Will screws remain accessible?
A dry assembly often answers questions that drawings cannot.
Mistake #5 — Rushing the Glue-Up
Glue introduces time pressure.
Once it’s applied, the pace naturally increases.
That’s exactly why preparation matters.
Before opening the bottle, gather:
- Clamps
- Fasteners
- Drill and driver
- Damp cloth
- Mallet
- Measuring tools
Everything should be within reach.
When the workspace is organized, glue-ups become calm rather than chaotic.
Mistake #6 — Using More Glue Than Necessary
It’s a common assumption.
More glue must create a stronger joint.
In reality, excessive glue simply creates excessive cleanup.
A thin, even film across clean mating surfaces is all that’s required.
Large amounts of squeeze-out:
- Waste adhesive
- Slow assembly
- Complicate finishing
- Increase sanding time
The goal isn’t quantity.
It’s complete coverage.
Mistake #7 — Forgetting to Check for Square
A cabinet can only perform as well as its geometry.
If the cabinet box isn’t square, everything that follows becomes more difficult.
Doors become harder to align.
Shelves fit inconsistently.
Reveal lines drift.
Installation requires unnecessary adjustment.
Check diagonals repeatedly during assembly—not just at the end.
Small corrections made early are far easier than major corrections later.
Mistake #8 — Uneven Clamp Pressure
Clamps are remarkably powerful.
Used carelessly, they can shift panels, introduce twist, or pull assemblies slightly out of alignment.
Instead of tightening one clamp completely before moving to the next, work gradually around the cabinet.
Apply pressure evenly.
Watch the joints as the clamps tighten.
The cabinet should move into alignment—not out of it.
Mistake #9 — Ignoring Wood Movement
One reason plywood dominates cabinet construction is its dimensional stability.
Solid hardwood behaves differently.
As humidity changes throughout the year, hardwood naturally expands and contracts across its width.
Ignoring that movement can eventually lead to:
- Cracks
- Split joints
- Binding doors
- Distorted face frames
Whenever solid wood is incorporated into a cabinet, allow it enough freedom to move naturally.
Good design anticipates seasonal change instead of fighting it.
Mistake #10 — Weak Shelf Planning
Shelves often receive less attention than doors.
Ironically, they’re usually the hardest-working part of the cabinet.
Before deciding on shelf thickness or spacing, think about what the cabinet will actually hold.
Heavy storage may require:
- Thicker shelves
- Hardwood edging
- Shorter spans
- Center dividers
- Fixed shelf reinforcement
Design shelves around real loads rather than optimistic assumptions.
Mistake #11 — Treating Hardware as an Afterthought
Beautiful cabinetry deserves dependable hardware.
Choosing hinges or handles solely by appearance often leads to disappointment later.
Quality hardware affects daily use more than almost any visible feature.
Reliable hinges maintain alignment.
Strong shelf supports remain level.
Comfortable handles improve every interaction with the cabinet.
Hardware should support the craftsmanship—not undermine it.
Mistake #12 — Drilling Without a Template
Few mistakes are more frustrating than misaligned handle holes.
Once drilled, they’re difficult to hide.
Professional cabinetmakers almost always rely on templates or drilling jigs.
The process becomes:
Measure once.
Position the jig.
Verify alignment.
Drill confidently.
Consistency is nearly automatic.
Mistake #13 — Neglecting Surface Preparation
Many finishing problems begin hours before finish is ever applied.
Glue residue.
Machine marks.
Uneven sanding.
Dust trapped beneath the first coat.
These flaws become far more visible once paint, stain, or clear finish reaches the surface.
Before finishing:
- Inspect under bright light.
- Remove all glue.
- Sand progressively.
- Vacuum thoroughly.
- Wipe with a tack cloth.
Preparation determines appearance.
Mistake #14 — Applying Finish Too Heavily
A heavy coat may appear faster.
It rarely looks better.
Thick applications increase the likelihood of:
- Runs
- Sags
- Uneven sheen
- Long curing times
Multiple thin coats almost always produce smoother, more durable results.
Think of finishing as building protection gradually rather than covering the wood all at once.
Mistake #15 — Ignoring Workshop Safety During Familiar Tasks
Ironically, many accidents happen during routine operations.
Confidence slowly replaces caution.
A quick cut becomes “good enough.”
Eye protection stays on the bench.
Push sticks seem unnecessary.
Professional woodworkers understand that consistency applies to safety as much as craftsmanship.
Good habits never become optional simply because a task feels familiar.
Protect yourself every time you work.
Mistake #16 — Installing the Cabinet Too Quickly
After days of careful work, it’s understandable to want the cabinet hanging on the wall as soon as possible.
Installation deserves the same patience as construction.
Always verify:
- Stud locations
- Level reference lines
- Fastener selection
- Door clearance
- Weight distribution
A well-built cabinet deserves an equally careful installation.
Mistake #17 — Skipping the Final Inspection
It’s tempting to call the project finished once the cabinet is mounted.
Experienced cabinetmakers usually do one more thing.
They walk away.
Then they come back.
Looking at the cabinet with fresh eyes often reveals tiny details that went unnoticed during construction.
Perhaps one hinge needs another quarter turn.
Maybe one handle feels slightly loose.
A shelf pin isn’t fully seated.
These final refinements require only minutes, yet they often make the greatest difference in how the cabinet feels to use.
The Best Woodworkers Aren’t Perfect
There’s a common misconception that experienced cabinetmakers simply don’t make mistakes anymore.
The reality is much more encouraging.
They still make them.
The difference is that they’ve learned to recognize warning signs early.
They measure again when something feels uncertain.
They stop before rushing.
They test a finish on scrap.
They dry-fit before gluing.
They inspect before celebrating.
Those habits aren’t dramatic.
They’re simply consistent.
And consistency is where craftsmanship quietly grows.
With the cabinet now complete and the most common pitfalls behind you, it’s time to explore the subtle techniques that transform solid woodworking into exceptional woodworking. The next section looks beyond the fundamentals, revealing the professional methods, finishing details, workflow improvements, and design refinements that give custom wall cabinets the unmistakable look and feel of high-end craftsmanship.
Part 10 — Professional Cabinetmaking Techniques: The Small Details That Make a Big Difference
By this point, you’ve done something many people never attempt.
You’ve planned the project carefully.
Measured the space with intention.
Built a cabinet that is square, sturdy, and ready for everyday use.
If you stopped here, you’d already have a cabinet that performs well for years.
But this is where experienced cabinetmakers begin thinking differently.
They stop asking, “Is it finished?”
Instead, they ask, “What would make this feel exceptional?”
The answer is rarely found in expensive machinery or exotic hardwoods.
It’s found in details.
Tiny adjustments.
Thoughtful choices.
Habits repeated on every project until they become second nature.
Individually, these refinements may seem almost insignificant.
Together, they create cabinetry that feels unmistakably professional.
People may never point to a specific feature and say, “That’s why this cabinet looks better.”
They simply notice that it does.
Build with Intention, Not Just Accuracy
Accuracy is essential.
Intention takes it one step further.
Every cut should have a reason.
Every joint should support the design.
Every piece of hardware should improve the experience of using the cabinet.
Professional cabinetmakers rarely add details simply because they can.
Instead, every element serves either function, appearance, or ideally both.
That discipline creates work that feels calm, balanced, and purposeful.
Let Precision Become a Habit
Many beginners treat precision as something reserved for important cuts.
Professionals approach every task with the same level of care.
Whether marking a hinge location or trimming a shelf by a fraction of a millimeter, consistency remains the goal.
Develop habits such as:
- Measuring from the same reference edge.
- Checking machine settings before every operation.
- Verifying dimensions before making repeat cuts.
- Cleaning layout lines before assembly.
These routines soon become automatic.
Over time, they improve every project without adding noticeable effort.
Think in Systems Instead of Individual Parts
One hallmark of experienced cabinetmakers is that they rarely view components in isolation.
A shelf isn’t simply a shelf.
It’s connected to the cabinet sides.
The cabinet sides influence the doors.
The doors affect hardware placement.
Hardware changes how people interact with the cabinet.
Everything influences everything else.
This systems-based mindset produces cabinetry that feels cohesive because every decision supports the next.
Use Story Sticks Instead of Measuring Repeatedly
One simple technique has been passed from one generation of woodworkers to the next because it works so well.
The story stick.
Rather than measuring the same dimension repeatedly with a tape measure, transfer critical dimensions onto a dedicated wooden strip.
Use it to mark:
- Shelf locations
- Hinge positions
- Handle placement
- Face-frame dimensions
- Shelf-pin spacing
Every component receives identical markings without cumulative measuring errors.
It’s remarkably simple.
It’s remarkably accurate.
Build Repeatability into Every Step
Professionals don’t rely on perfect concentration.
They rely on repeatable processes.
Whenever possible:
- Use stop blocks.
- Clamp guides in place.
- Build simple drilling templates.
- Create router jigs.
- Use crosscut sleds for repeated cuts.
Repeatability reduces fatigue because the setup performs much of the precision work for you.
Instead of measuring twenty identical parts, you measure once and repeat with confidence.
Create Cleaner Edges
Freshly machined plywood edges often look sharp.
They also chip easily.
A light pass with fine sandpaper or a block plane softens those edges without noticeably changing the profile.
The improvement is subtle.
Running your hand across the finished cabinet feels noticeably different.
Comfort becomes part of the craftsmanship.
Hide What Doesn’t Need to Be Seen
One reason custom cabinetry feels refined is that unnecessary visual distractions disappear.
Whenever practical:
- Conceal pocket holes inside the cabinet.
- Position screws where they won’t be visible.
- Keep mounting hardware hidden.
- Align fasteners consistently.
The goal isn’t to disguise construction.
It’s to let the design become the focus rather than the assembly method.
Upgrade the Details People Touch Every Day
Visitors may admire the cabinet from across the room.
You’ll experience it with your hands.
Think about every point of contact.
Door handles.
Shelf edges.
Door movement.
Soft-close hinges.
Smooth finishes.
Comfortable grip.
These are the details that shape daily experience.
Excellent cabinetry doesn’t simply look good.
It feels good to use.
Make Grain Work for You
Wood has a remarkable ability to guide the eye.
Thoughtful grain orientation creates visual harmony without adding cost.
Whenever practical:
- Keep vertical grain running consistently across cabinet sides.
- Match adjacent door panels.
- Reserve the most attractive grain for highly visible components.
- Position less decorative material inside the cabinet.
The cabinet immediately feels more intentional.
Many people won’t consciously notice why.
They’ll simply recognize the result.
Use Light as a Quality Control Tool
Professional shops often inspect projects under multiple lighting conditions.
Why?
Because different light reveals different imperfections.
A cabinet that appears flawless beneath overhead workshop lighting may show sanding scratches when sunlight moves across the surface.
Before calling the project complete, inspect it using:
- Natural daylight
- Overhead lighting
- Side lighting
- Low-angle lighting
Small imperfections become much easier to correct before the finish fully cures.
Sand Beyond “Good Enough”
Many woodworkers stop sanding the moment a surface feels smooth.
Professionals often continue just a little longer.
Not because the wood needs it.
Because consistency matters.
Inspect every surface with your fingertips.
Feel for:
- Raised grain
- Sharp transitions
- Minor machining marks
- Glue residue
Your hands often detect imperfections long before your eyes.
Learning to trust both creates noticeably better work.
Organize the Interior as Carefully as the Exterior
A beautiful cabinet should be just as satisfying to open as it is to look at.
Think beyond empty shelves.
Depending on its purpose, you might include:
- Tool holders
- Charging stations
- Adjustable dividers
- Storage bins
- Magnetic organizers
- Labeling systems
- Small parts trays
Thoughtful organization transforms storage into workflow.
Everything gains a place.
Everything becomes easier to find.
Keep Future Maintenance in Mind
One sign of excellent design is that future maintenance feels effortless.
Ask yourself:
Can shelves be adjusted easily?
Can hinges be replaced without disassembling the cabinet?
Are mounting screws accessible if the cabinet ever needs to be removed?
Can hardware be tightened without difficulty?
Designing for maintenance adds long-term value that often goes unnoticed until years later.
Build Jigs That Save Time Later
Some of the most valuable tools in a cabinetmaker’s workshop never came from a store.
They were built specifically for recurring tasks.
Simple shop-made jigs can dramatically improve:
- Accuracy
- Consistency
- Speed
- Safety
Consider building jigs for:
- Shelf pin drilling
- Door handle placement
- Concealed hinge boring
- Repeat crosscuts
- Corner assembly
The first project may require extra effort.
Every project afterward becomes easier.
Document What You Learn
Every completed cabinet teaches something.
Capture those lessons while they’re still fresh.
Keep notes about:
- Material choices
- Finish schedules
- Hardware brands
- Measurements that worked well
- Mistakes worth avoiding
- Improvements for future builds
A simple notebook gradually becomes a personalized woodworking reference that’s often more valuable than any single plan.
Experience becomes easier to repeat when it’s written down.
Slow Down at the End
There’s an interesting pattern among experienced craftspeople.
They often work most slowly during the final ten percent of the project.
Not because the work becomes harder.
Because they know the final details create the strongest impression.
They adjust one hinge again.
Polish one corner.
Remove one last pencil mark.
Touch up one tiny finish flaw.
Those final minutes rarely add much time.
They add tremendous value.
The Difference People Notice Without Realizing It
Ask someone why one cabinet feels more expensive than another, and they’ll often struggle to explain it.
They might mention the finish.
Or the wood.
Or the hardware.
In reality, they’re responding to dozens of thoughtful decisions working together.
The doors close quietly.
The reveal lines remain perfectly even.
The shelves feel solid.
The handles sit exactly where your hand expects them.
The finish reflects light smoothly across every surface.
Nothing calls attention to itself.
Everything simply works.
That quiet confidence is one of the defining characteristics of fine cabinetmaking.
It’s never about showing off.
It’s about removing distractions until only craftsmanship remains.
With the cabinet complete and refined using the same techniques trusted by experienced woodworkers, one final step remains before this guide concludes. The next section answers the questions builders ask most often—from choosing materials and preventing shelf sag to adjusting hinges, maintaining finished cabinets, and solving the small challenges that naturally arise during years of everyday use.
Part 11 — Frequently Asked Questions About Wall Cabinet Woodworking Plans
Every woodworking project begins with questions.
Some appear before the first board is purchased.
Others don’t surface until the cabinet is halfway assembled or hanging on the wall.
That’s perfectly normal.
In fact, one of the quickest ways to improve your woodworking is to stay curious. Every question leads to a better understanding of the materials, the process, and the countless small decisions that separate an average cabinet from one you’ll still admire years from now.
The following questions come from the kinds of situations nearly every cabinet builder encounters. Whether you’re planning your very first wall cabinet or refining techniques you’ve used for years, these answers will help you move forward with greater confidence.
“I’m building my first cabinet. What’s the biggest mistake I should avoid?”
The most common mistake isn’t using the wrong tool or choosing the wrong wood.
It’s rushing.
Many beginners feel pressure to make visible progress quickly, so they move from measuring to cutting before they’ve fully thought through the project.
Instead, slow the process down.
Measure carefully.
Review your cut list.
Lay out every component before making the first cut.
Most serious cabinet-building problems begin long before assembly—they begin during planning.
Patience almost always produces better results than speed.
“What’s the best material for a wall cabinet?”
For most projects, cabinet-grade plywood remains the best overall choice.
It offers an excellent balance of:
- Strength
- Dimensional stability
- Smooth surfaces
- Reliable screw holding
- Long-term durability
Pairing plywood with hardwood for face frames, doors, or shelf edging gives you the structural advantages of engineered panels while adding the beauty and durability of solid wood where it matters most.
It’s a combination trusted by professional cabinetmakers for good reason.
“Can I build a quality cabinet without expensive tools?”
Absolutely.
Professional equipment improves efficiency, but it doesn’t replace careful workmanship.
Many excellent cabinets are built using only a modest collection of tools, including:
- Circular saw
- Drill and driver
- Random-orbit sander
- Router
- Combination square
- Reliable clamps
- Measuring tools
Accurate layout, sharp blades, and patient work have a much greater influence on the finished cabinet than owning a shop full of machinery.
“How do I know if my cabinet is square?”
The easiest method is also one of the most reliable.
Measure diagonally from one corner of the cabinet to the opposite corner.
Repeat the measurement for the opposite diagonal.
If both measurements match, the cabinet is square.
It’s worth checking this during several stages of assembly—not just at the end.
Small adjustments made early are much easier than major corrections after glue has cured.
“Should I choose fixed shelves or adjustable shelves?”
The answer depends on how the cabinet will be used.
Fixed shelves increase structural strength by tying the cabinet sides together.
Adjustable shelves provide flexibility as storage needs change.
Many of the best cabinet designs combine both approaches.
A fixed shelf adds rigidity.
Adjustable shelves provide versatility.
Together they create a cabinet that’s both strong and adaptable.
“Why do my cabinet doors never seem perfectly aligned?”
Door alignment depends on several factors working together.
Common causes include:
- A cabinet that’s slightly out of square
- Hinge placement that’s inconsistent
- Uneven reveal lines
- Minor installation adjustments that haven’t yet been made
The good news is that modern concealed hinges allow adjustment in multiple directions.
Take your time.
Make small changes.
Step back often and evaluate the cabinet as a whole rather than focusing on one hinge at a time.
“What’s the easiest door style for beginners?”
Slab doors remain the simplest option.
Their clean lines require fewer parts, fewer machining operations, and less assembly time.
Once you’re comfortable building slab doors, Shaker-style doors are an excellent next step.
They introduce frame-and-panel construction without becoming unnecessarily complicated.
Raised-panel doors generally require more advanced tools and techniques and are often best saved for future projects.
“How can I stop shelves from sagging?”
Shelf sag is usually the result of span, load, or insufficient support.
Fortunately, there are several effective solutions.
You can:
- Add hardwood edging.
- Increase shelf thickness.
- Reduce unsupported width.
- Install a center divider.
- Use fixed shelves where additional rigidity is needed.
The best solution depends on what the cabinet is expected to hold.
Designing shelves around real storage needs is always better than relying on estimates.
“Is plywood really better than solid wood?”
For cabinet boxes, in most cases, yes.
Plywood is engineered to remain dimensionally stable.
Unlike wide solid wood panels, it resists seasonal movement exceptionally well.
That stability makes it ideal for:
- Cabinet sides
- Tops
- Bottoms
- Shelves
- Interior partitions
Solid hardwood still excels in face frames, doors, edging, and decorative components.
Using both materials together allows each to perform where it does best.
“When should I apply the finish?”
Many woodworkers prefer to finish individual components before final hardware installation.
This approach makes it easier to reach inside corners and hidden surfaces.
However, structural assembly should generally be complete before finishing begins.
Always follow the drying and curing recommendations for your chosen finish before reinstalling doors or hardware.
Patience during finishing protects all the work you’ve already completed.
“Should I paint the cabinet or leave the wood natural?”
Neither choice is universally better.
Paint creates a clean, uniform appearance while offering excellent protection.
Natural finishes highlight the grain and character of the wood itself.
The decision often depends on three factors:
- The room where the cabinet will be installed
- The species of wood you’ve selected
- The overall style you’re trying to achieve
Choose the finish that complements both the cabinet and the space around it.
“What’s the safest way to mount a wall cabinet?”
Whenever possible, fasten the cabinet directly into wall studs.
Heavy cabinets should never rely solely on drywall anchors.
Many experienced cabinetmakers also prefer French cleats because they distribute weight evenly while making installation and future removal significantly easier.
A secure mounting system is every bit as important as strong joinery.
“How long should I let wood glue cure?”
Always follow the manufacturer’s recommendations.
While many woodworking glues become strong enough for careful handling within several hours, maximum strength usually develops after a longer curing period.
Avoid loading shelves or mounting the cabinet before the adhesive has fully cured.
Waiting a little longer is almost always worthwhile.
“How do I make my cabinet look professionally built?”
People often assume the answer involves expensive tools.
More often, it comes down to consistent attention to detail.
Focus on:
- Accurate measurements
- Clean joinery
- Even reveal lines
- Smooth sanding
- Quality hardware
- Thoughtful grain orientation
- Careful finishing
- Precise installation
Professional results rarely come from one dramatic improvement.
They’re built through dozens of small decisions made well.
“How should I maintain the cabinet after it’s installed?”
Fortunately, maintenance is simple.
Every few months:
- Dust surfaces with a soft cloth.
- Clean using products appropriate for the finish.
- Tighten loose hardware if necessary.
- Check mounting screws.
- Inspect hinges for smooth operation.
- Repair minor finish damage before moisture reaches bare wood.
With basic care, a well-built cabinet can remain attractive and dependable for decades.
“Will my woodworking skills improve after just one cabinet?”
Without question.
Every cabinet teaches lessons that no article or video can fully explain.
You’ll become more comfortable reading plans.
You’ll measure with greater confidence.
You’ll begin recognizing grain direction instinctively.
Tool setup will feel more natural.
Assembly will become more organized.
Most importantly, you’ll begin thinking like a cabinetmaker rather than simply following instructions.
That’s a transformation every experienced woodworker remembers.
“How do experienced cabinetmakers work so confidently?”
Confidence isn’t something they begin with.
It’s something they build.
One accurate measurement at a time.
One carefully planned cut.
One successful glue-up.
One completed cabinet after another.
Experience doesn’t eliminate mistakes.
It teaches you how to prevent most of them—and how to solve the rest without panic.
That’s why every cabinet, whether it’s your first or your fiftieth, still has something valuable to teach.
And that’s one of the reasons woodworking remains such a rewarding craft.
The final part of this guide steps away from technique and focuses on the practical side of building your workshop. Instead of a traditional conclusion, you’ll find a carefully selected collection of tools, materials, books, hardware, and workshop resources that many woodworkers rely on to build stronger cabinets, work more efficiently, and continue developing their skills long after this project is complete.
Part 12 — Products, Tools & Resources for Building Better Wall Cabinets
Completing a wall cabinet is satisfying in its own right, but for many woodworkers it marks the beginning rather than the end.
One cabinet often leads to another.
A workshop cabinet inspires better tool storage.
That improved workspace makes larger furniture projects more enjoyable.
Before long, you’re designing built-ins, upgrading your shop, or tackling custom cabinetry for different rooms in the house.
That’s one of the unique qualities of woodworking.
Every project leaves behind more than the finished piece itself. It leaves behind experience, confidence, and a clearer understanding of what works well in your own workshop.
The following resources aren’t presented as a shopping list you must own before building another cabinet. Instead, think of them as practical upgrades to consider over time. Add them gradually as your skills grow and your projects become more ambitious.
Essential Hand Tools Worth Owning
A dependable set of hand tools remains valuable no matter how advanced your workshop becomes.
Rather than buying everything at once, focus on tools you’ll reach for repeatedly.
A solid foundation includes:
- Quality tape measure
- Combination square
- Speed square
- Marking knife
- Carpenter’s pencils
- Sharp bench chisels
- Block plane
- Clamps in several sizes
- Utility knife
- Dead-blow or rubber mallet
Well-maintained hand tools often outlast several generations of power tools and continue delivering accurate results year after year.
Power Tools That Deliver the Greatest Value
Many beginning woodworkers assume they need a fully equipped professional shop to build beautiful cabinetry.
In reality, a small collection of dependable tools can accomplish an impressive amount of work.
If you’re expanding your workshop gradually, these tools offer excellent long-term value.
Circular Saw
Ideal for:
- Breaking down plywood
- Straight rip cuts
- Crosscuts with a guide
- General cabinet construction
A quality blade often improves results just as much as the saw itself.
Router
One of the most versatile tools in cabinetmaking.
Useful for:
- Dados
- Rabbets
- Decorative edges
- Flush trimming
- Edge banding
- Hardware recesses
As your woodworking experience grows, the router quickly becomes indispensable.
Random-Orbit Sander
A smooth finish begins long before stain or paint is applied.
A reliable random-orbit sander helps produce consistent, professional-looking surfaces while reducing fatigue during longer sanding sessions.
Drill and Impact Driver
Having both tools available saves considerable time.
Keep a drill bit in one and a driver bit in the other, allowing you to move seamlessly between drilling pilot holes and driving screws.
Table Saw
If cabinetmaking becomes a regular part of your woodworking, a table saw is often one of the most valuable long-term investments.
Its ability to produce consistent, repeatable cuts dramatically improves efficiency and accuracy.
Measuring and Layout Equipment
Accurate layout is one of the defining characteristics of professional woodworking.
Consider adding:
- Long straightedge
- Precision ruler
- Digital angle gauge
- Calipers
- Cabinet story sticks
- Layout triangles
- Laser level
These tools don’t simply improve accuracy.
They reduce uncertainty.
And reducing uncertainty makes woodworking considerably more enjoyable.
Cabinet Hardware Worth the Investment
Hardware is one of the few parts of a cabinet you’ll interact with every day.
Choosing dependable components pays dividends for years.
Look for quality:
- Concealed hinges
- Soft-close hinges
- Shelf pins
- Cabinet pulls
- Drawer slides for future projects
- Mounting screws
- Adjustable hanging hardware
- French cleat hardware if preferred
Well-designed hardware quietly improves the experience of using the cabinet every single day.
Wood and Sheet Goods
As your projects become more refined, you’ll likely begin recognizing subtle differences in materials.
Excellent cabinet stock often includes:
- Cabinet-grade birch plywood
- Maple plywood
- Oak plywood
- Walnut plywood for premium projects
- Solid maple
- Solid oak
- Cherry
- Walnut
- Poplar for painted face frames
- Hardwood edging strips
Choosing quality material doesn’t eliminate mistakes, but it provides a much better foundation for excellent craftsmanship.
Adhesives and Finishing Supplies
Keeping a dedicated finishing kit ready makes future projects far easier.
Useful supplies include:
- High-quality wood glue
- Wood filler
- Sandpaper in multiple grits
- Tack cloths
- Lint-free finishing cloths
- Foam brushes
- Quality natural-bristle brushes
- Painter’s pyramids
- Mixing containers
- Stir sticks
- Disposable gloves
Having everything prepared before finishing begins allows you to focus entirely on applying a beautiful, even finish.
Workshop Organization That Pays for Itself
An organized workshop doesn’t just look better.
It supports better work.
Simple additions can make a remarkable difference.
Consider:
- Wall-mounted tool racks
- Clamp storage
- Hardware organizers
- Small parts drawers
- Lumber storage racks
- Mobile tool carts
- Rolling workbenches
- Dedicated sanding station
- Scrap wood storage bins
A workshop where every tool has a home encourages efficient, focused work.
Dust Collection and Safety Equipment
Fine woodworking and clean air belong together.
Even a modest dust management system improves both comfort and visibility while protecting your health.
Keep these essentials close at hand:
- Shop vacuum
- Dust separator
- Dust collection hoses
- Respirator or dust mask
- Safety glasses
- Hearing protection
- Push sticks
- Push blocks
- First-aid kit
- Fire extinguisher
Good safety habits quickly become second nature and help make every project more enjoyable.
Helpful Books for Cabinetmakers
The internet offers endless inspiration, but a well-written woodworking book remains an outstanding learning resource.
Look for books covering:
- Cabinet construction
- Joinery techniques
- Furniture design
- Wood technology
- Finishing methods
- Workshop organization
- Jig building
- Hand tool techniques
Many experienced woodworkers return to the same trusted references throughout their careers.
A good book grows more valuable each time it’s opened.
Build a Small Collection of Shop-Made Jigs
Some of the most useful workshop accessories never come from a store.
They’re built from leftover plywood after finishing a project.
Useful jigs include:
- Crosscut sled
- Shelf pin drilling jig
- Corner clamping blocks
- Handle drilling template
- Router guide
- Assembly squares
- Panel cutting guide
- Glue-up cauls
Each jig saves time while improving consistency on future builds.
They’re small investments that continue paying off project after project.
Consumables You’ll Always Need
Experienced woodworkers often keep a small supply of frequently used items on hand so projects don’t stall unexpectedly.
Maintain a stock of:
- Wood screws
- Pocket-hole screws
- Sandpaper
- Wood glue
- Masking tape
- Painter’s tape
- Pencil refills
- Utility knife blades
- Shop towels
- Disposable mixing cups
Running out of a simple consumable in the middle of a build is surprisingly frustrating.
A small reserve keeps momentum going.
Continue Building Skills One Project at a Time
Every completed cabinet teaches something valuable.
Perhaps your measurements became more accurate.
Maybe your glue-ups felt less stressful.
Perhaps your finishing technique improved.
Those lessons naturally carry into future projects.
As your confidence grows, consider expanding into:
- Base cabinets
- Built-in bookcases
- Garage storage systems
- Entertainment centers
- Pantry cabinets
- Mudroom storage
- Shop furniture
- Custom shelving
- Bathroom vanities
Each new project builds on the experience gained from the last.
The Most Valuable Resource Is Experience
It’s easy to believe that better woodworking comes from better tools.
While quality equipment certainly helps, experience remains the resource that improves every aspect of your work.
Experience teaches you to notice grain direction before cutting.
It reminds you to dry-fit before gluing.
It encourages one final measurement before making an important cut.
It develops patience during finishing and confidence during assembly.
Those lessons can’t be purchased.
They are earned one project at a time.
And that’s one of the greatest rewards woodworking offers.
Every cabinet you build leaves your workshop as something useful.
Every cabinet also leaves behind a more capable craftsperson, ready for the next challenge with sharper skills, greater confidence, and a deeper appreciation for the quiet satisfaction that comes from building something well.