
There’s something deeply satisfying about building a piece of furniture that becomes part of everyday life. A rustic sideboard isn’t just another woodworking project—it’s where holiday dishes are stored, family photos are displayed, and conversations naturally gather. Years from now, the small marks and worn edges won’t be flaws. They’ll be reminders of meals shared, celebrations hosted, and memories made.
That’s one of the biggest differences between handmade furniture and something pulled from a warehouse shelf. Store-bought cabinets often prioritize speed and cost. A handcrafted sideboard prioritizes longevity, character, and craftsmanship.
Whether your goal is to create extra dining room storage, build a farmhouse buffet cabinet, or challenge yourself with a rewarding furniture project, this guide will walk you through the process from the first sketch to the final coat of finish. Every stage has been designed to help you work with confidence while understanding not only what to do, but why each step matters.
You’ll learn how to choose the right wood, build a cabinet that stays square, install smooth-running drawers and well-fitted doors, and apply a finish that highlights the natural beauty of solid wood. Along the way, you’ll also discover practical tips that experienced furniture makers rely on every day—small details that often make the difference between a project that looks homemade and one that looks professionally built.
The best part? You don’t need an industrial workshop filled with expensive equipment. With careful planning, quality materials, and patience, you can build a sideboard that’s sturdy enough to serve your family for decades.
Table of Contents
- Introduction
- Project Overview & Planning
- Tools You’ll Need
- Lumber, Hardware & Materials
- Free Rustic Sideboard Cut List
- Step-by-Step Building Instructions
- Rustic Finishing Techniques
- Common Mistakes & Expert Tips
- Customization Ideas
- Frequently Asked Questions & Products / Tools / Resources
Why a Rustic Sideboard Never Goes Out of Style
Furniture trends come and go. Rustic furniture has quietly ignored that cycle.
Its appeal comes from something much simpler: honest materials, practical design, and craftsmanship that doesn’t rely on passing fashion. A solid wood sideboard feels just as natural in a century-old farmhouse as it does in a modern home where clean lines meet warm textures.
Natural grain, subtle imperfections, and hand-finished details give every piece its own personality. No two boards are identical, which means no two finished sideboards ever truly look the same.
That’s part of the attraction.
Instead of hiding the wood’s character, rustic furniture celebrates it.
More Than Just Storage
At first glance, a sideboard is simply a cabinet. In everyday life, it becomes much more.
Depending on where it’s placed, it can serve as:
- A dining room buffet
- Kitchen storage cabinet
- Coffee bar
- Entryway organizer
- Living room console
- Media cabinet
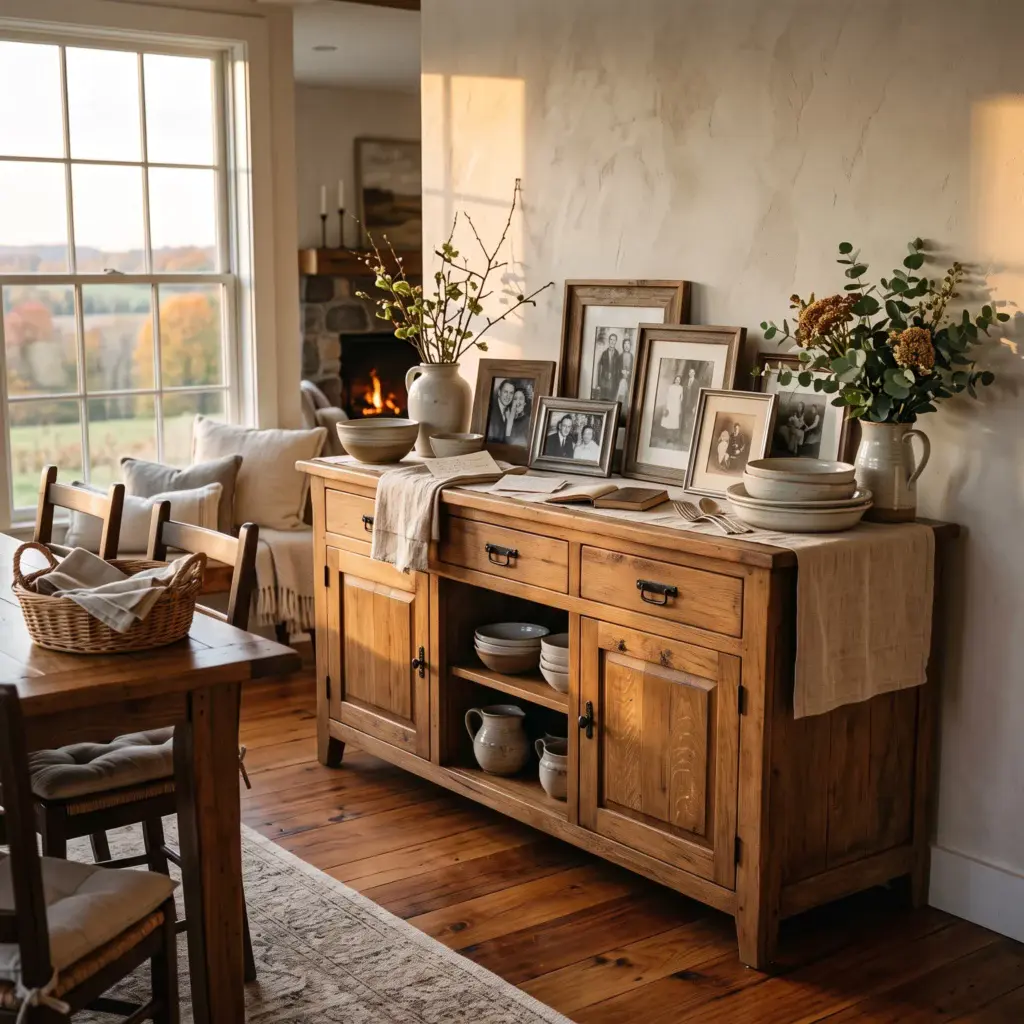
- Display piece for books, pottery, or family heirlooms
Building one yourself allows every shelf, drawer, and compartment to reflect how you actually live rather than forcing you to adapt to a factory design.
Why Build Instead of Buy?
Walk through almost any furniture showroom and you’ll find cabinets that resemble solid wood—but many rely heavily on particleboard, thin veneers, or engineered materials designed for mass production.
Building your own changes that equation completely.
You decide:
- Which hardwood to use
- How large the cabinet should be
- How many drawers or shelves it includes
- Which finish best suits your home
- What hardware completes the design
Just as importantly, you control the quality of every joint, every fastener, and every detail hidden beneath the surface.
The finished piece becomes something built to last—not simply assembled.
What You’ll Learn in This Guide
This article follows the same sequence professional furniture builders use when planning a cabinet project.
You’ll discover how to:
- Choose the right wood species for durability and appearance
- Plan dimensions that fit your room and storage needs
- Select essential tools and materials
- Work from a practical cut list
- Assemble a square, sturdy cabinet
- Build smooth drawers and properly aligned doors
- Apply a finish that protects the wood while enhancing its natural beauty
- Personalize the design with thoughtful custom features
- Avoid the most common mistakes that can affect fit, finish, and long-term performance
Whether you’re tackling your first large furniture build or adding another handcrafted piece to your workshop portfolio, each section is designed to build your confidence as your project takes shape.
Before the First Cut
One of the biggest misconceptions about woodworking is that the real work begins when the saw turns on.
In reality, the strongest projects are often built long before the first board is cut.
Careful planning, thoughtful material selection, and understanding how wood behaves through changing seasons will make every later step easier. Investing a little more time upfront often prevents hours of frustration during assembly and finishing.
That’s exactly where we’ll begin.
Next: Part 2 — Project Overview & Planning, where we’ll map out the sideboard’s dimensions, explore design choices, and choose the best wood species for a beautiful, durable build.
Part 2: Project Overview & Planning
Every memorable furniture build begins long before sawdust fills the workshop.
It starts with an idea.
Perhaps you’ve been searching for a sideboard that fits an awkward dining room wall, only to discover that every store-bought option is either too large, too small, poorly built, or far beyond your budget. Or maybe you’ve imagined building a piece that feels personal—something with real weight, genuine wood grain, and the kind of craftsmanship that improves with age.
This planning stage is where that idea becomes a practical project.
The decisions you make now—dimensions, wood species, storage layout, and construction style—will shape everything that follows. Taking the time to think through these details doesn’t slow the project down. It gives it direction.
Designing Around Your Home, Not Someone Else’s
One of the greatest advantages of building your own furniture is that you’re not forced to compromise.
Instead of asking whether a cabinet will fit your room, you build one that was designed for it from the beginning.
Before deciding on dimensions, spend a few minutes looking at the space where the sideboard will eventually live.
Ask yourself:
- Will it sit beneath a window?
- Is there enough room for cabinet doors to open comfortably?
- Will people regularly walk past it?
- Is there a dining table nearby?
- Will decorative items sit on top?
- What needs to be stored inside?
The answers to these questions are often more valuable than any standard furniture measurement.
Recommended Dimensions
For most homes, these proportions create a balanced, versatile sideboard.
Overall Width: 60 inches
Overall Height: 36 inches
Overall Depth: 18 inches
These dimensions provide generous storage while keeping the cabinet visually proportional in most dining rooms and living spaces.
Of course, they’re only a starting point.
Because you’re building the piece yourself, every measurement can be adjusted without sacrificing the overall design.
Finding the Right Width
The width of the cabinet largely depends on its purpose.
Small Sideboard
Approximately 36–48 inches
A great choice for:
- Apartments
- Entryways
- Breakfast nooks
- Compact dining rooms
Despite its smaller footprint, it still offers useful storage without making the room feel crowded.
Standard Sideboard
Approximately 54–66 inches
This is the most versatile size.
It comfortably stores:
- Dinnerware
- Serving platters
- Table linens
- Glassware
- Seasonal decorations
For many homes, this range provides the ideal balance between storage and proportion.
Large Buffet Cabinet
Approximately 72–96 inches
Perfect for:
- Open-concept homes
- Large dining rooms
- Entertaining spaces
- Families needing substantial storage
Longer cabinets also create a striking visual anchor beneath artwork or large mirrors.
Choosing the Right Height
Height influences both appearance and usability.
A sideboard around 36 inches tall is comfortable for serving food, arranging decorations, or preparing drinks.
Lower cabinets tend to feel more contemporary, while slightly taller designs create a more traditional furniture presence.
If you plan to use the cabinet as a coffee station or buffet during gatherings, this standard height is especially comfortable.
Deciding on the Depth
Depth affects both storage capacity and how much floor space the cabinet occupies.
A depth of 18 inches works well for most households because it easily accommodates:
- Dinner plates
- Serving bowls
- Small appliances
- Storage baskets
- Folded table linens
Increasing the depth beyond 20 inches may provide additional storage but can also make the cabinet feel visually heavier in smaller rooms.
Think About What Will Live Inside
Storage is rarely one-size-fits-all.
Before finalizing your design, imagine opening the completed cabinet six months from now.
What do you actually expect to find inside?
If it’s dining room storage, you may need space for:
- Plates
- Serving trays
- Glassware
- Cutlery
- Napkins
- Holiday dishes
If the sideboard is headed for an entryway, your priorities might look very different:
- Shoes
- Bags
- Hats
- Gloves
- Charging cables
Designing around real-life use almost always produces furniture that remains useful for years.
Planning the Interior Layout
A classic rustic sideboard often combines drawers with enclosed cabinets.
That arrangement remains popular for good reason.
Drawers keep smaller items organized and easy to reach, while larger cabinet compartments provide flexible storage for bulky items.
A practical layout includes:
- Three upper drawers
- Two lower cabinet doors
- Adjustable shelves behind each door
This configuration adapts easily as storage needs change over time.
Fixed or Adjustable Shelves?
Both options have advantages.
Fixed Shelves
Provide greater structural strength.
Ideal when storing heavier items such as:
- Cast iron cookware
- Large serving platters
- Kitchen appliances
Adjustable Shelves
Offer much greater flexibility.
They allow you to reorganize the cabinet without rebuilding it.
If you’re uncertain about future storage needs, adjustable shelves are usually the better long-term investment.
Selecting the Right Wood Species
Every wood species tells a different story.
Some are bold.
Some are understated.
Others quietly develop character with every passing year.
The wood you choose affects not only the appearance of the finished sideboard but also its weight, durability, workability, and cost.
White Oak
White oak has become one of the defining woods of modern rustic furniture.
Its appeal comes from a combination of strength and understated elegance.
The grain is pronounced without feeling busy, and it accepts stain exceptionally well.
White oak also resists moisture better than many hardwoods, making it an excellent choice for dining rooms and kitchens.
If you’re hoping to build a sideboard that could easily become an heirloom, white oak is difficult to beat.
Red Oak
Red oak offers many of the same structural advantages at a more approachable price.
It’s widely available, machines beautifully, and finishes well.
Its more open grain gives rustic furniture additional texture, making it a favorite among woodworkers who appreciate traditional farmhouse style.
Maple
Maple brings a different personality to rustic furniture.
Its smooth grain creates a cleaner appearance that blends beautifully with modern farmhouse interiors.
Because it is extremely hard and durable, maple also resists everyday dents and scratches better than softer woods.
Walnut
Few hardwoods possess the natural richness of walnut.
Its deep chocolate tones often require little more than a clear finish to create a luxurious appearance.
Although walnut commands a higher price, many woodworkers consider it worthwhile for statement furniture that will remain in the family for generations.
Pine
Pine has introduced countless people to furniture building.
It’s affordable, forgiving to work with, and readily available.
While it dents more easily than hardwood, many builders actually embrace those marks as part of pine’s rustic charm.
Furniture built from pine gradually develops a lived-in character that feels authentic rather than worn.
Reclaimed Wood
Every reclaimed board carries a history.
Old nail holes.
Weathered grain.
Color variations that cannot be manufactured.
When cleaned and milled properly, reclaimed lumber produces furniture with unmatched personality.
It does require extra preparation, however.
Always inspect reclaimed boards carefully for:
- Nails
- Screws
- Hidden metal
- Rot
- Insect damage
- Structural weakness
Taking time to prepare reclaimed lumber properly protects both your tools and your finished project.
Solid Wood or Plywood?
Many people assume an entire cabinet should be built from solid hardwood.
Professional furniture makers often take a different approach.
Solid wood shines where it’s visible.
Cabinet-grade plywood excels where stability matters most.
A balanced approach typically works best.
Solid Hardwood
Use for:
- Cabinet top
- Face frame
- Doors
- Drawer fronts
- Legs
- Decorative trim
These components showcase natural grain and give the furniture its distinctive character.
Cabinet-Grade Plywood
Reserve for:
- Cabinet sides
- Bottom
- Interior dividers
- Shelves
- Back panel
Quality plywood minimizes seasonal movement while providing exceptional strength and stability.
Understanding Wood Movement
Wood never completely stops moving.
As humidity rises and falls throughout the year, every solid wood board expands and contracts across its width.
Ignoring this simple fact is one of the fastest ways to create cracks, split panels, or warped tabletops.
Successful furniture builders plan for this movement instead of trying to prevent it.
That means:
- Floating door panels
- Expansion-friendly tabletop fasteners
- Proper grain orientation
- Thoughtful joinery
These details are rarely visible once the project is complete, yet they often determine whether the furniture lasts five years or fifty.
Sketch Before You Build
You don’t need advanced design software to benefit from visual planning.
Even a hand-drawn sketch can reveal proportion issues, awkward spacing, or storage limitations before a single board is cut.
Include:
- Overall dimensions
- Drawer layout
- Door sizes
- Shelf locations
- Hardware placement
- Grain direction where possible
Seeing the project on paper helps transform scattered ideas into a clear construction plan.
It also makes material estimating far more accurate.
By the time the first piece of lumber reaches the saw, every major decision should already feel settled.
From here, the project shifts from planning to preparation.
The next step is assembling the collection of tools that will help turn carefully selected boards into a beautifully crafted rustic sideboard.
Part 3: Tools You’ll Need
Walk into almost any woodworking shop and you’ll notice something interesting.
The finest furniture rarely comes from the shop with the most expensive tools.
Instead, it comes from the one where every tool is understood, maintained, and used with care.
A rustic sideboard may look like a complex piece of furniture, but it doesn’t require a commercial cabinet shop to build. Most woodworkers already own many of the essentials. The remaining tools simply make certain tasks faster, more accurate, or more enjoyable.
Think of your tools as partners rather than shortcuts. Their job isn’t to replace craftsmanship—it’s to help you express it with greater precision.
The Essential Power Tools
These are the workhorses of the project. They’ll handle nearly every major operation from rough milling to final assembly.
Table Saw
If one machine defines furniture building, it’s the table saw.
Nearly every major component of the sideboard passes through it at some stage.
You’ll use it to:
- Rip hardwood to width
- Cut cabinet panels
- Trim face-frame components
- Prepare drawer parts
- Square plywood
- Create clean, repeatable cuts
Accuracy here pays dividends throughout the build. A cabinet assembled from perfectly sized parts naturally fits together with fewer adjustments.
Choosing the Right Blade
The blade matters almost as much as the saw itself.
For furniture work, a quality carbide-tipped combination blade is an excellent all-around choice. If you’re cutting a large amount of hardwood or plywood, dedicated rip and crosscut blades can produce even cleaner results.
A sharp blade leaves smoother surfaces, reduces burning, and minimizes tear-out—saving time during sanding.
Miter Saw
The miter saw excels at making precise crosscuts quickly and consistently.
It’s particularly useful when preparing:
- Rails
- Stiles
- Legs
- Trim pieces
- Face-frame components
When multiple pieces need to be exactly the same length, a stop block transforms the miter saw into one of the most accurate tools in the shop.
Circular Saw
Not everyone owns a cabinet saw large enough to handle full sheets of plywood.
That’s perfectly fine.
A circular saw paired with a straightedge guide often makes breaking down sheet goods easier and safer.
Large plywood panels become manageable long before they ever reach the table saw.
Router
Few tools are as versatile as a router.
Depending on the bit you install, it can perform dozens of different jobs.
For this project, it’s especially useful for:
- Cutting dados
- Routing rabbets
- Creating decorative edges
- Flush trimming
- Cutting grooves
- Mortising hardware
- Softening sharp corners
A small collection of quality router bits will continue to serve you well on future furniture projects.
Cordless Drill and Driver
You’ll likely pick up your drill more than any other tool during the build.
Its responsibilities include:
- Drilling pilot holes
- Driving screws
- Installing hardware
- Mounting drawer slides
- Attaching hinges
- Assembling cabinet components
Having two cordless tools—one fitted with a drill bit and the other with a driver bit—can save a surprising amount of time during assembly.
Random Orbital Sander
No finish can hide poor surface preparation.
A quality random orbital sander makes smoothing large surfaces faster while producing fewer visible sanding marks.
You’ll use it throughout the project to:
- Remove milling marks
- Blend glue joints
- Smooth edges
- Prepare surfaces for stain
- Sand between finish coats
Let the weight of the sander do the work. Excessive pressure often creates swirl marks rather than removing them.
Hand Tools That Make a Big Difference
Power tools provide speed.
Hand tools provide finesse.
They help fine-tune the details that often separate good furniture from exceptional furniture.
Tape Measure
Simple?
Absolutely.
Unimportant?
Not even close.
A reliable tape measure becomes one of the most frequently used tools throughout the build.
Develop the habit of checking every measurement twice before cutting.
Wood is forgiving in many ways.
Length isn’t one of them.
Combination Square
Few layout tools are as useful.
You’ll use it to:
- Verify ninety-degree corners
- Set blade heights
- Mark precise layout lines
- Check drawer alignment
- Confirm cabinet squareness
When building furniture, consistency matters more than speed.
Marking Knife
Unlike a pencil, a marking knife creates an incredibly precise layout line.
It also helps guide chisels and saws exactly where they belong.
Many experienced furniture makers consider it one of the simplest upgrades to overall accuracy.
Chisels
Even in a workshop filled with power tools, sharp chisels remain indispensable.
They’re ideal for:
- Cleaning joinery
- Fine-tuning hinge mortises
- Removing dried glue
- Adjusting tight-fitting components
- Squaring routed corners
Sharp chisels are also significantly safer than dull ones because they require less force and offer greater control.
Clamps
Ask almost any woodworker how many clamps are enough.
The answer is usually the same.
“Just a few more.”
For this project, you’ll benefit from a variety of clamp styles:
- Parallel clamps
- Pipe clamps
- F-style clamps
- Spring clamps
- Corner clamps
Clamps don’t simply hold parts together.
They help maintain alignment while glue cures, ensuring the cabinet remains square and joints close tightly.
Joinery Tools
Strong furniture begins with strong joinery.
Several methods work well for a rustic sideboard, and the best choice often depends on your experience level and available tools.
Pocket Hole Jig
Pocket hole joinery has become incredibly popular because it combines speed with impressive strength.
It’s particularly useful for:
- Face frames
- Cabinet boxes
- Internal braces
- Hidden structural components
When paired with quality wood glue, pocket screws create joints that are more than capable of supporting everyday furniture use.
Dowel Jig
Dowels provide clean, hidden reinforcement without visible fasteners.
They’re an excellent option for:
- Edge joining
- Face frames
- Cabinet assembly
- Furniture panels
Accuracy is critical, so invest time in careful layout before drilling.
Loose Tenon Joiner
For woodworkers who frequently build furniture, loose tenon systems offer remarkable speed and precision.
Benefits include:
- Strong joints
- Excellent alignment
- Fast assembly
- Minimal visible joinery
While certainly not required, they’re a pleasure to use on larger furniture projects.
Biscuit Joiner
Biscuits primarily help align panels during glue-ups.
They’re especially useful when assembling wide tabletops or cabinet panels because they reduce shifting while clamps are tightened.
Measuring and Layout Tools
Precision begins long before assembly.
Useful layout tools include:
- Steel ruler
- Straightedge
- Digital angle gauge
- Carpenter’s pencil
- Compass
- Center punch
- Story stick
- Marking gauge
These simple tools reduce small errors that might otherwise multiply throughout the build.
Safety Equipment
Woodworking should be enjoyable.
Protecting yourself helps ensure it stays that way.
Always keep these essentials nearby:
- Safety glasses
- Hearing protection
- Dust mask or respirator
- Push sticks
- Push blocks
- First-aid kit
- Fire extinguisher
Fine hardwood dust can linger in the air long after cutting stops.
A quality respirator provides much better protection than a basic paper mask, especially during sanding.
Helpful Workshop Accessories
These aren’t mandatory, but they make the project noticeably easier.
Drill Bit Set
A complete assortment should include:
- Brad-point bits
- Twist bits
- Countersink bits
- Driver bits
- Forstner bits
Brad-point bits are particularly valuable for clean, accurately positioned holes in hardwood.
Hardware Installation Jig
Perfectly aligned drawer pulls and cabinet knobs instantly elevate the appearance of finished furniture.
A hardware jig eliminates repeated measuring and improves consistency.
Glue Applicators
Glue brushes, rollers, and silicone spreaders help create even adhesive coverage while minimizing waste.
Even glue distribution produces stronger joints and less squeeze-out.
Cabinet Squares
Assembly squares hold cabinet corners at ninety degrees while clamps are tightened.
They’re especially useful during glue-ups when several components need to remain perfectly aligned.
Lighting Matters More Than Most People Realize
One of the most overlooked workshop upgrades isn’t another power tool.
It’s better lighting.
Bright, even illumination makes it much easier to:
- Spot sanding scratches
- Detect glue residue
- Verify layout lines
- Check finish quality
- Identify gaps in joinery
Natural daylight is excellent, but high-quality LED shop lights provide consistent visibility regardless of the weather outside.
Organizing the Workspace
A clean workshop isn’t simply more pleasant.
It’s more efficient.
Before beginning the build, establish dedicated areas for:
- Lumber storage
- Cutting
- Milling
- Assembly
- Sanding
- Finishing
- Hardware organization
Keeping similar tasks grouped together reduces unnecessary movement and helps maintain focus during longer work sessions.
Sharpen Before You Start
One simple habit distinguishes many experienced woodworkers from beginners.
They sharpen first.
Sharp blades and bits produce:
- Cleaner cuts
- Less tear-out
- Better joinery
- Safer operation
- Smoother surfaces
Dull tools require more force, generate more heat, and often leave surfaces that demand significantly more sanding.
Build Accuracy Begins with Setup
Many woodworking mistakes aren’t caused by poor technique.
They’re caused by rushing through setup.
Before making the first cut:
- Verify blade alignment.
- Check fence accuracy.
- Confirm measuring tools agree.
- Calibrate saw angles.
- Test router bit depth.
- Inspect clamps for proper operation.
A few extra minutes spent preparing your equipment often saves hours correcting mistakes later.
With the workshop ready and every essential tool within reach, the project is finally prepared to move from planning into production.
The next step is selecting the lumber, plywood, hardware, adhesives, and finishing materials that will give your rustic sideboard both its strength and its unmistakable character.
Part 4: Lumber, Hardware & Materials
The quality of a piece of furniture is often decided before the first joint is cut.
Two sideboards can follow the exact same plans, be built with the same tools, and receive the same finish, yet look completely different in the end. More often than not, the difference comes down to the materials chosen at the beginning.
Wood has personality. Every board carries its own grain, color, texture, and history. Some pieces are calm and uniform, while others are full of knots, mineral streaks, and dramatic grain patterns. Learning to work with those natural characteristics instead of fighting them is part of what makes woodworking so rewarding.
This section will help you choose materials that not only look beautiful on day one but continue to perform well for decades.
Complete Material List
The following list is based on a rustic sideboard measuring approximately:
- 60 inches wide
- 36 inches high
- 18 inches deep
If you adjust the overall dimensions, you’ll need to recalculate your lumber requirements accordingly.
Solid Hardwood
You’ll need approximately 40–50 board feet of hardwood.
This will be used for:
- Cabinet top
- Face frame
- Cabinet doors
- Drawer fronts
- Legs or base
- Decorative trim
- Edge banding where needed
Buying a little extra is always wise. It allows you to work around knots, defects, and unexpected mistakes without interrupting the project.
Cabinet-Grade Plywood
Quality plywood provides stability where large panels are required.
Recommended materials include:
3/4-inch Plywood
One to two sheets, depending on your layout.
Used for:
- Cabinet sides
- Cabinet bottom
- Interior partitions
- Fixed shelving
1/2-inch Plywood
Typically one sheet.
Ideal for:
- Drawer boxes
- Interior organizers
- Pull-out trays
1/4-inch Plywood
One sheet is generally sufficient.
Used for:
- Cabinet back
- Drawer bottoms
- Door panels if preferred
High-quality plywood resists warping and greatly improves dimensional stability without sacrificing strength.
Choosing the Best Hardwood
The wood species you select influences far more than appearance.
It affects:
- Durability
- Weight
- Workability
- Cost
- Finishing behavior
- Long-term stability
Let’s look at the most popular options.
White Oak
White oak has earned its reputation as one of the finest furniture woods available.
Its grain has enough character to feel rustic without becoming overly busy.
Reasons many furniture makers choose white oak include:
- Exceptional strength
- Excellent moisture resistance
- Beautiful grain patterns
- Outstanding stain absorption
- Long service life
It develops even more character as it ages, making it a favorite for heirloom furniture.
Red Oak
Red oak remains one of the most accessible hardwoods in many lumberyards.
Compared to white oak, it offers:
- Lower cost
- Easy machining
- Good strength
- Attractive open grain
Its pronounced texture complements traditional farmhouse and rustic furniture particularly well.
Maple
Maple creates a cleaner interpretation of rustic style.
Its fine, consistent grain works beautifully in homes where traditional warmth meets modern simplicity.
Advantages include:
- Excellent hardness
- Smooth surface
- Outstanding durability
- Minimal visible grain distractions
Because maple absorbs stain differently than oak, always test your finish before committing to the entire project.
Walnut
Few woods attract attention as effortlessly as walnut.
Its naturally dark color often eliminates the need for stain altogether.
Benefits include:
- Rich chocolate tones
- Elegant grain
- Excellent stability
- Premium appearance
Walnut is more expensive than many domestic hardwoods, but its timeless beauty makes it a worthwhile investment for statement furniture.
Pine
Pine has introduced generations of woodworkers to furniture building.
Its affordability and forgiving nature make it especially appealing for first-time builders.
Benefits include:
- Budget friendly
- Easy to cut
- Readily available
- Lightweight
- Warm rustic character
Although pine dents more easily than hardwood, those small imperfections often add to its charm over time.
Reclaimed Wood
Every reclaimed board carries evidence of another life.
Weathered textures.
Old saw marks.
Subtle color variations.
Occasional nail holes.
These features create authenticity that simply can’t be manufactured.
Common sources include:
- Barn beams
- Salvaged flooring
- Warehouse timbers
- Old fencing
- Demolition lumber
Before milling reclaimed wood, inspect every board carefully for hidden metal, insect damage, loose knots, and structural weaknesses.
Running a metal detector over reclaimed lumber before cutting can save both your tools and your patience.
Understanding Board Feet
Hardwood is generally sold by the board foot rather than by length.
The calculation is straightforward:
Board Feet = (Thickness × Width × Length) ÷ 144
For example:
A board measuring:
- 1 inch thick
- 8 inches wide
- 96 inches long
Contains approximately:
5.33 board feet
Understanding this calculation helps you estimate material costs more accurately and compare lumber prices with confidence.
Why Furniture Makers Combine Hardwood and Plywood
Some beginners assume an entire cabinet should be built from solid hardwood.
Professional furniture builders often prefer a combination of materials.
There’s a good reason.
Each material excels at different tasks.
Use Solid Wood For
- Cabinet top
- Face frame
- Doors
- Drawer fronts
- Legs
- Decorative trim
These are the components people see and touch.
Natural hardwood provides warmth, texture, and visual depth that engineered materials simply cannot replicate.
Use Cabinet-Grade Plywood For
- Cabinet sides
- Bottom panel
- Interior dividers
- Adjustable shelves
- Cabinet back
Plywood remains far more stable across changing humidity, making it ideal for larger panels where seasonal movement could otherwise create problems.
Selecting High-Quality Plywood
Not all plywood belongs in fine furniture.
Look for cabinet-grade products with:
- Smooth veneer
- Minimal internal voids
- Flat panels
- Strong core construction
- Consistent thickness
Popular choices include:
Birch Plywood
Strong, smooth, and excellent for painted or stained interiors.
Oak Veneer Plywood
Ideal when building oak furniture.
Its grain blends naturally with solid oak face frames and doors.
Maple Veneer Plywood
Provides a clean, contemporary appearance that pairs beautifully with maple hardwood.
Baltic Birch
Widely respected for premium cabinet construction.
Its many thin veneer layers produce exceptional strength, stability, and attractive exposed edges.
Hardware That Improves Everyday Use
Well-built furniture deserves quality hardware.
Small upgrades here can noticeably improve how the finished cabinet feels every time it’s opened.
Drawer Slides
Full-extension ball-bearing slides remain one of the best investments you can make.
They offer:
- Smooth movement
- Full drawer access
- High weight capacity
- Long service life
Soft-close versions add an extra level of refinement by preventing drawers from slamming shut.
Cabinet Hinges
Two popular choices stand out.
Concealed European Hinges
Ideal for clean, modern construction.
Benefits include:
- Easy adjustment
- Hidden appearance
- Soft-close options
- Consistent alignment
Decorative Surface Hinges
Perfect for farmhouse or traditional rustic furniture.
Available in finishes such as:
- Black iron
- Antique bronze
- Aged brass
Visible hinges become part of the furniture’s overall design rather than something hidden away.
Knobs and Drawer Pulls
Hardware has a surprising influence on the finished style.
For rustic furniture, popular options include:
- Forged iron pulls
- Oil-rubbed bronze handles
- Matte black hardware
- Antique brass knobs
- Leather drawer pulls
- Cup-style drawer handles
Choose hardware that complements the wood instead of competing with it.
Sometimes the simplest designs create the strongest impression.
Fasteners
Reliable fasteners contribute to long-term durability.
Keep these supplies on hand:
- Pocket screws
- Wood screws
- Trim screws
- Brad nails
- Finish nails
Quality fasteners hold more securely and are less likely to strip during installation.
Choosing the Right Wood Glue
Wood glue forms some of the strongest joints in the entire project.
When properly applied, the glue bond is often stronger than the surrounding wood fibers.
Standard PVA Glue
An excellent choice for indoor furniture.
Advantages include:
- Strong bond
- Easy cleanup
- Reasonable working time
- Readily available
Waterproof Wood Glue
Recommended if the sideboard will live in areas where occasional moisture exposure is possible.
Polyurethane Glue
Extremely durable and moisture resistant.
Because it expands during curing, careful application is important to avoid unnecessary cleanup.
Sandpaper You’ll Need
A beautiful finish begins with patient sanding.
Keep these grits available:
- 80
- 120
- 150
- 180
- 220
- 320 (for sanding between finish coats)
Each grit removes the scratches left behind by the previous one, gradually creating an exceptionally smooth surface.
Choosing a Finish
The finish protects the wood while bringing its grain to life.
Popular options include:
Oil-Based Polyurethane
Excellent for:
- Dining room furniture
- Heavy everyday use
- Warm amber appearance
Water-Based Polyurethane
Ideal for:
- Light-colored woods
- Modern rustic designs
- Faster project completion
Hard Wax Oil
A favorite among many custom furniture makers.
It enhances the wood’s natural feel while remaining relatively easy to repair if the surface becomes scratched over time.
Furniture Wax
Best used as a finishing touch over an existing protective finish to soften the sheen and create a rich, hand-rubbed appearance.
Optional Decorative Materials
If you’d like to personalize your sideboard even further, consider incorporating details such as:
- Sliding barn door hardware
- Tempered glass door panels
- Woven cane inserts
- Wire mesh panels
- Decorative corbels
- Forged corner brackets
- Contrasting wood inlays
- LED interior lighting
These additions aren’t necessary, but they can give your project a unique identity that reflects your own style.
Buying Lumber Like a Furniture Maker
Experienced woodworkers rarely choose the first board they see.
Instead, they look for:
- Straight grain where strength matters
- Attractive figure for visible components
- Minimal twist
- Flat surfaces
- Few structural defects
Whenever possible, buy about 10–15% more lumber than your calculations require.
Extra material gives you flexibility if a board reveals hidden defects during milling or if you decide to improve grain matching on highly visible parts.
Taking a little extra time at the lumberyard often produces noticeably better furniture.
With the materials gathered and every board carefully selected, the project is finally ready to move from preparation into production.
In the next section, you’ll organize those materials into a practical cut list that simplifies the build, minimizes waste, and keeps every component clearly labeled from the first cut to the final assembly.
Part 5: Free Rustic Sideboard Cut List
There’s a moment in every woodworking project when a pile of rough lumber begins to feel like something more.
The design is finished. The materials are stacked neatly in the workshop. The tools are ready. All that’s left is making the first cut.
It can be exciting—and a little intimidating.
That’s exactly why a detailed cut list matters.
Instead of making decisions one board at a time, you’re working from a clear roadmap. Every panel, rail, stile, and shelf has a purpose before it ever reaches the saw. That approach reduces mistakes, minimizes waste, and keeps the entire build organized from beginning to end.
Take your time during this stage. Label every piece, pay attention to grain direction, and remember that thoughtful preparation often leads to cleaner assembly later.
Before You Start Cutting
Resist the urge to begin immediately.
Spend a few minutes laying out your boards across a flat surface.
Look for:
- Beautiful grain patterns
- Knots that could weaken structural parts
- Checks or cracks near the ends
- Areas with mineral streaks or color variation
- Sections that would make attractive drawer fronts or door panels
This simple exercise allows you to place the most visually interesting wood where people will actually see it.
Less attractive sections can often be used for internal components without affecting the finished appearance.
Standard Finished Dimensions
The following cut list is based on a completed sideboard measuring approximately:
- Width: 60 inches
- Height: 36 inches
- Depth: 18 inches
These measurements can be adjusted to suit your available space while maintaining the same overall construction sequence.
Cabinet Carcass Components
The cabinet carcass forms the structural core of the project.
Every other component depends on this section being accurately cut and assembled.
| Part | Quantity | Material | Finished Size |
|---|---|---|---|
| Side Panels | 2 | 3/4″ Cabinet-Grade Plywood | 34½” × 18″ |
| Bottom Panel | 1 | 3/4″ Cabinet-Grade Plywood | 58½” × 18″ |
| Fixed Shelf | 1 | 3/4″ Cabinet-Grade Plywood | 58½” × 17¼” |
| Center Divider | 1 | 3/4″ Cabinet-Grade Plywood | 34½” × 18″ |
| Top Support Rails | 2 | Hardwood | 58½” × 3″ |
| Bottom Stretcher | 1 | Hardwood | 58½” × 4″ |
| Back Panel | 1 | 1/4″ Plywood | 58½” × 34½” |
Face Frame Components
The face frame transforms the cabinet from a simple plywood box into furniture.
It strengthens the front of the cabinet while creating clean openings for the drawers and doors.
| Part | Quantity | Material | Finished Size |
|---|---|---|---|
| Outside Stiles | 2 | Hardwood | 34½” × 1½” |
| Center Stiles | 2 | Hardwood | 34½” × 1½” |
| Top Rail | 1 | Hardwood | 57″ × 1½” |
| Bottom Rail | 1 | Hardwood | 57″ × 1½” |
| Drawer Rails | 2 | Hardwood | 57″ × 1½” |
| Vertical Drawer Dividers | 2 | Hardwood | 15″ × 1½” |
Cabinet Top
The top is often the first thing people notice.
Spend extra time selecting attractive grain and arranging boards before glue-up.
| Part | Quantity | Material | Finished Size |
|---|---|---|---|
| Top Boards | As Needed | Hardwood | Glue-Up to 62″ × 20″ |
Optional:
| Part | Quantity | Material |
|---|---|---|
| Breadboard Ends | 2 | Hardwood |
| Edge Trim | 2 | Hardwood |
A slight overhang creates a more substantial furniture appearance.
Recommended overhang:
- Front: 1 inch
- Both sides: 1 inch
- Rear: ½ inch
Door Components
This design uses two traditional frame-and-panel cabinet doors.
Door Frames
| Part | Quantity | Material | Finished Size |
|---|---|---|---|
| Door Stiles | 4 | Hardwood | 25″ × 2¼” |
| Door Rails | 8 | Hardwood | 12″ × 2¼” |
Door Panels
| Part | Quantity | Material | Finished Size |
|---|---|---|---|
| Center Panels | 2 | 1/4″ Plywood or Solid Wood | 20″ × 14″ |
If using solid wood panels, remember that they should float within the frame rather than being glued in place.
This allows natural seasonal movement without creating stress in the joints.
Drawer Boxes
The internal drawer boxes prioritize strength over appearance.
Quality joinery matters more than decorative grain here.
Drawer Sides
| Part | Quantity | Material | Finished Size |
|---|---|---|---|
| Drawer Sides | 6 | 1/2″ Plywood | 16″ × 5″ |
Drawer Fronts and Backs
| Part | Quantity | Material | Finished Size |
|---|---|---|---|
| Drawer Fronts | 3 | 1/2″ Plywood | 20″ × 5″ |
| Drawer Backs | 3 | 1/2″ Plywood | 20″ × 5″ |
Drawer Bottoms
| Part | Quantity | Material | Finished Size |
|---|---|---|---|
| Drawer Bottoms | 3 | 1/4″ Plywood | 20″ × 16″ |
Decorative Drawer Fronts
These are the visible drawer faces that give the cabinet its finished appearance.
Use boards with the most attractive grain.
| Part | Quantity | Material | Finished Size |
|---|---|---|---|
| Drawer Fronts | 3 | Hardwood | 21″ × 6″ |
Aim for consistent reveals of approximately 1/16 to 1/8 inch between each drawer front.
Small, even gaps contribute significantly to a professional-looking result.
Interior Shelves
Adjustable shelves make the cabinet far more versatile over time.
| Part | Quantity | Material | Finished Size |
|---|---|---|---|
| Adjustable Shelves | 2 | 3/4″ Cabinet-Grade Plywood | 18″ × 17¼” |
Shelf pin systems allow future adjustments without modifying the cabinet itself.
Base Options
The base sets the visual tone of the entire piece.
Choose the style that best matches your design.
Option One: Traditional Plinth Base
| Part | Quantity | Material | Finished Size |
|---|---|---|---|
| Front Rail | 1 | Hardwood | 57″ × 4″ |
| Side Rails | 2 | Hardwood | 16″ × 4″ |
A plinth base gives the cabinet a grounded, substantial appearance.
Option Two: Furniture Legs
| Part | Quantity | Material | Finished Size |
|---|---|---|---|
| Legs | 4 | Hardwood | 3″ × 3″ × 6″ |
Square legs create a classic farmhouse feel, while tapered legs lend a lighter, more contemporary look.
Planning for Hardware
Before drilling any holes, spend time considering placement.
A carefully positioned handle or hinge can subtly improve the balance of the entire cabinet.
Hinges
Plan for:
- Two hinges per standard door
- Three hinges for larger or heavier doors
Drawer Slides
Recommended:
- Full-extension
- Ball-bearing
- Sixteen-inch slides
Install both sides at exactly the same height to ensure smooth drawer operation.
Knobs and Pulls
A simple drilling template helps maintain perfectly aligned hardware across every drawer and door.
Small inconsistencies become surprisingly noticeable once the cabinet is complete.
Grain Matching for a Furniture-Quality Appearance
One detail often seen in high-end furniture is intentional grain flow.
Rather than selecting boards randomly, arrange them so the grain appears to continue naturally across neighboring components.
This works especially well for:
- Cabinet doors
- Drawer fronts
- The solid wood top
Bookmatching or carefully sequencing boards before cutting creates visual harmony that immediately elevates the finished piece.
Organizing Your Cut Sequence
Cutting parts in the right order reduces waste and makes better use of your lumber.
A practical sequence is:
- Break down plywood sheets.
- Mill all hardwood to thickness.
- Rip hardwood to width.
- Crosscut parts slightly oversized.
- Joint and plane where necessary.
- Trim every component to final dimensions.
Leaving pieces slightly oversized until after milling gives you room to correct small movement in the wood before making final cuts.
Label Everything
As each part is completed, label it immediately.
Painter’s tape works well because it removes cleanly without leaving adhesive behind.
A simple system might include:
- SP-1 – Side Panel
- BP – Bottom Panel
- FF-S – Face Frame Stile
- FF-R – Face Frame Rail
- DT-L – Left Door
- DT-R – Right Door
- DR-1 – Drawer One
Clear labels eliminate guesswork during assembly and make dry-fitting much faster.
Double-Check Before the First Assembly
Before putting away your measuring tools, lay every component on your workbench.
Confirm that:
- All parts are cut to size.
- Matching pieces are identical.
- Joinery locations are marked.
- Grain direction looks intentional.
- Door and drawer components have been grouped together.
- Cabinet panels remain flat.
- No parts were accidentally omitted.
This quiet moment of verification is often where experienced furniture makers catch small issues before they become larger problems.
By now, what began as a stack of lumber has become a carefully organized collection of components, each with a clear purpose.
The next stage is where those individual pieces finally begin coming together—transforming measured boards into the framework of a handcrafted rustic sideboard that will last for years to come.
Part 6: Step-by-Step Building Instructions
This is where the project begins to feel real.
Until now, you’ve been measuring, planning, organizing, and preparing. The workshop has been filled with individual parts—panels, rails, stiles, shelves, and carefully labeled boards waiting for their moment.
Now those separate pieces begin telling a single story.
Take your time during every stage of assembly. Furniture isn’t built by rushing from one task to the next. It’s built through dozens of small, thoughtful decisions made one after another. A careful fit here, a square corner there, another measurement checked before tightening a clamp—those quiet moments are what ultimately produce furniture that feels solid, balanced, and beautifully made.
One habit is worth carrying through the entire build:
Dry-fit first. Glue second. Fasten last.
A few extra minutes spent checking alignment before committing with glue can save hours of correction later.
Step 1: Prepare Every Component
Before assembly begins, inspect each piece one last time.
Look closely for:
- Milling marks
- Tear-out
- Glue residue from test pieces
- Slight warping
- Rough edges
- Incorrect dimensions
Small imperfections are far easier to correct now than after the cabinet has been assembled.
Break Every Sharp Edge
Furniture should feel inviting to the touch.
Use either:
- 220-grit sandpaper
- A block plane
- A small round-over router bit
Lightly soften exposed corners.
The goal isn’t to noticeably round them over—just remove the razor-sharp edges left behind by machining.
It’s a subtle detail, but one people notice the first time they run a hand across the finished piece.
Step 2: Assemble the Cabinet Carcass
Every cabinet begins with its foundation.
If the carcass is square, the rest of the build becomes dramatically easier.
If it isn’t, every later step becomes an adjustment.
Lay the two side panels on a clean, flat work surface.
Position the remaining structural components between them:
- Bottom panel
- Fixed shelf
- Center divider
- Top support rails
- Bottom stretcher
Without glue, assemble everything once to confirm the fit.
Nothing should require force.
If something feels tight, find out why before moving forward.
Choosing Your Joinery
Several joinery methods work well for this project.
Choose the one that best matches your experience and tools.
Pocket Hole Joinery
Excellent for builders who value speed and simplicity.
Benefits include:
- Fast assembly
- Strong hidden joints
- Minimal clamping time
- Beginner friendly
Dado Joints
Dados provide outstanding strength by mechanically supporting shelves and panels.
They also make assembly easier because the parts naturally align themselves.
Loose Tenons or Domino Joinery
Ideal for experienced furniture builders.
These joints combine excellent strength with precise alignment and are especially satisfying during final assembly.
Glue the Cabinet Together
Once everything fits correctly, begin final assembly.
Apply an even coat of wood glue to every mating surface.
There’s no need to flood the joint.
A thin, consistent layer creates the strongest bond.
As the clamps come together, you’ll notice a small bead of glue squeezing from the joint.
That’s exactly what you want.
Immediately wipe away excess glue with a damp cloth before it begins to harden.
Check for Square
This is one of the most important moments in the entire project.
Measure diagonally from corner to corner.
Then measure the opposite diagonal.
If both measurements match, your cabinet is square.
If they don’t, gently adjust the clamps until they do.
Only after confirming the cabinet is square should you install screws or allow the glue to cure.
Step 3: Install the Back Panel
Many people think the back panel simply closes the cabinet.
In reality, it performs a much more important job.
It locks the entire structure into square.
Lay the cabinet face down on a protected work surface.
Double-check that everything remains aligned.
Position the back panel carefully before fastening it with:
- Brad nails
- Narrow crown staples
- Small wood screws
Work around the perimeter evenly rather than fastening one side completely before the others.
This helps preserve alignment while the panel is secured.
Step 4: Build the Face Frame
This is often the stage where the project begins to look like real furniture.
The face frame hides plywood edges, strengthens the cabinet, and creates crisp openings for drawers and doors.
Arrange every component on the bench first.
You’ll need:
- Outside stiles
- Center stiles
- Top rail
- Bottom rail
- Drawer rails
- Vertical dividers
Take a moment to step back and look at the overall proportions.
Sometimes seeing the complete frame laid out reveals small adjustments that improve visual balance.
Assemble the Frame
Join the parts using your preferred method.
Popular options include:
- Pocket screws
- Dowels
- Mortise-and-tenon joints
- Loose tenons
Clamp the completed frame on a flat surface until the glue cures.
A twisted face frame will make door alignment much more difficult later.
Attach the Face Frame
Apply glue to the cabinet edges.
Position the frame carefully.
Clamp it securely.
Fasten from inside the cabinet whenever possible so no fasteners remain visible on the finished surface.
Before walking away, inspect every reveal.
Tiny adjustments made now prevent much larger frustrations later.
Step 5: Build the Solid Wood Top
The cabinet top often becomes the focal point of the entire project.
Spend time here.
It deserves it.
Arrange the Boards
Lay every board side by side without glue.
Rotate them until the grain feels balanced.
Don’t simply look at individual boards.
Look at how they work together.
Natural grain should appear to flow across the entire surface.
Spread knots and color variation evenly rather than clustering them together.
This quiet stage often has more influence on the final appearance than the glue-up itself.
Glue and Clamp
Apply glue evenly along every edge.
Bring the boards together gradually.
Alternate clamps above and below the panel to reduce bowing.
Tighten each clamp slowly rather than forcing one side closed all at once.
Allow the glue to cure completely before removing the clamps.
Patience here produces flatter panels and stronger joints.
Flatten the Top
After curing:
- Scrape away dried glue.
- Trim both ends square.
- Flatten any uneven joints.
- Sand progressively through the grits.
The smoother the surface now, the easier finishing will become later.
Step 6: Build the Cabinet Doors
Well-built doors immediately elevate the appearance of the finished sideboard.
Their fit should feel effortless.
Their movement should feel smooth.
Begin by assembling the door frames.
The stiles and rails should fit cleanly with minimal gaps.
Install the Center Panels
If you’re using plywood panels, they may be secured normally.
If you’re using solid wood panels, allow them to float inside the grooves.
Never glue them into place.
Seasonal wood movement is inevitable, and floating panels accommodate that movement without creating cracks.
Test Every Door
Before installing hinges, place each door into its opening.
Check the spacing carefully.
Aim for consistent reveals on every edge.
Uniform gaps immediately communicate precision and craftsmanship.
Step 7: Assemble the Drawers
Drawers receive constant use, which makes accuracy especially important.
Build each drawer box using your preferred joinery.
Options include:
- Rabbets
- Lock rabbets
- Box joints
- Pocket screws
Install the plywood bottom into a groove whenever possible.
Captured drawer bottoms are significantly stronger than bottoms simply nailed underneath.
Confirm Every Drawer Is Square
Measure each drawer diagonally.
Matching measurements indicate a square assembly.
Even a slight twist can affect how smoothly the drawer operates later.
Step 8: Install Drawer Slides
Drawer slides reward careful layout.
Using a combination square, mark consistent reference lines inside the cabinet.
Install each slide perfectly level.
Take your time.
Even tiny alignment errors can cause drawers to bind.
Before moving forward, slide each drawer in and out several times.
The motion should feel smooth without resistance.
If something doesn’t feel right now, it certainly won’t improve after decorative fronts are attached.
Step 9: Install Decorative Drawer Fronts
These visible hardwood fronts define much of the cabinet’s personality.
Use small spacers to maintain even gaps between each drawer.
Many furniture makers use playing cards because they’re remarkably consistent in thickness.
Temporarily clamp the front into position.
Open the drawer.
Drive screws from inside the drawer box.
Only tighten them fully after confirming alignment.
Step 10: Hang the Cabinet Doors
Attach the hinges to the doors first.
Then install the complete assemblies onto the cabinet.
Most modern hinges allow adjustments in three directions.
Take advantage of that flexibility.
Make small adjustments one at a time until:
- Door gaps appear even.
- Doors close smoothly.
- The face frame remains consistently visible around every opening.
Resist the temptation to settle for “good enough.”
Door alignment is one of the first things people notice.
Step 11: Install the Hardware
Now the sideboard begins to feel finished.
Attach:
- Drawer pulls
- Cabinet knobs
- Decorative handles
Use a drilling template whenever possible.
Even a difference of one or two millimeters becomes surprisingly obvious once several pieces of hardware are installed side by side.
Consistency creates visual calm.
Step 12: Attach the Cabinet Top
Solid wood tops should never be rigidly fastened across their entire width.
Instead, use hardware that allows seasonal expansion and contraction.
Excellent options include:
- Figure-eight fasteners
- Tabletop clips
- Z-clips
- Elongated screw holes
Center the top carefully before fastening it.
Step back and view the cabinet from multiple angles.
Equal overhangs create balance and symmetry.
Final Assembly Inspection
Before moving on to sanding and finishing, spend a few quiet minutes simply examining your work.
Open every drawer.
Close every door.
Run your hand across every joint.
Look closely under good lighting.
Check for:
- Tight joints
- Smooth drawer operation
- Consistent door reveals
- Flush surfaces
- Secure hardware
- Glue residue
- Minor dents or scratches
- Areas that need final sanding
Now is the ideal time to make small adjustments.
Once stain and finish are applied, even simple corrections become far more involved.
The sideboard is no longer a collection of individual boards.
It has become a complete piece of furniture—solid, functional, and unmistakably handcrafted.
The next stage is where all of that craftsmanship truly comes to life.
A carefully chosen finish won’t just protect the wood; it will reveal its depth, highlight its grain, and give the sideboard the rich, timeless character that defines exceptional rustic furniture.
Part 7: Rustic Finishing Techniques
If building the sideboard is about craftsmanship, finishing it is about revealing its personality.
Until this point, you’ve been focused on precision—square corners, tight joinery, smooth drawer action, and careful measurements. The wood has done its job quietly, waiting for the moment when its color, texture, and grain finally come to life.
That moment happens now.
A thoughtful finish doesn’t hide wood beneath a layer of color. It celebrates what was already there. Every cathedral grain pattern, every subtle knot, every ribbon of contrasting color becomes more vivid. The cabinet stops looking like a woodworking project and starts looking like furniture.
Don’t rush this stage.
Many experienced furniture makers will tell you that the finish deserves just as much attention as the joinery beneath it.
Start with a Perfect Surface
The finish can only be as good as the surface underneath.
Even tiny flaws become surprisingly visible once stain or clear finish is applied.
Before opening a single can of finish, inspect the entire sideboard under bright light.
Slowly move around the cabinet.
Look across the surface rather than directly at it.
This angle reveals imperfections that are easy to miss otherwise.
Pay attention to:
- Glue residue
- Pencil marks
- Scratches
- Dents
- Milling marks
- Tear-out
- Uneven joints
Now is the time to fix them.
Not after the stain goes on.
Sanding Isn’t About Speed
It’s tempting to think sanding is simply a chore that comes before finishing.
In reality, sanding is part of finishing.
Every grit prepares the wood for the next one, gradually replacing coarse scratches with finer and finer ones until the surface feels almost silky beneath your fingertips.
A patient sanding routine produces noticeably richer results.
Recommended Sanding Progression
Work gradually through the grits.
- 80 grit — Remove machining marks
- 120 grit — Flatten surfaces
- 150 grit — Refine scratches
- 180 grit — Prepare hardwood
- 220 grit — Final finish sanding
Avoid jumping from one grit to another.
Skipping steps often leaves scratches that don’t become obvious until stain darkens the wood.
Always Sand with the Grain
Wood naturally reflects light along its grain.
Cross-grain scratches interrupt that pattern and become much more noticeable once the finish is applied.
Keep sanding strokes moving in the same direction as the grain whenever possible.
The difference may seem subtle during sanding, but it becomes dramatic after finishing.
Dust Is the Enemy of a Beautiful Finish
Even the finest finish can’t hide dust trapped beneath it.
Before applying stain or clear coats:
- Vacuum every surface.
- Clean corners thoroughly.
- Blow dust from joints if compressed air is available.
- Wipe everything with a microfiber cloth.
- Finish with a tack cloth immediately before staining.
This simple routine prevents tiny dust particles from becoming permanent imperfections.
Decide What Kind of Rustic Story You Want to Tell
Not all rustic furniture looks the same.
Some pieces appear fresh from a craftsman’s workshop.
Others feel like they’ve lived quietly in a farmhouse for generations.
Neither approach is right or wrong.
The finish simply tells a different story.
Natural Rustic
This style celebrates the wood itself.
Characteristics include:
- Visible grain
- Minimal color alteration
- Soft satin sheen
- Little or no distressing
White oak, walnut, and maple look especially beautiful with this approach.
The focus remains on the natural character of the lumber.
Farmhouse Rustic
Perhaps the most recognizable style.
Expect:
- Warm brown tones
- Slightly softened edges
- Gentle signs of wear
- Matte or low-sheen finish
It feels comfortable.
Inviting.
Like furniture that’s always belonged in the room.
Weathered Barnwood
Inspired by decades of exposure to sun, rain, and changing seasons.
Typical features include:
- Gray undertones
- Textured grain
- Aged appearance
- Subtle color variation
This finish pairs beautifully with reclaimed wood and black metal hardware.
Modern Rustic
Cleaner lines.
Less distressing.
More emphasis on craftsmanship than age.
Natural finishes and simple hardware create furniture that feels timeless without appearing overly traditional.
Using a Wood Conditioner
Some woods absorb stain beautifully.
Others don’t.
Species such as:
- Pine
- Maple
- Birch
can develop uneven, blotchy coloring if stain is applied directly.
A wood conditioner helps regulate absorption, creating a smoother, more consistent appearance.
Although it adds an extra step, it often saves considerable frustration later.
Applying the Stain
This is often the most satisfying moment of the entire build.
As the stain touches the wood, the grain seems to emerge almost instantly.
What looked plain a few seconds earlier suddenly becomes rich with contrast and depth.
Work methodically.
Apply stain to one manageable section at a time.
Allow it to penetrate briefly before wiping away the excess with a clean cloth.
The longer stain remains on the surface, the deeper the color generally becomes.
Always follow the product’s recommended timing.
Popular Rustic Stain Colors
Some finishes have become classics for a reason.
Popular choices include:
- Early American
- Provincial
- Special Walnut
- Dark Walnut
- Weathered Oak
- Classic Gray
- Golden Oak
- Espresso
Rather than relying on the color printed on the can, test each stain on leftover pieces from your project.
The same stain often looks dramatically different on white oak, pine, walnut, and maple.
Creating Authentic Character
Rustic furniture should feel naturally aged—not artificially damaged.
Less is almost always more.
The goal is subtle realism.
Softly Worn Edges
After staining, lightly sand a few corners and edges.
Focus on places where hands naturally touch furniture over the years.
Examples include:
- Drawer edges
- Door corners
- Cabinet top
- Lower rails
The effect should feel accidental rather than planned.
Wire Brushing
Wire brushing removes some of the softer wood fibers while leaving the harder grain behind.
The result is texture that catches both light and finish beautifully.
It works particularly well on:
- Oak
- Pine
- Fir
Brush in the direction of the grain to maintain a natural appearance.
Gentle Distressing
If you prefer an older farmhouse look, create subtle imperfections using everyday objects.
Examples include:
- A short chain
- Rounded hammer face
- Canvas bag filled with bolts
- Wooden mallet
Avoid repeating patterns.
Real wear develops randomly over time.
Artificial wear often becomes obvious because it’s too evenly distributed.
Layering Color
Many premium furniture finishes rely on multiple tones rather than one.
For example:
Apply a lighter stain first.
Allow it to dry completely.
Then selectively add a darker stain around edges, corners, and recessed areas.
Blend gently with a clean cloth.
The result creates remarkable depth that resembles naturally aged wood.
Protecting the Surface
Once the stain has cured, it’s time to seal everything beneath a durable finish.
Protection matters just as much as appearance.
A dining room sideboard may support serving dishes, beverages, decorative pieces, and everyday household items.
The finish should be ready for real life.
Oil-Based Polyurethane
A favorite for traditional furniture.
Advantages include:
- Excellent durability
- Warm amber tone
- Moisture resistance
- Long-lasting protection
Apply several thin coats rather than one heavy coat.
Between coats, lightly sand with 320-grit paper for an exceptionally smooth finish.
Water-Based Polyurethane
Ideal if you want the wood to retain its lighter natural color.
Benefits include:
- Crystal-clear appearance
- Faster drying
- Lower odor
- Minimal yellowing
Especially attractive on maple and white oak.
Hard Wax Oil
Increasingly popular among furniture makers.
Instead of creating a thick plastic-like film, it penetrates the wood itself.
Advantages include:
- Natural feel
- Easy spot repairs
- Soft matte appearance
- Pleasant tactile finish
Many people love the way hard wax oil allows the wood to feel like wood rather than a coated surface.
Furniture Wax
Wax works beautifully as a final touch over an existing protective finish.
After curing, buffing with wax produces:
- Rich depth
- Soft sheen
- Smooth feel
While attractive, wax alone isn’t usually sufficient protection for heavily used dining furniture.
Drying Versus Curing
This distinction catches many first-time builders by surprise.
A finish may feel dry within hours.
That doesn’t mean it’s fully hardened.
During the curing period:
- Avoid heavy objects.
- Don’t place decorative pieces directly on the surface.
- Keep standing water away.
- Handle the cabinet carefully.
Giving the finish time to reach full hardness rewards you with greater durability for years to come.
Final Buffing
After the finish has fully cured, buff the entire sideboard with a clean cotton cloth.
The difference is subtle but noticeable.
The surface becomes smoother.
The sheen evens out.
The wood seems to gain additional depth.
It’s a quiet finishing touch that rewards careful work throughout the entire project.
Keeping Your Sideboard Looking Beautiful
Solid wood furniture becomes more attractive when it’s cared for consistently.
Fortunately, maintenance is simple.
Regular habits include:
- Dusting with a microfiber cloth
- Cleaning spills promptly
- Avoiding harsh household chemicals
- Using coasters beneath drinks
- Placing felt pads beneath decorative items
If you’ve used a hard wax oil finish, occasional maintenance coats will refresh the surface without requiring a complete refinishing.
Small Details That Separate Good Furniture from Great Furniture
Professional furniture makers often share a few finishing habits.
None are complicated.
Together, they make a remarkable difference.
- Stir finishes gently instead of shaking the container.
- Apply thin coats rather than heavy ones.
- Maintain a clean finishing space.
- Work with good lighting.
- Test every finish on scrap wood first.
- Allow each coat to dry completely before applying the next.
- Never rush the curing process.
These aren’t secrets.
They’re simply the result of patience and consistency.
And when the final coat has cured, you’ll finally see what all the careful planning, measuring, and craftsmanship have been leading toward—a rustic sideboard whose grain glows warmly, whose finish invites touch, and whose presence feels as though it has always belonged in the room.
The remaining stages focus on refinement: avoiding common mistakes, solving problems before they become frustrating, and exploring ways to make the finished sideboard uniquely your own.
Part 8: Common Mistakes & Expert Tips
Every woodworker has a project they remember for the wrong reasons.
Maybe a cabinet door refused to close properly after hours of careful work. Maybe a tabletop developed a crack during winter, or a beautiful stain revealed glue spots that somehow escaped notice. Those moments can be frustrating, but they also become valuable teachers.
The encouraging part is this: most woodworking mistakes are predictable.
Once you understand why they happen, they’re surprisingly easy to avoid.
This section isn’t about pointing out what can go wrong. It’s about helping you recognize small warning signs before they become larger problems, allowing your rustic sideboard to look, feel, and perform like a professionally crafted piece.
Mistake #1: Working with Lumber That Isn’t Ready
Freshly purchased lumber may look perfectly fine, but appearances can be deceptive.
Wood continues to gain or lose moisture depending on its environment. If boards are milled and assembled before they acclimate to your workshop, they can move after construction, causing gaps, twists, or warped doors.
Watch for:
- Twisted boards
- Bowed edges
- Cupping
- End checks
- Uneven moisture levels
A Better Approach
Store lumber flat with spacers between each layer so air can circulate freely.
Whenever possible, let the wood acclimate for at least a week—longer if it has come from a significantly different climate.
A moisture meter isn’t essential, but it can remove much of the guesswork.
Mistake #2: Forgetting That Wood Is Always Moving
One of the biggest surprises for new furniture builders is discovering that wood never truly stops changing.
As humidity rises and falls throughout the year, solid wood naturally expands and contracts across the grain.
Trying to prevent that movement almost always creates bigger problems.
Common Examples
- Cracked tabletops
- Split door panels
- Warped cabinet tops
- Broken glue joints
Build With Movement in Mind
Allow wood to do what nature intends.
Use:
- Floating door panels
- Figure-eight fasteners
- Tabletop clips
- Elongated screw holes where appropriate
Furniture that accommodates movement will generally outlast furniture that tries to resist it.
Mistake #3: Rushing Through Milling
Straight boards are the foundation of straight furniture.
If milling is rushed, every later step becomes more difficult.
Small twists that seem insignificant at the beginning often become obvious once cabinet doors and drawers are installed.
Professional Milling Sequence
Many furniture makers follow this order:
- Flatten one face.
- Plane to thickness.
- Joint one edge.
- Rip to width.
- Crosscut to length.
- Make final trimming cuts.
This sequence produces parts that fit together naturally instead of requiring force during assembly.
Mistake #4: Ignoring Squareness During Assembly
A cabinet rarely becomes square by accident.
It stays square because someone checks it repeatedly.
Many builders measure diagonals once, then assume everything remains aligned throughout glue-up.
Unfortunately, clamps have a way of shifting parts slightly as pressure increases.
Get Into the Habit Of:
- Measuring diagonals often.
- Checking shelves for level.
- Verifying ninety-degree corners.
- Inspecting alignment before tightening every clamp.
A few minutes spent checking for square saves hours adjusting doors and drawers later.
Mistake #5: Using Too Much Glue
It’s an easy mistake to make.
More glue feels like more strength.
In reality, a properly fitted joint requires only a thin, even layer of adhesive.
Excess glue simply squeezes out, creating extra cleanup and increasing the chance of visible glue spots beneath stain.
The Goal
A narrow bead of squeeze-out along the joint.
Not puddles.
Not drips.
Just enough to confirm complete coverage.
Wipe excess glue away while it’s still wet.
You’ll thank yourself during finishing.
Mistake #6: Drawer Problems That Could Have Been Prevented
Few things are more disappointing than beautifully built drawers that refuse to slide smoothly.
Most drawer issues have surprisingly simple causes.
Possible Reasons
- Slides installed out of level
- Cabinet slightly out of square
- Drawer box oversized
- Hardware mounted unevenly
Before Installing Decorative Fronts
Slide every drawer in and out several times.
Watch carefully.
The movement should feel smooth, quiet, and effortless.
If it doesn’t, make adjustments now rather than hoping the problem disappears later.
It won’t.
Mistake #7: Uneven Door Gaps
Cabinet doors attract attention almost immediately.
Even people who know nothing about woodworking tend to notice when gaps aren’t consistent.
Fortunately, this is usually an adjustment issue rather than a rebuilding issue.
Aim For:
Approximately 1/16–1/8 inch around every edge.
Modern concealed hinges make these adjustments straightforward.
Work patiently.
Small changes often produce dramatic improvements.
Mistake #8: Treating Sanding Like a Chore
Many finishing problems actually begin long before stain is opened.
They begin with rushed sanding.
Skipping grits or sanding inconsistently often leaves scratches that only become visible after stain highlights them.
Good sanding takes time.
But poor sanding often takes even longer to repair.
Mistake #9: Uneven Stain Absorption
Some woods naturally absorb stain differently than others.
Species such as:
- Pine
- Maple
- Birch
can develop dark patches beside lighter areas.
Preventing Blotchiness
- Use a wood conditioner when appropriate.
- Sand consistently.
- Remove all dust.
- Test stain on offcuts first.
Five minutes spent testing color can prevent hours of refinishing.
Mistake #10: Installing Hardware Too Soon
There’s something exciting about finally attaching drawer pulls and cabinet knobs.
It’s also one of the last jobs that should happen.
Hardware complicates sanding and finishing while increasing the chance of scratches.
A better order is:
- Complete construction.
- Finish sanding.
- Apply stain.
- Apply protective finish.
- Allow full curing.
- Install hardware.
- Make final adjustments.
This sequence produces cleaner results with far less frustration.
When Something Doesn’t Go as Planned
Even careful builders occasionally encounter problems.
That’s perfectly normal.
Most issues have practical solutions.
The Drawer Sticks Halfway
Before reaching for sandpaper, check the obvious possibilities.
Is the cabinet still square?
Are both slides mounted at exactly the same height?
Has a screw backed out slightly?
Many drawer problems originate with hardware alignment rather than the drawer itself.
The Doors Refuse to Line Up
Resist the urge to trim the doors immediately.
Instead:
- Adjust the hinges.
- Verify the cabinet remains square.
- Check that the face frame hasn’t shifted.
Only after exhausting those possibilities should you consider trimming the doors.
The Cabinet Rocks Slightly
Perfectly flat workshop floors are rare.
Perfectly flat house floors are even rarer.
Move the cabinet into its final location before making adjustments.
Minor rocking can often be corrected with furniture levelers or discreet felt pads rather than altering the cabinet itself.
Glue Spots Appear After Staining
Almost every woodworker experiences this at least once.
The stain simply can’t penetrate dried glue.
If it happens:
- Allow the stain to dry.
- Sand the affected area carefully.
- Remove all remaining glue.
- Reapply stain gradually until the color blends.
It’s a reminder that glue cleanup deserves just as much attention as joinery.
Raised Grain After Finishing
Water-based finishes sometimes lift tiny wood fibers.
Fortunately, the solution is simple.
After the first coat dries:
- Sand lightly with 320-grit paper.
- Remove the dust.
- Continue with the next coat.
The remaining coats will feel dramatically smoother.
Small Habits That Produce Better Furniture
Experienced furniture makers often rely on routines that seem almost insignificant.
Collectively, those habits make a tremendous difference.
Build in Smaller Sections
Instead of assembling everything at once, complete manageable subassemblies first.
For example:
- Build the cabinet.
- Assemble the face frame.
- Construct the doors.
- Build the drawers.
Breaking the project into stages improves accuracy and reduces stress.
Create a Story Stick
Rather than measuring repeatedly, transfer important dimensions onto a dedicated wooden stick.
Use it throughout the project for:
- Drawer spacing
- Shelf locations
- Hardware placement
- Door reveals
A story stick removes repeated measuring errors and speeds up layout work.
Practice on Scrap Wood
Before:
- Adjusting router bits
- Testing stains
- Installing hinges
- Drilling hardware holes
Practice on leftover pieces from the project.
Mistakes made on scrap become lessons rather than repairs.
Protect Finished Surfaces
Once finishing begins, place soft blankets or foam beneath completed components during assembly.
Even a small screwdriver slipping across a finished top can undo hours of careful work.
Protecting surfaces is easier than repairing them.
Slow Down at the End
There’s a natural temptation to hurry during the final stages.
The project already looks finished.
The excitement builds.
Ironically, this is often where avoidable mistakes happen.
Take your time.
Double-check alignments.
Allow finishes to cure completely.
Walk away for a few minutes if needed.
Fresh eyes almost always notice details that tired ones overlook.
A Professional Quality Check
Before considering the project complete, inspect it the same way a custom furniture maker would.
Construction
- Cabinet remains square.
- Joints are tight.
- Shelves sit level.
- Top is securely attached while allowing seasonal movement.
Doors
- Open smoothly.
- Close without rubbing.
- Maintain even gaps.
Drawers
- Slide effortlessly.
- Sit flush when closed.
- Reveal consistent spacing.
Finish
- Smooth to the touch.
- Uniform color.
- No visible glue residue.
- No dust trapped beneath the finish.
Hardware
- Securely fastened.
- Evenly aligned.
- Comfortable to operate.
This final inspection isn’t about searching for perfection.
It’s about appreciating the countless careful decisions that have brought the project to this point.
Soon, the woodworking will be finished.
What’s left is the enjoyable part—adding personal touches that make the sideboard unmistakably yours, from custom storage layouts to distinctive hardware and finishing details that reflect your own style rather than anyone else’s.
Part 9: Customization Ideas
By now, the hard work is behind you.
The cabinet is built. The joinery is complete. The finish has brought the wood to life.
This is where the project becomes deeply personal.
No two homes are exactly alike, and neither are the people who live in them. That’s why some of the most memorable pieces of furniture aren’t the most elaborate—they’re the ones thoughtfully adapted to fit a particular space, a particular family, and a particular way of living.
Think of these ideas as inspiration rather than rules. Add what makes sense, leave what doesn’t, and create a sideboard that feels as though it has always belonged in your home.
Adjust the Size to Fit Your Space
One of the greatest advantages of building your own furniture is freedom.
You’re never limited by standard showroom dimensions.
If your dining room has a narrow wall, shorten the cabinet.
If you have a large open space begging for a statement piece, stretch the design without compromising its proportions.
Compact Sideboard
Perfect for:
- Apartments
- Entryways
- Breakfast nooks
- Small dining rooms
Recommended dimensions:
- Width: 36–48 inches
- Height: 34–36 inches
- Depth: 16–18 inches
A smaller cabinet still offers useful storage while helping the room feel open and uncluttered.
Standard Family Sideboard
The most versatile option.
Recommended dimensions:
- Width: 54–66 inches
- Height: 36 inches
- Depth: 18 inches
This size comfortably stores everyday dining essentials while remaining visually balanced.
Oversized Buffet Cabinet
Ideal for:
- Large dining rooms
- Open-concept homes
- Entertaining spaces
- Homes with extensive serving ware
Recommended dimensions:
- Width: 72–96 inches
- Depth: 20–22 inches
A larger cabinet naturally becomes a focal point and offers impressive storage without sacrificing elegance.
Experiment with Different Base Styles
The base changes the personality of the furniture more than many people realize.
Even when the cabinet remains identical, different bases create entirely different impressions.
Traditional Plinth Base
Solid.
Grounded.
Timeless.
A plinth base gives the cabinet visual weight and reinforces the classic farmhouse aesthetic.
It also hides uneven floors more effectively than exposed legs.
Chunky Square Legs
Square legs create a handcrafted appearance that feels strong and substantial.
They pair especially well with:
- White oak
- Reclaimed lumber
- Thick cabinet tops
- Traditional rustic interiors
Tapered Legs
If you’d like the cabinet to feel lighter and more contemporary, tapered legs are an excellent option.
They’re particularly attractive in:
- Modern farmhouse homes
- Scandinavian-inspired interiors
- Transitional spaces
The cabinet still feels rustic, but with a softer visual footprint.
Steel Frame Base
For a modern industrial look, combine solid wood with a black powder-coated steel base.
The contrast between warm wood and clean metal creates furniture that feels both rustic and contemporary.
Personalize the Doors
Cabinet doors offer one of the easiest ways to give your sideboard a distinctive character.
Classic Shaker Doors
Simple recessed panels remain one of the most versatile door styles ever created.
They complement:
- Farmhouse interiors
- Craftsman homes
- Contemporary spaces
- Traditional dining rooms
Their clean lines allow the natural beauty of the wood to remain the focal point.
Sliding Barn Doors
Few design features communicate “rustic” more immediately.
Sliding doors work especially well on wider sideboards and add a touch of farmhouse charm without feeling overly decorative.
Black steel hardware creates an attractive contrast against warm wood tones.
Glass Panel Doors
If you enjoy displaying beautiful dishes, handmade pottery, or glassware, glass inserts instantly transform the cabinet into both storage and display furniture.
Adding interior lighting enhances the effect even further.
Woven Cane Panels
Natural cane has made a strong return in furniture design.
Its texture introduces warmth while keeping the cabinet visually light.
It’s an excellent choice if you appreciate a blend of rustic craftsmanship and modern design.
Metal Mesh Inserts
Wire mesh offers another distinctive option.
It combines rustic warmth with industrial character and works especially well alongside forged iron hardware.
Build the Interior Around Your Lifestyle
The outside may catch people’s attention.
The inside determines how useful the cabinet becomes every single day.
Think carefully about how you’ll actually use the storage.
Adjustable Shelves
If flexibility matters, adjustable shelving is difficult to beat.
You can easily reorganize the cabinet as your needs change.
Perfect for storing:
- Serving platters
- Mixing bowls
- Decorative baskets
- Small appliances
- Seasonal decorations
Wine Storage
If entertaining is part of your lifestyle, a built-in wine rack adds both function and visual interest.
Popular additions include:
- Horizontal bottle storage
- Diamond wine cubbies
- Stemware racks
- Pull-out serving trays
Together they create a dedicated beverage station without increasing the cabinet’s footprint.
Pull-Out Shelves
Deep cabinets sometimes hide items at the back.
Pull-out shelves eliminate that problem.
They’re particularly useful for heavier objects like:
- Stand mixers
- Dutch ovens
- Large cookware
- Appliance storage
Instead of reaching awkwardly into the cabinet, everything slides smoothly toward you.
Hidden Compartments
Hidden storage isn’t only practical.
It also adds a subtle element of craftsmanship.
A concealed compartment can discreetly store:
- Important documents
- Family keepsakes
- Spare keys
- Small valuables
Done well, it becomes one of those thoughtful details that only the builder truly knows about.
Make the Cabinet Top a Statement
The top is the largest uninterrupted surface on the entire piece.
A few design choices here can dramatically influence the final appearance.
Thick Laminated Top
Building a thicker-looking top from laminated boards creates the impression of a substantial slab while making efficient use of standard lumber.
The result feels bold without becoming bulky.
Breadboard Ends
Breadboard ends are both beautiful and practical.
Visually, they frame the tabletop.
Structurally, they help minimize cupping while respecting natural wood movement.
They’re especially striking on white oak and walnut.
Live Edge Top
A live edge preserves the natural outline of the tree.
Every curve is unique.
Combined with simple cabinet lines, a live-edge top creates a dramatic centerpiece that celebrates the wood’s original form.
Decorative Details That Add Character
Sometimes the smallest details leave the strongest impression.
Consider incorporating:
- Decorative corbels
- Chamfered edges
- Hand-carved accents
- Bead molding
- Contrasting wood inlays
- Exposed joinery
- Wooden pegs
- Custom nameplates
The key is balance.
A few carefully chosen details often have greater impact than excessive decoration.
Choosing the Right Hardware
Hardware acts like jewelry for furniture.
It should complement the design rather than dominate it.
Rustic Farmhouse
Popular choices include:
- Forged iron pulls
- Oil-rubbed bronze knobs
- Black steel hardware
These finishes emphasize warmth and handcrafted character.
Traditional Style
Consider:
- Antique brass
- Aged bronze
- Cup-style drawer pulls
- Vintage-inspired knobs
These finishes create timeless elegance without feeling overly formal.
Modern Rustic
If your home leans more contemporary, consider:
- Matte black handles
- Brushed nickel hardware
- Slim bar pulls
- Minimalist edge pulls
Simple hardware allows the grain of the wood to remain the visual centerpiece.
Creative Finish Ideas
The same sideboard can tell very different stories depending on its finish.
Natural Clear Finish
Perhaps the most timeless option.
It highlights:
- Natural grain
- Color variation
- Figure
- Texture
Perfect for premium hardwoods where the wood itself deserves attention.
Warm Brown Finish
Classic farmhouse style.
Popular stain colors include:
- Provincial
- Early American
- Special Walnut
The warmth feels inviting without overwhelming the grain.
Weathered Gray Finish
Ideal for:
- Coastal homes
- Cottage interiors
- Rustic modern spaces
Layering gray with warmer brown tones creates realistic depth that resembles naturally aged wood.
Two-Tone Finish
Pairing contrasting colors creates a fresh interpretation of rustic furniture.
Popular combinations include:
- Walnut top with white base
- Natural oak with black base
- Dark brown top with sage green cabinet
- Honey oak with charcoal gray base
The contrast adds visual interest while maintaining the warmth of solid wood.
Modern Features Worth Considering
Traditional craftsmanship and modern convenience can work beautifully together.
Thoughtful upgrades include:
- Soft-close drawer slides
- Soft-close hinges
- Adjustable shelf systems
- Built-in cable management
- USB charging ports
- Hidden power outlets
- Motion-activated LED lighting
These additions quietly improve everyday usability without changing the cabinet’s timeless appearance.
Styling Your Finished Sideboard
Once the project moves into your home, resist the temptation to fill every inch of the top.
Wood deserves room to breathe.
Instead, create visual balance with a carefully chosen collection of objects.
Popular styling elements include:
- Handmade pottery
- Woven baskets
- Ceramic vases
- Framed artwork
- Candlesticks
- Wooden serving boards
- Stacked books
- Fresh greenery
- Linen runners
Varying heights and textures creates interest while allowing the craftsmanship of the cabinet itself to remain the star.
Caring for Your Sideboard Over Time
Solid wood furniture becomes more beautiful with age when it’s cared for thoughtfully.
Fortunately, maintenance requires very little effort.
For everyday care:
- Dust with a microfiber cloth.
- Wipe spills promptly.
- Avoid harsh chemical cleaners.
- Use coasters beneath drinks.
- Lift decorative items instead of dragging them.
Once or twice a year:
- Tighten hardware if needed.
- Check door alignment.
- Inspect drawer operation.
- Refresh hard wax oil finishes when appropriate.
These simple habits help preserve both appearance and function for many years.
The next and final part of this guide answers the questions that almost every builder asks at some point during the project—from choosing the best wood and estimating costs to understanding joinery and long-term maintenance. It also includes a carefully selected list of recommended products, tools, and resources that can make both this build and future furniture projects even more enjoyable.
Part 10: Frequently Asked Questions
Even after the last coat of finish has dried and the final drawer pull has been tightened, a few questions almost always linger. Some come up before the first cut, others halfway through the build, and a few only after the sideboard has found its place in your home.
Here are the questions woodworkers ask most often—and the answers that can make your next project even smoother.
Frequently Asked Questions
Is this project suitable for beginners?
Yes, provided you’re comfortable using basic woodworking tools and have completed a few smaller projects.
A rustic sideboard is considered an intermediate furniture build because it combines cabinet construction, drawers, doors, and finishing techniques. None of those skills are unusually difficult on their own, but together they require patience and careful measuring.
If you approach the project one section at a time, it’s entirely achievable.
What’s the best wood for a rustic sideboard?
There isn’t one perfect answer because every wood brings something different to the finished piece.
White oak remains one of the most popular choices thanks to its strength, attractive grain, and excellent durability.
Red oak offers many of the same qualities at a lower price.
Walnut creates a premium appearance with its naturally rich color.
Maple works beautifully in modern rustic interiors.
Pine is affordable, easy to work with, and develops character as it ages.
Choose the wood that best fits both your budget and the style you’re hoping to create.
How much lumber will I need?
For a sideboard measuring roughly 60 inches wide by 36 inches high, plan on approximately:
- 40–50 board feet of hardwood
- One to two sheets of 3/4-inch cabinet-grade plywood
- One sheet of 1/2-inch plywood
- One sheet of 1/4-inch plywood
Buying an extra 10–15% of hardwood gives you flexibility for grain matching and unexpected mistakes.
How much does it cost to build a rustic sideboard?
Material costs vary depending on your location and the wood species you choose.
As a general guide:
- Pine: $250–$400
- Red oak: $400–$650
- White oak: $500–$800
- Walnut: $700–$1,200+
Premium hardware and specialty finishes can increase the overall cost, but they also enhance durability and everyday use.
How long does the project usually take?
Most hobby woodworkers complete the project over two to four weekends.
If you’re building only on evenings or taking extra time with the finish, expect the project to span a little longer.
There’s no advantage in rushing furniture building.
Some of the best pieces are built slowly.
Can I change the dimensions?
Absolutely.
That’s one of the greatest advantages of building your own furniture.
You can:
- Increase the width
- Reduce the depth
- Add more drawers
- Increase cabinet height
- Modify shelf spacing
- Change the base style
Just be sure any structural changes maintain adequate support and balanced proportions.
Should I use pocket holes or traditional joinery?
Both approaches produce strong furniture.
Pocket holes are:
- Fast
- Accurate
- Beginner friendly
- Excellent for cabinet construction
Traditional joinery such as mortise-and-tenon, loose tenons, or dowels offers additional craftsmanship and can become part of the furniture’s character.
Choose the method that matches your experience, tools, and goals.
Why do professional furniture makers combine hardwood and plywood?
Because each material excels in different situations.
Solid hardwood provides:
- Beautiful grain
- Durability
- Warmth
- Natural character
Cabinet-grade plywood offers:
- Excellent stability
- Resistance to seasonal movement
- Strong large panels
- Efficient material use
Combining both creates furniture that is both attractive and structurally reliable.
What’s the most durable finish?
For a dining room sideboard that sees regular use, oil-based polyurethane remains one of the toughest protective finishes available.
If you prefer a more natural feel, hard wax oil is an excellent alternative and is easier to repair over time.
The best choice depends on how you plan to use the furniture and the look you want to achieve.
How do I keep solid wood from cracking?
You don’t stop wood from moving—you design for it.
Allow seasonal expansion and contraction by using:
- Figure-eight fasteners
- Tabletop clips
- Floating door panels
- Proper grain orientation
- Expansion-friendly joinery
Wood movement is completely natural.
Furniture lasts for generations when it’s built with that movement in mind.
How can I make the finish look more natural?
Resist the temptation to overdo it.
A convincing rustic finish usually comes from restraint rather than heavy distressing.
Use:
- Thin stain applications
- Gentle edge softening
- Light wire brushing
- Multiple finish coats
- Careful sanding
The wood itself should remain the focus.
How do I care for the finished sideboard?
Regular maintenance is surprisingly simple.
Dust often with a soft microfiber cloth.
Clean spills as soon as possible.
Avoid abrasive cleaners or excessive moisture.
Use felt pads beneath decorative objects and coasters under drinks.
If you’ve chosen a hard wax oil finish, occasional maintenance coats will keep the wood looking fresh for years.
Will this style still look good years from now?
That’s one of the reasons rustic furniture remains so popular.
Unlike trend-driven designs, a solid wood sideboard develops more character as it ages.
Small marks become part of its story.
The finish softens naturally.
The wood gains depth.
Instead of wearing out, it grows into itself.
That’s something factory furniture rarely manages to do.
Products / Tools / Resources
The following tools and materials can make this project easier, more accurate, and more enjoyable. While many alternatives exist, these are the types of products worth considering for a furniture build of this size.
Essential Power Tools
- Table saw
- Sliding compound miter saw
- Random orbital sander
- Compact router
- Cordless drill and impact driver
- Circular saw with guide track
Hand Tools
- Combination square
- Tape measure
- Marking knife
- Bevel gauge
- Sharp bench chisels
- Block plane
- Claw hammer or wooden mallet
- Screwdriver set
Clamping Equipment
- Parallel clamps
- F-style clamps
- Bar clamps
- Spring clamps
- Corner clamps
- Panel glue-up clamps
Having a variety of clamp lengths makes furniture assembly significantly easier.
Joinery Accessories
- Pocket hole jig
- Dowel jig
- Loose tenon joinery system (optional)
- Biscuit joiner (optional)
- Countersink drill bits
- Brad-point drill bit set
Measuring & Layout Tools
- Digital angle gauge
- Steel ruler
- Straightedge
- Story stick
- Carpenter’s pencils
- Center punch
Accurate layout tools often improve the quality of a project more than buying another power tool.
Sanding Supplies
Keep several grits available throughout the project:
- 80 grit
- 120 grit
- 150 grit
- 180 grit
- 220 grit
- 320 grit
Quality sanding discs tend to last longer and produce more consistent results.
Finishing Supplies
- Tack cloths
- Lint-free cotton cloths
- High-quality brushes
- Foam applicators
- Mixing cups
- Stir sticks
- Painter’s pyramids
- Disposable gloves
A clean finishing setup is just as important as the finish itself.
Hardware
Choose hardware that complements the style of your sideboard.
Popular options include:
- Full-extension drawer slides
- Soft-close drawer slides
- Concealed cabinet hinges
- Decorative surface hinges
- Black iron drawer pulls
- Antique brass knobs
- Matte black cabinet handles
Small hardware upgrades can noticeably improve the everyday feel of the finished cabinet.
Lumber & Materials
For the best results, look for:
- White oak
- Red oak
- Walnut
- Maple
- Pine
- Cabinet-grade plywood
- Baltic birch plywood
Selecting straight, dry lumber with attractive grain will have a greater impact on the finished sideboard than almost any other decision you make during the build.
Workshop Essentials
A comfortable, organized workspace makes every stage of the project more enjoyable.
Helpful additions include:
- LED shop lighting
- Dust collection system
- Shop vacuum
- Moisture meter
- Push sticks
- Workbench with sturdy vise
- Mobile assembly table
- Safety glasses
- Hearing protection
- Respirator
Good organization doesn’t just save time—it allows you to focus on the craftsmanship itself.
Whether this rustic sideboard becomes the centerpiece of your dining room, a hardworking buffet cabinet, or a piece that stays in your family for years to come, the care you invest in every cut, every joint, and every finish coat will always be visible. That’s the quiet reward of building furniture by hand: creating something that serves a purpose today while carrying a story into tomorrow.