
A woodworking cutting board is one of those projects that looks almost suspiciously simple.
A few strips of hardwood. Some glue. A handful of clamps. Sand it smooth, wipe on a finish, and you’re done.
Except that isn’t quite how it feels when you’re standing at the bench with maple and walnut spread in front of you, trying to decide which strip should go where. Or when the glue starts setting faster than you’d like. Or when a seam you barely noticed suddenly catches the light after the first coat of oil.
That’s when the project becomes more than a rectangle of wood.
A good cutting board teaches you to pay attention.
It teaches you that flat lumber matters. That grain direction matters. That clamp pressure matters. That sanding isn’t just the dull part between building and finishing. And perhaps most importantly, it teaches you how much beauty can come from doing simple things carefully.
You don’t need elaborate joinery. You don’t need a workshop filled with industrial machines. You don’t need to be an expert woodworker.
You do need patience, suitable hardwood, accurate preparation, and a willingness to slow down at the points where rushing is most tempting.
The reward is something you can actually use.
Not a practice joint tucked into a drawer. Not a scrap of wood showing your first attempt at routing an edge. A real object. Something that sits on the kitchen counter, gathers knife marks, darkens with age, gets washed, re-oiled, and used again.
This guide walks through the complete process, from choosing hardwood to applying the final food-safe finish.
If this is your first woodworking cutting board, start simple.
If you’ve already made one, look for the details that make the next one better.
Either way, the goal is the same: turn ordinary hardwood into a cutting board that feels deliberate, balanced, useful, and built to last.
Quick Answer: How Do You Make a Wooden Cutting Board?
To make a wooden cutting board, start with a dense, suitable hardwood such as hard maple, walnut, cherry, or beech. Mill the lumber flat and square, cut it into strips, arrange those strips into a pattern, and glue them together with an appropriate water-resistant wood glue.
Once the glue has fully cured, flatten the board, trim it to its final size, shape the edges, sand progressively through the grits, raise the grain, sand again, and apply a food-safe cutting board finish such as food-grade mineral oil or a cutting board conditioner.
The basic process looks like this:
- Choose suitable hardwood.
- Mill the lumber flat and square.
- Cut the stock into strips.
- Arrange the pattern.
- Dry-fit everything.
- Glue and clamp the board.
- Flatten the glue-up.
- Trim the board to final dimensions.
- Shape the edges and corners.
- Sand the surface thoroughly.
- Raise the grain and perform a final sanding.
- Apply a food-safe finish.
- Let the board rest before putting it to work.
On paper, it’s straightforward.
At the bench, the small choices are what make the finished board sing.
Why a Cutting Board Is Such a Good Woodworking Project
There is a particular satisfaction in making something that leaves the workshop and immediately becomes part of everyday life.
A cutting board does exactly that.
You might spend an afternoon fussing over a glue line that no one else would ever notice. Then, a week later, someone is chopping onions on the finished board while dinner cooks.
That contrast is part of the charm.
The project is small enough to feel manageable, but serious enough to teach real woodworking.
A Small Project That Teaches Big Skills
A well-built cutting board quietly introduces many of the same skills you’ll use on larger projects:
- selecting lumber
- reading grain
- ripping and crosscutting
- jointing
- planing
- gluing
- clamping
- flattening
- routing
- sanding
- finishing
The useful part isn’t simply practicing these things in isolation.
It’s seeing how one step affects the next.
Poor milling creates bad glue joints.
Bad glue joints make flattening harder.
Rushed sanding makes the finish look uneven.
Uneven finishing can become more noticeable after the board has been washed a few times.
The lesson is simple, and it applies far beyond cutting boards:
Good woodworking usually begins long before the part that looks impressive.
Why Beginners Can Still Get a Professional-Looking Result
Large furniture projects introduce complications almost immediately.
Doors need to fit. Drawers need to slide. Frames need to stay square. Panels move. Hardware adds another layer of precision.
A simple edge-grain cutting board strips most of that away.
You can focus on a handful of fundamentals:
Flat surfaces.
Square edges.
Tight joints.
Controlled glue-ups.
Clean sanding.
A good finish.
Get those right, and even an early project can look remarkably polished.
What Wood Is Best for a Woodworking Cutting Board?
The best cutting board woods tend to be hardwoods that combine durability, relatively tight grain, dimensional stability, and good workability.
For many woodworkers, hard maple is the classic choice.
It has a clean appearance, a fine texture, and enough hardness to stand up well to repeated kitchen use. Walnut and cherry are also popular, especially when you want more color or contrast. Beech can be another practical option.
The point isn’t to hunt for the hardest wood you can find.
A good cutting board wood needs balance.
You want something durable enough to withstand use, but not so hard that it becomes unpleasant to machine or unnecessarily aggressive on knife edges.
You also want to think about pore structure, grain, stability, and whether the wood is suitable for repeated contact with food and moisture.
Maple: Quiet, Clean, and Hard to Go Wrong With
Hard maple doesn’t shout.
That’s part of its appeal.
Its pale color and subtle grain give a cutting board a clean, almost architectural look. Used alone, it can feel simple and refined. Paired with walnut, it becomes the light half of a strong contrast.
Maple also works beautifully when you want the craftsmanship to show without the wood itself becoming visually busy.
For a first cutting board, an all-maple design is difficult to argue with.
Walnut: The Wood That Changes the Mood
Add walnut to maple and the entire board changes.
The darker brown color creates contrast instantly. A narrow walnut strip can make a plain board feel considered. Several darker sections can give the board a heavier, more luxurious look.
One of the easiest mistakes is assuming more contrast is always better.
Often, it isn’t.
A single dark stripe placed well can carry more visual weight than a complicated pattern with half a dozen competing elements.
Restraint matters.
Cherry: Warmth That Deepens With Time
Cherry has a softness to its color that makes it especially appealing in kitchen projects.
Freshly milled cherry may look lighter than expected, but the color tends to deepen as the wood ages and sees light.
That slow change gives it character.
Cherry also sits beautifully between maple and walnut visually. It can bridge the gap between very light and very dark wood without making the board feel overly patterned.
Beech: Practical, Understated, Worth Considering
Beech doesn’t always receive the same attention as maple or walnut, but it deserves a place in the conversation.
It’s hard, useful, and has a relatively subtle appearance.
Depending on where you live, it may also be easier to source or more economical than some of the better-known cutting board woods.
Local hardwood dealers are often worth visiting before you settle on a species.
Sometimes the best choice isn’t the wood everyone on the internet uses.
It’s the good material you can actually buy straight, dry, and at a sensible price.
Woods to Avoid for Cutting Boards
A leftover board isn’t automatically a cutting board blank.
That’s especially true when food is involved.
Be cautious with:
- very soft woods
- highly porous species
- pressure-treated lumber
- unknown reclaimed wood
- lumber with chemical contamination
- wood with an uncertain finishing history
- unidentified species
Pine is a good example.
It’s useful, inexpensive, and easy to work. For many projects, that’s exactly what you want.
For a heavily used cutting surface, though, its softness works against it.
Reclaimed lumber can be even trickier. An old board might look beautiful while carrying a history you can’t see: treatments, oils, industrial exposure, old finishes, or contamination.
For a cutting board, known material is usually the smarter choice.
Open Grain vs. Closed Grain: Why the Surface Matters
When woodworkers talk about open-grain and closed-grain woods, they’re describing the visible pore structure of the timber.
Some species have large, obvious pores.
Others are much tighter and smoother.
That difference matters when you’re choosing wood for a surface that will repeatedly encounter food, water, knives, and cleaning.
It’s one reason hard maple remains such a common favorite.
Is Oak Good for Cutting Boards?
Oak is hard, widely available, and familiar.
That makes it tempting.
But the pronounced pore structure of oak, especially red oak, is one reason many woodworkers choose tighter-grained species instead.
If you’re buying lumber specifically for a cutting board rather than trying to use what you already own, maple, walnut, cherry, or beech usually gives you a more conventional starting point.
Edge Grain vs. End Grain vs. Face Grain
Before you start cutting strips, you need to decide what kind of cutting board you’re actually building.
The three main approaches are face grain, edge grain, and end grain.
They look different.
They behave differently.
And they don’t ask the same things from the builder.
What Is a Face-Grain Cutting Board?
A face-grain board presents the broad face of the lumber as the working surface.
This shows off the grain beautifully.
It’s also relatively straightforward to build.
For serving boards or lighter use, face grain can be attractive.
For a cutting board that will see frequent knife work, many woodworkers lean toward edge-grain or end-grain construction instead.
What Is an Edge-Grain Cutting Board?
An edge-grain board uses the narrower edges of strips as the working surface.
For many hobby woodworkers, this is the sweet spot.
It gives you:
- strong durability
- clean linear patterns
- manageable construction
- easier flattening than end grain
- plenty of room for creative wood combinations
If you’re building your first woodworking cutting board, edge grain is a very sensible place to begin.
What Is an End-Grain Cutting Board?
Turn a piece of lumber and look directly at its end.
Those visible fibers become the working surface on an end-grain board.
That’s what creates the familiar checkerboard, brick, and geometric designs often seen on premium butcher blocks.
End grain can be beautiful.
It also asks more of you.
You’ll usually deal with multiple glue-ups, additional cutting, more careful flattening, and a lot more sanding.
It is absolutely worth building once you have the fundamentals.
It just isn’t necessarily the best first lesson.
Which Type Is Best for a Beginner?
For most beginners, edge grain wins.
You still learn wood selection, milling, glue-up, clamping, flattening, sanding, finishing, and design.
You simply remove one layer of complexity.
Once you can make a clean edge-grain board, end grain becomes far less intimidating.
Tools and Materials You’ll Need
A cutting board doesn’t require every machine in a serious woodworking shop.
What matters is whether you can produce lumber that is straight, flat, square, and accurately sized.
A typical build may involve:
- table saw
- miter saw or another safe crosscutting method
- jointer
- planer
- random orbital sander
- clamps
- square
- tape measure or rule
- straightedge
- router
- appropriate router bits
- sanding supplies
- suitable wood glue
- cutting board finish
You may not need all of those.
Your tools determine your workflow, but they don’t change the goal.
Helpful Tools That Make the Job Easier
A few extra tools can make the project smoother:
- drum sander
- moisture meter
- card scraper
- cabinet scraper
- router flattening sled
- clamping cauls
- dust extraction
- bench dogs
They’re helpful.
They’re not magical.
A drum sander can’t turn poor joints into good ones.
A fancy router can’t save badly prepared stock.
The basics still carry the project.
Can You Build a Cutting Board Without a Planer?
Yes.
A planer makes dimensioning faster, but it is not a requirement.
You can work around it by:
- buying surfaced lumber
- using hand planes
- flattening with a router sled
- using a drum sander
- sanding out minor inconsistencies
For a beginner without milling equipment, S4S lumber can simplify the project dramatically.
S4S means surfaced on four sides.
Still, check it before you buy.
Pre-milled lumber can cup, bow, or twist too.
Choosing Glue for a Cutting Board
A cutting board lives in a demanding environment.
It gets wet.
It dries.
It gets washed.
It sits near sinks, food, steam, and temperature changes.
Use a woodworking adhesive appropriate for the application and follow the manufacturer’s current guidance for moisture resistance, clamp time, open time, and curing.
One rule matters more than the label on the bottle:
Glue doesn’t replace good joinery.
If two edges don’t meet cleanly during the dry fit, don’t assume clamp pressure will make the problem disappear.
Fix the surfaces first.
How Thick Should a Wooden Cutting Board Be?
There is no single correct thickness.
The right dimension depends on the size of the board, the construction style, the intended use, and how substantial you want it to feel.
For many medium-sized edge-grain cutting boards, something around 1¼ to 1¾ inches thick can be a practical range.
That isn’t a law.
A smaller prep board can be thinner.
A large carving board can be thicker.
A heavy butcher-style board may be thicker still.
Why Thickness Matters More Than It Seems
Thickness affects more than appearance.
It affects weight, rigidity, handling, and how the board responds to moisture changes.
Thin boards use less material and are easy to move.
They also have less stiffness.
Wood will always respond to changes in moisture.
One side gets wet. The other stays dry. Then one side dries faster.
The thinner the board, the less material there is resisting those forces.
A thick board can warp too, of course.
The goal isn’t to make it indestructible.
The goal is to design with wood movement in mind.
Choosing and Preparing the Lumber
This is where the finished board really begins.
Not when the glue comes out.
Not when the oil goes on.
At the lumber rack.
Inspect the Boards Before You Buy Them
Sight down each board.
Look across the face.
Check the edges.
Pay attention to:
- bow
- cup
- twist
- checks
- cracks
- loose knots
- severe grain defects
- suspicious discoloration
A small defect can sometimes be cut away.
A badly twisted board may consume more time and material than it’s worth.
Buy with the finished project in mind, not just the price per board foot.
Think About Color Before You Cut
If you’re combining species, lay the boards together before doing anything irreversible.
Move them around.
Turn them.
Swap positions.
A random stack can suddenly reveal a pattern once you stop looking at the individual boards and start looking at the composition.
Imagine a maple and walnut board laid out like this:
maple | maple | walnut | maple | walnut | maple | maple
Simple.
Balanced.
Visually calm.
You don’t need complexity to make a cutting board look intentional.
How to Make a Woodworking Cutting Board Step by Step
The process below focuses on an edge-grain board because it gives you a strong balance of simplicity, durability, and visual flexibility.
Step 1: Mill the Hardwood Flat and Square
Good glue-ups start with good surfaces.
You need:
- one flat reference face
- one straight reference edge
- a parallel opposite face
- a parallel opposite edge
A jointer and planer handle this efficiently.
Hand tools and jigs can get you there too.
What matters is the result.
Every strip should meet its neighbor cleanly without rocking, bowing, or leaving daylight through the joint.
Step 2: Cut the Lumber Into Strips
Rip the wood according to your design.
Consistency matters here.
Small errors become more noticeable as the number of strips increases.
If you’re working with accent strips or multiple species, keep the pieces organized as you go.
Label them if necessary.
It’s surprisingly easy to lose the pattern you spent ten minutes arranging once the shop fills with offcuts.
Step 3: Arrange the Pattern
Before glue touches wood, stop and look.
Lay the strips together.
Stand back.
Move one.
Swap two.
Turn a strip end-for-end.
Sometimes the most interesting grain is hiding on the piece you planned to put near the edge.
Sometimes two dark walnut strips sitting beside each other feel heavy, while splitting them apart creates balance.
This is the cheapest stage of the entire project to change your mind.
Use it.
Step 4: Dry-Fit Everything
Push the strips together without glue.
Inspect the seams.
Check the total width.
Check the pattern.
Check your clamps.
Check whether the joints close naturally.
If a gap disappears only when you lean hard on the clamp handle, something is wrong.
A dry fit should already look convincing.
The glue-up should not be the moment when you discover problems.
Step 5: Glue and Clamp the Board
Apply glue evenly to the mating surfaces.
Bring the strips together.
Tighten your clamps gradually, moving from one to another rather than crushing one area first.
Watch the top surface carefully.
Strips can creep upward under pressure.
If that happens, correct it while you still can.
You want firm, even pressure.
Not violence.
A little squeeze-out is normal.
A flood of glue mostly gives you more cleanup later.
Then leave the board alone.
This is one of those moments where doing nothing is part of doing the job well.
How to Keep the Glue-Up Flat
Glue-ups have a way of feeling calm right up until the adhesive starts spreading.
Then suddenly you’re watching the clock.
Preparation solves most of that.
Work on a Flat Surface
If your assembly table is twisted, it isn’t doing you any favors.
Check the surface before the glue comes out.
Position Clamps Thoughtfully
Clamps should apply pressure evenly across the joint line.
Depending on your setup, alternating clamps above and below the board can help balance forces.
Use Cauls When Helpful
Straight cauls can help hold strips in alignment during clamping.
Just make sure they don’t become glued permanently to the project.
A little preparation here can save a lot of flattening later.
Don’t Try to Clamp Bad Joints Into Submission
This is worth saying twice.
If a joint is bad dry, it is still bad when covered in glue.
Fix it first.
Step 6: Flatten the Glue-Up
Once the adhesive has cured according to the manufacturer’s guidance, remove the clamps and inspect the board.
Now the project begins to feel real.
Check it with a straightedge.
Look across the surface in several directions.
Depending on your tools, you might flatten the board with:
- a planer
- a drum sander
- a router sled
- a hand plane
- careful sanding for minor irregularities
The better the glue-up, the less work this stage requires.
That is why so much of cutting board woodworking is really about what happened earlier.
Step 7: Trim and Square the Board
Once the board is flat, establish the final shape.
Square the ends.
Trim away small defects.
Check the proportions.
This is one of those places where measurements should guide you, not trap you.
If cutting half an inch off one end suddenly makes the board look better, do it.
The dimensions you wrote down before the build are not sacred.
The board in front of you is the reality.
Step 8: Shape the Edges and Corners
Sharp edges can make an otherwise beautiful cutting board feel unfinished.
You don’t need anything elaborate.
A subtle roundover or chamfer can change the entire feel of the piece.
Possible details include:
- small roundovers
- softened corners
- chamfers
- finger grooves
- eased edges
The best edge treatment is often the one you barely notice.
You feel it more than you see it.
Should You Add a Juice Groove?
A juice groove is useful when the board will be used for carving meat, cutting fruit, or handling other foods that release a lot of liquid.
But it isn’t mandatory.
In fact, for general prep work, a completely flat surface may be easier to clean and more flexible to use.
If you do add a groove, wait until the board is flat and at its final size.
Don’t route decorative details into a blank that still needs major machining.
Step 9: Sand Until the Surface Is Actually Ready
This is the stage almost everyone wants to rush.
The board looks finished.
You can already picture the oil darkening the grain.
That anticipation is dangerous.
Sanding is where the difference between “pretty good” and “beautiful” often appears.
Start With the Grit the Surface Needs
Don’t begin with very coarse sandpaper unless the surface actually requires it.
But don’t try to remove deep machine marks with 220 grit either.
Choose a sensible starting point and move through a progression such as:
80 → 120 → 150 → 180 → 220
The exact sequence depends on the surface, species, and finish.
The principle stays the same:
Each grit removes the scratches left by the one before it.
Use Pencil Marks to Keep Yourself Honest
Lightly scribble pencil lines across the board before sanding.
As you work, the marks reveal where you’re actually removing material.
It’s a simple trick, but a useful one.
Without it, it’s easy to sand the obvious areas repeatedly while low spots stay untouched.
Step 10: Raise the Grain Before the Final Sanding
This tiny extra step pays off the first time the board gets wet.
Water can lift compressed wood fibers.
A board that felt glassy in the shop can feel slightly furry after its first wash.
Instead of waiting for the kitchen to reveal that, trigger it yourself.
Lightly dampen the board with clean water.
Let it dry completely.
Then sand the raised fibers gently with your final grit.
The result is a surface that stays smoother once the board enters real use.
Step 11: Apply a Food-Safe Cutting Board Finish
This is the moment people remember.
The board may have looked pale and dusty for hours.
Then the finish touches the surface.
Maple warms.
Walnut deepens.
Cherry becomes richer.
The pattern suddenly makes sense.
Food-Grade Mineral Oil
Food-grade mineral oil is widely used on wooden cutting boards.
It penetrates the wood rather than creating a hard film over the cutting surface.
Apply it according to the product instructions.
New wood may drink up far more than you expect.
Treat:
- the top
- the bottom
- the edges
- corners
- routed details
Don’t oil only the side that photographs well.
The entire board matters.
Beeswax and Cutting Board Conditioners
Many woodworkers follow mineral oil with a conditioner containing wax.
This can leave the board with a pleasing surface feel while adding another layer of moisture resistance.
Use products intended for cutting boards or food-contact wooden surfaces.
What Shouldn’t You Use to Oil a Cutting Board?
Edible doesn’t automatically mean appropriate.
It can be tempting to grab whatever cooking oil is already in the kitchen.
Some cooking oils can oxidize and become unpleasant over time.
A better approach is to use a finish specifically intended for cutting boards or butcher blocks.
When in doubt, follow the product’s intended use instead of improvising.
Step 12: Let the Board Rest Before You Use It
After hours of milling, gluing, sanding, and finishing, this is the point where impatience tends to return.
Don’t rush it.
Allow the finish to absorb, dry, or cure as the manufacturer recommends.
Wipe away excess if instructed.
Then leave the board alone.
When you come back to it, you’ll notice something.
It doesn’t look like pieces of wood anymore.
It looks like one thing.
That’s the moment the project changes.
Cutting Board Designs That Look More Expensive Than They Are
You don’t need complicated patterns to make a cutting board look sophisticated.
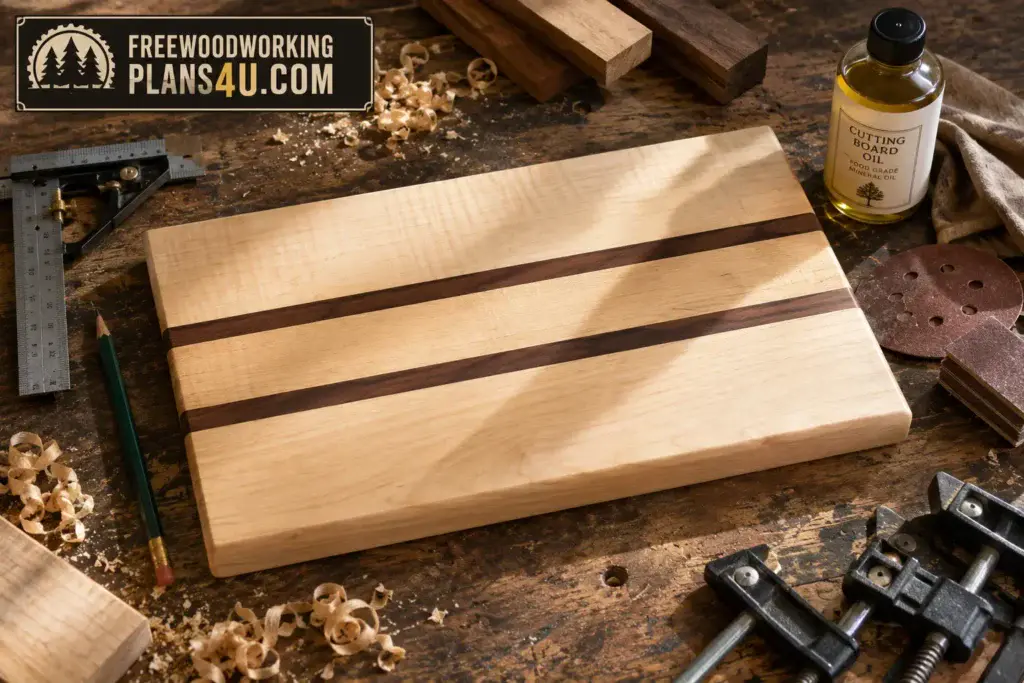
Often, the simpler the arrangement, the more important the proportions become.
Maple and Walnut
This is the classic contrast.
Maple gives you brightness.
Walnut gives you depth.
Try:
- one central walnut stripe
- two narrow walnut accents
- mirrored strips
- different strip widths
The material does most of the visual work for you.
Maple, Walnut, and Cherry
Three woods give you more range without forcing you into a complicated pattern.
A simple arrangement might use wide maple strips, narrow walnut accents, and medium cherry sections.
The variation in width matters almost as much as the color.
That’s what creates rhythm.
Asymmetrical Patterns
Not every board needs to be mirrored around the centerline.
An off-center group of dark accent strips can create a more contemporary look.
It also gives you more flexibility when you’re working with limited scraps.
Scrap-Wood Cutting Boards
Suitable hardwood offcuts are perfect for cutting boards.
That strip of walnut too narrow for a furniture part may suddenly be exactly what the design needs.
Just make sure the species is appropriate and the material is clean and known.
Recommended reading: Beginner Scrap Wood Projects: 15 Easy Builds Anyone Can Finish in a Weekend
Common Cutting Board Mistakes That Are Easy to Avoid
A cutting board is forgiving in some ways.
In others, it remembers everything.
Choosing Wood Because It Looks Pretty
Appearance matters.
Suitability comes first.
Use the right wood, then make it beautiful.
Milling Carelessly
Small inaccuracies multiply quickly.
One strip slightly out of square may not seem important.
Ten strips later, the problem is obvious.
Take your time here.
Skipping the Dry Fit
This saves almost no time.
It can cost plenty.
A dry fit lets you catch gaps, pattern problems, clamp issues, and alignment errors before glue starts the countdown.
Using Too Much Clamp Pressure
More pressure does not equal a stronger board.
You need enough pressure to close properly prepared joints.
Nothing more.
Rushing the Cure
The board will still be there tomorrow.
Let the adhesive reach the stage recommended by the manufacturer before machining or heavily stressing the glue-up.
Sanding Too Fast
Scratches have a nasty habit of hiding while the wood is dry and announcing themselves loudly once the finish goes on.
Inspect the surface under good light.
Change your viewing angle.
Run your hand across it.
Then inspect again.
Forgetting to Raise the Grain
It feels unnecessary right up until the first wash.
Do it before finishing.
You’ll notice the difference later.
Treating Only the Top
The bottom and edges are still wood.
They still react to moisture.
Finish the whole board.
Putting a Wooden Cutting Board in the Dishwasher
Don’t.
Dishwashers combine prolonged water exposure, heat, detergent, and rapid drying.
That is a miserable environment for a glued hardwood board.
Hand wash it instead.
How to Care for a Handmade Wooden Cutting Board
A handmade cutting board isn’t fragile.
It just needs to be treated like wood rather than plastic.
Wash It by Hand
Clean it promptly after use.
Avoid soaking it.
Don’t leave it sitting in a sink full of water.
Dry it thoroughly.
Whenever possible, allow air to reach both faces during drying.
Re-Oil It When the Wood Looks Dry
There isn’t a perfect schedule.
Climate, frequency of use, washing, wood species, and finish all influence how quickly the board dries out.
Watch the surface.
If it begins to look pale or dry, it may be time for another application of oil or conditioner.
Knife Marks Are Part of the Story
A cutting board that gets used will show wear.
That’s not failure.
It’s evidence that the object is doing its job.
If the surface eventually becomes rough or heavily marked, solid wood offers a wonderful advantage.
It can often be resurfaced.
Sand it carefully.
Refinish it.
Give it another life.
Can You Build a Cutting Board With Basic Tools?
Yes.
Especially if you start with surfaced lumber.
A basic setup may be enough:
- an appropriate saw
- measuring and marking tools
- clamps
- a sander
- suitable glue
- finishing supplies
The fewer milling tools you own, the more carefully you should select your lumber.
Flat, straight S4S hardwood can remove much of the early preparation work.
That isn’t taking a shortcut in the negative sense.
It’s matching the project to the shop you actually have.
How Long Does It Take to Make a Wooden Cutting Board?
The hands-on woodworking may take only several hours.
The full project usually stretches across multiple sessions because glue and finish need time.
A practical rhythm might look like this:
Session one: lumber preparation, cutting, pattern layout, glue-up.
Session two: flattening, trimming, edge work, sanding.
Session three: grain raising, final sanding, finishing.
Your actual timing will depend on tools, complexity, adhesive, finish, and experience.
Speed isn’t the useful measure here.
A cutting board may be used for years.
Another half hour spent sanding properly is a tiny investment.
How Much Does It Cost to Build a Cutting Board?
Cost varies dramatically depending on where you live and what you build.
The main factors include:
- hardwood species
- local lumber prices
- board size
- board thickness
- pattern complexity
- waste
- finishing supplies
Walnut usually costs more than many locally available hardwoods.
End-grain designs also tend to consume more material and create more offcuts.
For a first board, there’s no need to chase exotic species.
A clean maple cutting board with two walnut accents can look far better than an expensive board with sloppy glue lines.
Execution always shows.
How Do You Keep a Wooden Cutting Board From Warping?
You can’t make wood stop being wood.
It will always respond to moisture.
The goal is to reduce uneven movement.
Start with properly dried lumber.
Mill accurately.
Build sound joints.
Avoid making a very large board unnecessarily thin.
Finish the whole board.
Don’t soak it.
Don’t use the dishwasher.
Don’t leave one wet face trapped against a countertop.
The underlying issue is moisture imbalance.
When one side gains or loses moisture much faster than the other, movement can follow.
Good construction reduces the risk.
Good care continues that work.
Beginner Cutting Board vs. Advanced Cutting Board
If you’re building your first one, keep the design under control.
The urge to make something spectacular is understandable.
But a simple board built beautifully will teach you more than an ambitious board that becomes an exercise in damage control.
A strong first project might be:
Edge-grain maple with two walnut accent strips.
That teaches you nearly everything you need:
- wood selection
- milling
- ripping
- layout
- glue-up
- clamping
- flattening
- edge treatment
- sanding
- finishing
Then you can move on.
Add cherry.
Try asymmetry.
Build end grain.
Explore checkerboards and brick patterns.
Complexity becomes enjoyable once the fundamentals stop demanding all of your attention.
Woodworking Cutting Board FAQs
What’s the best wood if I’m making my first cutting board?
Hard maple is one of the safest places to start. It’s hard, durable, relatively tight-grained, and visually clean. Walnut, cherry, and beech are also common choices, especially when you want more variation in color.
How thick should I make it?
For many medium-sized edge-grain cutting boards, something around 1¼ to 1¾ inches thick can work well. Smaller boards can be thinner, while larger butcher-style boards may benefit from more thickness.
Can I use oak if that’s what I already have?
Oak is certainly hard, but its pronounced pore structure—especially in red oak—is why many woodworkers choose tighter-grained hardwoods such as maple instead.
What if I don’t own a planer?
You can still build a cutting board. Buy surfaced lumber, use hand planes, flatten with a router sled, use a drum sander, or combine other appropriate methods. Flat and square stock is the goal; the machine used to get there is secondary.
Should I build edge grain or end grain first?
Start with edge grain if you’re new to cutting boards. It teaches nearly all the important skills without adding the extra cutting and glue-up stages that end-grain construction requires.
What glue should I use?
Choose a woodworking adhesive appropriate for the moisture exposure and intended use of the project. Follow the manufacturer’s current directions for clamping and curing rather than relying on a universal rule.
How long should I leave the glue before working on the board again?
That depends on the adhesive, temperature, humidity, and the manufacturer’s instructions. Give the glue the time it needs. Saving a few hours isn’t worth compromising the project.
Can I use olive oil?
It’s better to use a product designed specifically for cutting boards or butcher blocks. Some cooking oils can oxidize and develop unpleasant odors over time.
Why did my cutting board feel rough after I washed it?
Water can raise the wood fibers. That’s why many woodworkers intentionally dampen the board after sanding, let it dry, and then sand lightly one final time before applying finish.
How can I reduce the chance of cracking?
Use suitable dry hardwood, make clean glue joints, avoid extreme moisture changes, don’t soak the board, keep it out of the dishwasher, let it dry properly, and maintain the finish.
Can I sand an old cutting board and make it look good again?
Often, yes. If the board is structurally sound and has enough thickness remaining, many solid hardwood cutting boards can be resurfaced, sanded, and refinished.
Is end grain really worth the extra work?
If you enjoy the process, absolutely. End-grain boards can be striking and offer a very different visual character. Just expect more cutting, more glue-ups, more flattening, and more sanding than with a basic edge-grain board.
Cutting Board Build Checklist
- Choose a suitable hardwood.
- Inspect the lumber for bow, twist, cracks, and defects.
- Mill the stock flat, straight, and square.
- Cut strips accurately.
- Arrange the pattern before gluing.
- Dry-fit every joint.
- Prepare clamps before applying glue.
- Apply even pressure during the glue-up.
- Allow the adhesive to cure properly.
- Flatten the glued panel.
- Trim the board to final dimensions.
- Ease or shape sharp edges.
- Sand through an appropriate grit sequence.
- Raise the grain.
- Perform the final light sanding.
- Remove dust thoroughly.
- Apply a finish intended for cutting boards.
- Treat the top, bottom, edges, and details.
- Allow the finish appropriate time before use.
Products / Tools / Resources
You don’t need a giant shop to build a good cutting board, but a few well-chosen tools make the process easier and more predictable.
Hard maple, walnut, cherry, or beech lumber: Start with dry, straight hardwood from a source you trust. If you don’t own milling machines, look for S4S lumber to reduce preparation work.
Quality woodworking clamps: Cutting boards need even clamping pressure across multiple joints. A small collection of dependable parallel clamps, bar clamps, or pipe clamps can be more useful than owning dozens of cheap clamps that flex under pressure.
Water-resistant woodworking glue: Choose an adhesive appropriate for kitchen projects and repeated moisture exposure, and follow the manufacturer’s current directions.
Random orbital sander: For most hobby shops, this is the workhorse of cutting board surface preparation. Pair it with a sensible range of sanding grits rather than trying to do everything with one disc.
Router and roundover bit: A subtle roundover can transform the way a cutting board feels in the hands without making the design look overly decorative.
Router flattening sled: Useful if you don’t own a planer or if you’re working with a board that cannot be flattened safely or conveniently with your existing equipment.
Food-grade mineral oil: A straightforward option for conditioning wooden cutting boards. Use a product specifically intended for cutting boards, butcher blocks, or similar food-contact surfaces.
Cutting board conditioner: Mineral-oil-and-wax conditioners can give the finished board a richer feel and make ongoing maintenance simple.
Moisture meter: Not essential for every beginner, but useful if you regularly buy rough hardwood or want more confidence that lumber is ready to be milled and glued.
Straightedge and reliable square: These aren’t exciting purchases, but they quietly affect almost every stage of the build. A flat board begins with knowing whether your material is actually flat.