
Walk into almost any woodworking shop and, at first glance, nothing looks unusual.
There’s the bench. The table saw. A rack of clamps on the wall. Chisels somewhere within reach. Maybe a miter saw station running along one side, a planer tucked under a counter, a bandsaw waiting quietly in the corner.
Everything feels normal.
Until you’re left-handed.
Then you start noticing the little things.
A vise sits on the side you wouldn’t naturally choose. A tape measure reads upside down from the angle you use most often. You reach across your body for the same pencil twenty times in an afternoon. Your hand throws a shadow over the line you’re trying to mark. A switch is accessible, technically, but never from the position where your body actually wants to stand.
None of these things seems dramatic on its own.
That’s precisely why they’re easy to ignore.
But woodworking is repetitive. A movement you perform once barely matters. A movement you repeat hundreds of times begins to shape how the entire shop feels.
A thoughtful woodworking shop setup for left-handed people removes that friction.
Not by turning every conventional workshop backward.
Not by pretending every machine needs a special left-handed version.
And definitely not by reversing safe operating procedures simply because your dominant hand happens to be your left.
The better approach is more intelligent than that.
You build the workshop around the intersection of four things:
your body, your tools, your material, and the way the work actually moves.
When those four start cooperating instead of fighting one another, the shop changes.
You stop noticing the room.
You just work.
What Actually Makes a Woodworking Shop Left-Handed?
A good left-handed woodworking shop is not a mirrored version of a conventional shop. It is a workshop where frequently used tools, storage, lighting, workholding, controls, and work zones support the woodworker’s natural movements without interfering with the safe operating requirements of the equipment.
That distinction matters.
Some parts of a workshop can absolutely be customized around handedness:
- workbench orientation,
- vise placement,
- tool storage,
- measuring stations,
- lighting,
- clamp storage,
- portable-tool positioning,
- dust-hose routing,
- and frequently used controls.
Other things are dictated by the machine itself.
Blade rotation does not care whether you write with your left hand.
Neither does cutter direction.
The same is true of guarding, fence geometry, kickback considerations, and manufacturer-specified feed directions.
So the guiding principle is simple:
Adapt the shop where adaptation helps. Respect the machine where mechanics decide the rules.
That’s the foundation of a truly effective left-handed woodworking shop setup.
Before You Move a Single Tool, Measure the Room Honestly
There’s a temptation when planning a workshop to start with the exciting decisions.
Where should the table saw go?
Should the workbench face the window?
Would the bandsaw fit beside the planer?
Those questions matter, but they come later.
First, measure the room.
Not approximately.
Actually measure it.
Record:
- wall lengths,
- ceiling height,
- door openings,
- window locations,
- stairs,
- posts,
- radiators,
- electrical panels,
- existing outlets,
- garage doors,
- permanent cabinets,
- heating equipment,
- and anything else that cannot easily move.
Then look at the space as something material has to travel through.
That changes everything.
Follow a Full Sheet of Plywood Through the Shop
Picture yourself bringing a sheet of plywood inside.
Can you get through the door comfortably?
Where do you set it down?
Can you move it toward the table saw without turning sideways around a cabinet?
Can the saw handle it without the sheet colliding with another machine?
Now imagine the opposite end of the process.
You’ve built a large bookcase.
Can it leave the room?
It sounds obvious until somebody finishes a project that barely clears the doorway.
A good woodworking shop layout begins with movement.
Storage comes second.
Step 1: Watch How You Actually Work
This is where generic workshop plans stop being useful.
You’re not designing for “a left-handed person.”
You’re designing for yourself.
Those are not always the same thing.
Some left-handed woodworkers use drills with their right hand. Some naturally position themselves on the same side of a machine as right-handed users. Others have spent decades adapting to right-handed layouts and now have habits that feel completely normal.
So pay attention.
Which Hand Does What?
Spend a little time observing yourself.
Which hand:
- holds your pencil?
- uses the marking knife?
- guides a drill?
- swings the mallet?
- pushes the hand plane?
- adjusts the clamp?
- reaches for the tape measure?
- steadies the workpiece?
- operates the machine control?
Even more important, notice where your body wants to stand.
Handedness isn’t only about the hand.
It affects stance, shoulder rotation, sight lines, reach, balance, and how you approach the work.
Find Your Natural Reach Zone
Stand at your bench.
Relax.
Now reach naturally with your left hand.
Don’t lean.
Don’t twist.
Don’t stretch.
That arc around your body is valuable real estate.
The tools you use constantly should live somewhere inside or near it.
Maybe that means:
- a square hanging slightly left of center,
- pencils in a shallow tray,
- a block plane on the bench shelf,
- chisels on the wall,
- a measuring tape clipped where your hand expects it.
These adjustments rarely look impressive in photographs.
But they’re exactly the kind of changes you feel after three hours in the shop.
Step 2: Stop Thinking in Machines and Start Thinking in Workflow
A workshop can contain every tool you want and still feel awkward.
The reason is usually flow.
Wood doesn’t stay in one place.
It moves.
From storage to rough cutting.
From rough cutting to milling.
From milling to joinery.
From joinery to assembly.
From assembly to sanding.
Eventually, if everything goes well, it becomes something worth carrying out the door.
That sequence should influence the room.
Lumber Storage
Raw material should ideally be reasonably close to the point where it enters the shop.
If every board you bring inside must travel through the entire room before reaching storage, you’re creating unnecessary work before the project has even started.
Separate storage where practical for:
- long boards,
- short boards,
- plywood,
- MDF,
- molding,
- dowels,
- hardwood offcuts,
- and scrap worth keeping.
The important thing is accessibility.
A lumber rack isn’t efficient if retrieving one board requires moving a small forest.
Milling
Your milling zone may include:
- jointer,
- planer,
- table saw,
- bandsaw,
- and miter saw.
These machines tend to share one problem:
long stock.
That means they need more space than their footprints suggest.
A machine only three feet long may require eight or ten feet of working clearance.
This is where overlapping work zones become incredibly useful.
The Bench and Joinery Area
This is often the heart of the shop.
It’s where the project slows down.
You measure.
Test.
Mark.
Plane.
Chisel.
Clamp.
Adjust.
Look at something for thirty seconds and decide it’s still not quite right.
Because so many hours happen here, the workbench deserves more ergonomic attention than almost anything else.
Assembly
Assembly space disappears fast.
A small cabinet suddenly needs clamps on four sides. A tabletop becomes twice as awkward once the base is attached.
If possible, leave access around more than one side of your assembly surface.
In compact shops, the assembly table may also serve as table-saw outfeed.
That’s fine.
A small workshop often works best when one surface does several jobs well.
Step 3: Make the Workbench Feel Like It Belongs to You
The workbench is where handedness becomes most personal.
Machines often dictate how you approach them.
A bench doesn’t.
You can shape it around your habits.
Where Should a Left-Handed Woodworker Put the Vise?
There’s no universal answer.
Traditional workbench arrangements often assume right-handed use, so reversing the vise can make perfect sense for some left-handed woodworkers.
But don’t install anything based only on tradition—or rebellion against tradition.
Test it.
Clamp a board.
Pretend you’re planing.
Pretend you’re sawing dovetails.
Reach for a chisel.
Position yourself for edge work.
Notice where your feet go.
Notice where your elbow travels.
Notice which end of the bench gives the workpiece better support.
Your body will usually answer the question faster than a diagram will.
Face Vise Placement
A face vise may be used for:
- edge planing,
- sawing,
- joinery,
- shaping,
- trimming,
- and general workholding.
Its location should support the direction in which you naturally work.
If you’re building a new bench, mock up the position first.
Even an empty box or a scrap block temporarily clamped to the bench can help.
Once the vise is bolted on and the bench has been built around it, moving it becomes considerably less charming.
Tail Vises, End Vises, and Bench Dogs
These systems are especially useful for holding boards flat across the benchtop.
Whether you need them depends on how you work.
A hand-tool furniture maker may use them constantly.
Someone building garage storage with power tools may hardly touch them.
Don’t add a feature merely because a “proper” bench is supposed to have one.
That’s how shops become museums of good intentions.
Build around the work you actually do.
Planing Stops and Holdfasts
Good workholding disappears into the process.
You place the board.
Secure it.
Work.
That’s it.
Bench dogs, holdfasts, vises, planing stops, clamps, and bench hooks should make that easier.
For a left-handed user, position the most frequently used workholding devices where they can be operated without repeatedly stepping around the bench or reaching awkwardly across your body.
Step 4: Give the Table Saw the Space It Really Needs
A table saw tends to dominate a workshop.
Not because of the machine itself.
Because of the invisible space around it.
Imagine a long corridor running straight through the saw.
Material enters.
It passes the blade.
It needs somewhere to go.
That corridor matters more than the saw’s footprint.
Infeed and Outfeed Come First
Long boards and sheet goods require uninterrupted space.
In small shops, this may mean positioning the saw so material can temporarily extend through an open doorway.
A workbench or assembly table can sometimes double as an outfeed surface, provided heights and safety considerations work properly.
Left-Handed Does Not Mean Reversing Table-Saw Safety
This point deserves emphasis.
Do not change correct table-saw technique merely to make the operation feel more left-handed.
Use the saw according to the manufacturer’s instructions.
Blade position, fence relationship, kickback risk, guarding, riving knives, push devices, and safe body position matter more than dominant-hand preference.
A left-handed woodworking shop should feel more natural.
It should never become less safe.
Keep Push Devices Within Reach
Push sticks and push blocks should live beside the saw.
Not somewhere you can technically find them.
Beside the saw.
The same goes for featherboards and other safety accessories.
Good shop design reduces the distance between knowing what you should do and actually doing it.
Don’t Hide the Stop Switch
The machine’s controls need to remain unobstructed.
A cabinet that looks wonderful but blocks emergency access is badly designed.
The same applies to:
- dust hoses,
- scrap bins,
- mobile carts,
- extension cords,
- and stacked lumber.
Safety controls should never be buried behind convenience.
Step 5: Make the Miter Saw Station Work With Your Measuring Habits
Miter saws are easy to position badly because the machine itself is relatively compact.
The material isn’t.
Long boards need support on both sides.
Permanent stations often solve this with extended countertops or wings.
Smaller shops can use:
- folding supports,
- removable extensions,
- roller stands,
- or mobile saw stands.
For a left-handed woodworker, the real opportunity is often in the workflow around the saw.
Where is the pencil?
Which hand pulls the tape?
Where do you naturally stand while aligning the mark?
Which side do you prefer for repeated measurements?
Stop Blocks Are Worth Their Weight in Frustration Saved
If you cut repeated pieces, a stop-block system can eliminate constant measuring.
Set the dimension.
Make the cuts.
No squinting at the tape every single time.
This improves both speed and consistency, regardless of handedness.
But placing the stop system where your natural measuring movement makes sense can make the station feel far more intuitive.
Step 6: Don’t Reverse Router Operations Just Because You’re Left-Handed
The router is one of the clearest examples of why a left-handed shop should never become a mirror-image exercise.
Feed direction is determined by cutter rotation and the operation being performed.
Not by handedness.
Always follow the manufacturer’s guidance for your router and router table.
That part is non-negotiable.
Everything around it, however, can still be optimized.
Router Table Controls
A remote or externally mounted switch can make a router table easier to control when permitted by the tool’s design.
Position controls where you can reach them comfortably without leaning toward the cutter.
Also consider:
- fence adjustment,
- featherboard access,
- bit-height adjustment,
- guard location,
- dust collection,
- and storage for router bits.
Handheld Routers
When buying or choosing a router, pay attention to:
- handle symmetry,
- switch position,
- plunge lock location,
- depth controls,
- visibility,
- balance,
- auxiliary handles,
- and dust ports.
A router doesn’t need to be marketed as “left-handed” to feel comfortable in your hands.
Often, ambidextrous design is better.
Step 7: Let the Jointer and Planer Share Space Intelligently
A jointer and planer can occupy huge amounts of imaginary floor space.
The machines aren’t huge.
The boards are.
Jointer Placement
A jointer needs a straight path for long material.
Boards enter one end and leave the other.
That makes it a good candidate for overlapping clearance with another machine, provided you’re not operating both at once.
The actual operation, including feed direction and safe stance, should always follow the machine manufacturer’s guidance.
Handedness does not override cutterhead mechanics.
Planer Placement
A planer is often easier to accommodate.
Put it on a mobile base.
Roll it into an open lane when needed.
Put it away when you’re finished.
This leads to one of the best rules for small woodworking shops:
Floor space should be earned.
If a machine runs once every two weeks, it probably doesn’t need permanent ownership of the center of the room.
Step 8: Give the Bandsaw and Drill Press Just Enough Room
Bandsaws and drill presses are often easier to tuck near walls than table saws or jointers.
That doesn’t mean they should be wedged into dead corners.
Bandsaw
Think about:
- blade visibility,
- lighting,
- control access,
- dust collection,
- workpiece support,
- and the direction longer stock might travel.
If you occasionally resaw long boards, placing the bandsaw near a doorway can buy you temporary clearance without sacrificing permanent floor space.
Drill Press
A drill press usually works well near a wall as long as larger pieces can still fit.
Store commonly used accessories nearby:
- drill bits,
- Forstner bits,
- countersinks,
- chuck keys where applicable,
- clamps,
- sanding drums,
- and layout tools.
You shouldn’t have to walk across the workshop for a clamp every time you drill a hole.
Step 9: Rebuild Tool Storage Around Reach, Not Appearance
There’s something deeply satisfying about a perfectly organized tool wall.
Until half the tools are in the wrong place.
Storage should begin with frequency of use.
Not symmetry.
Not photographs.
Not what somebody else hangs above their bench.
Primary Reach Zone
These are the tools you touch constantly.
Depending on your work, that may include:
- pencil,
- marking knife,
- combination square,
- tape measure,
- chisels,
- mallet,
- block plane,
- ruler,
- screwdrivers,
- and a few small clamps.
Put them where your left hand naturally goes.
Secondary Zone
Regularly used tools can live slightly farther away.
Drawers and wall cabinets are perfect here.
Occasional Tools
Specialty tools can move out of prime territory.
Higher shelves.
Lower drawers.
Cabinets farther from the bench.
If you only touch something twice a year, it doesn’t deserve the best parking space in the shop.
Why French Cleats Work So Well
French-cleat storage systems are useful because they allow your shop to evolve.
That matters.
The position that seems perfect on day one may become annoying six months later.
Move the holder.
Problem solved.
No rebuilding required.
Left-Handed Hand Tools: Which Ones Actually Matter?
Many hand tools are naturally ambidextrous.
Others become left-handed mainly because of how they interact with your body and workholding.
Hand Planes
Most conventional bench planes can be used from either side.
The real difference is often:
- stance,
- planing direction,
- vise location,
- board orientation,
- and where other tools sit while you work.
That’s why a left-handed bench setup often matters more than a left-handed plane.
Hand Saws
Many saws can be used with either hand, but handle shape may feel better in one orientation than another.
If possible, hold the saw before buying.
A handle that fits your hand well is worth far more than a label.
Chisels
Chisels themselves are generally neutral.
The difference comes from workholding.
Your preferred angle of approach may change how you want the board clamped.
Marking Knives
Some marking knives are single-bevel.
That can favor particular cutting orientations.
Double-bevel and spear-point designs can be more flexible for users who work from either direction.
Tape Measures
This sounds minor until you use the same tape fifty times in a day.
Certain models offer markings that are easier to read from multiple orientations.
If your normal measuring motion leaves the numbers upside down every time, changing the tape may be one of the cheapest ergonomic wins in your shop.
Learn more: The Left-Handed Woodworker’s Tool Guide — What Actually Matters Before You Buy
Choosing Power Tools as a Left-Handed Woodworker
When shopping for tools, ignore the temptation to ask only:
“Is this left-handed?”
Ask instead:
Can I operate every important control comfortably and safely?
That’s the real question.
Circular Saws
Circular saws come with different blade orientations.
For a left-handed user, one style may offer a cleaner sight line than another.
Evaluate:
- blade visibility,
- balance,
- trigger position,
- dust discharge,
- handle comfort,
- and where your body naturally sits relative to the cut.
Don’t assume one blade side is universally best.
Try the tool if you can.
Drills and Drivers
Most drills and impact drivers are fairly neutral.
Still, check:
- forward/reverse switches,
- belt clips,
- auxiliary handles,
- trigger comfort,
- and battery clearance.
Tiny control differences become noticeable when you use the tool all day.
Jigsaws
Look for a clear view of the blade and cut line.
Also pay attention to:
- switch position,
- handle shape,
- orbital controls,
- dust clearing,
- and overall balance.
Sanders
Sanders are usually easy to use with either hand.
The annoying part is often the hose.
If a dust hose keeps dragging across your left arm or elbow, reroute it from above or from the opposite side.
That one adjustment can make the tool feel completely different.
Routers
Routers deserve closer inspection because control layout varies considerably.
Look at:
- handles,
- plunge mechanisms,
- power switch,
- speed controls,
- depth adjustment,
- dust extraction,
- and visibility.
A powerful router that makes you twist your wrist awkwardly is not the better tool.
Recommended reading: Woodworking Power Equipment Mastery: Build a Professional Workshop Without Buying the Wrong Tools
Dust Collection Should Stay Out of Your Way
Dust collection is wonderful when it disappears into the background.
It’s miserable when the hose becomes another obstacle you’re wrestling.
Plan the system alongside the workshop layout.
Main Duct Routing
Where practical, run main ducts:
- along walls,
- overhead,
- or through fixed areas that keep them out of traffic.
Then branch toward individual machines.
Watch Your Dominant Side
For left-handed users, pay close attention to flexible hoses connected to handheld sanders and routers.
If the hose constantly passes behind your left arm, try suspending it overhead or bringing it in from the opposite side.
The goal is simple:
The dust system should follow your movements.
You should not have to work around it.
Blast Gates
Put blast gates somewhere reachable.
Not behind the planer.
Not underneath a cabinet where you have to kneel.
If a system is awkward to use, eventually you’ll stop using it properly.
Electrical Layout: Put Power Where the Work Happens
A workshop full of extension cords feels temporary forever.
Permanent or intelligently placed outlets can dramatically improve workflow.
Think about power near:
- the workbench,
- stationary machines,
- charging stations,
- assembly areas,
- overhead tool locations,
- and mobile equipment.
Electrical installation should comply with applicable codes and be performed by a qualified professional where required.
Controls Matter Too
Handedness becomes relevant if you repeatedly reach across your body to start or stop something.
When the equipment allows safe external control placement, position controls for convenient access.
But never bypass or modify manufacturer safety systems simply to make the layout feel more convenient.
Lighting: The Left-Handed Problem Nobody Notices Until the Shadow Appears
You draw a pencil line.
Your hand moves over it.
The line disappears into shadow.
You lean sideways.
There it is again.
That small annoyance is a lighting problem, not a woodworking problem.
Start With Good Ambient Light
Broad overhead lighting reduces harsh shadows and dark corners.
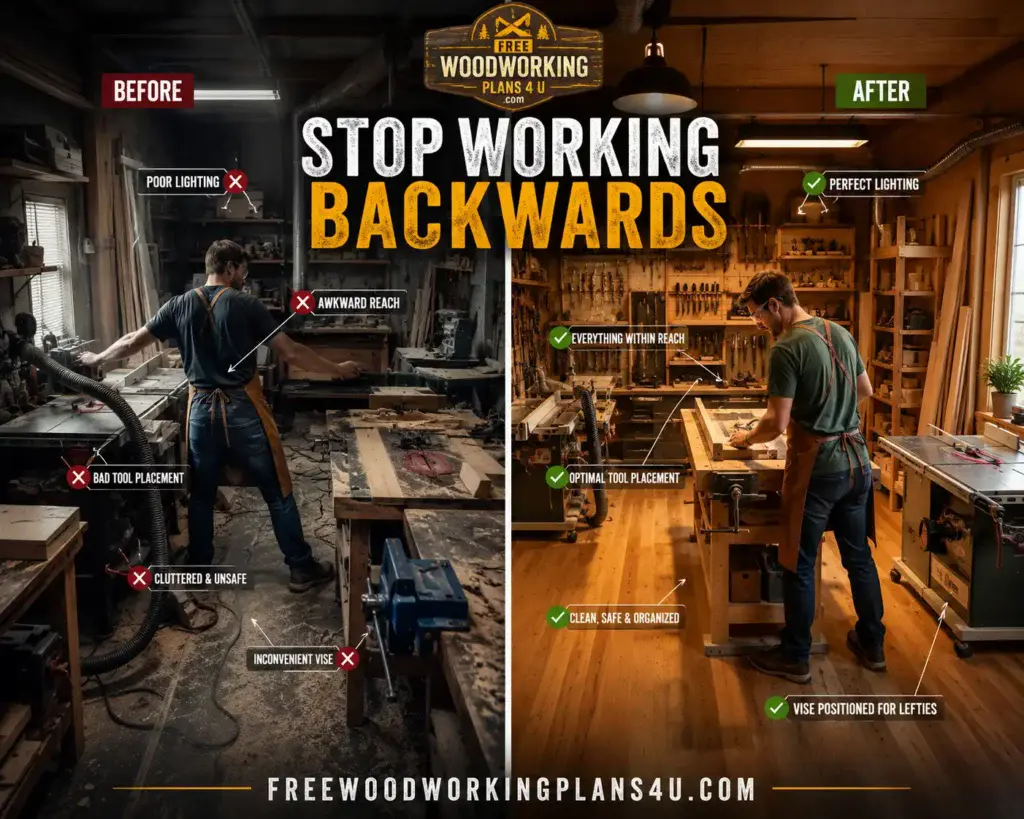
But detailed work needs more.
Add Task Lighting
Good places include:
- workbench,
- sharpening station,
- drill press,
- bandsaw,
- scroll saw,
- router station,
- and assembly area.
At a left-handed bench, try positioning the task light so illumination reaches the work from the opposite side of your dominant hand.
You’re trying to prevent your hand and forearm from becoming the lampshade.
Safety Has to Fit the Woodworker Too
Good safety systems are convenient by design.
If your eye protection is across the shop, eventually there will be a moment when you tell yourself you’re making “just one quick cut.”
Don’t create that moment.
Keep PPE Close
Give safety equipment a permanent home:
- safety glasses,
- hearing protection,
- respirators,
- dust masks,
- face shields,
- and any task-specific protection you use.
Put it close to where work begins.
Know Where the Stop Controls Are
You should know exactly how every machine shuts down before you turn it on.
Keep those controls clear.
No clamps hanging over them.
No carts parked in front.
No dust hoses draped across them.
Fire Safety
Woodworking shops contain a combination of:
- sawdust,
- electrical equipment,
- finishing products,
- solvents,
- oily rags,
- and combustible material.
Follow local fire-safety requirements and manufacturer instructions for storage and disposal.
Oil-soaked rags deserve particular care because certain finishes can create a combustion hazard when handled incorrectly.
Keep the Floor Boring
A workshop floor should be uneventful.
No loops of extension cord.
No offcut pile behind your heel.
No dust hose across the walking path.
No clamp waiting to catch your boot.
A clear floor isn’t visually exciting.
That’s the point.
Recommended reading: Build a Safer Workshop: The Ultimate Beginner-to-Pro Woodworking Safety Equipment Roadmap
Left-Handed Workshop Layout Ideas for Different Shop Sizes
Every room imposes its own limits, but certain strategies work especially well at different scales.
8 × 10-Foot Micro Shop
In a very small shop, flexibility is more valuable than permanence.
Use:
- mobile bases,
- benchtop machinery,
- flip-top stands,
- folding work surfaces,
- vertical storage,
- wall-mounted cabinets,
- and a movable bench where practical.
The center of the room becomes shared space.
One machine uses it.
Then another.
Then assembly takes over.
For left-handed woodworking, keep the bench zone intentionally arranged around your dominant-side reach while leaving the rest of the room flexible.
12 × 16-Foot Shed Shop
Now you can begin separating work into zones.
A simple flow might be:
lumber storage → milling → cutting → bench → assembly
Try to place the bench where lighting works in your favor.
Use shared clearance lanes for machines handling long stock.
One-Car Garage Shop
The garage door is an asset.
Open it and suddenly long boards have somewhere to go.
Mobile machines work particularly well here.
A central bench can double as:
- assembly surface,
- table-saw outfeed,
- router station,
- and general worktable.
Wall space becomes storage.
Floor space stays flexible.
Two-Car Garage Shop
This size allows more separation.
You might keep milling machinery on one side and dedicate the other to:
- bench work,
- assembly,
- tool storage,
- joinery,
- and finishing preparation.
With more space available, you can stop asking “Where will this machine fit?” and start asking “Where should this operation happen?”
That’s a much better question.
What If a Right-Handed Person Uses the Shop Too?
Then the goal changes.
You’re no longer building a purely left-handed workshop.
You’re building a flexible one.
That can be even better.
Use Neutral Machine Positions
Whenever possible, give machines access from more than one side.
Keep Workstations Mobile
A rolling bench, assembly table, or tool cart can adapt to different users.
Use Modular Storage
French-cleat systems, movable drawer units, and rolling carts make frequently used tools easier to relocate.
Favor Ambidextrous Controls
When two people share equipment, machines with accessible controls from multiple positions become especially valuable.
The shop doesn’t have to choose a side.
It can simply stop forcing either person into an awkward one.
15 Left-Handed Workshop Setup Mistakes That Quietly Make Everything Harder
Some shop problems are obvious.
Others become part of the background until you finally remove them and wonder why you tolerated them for so long.
1. Mirroring the Entire Workshop
Some things can be reversed.
Machine mechanics cannot.
2. Ignoring Cutter Rotation
Router bits, saw blades, jointers, and similar tools operate according to mechanical rules.
Hand preference does not change them.
3. Installing the Vise Without Testing It
Spend ten minutes pretending to work before drilling permanent holes.
You may save yourself hours later.
4. Keeping Everyday Tools on the Wrong Side
You shouldn’t need a cross-body reach every time you want your square.
5. Designing Around Machines Instead of Material
Follow the wood.
That usually reveals the right layout.
6. Forgetting Long Stock
Measure the board, not just the machine.
7. Letting Your Hand Block the Light
Move the light.
It’s easier than learning to see through your wrist.
8. Routing Hoses Across Your Left Arm
Dust collection should disappear from attention, not demand it.
9. Blocking Controls
Never trade safety access for prettier storage.
10. Making Everything Permanent
Your workshop will change.
Let it.
11. Giving Rarely Used Tools the Best Storage
Prime space is for daily tools.
12. Forgetting Assembly Room
Projects grow.
Leave somewhere for that to happen.
13. Buying a Tool Because It Says “Left-Handed”
Comfort, visibility, control, and safe operation matter more than marketing.
14. Copying Somebody Else’s Workshop Exactly
Their workflow is not yours.
Neither is their body.
15. Skipping the Mockup Stage
A strip of painter’s tape costs almost nothing.
Moving a 300-pound machine twice is less charming.
Test Your Workshop Before You Build It
This is one of the simplest things you can do.
Tape the workshop onto the floor.
Use painter’s tape to mark footprints for:
- workbench,
- table saw,
- jointer,
- planer,
- bandsaw,
- drill press,
- assembly table,
- cabinets,
- lumber racks,
- and walking paths.
Then walk through the imaginary room.
Carry an Invisible Board
Start at lumber storage.
Bring the board to the jointer.
Then planer.
Then saw.
Then bench.
Does anything get in the way?
Can you turn?
Do you have enough outfeed room?
You can discover an astonishing number of layout problems without moving anything heavier than a roll of tape.
Pretend to Work at the Bench
Stand where the bench will be.
Reach for a square.
Pretend to mark a board.
Clamp it.
Plane it.
Chisel it.
Where does your arm naturally travel?
What does your body want to do?
This may sound silly.
It is also extraordinarily useful.
Left-Handed Woodworking Shop Setup Checklist
Before you consider the workshop finished, run through the basics.
Layout and Workflow
- Can lumber enter without awkward maneuvering?
- Can finished projects leave?
- Does material move logically between operations?
- Are long-stock clearance paths available?
- Are walking paths clear?
Workbench
- Does the vise placement feel natural?
- Can you plane and saw comfortably?
- Are frequently used tools within easy reach?
- Is task lighting positioned well?
- Are clamps and workholding easy to access?
Machinery
- Are manufacturer-prescribed operating directions maintained?
- Are safety controls accessible?
- Is there enough infeed and outfeed room?
- Are guards and safety devices unobstructed?
- Are push sticks and push blocks nearby?
Hand Tools
- Do daily tools live near the bench?
- Are measuring and marking tools easy to grab?
- Are specialty tools stored out of prime space?
Storage
- Can you get to lumber easily?
- Is scrap under control?
- Can storage change as your shop evolves?
- Is floor space being used for work rather than clutter?
Electrical
- Are outlets where they’re needed?
- Are extension cords kept away from walking paths?
- Are machine electrical requirements properly supported?
- Are controls accessible?
Lighting
- Is general lighting even?
- Do detailed work areas have task lighting?
- Does your left hand block the light during marking or cutting?
Dust Collection
- Do hoses stay away from natural movements?
- Are blast gates easy to reach?
- Can mobile machines connect without dragging hoses everywhere?
- Are ducts and cords out of traffic zones?
Safety
- Is PPE close at hand?
- Can every machine be stopped quickly?
- Are exit paths clear?
- Are finishes and combustible materials stored appropriately?
- Is the floor free from trip hazards?
Already Have a Shop? You Probably Don’t Need to Rebuild It
If your workshop already exists, don’t assume you need a complete redesign.
Start with the annoyances.
Those are your clues.
Move the Tools You Reach for Most
Pay attention for several days.
Every time you reach awkwardly across yourself, notice it.
Then move the tool.
Sometimes a workshop can feel dramatically better after changing the location of six objects.
Fix the Light
If your hand repeatedly casts a shadow across layout lines, adjust the task light.
Cheap.
Fast.
Useful every day.
Reconsider Workholding
You may not need to move the entire vise.
A bench hook, removable fixture, auxiliary clamp, or alternate workholding setup may solve the issue.
Get the Hoses Out of Your Way
Reroute dust hoses and cords that interfere with your left arm or preferred standing position.
Only Move Heavy Machines When There’s a Real Reason
Don’t relocate equipment simply because a theoretical diagram says it belongs somewhere else.
If the machine works comfortably and safely where it is, leave it alone.
A smarter workshop is not one where everything moved.
It’s one where the friction did.
Questions Left-Handed Woodworkers Actually Ask
“Do I really need a different workshop because I’m left-handed?”
Not an entirely different workshop.
What you need is a workshop that recognizes how you naturally move.
That may mean different tool storage, bench orientation, vise placement, task lighting, and control access.
Most machines themselves can still be used by left-handed woodworkers when operated according to their intended safety procedures.
“Should I just mirror a normal woodworking shop?”
No.
That’s one of the easiest mistakes to make.
Some ergonomic choices can be mirrored.
Machine operation generally cannot.
Feed direction, blade rotation, guarding, and cutter mechanics must remain correct regardless of dominant hand.
“Which side should my vise go on?”
Whichever side supports your actual planing, sawing, chiseling, and clamping habits.
Test both positions before installing anything permanently.
Your body will give you a more useful answer than tradition.
“Are table saws safe for left-handed people?”
They can be used by left-handed woodworkers when the specific saw is operated according to the manufacturer’s safety instructions and appropriate procedures are followed.
Handedness does not eliminate the need for correct body position, guards, riving knives, push devices, and awareness of kickback risk.
“Do I need special left-handed woodworking tools?”
Usually, no.
Many woodworking tools are naturally ambidextrous.
Where differences matter, look for accessible switches, symmetrical grips, reversible handles, good sight lines, and controls you can reach comfortably.
Some specialty measuring or marking tools may also be available in layouts more convenient for left-handed users.
“Is there such a thing as a left-handed workbench?”
Not in the sense that every left-handed person requires one specific design.
A conventional bench can often be adapted through vise placement, workholding, tool storage, lighting, and orientation.
The important thing is that the bench supports your movement.
“Does router feed direction change because I’m left-handed?”
No.
Correct router feed direction depends on cutter rotation and the specific operation.
Follow the router manufacturer’s instructions.
This is one area where handedness should not influence the fundamental mechanics.
“What’s the cheapest way to make my current shop more left-handed?”
Start with the things you touch and notice most:
- move frequently used tools,
- reposition task lighting,
- rearrange portable workholding,
- reroute hoses,
- clear your dominant-side movement zone,
- and relocate small controls or accessories where safely possible.
Most of these improvements cost little or nothing.
“What if my partner is right-handed?”
Aim for flexibility.
Keep machines approachable from multiple positions.
Use mobile workstations.
Choose modular storage.
Favor controls that can be reached comfortably by either person.
The best shared workshop isn’t left-handed or right-handed.
It’s adaptable.
Products / Tools / Resources
You don’t need to buy a workshop full of specialty gear just because you’re left-handed. In most cases, a few carefully chosen tools and accessories make a much bigger difference than replacing equipment that already works.
Ambidextrous Tape Measure
Look for a tape with markings that remain easy to read from multiple working positions. It sounds minor until you stop turning the tape upside down fifty times a day.
Double-Bevel or Spear-Point Marking Knife
A marking knife that works cleanly from either side is especially useful for layout work, joinery, and transferring lines against a square.
Large Paddle-Style Machine Switches
Where compatible with the equipment and manufacturer requirements, large accessible switches can make stationary tools easier to stop without hunting for a small button.
Mobile Machine Bases
A planer, bandsaw, jointer, or other occasional-use machine often becomes much easier to live with once it can move.
This is especially valuable in one-car garages and compact workshops.
French-Cleat Storage
Few storage systems are as forgiving.
Hang a holder.
Use it for a month.
If it turns out to be in exactly the wrong place for your left-handed reach, move it in thirty seconds.
Adjustable Task Lighting
A movable bench lamp or machine light can eliminate the shadow your dominant hand throws across layout marks and cut lines.
Choose something easy to reposition rather than relying entirely on overhead lighting.
Overhead Dust-Hose Supports
For sanders and routers, bringing the hose down from above can keep it from dragging over your left wrist, elbow, or shoulder.
Push Sticks and Push Blocks
Keep appropriate push devices close to machines where they’re required.
Convenience is part of safety. If the push block is hanging beside the saw, using it becomes automatic.
Bench Holdfasts and Flexible Workholding
Holdfasts, bench dogs, removable stops, and clamps allow you to secure work where it feels comfortable without permanently redesigning the entire bench.
Painter’s Tape
Possibly the cheapest workshop-layout tool you’ll ever buy.
Use it to mark machine footprints, benches, cabinets, and walking lanes before drilling holes, bolting down equipment, or building permanent storage.
A few meters of tape can prevent a surprising amount of regret.