
A dining chair is one of those projects that looks almost suspiciously simple.
Four legs. A seat. A back. A few rails tying everything together.
Then you try to build one.
That is when the chair starts revealing its secrets.
A backrest that stands just a little too upright feels stiff after ten minutes. A seat that reaches too far forward presses behind your knees. One tiny inconsistency in the leg geometry leaves the whole thing rocking against the floor. A joint that looked perfectly respectable on the workbench can slowly loosen after months of people sitting down, leaning sideways, dragging the chair across the room, and tipping back during conversation.
Chairs live a harder life than they appear to.
That is also what makes building one so satisfying.
A good dining chair is not merely a collection of attractive wooden parts. It is a small piece of engineering shaped around the human body. It has to carry weight, tolerate movement, feel comfortable through a long meal, survive years of use, and still look graceful enough to belong beside a dining table.
These dining chair woodworking plans are built around that reality.
The goal is not to rush through a pile of measurements and end up with something vaguely chair-shaped. The goal is to understand why the parts are sized the way they are, why certain joints matter, how comfort is built into the geometry, and how to make one chair successfully before turning it into a full dining set.
If you can build one chair that feels right beneath you, the rest of the project changes completely.
You are no longer guessing.
You have a pattern.
Dining Chair Woodworking Plans: The Project at a Glance
Before lumber starts hitting blades, it helps to know what kind of project you are getting into.
| Project Detail | Recommendation |
|---|---|
| Skill level | Intermediate beginner to intermediate |
| Primary material | Hardwood |
| Suggested woods | Oak, maple, ash, cherry, or walnut |
| Approximate seat height | 17–19 inches |
| Approximate seat width | 17–20 inches |
| Approximate seat depth | 16–18 inches |
| Overall height | Roughly 32–38 inches |
| Primary joinery | Mortise and tenon, loose tenons, or dowels |
| Seat | Solid wood or upholstered |
| Finish | Durable furniture-grade finish |
| Best first move | Build one prototype before making a set |
Those dimensions are not commandments carved into stone.
Your dining table matters. So does the thickness of the seat, the shape of the backrest, the proportions of the person sitting in it, and the overall style of the chair.
But there is one recommendation worth taking seriously from the start:
Build one chair first.
Not six.
Not eight.
One.
Sit in it. Slide it under your table. Lean against the back. Notice where your legs fall. Look at it from across the room.
Only then should you decide whether you want several more exactly like it.
What Actually Makes a Dining Chair Good?
A successful chair has to satisfy several demands at once.
It must support weight safely. It must resist twisting. It should sit firmly on the floor without rocking. The seat needs to feel comfortable. The backrest has to support the body without pushing it unnaturally forward. The proportions have to make sense beside the table.
And none of those requirements exist in isolation.
A chair that is massively overbuilt may be strong, but it can also feel clumsy and look heavy. A delicate chair may look elegant, yet leave too little material around critical joints.
The best designs live somewhere between those extremes.
They feel visually light without being structurally timid.
A chair deals with forces a shelf never sees
A bookshelf lives an easy life by comparison.
Most of its load moves downward.
A dining chair is constantly being tested from different directions. Someone drops into it. Someone leans back. Someone shifts sideways. A child climbs onto one edge. Another person scoots the chair across the floor without standing up.
The joints experience compression, tension, leverage, and racking.
That is why furniture-making fundamentals matter so much here.
Straight grain. Accurate joinery. Sensible proportions. Good glue surfaces. Careful assembly.
Those quiet decisions inside the structure are what make the finished chair feel solid.
Recommended reading: Woodworking Chair Joinery Techniques: The Complete Guide to Building Chairs That Never Loosen (Every Joint Compared)
Start With the Body: Dining Chair Dimensions and Ergonomics
Before deciding how wide a tenon should be, think about the person who will eventually sit in the chair.
This is where a lot of homemade furniture goes wrong.
The builder focuses on the wood, the joinery, the finish, the grain. All important.
But the human body notices dimensions long before it notices craftsmanship.
An inch can matter.
Sometimes half an inch matters.
Dining Chair Seat Height
Most dining chair seats fall somewhere around 17 to 19 inches from the floor.
Roughly 18 inches is a sensible starting point for many designs.
Still, measure your dining table before committing to anything.
The chair and table work as a pair. There should be enough room between the seat and the underside of the table for the sitter’s thighs and knees.
A useful planning range is roughly 10 to 12 inches of vertical clearance between the seat surface and the functional underside of the table.
Too little clearance feels cramped.
Too much can make the chair feel low and awkward.
Build for the table you actually own.
Dining Chair Seat Width
A seat around 17 to 20 inches wide works well for many armless dining chairs.
Wider is not automatically better.
A chair can become oversized surprisingly quickly, especially once six or eight of them surround a table.
The aim is enough room to sit naturally without giving every dining chair the footprint of a lounge chair.
Dining Chair Seat Depth
A good starting range is approximately 16 to 18 inches.
A shallow seat can feel like it is not supporting enough of the legs.
Go too deep, though, and shorter users may not be able to sit against the backrest without the front edge pressing into the backs of their knees.
This is one of those measurements that looks harmless on paper and becomes obvious the moment you sit down.
Dining Chair Backrest Angle
A perfectly upright chair back often looks tidy.
It does not always feel tidy.
A small rearward lean can dramatically improve comfort while still keeping the chair appropriate for dining rather than lounging.
That angle can come from several places:
- angled rear legs,
- angled backrest joinery,
- curved back rails,
- shaped back components,
- or a combination of those features.
There is no single magic number that guarantees comfort.
The backrest angle works together with seat depth, seat angle, lumbar position, back shape, and the height of the sitter.
This is why testing the prototype matters more than chasing a theoretically perfect angle.
A Practical Dining Chair Size to Build Around
For a simple armless dining chair, these dimensions provide a workable starting framework:
- Overall width: 18–20 inches
- Overall depth: 20–23 inches
- Seat width: approximately 18 inches
- Seat depth: approximately 17 inches
- Seat height: approximately 18 inches
- Overall height: approximately 34–36 inches
Use them to establish proportions, not as an excuse to stop thinking.
Your final measurements depend on stock thickness, joinery, backrest style, seat construction, and the visual language of the chair.
And there is another distinction worth making early:
Finished chair dimensions are not the same thing as component dimensions.
A rail may extend into a leg because of its tenon. A solid seat may overhang the frame. Rear legs can continue upward and become part of the backrest. Angled components change the geometry in ways that are not obvious from a simple front view.
Design the chair as a finished object first.
Then work backward into the individual parts.
Choosing Wood That Belongs in a Chair
Dining chairs reward good lumber.
The wood must do more than look attractive. It needs to machine cleanly, hold strong joints, tolerate repeated stress, and wear gracefully.
Several hardwoods fit the job particularly well.
Oak
Oak has everything going for it: strength, availability, durability, and unmistakable grain.
White oak, in particular, can look exceptional in dining furniture.
Its visible grain also means board selection matters. Two pieces cut to the same dimensions can look completely different depending on how the grain runs.
Hard Maple
Hard maple feels dense and serious in the hand.
It is strong, durable, and visually restrained, which makes it especially appealing in clean contemporary furniture.
The trade-off is hardness.
Sharp cutters and careful setup make the work much more pleasant.
Ash
Ash offers a beautiful middle ground.
It is strong and tough, yet generally pleasant to work. Its grain is pronounced enough to give the chair character without visually dominating the design.
For practical furniture, it is a very capable choice.
Cherry
Cherry has a warmth that becomes richer with age.
It machines beautifully, finishes elegantly, and suits furniture meant to live indoors for decades.
A cherry chair can look lovely on day one and even better years later.
Walnut
Walnut brings instant depth and elegance.
Even simple shapes can feel refined when made from well-selected walnut.
The obvious drawback is price.
A complete dining set can consume a surprising amount of material, particularly if rear legs require wide blanks.
What About Pine?
Yes, you can build a dining chair from pine.
There is nothing inherently wrong with that.
Pine is affordable, easy to find, and friendly to work.
It is also softer than the hardwoods typically used for long-lived chairs. It dents more easily, and certain high-stress joints may benefit from more generous dimensions.
Pine makes sense for:
- prototypes,
- rustic furniture,
- practice builds,
- budget projects,
- and lightweight designs.
For a chair set intended to survive decades of daily use, hardwood is usually the safer starting point.
Grain Direction Can Make or Break a Chair Part
A beautiful piece of wood can still become a poor chair component.
Imagine laying out a curved rear leg on a wide board.
The shape fits perfectly.
You cut it out, refine the curve, and stand back to admire it.
Then you notice the grain slicing diagonally across the narrowest part of the leg.
That is not merely cosmetic.
Wood is much stronger when the grain follows the shape of the component.
This becomes especially important in:
- rear chair legs,
- curved back components,
- thin rails,
- stretchers,
- and other highly stressed parts.
Move templates around the board before cutting.
Watch the grain.
Sometimes sacrificing a little more lumber produces a dramatically better component.
Saving wood is satisfying.
Building a chair leg that stays intact is more satisfying.
Tools You’ll Need to Build the Chair
The tool list can be surprisingly flexible.
You do not need a commercial furniture shop.
You do need a way to work accurately.
Measuring and Layout Tools
Useful basics include:
- tape measure,
- combination square,
- marking gauge,
- marking knife or sharp pencil,
- bevel gauge,
- straightedge,
- and reliable clamps.
Chair construction magnifies small errors.
A discrepancy that seems meaningless on one component can become obvious after four legs and several rails come together.
Cutting and Milling Tools
Depending on your design and the lumber you buy, you may use:
- table saw,
- miter saw,
- circular saw with a guide,
- bandsaw,
- jigsaw,
- jointer,
- planer,
- router,
- hand planes,
- and chisels.
You do not need every one of these.
Buy surfaced lumber and you may not need a jointer or planer.
Choose straight rear legs and the bandsaw becomes less important.
The smartest project is often the one designed around the tools already in your shop.
Joinery Tools
The joint dictates the tooling.
Depending on your approach, that might mean:
- chisels,
- router and jig,
- mortising machine,
- doweling jig,
- loose-tenon system,
- drill and bits,
- or traditional hand tools.
Pick the joinery first.
Then choose the simplest accurate way to make it.
Learn the Chair’s Anatomy Before Cutting Parts
It helps to know what every piece is doing.
Front Legs
Usually straightforward and mostly responsible for supporting the front of the seat structure.
Rear Legs
Often more complex.
Rear legs may angle backward and continue all the way into the backrest, making them both structural and visual components.
Side Aprons or Seat Rails
These connect the front and rear legs along each side and create part of the structural frame beneath the seat.
Front and Rear Rails
These tie the side assemblies together and complete the main seat frame.
Stretchers
Stretchers connect the legs lower down.
They are not mandatory in every design, but they can add useful resistance against racking.
Back Rails or Slats
These form the backrest and can be straight, curved, vertical, horizontal, sculpted, or upholstered.
Seat
The seat may be:
- solid hardwood,
- plywood and upholstery,
- laminated,
- woven,
- or assembled from several boards.
Once those roles are clear, the build sequence starts making more sense.
Build a Cut List Before You Build a Chair
There is no honest universal cut list for every dining chair.
The exact dimensions depend too heavily on your design.
Instead, create a project-specific schedule like this:
| Component | Quantity | Rough Size | Final Size | Joinery | Notes |
| Front legs | 2 | Oversized | Final dimension | Mortises/other | Match grain |
| Rear legs | 2 | Oversized | Template size | Mortises/other | Watch grain direction |
| Side rails | 2 | Oversized | Final dimension | Tenons/other | Match pair |
| Front rail | 1 | Oversized | Final dimension | Tenons/other | Reference face |
| Rear rail | 1 | Oversized | Final dimension | Tenons/other | Check back geometry |
| Stretchers | As needed | Oversized | Final dimension | Design dependent | Optional |
| Back components | Design dependent | Oversized | Template size | Design dependent | Test comfort |
| Seat | 1 assembly | Oversized | Final dimension | Attachment hardware | Allow movement |
Keep parts slightly oversized during early milling when you can.
Extra material is freedom.
Once the cut has been made, that freedom disappears.
Step 1: Mill the Lumber Without Rushing It
Accuracy starts here.
If you are working with rough lumber, establish:
- one flat reference face,
- one square reference edge,
- consistent thickness,
- consistent width where needed,
- and sensible rough lengths.
Do not machine each component independently as though it has nothing to do with the others.
Pair matching pieces.
Mill groups together.
If two side rails need to be identical, treat them like twins from the beginning.
Give rough-milled lumber a chance to move
Freshly machined wood sometimes shifts as internal stresses are released.
When practical, rough-mill important parts slightly oversized, let them rest, then bring them to final dimensions later.
If something bows or twists a little, you still have enough material left to correct it.
Step 2: Make the Front Legs While Everything Is Still Square
The front legs are often simpler than the rear legs, which makes them a good place to establish your rhythm.
Start with square, straight blanks.
If the design includes tapers or shaping, consider cutting the structural joinery first while the blank still offers clean reference faces.
This makes measurement easier.
It makes machine setups easier.
And it makes mistakes less likely.
There is a useful rule hiding here:
Do the precision work while the part is still easy to hold and measure.
Make it pretty afterward.
Step 3: Build the Rear Legs Carefully
Rear legs often carry the visual character of the entire chair.
They also tend to carry more complexity.
A single rear leg may begin at the floor, angle backward, pass alongside the seat, and continue up into the back.
That one piece influences:
- stability,
- backrest angle,
- seat geometry,
- chair height,
- and overall appearance.
Make a Full-Size Template
If the rear leg has a curve or unusual profile, make the template before touching expensive hardwood.
Plywood or MDF works well.
Refine the template until the shape feels right.
Then use it to lay out the actual leg blanks.
This becomes even more valuable if you plan to build a complete set.
The first template takes time.
Every chair after that pays you back.
Follow the Grain, Not Just the Edge of the Board
Do not position the template only to save lumber.
Look at how the grain runs through the final leg shape.
The grain should follow the component as naturally as possible, especially where the leg becomes narrow or changes direction.
Step 4: Cut Joinery That Can Survive Real Life
Now the project becomes structural.
For a traditional hardwood dining chair, mortise-and-tenon joinery is difficult to argue against.
A tenon on the rail fits into a mortise in the leg, creating substantial glue surface and excellent resistance to movement.
It is not the only method.
But it is a proven one.
Mortise and Tenon
A well-fitted mortise-and-tenon joint offers:
- large glue surfaces,
- good resistance to racking,
- accurate alignment,
- and long-term strength.
The goal is not complexity.
The goal is fit.
Loose Tenons
Loose-tenon joinery creates mortises in both components and connects them with a separate tenon.
This can be extremely efficient, especially when several identical chairs need to be made.
The geometry remains strong while the machining becomes more repeatable.
Dowels
Dowels can also produce strong furniture joints when the work is accurate.
Alignment matters.
So do hole depth, spacing, glue coverage, and fit.
A reliable doweling jig can turn what might otherwise be a fiddly process into something highly repeatable.
Step 5: Build the Side Assemblies First
Trying to assemble an entire dining chair in one heroic glue-up is unnecessary.
Break the chair into manageable sections.
One common method is to build:
- the left side assembly,
- the right side assembly,
- then connect them with the front and rear rails.
Each side may include:
- a front leg,
- a rear leg,
- a side apron,
- and possibly a stretcher.
Dry-fit each side.
Check whether the joints seat correctly.
Look at the relationship between the front and rear legs.
Measure the seat height.
Verify that the geometry still matches the drawing.
Glue should never be the first time two critical parts meet each other.
Step 6: Bring the Chair Frame Together
Once the side assemblies are complete, the front and rear rails tie everything together.
This is the point when the pile of parts suddenly starts looking like furniture.
It is also when small mistakes become visible.
Measure one diagonal across the frame.
Then the other.
If the dimensions match closely, the frame is likely square.
If they do not, find out why.
Do not assume more clamp pressure is the answer.
A clamp closes a sound joint.
It should not be used to bully inaccurate woodworking into temporary alignment.
Step 7: Add Stretchers Where the Design Needs Them
Stretchers can run:
- between the front legs,
- between the rear legs,
- along the sides,
- or in combinations.
Their purpose is not decorative alone.
They can make a meaningful difference in how the chair resists side-to-side movement.
That said, add them intentionally.
Their height affects foot clearance.
Their thickness affects appearance.
Their location influences joinery and glue-up order.
They are part of the design, not an afterthought.
Step 8: Shape a Backrest People Actually Want to Lean Against
The backrest is where the chair stops being purely structural and starts becoming personal.
A chair can be built beautifully and still feel unpleasant if the backrest geometry is wrong.
Straight Back Rails
Straight rails are easy to make and suit simple designs.
Round or soften their edges.
A crisp machined corner may look clean but feel surprisingly harsh against the body.
Curved Back Rails
Curves can follow the back more naturally.
They may be:
- cut from solid lumber,
- laminated,
- shaped,
- or made with more advanced methods.
The curve does not need to be dramatic.
A subtle shape is often enough to make the chair feel more intentional.
Vertical Slats
Slats create visual lightness and can distribute pressure nicely across the back.
Upholstered Backrest
Upholstery introduces another layer of construction, but it also opens the door to more softness and comfort.
Whatever direction you choose, test it before final assembly.
Clamp temporary pieces into place if necessary.
Sit against them.
The human spine has the final vote.
Step 9: Build the Seat With Comfort in Mind
The seat is where the body spends most of its time.
That makes it worth more thought than simply cutting a rectangle and calling it done.
Solid Wood Seat
A solid hardwood seat can be striking.
It can stay flat, or you can shape it gently for comfort.
If you glue several boards together, think about:
- grain direction,
- color match,
- glue-joint quality,
- board arrangement,
- and final flattening.
Also remember that a solid seat moves across the grain as humidity changes.
The way it attaches to the frame matters.
Upholstered Seat
An upholstered seat can be built around a stable substrate with:
- foam,
- batting,
- upholstery fabric,
- or leather.
This separates structural construction from surface comfort and can be a very practical route for a first chair.
Step 10: Attach the Seat Without Trapping the Wood
Solid wood does not stop moving because you admire the finished project.
Humidity changes.
The seat expands and contracts.
That movement needs somewhere to go.
Depending on the design, useful attachment options include:
- figure-eight fasteners,
- tabletop-style clips,
- elongated screw holes,
- wooden buttons,
- or other movement-friendly methods.
The principle is simple:
Secure the seat firmly without locking cross-grain movement in place.
Internal linking opportunity: Link to guides about wood movement, attaching tabletops, furniture fasteners, seasonal expansion, and cross-grain construction.
Step 11: Dry-Fit the Entire Chair and Stop Thinking Like a Woodworker for a Minute
Assemble the whole chair without glue.
Then step away from the joints.
Forget mortises.
Forget tenons.
Forget your cut list.
Look at the object as a chair.
Put it on a flat floor.
Sit in it if the dry-fit is stable enough.
Ask yourself:
- Is the seat comfortable?
- Does the backrest meet your back where it should?
- Is the seat too deep?
- Does the chair feel too upright?
- Do the proportions look balanced?
- Does anything shift when weight moves sideways?
- Are the joints fully seated?
- Does the chair slide comfortably under the table?
This is the moment when theory meets the body.
It is also your last easy opportunity to change something.
Once the glue cures, every correction becomes more complicated.
Step 12: Glue-Up Without the Panic
A chair glue-up can become chaotic very quickly if the clamps are scattered around the shop and nobody remembers the assembly order.
Prepare first.
Have nearby:
- clamps,
- cauls if needed,
- square,
- tape measure,
- mallet,
- glue-cleanup tools,
- and every component arranged in the correct order.
Then perform one last dry run.
It may feel excessive.
It rarely is.
Apply Glue Deliberately
Cover the mating surfaces thoroughly without drowning them.
Bring the assembly together in the sequence you already rehearsed.
Tighten clamps gradually.
Watch what the frame does as pressure increases.
Do not crank one clamp down immediately and assume everything else will follow.
Check the Diagonals Again
Before the glue begins setting, measure the frame.
If one diagonal is longer, minor changes in clamp pressure may help bring the assembly square.
Then stand back and look at the chair from several angles.
Measurements matter.
So does your eye.
Why a Dining Chair Starts Wobbling
A chair that rocks against the floor has an uncanny ability to make otherwise beautiful craftsmanship feel amateurish.
Fortunately, wobble is usually diagnosable.
One Leg Is Effectively Too Long or Too Short
Cutting, shaping, sanding, and final assembly can all introduce small differences.
The Frame Is Twisted
All four legs may technically be the same length while the assembled frame is no longer in the same plane.
Joinery Pulled the Geometry Out of Position
A rail or stretcher installed slightly off can affect the entire structure.
The Floor Is Lying to You
Move the chair before touching the legs.
Many floors are not as flat as they look.
Test the chair on a reliably flat reference surface first.
How to Fix a Wobbly Wooden Chair Without Making It Worse
Find the cause before removing wood.
Place the chair on a known flat surface.
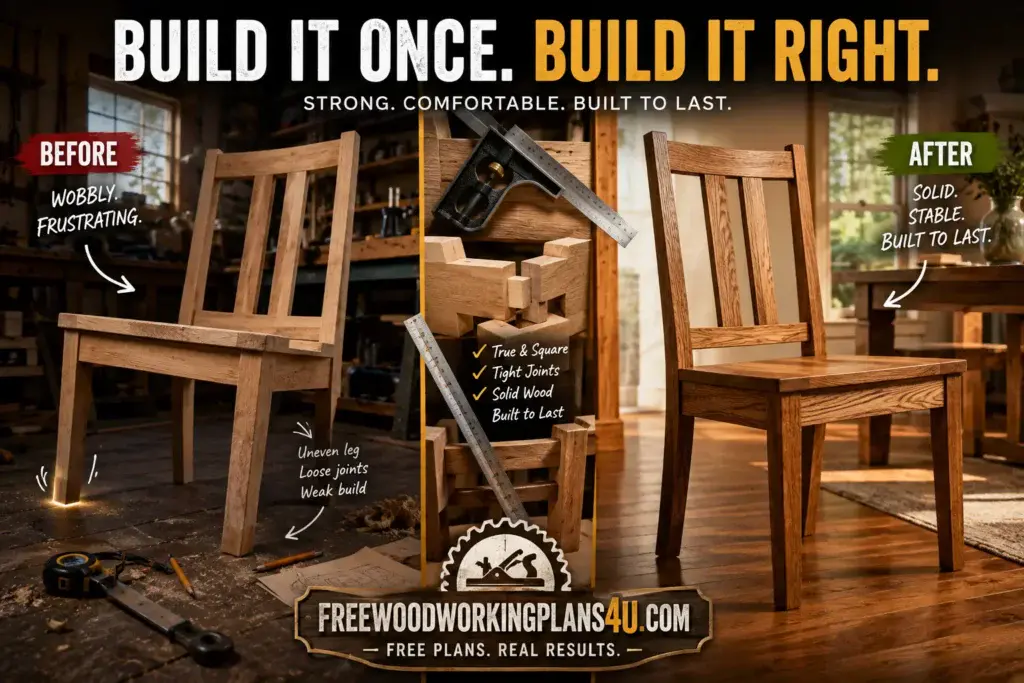
Rock it gently.
Identify which feet are making contact and which one is not.
If the frame is sound and the error is tiny, careful leveling may solve the problem.
Remove material slowly.
A hand plane or sanding block can change the result faster than you expect.
Check repeatedly.
The goal is not simply to make all four legs measure the same.
The goal is to make all four feet touch the same plane.
Sanding a Chair Is a Different Kind of Job
A tabletop gives you space.
A chair gives you corners.
Rails disappear into legs. Back slats create narrow gaps. Curves meet flats. Tight intersections become difficult to reach after assembly.
Do as much sanding as possible before glue-up.
Future you will be grateful.
Use an abrasive progression suitable for the wood species and finish you intend to apply.
And resist the urge to sand forever simply because finer sounds better.
Some finishes perform better on surfaces prepared only to a certain grit.
Follow the finish manufacturer’s recommendations.
Soften Every Edge the Body Will Touch
This is one of those small details that separates a chair that looks handmade from one that feels handmade.
Hands wrap around the back.
Legs touch the seat edge.
People grab the chair and drag it backward.
A slight roundover or softened arris can change that tactile experience completely.
The eye may barely notice.
The hand notices instantly.
Choosing a Finish That Can Handle Dinner
Dining chairs do not live behind glass.
They live around food, fingerprints, spills, damp cloths, friction, and daily handling.
Choose the finish with that reality in mind.
Oil Finishes
Oil can bring warmth and depth to hardwood and is generally approachable to apply.
Protection varies between products, so understand what the specific finish is designed to withstand.
Hard-Wax Oil
Hard-wax oils are popular because they can retain a natural wood appearance while offering practical durability and relatively straightforward repair.
Follow the product instructions carefully.
Polyurethane and Other Film Finishes
Film finishes can offer strong protection against everyday wear.
Patience matters.
Several thin, controlled coats usually look better than trying to build everything in one heavy application.
Whatever finish you choose, test it on scrap from the actual project.
Finishing should not begin with a surprise.
Before You Build Six Dining Chairs, Build One
This is where impatience can become expensive.
You know the final table needs six chairs.
The efficient thing seems obvious.
Cut twelve front legs.
Twelve rear legs.
Twelve side rails.
Start batching everything.
Except that you still do not know whether the chair feels good.
Make the first one.
Sit in it.
Use it with your table.
Ask someone else to sit in it.
Look at it under normal room lighting.
See whether the backrest feels right after twenty minutes rather than twenty seconds.
Maybe nothing needs to change.
Perfect.
Now you have a proven prototype.
But perhaps the seat should be slightly shallower. Maybe the back needs another degree of lean. Maybe the front legs feel visually too heavy. Perhaps the edge of the back rail needs more shaping.
Those are cheap discoveries when there is only one chair.
They become painful after you have already cut six sets of parts.
How to Batch-Build Matching Dining Chairs Once the Prototype Works
After the first chair proves itself, repetition becomes your friend.
Save Every Useful Template
Keep templates for:
- rear legs,
- seat shapes,
- curved rails,
- decorative profiles,
- joinery locations.
Use Stop Blocks
If twelve rails need the same length, set up a stop.
Do not measure every one independently.
Repeated measuring creates repeated opportunities for tiny differences.
Machine Like Parts Together
Complete the same operation across the batch before changing setups.
For example:
- rough-cut all corresponding blanks,
- mill them to thickness,
- cut matching lengths,
- lay out joinery,
- machine identical joints,
- then move to the next stage.
The more repeatable the process, the more identical the chairs become.
Label Everything
Mark:
- chair number,
- left and right,
- front and rear,
- inside and outside,
- mating joints.
A dozen similar rails lying on the bench can make anyone question their memory.
A pencil solves the problem.
The Mistakes That Ruin Good Dining Chair Projects
Some errors announce themselves immediately.
Others wait until the chair has been used for months.
Building the Entire Set Before Testing the Design
One bad measurement multiplied by six is still a bad measurement.
Prototype first.
Ignoring Grain Direction
The shape may look right while the grain creates a structural weakness.
Read the board before cutting.
Choosing Weak Joinery for High-Stress Areas
Chair joints deal with movement in several directions.
Use joinery that can handle it.
Skipping the Dry Fit
A glue-up should confirm that everything works.
It should not be an experiment.
Making the Backrest Too Upright
Elegant geometry can still be uncomfortable.
Let the body test the design.
Forgetting Wood Movement
Solid wood keeps responding to humidity long after the project leaves the workshop.
Allow for it.
Overtightening Clamps
Excess pressure can distort a frame.
More is not always better.
Trying to Fix Bad Joinery With Clamp Pressure
If the assembly only closes under extreme force, something is wrong.
Find it before adding glue.
Leaving All Sanding Until the End
Some areas become miserable to reach once the chair is assembled.
Sand intelligently before glue-up.
Measuring Every Duplicate Part Separately
Use reference faces, templates, stops, and jigs.
Repeatability beats repeated measuring.
How Strong Should a Homemade Dining Chair Be?
There is no responsible universal weight rating for a homemade chair.
Strength depends on too many variables:
- wood species,
- grain direction,
- material defects,
- component thickness,
- joint type,
- joint fit,
- glue quality,
- overall geometry,
- and the direction of the load.
There is another complication.
People do not apply weight to chairs gently and perfectly vertically.
They drop into them.
Lean back.
Shift sideways.
Push themselves up with one hand.
That creates dynamic forces far beyond a simple static number.
Build conservatively using proven furniture-making principles.
Then inspect the chair over time for:
- looseness,
- cracks,
- joint movement,
- creaking,
- or developing wobble.
A good chair should disappear beneath the sitter.
Nobody should need to wonder whether it is strong enough.
Dining Chair Woodworking Plans FAQ
I’ve never built a chair before. Is this too ambitious?
Not necessarily.
A dining chair is more demanding than a shelf or simple bench because several things have to work at once: precise joinery, geometry, stability, comfort, and four-point contact with the floor.
If you already know how to make accurate cuts and basic furniture joints, a straightforward dining chair is a reasonable next challenge.
Keep the design simple.
Complex curves and compound angles can wait.
What wood would you choose if this were your first hardwood chair?
Oak, maple, ash, cherry, and walnut can all work beautifully.
For a first chair, availability and workability matter just as much as appearance.
Choose straight-grained, structurally sound stock and avoid boards with defects around high-stress components.
How high should the seat actually be?
Most dining chair seats fall somewhere around 17 to 19 inches from the floor.
About 18 inches is a practical starting point.
Still, measure your dining table before settling on the number.
The chair and table have to work together.
How wide is wide enough?
For many armless chairs, somewhere around 17 to 20 inches feels comfortable without taking over the room.
Your table width and spacing between chairs should influence the final choice.
What seat depth usually feels right?
Approximately 16 to 18 inches is a useful range.
Too shallow feels unsupported.
Too deep can make it difficult for shorter users to sit against the back comfortably.
Does the back really need to lean?
Usually, a slight rearward inclination feels better than a completely upright backrest.
The exact amount depends on the seat, back shape, and overall design.
Test the prototype rather than relying only on a number.
Which joint should I trust most in a dining chair?
Mortise-and-tenon joinery remains one of the classic choices for good reason.
Loose tenons and accurately executed dowel joints can also perform very well.
What matters is choosing a structurally appropriate joint and making it accurately.
Do I need stretchers?
Not always.
Some chair designs achieve excellent rigidity without them.
Others benefit substantially from stretcher systems.
The answer depends on the leg geometry, rail dimensions, joinery, and overall structure.
Why is my chair wobbling when all the legs measure the same?
The frame may be twisted, the joinery may have pulled the legs out of plane, or the floor itself may be uneven.
Check the chair on a known flat surface before trimming anything.
Can I build chairs without a table saw?
Yes.
The exact tools depend on the design and material preparation.
Surfaced lumber, portable power tools, hand tools, routers, doweling jigs, and other methods can replace many operations normally handled by larger stationary machines.
Recommended reading: Woodworking Without a Table Saw: 9 Better Alternatives for Every Cut, Project, and Workshop
Are pocket holes enough for a dining chair?
Pocket screws can be useful in furniture, but critical chair joints experience repeated forces in several directions.
For major rail-to-leg connections, mortise-and-tenon, loose-tenon, or properly designed dowel joinery is generally the more robust route.
Can I screw the solid wood seat straight to the frame?
You need to account for wood movement.
A solid seat expands and contracts across the grain as humidity changes.
Use a method that secures the seat while still allowing controlled movement.
How do I make six handmade chairs actually look like a set?
Stop measuring everything from scratch.
Use your successful prototype, full-size templates, stop blocks, reference surfaces, jigs, and repeatable machine setups.
Then batch matching components together.
Consistency comes from the process.
Products / Tools / Resources
Building a dining chair does not require owning every woodworking machine imaginable. A few well-chosen tools make the project dramatically easier, especially when accuracy and repeatability matter.
Combination square: One of the most useful tools in the entire build. Use it for checking square edges, laying out joinery, transferring measurements, and verifying component alignment.
Marking gauge: Particularly useful for mortise-and-tenon work because it creates repeatable reference lines rather than relying on individually measured pencil marks.
Bevel gauge: Helpful when transferring backrest or leg angles from a drawing, prototype, or full-size template.
Quality clamps: Chair glue-ups can become frustrating quickly if clamps flex, slip, or cannot apply controlled pressure. A mixture of bar clamps and smaller clamps is useful.
Mortising tools: Traditional chisels, router-based jigs, dedicated mortisers, or loose-tenon systems can all work. Choose the approach that matches your existing tools and comfort level.
Doweling jig: A good doweling jig provides an approachable route to repeatable rail-to-leg joinery when traditional mortise-and-tenon construction is not practical.
Bandsaw or jigsaw: Especially useful when cutting curved rear-leg profiles or shaped back components.
Router with bearing-guided bit: Once a good template exists, a router can help reproduce matching curved components for a complete chair set.
Hand plane: Useful for refining surfaces, softening transitions, leveling small discrepancies, and making the kind of controlled adjustments that power tools sometimes make difficult.
Random-orbit sander: Convenient for broad areas before assembly, although hand sanding will still be necessary around curves, joints, edges, and tight intersections.
Figure-eight fasteners or furniture clips: Useful when securing a solid wood seat while still allowing seasonal expansion and contraction.
Furniture-grade wood glue: Use a reliable adhesive appropriate for interior furniture and follow its open-time and clamping recommendations rather than treating every glue the same.
Full-size plywood or MDF templates: Cheap material with enormous value. A good rear-leg or backrest template can turn one carefully designed chair into an entire matching dining set.
Useful related woodworking resources: Internal guides on mortise-and-tenon joinery, wood grain direction, choosing hardwood, wood movement, furniture finishing, milling rough lumber, making reusable templates, woodworking clamps, furniture fasteners, and building a matching dining table all make natural next steps from this project.