
Some of the most remarkable woodworking projects don’t begin with fresh lumber stacked neatly on a store shelf.
They begin with an old barn door weathered by decades of rain. A pile of forgotten floorboards tucked away in a warehouse. A sturdy oak beam that once supported a farmhouse roof. At first glance, these pieces may seem worn out or past their prime. Look a little closer, though, and you’ll find something far more valuable: character that simply can’t be manufactured.
That’s the enduring appeal of woodworking projects using reclaimed wood.
Every knot, saw mark, and faded nail hole tells part of a story. Instead of hiding those details, reclaimed woodworking embraces them, turning history into furniture that’s both practical and deeply personal. Whether you’re building your first floating shelf or planning an heirloom dining table, reclaimed wood offers a chance to create something distinctive while giving quality timber a second life.
This guide walks through every stage of the process—from choosing safe reclaimed lumber to building furniture that can last for generations. Along the way, you’ll discover project ideas for every skill level, learn professional techniques for working with salvaged wood, and gain the confidence to transform overlooked materials into pieces you’ll be proud to use every day.
Quick Answer
Reclaimed wood is previously used lumber recovered from structures such as barns, factories, homes, fences, pallets, and warehouses. When properly inspected, cleaned, and prepared, it can be used to build everything from shelves and benches to dining tables, cabinets, and outdoor furniture. Woodworking projects using reclaimed wood combine sustainability, affordability, and timeless design, making them an excellent choice for beginners and experienced woodworkers alike.
Table of Contents
- Why Reclaimed Wood Is Capturing the Attention of Woodworkers Everywhere
- What Is Reclaimed Wood?
- Every Board Carries a History
- Why More Woodworkers Are Choosing Reclaimed Lumber
- Is Reclaimed Wood Better Than New Lumber?
- Understanding the Most Common Types of Reclaimed Wood
- Where to Find Reclaimed Wood and How to Choose Lumber Worth Building With
- Building the Right Workshop for Woodworking Projects Using Reclaimed Wood
- Beginner-Friendly Woodworking Projects Using Reclaimed Wood
- Intermediate Woodworking Projects Using Reclaimed Wood
- Advanced Woodworking Projects Using Reclaimed Wood
- How to Finish Reclaimed Wood Without Losing Its Character
- Preventing Problems Before They Happen: Wood Movement, Repairs, and Long-Term Care
- From Workshop to Marketplace: Selling Woodworking Projects Using Reclaimed Wood
- Frequently Asked Questions About Woodworking Projects Using Reclaimed Wood
- Products, Tools, and Resources
Why Reclaimed Wood Is Capturing the Attention of Woodworkers Everywhere
Spend a few minutes browsing handcrafted furniture online or walking through a local artisan market, and one trend quickly becomes obvious.
Reclaimed wood is everywhere.
From modern coffee tables with weathered tops to rustic floating shelves and custom-built kitchen islands, reclaimed lumber has become one of the most sought-after materials in woodworking. Yet its popularity isn’t simply a passing design trend.
People are drawn to reclaimed wood because it offers something that brand-new lumber rarely can: authenticity.
Fresh boards are uniform. They’re clean, predictable, and consistent. Reclaimed wood is the opposite. It carries the marks of time—subtle imperfections that give every project its own personality. A century-old oak beam may display tight growth rings, hand-hewn tool marks, and natural color variations that would be impossible to reproduce in a factory.
For many woodworkers, those details aren’t flaws. They’re the reason to choose reclaimed wood in the first place.
There’s also a practical side to its growing appeal.
As lumber prices continue to fluctuate and sustainability becomes a priority for more homeowners, reclaiming existing wood makes both economic and environmental sense. Instead of sending usable timber to a landfill, you’re extending its life in a meaningful way.
The result is furniture that feels as good to build as it does to own.
What Is Reclaimed Wood?
At its simplest, reclaimed wood is lumber that has already served one purpose and is being reused for another.
Rather than harvesting new trees, reclaimed wood is carefully salvaged, cleaned, and prepared for future projects.
Its previous life might have been in:
- Historic barns
- Residential homes
- Industrial buildings
- Warehouses
- Bridges
- Fencing
- Shipping pallets
- Wooden crates
- Old flooring
- Structural beams
Each source leaves its own signature on the wood.
Barn boards often feature rich weathering and warm tones. Factory flooring tends to be exceptionally dense from decades of heavy use. Old-growth beams can display remarkable stability because the timber matured slowly before it was originally harvested.
Those differences give reclaimed lumber a level of individuality that many woodworkers actively seek.
Every Board Carries a History
One of the most rewarding aspects of reclaimed woodworking has little to do with tools or techniques.
It’s perspective.
Imagine running your hand across a weathered plank that once formed part of a century-old barn. Long before it became a tabletop or bookshelf, it sheltered livestock through changing seasons, endured summer heat and winter storms, and quietly witnessed generations of daily life.
That history doesn’t disappear when the wood is repurposed.
It becomes part of the finished piece.
Unlike mass-produced furniture, reclaimed wood projects invite conversation. Guests notice the unusual grain, the tiny nail holes, or the subtle changes in color. Inevitably, someone asks where the wood came from.
Suddenly, the furniture has a story.
That sense of connection is difficult to manufacture, and it’s one reason handcrafted reclaimed wood pieces continue to hold lasting appeal.
Why More Woodworkers Are Choosing Reclaimed Lumber
There are plenty of reasons reclaimed wood has become a favorite among hobbyists and professionals alike.
Distinctive Character
No two reclaimed boards are exactly alike.
Natural weathering, varied grain patterns, and years of use create visual depth that new lumber often lacks. Even projects built from the same original structure will develop their own unique appearance.
Sustainability
Reusing existing lumber reduces demand for newly harvested timber and keeps valuable material out of landfills.
For many builders, this adds another layer of satisfaction to every completed project.
Potential Cost Savings
Depending on where you source it, reclaimed wood can cost significantly less than premium hardwood purchased new.
While preparation takes time, the finished results often rival furniture built from far more expensive materials.
Quality That Has Already Stood the Test of Time
Many reclaimed boards have already proven their durability.
If a beam has remained structurally sound for decades, it’s a strong indication that the wood possesses excellent long-term stability when properly prepared and incorporated into a new project.
Is Reclaimed Wood Better Than New Lumber?
It’s a question that sparks plenty of debate among woodworkers.
The truth is that neither material is universally better.
Each has strengths.
New lumber offers consistency and convenience. Dimensions are predictable, moisture levels are easier to manage, and preparation is generally straightforward.
Reclaimed wood demands more effort.
It must be inspected carefully, cleaned thoroughly, and checked for hidden metal before machining.
That extra work, however, often comes with a worthwhile reward.
Older lumber may have grown slowly over many decades, producing dense growth rings and remarkable stability. Combined with its unique appearance, reclaimed wood offers qualities that simply can’t be replicated by modern milling alone.
For projects where individuality matters as much as function, reclaimed lumber often becomes the preferred choice.
Understanding the Most Common Types of Reclaimed Wood
Not all reclaimed lumber behaves the same way.
Knowing where a board came from can provide useful clues about its appearance, durability, and best use.
Barn Wood
Barn wood is prized for its weathered texture and warm, rustic appearance.
It’s especially popular for:
- Floating shelves
- Accent walls
- Headboards
- Dining tables
- Decorative beams
Reclaimed Hardwood Flooring
Old hardwood flooring is often made from premium species and has already acclimated over many years.
It works beautifully for:
- Tabletops
- Shelves
- Decorative panels
- Serving trays
Structural Timbers
Large reclaimed beams are ideal for substantial furniture projects because they provide impressive strength while showcasing dramatic grain patterns.
Pallet Wood
Pallet wood is widely available and frequently inexpensive, making it a common choice for beginner projects.
However, every pallet should be inspected carefully to ensure it is clean, structurally sound, and suitable for reuse before bringing it into your workshop.
Looking Beyond the Surface
One lesson every experienced woodworker learns is this:
The appearance of reclaimed wood can be deceiving.
A dusty board with rough edges may seem ready for the scrap pile, yet beneath years of dirt and oxidation lies beautiful grain waiting to emerge.
Learning to recognize that hidden potential changes the way you see materials.
Old fencing becomes future shelving.
A worn door becomes a desktop.
Forgotten floorboards become the centerpiece of a family dining room.
That’s the quiet satisfaction at the heart of reclaimed woodworking.
You’re not simply building furniture.
You’re uncovering possibilities that were there all along.
In the next chapter, we’ll explore where to find high-quality reclaimed wood, how to identify boards worth saving, and the essential safety checks every woodworker should perform before making the first cut.
Part 2: Where to Find Reclaimed Wood and How to Choose Lumber Worth Building With
One of the most enjoyable parts of working with reclaimed wood happens long before the first cut.
It’s the hunt.
Unlike buying neatly stacked boards from a lumberyard, finding reclaimed wood feels more like a treasure search. The best pieces rarely announce themselves. They’re tucked away in forgotten barns, hidden beneath old flooring, leaning against garage walls, or waiting in a salvage yard for someone to recognize their potential.
Over time, you’ll notice something interesting.
Experienced woodworkers don’t just see old wood.
They notice straight grain beneath chipped paint. They spot thick oak hidden inside a weathered beam. They can picture a dining table where someone else only sees demolition debris.
That shift in perspective is one of the most rewarding parts of the craft.
Where to Find High-Quality Reclaimed Wood
There isn’t one perfect source for reclaimed lumber. The best option often depends on the type of project you’re planning and the look you’re hoping to achieve.
Some woodworkers prefer heavily weathered boards with visible character. Others search for dense hardwood that can be milled into smooth furniture while still retaining hints of its history.
Wherever you look, patience usually pays off.
Old Barns
Barn wood has become almost legendary among furniture makers, and with good reason.
Many older barns were built using slow-growth timber harvested decades before modern forestry practices became common. That lumber often displays tight grain, impressive stability, and rich color that develops naturally over time.
Barn wood is especially popular for:
- Dining tables
- Coffee tables
- Floating shelves
- Fireplace mantels
- Headboards
- Accent walls
Before removing material from an old structure, always make sure you have permission and that the building is safe to enter.
Home Renovation and Demolition Projects
Renovation work frequently uncovers lumber that’s still in excellent condition.
Older homes may contain:
- Hardwood flooring
- Ceiling joists
- Roof beams
- Stair treads
- Window frames
- Solid wood doors
- Trim boards
Contractors sometimes welcome someone willing to remove reusable wood, particularly when it reduces disposal costs.
It’s worth asking politely before demolition begins.
Architectural Salvage Yards
If you’d rather skip the uncertainty of searching through demolition sites, architectural salvage businesses can be an excellent alternative.
These suppliers often organize reclaimed materials by size, species, or intended use.
While prices may be higher than sourcing lumber yourself, the trade-off is convenience.
You’ll often find cleaner boards, more consistent dimensions, and knowledgeable staff who can identify different wood species.
Old Fencing
Fence boards usually aren’t suitable for every furniture project, but they can produce beautiful results when chosen carefully.
They’re especially useful for:
- Garden planters
- Outdoor benches
- Decorative wall panels
- Privacy screens
- Rustic signs
Look for boards that remain structurally sound.
Surface weathering adds charm.
Deep rot does not.
Hardwood Flooring
Old hardwood flooring is one of the hidden gems of reclaimed woodworking.
Because flooring was designed to withstand decades of daily use, it often remains remarkably durable.
Depending on the age of the building, you may find species such as:
- Oak
- Maple
- Hickory
- Fir
- Pine
After cleaning and milling, reclaimed flooring can become stunning tabletops, shelves, cutting boards, and decorative panels.
Shipping Pallets
Pallets are one of the most accessible sources of reclaimed wood, making them especially attractive for beginners.
They’re also one of the most misunderstood.
Some pallets are perfectly suitable for woodworking projects.
Others should never be used indoors.
Understanding the difference is essential.
Always inspect pallet wood carefully before bringing it into your workshop.
Choosing Boards With Potential
Finding reclaimed lumber is only the first step.
The next challenge is deciding which boards deserve your time.
Experienced furniture makers develop an eye for potential rather than perfection.
A board covered in dirt may hide beautiful grain.
A rough edge may disappear during milling.
A few nail holes might become the most interesting part of the finished piece.
At the same time, some defects simply aren’t worth working around.
Learning to recognize the difference saves both time and frustration.
Check the Structure Before the Appearance
It’s easy to become distracted by attractive grain patterns.
Instead, begin by evaluating the board’s overall condition.
Ask yourself:
- Does it remain structurally sound?
- Is there significant warping?
- Are cracks shallow or deep?
- Is the wood firm throughout?
- Has moisture caused decay?
Cosmetic flaws often add personality.
Structural weaknesses usually become bigger problems later.
Learn to Recognize Common Wood Species
You don’t need to identify every species instantly, but becoming familiar with the most common ones will improve your project planning.
Oak
Oak is dense, durable, and highly resistant to wear.
Its pronounced grain makes it a favorite for dining tables, benches, shelving, and cabinets.
Maple
Maple offers a smoother appearance and excellent strength.
It’s often chosen for furniture that benefits from a cleaner, more contemporary look.
Pine
Pine is lighter in weight and generally easier to work with.
Its knots and warm color make it especially popular in rustic furniture.
Douglas Fir
Douglas fir combines strength with relatively straight grain, making it suitable for both structural and decorative projects.
Understanding the characteristics of each species helps you match the material to the demands of your project.
Moisture Matters More Than Most Beginners Realize
One of the biggest misconceptions about reclaimed lumber is that old wood must already be dry.
Age and moisture aren’t the same thing.
A board removed from an old building may still contain excess moisture depending on where and how it has been stored.
Using damp lumber can lead to:
- Warping
- Shrinkage
- Joint failure
- Cracking
- Finish problems
Before building furniture, allow reclaimed wood to acclimate to your workshop.
Giving the lumber time to adjust often prevents problems that would otherwise appear months after the project is complete.
Hidden Hazards That Can Damage Your Tools
Reclaimed wood occasionally contains surprises.
Some add character.
Others can ruin expensive equipment in seconds.
Developing a careful inspection routine protects both your project and your tools.
Nails
Old nails are often buried beneath weathered surfaces and may not be visible until the board is cut.
Even one small nail can damage saw blades, planer knives, or jointer cutters.
Every board deserves a careful inspection before machining.
Screws and Staples
Repairs made over the years may leave behind hidden fasteners.
Pay particular attention to:
- Filled holes
- Cracks
- End grain
- Previous joints
It’s worth checking the same board more than once.
Wire
Fence boards sometimes contain small sections of embedded wire.
Older framing lumber may also include metal ties or staples.
These are easy to overlook but should always be removed before cutting or planing.
Surface Contamination
Some reclaimed wood has been exposed to oils, chemicals, or heavy dirt during its previous life.
If contamination appears extensive or you cannot determine what the wood has been exposed to, it’s often best to choose another board for indoor furniture.
Cleaning Reclaimed Wood Without Removing Its Character
Cleaning isn’t about making reclaimed wood look new.
It’s about preparing it for another lifetime of use.
The goal is to remove dirt while preserving the features that make the wood unique.
Start with the gentlest approach possible.
A stiff brush, shop vacuum, or compressed air often removes years of dust without affecting the surface.
Only after loose debris is gone should you decide whether additional cleaning is necessary.
Remember, every layer of weathering doesn’t need to disappear.
Sometimes the most beautiful surface is the one that’s barely touched.
Should You Plane Every Board?
Many beginners assume every reclaimed board should be milled until it looks perfectly smooth.
Professional furniture makers often take a different approach.
Instead of flattening every visible surface, they choose carefully.
Hidden faces may be planed to improve joinery.
Visible faces may remain lightly weathered to preserve texture and history.
This combination creates furniture that’s both structurally precise and visually authentic.
It’s one of the defining characteristics of high-quality reclaimed wood furniture.
Organizing Lumber Before You Build
Good woodworking starts with good organization.
Once you’ve gathered reclaimed lumber, sort it before beginning any project.
Organize boards by:
- Species
- Thickness
- Length
- Moisture level
- Grain pattern
- Color
- Intended use
Doing this now makes project planning much easier later.
It also helps you reserve your most attractive boards for the parts of the project people will notice first.
Seeing Possibility Instead of Scrap
Eventually, something changes.
You stop looking at reclaimed wood as discarded material.
Instead, you begin imagining what it could become.
A stack of weathered planks starts to resemble floating shelves.
A heavy beam becomes the foundation of a farmhouse dining table.
An old hardwood floor becomes a custom desktop.
That’s when reclaimed woodworking becomes more than a hobby.
It becomes a way of seeing.
The wood hasn’t changed.
You have.
And once that shift happens, it’s difficult to look at old lumber the same way again.
In the next chapter, we’ll step into the workshop and explore the essential hand tools, power tools, safety equipment, and workspace setup that make woodworking projects using reclaimed wood more enjoyable, more efficient, and far more successful.
Part 3: Building the Right Workshop for Woodworking Projects Using Reclaimed Wood
Every memorable woodworking project begins long before a saw blade touches wood.
It starts with preparation.
Not the kind that fills a shopping cart with expensive tools or turns a garage into a showroom workshop—but the quieter kind. A clean workbench. Sharp blades. Good lighting. A place where you can slow down, study a board, and decide how to bring out the best in it.
Reclaimed wood has a personality all its own.
One board might be perfectly flat. The next may have a slight twist earned from decades of changing seasons. Some pieces arrive clean and ready to mill. Others need patient inspection before they’re safe to use.
That’s why a thoughtful workspace matters.
The more organized your shop is, the easier it becomes to focus on craftsmanship instead of constantly solving avoidable problems.
You Don’t Need a Huge Workshop to Build Beautiful Furniture
One of the biggest myths in woodworking is that great projects require a massive shop filled with industrial machinery.
They don’t.
Many skilled furniture makers started with little more than a sturdy workbench, a handful of reliable tools, and the determination to improve one project at a time.
Whether you’re working in a garage, basement, spare room, garden shed, or a dedicated workshop, the goal is the same:
Create a space that’s safe, efficient, and enjoyable to work in.
Instead of thinking about square footage, think about workflow.
Can you move comfortably around your workbench?
Is there enough room to safely cut longer boards?
Do you have adequate lighting where precision matters most?
Small improvements in organization often have a greater impact than buying another power tool.
Divide Your Workshop Into Practical Zones
Professional workshops rarely feel chaotic because every activity has its place.
Creating simple work zones helps keep projects moving smoothly from rough lumber to finished furniture.
Inspection Area
Every reclaimed board deserves a careful inspection before it enters the rest of your workshop.
This is where you’ll:
- Brush away dirt
- Check for cracks
- Look for hidden fasteners
- Identify the wood species
- Measure moisture levels
- Sort boards by size
Keeping inspection separate from cutting and assembly also helps prevent dirt and debris from spreading throughout your workspace.
Milling Area
Once a board has been inspected and declared safe, it’s ready for preparation.
Depending on your tools, this area may be used for:
- Breaking down long boards
- Straightening edges
- Flattening faces
- Cutting rough dimensions
- Trimming damaged ends
Think of this stage as shaping raw material into workable components.
Assembly Area
This is where individual pieces become furniture.
Your assembly space should provide a flat surface with enough room to lay out every component before reaching for glue or clamps.
Dry-fitting projects here allows you to catch small mistakes while they’re still easy to fix.
Finishing Area
Dust and fresh finishes rarely get along.
If possible, reserve a clean corner of the workshop for applying oils, waxes, or protective topcoats.
Even a simple folding table covered with clean paper can become an effective finishing station if it’s kept free from sanding dust.
The Hand Tools That Earn Their Place in Every Workshop
Power tools often receive the most attention, but hand tools are where precision really begins.
Many of the adjustments that transform a good project into a great one happen with tools that fit comfortably in one hand.
Tape Measure
It sounds obvious, yet few tools influence the success of a project more than a reliable tape measure.
Accurate measurements reduce waste, improve joinery, and make assembly far less frustrating.
One small habit makes a surprising difference:
Measure twice before making every important cut.
It takes only a few extra seconds but can save hours of rework.
Combination Square
A combination square quickly becomes one of the most frequently used tools in the shop.
It helps you:
- Check 90-degree angles
- Mark layout lines
- Verify blade settings
- Measure depths
- Confirm accurate assembly
It’s simple, dependable, and useful on nearly every project.
Marking Knife
Pencils are convenient.
Marking knives are precise.
The shallow groove created by a marking knife guides saws and chisels while producing cleaner, more accurate cuts.
It’s a small upgrade that many woodworkers wish they had made sooner.
Chisels
A sharp chisel is one of the most versatile tools in woodworking.
It allows you to:
- Fine-tune joints
- Clean corners
- Remove excess glue
- Trim plugs
- Refine joinery
Keeping chisels sharp is just as important as owning them.
A dull edge requires more force, produces rougher results, and can actually be less safe to use.
Block Plane
Some adjustments are too small for power tools.
A block plane excels at those finishing touches.
Use it to:
- Ease sharp edges
- Flatten high spots
- Fine-tune joints
- Clean end grain
- Remove tiny imperfections
It’s particularly useful when working with reclaimed wood because it lets you improve a surface without stripping away its natural character.
Clamps
Ask ten experienced woodworkers if they own enough clamps, and you’ll probably hear the same answer.
“Not yet.”
Clamps hold projects together while glue cures, but they also help align components and prevent movement during assembly.
A practical collection might include:
- Bar clamps
- Spring clamps
- Quick-release clamps
- Corner clamps
- Pipe clamps
You don’t need dozens immediately.
Build your collection gradually as your projects become more ambitious.
Power Tools That Make Reclaimed Wood Easier to Work With
While beautiful furniture can certainly be built with hand tools alone, power tools improve efficiency and consistency—especially when working with reclaimed lumber.
The goal isn’t to own every machine available.
It’s to choose tools that genuinely expand what you can build.
Circular Saw
Versatile, portable, and surprisingly accurate when paired with a straight guide, a circular saw is one of the best first investments for many woodworkers.
It handles:
- Crosscuts
- Rip cuts
- Breaking down long boards
- Cutting sheet goods
For many projects, it’s the workhorse of the workshop.
Miter Saw
Clean, repeatable crosscuts become much easier with a miter saw.
It’s particularly valuable when building projects with multiple components of identical length, such as:
- Benches
- Picture frames
- Shelving
- Blanket ladders
- Furniture legs
Accuracy improves, and so does efficiency.
Table Saw
Often described as the centerpiece of a woodworking shop, a table saw allows for highly accurate cuts and repeatable dimensions.
It’s commonly used for:
- Rip cuts
- Joinery
- Panel sizing
- Dados
- Tenons
- Edge trimming
Before running reclaimed lumber across a table saw, always inspect carefully for hidden nails, screws, or staples.
One missed fastener can damage both the blade and the workpiece.
Thickness Planer
Reclaimed boards rarely begin at consistent thicknesses.
A planer helps create uniform surfaces while preserving as much material as possible.
Many furniture makers plane only the hidden faces of reclaimed boards, leaving visible surfaces lightly weathered for added character.
That approach combines precision with authenticity.
Random Orbital Sander
Few tasks influence the final appearance of a project more than sanding.
A random orbital sander removes milling marks while preparing wood for stain or finish.
The key is patience.
Rather than trying to achieve a perfect surface in one pass, work gradually through finer abrasives until the wood feels smooth without losing its natural texture.
Cordless Drill and Driver
Few projects reach completion without drilling holes or installing hardware.
A reliable cordless drill handles tasks such as:
- Pilot holes
- Countersinking
- Screw installation
- Hardware mounting
- Pocket-hole assembly
Having a spare battery ready keeps your workflow moving without interruption.
Helpful Tools That Become More Valuable Over Time
As your skills grow, you’ll likely discover a few additional tools that simplify reclaimed woodworking.
While not essential for beginners, they can make larger or more complex projects easier.
Useful additions include:
- Moisture meter
- Metal detector
- Router
- Cabinet scraper
- Oscillating multi-tool
- Drill press
- Biscuit joiner
Rather than buying everything at once, let your projects guide future purchases.
When a tool consistently solves a problem you’re encountering, it’s probably worth adding to the workshop.
Why Sharp Tools Matter More Than Expensive Tools
Many beginners assume better results come from buying more expensive equipment.
In reality, sharp tools usually have a greater impact than premium machines.
Sharp blades and bits:
- Produce cleaner cuts
- Reduce tear-out
- Require less effort
- Improve safety
- Leave smoother surfaces
Make it a habit to inspect cutting edges regularly.
Replacing or sharpening a dull blade often transforms the quality of your work immediately.
Safety Habits That Become Second Nature
Woodworking should be enjoyable, and developing consistent safety habits helps keep it that way.
Rather than treating safety as an afterthought, make it part of your routine.
Protect Your Eyes
Wood chips and dust travel farther than many people expect.
Comfortable safety glasses quickly become something you wear without thinking about it.
Protect Your Hearing
Repeated exposure to loud machinery can affect hearing over time.
Lightweight hearing protection makes longer workshop sessions far more comfortable.
Keep Dust Under Control
Sawdust is more than a housekeeping issue.
A cleaner workspace improves:
- Air quality
- Visibility
- Tool performance
- Surface finishing
Vacuuming regularly and collecting dust at the source makes the shop more pleasant to work in.
Dress for the Job
Loose sleeves, jewelry, or untied long hair can create unnecessary hazards around rotating tools.
Simple, well-fitting clothing allows you to move comfortably while reducing risk.
Develop a Repeatable Workflow
One of the easiest ways to improve your woodworking is to follow the same sequence every time.
Consistency reduces mistakes.
A dependable workflow might look like this:
- Inspect every board.
- Remove all hardware.
- Check for hidden metal.
- Clean the wood.
- Measure moisture if needed.
- Allow the lumber to acclimate.
- Mill rough dimensions.
- Cut final dimensions.
- Dry-fit every component.
- Assemble.
- Sand thoughtfully.
- Apply the finish.
Following the same process from project to project creates confidence and makes it easier to spot problems before they become expensive.
Learning to Read the Wood
Perhaps the most important skill in woodworking can’t be purchased.
It develops through observation.
Before making a cut, pause.
Look closely at the grain.
Notice how the light catches the surface.
Pay attention to knots, color changes, and subtle curves.
Every board offers clues about how it wants to be used.
Some are ideal for tabletops.
Others naturally become legs, shelves, or decorative panels.
The more carefully you study reclaimed wood, the better your designs become.
Eventually, choosing the right board feels less like making a decision and more like discovering what it was always meant to become.
In the next chapter, we’ll put those tools and techniques to work by exploring beginner-friendly woodworking projects using reclaimed wood that build confidence, strengthen core skills, and produce beautiful, practical pieces you’ll use for years to come.
Part 4: 10 Beginner-Friendly Woodworking Projects Using Reclaimed Wood You’ll Actually Want to Build
There’s a moment every woodworker remembers.
You’ve cleaned the reclaimed boards, removed the old nails, studied the grain from every angle, and stacked the lumber neatly in your workshop.
Now comes the question that matters most:
What should I build first?
It’s tempting to dream about a handcrafted dining table or a custom kitchen island, but the smartest place to begin is somewhere much smaller.
The best beginner projects don’t just produce useful furniture. They quietly teach the habits that experienced woodworkers rely on every day—accurate measuring, thoughtful planning, clean cuts, careful assembly, and patient finishing.
Even better, reclaimed wood is remarkably forgiving.
A small knot that might seem out of place on factory furniture suddenly becomes a design feature. A weathered edge can add warmth instead of looking unfinished. Every completed project reminds you that perfection isn’t the goal.
Character is.
The projects below are arranged to help you build confidence one step at a time while creating pieces you’ll actually use around your home.
1. Floating Shelves
Skill Level: Beginner
Estimated Build Time: 2–4 hours
If there’s one project almost every woodworker recommends, it’s a floating shelf.
Simple enough to complete in an afternoon yet attractive enough to transform an entire room, floating shelves introduce many of the core skills you’ll use throughout your woodworking journey.
Why They’re Great for Beginners
You’ll practice:
- Measuring accurately
- Making straight cuts
- Sanding evenly
- Applying finish
- Mounting hardware securely
Perhaps most importantly, floating shelves showcase reclaimed wood beautifully.
A board with visible grain, old saw marks, or subtle weathering suddenly becomes the focal point of a wall.
Where Floating Shelves Work Best
Consider installing them in:
- Living rooms
- Kitchens
- Bathrooms
- Home offices
- Bedrooms
- Laundry rooms
- Entryways
Because they require relatively little material, they’re also an excellent way to use shorter reclaimed boards.
2. Rustic Picture Frames
Skill Level: Beginner
Estimated Build Time: 2–3 hours
Not every woodworking project needs to fill a room.
Sometimes the smallest builds become the most meaningful.
Picture frames are a perfect example.
They’re inexpensive to make, require only modest amounts of lumber, and make thoughtful gifts that friends and family genuinely appreciate.
Skills You’ll Develop
Building a frame helps reinforce:
- Accurate measuring
- Clean corner joints
- Careful clamping
- Surface preparation
- Finish application
Once you’ve built one, you’ll likely begin saving every attractive offcut in your workshop because suddenly you know exactly what it could become.
3. Wooden Serving Tray
Skill Level: Beginner
Estimated Build Time: 3–5 hours
A serving tray blends craftsmanship with everyday usefulness.
Whether it’s carrying breakfast on a quiet Sunday morning or displaying candles on a coffee table, it quickly becomes one of those projects that gets used far more often than expected.
What You’ll Practice
This project introduces:
- Edge joining
- Handle installation
- Layout planning
- Surface leveling
- Final finishing
Choose boards with interesting grain patterns or subtle color variation.
Because the tray is relatively compact, even highly figured reclaimed wood becomes easy to showcase.
4. Entryway Coat Rack
Skill Level: Beginner
Estimated Build Time: 3–4 hours
Few household items work harder than a simple coat rack.
Keys.
Jackets.
Bags.
Hats.
They’re often the first things you reach for when leaving home and the first things you set down when returning.
A reclaimed wood coat rack combines organization with character, making an ordinary wall feel intentional.
Design Ideas
You might include:
- Decorative hooks
- A narrow display shelf
- Key storage
- Small cubbies
- Mail organization
The beauty of this project lies in its flexibility.
It can be as simple or as detailed as your current skills allow.
5. Plant Stand
Skill Level: Beginner
Estimated Build Time: 4–6 hours
Indoor plants and reclaimed wood seem naturally suited to one another.
Both celebrate organic materials.
Both bring warmth into a room.
And together they create spaces that feel relaxed and welcoming.
A plant stand introduces basic furniture construction without the complexity of larger projects.
Skills You’ll Build
Along the way you’ll practice:
- Leg construction
- Stable assembly
- Weight distribution
- Accurate layout
- Square glue-ups
Start with a compact design.
Once you’ve built one successfully, it’s easy to create matching stands in different heights.
6. Storage Crate
Skill Level: Beginner
Estimated Build Time: 4–5 hours
Every workshop eventually accumulates tools.
Every home collects blankets, books, toys, or seasonal decorations.
A sturdy reclaimed wood crate solves all of those storage challenges while providing valuable woodworking practice.
Great Uses
Finished crates work well for storing:
- Firewood
- Gardening supplies
- Children’s toys
- Books
- Shoes
- Blankets
- Craft materials
Because they’re built from relatively simple panels, storage crates help reinforce accurate assembly and keeping projects square.
7. Wall-Mounted Key Holder
Skill Level: Beginner
Estimated Build Time: Around 2 hours
Sometimes the most satisfying projects are the quickest.
A reclaimed wood key holder requires little material, costs very little to build, and immediately becomes useful.
Simple Features to Include
Depending on your style, consider adding:
- Key hooks
- Small mail shelf
- Phone charging ledge
- Decorative engraving
- Mini planter
- Chalkboard panel
Small details allow you to personalize the design without making construction overly complicated.
8. Blanket Ladder
Skill Level: Beginner to Intermediate
Estimated Build Time: One day
Blanket ladders remain one of the most recognizable reclaimed wood projects—and for good reason.
They’re practical.
They’re attractive.
And they allow beautiful lumber to take center stage.
Rather than hiding the wood beneath complicated construction, the design lets long, uninterrupted grain become the visual highlight.
Skills You’ll Reinforce
Building a blanket ladder improves:
- Consistent measuring
- Repeatable cuts
- Parallel assembly
- Surface preparation
- Finishing techniques
It’s also an excellent confidence-building project because the design remains forgiving while still looking impressive.
9. Birdhouse
Skill Level: Beginner
Estimated Build Time: 2–4 hours
Birdhouses have introduced countless people to woodworking.
They require only a small amount of material, can often be completed in an afternoon, and provide immediate satisfaction once installed outdoors.
What You’ll Learn
This project helps develop:
- Basic layout
- Accurate drilling
- Roof construction
- Simple joinery
- Exterior finishing
It’s also an enjoyable project to build with children or grandchildren, making it an opportunity to share woodworking skills across generations.
10. Rustic Bench
Skill Level: Beginner to Intermediate
Estimated Build Time: Weekend Project
A simple bench represents an important milestone.
Unlike smaller decorative pieces, it must safely support weight while remaining stable through years of daily use.
That introduces structural thinking without becoming overly complicated.
Skills You’ll Gain
Building a bench teaches:
- Load-bearing construction
- Leg alignment
- Strong joinery
- Glue-up strategy
- Reinforcement techniques
Once completed, it can serve almost anywhere.
Place it in an entryway, beside a dining table, on a porch, or beneath a window.
It’s one of those projects that quietly proves just how versatile reclaimed wood can be.
Choosing the Right First Project
When deciding where to begin, don’t ask yourself which project looks the most impressive.
Instead, ask which project teaches the skills you want to develop next.
If you’re still becoming comfortable with measuring and cutting, a picture frame or serving tray may be the perfect starting point.
If you’re ready to explore simple furniture construction, consider a plant stand or rustic bench.
Progress happens naturally when every project builds upon the one before it.
There’s no need to rush toward complicated furniture.
Strong fundamentals make ambitious projects far more enjoyable later.
Let the Wood Shape the Design
One of the most valuable habits you can develop is allowing the material to influence the finished piece.
Instead of forcing every reclaimed board into the same design, pay attention to what it offers.
A long, straight plank almost seems destined to become a floating shelf.
A beautifully weathered board deserves a visible place on a coffee table.
Smaller offcuts often become trays, frames, or decorative accents.
Working this way creates less waste and usually produces more interesting furniture.
The wood already carries decades of character.
Your job is simply to give it another chapter.
Common Mistakes First-Time Builders Make
Every woodworker makes mistakes.
The important thing is learning from them before they become habits.
Sanding Away Too Much Character
It’s easy to become enthusiastic with a sander.
Unfortunately, excessive sanding removes the very weathering that makes reclaimed wood so appealing.
Smooth what’s necessary.
Preserve what makes the wood unique.
Skipping the Dry Fit
Never assume everything will align perfectly after glue is applied.
Assemble every project first without adhesive.
This simple step reveals alignment issues while corrections remain easy.
Ignoring Wood Movement
Even reclaimed lumber continues responding to seasonal humidity.
Planning for natural expansion and contraction helps prevent cracks and joint failure later.
Rushing the Finish
A beautiful finish rewards patience.
Allow adequate drying time between coats, inspect surfaces carefully, and avoid the temptation to hurry the final stage.
The finish is often the first thing people notice.
Give it the attention it deserves.
Confidence Comes From Completing Projects
Every finished project changes the way you see yourself as a woodworker.
The first floating shelf builds confidence with measuring.
The first serving tray improves your understanding of grain direction.
The first bench teaches structural thinking.
None of these projects is simply an object.
Each one becomes practice for something larger waiting down the road.
That’s the quiet beauty of woodworking.
Every completed build prepares you for the next challenge without you even realizing it.
And before long, you’ll look back at your first simple shelf with the same appreciation that experienced craftspeople feel for their earliest work—not because it was perfect, but because it was where everything truly began.
In the next chapter, we’ll move beyond beginner projects and explore intermediate woodworking projects using reclaimed wood, including coffee tables, farmhouse benches, console tables, bookshelves, storage furniture, and other pieces that introduce stronger joinery, improved structural design, and the techniques used to build furniture that lasts for decades.
Part 5: Intermediate Woodworking Projects Using Reclaimed Wood That Elevate Your Skills
There comes a point when simple projects stop feeling quite so intimidating.
You’ve built a shelf that hangs straight. A serving tray that still gets compliments. Maybe a rustic bench that’s become everyone’s favorite place to sit while taking off muddy boots.
Without realizing it, you’ve crossed an important threshold.
You’re no longer wondering if you can build furniture.
Now you’re asking, What should I build next?
This is where woodworking becomes especially rewarding.
Intermediate projects ask a little more of you. They’re larger, more detailed, and often require greater accuracy, but they also introduce techniques that transform a hobby into genuine craftsmanship.
More importantly, reclaimed wood begins to reveal why so many experienced furniture makers prefer it. Larger surfaces showcase dramatic grain patterns. Wide tabletops tell stories through weathered textures. Every knot, color shift, and hand-hewn mark becomes part of the design rather than something to hide.
These projects aren’t about rushing toward mastery.
They’re about building it, one carefully measured cut at a time.
1. Reclaimed Wood Coffee Table
Skill Level: Intermediate
Estimated Build Time: 1–2 weekends
If beginner projects teach individual woodworking skills, a coffee table teaches how those skills work together.
A successful coffee table combines thoughtful design with practical engineering. It needs to remain stable, withstand daily use, and look just as inviting years from now as it did the day you carried it into your living room.
Skills You’ll Strengthen
Building a coffee table gives you experience with:
- Panel glue-ups
- Tabletop layout
- Leg construction
- Structural reinforcement
- Surface flattening
- Finish preparation
The tabletop deserves special attention.
Instead of arranging boards randomly, experiment with different layouts before making anything permanent. Rotate pieces, swap positions, and study how the grain flows across the surface.
Sometimes the best arrangement isn’t the most symmetrical—it’s the one that feels the most natural.
2. Farmhouse Entry Bench
Skill Level: Intermediate
Estimated Build Time: Weekend project
A farmhouse bench is one of those rare furniture pieces that works almost anywhere.
Place it in an entryway.
Slide it beneath a dining table.
Use it on a covered porch.
Move it into a mudroom.
Its simplicity is exactly what makes it so versatile.
Unlike decorative projects, though, a bench has an important responsibility.
It must safely support people.
That means every joint, stretcher, and leg deserves careful attention during construction.
Focus Areas
Take extra care with:
- Leg alignment
- Strong joinery
- Weight distribution
- Seat support
- Overall stability
A sturdy bench teaches lessons you’ll rely on later when building dining tables, beds, and other large furniture.
3. Console Table
Skill Level: Intermediate
At first glance, a console table seems straightforward.
Its narrow profile, however, leaves very little room for mistakes.
A leg that’s even slightly out of alignment quickly becomes noticeable.
That’s exactly why this project is so valuable.
It encourages precision without becoming overwhelmingly complicated.
Popular Design Variations
Depending on your style, you might choose:
- Tapered legs
- Rustic trestle base
- Industrial metal frame
- Lower storage shelf
- Single drawer
- Floating design
Because console tables often occupy entryways or hallways, they’re among the first pieces visitors notice.
Thoughtful proportions and clean craftsmanship make a lasting impression.
4. Blanket Chest
Skill Level: Intermediate
Blanket chests have remained useful for generations because they combine storage with timeless design.
Reclaimed wood adds another layer of warmth.
Whether it’s storing quilts, seasonal clothing, keepsakes, or children’s toys, a handcrafted chest often becomes a piece that stays in the family for years.
Skills You’ll Learn
This project introduces:
- Large panel construction
- Lid installation
- Hardware alignment
- Interior planning
- Accurate box assembly
Take your time during assembly.
Small errors become much more noticeable on larger furniture.
5. Bookshelf
Skill Level: Intermediate
Building a bookshelf might seem simple until you begin thinking about weight.
Books are surprisingly heavy.
A well-designed bookshelf needs more than attractive shelves—it needs thoughtful engineering.
Things to Consider
Before construction, think about:
- Shelf span
- Material thickness
- Back panel support
- Wall attachment
- Intended load
Reclaimed hardwood performs particularly well here because its density helps reduce long-term sagging.
It’s one of those projects where choosing the right material makes a noticeable difference.
6. Bathroom Vanity
Skill Level: Intermediate to Advanced
Bathrooms present challenges that other rooms simply don’t.
Moisture.
Steam.
Daily use.
A reclaimed wood vanity needs to balance beauty with durability.
Planning Ahead
Before cutting your first board, consider:
- Sink dimensions
- Plumbing access
- Storage needs
- Drawer placement
- Moisture-resistant finish
Planning carefully at the beginning often prevents difficult adjustments later.
7. Outdoor Planter Box
Skill Level: Intermediate
Outdoor woodworking introduces an entirely new set of considerations.
Rain.
Sunlight.
Changing temperatures.
Good design becomes just as important as good construction.
Best Uses
Planter boxes work beautifully for:
- Flowers
- Herbs
- Vegetable gardens
- Small shrubs
- Decorative entrances
Choose reclaimed wood that naturally tolerates outdoor conditions, and remember that proper drainage helps the project last much longer.
8. Entertainment Console
Skill Level: Intermediate
Modern entertainment furniture needs to do far more than support a television.
It often becomes the organizational center of an entire room.
Features Worth Considering
Many builders include:
- Open shelving
- Cable management
- Adjustable shelves
- Cabinet doors
- Display storage
- Ventilation openings
A little planning here creates furniture that’s both attractive and practical.
9. Storage Cabinet
Skill Level: Intermediate
Cabinets reward careful craftsmanship.
Doors should align cleanly.
Shelves should remain level.
Hardware should operate smoothly.
Every detail contributes to the finished piece.
Skills Reinforced
Cabinet construction strengthens your understanding of:
- Face frames
- Door fitting
- Shelf spacing
- Hardware installation
- Precision measuring
Few projects improve woodworking accuracy quite as effectively.
10. Rolling Workshop Cart
Skill Level: Intermediate
Sometimes the smartest project you can build is one that improves every future project.
A mobile workshop cart does exactly that.
Instead of searching for tools while working, everything stays organized and within reach.
Practical Features
Consider including:
- Locking casters
- Drawer storage
- Clamp rack
- Adjustable shelving
- Dedicated work surface
- Tool holders
Once completed, you’ll likely wonder how you managed without it.
Choosing Better Joinery
As furniture grows larger, joinery matters more.
Small decorative projects can often rely on straightforward construction methods.
Larger furniture deserves stronger connections.
Pocket-Hole Joinery
Pocket-hole joinery remains popular because it’s approachable, efficient, and surprisingly strong when used appropriately.
It’s particularly useful for:
- Cabinets
- Benches
- Utility furniture
- Workshop projects
The hidden fasteners also help maintain a clean appearance.
Dowels
Dowels create clean, nearly invisible joints while improving alignment during assembly.
Although they require careful drilling, they reward patience with professional-looking results.
Mortise and Tenon
Few woodworking joints have earned as much respect as the mortise and tenon.
Furniture built centuries ago still relies on this remarkably strong connection.
Learning it takes practice, but the effort pays dividends throughout your woodworking journey.
Lap Joints
Simple doesn’t mean weak.
Properly fitted lap joints provide excellent strength while remaining relatively straightforward to construct.
They’re especially useful for:
- Frames
- Shelving
- Outdoor furniture
- Utility projects
Designing Furniture That Feels Balanced
Good furniture isn’t simply functional.
It feels right.
That sense of balance comes from paying attention to proportion.
A thick tabletop supported by delicate legs often appears unstable.
Heavy bases beneath thin tops can feel awkward.
Before cutting lumber, take a moment to step back and study your design.
Sometimes a small adjustment in width or height transforms the entire project.
Respect the Nature of Wood
Even after decades of service, reclaimed wood continues responding to seasonal humidity.
That’s perfectly normal.
Rather than trying to stop movement, build with it in mind.
Allow tabletops room to expand.
Avoid rigid fastening methods where flexibility is needed.
Furniture built with these natural changes in mind generally lasts much longer.
Preparing for the Finish
By this stage, you’re likely spending more time on surface preparation than you did during your first few projects.
That’s a good sign.
Excellent finishes begin long before the first coat is applied.
Inspect every surface carefully.
Look for:
- Sanding scratches
- Glue residue
- Uneven edges
- Sharp corners
- Surface defects
Small improvements here often produce dramatic differences in the finished appearance.
Mistakes That Slow Progress
As confidence grows, it’s easy to become impatient.
Ironically, that’s when mistakes become more common.
Skipping Dry Assembly
Large furniture should always be assembled without glue before final construction.
A few extra minutes now can prevent hours of frustration later.
Mixing Uneven Lumber
Boards with inconsistent thickness create unnecessary challenges during assembly.
Prepare components before beginning final construction whenever possible.
Overcomplicating the Design
Beautiful furniture rarely needs excessive decoration.
Allow reclaimed wood to remain the star of the project.
Its grain, texture, and history already provide more visual interest than most decorative details ever could.
The Moment Everything Begins to Click
Intermediate woodworking is where many builders experience a subtle but important change.
You’re no longer simply following measurements.
You’re making decisions.
You begin choosing boards based on grain rather than convenience.
You think about how a tabletop will look five years from now.
You notice small details that once escaped your attention.
Those aren’t just technical improvements.
They’re signs that you’re beginning to think like a furniture maker.
And that’s exactly what prepares you for the next stage—building large, heirloom-quality pieces that combine engineering, craftsmanship, and timeless design into furniture capable of serving generations.
In the next chapter, we’ll step into advanced woodworking projects using reclaimed wood, including dining tables, bed frames, kitchen islands, sliding barn doors, and custom built-ins that showcase the full beauty and strength of reclaimed lumber.
Part 6: Advanced Woodworking Projects Using Reclaimed Wood That Become Family Heirlooms
Every woodworker reaches a point where the project on the workbench starts to mean something more.
It’s no longer just about building furniture.
It’s about creating something that could still be standing decades from now.
A dining table where birthdays are celebrated year after year.
A bed frame that moves from one home to another instead of being replaced.
A handcrafted desk where someone writes a novel, starts a business, or helps a child with homework.
These projects ask more of you.
They require patience, careful planning, and a willingness to slow down. Every decision matters—from the direction of the grain to the way each joint is fitted. There’s less room for shortcuts, but the reward is furniture with a level of permanence that’s increasingly rare.
Reclaimed wood feels especially at home in projects like these.
Its age, texture, and proven durability give every finished piece a sense of depth before it’s even assembled.
1. Farmhouse Dining Table
Skill Level: Advanced
Estimated Build Time: 2–4 weekends
Few woodworking projects carry as much emotional weight as a dining table.
Think about how much life happens around one.
Family dinners.
Holiday celebrations.
Board games.
Homework.
Late-night conversations.
Morning coffee.
When you build a dining table, you’re creating more than furniture. You’re building a place where memories will unfold.
Planning the Tabletop
The tabletop deserves more attention than any other part of the project.
Before cutting or joining anything, lay every board side by side.
Move them around.
Flip them over.
Rotate them.
Look for a natural flow in the grain instead of forcing perfect symmetry.
Sometimes a darker board placed between two lighter ones creates balance.
Sometimes a knot belongs near the edge instead of the center.
There isn’t a formula.
There is only careful observation.
The wood usually tells you when the arrangement feels right.
Choosing the Base
The base influences both appearance and functionality.
Popular options include:
- Traditional four-leg frame
- Trestle base
- Pedestal base
- X-frame design
- Industrial steel supports
Think beyond appearance.
Consider leg placement, knee clearance, chair spacing, and long-term stability.
A beautiful table should also be comfortable to gather around.
2. Reclaimed Wood Bed Frame
Skill Level: Advanced
A bed frame experiences constant movement.
Unlike many furniture pieces that remain relatively undisturbed, a bed absorbs weight, shifting pressure, and everyday use.
Strong construction isn’t optional.
It’s essential.
Areas That Deserve Extra Attention
Focus on:
- Corner joinery
- Side rail support
- Center beam reinforcement
- Headboard attachment
- Hardware accessibility
Whenever practical, design the frame so it can be disassembled for moving without compromising its strength.
Future-you will appreciate the effort.
Designing a Statement Headboard
The headboard often becomes the visual centerpiece.
Reclaimed wood offers countless possibilities, including:
- Horizontal planks
- Chevron layouts
- Herringbone patterns
- Mixed-width boards
- Live-edge accents
- Framed panel designs
Let the wood speak.
Simple layouts often showcase reclaimed lumber far better than overly decorative designs.
3. Kitchen Island
Skill Level: Advanced
A kitchen island serves many purposes.
Preparation space.
Storage.
Dining.
Conversation.
It often becomes the busiest area in the room.
Because of that, planning matters just as much as construction.
Before cutting your first board, think carefully about how the island will actually be used.
Questions Worth Asking
Will it include:
- Seating?
- Drawers?
- Shelving?
- Hidden storage?
- Electrical outlets?
- Space for appliances?
Designing around daily habits creates furniture that feels intuitive instead of merely impressive.
4. Sliding Barn Door
Skill Level: Advanced
Sliding barn doors have remained popular because they combine practical function with unmistakable character.
A reclaimed wood door immediately becomes a focal point.
Every weathered board contributes texture that new lumber simply can’t imitate.
Keys to Success
A well-built sliding door should remain:
- Flat
- Square
- Properly balanced
- Smooth to operate
Even slight twisting can affect how the hardware performs over time.
Take your time during assembly and check for alignment often.
5. Built-In Bookshelves
Skill Level: Advanced
Freestanding furniture can always be moved.
Built-ins become part of the home itself.
That permanence changes how they’re designed.
Walls are rarely perfectly straight.
Floors may slope slightly.
Corners are almost never exactly ninety degrees.
Successful built-ins account for these realities rather than assuming every measurement is perfect.
Planning Considerations
Think about:
- Shelf spacing
- Lighting
- Crown molding
- Baseboard integration
- Weight distribution
- Future accessibility
Done well, built-ins look as though they’ve always belonged there.
6. Executive Desk
Skill Level: Advanced
A desk is one of the most personal pieces of furniture you can build.
People spend countless hours sitting behind it.
Working.
Learning.
Creating.
Planning.
The design should support those moments.
Practical Features
Depending on your needs, consider including:
- Cable management
- File drawers
- Keyboard tray
- Adjustable shelves
- Hidden storage
- Charging station
Small details often have the greatest impact on everyday comfort.
7. Bathroom Vanity
Skill Level: Advanced
Bathrooms challenge furniture in ways few other rooms do.
Humidity rises and falls constantly.
Water is unavoidable.
Daily use is relentless.
A reclaimed wood vanity must balance warmth with resilience.
Priorities
Plan for:
- Moisture resistance
- Proper ventilation
- Easy cleaning
- Durable finish
- Accessible plumbing
Beautiful design means little if the furniture can’t withstand the environment it’s built for.
8. Entertainment Wall
Skill Level: Advanced
Large entertainment units combine furniture making with interior design.
Rather than focusing solely on the television, think about the entire room.
How will books be displayed?
Where will speakers sit?
Is there room for decorative objects?
Can cables remain hidden?
A thoughtful design creates visual harmony instead of overwhelming the space.
9. Matching Dining Bench Set
Building one bench requires accuracy.
Building two or more requires consistency.
Matching furniture introduces an entirely new challenge.
Every measurement must repeat precisely.
Templates, stop blocks, and careful layout become invaluable.
Consistency is one of the defining qualities of professional craftsmanship.
10. Custom Workbench
Every serious woodworker eventually reaches an interesting milestone.
Instead of adapting to someone else’s workbench, they build their own.
A custom workbench reflects everything you’ve learned.
It isn’t just another project.
It’s a tool that improves every project that follows.
Features to Consider
Many woodworkers include:
- Thick hardwood top
- Storage drawers
- Tool shelf
- Integrated vise
- Bench dog holes
- Locking casters
Build it around the way you work.
A thoughtfully designed workbench becomes the center of the workshop for years to come.
Traditional Joinery That Stands the Test of Time
Advanced furniture deserves joints that match its intended lifespan.
Many traditional methods remain popular today because they simply work.
Mortise and Tenon
Strong, elegant, and time-tested.
This joint excels in:
- Tables
- Chairs
- Beds
- Benches
- Structural frames
Its strength comes from both mechanical fit and generous glue surface.
Through Tenons
Instead of hiding craftsmanship, through tenons celebrate it.
Visible joinery becomes part of the design, adding visual interest while reinforcing structural strength.
Dovetails
Few joints are as recognizable as dovetails.
They’re especially well suited for:
- Drawers
- Blanket chests
- Storage boxes
- Cabinetry
When fitted properly, dovetails provide exceptional resistance to pulling forces.
Breadboard Ends
Large tabletops naturally expand and contract with seasonal humidity.
Breadboard ends help keep wide surfaces flat while allowing that movement to occur naturally.
It’s a classic solution that continues to earn its place in fine furniture.
Think Beyond the First Year
Advanced woodworking requires a different mindset.
Instead of asking whether a piece looks good today, ask how it will perform ten years from now.
Will the tabletop remain flat?
Can the finish be renewed?
Will the joints stay tight?
Can damaged hardware be replaced easily?
These questions influence every design decision.
Furniture built with longevity in mind almost always feels better made because every detail has a purpose.
Preserving Character Without Sacrificing Precision
One challenge appears repeatedly when working with reclaimed wood.
How much history should remain visible?
There’s no universal answer.
A weathered face on a dining table may become its defining feature.
Hidden structural components, however, often benefit from precise milling and clean joinery.
The balance lies somewhere in the middle.
Preserve the story where people can see it.
Prioritize accuracy where strength matters most.
The best reclaimed furniture achieves both.
Surface Preparation at an Advanced Level
By now, you’ll likely notice details you would have overlooked in your first projects.
Tiny sanding scratches.
Uneven reflections.
Glue squeeze-out.
Slightly sharp edges.
Before applying any finish, inspect the project from every angle under bright light.
Run your hand across every surface.
Often your fingertips discover imperfections before your eyes do.
This final inspection isn’t about chasing perfection.
It’s about ensuring the craftsmanship matches the effort you’ve invested.
Choosing a Finish for Heirloom Furniture
Large furniture deserves finishes that protect without hiding the natural beauty of the wood.
Several options work particularly well with reclaimed lumber.
Penetrating Oil
Enhances grain while maintaining a natural appearance.
Ideal for furniture where warmth and texture are the priority.
Hard Wax Oil
Offers excellent protection while remaining easy to maintain and repair.
Many furniture makers appreciate its low-sheen finish and tactile feel.
Polyurethane
A practical choice for surfaces that experience heavy daily use.
Dining tables, desks, and kitchen furniture often benefit from its durability.
Wax
Applied over compatible finishes, wax creates a smooth feel and soft luster that invites people to reach out and touch the wood.
Thinking Like a Furniture Maker
The biggest difference between an experienced furniture maker and a beginner isn’t the size of the workshop.
It’s the questions they ask before making the first cut.
Is this the right board?
Will the grain flow naturally?
Can this joint be stronger?
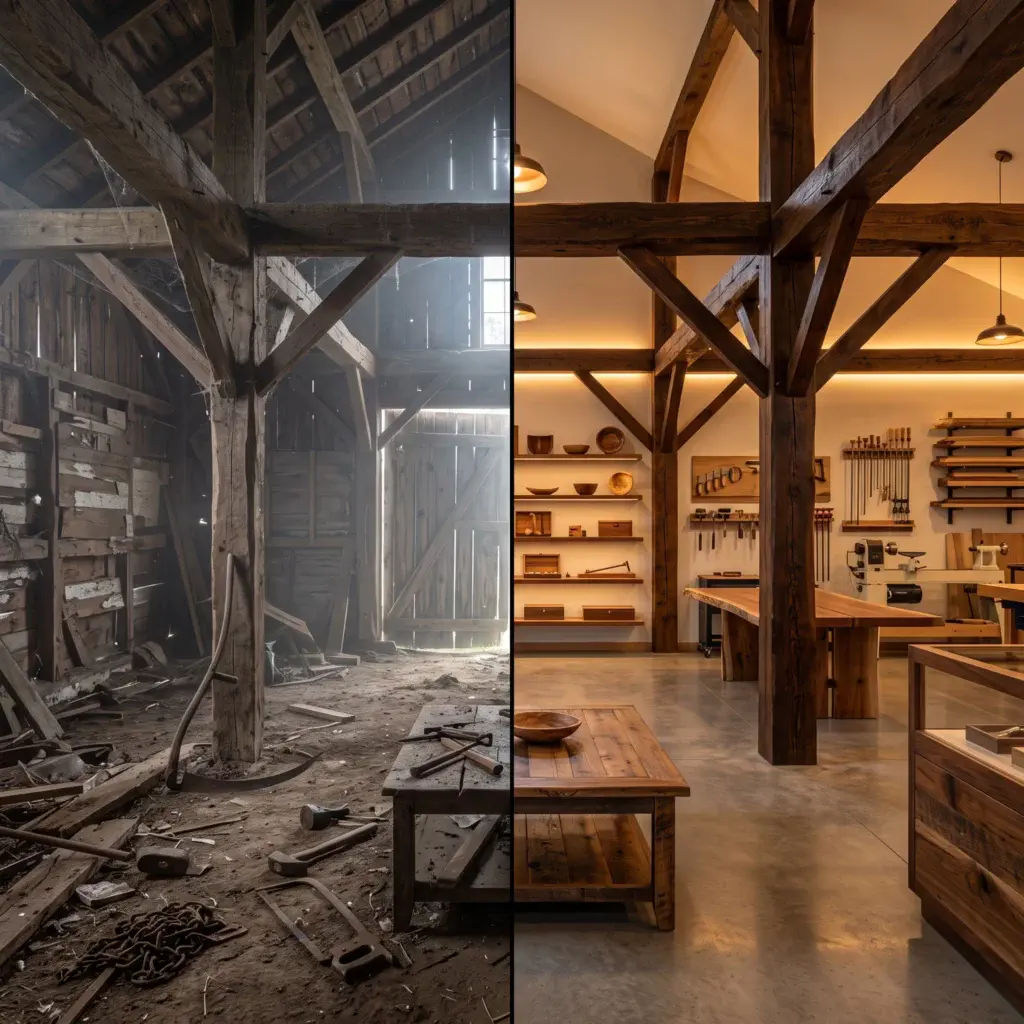
Does the design allow for seasonal movement?
Is there a simpler solution?
Those questions don’t slow progress.
They improve it.
Over time, they become instinctive.
And that’s when woodworking changes from assembling pieces of wood into creating furniture with lasting purpose.
In the next chapter, we’ll explore professional finishing techniques for reclaimed wood, including sanding strategies, stain selection, oils, protective finishes, and the methods experienced woodworkers use to preserve the authentic character that makes reclaimed lumber so remarkable.
Part 7: How to Finish Reclaimed Wood Without Losing the Character That Made You Choose It
There’s a quiet moment that arrives near the end of every woodworking project.
The cuts are finished.
The joinery is complete.
The clamps have come off.
For the first time, the piece looks like the furniture you imagined when you selected that first weathered board.
And then comes the finish.
It’s tempting to think of finishing as the final task on a checklist, but experienced woodworkers know better.
A finish doesn’t simply protect wood.
It reveals it.
The grain becomes deeper. Color gains warmth. Tiny details that seemed almost invisible suddenly emerge. Every saw mark, knot, and subtle shift in tone begins telling its story more clearly.
With reclaimed wood, this stage deserves special care.
Your goal isn’t to make old wood look new.
It’s to protect everything that makes it irreplaceable.
Before You Open the Finish, Slow Down
Many finishing problems begin long before the first coat is applied.
A little extra preparation almost always produces a dramatically better result.
Instead of reaching immediately for a brush or cloth, spend time looking at the project from every angle.
Natural light helps.
So does stepping back for a few minutes and returning with fresh eyes.
Questions worth asking include:
- Are there any glue marks left?
- Do the surfaces feel consistently smooth?
- Have sharp edges been softened?
- Is every trace of dust gone?
- Does the grain flow naturally across the project?
Small imperfections become surprisingly obvious once a finish is applied.
Finding them now is much easier than correcting them later.
Sanding: Know When to Stop
Perhaps no step is misunderstood more than sanding.
Many beginners assume smoother always means better.
With reclaimed wood, that’s rarely true.
Every pass of the sander removes a little more history.
Eventually the weathered texture, softened corners, and subtle tool marks disappear, leaving a surface that could easily be mistaken for brand-new lumber.
That’s usually not why you chose reclaimed wood.
Instead, think of sanding as refinement rather than restoration.
You’re removing roughness that affects comfort or function—not erasing decades of natural aging.
Sand With Intention
Move with the grain whenever possible.
Let the abrasive do the work instead of pressing harder.
Aggressive sanding often creates uneven surfaces while removing details that can never be replaced.
Some projects require more smoothing than others.
A dining table should feel comfortable beneath your hands.
A decorative wall shelf can preserve far more texture.
Always let the purpose of the project guide your decisions.
Cleaning the Surface Properly
Dust has a remarkable ability to hide until the moment you begin finishing.
Take time to remove it thoroughly.
A careful cleaning routine usually includes:
- Vacuuming every surface
- Brushing dust from knots and cracks
- Wiping with a clean microfiber cloth
- Allowing the wood to dry completely if any moisture is used
Pay particular attention to:
- Joinery
- Inside corners
- Nail holes
- End grain
- Decorative grooves
Even a small amount of trapped dust can affect the final appearance.
Should You Stain Reclaimed Wood?
This is one of the most common questions woodworkers ask.
The answer depends on the wood itself.
Some reclaimed lumber develops extraordinary color through decades of sunlight, oxidation, and natural aging.
Covering those tones with stain often hides what makes the material special.
Other projects benefit from carefully chosen color.
Stain can help:
- Blend boards with different shades
- Match existing furniture
- Increase grain contrast
- Create a more consistent appearance
There’s no universal rule.
Instead of asking whether reclaimed wood should be stained, ask whether stain genuinely improves this particular piece.
Often, less is more.
Oil Finishes: Let the Wood Speak for Itself
Many experienced furniture makers reach for oil finishes when working with reclaimed wood.
The reason is simple.
Oil enhances rather than dominates.
Instead of forming a thick layer over the surface, it penetrates the fibers, bringing out the depth and richness already hidden within the grain.
Benefits include:
- Warm natural appearance
- Enhanced grain definition
- Easy maintenance
- Comfortable feel
- Simple spot repairs
Oil finishes work especially well on:
- Coffee tables
- Shelving
- Headboards
- Decorative furniture
- Benches
The result feels handcrafted instead of heavily coated.
Hard Wax Oil: A Favorite for Everyday Furniture
If there’s one finish that consistently earns praise among furniture makers, it’s hard wax oil.
It offers an appealing balance between protection and natural appearance.
Rather than creating a glossy plastic-like film, it leaves the surface looking and feeling like real wood.
Many builders appreciate it because it’s:
- Durable
- Water resistant
- Repairable
- Low sheen
- Pleasant to touch
For reclaimed wood furniture that will be used every day, it’s often an excellent choice.
Polyurethane: Built for Heavy Use
Some furniture needs more protection than oil alone can provide.
Kitchen tables.
Desks.
Bathroom furniture.
Children’s furniture.
These pieces experience constant wear, making durability a priority.
Polyurethane creates a protective barrier against:
- Moisture
- Everyday scratches
- Food spills
- Household cleaning
Available in matte, satin, semi-gloss, and gloss, it offers flexibility without requiring frequent maintenance.
For reclaimed wood, matte and satin finishes often preserve a more authentic appearance than high-gloss alternatives.
Wax: The Finishing Touch
Wax doesn’t replace a durable protective finish in demanding environments.
Instead, it adds something different.
A softer glow.
A smoother touch.
A subtle richness that encourages people to run their hand across the surface.
Applied over a compatible finish, wax creates furniture that feels every bit as inviting as it looks.
Bringing Out the Best in Natural Grain
One of reclaimed wood’s greatest strengths is variation.
Color changes.
Mineral streaks.
Growth rings.
Weathering.
Tiny imperfections.
Rather than trying to make every board match perfectly, celebrate those differences.
The most memorable furniture often includes gentle contrast.
Those variations remind us that we’re looking at real wood, shaped by time rather than manufactured for uniformity.
Finishing Outdoor Projects
Outdoor furniture faces a different set of challenges.
Rain.
Sunlight.
Changing temperatures.
Humidity.
Wind.
Protection begins long before the finish.
Choose durable species whenever possible, and design projects so water can drain easily instead of collecting on flat surfaces.
A thoughtful design often extends a project’s life just as much as the finish itself.
Regular inspection and occasional maintenance help outdoor furniture remain attractive year after year.
Applying the Finish
Patience matters here more than speed.
Thin, even applications generally produce better results than heavy coats.
Allow each layer adequate time to dry before continuing.
As you work, watch how the wood changes.
This is one of the most satisfying moments in the entire process.
Grain that looked quiet suddenly becomes dramatic.
Colors deepen.
Textures become more defined.
The reclaimed board you’ve been shaping finally reveals its full personality.
Small Repairs Before the Final Coat
Now is the time to catch anything you may have missed.
Look closely for:
- Glue residue
- Small scratches
- Raised grain
- Uneven sheen
- Dust nibs
Addressing these details before the final coat creates a noticeably more refined result.
Professional-looking furniture is rarely about one dramatic improvement.
It’s the accumulation of dozens of small decisions made carefully.
Caring for Finished Reclaimed Wood Furniture
A quality finish protects furniture, but good habits protect the finish.
Fortunately, maintenance doesn’t need to be complicated.
Clean Gently
Soft cloths are usually all that’s needed for routine cleaning.
Avoid abrasive products that may gradually wear away the protective finish.
Wipe Up Spills Promptly
Even durable finishes appreciate a little help.
Cleaning spills sooner rather than later reduces the likelihood of staining or moisture damage.
Avoid Extreme Conditions
Very dry air, excessive humidity, or prolonged direct sunlight can gradually affect wood over time.
Position furniture thoughtfully whenever possible.
Refresh When Necessary
Many penetrating finishes can be renewed without completely stripping the surface.
Routine maintenance often keeps reclaimed furniture looking beautiful for decades.
Finishing Mistakes Worth Avoiding
Even skilled woodworkers occasionally encounter finishing problems.
Fortunately, most are preventable.
Applying Finish to a Dusty Surface
Dust that seems invisible beforehand becomes surprisingly obvious once trapped beneath a finish.
A clean workspace makes a remarkable difference.
Rushing Drying Time
Each coat needs time to cure properly.
Applying another coat too soon can create uneven results that require additional work later.
Choosing Appearance Over Function
A decorative shelf and a kitchen tabletop have very different needs.
Select finishes based on how the furniture will actually be used, not only how it looks in the can.
Trying to Make Old Wood Look New
Perhaps the most common mistake of all.
Reclaimed wood doesn’t need to imitate freshly milled lumber.
Its scratches, weathering, and subtle imperfections are precisely what make it memorable.
Protect them.
Don’t erase them.
When the Wood Finally Comes to Life
There’s something almost magical about the first coat of finish on reclaimed wood.
What looked dry and muted moments earlier suddenly becomes vibrant.
The grain gains depth.
The colors become richer.
Details hidden for decades quietly emerge.
It’s a reminder that good woodworking isn’t about forcing beauty into the material.
It’s about revealing the beauty that was there from the beginning.
Every careful decision—from choosing the right board to applying the final finish—simply helps that story become easier to see.
In the next chapter, we’ll move beyond construction and finishing to explore one of the most overlooked aspects of woodworking: understanding wood movement, preventing common structural problems, maintaining reclaimed wood furniture over the long term, and developing the habits that help your projects remain strong and beautiful for generations.
Part 8: Preventing Problems Before They Happen — Wood Movement, Repairs, and Long-Term Care
One of the biggest surprises for new woodworkers comes months after a project is finished.
The table was perfectly flat when it left the workshop.
The cabinet doors lined up beautifully.
Every joint felt solid.
Then the seasons changed.
A drawer started sticking.
A tabletop developed a small gap.
A cabinet door shifted ever so slightly.
It’s easy to assume something went wrong during construction.
In reality, the furniture is simply doing what wood has always done.
It moves.
That isn’t a flaw.
It’s part of working with a natural material.
Understanding how reclaimed wood responds to its environment—and designing with that movement in mind—is one of the skills that separates durable furniture from furniture that constantly needs repair.
The encouraging news is that most long-term problems can be prevented before the first board is ever cut.
Wood Never Truly Stops Changing
Trees spend decades responding to changing weather.
Even after they’re milled into lumber, those wood fibers continue reacting to the environment around them.
As humidity rises, wood absorbs moisture and expands.
When the air becomes drier, it releases that moisture and contracts.
These changes are usually gradual, but they never stop entirely.
Reclaimed lumber behaves the same way.
Although older wood is often more stable than freshly milled material, it still deserves the same thoughtful planning.
Ignoring that reality is one of the quickest ways to shorten the life of an otherwise beautiful project.
Why Reclaimed Wood Still Moves
Many people assume reclaimed lumber has “finished moving” because it’s old.
That’s a common misconception.
Years of service often make reclaimed wood more dimensionally stable, but age doesn’t eliminate its ability to respond to seasonal humidity.
A beam that spent decades inside a barn has already experienced countless seasonal cycles.
Once that same beam becomes part of a dining table inside a climate-controlled home, it begins adapting to a completely different environment.
That’s perfectly normal.
Designing furniture that allows for those subtle changes is part of good craftsmanship.
Give Lumber Time to Adjust
Bringing reclaimed wood home and immediately building with it can create unnecessary problems later.
Instead, allow the lumber to acclimate to your workshop.
Lay boards flat.
Support them evenly.
Give air room to circulate.
Depending on the thickness of the material and where it came from, this adjustment period may take anywhere from several days to several weeks.
It requires patience, but it’s time well spent.
Wood that’s comfortable in your workshop is far more likely to remain stable after construction.
Smart Lumber Storage Makes a Difference
How you store reclaimed wood before building has a lasting impact on the finished project.
A little organization now can prevent hours of frustration later.
Store Boards Flat
Long boards should rest on level supports.
This helps reduce unnecessary bending while allowing the wood to remain evenly supported.
Keep Similar Pieces Together
Organizing lumber by:
- Species
- Thickness
- Length
- Moisture condition
makes planning easier once construction begins.
It also helps you identify matching boards for visible surfaces.
Allow Airflow
Avoid stacking boards tightly without ventilation.
Air circulating around the lumber promotes more even moisture balance throughout the pile.
Designing Furniture That Welcomes Natural Movement
Trying to prevent wood from moving rarely works.
Designing furniture that accommodates movement works remarkably well.
This principle influences nearly every advanced woodworking project.
Tabletops
Wide tabletops naturally expand and contract across their width.
Allowing appropriate movement prevents unnecessary stress from building inside the wood.
Thoughtful attachment methods help the top remain secure without restricting its natural behavior.
Cabinet Doors
Doors need consistent clearance around every edge.
Too little space may cause seasonal sticking.
Too much creates noticeable gaps.
Careful fitting helps maintain smooth operation throughout the year.
Drawers
A drawer that slides perfectly in winter may become tighter during humid summer months.
Planning appropriate clearances during construction reduces seasonal frustration.
Recognizing Common Problems Early
Most woodworking problems begin subtly.
The sooner you notice them, the easier they are to address.
A Table Begins to Rock
A slight wobble doesn’t always mean the legs were cut incorrectly.
It could result from:
- Seasonal movement
- Uneven flooring
- Loose hardware
- Minor joint movement
Start by checking the simplest possibilities before assuming major repairs are necessary.
Small Cracks Appear
Hairline cracks occasionally develop as wood adjusts to changing humidity.
Not every crack indicates structural failure.
Evaluate whether it affects strength or simply reflects normal seasonal movement.
Understanding the difference helps avoid unnecessary repairs.
Doors No Longer Close Smoothly
Cabinet doors may shift slightly throughout the year.
Inspect hinges first.
Small hardware adjustments often restore proper alignment without requiring major modifications.
Drawers Become Difficult to Open
Humidity frequently influences drawer fit.
Before sanding anything, consider whether seasonal conditions might be responsible.
Many drawers return to normal operation as indoor humidity changes.
Knowing When a Board Isn’t Worth Saving
One lesson every experienced woodworker eventually learns is that not every reclaimed board belongs in a finished project.
Some pieces have reached the end of their useful life.
Be cautious with lumber showing:
- Active insect damage
- Extensive rot
- Severe twisting
- Deep structural cracks
- Persistent mold
- Chemical contamination
Rejecting unsuitable material isn’t wasteful.
It’s part of building furniture you can trust.
Maintaining Furniture Through the Seasons
Beautiful furniture deserves thoughtful care.
Fortunately, maintenance is usually straightforward.
Keep Indoor Conditions Reasonably Stable
Large swings in humidity place unnecessary stress on solid wood furniture.
While perfect consistency isn’t realistic, avoiding dramatic changes helps preserve joints and finishes over time.
Protect Surfaces From Standing Water
A quality finish offers protection, but it isn’t an invitation to ignore spills.
Wiping up moisture promptly helps preserve both the finish and the wood beneath it.
Lift Heavy Furniture Instead of Dragging It
Dragging places extra stress on legs and joints.
Whenever practical, lift furniture carefully during moves or rearranging.
Small habits like this extend the life of handcrafted pieces.
Inspect Hardware Occasionally
Over time, screws, hinges, and bed hardware may loosen through normal use.
A quick inspection every so often helps prevent minor issues from becoming larger repairs.
Looking After Outdoor Projects
Outdoor reclaimed wood furniture faces a far more demanding environment.
Rain, sunlight, changing temperatures, and seasonal moisture all work against the finish.
Routine care makes a significant difference.
Inspect outdoor furniture periodically for:
- Finish wear
- Loose fasteners
- Water pooling
- Surface cracking
- Dirt buildup
Addressing small issues early is usually much easier than restoring neglected furniture later.
Repairing Everyday Wear
One advantage of solid reclaimed wood is that it ages gracefully.
Minor wear often adds character rather than reducing value.
Still, occasional repairs help keep furniture performing its best.
Surface Scratches
Many light scratches affect only the finish rather than the wood itself.
Appropriate maintenance for the finish already on the piece often restores its appearance without extensive refinishing.
Minor Dents
Not every dent needs to disappear.
Sometimes it’s simply another chapter in the furniture’s story.
When repairs are appropriate, take a conservative approach that preserves surrounding character whenever possible.
Loose Components
Furniture naturally experiences years of movement.
If you notice anything becoming loose, address it promptly.
Small adjustments today often prevent much larger repairs tomorrow.
Build Furniture That’s Easy to Maintain
One characteristic shared by many heirloom pieces is thoughtful design.
The people who built them expected future maintenance.
You can do the same.
Whenever practical:
- Keep hardware accessible.
- Make removable components easy to service.
- Choose finishes that can be renewed.
- Avoid designs that make future repairs unnecessarily difficult.
Furniture built with maintenance in mind often remains useful for generations.
Developing the Eye of a Craftsperson
Technical skills matter.
Observation matters just as much.
Experienced woodworkers constantly evaluate what they see.
They notice:
- Slight changes in grain direction.
- Tiny alignment differences.
- Inconsistent reflections across a surface.
- Gaps that others might overlook.
- How light reveals subtle imperfections.
These habits develop slowly.
With every completed project, your attention becomes sharper.
Eventually, you begin solving problems before they ever become visible.
That’s one of the quiet signs of real experience.
Furniture That Improves With Time
Mass-produced furniture often reaches its best condition the day it’s assembled.
From there, it slowly wears out.
Well-built reclaimed wood furniture often follows the opposite path.
The finish develops a gentle patina.
Small marks become reminders of daily life.
The wood settles naturally into its surroundings.
Instead of looking older, it gains personality.
That’s one of the reasons handcrafted furniture remains so meaningful.
It’s designed to be lived with.
Used.
Maintained.
Appreciated.
Not replaced.
In the next chapter, we’ll explore how woodworking projects using reclaimed wood can grow beyond a rewarding hobby into a source of income, covering pricing, presenting your work, photographing finished furniture, attracting customers, and building a reputation for craftsmanship that lasts.
Part 9: From Workshop to Marketplace — How to Sell Woodworking Projects Using Reclaimed Wood
There’s a moment that catches many woodworkers by surprise.
It usually happens after a project is finished and sitting in its new home.
A friend stops by and asks, “Where did you buy that?”
When you answer, “I built it,” the next question almost always follows.
“Could you make one for me?”
That’s how countless woodworking businesses begin.
Not with a business plan.
Not with a storefront.
Not with a marketing campaign.
Just one well-made piece that starts a conversation.
Reclaimed wood furniture has a unique advantage in today’s market because it offers something mass-produced products simply can’t: authenticity. Every board carries subtle differences in grain, color, texture, and history. No factory can reproduce that, and many customers are willing to pay for furniture that feels genuinely one of a kind.
Whether you’re hoping to earn a little extra income on weekends or build a full-time business, success depends on far more than woodworking skills alone.
The way you present your work, communicate with customers, and tell the story behind each piece matters just as much as the craftsmanship itself.
Why Reclaimed Wood Furniture Stands Out
Walk through a furniture showroom and you’ll notice something.
Most pieces look remarkably similar.
Uniform finishes.
Identical grain patterns.
Predictable designs.
There’s nothing inherently wrong with consistency, but it often comes at the expense of individuality.
Reclaimed wood offers the opposite experience.
Every project has its own personality.
One tabletop might feature weathered saw marks.
Another displays tight growth rings from a tree that matured over generations.
A third showcases nail holes that quietly hint at its previous life.
Customers notice these details.
More importantly, they remember them.
That’s one of the strongest advantages reclaimed wood furniture has in today’s marketplace.
Start With Projects People Already Need
When people first consider selling woodworking projects, it’s tempting to build whatever seems most exciting.
A better approach is to begin with pieces that solve everyday problems.
Useful furniture tends to generate consistent interest because it fits naturally into people’s homes.
Home Organization
Projects that improve storage are always in demand.
Popular examples include:
- Floating shelves
- Entryway benches
- Coat racks
- Key holders
- Storage crates
- Shoe racks
These pieces are practical, relatively approachable to build, and appeal to a wide range of buyers.
Living Room Furniture
The living room is often where handcrafted furniture makes the biggest visual impact.
Consider building:
- Coffee tables
- Console tables
- Bookshelves
- Side tables
- Media consoles
These projects allow reclaimed wood to become a defining design feature while providing lasting functionality.
Dining Furniture
Dining furniture typically requires more experience, but it also creates opportunities for larger custom commissions.
Projects might include:
- Dining tables
- Benches
- Buffet cabinets
- Serving carts
Because these pieces often become gathering places for families, customers tend to value craftsmanship over short-term trends.
Pricing Your Work Without Undervaluing Yourself
Pricing is one of the most challenging aspects of selling handcrafted furniture.
Many talented woodworkers charge too little because they focus only on material costs.
In reality, the value of handcrafted furniture extends far beyond the wood itself.
Every project includes:
- Design time
- Lumber preparation
- Milling
- Joinery
- Assembly
- Sanding
- Finishing
- Customer communication
- Packaging or delivery
Those hours deserve to be reflected in your pricing.
Remember, you’re not selling boards joined together.
You’re selling knowledge, experience, craftsmanship, and time.
Don’t Forget the Hidden Costs
Some expenses are easy to overlook until you start tracking them.
Think beyond lumber and hardware.
Consider:
- Sandpaper
- Finish products
- Glue
- Replacement blades
- Electricity
- Dust collection supplies
- Equipment maintenance
- Workshop overhead
Small costs accumulate over dozens of projects.
Understanding them helps you build a healthier business over the long term.
Create Work People Can Recognize
The most memorable furniture makers often share one characteristic.
Their work has a recognizable style.
That doesn’t mean every project looks identical.
Instead, there’s a consistent approach that ties everything together.
Perhaps your furniture emphasizes:
- Clean modern lines
- Rustic farmhouse charm
- Industrial-inspired details
- Minimalist forms
- Traditional craftsmanship
Over time, this consistency helps people recognize your work before they even know who built it.
That’s a powerful form of branding.
Tell the Story Behind the Wood
One of reclaimed wood’s greatest strengths has nothing to do with construction.
It’s the story.
People connect with stories because they add meaning to ordinary objects.
If you know where the wood came from, share that history honestly.
Perhaps the tabletop was crafted from old oak barn beams.
Maybe the shelves came from reclaimed warehouse flooring.
If the origin is unknown, that’s perfectly fine.
You can still talk about the care taken to reclaim, prepare, and transform the material into something useful again.
What matters is authenticity.
Never invent a history that doesn’t exist.
Real stories are compelling enough.
Photograph Furniture Like It Belongs in a Home
Beautiful furniture deserves thoughtful photography.
The goal isn’t simply documenting a finished project.
It’s helping people imagine living with it.
Use Natural Light
Soft daylight reveals grain, texture, and color far more accurately than harsh artificial lighting.
Morning or late afternoon often produces particularly flattering results.
Show the Details
Wide shots are important.
Close-up photographs matter just as much.
Capture:
- Grain patterns
- Joinery
- Hardware
- Edge details
- Surface texture
These images communicate craftsmanship in ways words cannot.
Provide Context
Instead of photographing furniture against a blank wall whenever possible, place it in a real setting.
A coffee table surrounded by seating.
Shelves displaying books and plants.
A dining table prepared for a meal.
Context helps buyers picture the furniture in their own homes.
Communicate Clearly With Customers
Clear communication builds trust.
Before beginning custom work, discuss:
- Dimensions
- Style preferences
- Finish selection
- Delivery expectations
- Timeline
- Budget
Writing these details down helps ensure everyone shares the same expectations.
It also reduces misunderstandings later in the project.
Handle Custom Orders Carefully
Custom furniture offers exciting creative opportunities, but it also introduces new responsibilities.
Resist the temptation to promise unrealistic completion dates.
Quality woodworking takes time.
Most customers appreciate honesty far more than overly optimistic deadlines that can’t be met.
It’s better to under-promise and over-deliver than the other way around.
Encourage Repeat Customers
A satisfied customer often becomes your best marketing.
Simple habits encourage people to return.
Deliver projects on time.
Respond to questions promptly.
Package furniture carefully.
Follow up after delivery to ensure everything meets expectations.
People remember how they were treated just as much as they remember the furniture itself.
Improve Efficiency Without Rushing
As orders increase, you’ll naturally look for ways to work more efficiently.
The key is removing wasted effort—not reducing quality.
Many experienced furniture makers improve productivity by:
- Building similar projects together
- Using templates for repeated cuts
- Organizing tools consistently
- Milling lumber in batches
- Preparing multiple glue-ups at once
These changes save time while preserving craftsmanship.
Mistakes That Hold New Furniture Makers Back
Every growing business faces challenges.
Fortunately, many of the most common mistakes are avoidable.
Charging Too Little
Low prices may generate interest initially, but they often become unsustainable.
Confident pricing reflects the value of your work.
Accepting Every Commission
Not every project is the right fit.
If a request falls far outside your experience or equipment, it’s perfectly reasonable to decline politely.
Focusing on projects you can complete exceptionally well strengthens your reputation over time.
Ignoring Workshop Organization
Efficiency begins with an organized workspace.
Time spent searching for tools or materials quickly adds up.
Good organization improves both productivity and enjoyment.
Neglecting Continued Learning
Woodworking rewards curiosity.
Continue refining your skills.
Experiment with new joinery.
Study historical furniture.
Practice better finishing techniques.
Every improvement becomes part of your future projects.
Success Looks Different for Everyone
Not every woodworker dreams of running a furniture company.
Some simply enjoy earning enough to support their hobby.
Others hope to replace a full-time income.
Both goals are equally worthwhile.
The definition of success belongs to you.
Perhaps it’s building furniture only on weekends.
Perhaps it’s creating one custom dining table each month.
Perhaps it’s opening a workshop where craftsmanship becomes your career.
There isn’t a single correct path.
The important thing is building work you’re genuinely proud to put your name on.
That reputation grows far more steadily than any marketing campaign ever could.
And in woodworking, reputation often becomes your most valuable asset.
In the final chapter, we’ll answer the questions nearly every woodworker asks about reclaimed lumber, offer practical solutions to common concerns, and finish with a curated Products / Tools / Resources section featuring the equipment, supplies, and reference materials that make woodworking projects using reclaimed wood more enjoyable and more successful.
Part 10: Frequently Asked Questions About Woodworking Projects Using Reclaimed Wood
By the time most people reach this stage, they’re no longer wondering whether reclaimed wood is worth using.
They’re thinking about their first project—or perhaps their next one.
The questions below reflect the conversations that come up again and again among DIY enthusiasts, hobbyists, and experienced furniture makers alike. If you’ve found yourself wondering about any of these topics, you’re certainly not alone.
Frequently Asked Questions
“Is reclaimed wood really better than buying new lumber?”
It depends on what you’re trying to build.
If you want perfectly uniform boards that require minimal preparation, new lumber is often the easier option.
If you’re looking for warmth, personality, and a material with genuine history, reclaimed wood offers something difficult to duplicate. Many older boards also come from slow-growth timber, giving them impressive density and stability when they’re properly prepared.
For furniture where character matters just as much as function, reclaimed wood is often the more rewarding choice.
“I’m completely new to woodworking. Is reclaimed wood too difficult to start with?”
Not at all.
The key is choosing the right project.
Simple builds like floating shelves, serving trays, picture frames, or coat racks allow you to learn how reclaimed wood behaves without becoming overwhelmed.
You’ll gain confidence with measuring, cutting, sanding, and finishing before moving on to larger furniture.
Every experienced woodworker started somewhere, and many began with projects just like these.
“How do I know if reclaimed wood is safe to use?”
Careful inspection is essential.
Before bringing reclaimed lumber into your workshop:
- Look for signs of rot.
- Check for insect damage.
- Remove nails, screws, and staples.
- Inspect for cracks that affect structural strength.
- Avoid boards with obvious chemical contamination.
- Allow the wood to acclimate before building.
A little patience during preparation protects both your tools and your finished project.
“Can I build indoor furniture from pallet wood?”
Sometimes—but not every pallet is suitable.
Always inspect pallet lumber carefully before using it indoors.
Choose clean, undamaged boards that are appropriate for furniture, and avoid pallets that show signs of contamination, excessive wear, or questionable previous use.
When selected carefully, pallet wood can become attractive shelving, decorative accents, storage projects, and other smaller pieces.
“Should every reclaimed board be sanded smooth?”
Usually, no.
One of reclaimed wood’s greatest strengths is its natural texture.
Rather than sanding every surface until it looks brand new, focus on removing splinters, rough spots, and machining marks while preserving the weathering that gives the wood its personality.
The goal is comfort—not perfection.
“What’s the easiest first furniture project?”
A floating shelf is hard to beat.
It requires relatively little material, teaches several core woodworking skills, and produces something you’ll use every day.
After that, many beginners move naturally into projects such as:
- Serving trays
- Rustic benches
- Plant stands
- Storage crates
- Coffee tables
Each project introduces new techniques without feeling like an overwhelming leap.
“How do I keep reclaimed wood furniture looking its best?”
Routine care goes a long way.
Dust regularly with a soft cloth.
Clean spills promptly.
Avoid prolonged exposure to standing water or harsh sunlight whenever possible.
If your furniture uses a renewable finish such as a penetrating oil or hard wax oil, refreshing it periodically helps maintain both protection and appearance.
Good maintenance doesn’t take much time, but it can dramatically extend the life of a piece.
“Can reclaimed wood be used outdoors?”
Yes, provided you choose suitable lumber and build with outdoor conditions in mind.
Naturally durable species perform especially well outside, and thoughtful design helps shed water rather than trapping it.
Outdoor furniture also benefits from regular inspections and timely maintenance to keep finishes performing as intended.
“Why does reclaimed wood cost more if it’s recycled?”
While some reclaimed lumber can be sourced inexpensively, high-quality reclaimed wood often requires considerable work before it’s ready to use.
Boards must be:
- Salvaged
- Transported
- Cleaned
- Inspected
- De-nailed
- Dried if necessary
- Sorted
- Milled
That preparation represents time, skill, and equipment, all of which contribute to the final value.
“How long can reclaimed wood furniture last?”
With thoughtful design, quality joinery, and proper maintenance, reclaimed wood furniture can remain functional for decades.
In many cases, the lumber has already served one lifetime before becoming part of your project.
Well-crafted furniture simply allows that story to continue.
Products / Tools / Resources
Whether you’re setting up your first workspace or expanding an established shop, investing in dependable tools and learning resources makes every project more enjoyable.
You don’t need to buy everything at once. Build your collection gradually, choosing tools that solve the challenges you’re encountering today while supporting the projects you hope to tackle tomorrow.
Essential Hand Tools
Every workshop benefits from a dependable set of basics:
- Tape measure
- Combination square
- Marking knife
- Chisel set
- Block plane
- Wood mallet
- Clamps in several sizes
- Measuring and layout tools
Quality hand tools often remain in use for decades, making them one of the best long-term investments a woodworker can make.
Core Power Tools
As your projects become more ambitious, these tools can dramatically improve efficiency and accuracy:
- Circular saw
- Miter saw
- Table saw
- Cordless drill and driver
- Random orbital sander
- Thickness planer
- Router
There’s no need to purchase every machine immediately. Add tools as your experience and project complexity grow.
Safety Equipment
Protecting yourself is just as important as protecting your projects.
Keep these essentials within easy reach:
- Safety glasses
- Hearing protection
- Dust mask or respirator suitable for woodworking
- Work gloves for material handling
- First-aid kit
- Fire extinguisher
Developing safe habits early creates a workshop that’s both productive and enjoyable to use.
Workshop Supplies
Small consumables often make the biggest difference during a build.
Consider keeping a steady supply of:
- Wood glue
- Sandpaper in multiple grits
- Microfiber cloths
- Painter’s tape
- Disposable finishing cloths
- Wood filler for appropriate applications
- Measuring pencils
- Replacement blades and bits
Running out of these items midway through a project can interrupt your workflow more than you might expect.
Finishing Supplies
Different projects call for different levels of protection.
Having a few dependable finishing options available allows you to choose the right one for each build.
Useful products include:
- Penetrating oil finishes
- Hard wax oil
- Polyurethane
- Furniture wax
- Clean applicator pads
- Quality natural- or synthetic-bristle brushes
- Lint-free cloths
Always test a finish on an offcut whenever possible before applying it to the completed project.
Lumber Sources
Building a reliable network of reclaimed wood suppliers saves time and often leads to better material.
Good places to look include:
- Architectural salvage yards
- Local demolition contractors
- Barn and farm renovations
- Hardwood flooring removal projects
- Community reuse centers
- Estate sales
- Habitat for Humanity ReStore locations
- Local woodworking groups
Relationships matter.
Many woodworkers discover that consistent, trustworthy sources become one of their greatest long-term advantages.
Learning Resources
Even after years in the workshop, there’s always something new to learn.
Consider exploring:
- Books on furniture design
- Joinery references
- Wood identification guides
- Finishing handbooks
- Sketchbooks for recording project ideas
- Workshops and local woodworking classes
The most accomplished furniture makers never stop being students of the craft.
Every project teaches something new.
Every board presents a different challenge.
And every reclaimed piece of lumber offers another opportunity to transform forgotten material into furniture with lasting purpose.