
There is a moment every woodworker recognizes. The board is against the fence, the blade is singing, and then the sound changes. The motor drops half a note. The feed becomes harder. A dark line appears on the cut edge.
At that point, the label on the blade suddenly feels important.
Is the kerf too wide for the saw? Is a thin-kerf blade the answer? Would a full-kerf blade hold a straighter line? Or is the real problem hiding somewhere else—in the fence, the tooth pattern, the stock, or the riving knife?
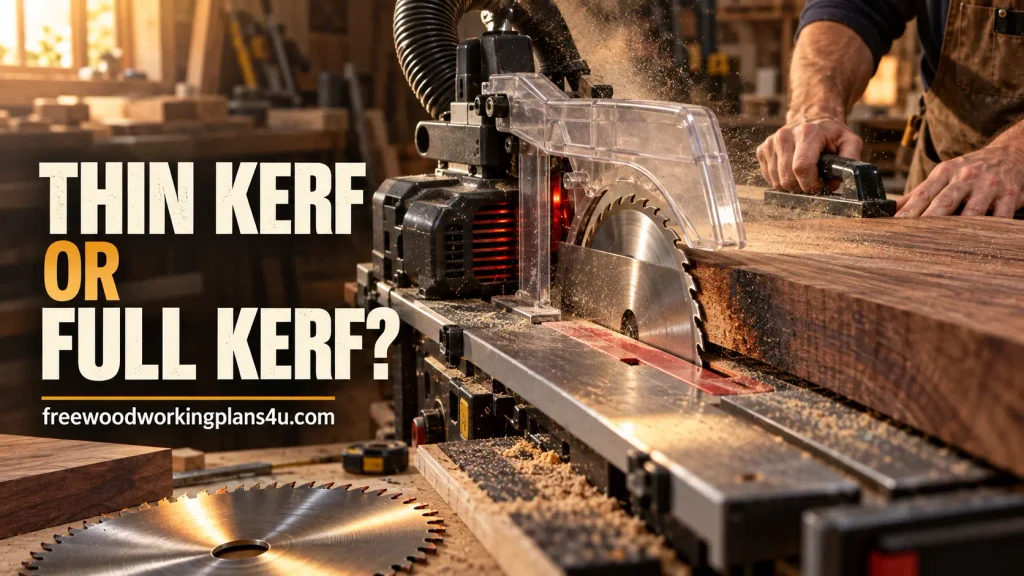
Quick answer: thin kerf is usually the better place to start on a portable, benchtop, or lower-powered saw because it removes less material and often reduces motor load. Full kerf is often the steadier choice on a powerful saw making long, demanding cuts in dense stock. But neither blade is automatically better. The correct choice is the one that fits your saw’s diameter, arbor, RPM, body thickness, kerf, riving knife or splitter, guard, insert, material, and intended cut.
That may sound less dramatic than “thin kerf versus full kerf,” but it is the decision that prevents expensive mistakes. A blade can fit the arbor and still be wrong for the safety hardware. A thin blade can save material and still wander. A full blade can feel solid and still burn plywood if its tooth geometry is wrong.
If you are choosing a blade while planning a project, you can begin with the site’s free woodworking plans and 440-page Art of Woodworking guide.
Then bring the blade decision back to the wood in front of you. Your saw will tell you more than a product label ever can.
Table of Contents
- The short answer: thin kerf or full kerf?
- What thin kerf and full kerf actually change
- Start with the saw, not the blade
- Compatibility checks
- Match the kerf to the material
- Match the blade to the cut
- Tooth geometry
- Portable and underpowered saws
- When full kerf makes more sense
- Material savings
- Troubleshooting
- Five-minute test
- Decision path
- FAQ
- Products, tools, and resources
The Short Answer: Thin Kerf or Full Kerf?
Thin kerf is the practical advantage when power is limited
A thin-kerf blade cuts a narrower slot. Less wood is removed on every pass, so the motor generally has less material to push through. That difference becomes noticeable when a small table saw is ripping thick boards, when a circular saw is working through sheet goods, or when a tired motor is already close to its limit.
The best feeling is not speed. It is control. The saw keeps its pitch. Your hands do not have to push harder. The board moves forward at a steady pace instead of stopping and starting as the motor struggles.
Thin kerf is also attractive when material yield matters. A few thousandths of an inch may not change a weekend project made from common pine. Across dozens of cuts in expensive hardwood, narrow strips, or a tightly planned sheet of plywood, the difference begins to accumulate.
Freud presents thin-kerf blades as a way to help underpowered table and radial-arm saws handle cutting with less demand on the motor. Freud’s thin-kerf product guidance is a manufacturer example, so treat it as useful guidance rather than a promise that every thin blade will transform every saw.
Thin kerf deserves your first look when:
- the saw is portable, compact, or underpowered;
- the motor bogs during a sensible rip cut;
- the work involves many repeated cuts;
- the stock is thin or expensive;
- reducing waste is important; or
- the saw manual approves a thin-kerf configuration.
Full kerf earns its place when the cut demands stiffness
A full-kerf blade removes a wider strip and usually has a thicker plate or body. That additional steel can resist deflection when the blade is working through a long rip in dense hardwood, particularly on a saw with enough power to keep the blade moving at a controlled feed rate.
There is a quiet confidence to a stable blade. It does not feel as though it is being pushed sideways by the board. The cut edge stays square. A series of parts comes off the saw with less variation.
Full kerf is often worth considering on a powerful contractor, hybrid, or cabinet saw when you regularly cut thick or dense stock. It can also be the economical choice when correcting a wandering cut would cost more in time and material than the wider kerf consumes.
Look seriously at full kerf when:
- the saw has plenty of motor reserve;
- the cut is long, dense, and precision-sensitive;
- a thin blade visibly deflects during normal feeding;
- stability matters more than maximum material yield; or
- your saw’s riving knife, splitter, guard, and insert are designed for it.
The simple comparison
| Your main concern | First blade category to investigate | What still needs checking |
|---|---|---|
| Motor bogging or difficult feed | Thin kerf | Tooth geometry, sharpness, alignment, and saw condition |
| Deflection or a wandering edge | Full kerf or a stiff thin-kerf design | Fence alignment, stock condition, arbor runout, and feed pressure |
| Plywood tear-out | A blade with the right tooth pattern | Support, exit-side control, sharpness, and kerf |
| Burning | Blade condition and setup | Feed rate, alignment, material, and motor load |
| Waste on repeated cuts | Thin kerf | Measured kerf and the actual cut layout |
| Pinching or kickback risk | Correct safety setup | Riving-knife, splitter, guard, and blade compatibility |
The important word is investigate. Kerf starts the conversation. It does not finish it.
Recommended guide: Saw Kerf Calculator for Woodworking Cut Lists: Calculate Exact Stock Length Before You Cut
What Thin Kerf and Full Kerf Actually Change
The kerf is the width of the slot left behind
The kerf is the material removed by the teeth. The blade body is the central plate that supports those teeth. Because the teeth project beyond the body, the final cut can be wider than the plate itself.
That difference matters. When you install a new blade, you are not only changing how much wood becomes dust. You may also be changing the relationship between the blade, the riving knife, the splitter, the throat plate, and the guard.
There is no single universal measurement that every manufacturer uses to separate thin kerf from full kerf. Product names are useful for finding options, but the specifications are what you should trust. Look for the diameter, arbor hole, actual kerf, plate or body thickness, tooth count, tooth pattern, hook angle, maximum RPM, and intended material.
Learn more: What Is Saw Kerf in Woodworking? The Hidden Width Behind Every Cut
Less material removed usually means less motor demand
The motor has to drive carbide teeth through fibers, knots, glue lines, veneers, and sometimes abrasive manufactured material. A narrower kerf means the teeth are removing a narrower slice at any instant.
That can reduce cutting resistance and make it easier to maintain a smooth feed. It does not make a dull blade sharp, a warped board straight, or a misaligned fence safe. A thin blade with too many teeth, the wrong hook angle, or heavy resin buildup can still work the motor hard.
Think of thin kerf as a way to spend the saw’s available power carefully. It is not permission to force an unsuitable blade through the stock.
A thicker body may improve resistance to deflection
Deflection is the small sideways movement that turns a straight cut into a slight curve or taper. You may see it as an edge that is not square, a cut that widens at one end, or a burn mark where the blade rubbed instead of cutting cleanly.
A thicker body can resist that movement. Yet blade thickness is only one part of stiffness. A full-kerf blade on a crooked fence is still going to produce a crooked cut. A thin-kerf blade on a carefully aligned saw may be remarkably stable.
Before deciding that thin means inaccurate, inspect the arbor, the fence, the insert, the stock, and your feed path. Many “blade problems” are setup problems wearing a more convenient disguise.
Wider kerf means more wood becomes sawdust
Every separation cut consumes material. A wider kerf consumes more. The relationship is simple enough to matter even when the rest of the project is complicated.
USDA Forest Service research describes the underlying principle: a thicker saw blade creates a wider kerf and sends more wood into sawdust. USDA Forest Service technical research
You may never notice the difference on two rough cuts in construction lumber. You may notice it immediately when laying out a sheet of plywood, cutting narrow cabinet parts, or working with a board that took time and money to find.
Start With the Saw, Not the Blade
The blade does not operate in isolation. It is part of a machine, and the machine sets the boundaries.
Portable, jobsite, and benchtop table saws
Portable saws are wonderfully useful because they go where the work is. They are also more likely to have limited motor reserve, lighter tables, smaller fences, and more vibration than a cabinet saw.
That is where thin kerf can feel like a genuine upgrade. The saw may hold its speed better, and the feed can become less of a wrestling match.
The catch is compatibility. Some portable saws are designed around a thin-kerf riving knife or splitter. Others specify a range of acceptable body and kerf thicknesses. A blade that slides onto the arbor can still be wrong for the safety hardware.
Contractor and hybrid saws
These saws sit between portability and mass. Some will handle a full-kerf blade comfortably in ordinary stock. Others reveal their limits when asked to rip thick maple, oak, or beech for several minutes.
Read the manual, consider the motor’s actual performance, and pay attention to how the saw behaves under load. If you keep both thin-kerf and full-kerf blades, make a note of which riving knife, insert, and guard configuration belongs with each one.
Cabinet saws
A cabinet saw generally brings more power, a heavier structure, and a more stable working surface. Full kerf can be an excellent choice for demanding hardwood rips because the saw has the reserve to carry the wider cut.
That does not make thin kerf irrelevant. A cabinet-saw owner may choose it to preserve expensive material, reduce load over a long production run, or cut narrow stock efficiently.
Power can conceal bad habits. A strong motor may push through a dull or dirty blade that would make a small saw complain immediately. The cut can still be inaccurate, hot, or unsafe.
Circular and track saws
Handheld tools have their own guards, shoes, blade depths, and intended blade configurations. A thin-kerf table-saw blade is not automatically the right choice for a circular saw simply because the diameter looks similar.
For a track saw, the kerf may also affect the splinter strip and the fit of the guide rail’s replaceable parts. For a miter saw, tooth pattern and hook angle may matter more than the narrowest possible cut.
Always ask the tool’s manual what it expects before applying a table-saw rule to a different machine.
The Compatibility Checks You Cannot Skip
Diameter and arbor
The blade must match the saw’s specified diameter and arbor hole. Do not rely on an adapter or an improvised setup simply because it appears to fit.
The blade also needs to sit fully and cleanly against the arbor flange. Dust or resin between the surfaces can introduce runout, vibration, and an inaccurate cut.
Maximum RPM
Check the blade’s rated speed against the spindle speed of the saw. Physical fit is not the same as operating compatibility.
If the blade markings and the saw documentation do not agree, stop and resolve the difference before installation.
Body thickness and kerf
The body thickness helps you understand stiffness. The kerf tells you how wide the cut will be and helps determine whether the riving knife or splitter is suitable.
Record both when the manufacturer provides them. Do not assume that two blades of the same diameter share the same body thickness or kerf.
Riving knife, splitter, and guard
This is the check that prevents a great deal of avoidable trouble. The riving knife or splitter must sit behind the blade in a way that keeps the kerf from closing, while remaining compatible with the blade body and cut width.
Some manufacturer manuals explicitly require the blade’s kerf and body thickness to match the riving knife or splitter. A Harbor Freight table-saw manual, for example, gives model-specific matching instructions. Your own saw manual is the authority for your machine.
Never remove or defeat a guard or riving knife to make an incompatible blade work. If the parts do not match, use an approved blade or an approved hardware combination.
Throat plate and insert
The blade needs sufficient clearance through the throat plate. A zero-clearance insert can support the material close to the teeth and help reduce tear-out, but it must be appropriate for the blade configuration being used.
Changing from thin kerf to full kerf may require a different insert. The reverse can also be true. Check before the blade reaches the wood.
Dado and specialty setups
Stacked dado sets, wobble dados, molding heads, and other specialty configurations deserve their own compatibility check. Use only combinations the saw manufacturer approves.
Do not assume that a saw suitable for a standard blade is automatically suitable for every wider or multi-piece setup.
Match the Kerf to the Material
The same blade can behave differently in pine, maple, plywood, MDF, and melamine. Material density, moisture, glue, veneer, grit, grain direction, and internal stress all change the experience.
Dense hardwood
Dense hardwood makes the motor work harder. On a powerful, aligned saw, full kerf may deliver the stiffness that makes a long rip feel composed. On a smaller saw, thin kerf may help the blade keep moving without forcing the feed.
Still, do not let the kerf label steal attention from the tooth pattern. A sharp thin-kerf ripping blade can outperform a full-kerf general-purpose blade in a rip. A full-kerf blade with unsuitable geometry can burn and struggle.
Softwood and construction lumber
Softwood is not always gentle. Knots, resin, moisture, bowed boards, and embedded grit can make a simple cut unpredictable.
Thin kerf can be efficient on a portable saw. Full kerf can feel stable on a heavier machine. The board itself may be the deciding factor. A bowed board can close the kerf against the blade or fence, while internal tension can make the cut open or pinch unexpectedly.
Plywood and veneered panels
Plywood usually rewards the correct tooth pattern, a sharp blade, firm support, and control over the exit side. Thin kerf may reduce load and waste, but it does not magically prevent splintering.
Two sheets with the same nominal thickness can behave differently because their veneers, cores, and glue lines are different. Test on an offcut from the sheet you will actually use.
MDF, melamine, and laminate
Engineered panels can be abrasive, dusty, and unforgiving. A blade designed for the surface and core will usually matter more than choosing the narrowest kerf available.
TCG-style tooth designs are often considered for abrasive or laminated materials, but the label is not a universal promise. Follow the blade maker’s application guidance and inspect the edge after a test cut.
Thin stock and narrow parts
Thin stock can vibrate, flex, and tear out easily. A thinner blade may preserve material, but support and control become even more important.
Keep the work stable, use appropriate push tools, and choose a tooth pattern that produces the finish the project needs.
Match the Blade to the Cut, Not Just the Board
The board tells you what you are cutting. The operation tells you how the blade must behave.
Ripping with the grain
Ripping follows the grain and usually benefits from teeth with larger gullets that can clear chips efficiently. A rip blade often uses fewer, larger teeth than a fine crosscut blade.
On a lower-powered saw, thin kerf can make it easier to keep a steady feed. On a powerful saw, full kerf may bring welcome stiffness to a long cut.
Crosscutting across the grain
Crosscutting asks the teeth to sever fibers cleanly. The right tooth pattern, bevel arrangement, and tooth count usually have more influence on the edge than kerf width alone.
A thin-kerf blade does not become a crosscut blade merely by being thin. If the edge is rough, investigate the blade’s purpose, sharpness, support, and exit-side behavior.
General-purpose work
A general-purpose blade is useful when the shop moves quickly between ripping and crosscutting. It is a compromise, though—not a magical blade that is equally ideal for every operation.
Choose a good general-purpose blade for the work you do most often, then keep a dedicated rip, crosscut, plywood, or laminate blade available when the finish or material justifies it.
Joinery and precision parts
Box joints, splines, dados, and repeated narrow parts magnify small dimensional errors. The actual kerf determines the width of the cut and therefore influences the fit.
Thin kerf may help you preserve more material. Full kerf may give a powerful saw the stability needed for a more repeatable cut. The test cut decides.
Recommended guide: The 25 Best Woodworking Joinery Books Every Woodworker Should Own (From Beginner to Master Craftsman)
Repeated production cuts
When the same cut is repeated twenty or one hundred times, consistency becomes its own kind of accuracy.
Record the blade, measured kerf, material, fence setting, insert, riving knife, and test result. A blade that saves a little stock but creates variation may cost more in sorting and rework than it saves in lumber.
Tooth Geometry Matters More Than the Kerf Label
Kerf is visible in the product name. Tooth geometry is where much of the cutting personality lives.
FTG for efficient ripping
Flat-top-grind teeth are commonly associated with ripping because their shape works efficiently along the grain and leaves gullets room to clear chips.
That does not mean every FTG blade is right for every rip. Tooth count, hook angle, carbide quality, blade design, and material still matter.
ATB for crosscuts and general work
Alternating-top-bevel teeth are common in crosscut and general-purpose blades. The alternating bevels help sever fibers and can produce a cleaner edge across the grain.
Tooth count and bevel angle change the result. So do blade sharpness and the way the material is supported.
TCG for abrasive and laminated material
Triple-chip-grind designs are often selected for materials that can wear teeth quickly or chip at the surface, including some laminates and engineered panels.
Use the manufacturer’s stated application as your guide. Tooth labels are useful shorthand, not a substitute for the blade’s complete specification.
Tooth count changes the feed experience
More teeth can produce a finer finish, but smaller gullets may clear chips less readily. Fewer teeth may feed more efficiently during a rip, while leaving more visible marks on the edge.
On a low-powered saw, a high-tooth-count blade can demand more resistance than its thin-kerf label suggests.
Hook angle changes how aggressively the blade feeds
Positive hook angles can pull the work into the blade more aggressively. Lower or negative hook designs may be selected for controlled crosscutting on some tools.
This is why a table-saw blade should not automatically migrate to a miter saw or radial-arm saw. The tool, guard, material, and intended feed behavior all matter.
When comparing blades, think in a complete set:
kerf + body thickness + tooth geometry + tooth count + hook angle + material rating + saw compatibility.
How to Decide on a Portable or Underpowered Saw
Notice the warning signs before changing blades
A saw that slows audibly, changes pitch, burns the wood, struggles to maintain feed, or trips its protection may be overloaded.
But overload is not always a kerf problem. A dull blade, dirty teeth, poor alignment, a pinched board, an unsuitable extension cord, dust buildup, or a motor issue can create the same symptoms.
Do not put a thin blade on a sick saw and call the diagnosis complete.
When thin kerf helps for the right reason
Thin kerf is helpful when the saw is healthy and aligned but is operating close to its available power. Removing less material can let the operator feed at a controlled pace instead of pushing hard enough to create heat and friction.
The improvement should feel calm. The motor should hold its pitch more consistently. The blade should leave a clean edge. Your hands should not have to fight the board.
When thin kerf is not the missing piece
A thin blade may be the wrong choice when it visibly deflects during a long cut, when the riving knife does not match, or when the work demands more lateral stiffness than the blade provides.
Before moving to a thicker blade, check:
- sharpness and damaged carbide;
- arbor cleanliness and blade seating;
- fence parallelism;
- miter-slot alignment;
- warped, bowed, or twisted stock;
- feed pressure and hand position;
- riving-knife location and compatibility.
If those details are sound and the blade still wanders, a stiffer design may genuinely be the answer.
A safer portable-saw comparison
Use the same species and thickness of scrap you will use in the project. Confirm the blade and safety hardware against the manual. Make a controlled test cut with proper support and push tools.
Compare the motor sound, feed effort, edge quality, squareness, burning, and final dimensions. Stop if the board pinches, the blade binds, or the setup becomes unpredictable.
When Full Kerf Is the Better Choice
Long rips expose weakness
A short cut may hide a blade’s tendency to flex. A long rip gives that tendency time to become visible.
If a powerful saw maintains speed and the setup is aligned, a full-kerf blade may stay steadier through dense stock. The benefit is not theoretical when a cabinet panel needs to remain square or a set of joinery parts must stay consistent.
Stability can outweigh the extra sawdust
Material yield matters. So does the cost of correcting a bad cut.
If a thin blade saves stock but produces a tapered edge, the rework may consume more material than the wider kerf would have used. If a thin blade is already stable enough, however, full kerf may simply add waste without adding useful control.
The real project calculation is:
lumber consumed + correction time + finish quality + safety margin.
Full kerf is not automatically better on a small saw
A wider blade can overload a small motor, slow the cut, increase heat, and invite the operator to push harder.
Forced feed pressure is not proof of a serious setup. If the saw cannot maintain a controlled cut, the answer may be thin kerf, shallower passes, a different cutting sequence, improved support, or a more capable saw.
How Much Wood Does Thin Kerf Actually Save?
Measure the blade in the material you use
The number printed on a product page is a starting point. Actual kerf can vary with tooth wear, sharpening, runout, material, and how the cut is measured.
Make a test cut in the actual stock, let the blade stop, and measure the slot or removed strip consistently. For joinery and cut lists, your measured number is more useful than a category label.
The simple calculation
For a basic series of separation cuts:
material consumed by kerf ≈ number of cuts × measured kerf
Imagine one blade measures 0.090 inch and another measures 0.125 inch. Across twenty separation cuts:
20 × (0.125 − 0.090) = 0.700 inch
That does not mean every board gives back seven-tenths of an inch. The actual result depends on the first and last cuts, trim allowances, unusable offcuts, and how efficiently the parts are laid out.
The calculation simply shows why a small difference can matter after enough repetitions.
When the savings become meaningful
Thin kerf deserves extra attention when:
- the number of cuts is high;
- the stock is expensive;
- the parts are narrow;
- the cut list has very little allowance;
- the panel layout is close to its yield limit; or
- the saw also benefits from reduced load.
For a couple of rough cuts in inexpensive lumber, straightness, safety, and finish are usually more important than the arithmetic.
Learn more:
When the Cut Goes Wrong: Burning, Drift, Chatter, and Rough Cuts
The blade width is an easy suspect because it is printed on the package. The real cause may be more ordinary—and more fixable.
Burning
Burning may come from a dull or dirty blade, a slow feed, fence misalignment, wet or resinous stock, too many teeth for the operation, or a saw working beyond its comfortable capacity.
A full-kerf blade may reduce deflection in one setup. A thin-kerf blade may reduce motor load in another. Neither one can sharpen a dull tooth.
Clean the blade according to the manufacturer’s instructions, inspect the teeth, verify alignment, and test an offcut. If the burn appears only in one part of the board, look for internal stress or a closing kerf.
Drift and tapered cuts
Drift is often blamed on a flexible blade, but the fence, feed path, stock, arbor, and blade condition can all contribute.
Check whether the fence is parallel to the blade. Notice whether the board is being pushed sideways as it travels. If the blade visibly deflects under normal feed pressure after the rest of the setup checks out, a stiffer blade may be justified.
Chatter and vibration
Chatter can point to arbor runout, a damaged blade, loose mounting, an unsuitable insert, vibration in the saw stand, or poor work support.
A heavier full-kerf blade may feel better on a rigid machine. A balanced thin-kerf blade can also cut smoothly when it is properly seated and the saw is aligned.
Rough or chipped edges
Look first at tooth geometry, tooth count, blade sharpness, material support, and exit-side tear-out.
Plywood and laminate often need a blade chosen for surface quality rather than the narrowest possible kerf.
Pinching and kickback risk
If the kerf closes against the blade, the stock can pinch. Board tension, misalignment, an incorrect riving knife, or an unsafe feed path can add to the danger.
Turn the saw off and disconnect power before inspecting or changing anything. Correct the problem using the manufacturer’s instructions, and keep approved guards and anti-kickback hardware in place.
A Five-Minute Blade Test That Beats Guesswork
When two blades appear nearly identical on paper, give them the same small audition. The wood will reveal the difference.
1. Write down the specifications
Record the saw model, blade diameter, arbor size, spindle speed, blade kerf, body thickness, tooth count, tooth geometry, hook angle, and intended material.
Confirm that the riving knife, splitter, guard, and insert are approved for the combination.
2. Inspect the blade
Look for damaged carbide, resin buildup, a bent plate, missing teeth, or markings that conflict with the saw’s requirements.
The blade should seat cleanly against a clean arbor flange.
3. Measure the actual kerf
Cut a piece of the same species and thickness as the project. After the saw has stopped and power has been disconnected for measurement, determine the width of the slot using a consistent method.
Write the number down. Your cut list will thank you later.
4. Listen and feel during the cut
Make equivalent cuts with the candidate blades. Do not force one blade or baby the other.
Notice whether the motor holds its pitch, whether the feed remains smooth, and whether the work seems to push back or wander.
5. Inspect the result
Check the edge for square, burn marks, tear-out, chatter, and visible deflection. Measure the finished part with a reliable rule, caliper, or square.
A blade that feels effortless but leaves an inaccurate edge is not the winner.
6. Document the setup
Record the blade, material, measured kerf, tooth pattern, fence setting, insert, riving knife, feed approach, and result.
The note turns today’s experiment into tomorrow’s shortcut, especially when you move from hardwood to plywood or from rough construction to joinery.
The Decision Path: Which Blade Should You Buy?
When a product page gives you ten specifications and no clear answer, use this order.
If your saw is portable or underpowered
Begin with a manufacturer-approved thin-kerf blade designed for the operation and material.
If it still burns or bogs, investigate blade sharpness, tooth count, alignment, stock condition, extension-cord suitability, dust buildup, and motor health before buying again.
If your saw is powerful and you make long hardwood rips
Compare a full-kerf rip blade with a high-quality thin-kerf alternative.
Choose the one that produces a straight, square edge at a controlled feed and remains compatible with the safety hardware. Do not buy extra stiffness you do not need, but do not trade control for a small material saving.
If plywood and sheet goods are your main work
Prioritize tooth geometry, finish rating, tooth count, sharpness, and tear-out control.
Thin kerf may help a portable saw, but the cleanest edge usually comes from the correct sheet-good blade, solid support, and a controlled exit.
If you make joinery or repeated parts
Measure the actual kerf, test the fit, and document the result.
The best blade is the one that repeats the intended dimension across the entire batch—not the one with the most impressive label.
If two compatible blades still look equally good
Ask yourself:
- Which one does the saw manual approve?
- Which one lets the motor maintain a controlled feed?
- Which tooth pattern matches the operation?
- Which one produces the straighter, cleaner test edge?
- Is the material saved worth any loss of stiffness or finish?
If the first answer is uncertain, pause there. Compatibility comes before performance.
FAQ: Thin Kerf vs Full Kerf Saw Blades
“Is a thin-kerf blade a better choice for someone just starting out?”
It can be a sensible choice for a beginner using a portable or lower-powered saw because less material removal may make the cut easier to feed.
It is not automatically safer or more accurate. Start with a compatible blade, an intact guard and riving knife, appropriate support, and a tooth pattern suited to the cut.
“Can I put a thin-kerf blade on any table saw?”
No. The arbor hole is only one part of the fit.
Check the manual and blade specifications for diameter, RPM, body thickness, kerf, riving knife or splitter, guard, and throat insert. A blade that mounts is not necessarily a blade the saw is designed to use.
“Will I need a different riving knife?”
Possibly. Some table saws require a particular thin-kerf riving knife or splitter. Others approve a range of blade kerfs and body thicknesses.
Use the instructions for your exact model. Never remove the riving knife simply to make an incompatible blade fit.
“Does full kerf always cut straighter?”
No. A thicker body may resist deflection during a demanding cut, but straightness also depends on blade quality, arbor runout, fence alignment, stock preparation, support, and feed control.
Make the comparison in the material and operation that matter to you.
“Will a thin-kerf blade save enough wood to matter?”
Sometimes. The benefit grows with the number of cuts, the cost of the stock, the narrowness of the parts, and the tightness of the cut layout.
Multiply the number of cuts by the difference between the measured kerfs, then account for offcuts and trim. For a few rough cuts in inexpensive lumber, clean control may matter more.
“Is thin kerf a good choice for hardwood?”
It can be, especially on a smaller saw where reduced motor load helps maintain a controlled feed.
On a powerful saw making long, dense rips, full kerf may offer useful stiffness. Tooth geometry, sharpness, and compatibility decide more than the label by itself.
“What about plywood?”
Thin kerf can help a portable saw and reduce material loss, but it does not guarantee a splinter-free edge.
Choose a blade designed for plywood or sheet goods, support the panel, control the exit side, and test on an offcut from the same sheet.
“Why is my saw blade burning the wood?”
Common causes include a dull or dirty blade, the wrong tooth geometry, a feed that is too slow, fence or miter alignment problems, pinching stock, resinous wood, or a saw that is overloaded.
Changing kerf may help, but diagnose the setup before assuming the blade width is responsible.
“Is a thin-kerf blade less safe?”
Kerf width alone does not determine safety.
A compatible thin-kerf blade can be appropriate when used with the approved riving knife, guard, insert, and operating procedure. An incompatible blade or a setup with removed safety hardware is unsafe regardless of kerf.
“Can a small jobsite saw handle full kerf?”
Only if the manufacturer approves that configuration and the saw can maintain a controlled cut without overload.
If the motor bogs, the feed becomes forced, or the safety hardware does not match, choose an approved alternative.
“What is the best all-purpose saw blade?”
There is no single best blade for every saw, material, and operation.
A high-quality general-purpose blade can cover routine work. Dedicated rip, crosscut, plywood, or laminate blades will usually perform better when the material or finish demands it.
ove from blade selection to planning, cutting, joinery, or material control.
Products / Tools / Resources
Saw documentation
Keep the owner’s manual, blade-guard instructions, riving-knife specifications, and approved accessory list close to the saw. For diameter, arbor, RPM, kerf, body thickness, and safety-hardware compatibility, the manual is the final authority.
Measuring tools
A reliable combination square, straightedge, rule, and caliper can reveal a tapered cut, inconsistent kerf, fence-alignment problem, or blade deflection.
Measure only after the saw has stopped and power has been disconnected as appropriate.
Setup and safety tools
Use appropriate push sticks or push blocks, work support, eye and hearing protection, dust collection, and a stable stand or bench.
A featherboard or other control aid can be useful when it suits the operation and is installed according to safe practice.
Blade maintenance
Clean resin, pitch, and dust from the blade using a method approved by the blade manufacturer. Store blades so the carbide tips cannot strike one another or hard surfaces.
A clean, sharp blade is often a bigger improvement than switching from one kerf category to another.
Project resources
Connect the blade decision to the work that follows it: the site’s free woodworking plans, cut-list guidance, plywood-cutting instruction, and joinery tutorials.
The blade is only one link in the chain. Board selection, layout, cutting, assembly, and final fit all depend on the small decisions made before the saw starts.