
There is a particular kind of hesitation that happens in a hardware aisle.
You are holding a chisel in one hand and looking at a cordless drill in the other. Nearby, circular saws promise clean, fast cuts. Planes and handsaws look quieter, older, almost deliberate. Everything seems useful. Everything seems like the beginning of a much larger bill.
That is why the question behind hand tools vs power tools cost for woodworking is rarely just, “Which one has the lower price?” Most beginners are really asking:
Will I spend money on the wrong equipment? Can I build something worthwhile without a full workshop? Am I buying a tool because I need it, or because every woodworking video seems to use one?
Here is the honest answer:
Hand tools usually cost less to buy at the beginning. Power tools often save more time and physical effort. For most beginners, a small, staged hybrid setup delivers the best balance of cost, flexibility, and finished projects.
If you plan to make one small box, repair a chair, or build a simple shelf, hand tools may be all you need. If you want to build benches, cabinets, tables, or several projects from plywood, a few power tools can earn their keep quickly. The expensive mistake is not choosing one category over the other. It is buying a workshop before you have a project.
The prices below are broad planning bands rather than live quotations. They use US dollars for convenience and exclude lumber, premium brands, a full workbench, and unusual specialty equipment. Local prices, corded-versus-cordless choices, and secondhand buying can shift the numbers quite a bit.
The One-Sentence Answer
Choose hand tools when the lowest starting cost, quiet work, and traditional skill-building matter most; choose power tools when speed, repeated cuts, and larger projects matter most; choose a hybrid setup when you want room to grow without buying everything twice.
That answer sounds simple. The interesting part is why it changes from one woodworker to another.
Quick Comparison: Hand Tools vs Power Tools
| Factor | Hand tools | Power tools | What it means for a beginner |
|---|---|---|---|
| Initial purchase cost | Usually lower | Usually higher | Hand tools are easier to enter with a small cash budget |
| Accessories | Sharpening gear, clamps, workholding | Blades, bits, discs, batteries, guides, dust control | Neither category is truly a one-tool purchase |
| Speed | Slower for long or repeated operations | Faster for cutting, drilling, and sanding | Power tools matter more when free time is scarce |
| Noise and dust | Generally quieter and cleaner | Louder and dustier | Hand tools may suit apartments or shared spaces |
| Skill curve | More technique is visible in the result | Faster path to rough progress | Each category teaches a different kind of control |
| Large projects | Possible, but more demanding | Usually more practical | Power tools often offer better value for furniture and sheet goods |
| Precision | Excellent with sharp tools and good technique | Excellent with guides and careful setup | Accuracy comes from the whole method, not the label on the tool |
| Long-term flexibility | Durable, compact, and often repairable | Efficient and versatile, but accessory-dependent | A thoughtful hybrid collection adapts most easily |
What “Cost” Really Means in Woodworking
The number on the price tag is only the first layer.
A handsaw may cost less than a circular saw. But the hand saw might need sharpening, a better bench, and several hours of patient practice. The circular saw may need a guide, extra blades, hearing protection, dust control, and a battery platform. Neither price is false. Neither price tells the whole story.
A more useful calculation is:
Total woodworking cost = purchase price + accessories + consumables + maintenance + workspace requirements + the value of your time − resale value.
The phrase “value of your time” deserves a little care. If planing a board on a quiet Saturday is the part you love, those hours are not a financial penalty. They are the activity. But if you only have two evenings a week and an unfinished project keeps drifting into the corner, time starts to behave like a real cost.
Purchase price is only the doorway
This is the obvious part: the saw, drill, plane, chisel set, sander, or router. It is also the easiest part to compare, which is why it tends to dominate beginner discussions.
The problem is that tools do not work in isolation. A sharp chisel needs a way to become sharp. A circular saw needs a safe way to guide a cut. A drill needs bits that match the material. A sander needs abrasive discs and somewhere for the dust to go.
Accessories quietly reshape the budget
Power-tool accessories can include:
- straightedges or guide rails;
- drill and driver bits;
- blades for different materials;
- batteries and chargers;
- extension cords;
- clamps;
- dust-extraction adapters;
- eye and hearing protection.
Hand-tool accessories can include:
- sharpening stones or abrasive paper;
- a honing guide;
- a mallet;
- a vise or other workholding system;
- bench dogs or holdfasts;
- rust protection;
- a reliable work surface.
This is why comparing one hand saw with one cordless drill creates such a distorted picture. You are not comparing two objects. You are comparing two ways of working.
Consumables become part of every project
Sandpaper wears away in a cloud of fine dust. Saw blades lose their edge. Drill bits break, dull, or disappear beneath a pile of offcuts. Sharpening stones wear too, and hand-tool edges need regular attention.
None of these costs is dramatic by itself. Over ten or twenty projects, however, small recurring purchases become part of the workshop’s real operating cost.
Maintenance has different personalities
Hand tools ask for cleaning, sharpening, flattening, and rust prevention. Power tools ask for dust removal, blade changes, battery care, cord inspection, and occasional repair.
Hand tools often reward patient maintenance with a very long service life. Power tools can deliver remarkable productivity, but motors, switches, batteries, and electronic components eventually age. The right question is not whether one category requires maintenance. Both do. The question is which type of maintenance fits the way you want to work.
Your workspace has a price, even when rent is free
Hand tools can live in a drawer and work on a compact bench. They still need stable workholding and enough clearance to make safe cuts.
Power tools need room for boards to enter and leave the cut, cords or batteries, dust collection, and your own body to move safely around the workpiece. In a small garage, apartment, or shared room, that practical requirement can outweigh a tempting discount.
Time is not automatically money—but sometimes it is
A hobbyist may happily spend four hours fitting a joint. A parent working after bedtime may not. Someone making a single keepsake has different priorities from someone building six shelves for a new home.
The most accurate budget is personal. It includes not only what you can afford to buy, but what you can realistically afford to spend in effort.
How Much Does a Beginner Hand-Tool Setup Cost?
A beginner hand-tool collection can be surprisingly modest when it is built around real projects rather than an imagined dream workshop.
The important word is collection. One chisel is not a woodworking system. A handsaw without a square, a way to hold the board, or a surface to sharpen on will leave you stranded halfway through the first project.
The essential hand-tool categories
Measuring and layout
Start with a tape measure, combination square, pencil or marking knife, and a straightedge. Depending on the kind of joinery you want to learn, a marking gauge may become useful later.
Layout is where accuracy begins. A modest saw guided by a trustworthy line can outperform an expensive saw used from a guess.
Cutting
A general-purpose handsaw, backsaw, or Japanese pull saw can cover a great deal of beginner work. The best choice depends on board thickness, cut direction, local availability, and the kind of control that feels natural in your hands.
Shaping and fitting
A small set of sharp chisels, a mallet, a block plane, a rasp, a file, or a card scraper can handle trimming, easing edges, cleaning corners, and fitting joints.
You do not need a dozen specialized planes to begin. You need a few tools that you understand well enough to reach for without hesitation.
Sharpening
Sharpening is the quiet cost hiding behind many hand-tool recommendations. When a blade is dull, the woodworker pushes harder. The cut wanders. The grain tears. Frustration arrives before the project has had a chance.
A basic sharpening setup may include stones or abrasive paper, a honing guide, lubricant, and a way to flatten the back of a blade. That investment pays for itself in better control, but it is part of the hand-tool budget from day one.
Workholding
Clamps, a vise, bench dogs, holdfasts, or a simple clamping board keep the workpiece still. Hand tools reward good workholding because the tool can then do its job rather than fighting the board.
Useful planning bands for hand tools
For a beginner collection that excludes lumber and a full workshop bench, these broad bands are useful:
- Lean hand-tool start: approximately $120–$250. Enough for small shelves, boxes, repairs, and foundational practice.
- Practical hand-tool setup: approximately $200–$450. Adds better workholding, sharpening equipment, more capable cutting tools, and a plane or scraper.
- Advanced hand-tool collection: $450 and beyond. Adds specialized joinery saws, premium chisels, additional planes, stronger vises, and tools selected for a particular furniture style.
The ranges overlap because buying decisions overlap. A carefully chosen used plane may cost less than a poor new one. A simple workholding solution may be enough at first, while a serious furniture maker will eventually want something more substantial.
Recommended reading: How Much Does It Cost to Start Woodworking? Real Beginner Budgets for Tools, Lumber, and Workshop Space
Why hand tools can be financially attractive
Hand tools are quiet. They store easily. Many can be repaired, restored, or passed on. They do not tie you to a battery platform, and they do not need a motor to turn a small correction into a production.
For someone who works occasionally, this matters. A tool that lives in a cupboard and remains ready for the next project may offer more value than a faster tool that is too noisy, too bulky, or too complicated to set up.
There is also a particular kind of confidence that comes from learning to read the wood directly. You hear the change in a cut. You feel when a plane is taking a clean shaving. The work becomes slower, perhaps, but more legible.
The hidden cost: sharpening and practice
Hand tools move part of the investment from machinery into skill. You may spend less at checkout and more time learning how to:
- read grain direction;
- hold a saw to a line;
- sharpen and maintain an edge;
- plane without tear-out;
- secure a workpiece;
- fit a joint without forcing it;
- recognize when a cut is drifting before the mistake becomes permanent.
That is not a weakness in the hand-tool approach. For many woodworkers, it is the reason to choose it. It simply belongs in the honest comparison.
How Much Does a Beginner Power-Tool Setup Cost?
Power tools usually ask for more money at the beginning. In return, they can remove some of the slowest and most physically demanding parts of woodworking.
A drill turns repeated holes into a manageable task. A circular saw makes a long board or sheet of plywood less intimidating. A random orbital sander can save an entire evening when the surface is large.
The essential power-tool categories
Drill or impact driver
A drill/driver is often the most useful first power tool because it performs several jobs. It drills pilot holes, drives screws, countersinks fasteners, and supports jigs and fixtures.
Bits are part of the purchase. A drill without suitable bits is an expensive handle.
Circular saw
A circular saw paired with a straightedge or guide can break down boards and sheet goods without requiring a permanent table saw. It stores easily and can be useful in a small workshop.
The guide matters. A good tool used against a shifting or inaccurate guide will still produce disappointing work.
Random orbital sander
Hand sanding remains important for edges, corners, and final touch-ups. On larger surfaces, however, a random orbital sander can save a great deal of time.
The ongoing cost is easy to underestimate: sanding discs, dust extraction, and protective equipment all follow the sander into the workshop.
Jigsaw
A jigsaw earns its place when curves, cutouts, or rough shaping become common. It may not belong in the first purchase, especially if your initial projects are mostly straight cuts.
Buying it when a project requires it is usually more economical than buying it because a complete tool list says you should.
Batteries, chargers, and accessories
Cordless tools are convenient, especially when a workspace is temporary or outlets are awkward. But the battery platform changes the arithmetic.
A bare tool can look affordable until the battery and charger are added. Once you own that platform, staying within it may be sensible. If you are buying only one power tool, a corded model may have the lower starting cost.
Useful planning bands for power tools
For a beginner collection that excludes lumber, a full bench, and premium workshop equipment:
- Lean power-tool start: approximately $250–$500. Usually includes a drill/driver, circular saw, basic guide, starter blades and bits, clamps, and safety equipment.
- Practical cordless setup: approximately $400–$900. Adds batteries, a charger, a random orbital sander, more accessories, and a compatible tool platform.
- Expanded workshop setup: $900 and beyond. May include a jigsaw, router, miter saw, table saw, improved dust extraction, or specialized accessories.
These numbers are planning tools, not promises. A corded setup, careful secondhand buying, or borrowing equipment can reduce the entry cost. A premium cordless ecosystem can raise it quickly.
Why power tools can save money
The strongest argument for power tools is not that they are modern. It is that they can make the work fit inside the life you actually have.
They become especially valuable when you are:
- breaking down plywood or long boards;
- making repeated cuts;
- drilling many holes;
- sanding broad surfaces;
- preparing several identical parts;
- working toward a deadline;
- dealing with physical strain that makes long hand-tool sessions difficult.
Speed also affects motivation. A project that reaches the assembly stage on Saturday has a better chance of being finished than one that remains a stack of carefully marked boards for three months.
The hidden cost: accessories and systems
Power tools are rarely standalone purchases. The circular saw wants a guide. The drill wants appropriate bits. The sander wants discs. The cordless system wants batteries and a charger. The entire group wants clamps, eye protection, hearing protection, and dust control.
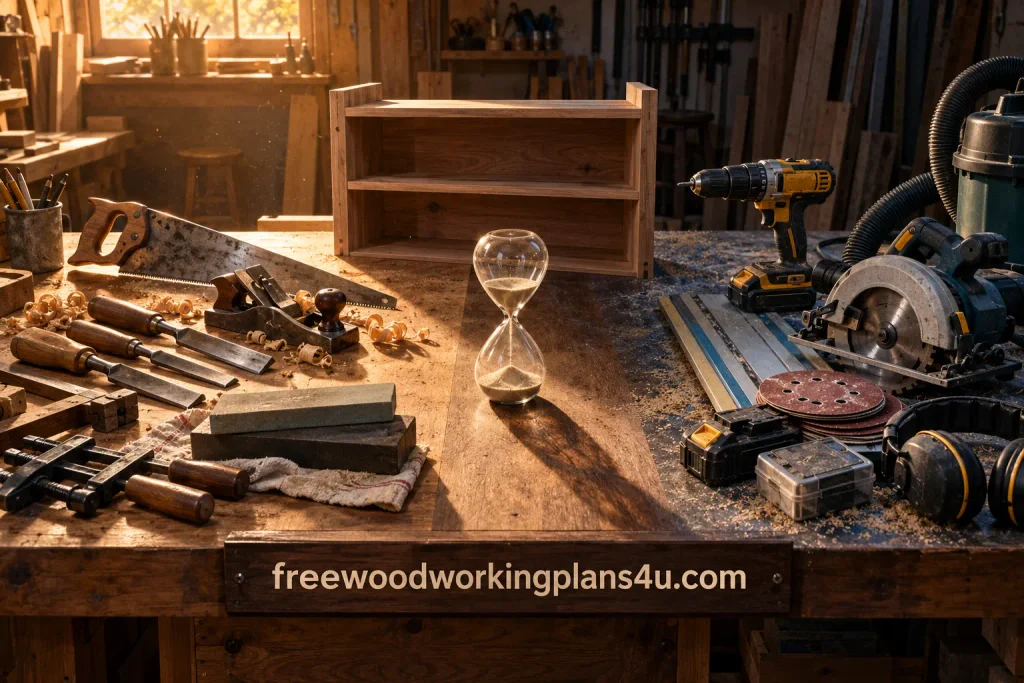
That is why the fairest comparison is not one hand saw against one drill. Compare a complete way of reaching the finished project.
Hand Tools vs Power Tools Cost by Project Type
The project changes the answer.
| Project type | Where hand tools help | Where power tools help | Likely best value |
|---|---|---|---|
| Small box | Short cuts, quiet precision, little setup | Quick rough cuts and sanding | Hand tools or hybrid |
| Wall shelf | Low equipment cost and simple joinery | Faster cutting and drilling | Hybrid |
| Narrow bench | Fitting, edge treatment, final corrections | Dimensioning boards and driving fasteners | Hybrid or power-first |
| Cabinet from plywood | Possible, but slow for repeated sheet cuts | Efficient breakdown, drilling, and sanding | Power-first or hybrid |
| Fine furniture | Tactile control and accurate fitting | Efficient stock preparation and waste removal | Hybrid |
| One-off repair | Low setup when tools are already available | Convenient drilling and fastening | Whichever tool you own |
| Repeated production | Time-intensive | Speed and consistency | Power tools |
Small boxes and shelves
This is the territory where hand tools can make the most financial sense.
The material is manageable. Cuts are short. Setup is quick. You can learn layout, sawing, chiseling, and surface preparation without first filling a garage with machines.
Power tools still have a role. A drill may simplify assembly, and a sander may help with broad surfaces. But if a project contains only a handful of cuts, the time saved may not justify a large initial purchase.
Benches and tables
Long boards change the rhythm of the work. So do repeated legs, stretchers, aprons, and panels.
A bench can absolutely be built with hand tools, but dimensioning several long parts by hand takes more effort and creates more opportunities for small inaccuracies. A circular saw can bring rough stock close to size. A drill can speed assembly. Hand tools can then refine the fit and clean the edges.
That combination feels less like compromise and more like good division of labor.
Cabinets and plywood projects
Plywood is heavy, awkward, and unforgiving when it is unsupported. Cutting a full sheet by hand is possible, but it is not always the most economical or pleasant route.
A circular saw with a reliable guide can make long cuts while keeping the setup relatively compact. A drill/driver speeds assembly, and a sander reduces the amount of time spent preparing broad faces.
For cabinets, storage units, and projects built from sheet goods, power tools often offer better value even when the initial budget is higher.
Fine joinery and furniture
Fine furniture rewards control. Hand tools are excellent for trimming tenons, paring shoulders, refining corners, fitting joints, and easing an edge without removing too much material.
Power tools can prepare stock and remove waste quickly, but many careful woodworkers still keep hand tools close for the last, decisive adjustments.
The real financial choice is often not hand versus power. It is whether you want to spend your energy removing bulk material or spend it making the final fit right.
The Time-versus-Money Calculation Beginners Should Use
If you want an answer that belongs to your workshop rather than someone else’s argument, calculate the cost per project.
A simple formula
Effective project cost = tool-system cost ÷ expected number of projects + consumables + materials + the value of your time.
Imagine a practical power-tool setup costs $350 and you expect to use it for twenty projects. Before resale value and consumables, the tool portion is about $17.50 per project.
Now imagine that the power tools save four hours on each build. If you value that time at $12 per hour, the time difference is $48 per project.
That does not prove the power tools are the better choice. Perhaps those four hours are the best part of your week. Perhaps the quiet repetition is why you started woodworking. But if those hours are the reason projects never get finished, the calculation reveals something important: the cheaper tool may be the one that gets used.
When time should count heavily
Let time carry real weight when:
- you only have a few hours each week;
- you are building for a customer;
- you want to sell furniture;
- you are making several similar pieces;
- unfinished projects drain your enthusiasm;
- physical effort makes long hand-tool sessions unrealistic.
When time should count lightly
Time may matter less when:
- woodworking helps you slow down;
- you are learning traditional techniques;
- the project is small;
- there is no deadline;
- the process matters as much as the finished object.
This distinction is easy to miss. One woodworker is buying a peaceful craft. Another is trying to finish six shelves before moving house. They can look at the same tool and see completely different value.
Three Beginner Budgets That Actually Make Sense
The safest way to spend less is not to choose the cheapest category. It is to choose a sequence.
Budget path one: hand-tool first
This path suits a beginner with limited cash, limited storage, or a genuine interest in traditional techniques.
Prioritize:
- accurate measuring and layout;
- one dependable handsaw;
- a few useful chisels;
- basic sharpening;
- clamps and stable workholding;
- one simple plane or scraper.
Begin with small projects. Let each project tell you what is missing. That is much more reliable than buying an entire hand-tool list before you have made your first cut.
Budget path two: hybrid and staged
For many beginners, this is the most forgiving route.
Start with:
- measuring and layout tools;
- clamps and a safe work surface;
- a handsaw or pull saw;
- a drill/driver;
- two or three chisels;
- sanding equipment suited to your first projects.
Add a circular saw and guide when long boards or sheet goods become part of the plan. Add a plane, router, jigsaw, or other specialty tool only when a project gives you a clear reason.
The cost is spread over time, but the important benefit is psychological as well as financial: every new tool arrives because you have encountered a real need, not because you are trying to become a woodworker by purchasing one.
Budget path three: power-tool first
This path suits someone with limited time, a furniture goal, or a preference for making visible progress quickly.
Prioritize:
- drill/driver and suitable bits;
- circular saw and guide;
- clamps;
- eye and hearing protection;
- dust control;
- random orbital sander if your projects involve large surfaces.
Do not assume the next step must be a table saw or a miter saw. A compact, versatile tool that solves several current problems is often a better first investment than a large machine that waits for an imaginary future workshop.
The Best Hybrid Setup for Most Beginners
A useful hybrid setup is not a shopping list with every category represented. It is a small group of tools that share the work.
Hand tools worth keeping in the core kit
- tape measure and combination square;
- pencil, marking knife, or marking gauge;
- handsaw or backsaw;
- two or three general-purpose chisels;
- mallet;
- block plane or card scraper;
- screwdriver set;
- clamps;
- a simple sharpening system.
Power tools worth considering
- drill/driver;
- circular saw with a reliable guide;
- random orbital sander;
- jigsaw when curved cuts become common.
Why this combination works
Power tools remove repetitive or physically demanding work. Hand tools handle layout, fitting, correction, edge treatment, and detail.
That division prevents two familiar beginner problems. You do not have to spend an entire evening making rough cuts by hand, and you do not have to buy a large machine collection before you know how you want to work.
It also leaves the future open. If you fall in love with traditional joinery, you already have a hand-tool foundation. If you begin building cabinets or selling projects, you can expand the power-tool side without replacing the entire workshop.
A note for left-handed beginners
Most beginners do not need specialized “left-handed” versions of ordinary woodworking tools. Comfort, visibility, balance, and control matter more than a label.
Set up the work so you can see the cut line clearly. Choose handles that sit naturally in your grip. Follow the manufacturer’s instructions for power tools, keep guards in place, and do not copy a right-handed technique blindly if it puts your body in an awkward position.
Good ergonomics are not an indulgence. They reduce fatigue, and less fatigue usually means better accuracy and safer decisions.
Recommended reading: Woodworking for Left-Handed People: Tools, Techniques & Workshop Setup for Better Results.
How to Save Money When Buying Woodworking Tools
Buy for the next project, not an imaginary workshop
Before buying anything, write down the operations your next project requires:
- What needs to be measured?
- Which cuts need to be made?
- How many holes will be drilled?
- Are there curves, joints, or repeated parts?
- How much surface will need sanding?
- How will the workpiece be held safely?
This small exercise turns shopping from temptation into planning.
Buy used selectively
Used hand tools can be excellent value when the body is sound and the tool can be restored. A used plane with a solid body may need cleaning and sharpening but still have a long life ahead.
Used power tools can save money too, provided you inspect them carefully. Look for:
- a working switch;
- an intact guard;
- no damaged cord or exposed wiring;
- no excessive vibration;
- no burning smell;
- a battery that still holds a useful charge;
- a flat base or table where accuracy matters;
- replacement blades, bits, or batteries that are still available.
Do not buy damaged safety equipment or an unknown respirator simply because it is cheap. Replace worn cutting accessories rather than assuming they are safe.
Borrow or rent specialized tools
If a router, planer, miter saw, or large sander is needed for one project, borrowing or renting may be the sensible financial choice.
Maker spaces, woodworking clubs, and community workshops can provide access to expensive equipment while you learn what you actually enjoy using. They may also save you from discovering, after an expensive purchase, that the machine has no comfortable place in your workspace.
Prefer versatile tools
A drill/driver, circular saw with a guide, clamps, and a few dependable hand tools can support a remarkable number of beginner projects.
Versatility is more valuable than status. A tool that solves five real problems is usually a better early purchase than a specialized machine that solves one problem beautifully but rarely appears in your plans.
Do not confuse low price with low cost
A very cheap tool that produces inaccurate cuts, overheats, loses its edge, or needs immediate replacement may cost more than a modestly better tool.
The goal is not the smallest receipt. It is the lowest cost of reaching a result you are happy to keep.
Safety Is Part of the Budget
Safety equipment belongs in the first budget, not at the end of the wish list.
For power tools, plan for eye protection, hearing protection, suitable dust control, and safe electrical practices. For hand tools, plan for sharp edges, stable workholding, controlled cuts, and a clear path for the tool if it slips.
Power tools create more noise and airborne dust, but hand tools are not harmless. A slipping chisel, badly supported board, or hurried cut can cause a serious injury. Protecting your hearing, lungs, eyes, hands, and concentration is part of protecting the future of the hobby.
In a small workshop, safety may also mean reducing clutter. A clear floor, a supported board, and enough room to move can prevent more trouble than another expensive accessory.
Recommended reading: Beginner Woodworking Safety Checklist: 47 Things to Check Before You Make Your First Cut
Common Beginner Questions About Tool Cost
“Are hand tools actually cheaper than power tools for woodworking?”
Usually, yes—at the beginning. A focused hand-tool setup can be affordable, especially for small projects and secondhand buying. But sharpening, clamps, workholding, and your available time still count. Power tools can become more economical when you build larger projects or repeat the same operation often.
“Can I really start woodworking with only hand tools?”
Yes. Boxes, small shelves, repairs, simple benches, and traditional joinery are all possible with hand tools. The approach becomes less economical when you regularly cut plywood, process long boards, sand broad surfaces, or work under deadlines.
Recommended reading: 25 Woodworking Projects With Hand Tools That Build Real Skills (Beginner to Advanced)
“What power tool would make the biggest difference first?”
A drill/driver is often the broadest first choice. A circular saw with a guide is a strong next step for boards and sheet goods. The right order still depends on your projects. A popular tool that never leaves its case is not a good investment.
“Do I need power tools to build proper furniture?”
No. Furniture can be built entirely with hand tools, although the process may require more practice and patience. Many experienced makers use power tools for rough preparation and hand tools for fitting, trimming, and final accuracy.
“Are power tools more expensive to maintain?”
They can be. Batteries, sanding discs, blades, bits, repairs, and dust-collection parts create recurring expenses. Hand tools need maintenance too, especially sharpening and rust prevention. The difference is not maintenance versus no maintenance; it is one maintenance routine versus another.
“Is buying used woodworking equipment worth the risk?”
Often, yes, if you inspect it carefully. Used hand tools can be excellent value when they are structurally sound. Used power tools can also make sense when the motor, switch, guard, cord, and battery are in good condition. Avoid unknown electrical damage and accessories that cannot be replaced.
“How much money should I set aside as a beginner?”
As a broad planning guide, a lean hand-tool start may fit within approximately $120–$250. A lean power-tool setup may require roughly $250–$500. A practical hybrid collection may begin around $350–$700. These ranges exclude lumber, a complete workbench, premium brands, and unusual specialty tools.
Learn more: What Woodworking Tools Can You Buy for $250, $500, or $1,000? Three Complete Beginner Setups
“Is corded or cordless better for the budget?”
Corded tools often cost less initially and do not require a battery ecosystem. Cordless tools offer convenience and portability, but batteries and chargers change the total price. Choose according to your workspace, access to outlets, and the number of compatible tools you expect to own.
“Are expensive hand tools worth paying for?”
Sometimes. Better tools may offer improved ergonomics, durability, accuracy, or edge retention. They cannot replace technique, though. Most beginners gain more from one dependable tool used regularly than from a premium collection with no clear job.
“What is the cheapest way to build a useful workshop?”
Begin with a project, buy foundational measuring and workholding tools, and add equipment in response to repeated needs. Borrow or rent specialized machines. Buy used selectively. Delay large upgrades—such as a router, miter saw, table saw, or advanced dust-collection system—until several projects show that you will use them.
Products / Tools / Resources
You do not need to buy every item in this section. Think of it as a sensible map, not a shopping command.
Measuring and marking
Start with a dependable tape measure, combination square, pencil, marking knife, and straightedge. These tools appear in almost every project, whether you work entirely by hand or use a shop full of machines.
Hand-tool essentials
A general-purpose handsaw, two or three useful chisels, a mallet, a block plane or card scraper, clamps, and a simple sharpening system form a strong hand-tool foundation. Choose comfortable handles and tools you can control confidently.
Power-tool essentials
For a compact power-tool path, consider a drill/driver with appropriate bits, a circular saw with a reliable guide, and—when your projects justify it—a random orbital sander with sanding discs. A jigsaw belongs on the list when curved cuts become part of your normal work.
Workholding and workshop equipment
Clamps, a stable work surface, a portable bench or vise, and sensible storage often improve results more than another cutting machine. Good workholding makes both hand tools and power tools safer and more accurate.
Safety and dust control
Keep eye protection, hearing protection, suitable respiratory protection, and dust control close at hand. For power-tool work, plan how dust will be captured before you begin. For hand-tool work, keep blades sharp, the workpiece secure, and the cutting path clear.