
Snippet
Building kitchen cabinets from scratch is one of the most rewarding home improvement projects you can take on. With thoughtful planning, accurate measurements, quality materials, and proven construction techniques, you can create custom cabinets that look professionally built while saving thousands of dollars. This complete guide walks you through every stage—from design and material selection to cabinet construction, finishing, and installation—helping you build a kitchen that’s beautiful, durable, and uniquely your own.
Table of Contents
Part 1 — Building Kitchen Cabinets Isn’t Just About Saving Money
- Why custom kitchen cabinets are more achievable than you think
- The true rewards of building cabinets yourself
- Why patience matters more than experience
- What you’ll learn throughout this complete guide
- Preparing for a successful cabinet-building project
Part 2 — Why Building Cabinets from Scratch Changes Everything
- More than just saving money
- How DIY cabinets compare to factory-built options
- Designing a kitchen around your lifestyle
- Choosing quality over mass production
- Why better materials produce longer-lasting cabinets
- Developing valuable woodworking skills
- Learning from mistakes
- Seeing cabinetry with a professional eye
- Is building your own cabinets the right choice?
Part 3 — Planning a Kitchen That Works Beautifully
- Evaluating your kitchen before designing
- Measuring accurately for perfect cabinet fit
- Drawing a complete kitchen layout
- Understanding standard cabinet dimensions
- Designing around everyday routines
- Creating efficient kitchen work zones
- Choosing between face-frame and frameless cabinets
- Planning around appliances
- Creating a complete cut list
- Estimating materials and supplies
- Building a prototype cabinet before full production
Part 4 — Choosing Materials That Stand the Test of Time
- Why material quality determines cabinet longevity
- Selecting cabinet-grade plywood
- Choosing the right hardwood veneer
- Understanding plywood thicknesses
- When MDF is the right choice
- Using solid hardwood effectively
- Selecting hardwood species for doors and trim
- Choosing premium cabinet hardware
- Soft-close hinges and drawer slides
- Selecting screws and fasteners
- Using wood glue correctly
- Finishing plywood edges with edge banding
- Investing in materials that last for decades
Part 5 — The Essential Tools for Building Cabinets
- Essential measuring and layout tools
- Choosing the right table saw
- Building cabinets without a table saw
- Using a circular saw effectively
- Why a miter saw speeds up production
- Using a router for professional results
- Drills, drivers, and pocket-hole jigs
- Clamps every cabinet builder should own
- Sanding tools for flawless surfaces
- Using a jigsaw for custom cuts
- Brad nailers and finishing tools
- Dust collection and workshop lighting
- Essential safety equipment
- Future tool upgrades
- Organizing your woodworking workshop
Part 6 — Building Strong, Perfectly Square Cabinet Boxes
- Understanding cabinet box construction
- Face-frame versus frameless assembly
- Breaking down plywood safely
- Cutting cabinet parts accurately
- Choosing the best joinery methods
- Dry fitting before assembly
- Building one cabinet at a time
- Applying glue correctly
- Clamping for perfect alignment
- Checking every cabinet for square
- Installing cabinet backs
- Building durable base cabinets
- Constructing lightweight wall cabinets
- Installing adjustable shelving
- Protecting finished cabinet components
- Why consistency produces professional results
Part 7 — Crafting Beautiful Doors and Smooth Drawers
- Choosing the ideal cabinet door style
- Shaker, slab, raised-panel, and glass doors
- Selecting hardwood for cabinet doors
- Milling lumber accurately
- Building rails and stiles
- Choosing strong door joinery
- Fitting floating center panels
- Sanding before assembly
- Building durable drawer boxes
- Choosing drawer materials
- Strong drawer joinery options
- Installing drawer bottoms
- Fitting drawer slides
- Installing concealed hinges
- Adjusting door reveals
- Testing every moving component
- Organizing and labeling doors and drawers
Part 8 — Finishing Cabinets Like a Professional
- Preparing cabinet surfaces properly
- Sanding for a flawless finish
- Removing dust before finishing
- Filling dents and imperfections
- Choosing between paint and stain
- Why primer is essential
- Spraying, brushing, or rolling finishes
- Applying multiple thin coats
- Sanding between coats
- Choosing a durable protective topcoat
- Allowing finishes to cure fully
- Installing handles and knobs
- Performing a final quality inspection
- Protecting cabinets before installation
Part 9 — Installing Your Kitchen Cabinets
- Preparing the kitchen for installation
- Finding the highest point of the floor
- Establishing level reference lines
- Locating wall studs
- Installing base cabinets correctly
- Leveling and shimming cabinets
- Clamping and fastening cabinet runs
- Installing wall cabinets safely
- Positioning corner cabinets
- Testing doors and drawers
- Installing pantry cabinets
- Adding toe kicks
- Installing decorative trim
- Making final door and drawer adjustments
- Performing a complete final inspection
- Cleaning the kitchen after installation
Part 10 — Professional Secrets, Common Mistakes, FAQ, Bonus, and Products / Tools / Resources
- Professional cabinet-building habits
- Common mistakes to avoid
- Maintaining kitchen cabinets for decades
- Frequently asked questions
- Professional cabinet builder’s final checklist
- Essential hand tools
- Essential power tools
- Recommended cabinet hardware
- Materials worth investing in
- Helpful workshop accessories
- Continuing your woodworking journey
- Final thoughts and next steps
Building Kitchen Cabinets Isn’t Just About Saving Money
There comes a moment during almost every kitchen renovation when reality sets in.
You’ve spent hours collecting ideas, comparing cabinet styles, and imagining how your dream kitchen might look. Then you receive a quote for custom cabinets—and suddenly that dream feels much farther away than you expected.
For many homeowners, that price tag is enough to put the entire renovation on hold.
But there’s another path.
It’s a path that demands patience instead of a massive budget. It rewards precision instead of shortcuts. And by the time it’s finished, you’ll have something no showroom can truly sell: a kitchen that was built by your own hands.
Learning how to build kitchen cabinets from scratch isn’t reserved for professional cabinetmakers or lifelong carpenters. Thousands of DIY enthusiasts discover every year that cabinet building is simply a collection of skills learned one careful step at a time.
If you already enjoy woodworking, you’ll find cabinet making to be one of the most satisfying projects you’ll ever tackle. If you’re completely new to it, don’t worry. Every expert once stood exactly where you are now—looking at a stack of plywood and wondering where to begin.
This guide was written to remove that uncertainty.
Rather than overwhelming you with complicated terminology or assuming years of experience, we’ll walk through the entire process exactly as a professional cabinetmaker would approach it. You’ll learn not only what to do, but why each step matters and how small decisions early in the project affect everything that follows.
By the end, you’ll understand how to plan intelligently, build accurately, finish beautifully, and install cabinets that look like they came from a high-end custom shop.
More importantly, you’ll realize that exceptional cabinets are rarely the result of extraordinary talent.
They’re the result of careful preparation, consistent habits, and refusing to rush the details.
Part 2 — Why Building Cabinets from Scratch Changes Everything
Most people decide to build their own kitchen cabinets for one simple reason.
They want to save money.
That’s understandable. Custom cabinets are expensive, and for many homeowners, they’re the single largest cost in a kitchen remodel.
But something interesting happens once the project begins.
The savings that seemed so important at the start gradually become just one of many rewards. Somewhere between measuring your first sheet of plywood and hanging the final cabinet door, you realize you’ve gained something far more valuable than a lower renovation bill.
You’ve built something that didn’t exist before.
Something designed around the way you cook, organize, and live.
That feeling is difficult to describe until you experience it yourself.
More Than a Budget-Friendly Alternative
Walk into a kitchen showroom and you’ll see rows of beautiful cabinets arranged under perfect lighting.
They look impressive.
What you don’t see are the compromises hidden behind those polished displays.
Many stock cabinets are built around standard dimensions that may not fit your kitchen perfectly. They’re designed to work reasonably well in thousands of homes rather than exceptionally well in yours.
Building from scratch completely changes that equation.
Instead of asking, “Which cabinet fits this space?”
You begin asking, “What would make this kitchen work better?”
That simple shift changes everything.
The Financial Difference Is Bigger Than Most People Expect
There’s no avoiding the fact that professionally built cabinets represent a major investment.
Depending on the size of the kitchen, custom cabinetry can cost anywhere from several thousand dollars to the price of a small car.
Building them yourself doesn’t eliminate expenses, but it changes where your money goes.
Instead of paying for:
- Factory labor
- Shipping
- Warehouse storage
- Retail markups
- Installation crews
You’re investing almost entirely in materials that become part of your finished kitchen.
That often means you can afford higher-quality plywood, better hardwood, premium hinges, and smoother drawer slides without exceeding the cost of entry-level factory cabinets.
Rather than purchasing someone else’s labor, you’re investing in your own craftsmanship.
Quality Becomes Your Decision
One of the biggest surprises for first-time builders is discovering how much control they suddenly have.
You choose the hardware.
You choose the joinery.
You decide whether shelves should support lightweight dishes or heavy cast-iron cookware.
Every decision belongs to you.
Professional cabinet shops make thousands of choices based on production speed and manufacturing costs.
You only have to make one decision:
“What would create the best cabinet?”
That freedom is incredibly powerful.
Build Around Your Life—Not Around Standard Sizes
Every family uses a kitchen differently.
Some people bake every weekend.
Others love entertaining.
Some need extra pantry storage, while others would gladly trade upper cabinets for open space and natural light.
Factory cabinets rarely understand those differences.
When you build from scratch, the kitchen becomes personal.
You might include:
- Extra-wide drawers for pots and pans
- A hidden pull-out recycling station
- Vertical storage for baking trays
- Deep drawers for small appliances
- Narrow spice organizers beside the stove
- A dedicated coffee station
- Pull-out shelves inside pantry cabinets
- Charging drawers for electronics
These aren’t expensive luxury upgrades.
They’re thoughtful design choices made possible because you’re building specifically for your own home.
Better Materials Mean Better Cabinets
Not every manufactured cabinet is poorly built.
Many are excellent.
But many budget-friendly options rely on materials chosen primarily because they’re inexpensive and easy to produce.
You don’t have to.
One of the greatest advantages of DIY cabinet building is the ability to start with better raw materials.
For example, you can choose:
- Cabinet-grade plywood instead of particleboard
- Solid hardwood face frames
- Full-thickness cabinet backs
- Heavy-duty drawer slides
- Soft-close concealed hinges
- Moisture-resistant finishes
- Premium fasteners
These choices may seem small individually.
Collectively, they determine whether your cabinets still feel solid twenty years from now.
Every Cabinet Teaches You Something
One of the unexpected rewards of cabinet making has nothing to do with the finished kitchen.
It’s the confidence that develops along the way.
The first cabinet often feels intimidating.
You measure repeatedly.
Double-check every cut.
Question every decision.
Then something changes.
The second cabinet comes together faster.
The third feels surprisingly familiar.
By the fifth or sixth cabinet, you’re no longer wondering whether you can build cabinets.
You’re thinking about how to build them even better.
That’s the beauty of woodworking.
Each project quietly teaches the next one.
Mistakes Become Valuable Teachers
No cabinetmaker, no matter how experienced, has avoided mistakes.
The difference is how they respond to them.
A panel cut too short.
A hinge installed in the wrong location.
A drawer that’s just slightly too tight.
These moments can feel frustrating, especially on your first project.
Yet they’re also some of the most valuable lessons you’ll ever learn.
Every correction strengthens your understanding.
Every adjustment improves your eye for detail.
Every small setback makes the next cabinet better.
Professional craftsmanship isn’t built on perfection.
It’s built on experience earned one decision at a time.
You’ll Start Seeing Cabinets Differently
After building your own kitchen, something unexpected often happens.
You’ll walk through furniture stores, home improvement centers, or a friend’s newly renovated house and instinctively notice details you never paid attention to before.
You’ll recognize:
- The joinery holding the cabinet together
- The quality of the plywood
- The alignment of the doors
- The spacing between drawers
- The type of hinges being used
- The finish quality around the edges
What once seemed mysterious now becomes familiar.
You begin seeing craftsmanship instead of just furniture.
The Satisfaction Lasts Longer Than the Project
Kitchen renovations eventually become part of everyday life.
The excitement fades.
The paint dries.
Life moves on.
But handcrafted cabinets have a remarkable way of reminding you where they came from.
Each time you reach for a coffee mug, slide open a drawer, or prepare dinner, you’re interacting with something you built yourself.
Visitors often notice too.
Someone inevitably asks,
“Who installed your cabinets?”
And answering,
“I built them,”
never gets old.
Is This Project Right for You?
You don’t need decades of experience.
You don’t need an industrial workshop.
And you certainly don’t need to be a master carpenter.
What you do need is a willingness to slow down.
Cabinet building rewards people who enjoy solving problems carefully rather than rushing toward the finish line.
If you’re comfortable learning new techniques, measuring accurately, and improving with every step, you’re already starting with the qualities that matter most.
Tools can be purchased.
Skills can be learned.
Patience is what truly separates beautiful cabinets from disappointing ones.
In the next part, we’ll move from inspiration to planning. Before a single board is cut, you’ll learn how professional cabinetmakers measure a kitchen, organize an efficient layout, and design cabinets that not only fit perfectly but also make everyday life noticeably easier.
Part 3 — Planning a Kitchen That Works Beautifully
The quality of your cabinets isn’t determined by the first cut you make.
It’s determined by everything that happens before it.
Experienced cabinetmakers understand this better than anyone. They know that careful planning eliminates problems long before they have a chance to appear. A well-thought-out design saves material, prevents costly mistakes, and makes the entire building process feel smoother from beginning to end.
It’s tempting to jump straight into cutting plywood. After all, that’s when the project finally starts to feel real.
Resist that temptation.
The hours you invest in planning will repay themselves many times over once construction begins.
Start by Looking at Your Kitchen Differently
Before you measure anything, spend time simply observing the room.
Walk through it as if you’ve never seen it before.
Imagine preparing breakfast on a busy weekday morning. Picture yourself hosting friends for dinner. Think about unloading groceries, washing dishes, or reaching for your favorite coffee mug.
These everyday routines reveal far more than measurements alone ever can.
Ask yourself:
- Where does food preparation naturally happen?
- Which areas always feel crowded?
- What items are difficult to reach?
- Where would additional storage make the biggest difference?
- Are there awkward corners that could be used more effectively?
The best kitchens aren’t just attractive.
They quietly make daily life easier.
Measure Like Precision Matters—Because It Does
Cabinet building is a game of small numbers.
A mistake of just a few millimeters may not seem important when measuring a wall, but by the time several cabinets sit beside one another, that tiny error can become impossible to ignore.
Professional cabinetmakers rarely trust a single measurement.
They verify everything.
Then they verify it again.
Take careful measurements of:
- Overall wall lengths
- Ceiling height
- Window positions
- Door openings
- Existing plumbing
- Electrical outlets
- Heating vents
- Appliance locations
- Floor-to-ceiling dimensions
- Corners and alcoves
Don’t assume opposite walls are identical.
Older homes especially have a habit of surprising even experienced builders.
Measure in several places.
Floors may slope.
Walls may bow.
Corners may not be perfectly square.
It’s better to discover those imperfections now than after your cabinets are assembled.
Draw the Kitchen Before Building It
Once you’ve gathered your measurements, put everything onto paper.
You don’t need architectural software to create an effective plan.
Even a neat hand-drawn sketch can reveal issues that would otherwise remain hidden.
Include:
- Every wall
- Windows
- Doors
- Appliances
- Plumbing fixtures
- Electrical boxes
- Ceiling features
- Structural columns
Label every dimension clearly.
Many cabinetmakers also create a second drawing showing only the cabinet layout.
This makes it much easier to visualize spacing, door swings, and storage zones before construction begins.
Planning on paper is far less expensive than correcting mistakes with plywood.
Understand Standard Cabinet Dimensions
Custom cabinets give you enormous design freedom.
That doesn’t mean every measurement should be invented from scratch.
Standard dimensions exist because decades of experience have shown they provide comfortable working heights and efficient storage.
Typical Base Cabinets
Most base cabinets measure:
- Approximately 34½ inches high
- Around 24 inches deep
- Between 9 and 48 inches wide
Once the countertop is installed, the finished height is usually close to 36 inches.
This height works comfortably for most people.
Wall Cabinets
Upper cabinets are generally shallower.
Typical dimensions include:
- Depth around 12 inches
- Heights of 30, 36, or 42 inches
- Widths matching base cabinets where practical
Leaving roughly 18 inches between the countertop and upper cabinets creates generous workspace while keeping everyday items within easy reach.
Pantry Cabinets
Tall pantry cabinets often extend close to the ceiling.
Common heights include:
- 84 inches
- 90 inches
- 96 inches
Depth depends on available space and intended storage.
A deep pantry offers tremendous capacity but should still allow comfortable access to items at the back.
Design Around Daily Habits
Beautiful kitchens photograph well.
Practical kitchens improve everyday life.
The difference often comes down to thoughtful planning.
Instead of asking where cabinets should fit, ask where activities naturally happen.
For example:
If baking is your favorite hobby, it makes sense to keep mixing bowls, measuring cups, baking trays, and flour together.
If mornings always begin with coffee, storing mugs, beans, filters, and your coffee machine in one dedicated area creates a smoother routine.
These may seem like small decisions.
Over the years, they become some of the most appreciated features in the entire kitchen.
Divide the Kitchen Into Functional Zones
Professional kitchen designers often organize cabinets around specific activities rather than simply filling available wall space.
This creates a natural workflow.
Cooking Zone
Store items such as:
- Pots
- Pans
- Cooking oils
- Utensils
- Spices
- Oven mitts
Keeping everything near the cooktop reduces unnecessary movement while preparing meals.
Cleaning Zone
Around the sink, consider placing:
- Dishwashing supplies
- Cleaning products
- Recycling bins
- Trash containers
- Dishwasher essentials
Everything needed for cleanup remains within easy reach.
Food Storage Zone
This area may include:
- Pantry cabinets
- Dry goods
- Canned food
- Small appliances
- Bulk storage
Grouping food storage together makes grocery organization much more efficient.
Preparation Zone
Dedicate valuable countertop space to meal preparation.
Nearby cabinets can store:
- Cutting boards
- Mixing bowls
- Chef’s knives
- Measuring tools
- Frequently used utensils
Small improvements in organization often save hundreds of unnecessary steps every week.
Choose the Cabinet Style That Matches Your Vision
Before construction begins, decide which cabinet style best suits your kitchen.
The two most common choices are face-frame and frameless cabinets.
Face-Frame Cabinets
A hardwood frame is attached to the front of each cabinet box.
Advantages include:
- Traditional appearance
- Excellent strength
- Easier assembly
- Greater forgiveness for beginners
- Solid support for doors
This style remains the most common choice in North America.
Frameless Cabinets
Also known as European-style cabinets, frameless construction eliminates the front frame entirely.
Benefits include:
- Clean modern lines
- Slightly larger interior space
- Wider drawer openings
- Contemporary appearance
Because every exposed edge remains visible, frameless cabinets demand greater precision during construction.
Plan Carefully Around Appliances
Your cabinets should work with your appliances—not force compromises later.
Before finalizing your design, confirm the exact specifications for every appliance.
Measure or verify:
- Refrigerator
- Dishwasher
- Range
- Cooktop
- Microwave
- Vent hood
- Wall oven
- Beverage refrigerator
- Wine cooler
Never rely solely on advertised dimensions.
Manufacturers often specify minimum clearances that are just as important as the appliance size itself.
Create a Complete Cut List
One habit separates professional cabinet shops from many DIY projects.
Everything is planned before cutting begins.
A complete cut list includes every individual component you’ll need.
For example:
- Cabinet sides
- Tops
- Bottoms
- Shelves
- Stretchers
- Face-frame pieces
- Drawer parts
- Door rails
- Door stiles
- Back panels
- Toe kicks
Many builders also record material thickness beside each component.
This simple system reduces waste, speeds up assembly, and makes purchasing materials much easier.
Estimate Materials With a Margin for Error
Once your plans are complete, calculate your material requirements.
Your list will likely include:
- Cabinet-grade plywood
- Hardwood lumber
- Edge banding
- Drawer slides
- Concealed hinges
- Shelf pins
- Cabinet screws
- Pocket-hole screws
- Wood glue
- Sandpaper
- Primer
- Paint or stain
- Protective topcoat
- Handles and drawer pulls
Always purchase slightly more than your calculations suggest.
A single mistake shouldn’t bring the entire project to a halt because you’re missing one sheet of plywood or one length of hardwood.
Experienced woodworking professionals know that a small reserve of material often saves considerable time and frustration.
Build a Prototype Before Committing to the Entire Kitchen
One of the smartest habits borrowed from professional cabinet shops is building a single test cabinet first.
Think of it as a full-scale rehearsal.
A prototype allows you to:
- Confirm your dimensions
- Test joinery methods
- Check hardware placement
- Verify drawer clearances
- Practice finishing techniques
- Make design improvements
If something needs adjusting, you’ve only built one cabinet.
Those lessons can then be applied to every cabinet that follows.
It’s one of the simplest ways to improve both confidence and quality before full production begins.
With careful planning complete, the project shifts from ideas to materials. In the next part, we’ll explore how choosing the right plywood, hardwood, hardware, and finishing products lays the foundation for cabinets that don’t just look impressive on installation day—but continue performing beautifully for decades.
Part 4 — Choosing Materials That Stand the Test of Time
Walk through a beautifully finished kitchen, and it’s easy to admire the paint, the elegant doors, or the perfectly aligned drawers.
What you don’t see is what truly determines whether those cabinets will still look beautiful twenty years from now.
The materials.
Every exceptional cabinet begins with thoughtful choices long before the first screw is driven. Professional cabinetmakers know that craftsmanship and material quality go hand in hand. Even flawless joinery cannot compensate for weak plywood or inferior hardware.
The good news is that when you build your own cabinets, you’re free from many of the compromises that come with mass production.
Instead of asking, “What’s the cheapest option?”
You can ask,
“What’s the smartest investment?”
That single mindset often produces cabinets that outperform many factory-built alternatives.
Why Material Quality Matters More Than Most People Realize
Kitchen cabinets work harder than almost any other furniture in your home.
Think about how often they’re used.
Doors swing open dozens of times every day.
Drawers support heavy cookware.
Shelves hold stacks of dishes.
Steam rises from boiling pots.
Cleaning products occasionally splash.
Temperature and humidity constantly change.
All of these forces quietly test the strength of your cabinets every single day.
When quality materials are used, those challenges become almost invisible.
When inferior materials are chosen, problems begin appearing much sooner than expected.
Common signs of poor-quality cabinetry include:
- Shelves beginning to sag
- Hinges loosening over time
- Drawer bottoms bowing under weight
- Doors drifting out of alignment
- Swollen cabinet bases near sinks
- Peeling finishes around edges
Starting with better materials greatly reduces the likelihood of these issues.
Cabinet-Grade Plywood: The Foundation of Strong Cabinets
Ask ten professional cabinetmakers what they use for cabinet boxes, and most will give the same answer.
Cabinet-grade plywood.
There’s a good reason for its popularity.
Unlike construction plywood, cabinet-grade panels are manufactured with tighter quality control, smoother hardwood veneers, and fewer internal voids. That consistency makes them easier to work with and significantly more durable over time.
Its advantages include:
- Outstanding structural strength
- Excellent screw-holding ability
- Smooth surfaces for painting or staining
- Greater resistance to warping
- Improved long-term stability
- Clean, attractive edges after machining
For most kitchen cabinet projects, it offers the ideal balance between strength, appearance, and reliability.
Choosing the Right Hardwood Veneer
Cabinet-grade plywood is available with many different hardwood faces.
Each offers a unique appearance and personality.
Maple
Maple remains one of the most popular choices for modern cabinetry.
Its smooth grain creates an exceptionally clean painted finish while also looking beautiful beneath clear finishes.
Birch
Birch combines durability with a subtle grain pattern.
It’s widely used in both professional cabinet shops and home woodworking projects because it machines cleanly and accepts finishes consistently.
Oak
Oak has long been associated with traditional cabinetry.
Its bold grain adds warmth and character, particularly when stained.
Cherry
Cherry develops remarkable depth and richness as it ages.
Over time, sunlight naturally deepens its color, giving cabinets an elegant, timeless appearance.
Walnut
Walnut is often chosen for premium kitchens.
Its naturally dark tones and refined grain create cabinets with unmistakable sophistication.
Understanding Plywood Thickness
Different cabinet components serve different purposes, so they don’t all require the same thickness.
Using the correct material in the correct location improves both strength and efficiency.
¾-Inch Plywood
This is the standard choice for:
- Cabinet sides
- Bottom panels
- Tops
- Fixed shelves
- Stretchers
Its rigidity provides excellent structural support.
½-Inch Plywood
Often used for:
- Drawer boxes
- Cabinet backs
- Interior dividers
- Certain lightweight components
It offers plenty of strength while reducing unnecessary weight.
¼-Inch Plywood
Typically reserved for:
- Drawer bottoms
- Cabinet backs
- Decorative backing panels
Although thinner, it performs exceptionally well when properly supported within grooves or rabbets.
Should You Use MDF?
Medium-density fiberboard, commonly known as MDF, is another material frequently used in cabinetry.
Its greatest advantage is consistency.
Because MDF contains no visible grain, painted surfaces often appear incredibly smooth.
Benefits include:
- Uniform texture
- Excellent paint finish
- Easy machining
- Stable dimensions
- No knots or grain irregularities
However, it’s important to understand its limitations.
Compared to plywood, MDF is:
- Heavier
- Less moisture resistant
- More difficult to repair
- Slightly weaker when holding screws
For painted cabinet doors or decorative panels, MDF can be an excellent option.
For structural cabinet boxes, cabinet-grade plywood generally remains the preferred choice.
Why Hardwood Still Plays an Essential Role
While plywood forms the backbone of most cabinets, hardwood provides strength and beauty where it’s most visible.
Solid hardwood is commonly used for:
- Face frames
- Cabinet doors
- Drawer fronts
- Decorative trim
- Crown molding
- Finished end panels
Because hardwood tolerates years of daily use while maintaining its appearance, it continues to be the material of choice for premium cabinetry.
Selecting Hardwood for Your Style
Each species brings its own character.
Maple
- Extremely durable
- Fine grain
- Excellent for painted kitchens
- Clean contemporary appearance
Oak
- Bold grain
- Outstanding strength
- Traditional charm
- Beautiful stain absorption
Cherry
- Rich color
- Smooth texture
- Luxurious appearance
- Ages gracefully
Walnut
- Deep natural color
- Elegant grain
- Modern sophistication
- Premium finish quality
Hickory
- Exceptional hardness
- Dramatic grain variation
- Rustic personality
- Excellent durability
There is no universally perfect wood.
The best choice is the one that complements both your design vision and your budget.
Don’t Overlook Cabinet Hardware
It’s easy to focus on plywood and hardwood while forgetting the components that make cabinets enjoyable to use.
Yet hardware influences your experience every single day.
Quality hardware includes:
- Concealed hinges
- Drawer slides
- Shelf supports
- Pull handles
- Decorative knobs
- Mounting brackets
- Adjustable feet where required
These parts may seem small compared to the cabinet itself, but they have an enormous impact on functionality.
Soft-Close Hinges Are Worth Every Penny
One feature instantly separates premium cabinetry from budget cabinets.
Soft-close hinges.
Instead of slamming shut, doors close gently and quietly.
Beyond convenience, they also:
- Reduce wear on hinges
- Protect cabinet frames
- Minimize noise
- Extend door life
- Create a luxurious feel
Most concealed hinges also provide multi-directional adjustment, making precise door alignment much easier during installation.
Drawer Slides Deserve Careful Attention
A beautiful drawer isn’t truly successful unless it operates effortlessly.
Choosing quality drawer slides transforms the daily experience of using your kitchen.
Popular options include:
Side-Mount Slides
Reliable and affordable.
Easy to install.
Suitable for many DIY projects.
Undermount Slides
Completely hidden beneath the drawer.
Offer:
- Soft-close operation
- Smooth movement
- Elegant appearance
- Greater perceived quality
These have become the preferred choice for many custom cabinetmakers.
Heavy-Duty Slides
Perfect for drawers holding:
- Cast-iron cookware
- Pantry items
- Small appliances
- Large serving dishes
Their higher weight capacity provides confidence that the drawer will continue operating smoothly for many years.
The Right Fasteners Matter
Cabinets experience constant stress throughout their lifetime.
Using proper fasteners helps ensure joints remain strong.
Useful options include:
- Cabinet screws
- Pocket-hole screws
- Confirmat screws
- Trim-head screws
- High-quality wood screws
Avoid using drywall screws for cabinet construction.
Although inexpensive, they’re relatively brittle and aren’t designed for structural woodworking applications.
Never Underestimate Good Wood Glue
Modern wood glue is remarkably strong.
When applied correctly, the bond often exceeds the strength of the surrounding wood.
For the best results:
- Apply an even bead.
- Cover the entire joint.
- Clamp firmly.
- Wipe away excess glue immediately.
Glue isn’t simply an accessory.
It’s a structural component of every quality cabinet.
Edge Banding Creates the Finished Look
Plywood edges reveal multiple internal layers that most cabinetmakers prefer to conceal.
Edge banding creates the appearance of solid wood while protecting exposed edges from wear.
Popular choices include:
- Iron-on wood veneer
- Solid hardwood strips
- Durable PVC edging
Though often overlooked, this finishing touch contributes enormously to the overall quality of the completed cabinets.
Choose Materials for the Next Twenty Years
One helpful way to make purchasing decisions is to think beyond today’s project.
Ask yourself:
“Will I still appreciate this choice ten years from now?”
Often the answer encourages small upgrades that provide tremendous long-term value.
Perhaps it’s better plywood.
Perhaps smoother drawer slides.
Perhaps hardwood instead of a lower-cost alternative.
When spread over decades of daily use, those investments become surprisingly inexpensive.
Quality materials don’t simply make cabinet building easier.
They create cabinets that continue looking and performing beautifully long after the excitement of the renovation has faded.
With your materials selected, the next step is assembling the tools that turn careful planning into precise craftsmanship. In the next part, we’ll explore the essential equipment every cabinet builder should have, from basic measuring tools to workshop upgrades that improve accuracy, efficiency, and confidence.
Part 5 — The Essential Tools for Building Cabinets
If you’ve ever watched a professional cabinetmaker at work, it’s easy to believe the secret lies in the workshop.
Rows of precision machines. Perfectly organized workbenches. Specialized tools you’ve never even heard of.
It can feel intimidating.
But here’s something many experienced builders will tell you:
The quality of your cabinets depends far more on how you use your tools than how many you own.
A skilled craftsman with a modest workshop will almost always outperform someone with expensive equipment but little patience or planning.
That should be encouraging.
You don’t need to recreate a commercial cabinet shop to build beautiful kitchen cabinets. You simply need reliable tools, a thoughtful workspace, and the willingness to slow down when accuracy matters.
Whether this is your first large woodworking project or another step in a growing collection of DIY builds, assembling the right tools will make every stage of cabinet construction more enjoyable.
Precision Starts With Measuring Tools
Long before the first saw blade spins, your measuring tools begin shaping the final result.
Cabinet making leaves very little room for guesswork.
A tiny measuring error at the beginning has a way of multiplying as the project grows. One cabinet becomes two. Two become ten. Before long, what seemed insignificant can affect an entire kitchen.
That’s why experienced cabinetmakers place enormous importance on measurement.
Keep these essentials within easy reach:
- Tape measure
- Combination square
- Speed square
- Precision ruler
- Marking gauge
- Carpenter’s pencil
- Fine-point marking knife
- Digital angle finder
- Chalk line
The sharper and more consistent your layout marks are, the easier every cut becomes.
Many professionals quietly follow one simple habit:
Measure.
Check.
Then check one more time.
It’s a small routine that prevents some very expensive mistakes.
The Table Saw: The Workshop’s Workhorse
If one machine sits at the center of cabinet building, it’s the table saw.
Nearly every cabinet component passes through it at some stage.
A quality table saw handles tasks such as:
- Ripping plywood
- Cutting hardwood
- Crosscutting components
- Creating dado joints
- Cutting rabbets
- Trimming face-frame stock
- Producing identical cabinet parts
More important than raw power is accuracy.
Look for features such as:
- A flat table surface
- A dependable rip fence
- Smooth height adjustments
- Accurate blade alignment
- Effective dust collection
A properly tuned table saw produces repeatable cuts that dramatically improve cabinet quality.
Don’t Have a Table Saw?
That’s perfectly fine.
Many outstanding kitchens have been built without one.
Modern alternatives make cabinet construction far more accessible than it once was.
Popular options include:
- Track saw
- Circular saw with guide rail
- Straight-edge cutting guide
- Portable cutting station
A track saw deserves particular attention.
Because it rides along a precision guide, it allows you to make long, clean cuts in full sheets of plywood while the material remains supported.
For builders working in a garage or small workshop, it can be one of the smartest investments available.
Why a Circular Saw Still Belongs in Every Workshop
Even if you own a table saw, a circular saw remains incredibly useful.
It’s ideal for:
- Breaking down large plywood sheets
- Outdoor cutting
- Rough sizing materials
- Jobsite adjustments
- Working in confined spaces
Pair it with a quality straight-edge guide and you’ll be surprised by the accuracy you can achieve.
Many builders use a circular saw for the initial breakdown before making final precision cuts on a table saw.
A Miter Saw Makes Repetition Easy
Kitchen cabinets involve countless repeated cuts.
Face frames, trim pieces, rails, and stiles all benefit from perfectly consistent lengths.
A compound miter saw makes those repetitive cuts fast and accurate.
It’s especially useful for:
- Hardwood face frames
- Cabinet trim
- Crown molding
- Toe kicks
- Decorative moldings
- Door components
Once properly adjusted, it becomes one of the most frequently used machines in the workshop.
The Router: Where Cabinets Begin to Look Custom
There are few tools as versatile as a router.
While cabinet boxes may provide the structure, routers often create the details that give custom cabinetry its distinctive appearance.
With the right bits, a router can:
- Shape decorative edges
- Cut dado joints
- Create rabbets
- Flush-trim panels
- Form cabinet door profiles
- Cut hinge recesses
- Follow templates accurately
Adding a router table expands its capabilities even further.
Many classic cabinet door designs rely almost entirely on careful router work.
A Drill and Driver You’ll Use Constantly
Cabinet building involves hundreds of screws.
Sometimes thousands.
A dependable cordless drill and impact driver quickly become indispensable.
You’ll use them for:
- Drilling pilot holes
- Driving pocket-hole screws
- Installing hinges
- Mounting drawer slides
- Attaching hardware
- Securing cabinets during installation
Look for comfortable balance rather than maximum size.
A lighter tool often causes less fatigue during long building sessions.
Pocket-Hole Jigs Make Cabinet Building Accessible
Pocket-hole joinery has transformed DIY cabinet construction.
Instead of complicated traditional joinery, builders can create strong, hidden connections quickly and accurately.
Pocket-hole jigs work particularly well for:
- Face frames
- Cabinet assembly
- Stretchers
- Trim installation
- Utility cabinetry
When combined with quality glue, pocket-hole joints provide excellent strength while keeping the construction process approachable for beginners.
Clamps: The Tool You Never Have Enough Of
Ask almost any cabinetmaker how many clamps they own.
Then ask how many more they would like.
The answer is usually:
“More.”
Clamps act as extra hands throughout the project.
They hold components securely while glue cures and help maintain perfect alignment during assembly.
Useful types include:
- Parallel clamps
- Bar clamps
- Pipe clamps
- Corner clamps
- Spring clamps
- Quick-grip clamps
Having several long clamps available makes assembling large cabinet boxes much less stressful.
Sanding Equipment Makes the Difference You Can Feel
Beautiful cabinets aren’t judged only by appearance.
They’re judged by touch.
Running your hand across a perfectly smooth cabinet door immediately communicates quality.
A random orbital sander makes achieving that finish much easier.
It’s commonly used for:
- Cabinet sides
- Doors
- Drawer fronts
- Face frames
- Hardwood edging
Move the sander steadily and let the abrasive do the work.
Pressing too hard often creates swirl marks rather than removing them.
A Jigsaw Handles the Unexpected
Not every cut is perfectly straight.
Kitchen cabinets often require openings for:
- Plumbing
- Electrical boxes
- Sink installations
- Decorative curves
- Custom scribing
A quality jigsaw allows you to make those irregular cuts safely and accurately.
Using sharp blades specifically designed for clean woodworking cuts greatly reduces splintering.
Brad Nailers Speed Up Finishing Work
Although not absolutely essential, a brad nailer can save considerable time.
It’s particularly useful for attaching:
- Decorative trim
- Cabinet backs
- Light moldings
- Temporary positioning pieces
- Face-frame details
Because the nails are so small, the holes become nearly invisible after filling and finishing.
Dust Collection Protects More Than Your Workshop
Cabinet making creates an astonishing amount of fine dust.
Without proper collection, that dust settles everywhere.
More importantly, it becomes something you breathe.
Even a simple shop vacuum connected to your primary tools makes a noticeable difference.
Benefits include:
- Cleaner workspace
- Better visibility
- Improved finish quality
- Healthier air
- Longer tool life
Professional shops invest heavily in dust collection for good reason.
A clean workshop is often a more productive workshop.
Good Lighting Improves Every Cut
Lighting rarely receives much attention until it’s missing.
Dim workspaces hide problems.
Bright workspaces reveal them early.
Good lighting helps you notice:
- Tear-out
- Surface scratches
- Glue residue
- Pencil marks
- Finish defects
- Alignment issues
Many cabinetmakers supplement overhead lighting with portable LED task lights positioned close to their work.
The improvement in visibility can be remarkable.
Safety Equipment Belongs in Every Workshop
No project is worth risking your health.
Developing safe habits from the beginning allows you to enjoy woodworking for many years to come.
Keep these essentials nearby:
- Safety glasses
- Hearing protection
- Dust mask or respirator
- Push sticks
- Push blocks
- Featherboards
- First aid kit
- Fire extinguisher
Experienced cabinetmakers don’t ignore safety because they’ve become skilled.
They prioritize safety because they understand exactly how quickly accidents can happen.
Upgrades That Can Come Later
As your experience grows, you may eventually expand your workshop.
Many professionals gradually add tools such as:
- Cabinet saw
- Router table
- Band saw
- Thickness planer
- Jointer
- Drill press
- Domino joiner
- Oscillating spindle sander
- Laser measuring tools
- Digital calipers
None of these are required for your first kitchen.
They simply increase efficiency and precision as your projects become more ambitious.
An Organized Workshop Builds Better Cabinets
Before you begin cutting plywood, spend time organizing your workspace.
It may not feel productive.
In reality, it’s one of the smartest investments you can make.
Professional cabinet shops are organized for a reason.
Every tool has a place.
Every material is easy to locate.
Every stage flows naturally into the next.
Simple habits make a tremendous difference:
- Keep cutting and assembly areas separate.
- Store plywood flat whenever possible.
- Label every cabinet component immediately.
- Organize hardware into clearly marked containers.
- Clean glue spills before they harden.
- Remove dust regularly throughout the build.
A tidy workshop doesn’t just improve efficiency.
It reduces mistakes, lowers frustration, and helps you focus on what really matters—building accurate, beautiful cabinets one careful step at a time.
With your tools ready and your workspace prepared, you’re finally standing at the point where planning becomes craftsmanship. In the next part, we’ll begin constructing the cabinet boxes themselves, exploring the professional techniques that create strong, perfectly square cabinets capable of supporting decades of everyday use.
Part 6 — Building Strong, Perfectly Square Cabinet Boxes
This is the stage where your kitchen finally begins to take shape.
The measurements have been checked.
The materials are stacked neatly in the workshop.
Your tools are ready.
Now it’s time to transform flat sheets of plywood into the foundation of an entire kitchen.
For many first-time builders, this is the most exciting—and sometimes the most intimidating—part of the project.
The truth is that cabinet boxes aren’t especially complicated.
What separates professional-looking cabinets from average ones isn’t complexity.
It’s precision.
Every accurate cut, every square corner, and every carefully assembled joint builds on the work you completed during the planning stage. Take your time here, because every door, drawer, and countertop will eventually depend on the accuracy of these cabinet boxes.
Understanding the Anatomy of a Cabinet
Before cutting any material, it’s helpful to understand how a cabinet is put together.
Although cabinet styles vary, most share the same basic components.
A typical cabinet consists of:
- Two side panels
- A bottom panel
- A top panel or stretchers
- A back panel
- Fixed shelves where required
- Adjustable shelves if desired
- A face frame (for traditional cabinets)
- Toe kick (for base cabinets)
Each part contributes to the cabinet’s overall strength.
When assembled correctly, the cabinet becomes a rigid structure capable of supporting significant weight for many years.
Face-Frame or Frameless Construction?
Earlier, you learned about the two primary cabinet styles.
Now it’s time to choose which one you’ll build.
Face-Frame Cabinets
Traditional face-frame cabinets include a hardwood frame attached to the front of the cabinet box.
Advantages include:
- Added structural strength
- Classic appearance
- Easier door alignment
- Excellent durability
- More forgiving for beginner builders
The face frame also hides the front plywood edges, creating a polished, furniture-like appearance.
Frameless Cabinets
Frameless cabinets eliminate the front frame entirely.
Instead, doors attach directly to the cabinet sides.
Benefits include:
- Contemporary appearance
- Slightly larger interior storage
- Wider drawer openings
- Cleaner visual lines
Because every edge remains visible, frameless cabinets require greater precision during construction.
Even small inaccuracies become noticeable.
Breaking Down Full Sheets of Plywood
Handling large plywood sheets can feel awkward, especially if you’re working alone.
Rather than lifting full sheets onto a table saw immediately, many professionals begin by cutting them into manageable sections.
A common approach is to:
- Support the sheet on a stable cutting surface
- Mark each cut carefully
- Break the sheet into oversized sections
- Trim every piece to its final dimension afterward
This method improves both safety and accuracy.
Remember to label every component immediately after cutting.
Writing “Left Side – Sink Base” or “Upper Cabinet Shelf” directly on the material prevents confusion later in the project.
Accurate Cuts Save Hours of Frustration
Cabinet construction depends on consistency.
A difference of even one or two millimeters between matching panels can create alignment problems throughout the build.
Develop habits that promote repeatable accuracy.
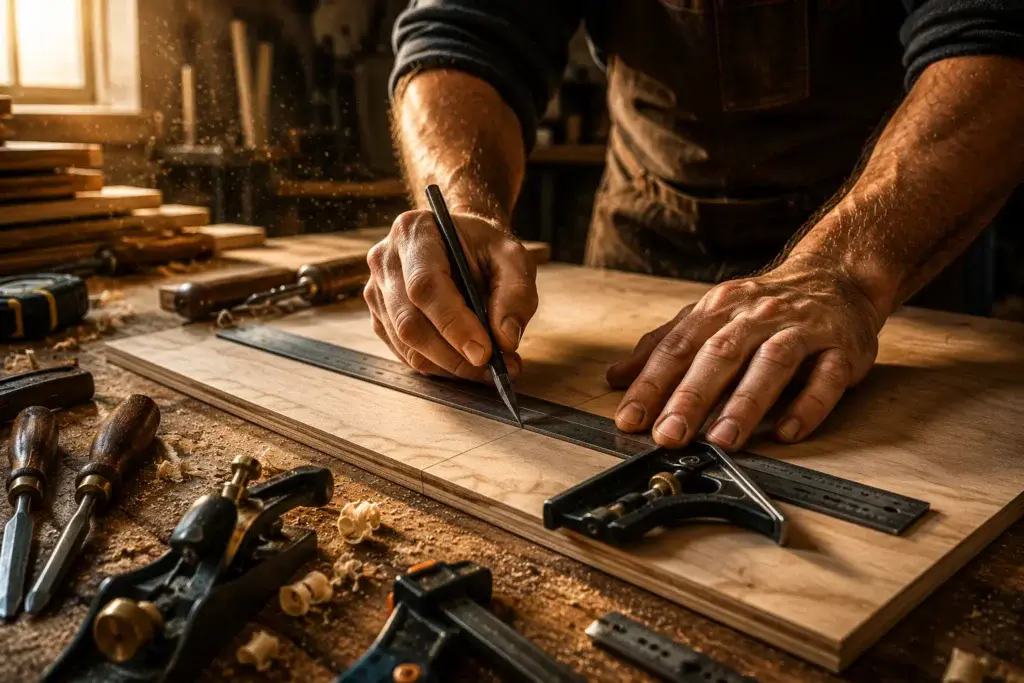
For example:
- Use stop blocks for repeated cuts.
- Check your saw blade for square before starting.
- Support long panels fully during cutting.
- Replace dull blades before they begin splintering plywood.
- Measure from the same reference edge every time.
Professional cabinetmakers rarely rush cutting day.
They understand that correcting mistakes afterward usually takes much longer than preventing them in the first place.
Choosing the Right Joinery
One of the strengths of modern cabinet building is that there isn’t just one correct method for assembling cabinet boxes.
Several joinery techniques produce excellent results.
Your choice depends on your experience, available tools, and preferred workflow.
Butt Joints
The simplest method joins one panel directly against another.
When reinforced with screws and glue, butt joints create surprisingly durable cabinets.
They’re an excellent starting point for beginners.
Pocket-Hole Joinery
Pocket-hole screws allow fast, hidden assembly.
Combined with high-quality wood glue, they provide strong, reliable joints while reducing the need for complex woodworking techniques.
Many professional shops use pocket holes for face frames and certain cabinet assemblies because they’re efficient and dependable.
Dado Joints
A dado is a groove cut into one panel that receives another panel.
Benefits include:
- Greater glue surface
- Improved alignment
- Excellent structural strength
- Easier assembly
Many cabinetmakers consider dados one of the strongest options for cabinet construction.
Rabbets
A rabbet removes material from the edge of a panel, allowing another component to fit neatly into place.
They’re commonly used for:
- Cabinet backs
- Top panels
- Bottom panels
Rabbets strengthen joints while helping keep the cabinet square during assembly.
Dry Fit Before Applying Glue
One simple habit separates experienced builders from frustrated beginners.
Always assemble the cabinet once before adding glue.
A dry fit allows you to verify:
- Panel orientation
- Joint alignment
- Hardware clearance
- Overall dimensions
- Squareness
If something doesn’t fit correctly, now is the easiest time to fix it.
Once glue is applied, every minute becomes more important.
Building One Cabinet at a Time
Looking at an entire kitchen’s worth of cabinet parts can feel overwhelming.
Instead of thinking about fifteen cabinets, think about one.
Finish that cabinet completely before beginning the next.
This approach allows you to:
- Refine your workflow
- Identify improvements
- Build confidence
- Maintain better organization
- Catch small errors before repeating them
Many professional cabinet shops even build a prototype cabinet before beginning production.
The lessons learned from that first cabinet often improve every cabinet that follows.
Applying Glue Correctly
Wood glue is strongest when applied thoughtfully.
More glue doesn’t create stronger joints.
In fact, excessive glue simply creates unnecessary cleanup.
For reliable results:
- Apply an even, continuous bead.
- Spread glue across the full joint surface.
- Avoid dry areas.
- Clamp firmly but don’t overtighten.
- Wipe away squeeze-out immediately with a damp cloth.
Clean joints require much less sanding later.
Clamping for Perfect Alignment
Clamps don’t just hold pieces together.
They help create accuracy.
Place clamps so pressure remains evenly distributed across the cabinet.
As you tighten them:
- Watch for shifting panels.
- Check corners frequently.
- Measure diagonally.
- Make adjustments before the glue begins curing.
Taking an extra five minutes during clamping often eliminates hours of correction later.
The Secret Every Cabinetmaker Knows: Check for Square
If there’s one measurement you should never skip, it’s this one.
A cabinet must be square.
The easiest method is measuring diagonally from corner to corner.
Measure:
- Top left to bottom right
- Top right to bottom left
If both measurements are identical, the cabinet is square.
If not, gently adjust the cabinet while the clamps remain loose enough to allow movement.
Repeat the measurements until both diagonals match.
This simple technique is one of the defining habits of professional cabinetmakers.
Installing the Cabinet Back
Many people underestimate the importance of the cabinet back.
It does far more than close the cabinet.
A properly installed back panel:
- Strengthens the cabinet
- Prevents twisting
- Helps maintain squareness
- Improves long-term durability
Whether using grooves, rabbets, or screws, ensure the back sits flat and securely against the cabinet box.
Building Strong Base Cabinets
Base cabinets carry most of the workload in a kitchen.
They support:
- Countertops
- Stone surfaces
- Heavy cookware
- Small appliances
- Sinks
- Everyday kitchen use
Because of these demands, rigidity is essential.
Many builders reinforce base cabinets with:
- Stretchers across the top
- Additional corner blocks
- Strong toe-kick construction
- Extra screws near high-stress areas
These small additions dramatically increase strength.
Constructing Wall Cabinets
Wall cabinets present different challenges.
Weight matters.
Since they’ll eventually hang from wall studs, reducing unnecessary mass makes installation much easier.
Wall cabinets should remain:
- Strong
- Lightweight
- Perfectly square
- Properly reinforced
Pay special attention to the mounting area where installation screws will later secure the cabinet to the wall.
Installing Adjustable Shelves
Adjustable shelving greatly increases cabinet flexibility.
Instead of permanently fixing every shelf, many builders drill evenly spaced shelf-pin holes.
Advantages include:
- Adjustable storage heights
- Easier future organization
- Better use of interior space
- Greater versatility
Simple drilling jigs make shelf-pin placement remarkably accurate and repeatable.
Protect Every Finished Panel
As cabinet boxes begin filling your workshop, it’s easy for freshly finished surfaces to become scratched.
Professional shops protect completed components throughout construction.
Simple habits include:
- Storing cabinets upright on protective blocks
- Separating finished surfaces with cardboard or foam
- Avoiding stacked hardware on cabinet tops
- Keeping the assembly area clean
Preventing scratches is always easier than repairing them.
Build With Consistency, Not Speed
One of the biggest temptations during cabinet construction is rushing once you’ve successfully built the first few cabinets.
Confidence grows quickly.
That’s wonderful—but don’t let speed replace precision.
Treat your tenth cabinet with the same care as your first.
Repeat the same measuring process.
Follow the same assembly routine.
Check every cabinet for square.
Consistency is what creates kitchens where every door aligns perfectly and every drawer glides effortlessly.
By the time the last cabinet box is assembled, you’ll notice something remarkable.
The intimidating stack of plywood that once filled your workshop has been transformed into the framework of an entirely new kitchen.
In the next part, we’ll bring those cabinet boxes to life by building beautiful doors and smooth, durable drawers—the details that people notice first and interact with every single day.
Part 7 — Crafting Beautiful Doors and Smooth Drawers
If cabinet boxes are the skeleton of your kitchen, the doors and drawers are its personality.
They’re the parts everyone notices first.
They’re the surfaces your family touches every day.
They’re also the components that immediately reveal the difference between average workmanship and true craftsmanship.
Walk into any beautifully designed kitchen and your eyes are naturally drawn to the cabinet doors.
Are the gaps perfectly even?
Do the drawer fronts line up flawlessly?
Do the doors close gently without rubbing against one another?
These details may seem small, but together they create the polished, high-end appearance that people often associate with professionally built cabinetry.
Fortunately, creating beautiful doors and drawers isn’t about complicated techniques.
It’s about consistency, patience, and careful attention to detail.
Choosing a Cabinet Door Style
Before cutting a single board, decide on the overall style you want your kitchen to have.
The design of your cabinet doors will influence the character of the entire room.
Some styles feel timeless.
Others create a clean, modern atmosphere.
The right choice depends on your home’s architecture, your personal taste, and how you want the kitchen to feel for years to come.
Shaker Doors
Few cabinet styles have remained as popular as the classic Shaker door.
Its clean lines and simple proportions work equally well in traditional, farmhouse, Scandinavian, and modern kitchens.
A typical Shaker door consists of:
- Two vertical stiles
- Two horizontal rails
- One flat center panel
Its understated design allows quality craftsmanship to take center stage.
For many first-time cabinet builders, it’s also one of the easiest and most rewarding styles to construct.
Slab Doors
If your goal is a sleek contemporary kitchen, slab doors deserve serious consideration.
Instead of frames and panels, each door is made from one solid, flat surface.
Advantages include:
- Minimalist appearance
- Easy cleaning
- Simple construction
- Excellent compatibility with modern hardware
Slab doors pair especially well with frameless cabinet construction.
Raised Panel Doors
Raised panel doors add depth, texture, and traditional elegance.
Their center panel is shaped to create subtle profiles that catch light beautifully.
Although more time-consuming to build, they create an unmistakably custom appearance that has remained popular for generations.
Glass Panel Doors
Adding a few glass-front cabinets can dramatically change the feel of a kitchen.
Glass doors help:
- Display decorative dishes
- Showcase glassware
- Break up long runs of solid cabinetry
- Reflect light throughout the room
Many homeowners reserve them for upper cabinets to create an open, welcoming atmosphere.
Selecting Hardwood for Doors
Unlike cabinet boxes, which often rely on cabinet-grade plywood, doors are usually built from solid hardwood.
The species you choose affects both durability and appearance.
Popular choices include:
Maple
- Smooth grain
- Extremely durable
- Excellent painted finish
- Modern appearance
Oak
- Strong character
- Distinctive grain
- Traditional warmth
- Outstanding durability
Cherry
- Rich natural color
- Elegant aging process
- Smooth texture
- Luxurious appearance
Walnut
- Deep chocolate tones
- Sophisticated grain
- Premium aesthetic
- Excellent stability
Regardless of species, always allow the lumber to acclimate to your workshop before construction begins.
Wood naturally expands and contracts with changes in humidity.
Allowing it to stabilize first helps reduce movement after the doors are built.
Milling Lumber Accurately
Beautiful cabinet doors begin with accurately prepared lumber.
Each board should be:
- Straight
- Flat
- Square
- Consistent in thickness
Even slight inconsistencies become noticeable once rails and stiles are assembled.
Take time to:
- Joint one edge if necessary
- Plane boards evenly
- Rip pieces to identical widths
- Cut components to precise lengths
This preparation creates tighter joints and cleaner finished doors.
Building Rails and Stiles
The frame surrounding the center panel consists of two different parts.
Stiles
These are the long vertical pieces that form the sides of the door.
Rails
These are the shorter horizontal pieces connecting the stiles.
Their dimensions determine the overall proportions of the door.
Keeping every rail and stile identical throughout the kitchen creates a unified appearance.
Consistency matters more than complexity.
Joining the Door Frame
Several joinery methods produce excellent cabinet doors.
Common options include:
- Mortise and tenon
- Cope and stick joints
- Dowels
- Loose tenons
- Pocket-hole construction for utility cabinets
Traditional mortise-and-tenon joinery remains one of the strongest and most respected techniques.
However, modern woodworking tools allow several methods to produce beautiful, durable doors when executed accurately.
Fitting the Center Panel
For frame-and-panel doors, the center panel should never be glued tightly inside the frame.
Instead, it needs room to move naturally as humidity changes throughout the year.
Leaving slight clearance allows seasonal expansion and contraction without causing cracks or warping.
This small detail is one of the reasons professionally built doors remain stable for decades.
Sand Before Final Assembly
Many beginners wait until the doors are fully assembled before sanding.
Professionals often do the opposite.
Sanding individual components beforehand makes it much easier to reach inside corners and decorative profiles.
After assembly, only light finish sanding is usually required.
This saves time while producing cleaner results.
Building Drawers That Feel Solid
Nothing reveals cabinet quality faster than a drawer.
A drawer should glide smoothly.
It should feel sturdy under load.
It should open effortlessly whether it’s carrying cutlery or heavy cookware.
Well-built drawers create a subtle impression of quality every time they’re used.
Choosing Drawer Material
Most quality drawers are constructed from hardwood plywood or solid hardwood.
Popular choices include:
- Birch plywood
- Maple plywood
- Solid maple
- Baltic birch
These materials provide:
- Excellent strength
- Smooth surfaces
- Reliable screw holding
- Long-term durability
Avoid thin particleboard for drawer construction whenever possible.
Strong Drawer Joinery
Drawer boxes experience constant movement.
Strong joints are essential.
Common methods include:
Dovetails
Often considered the hallmark of premium cabinetry.
Extremely strong.
Beautifully traditional.
Lock Rabbets
A practical alternative that provides excellent strength while remaining approachable for many DIY builders.
Pocket-Hole Joinery
Suitable for workshop cabinets and utility applications where hidden fasteners are acceptable.
Dowels and Loose Tenons
Both provide durable, clean-looking joints while maintaining excellent structural integrity.
Don’t Forget the Drawer Bottom
A drawer bottom supports everything placed inside.
Using material that’s too thin often results in sagging over time.
Many cabinetmakers install the bottom panel inside grooves cut into all four drawer sides.
This design distributes weight evenly while strengthening the entire drawer box.
For larger drawers intended to hold heavy cookware, thicker material provides valuable additional support.
Installing Drawer Slides
A perfectly built drawer can still perform poorly if the slides aren’t installed accurately.
Take your time.
Measure carefully.
Verify alignment before tightening screws.
Today’s most popular options include:
Side-Mount Slides
Affordable.
Reliable.
Easy to install.
Ideal for many first-time cabinet projects.
Undermount Soft-Close Slides
Hidden beneath the drawer.
Smooth, quiet operation.
Premium appearance.
Increasingly common in custom kitchens.
Whichever style you choose, consistency between every drawer is the key to a professional result.
Installing Concealed Hinges
Modern concealed hinges provide both functionality and flexibility.
Most include adjustments in three directions.
This allows you to fine-tune:
- Door height
- Side-to-side spacing
- Door depth
Small adjustments create perfectly even gaps between every cabinet door.
Patience here pays enormous dividends.
Achieving Perfect Door Gaps
Uniform spacing immediately communicates quality.
Professional cabinetmakers constantly check reveal lines—the narrow gaps surrounding each door.
Look for:
- Equal spacing on every side
- Consistent alignment between neighboring doors
- Drawer fronts centered beneath doors
- Smooth opening without rubbing
Making tiny adjustments one door at a time eventually produces a kitchen that looks balanced from every angle.
Test Every Moving Part
Before applying paint or stain, operate every door and drawer repeatedly.
Open them.
Close them.
Pull them fully out.
Slide them back in.
Listen carefully.
Watch for:
- Rubbing edges
- Uneven movement
- Loose screws
- Misaligned hinges
- Drawer binding
Correcting these issues before finishing is dramatically easier than fixing them afterward.
Label Everything Before Finishing
Once dozens of nearly identical doors and drawer fronts fill your workshop, it’s surprisingly easy to lose track of where each belongs.
Professional cabinet shops carefully label every component.
Simple markings such as:
- Sink Base Left
- Pantry Upper Right
- Island Drawer Three
make final installation far less stressful.
Most markings can be placed on hidden surfaces where they’ll never be seen after assembly.
The Small Details Create the Biggest Impression
Visitors rarely notice the thickness of your plywood.
They usually won’t ask what type of screws you used.
But they absolutely notice:
- Doors that close softly.
- Drawers that glide effortlessly.
- Perfectly even spacing.
- Crisp edges.
- Smooth surfaces.
- Beautiful craftsmanship.
Those details transform cabinets into furniture.
As you complete the last door and install the final drawer front, your kitchen will begin looking less like a construction project and more like the finished vision you imagined months earlier.
In the next part, we’ll explore one of the most transformative stages of the entire project—finishing. You’ll learn how careful sanding, painting, staining, and protective topcoats can elevate well-built cabinets into stunning custom pieces that look professionally crafted and remain beautiful for many years to come.
Part 8 — Finishing Cabinets Like a Professional
You’ve spent countless hours measuring, cutting, assembling, and fitting every cabinet with care.
The boxes are square.
The doors hang evenly.
The drawers glide effortlessly.
Now comes the stage that has the power to elevate all of that hard work—or unintentionally hide it.
The finish.
A flawless finish isn’t simply about choosing the right paint color or stain.
It’s about preparation.
Professional cabinetmakers often say that the finish begins long before the first coat is applied. The time invested in sanding, cleaning, and surface preparation is what separates an ordinary kitchen from one that immediately feels custom built.
If there’s one stage of cabinet making that rewards patience above all else, this is it.
Great Finishes Begin With Careful Surface Preparation
No finish can hide poor preparation.
In fact, paint and stain usually make imperfections even more noticeable.
Before reaching for a brush or spray gun, inspect every cabinet carefully.
Run your hand across every surface.
Your fingertips will often detect imperfections that your eyes miss.
Look for:
- Small dents
- Scratches
- Glue residue
- Sharp edges
- Raised wood fibers
- Tiny gaps
- Nail holes
Correct these now.
Once the finish has been applied, repairs become significantly more difficult.
Sanding Creates the Foundation
Sanding isn’t about removing large amounts of wood.
It’s about creating a perfectly consistent surface.
Work gradually through progressively finer grits rather than jumping straight to very fine sandpaper.
A typical process includes:
- Initial leveling
- Smoothing joints
- Softening sharp edges
- Final finish sanding
Always sand with the direction of the wood grain whenever possible.
Cross-grain scratches often become highly visible after stain or clear finishes are applied.
Remember that different materials require different approaches.
Solid hardwood, plywood veneer, and MDF all respond differently to sanding pressure.
Gentle, consistent sanding produces the best results.
Remove Every Trace of Dust
Dust is one of the biggest enemies of a professional finish.
Even tiny particles trapped beneath paint or clear coats become surprisingly noticeable once everything dries.
After sanding:
- Vacuum every surface thoroughly.
- Clean corners and joints.
- Blow dust from hinge recesses.
- Wipe surfaces with a microfiber cloth.
- Use a tack cloth before finishing.
Many professionals also allow the dust in the workshop to settle before beginning the finishing process.
A cleaner environment almost always produces a cleaner result.
Fill Small Imperfections
Minor defects are completely normal.
Fortunately, most disappear with the right filler.
Use quality wood filler for:
- Small dents
- Nail holes
- Tiny gaps
- Minor chips
- Surface imperfections
Allow filler to dry completely before sanding it flush with the surrounding surface.
Done correctly, the repair becomes almost invisible.
Paint or Stain? Choosing the Right Look
One of the biggest design decisions comes down to this question.
Should you paint your cabinets or highlight the natural beauty of the wood?
Both options can produce stunning kitchens.
The right choice depends on the style you want to create.
Painted Cabinets
Paint remains one of the most popular cabinet finishes today.
It offers:
- A clean appearance
- Endless color choices
- Excellent coverage
- Modern versatility
- Easy coordination with other finishes
Paint also allows you to use materials like MDF for doors while achieving an exceptionally smooth surface.
Stained Cabinets
Stain celebrates the natural character of hardwood.
Rather than hiding the grain, it enhances it.
Benefits include:
- Rich depth
- Visible wood grain
- Warm appearance
- Timeless elegance
- Easy touch-up of minor wear
If you’ve invested in beautiful hardwood, stain allows its natural beauty to remain the centerpiece.
Why Primer Matters
Skipping primer may seem like a shortcut.
It usually becomes an expensive mistake.
Primer creates a stable foundation by:
- Improving adhesion
- Sealing porous surfaces
- Reducing uneven absorption
- Preventing bleed-through
- Producing more uniform color
High-quality primer also reduces the number of finish coats required.
That saves both time and material while improving the final appearance.
Spray, Brush, or Roller?
Each finishing method offers advantages.
The best choice depends on your equipment, experience, and workspace.
Spraying
Many professional cabinet shops spray their finishes because it produces exceptionally smooth results.
Advantages include:
- Uniform coverage
- Minimal brush marks
- Excellent consistency
- Faster application on large projects
The trade-off is that spraying requires careful masking, good ventilation, and practice.
Brushing
High-quality brushes remain an excellent option for many DIY builders.
They’re especially useful when:
- Touching up small areas
- Working in limited spaces
- Applying certain specialty finishes
Using slow, even strokes helps minimize visible brush marks.
Rolling
Foam rollers can produce surprisingly attractive painted finishes.
They’re simple to use and work well for:
- Flat cabinet doors
- Cabinet sides
- Large panels
Many builders combine rolling with light brush work in corners for the best results.
Apply Thin Coats Instead of Thick Ones
One of the most common finishing mistakes is trying to achieve complete coverage in a single coat.
Professional finishes are built gradually.
Several thin coats almost always outperform one heavy application.
Thin coats:
- Dry more evenly
- Reduce runs
- Improve durability
- Produce smoother surfaces
- Require less sanding between coats
Patience pays enormous dividends here.
Sand Lightly Between Coats
Each coat raises tiny imperfections.
Light sanding removes them before the next layer is applied.
Between coats:
- Use fine-grit sandpaper.
- Apply very light pressure.
- Remove all sanding dust afterward.
This simple routine creates the silky-smooth finish associated with premium cabinetry.
Protect Your Cabinets With a Durable Topcoat
Whether you’ve painted or stained your cabinets, a protective topcoat adds valuable durability.
Kitchen cabinets endure:
- Steam
- Heat
- Moisture
- Food spills
- Cleaning products
- Daily handling
A quality protective finish helps preserve their appearance for many years.
Popular options include:
- Water-based polyurethane
- Oil-based polyurethane
- Conversion varnish
- Catalyzed lacquer
- Acrylic protective coatings
For many DIY projects, modern water-based polyurethane offers an excellent balance of durability, clarity, and ease of application.
Allow the Finish to Cure Properly
Dry and cured are not the same thing.
A cabinet may feel dry after only a few hours, yet the finish can continue hardening for days—or even weeks.
Avoid:
- Installing hardware too early
- Stacking finished doors together
- Closing doors tightly during curing
- Placing heavy objects on freshly finished surfaces
Giving the finish time to reach full hardness greatly improves long-term durability.
Installing Handles and Knobs
Hardware should enhance the overall design rather than compete with it.
Before drilling holes:
- Confirm every measurement.
- Use a drilling template.
- Double-check spacing.
- Test one door first.
Consistent hardware placement creates a polished, professional appearance throughout the kitchen.
Perform a Final Quality Inspection
Before installation begins, inspect every cabinet carefully.
Look at each surface under bright light.
Open every drawer.
Close every door.
Search for:
- Dust nibs
- Uneven sheen
- Paint runs
- Missed edges
- Hardware alignment
- Finish defects
Small corrections made now are far easier than repairs after the cabinets are mounted on the wall.
Protect the Finish During Storage
Finished cabinets remain vulnerable until installation is complete.
Store components carefully by:
- Standing doors vertically with spacers
- Protecting corners from impacts
- Covering finished surfaces with soft material
- Avoiding direct sunlight during long storage periods
- Keeping the storage area dry and clean
A little extra care prevents unnecessary scratches before your cabinets ever reach the kitchen.
The Finish Is What People Remember
Think back to the last beautiful kitchen you admired.
You probably don’t remember the screws.
Or the plywood.
Or the joinery hidden inside the cabinet boxes.
You remember the smooth doors.
The rich color.
The elegant sheen.
The way the entire kitchen looked complete.
That’s the power of a professional finish.
It brings together every hour you’ve invested so far and transforms individual cabinet parts into a unified, custom-built kitchen.
In the next part, you’ll move from the workshop into the heart of your home as we cover cabinet installation. You’ll learn how professionals level base cabinets, secure wall cabinets safely, align every door and drawer, and complete the final details that make a handcrafted kitchen look like it has always belonged there.
Part 9 — Installing Your Kitchen Cabinets
Months ago, this project existed only as an idea.
A few sketches.
A pile of measurements.
Several sheets of plywood.
Now your workshop is filled with beautifully finished cabinets that are ready for the final step.
Installation.
For many DIY builders, this stage feels intimidating because it combines everything you’ve learned so far. Heavy cabinets must be positioned accurately, walls are rarely perfectly straight, and even small alignment errors can affect the appearance of the entire kitchen.
The encouraging news is that installation isn’t about strength nearly as much as it is about preparation and patience.
Professional installers don’t rush.
They measure constantly.
They adjust carefully.
And they understand that every cabinet depends on the one installed before it.
Take your time, and your finished kitchen will reward you every single day.
Prepare the Room Before the First Cabinet Arrives
Successful installation begins with an empty, organized workspace.
Before bringing cabinets into the room:
- Remove old cabinetry completely.
- Repair damaged walls.
- Finish electrical work.
- Complete plumbing rough-ins.
- Install flooring if required.
- Paint walls where necessary.
- Clean the room thoroughly.
Trying to work around unfinished repairs often creates unnecessary frustration later.
A clean, prepared space makes installation smoother from the very beginning.
Find the Highest Point of the Floor
Very few kitchen floors are perfectly level.
Professional installers always determine the highest point before placing any cabinets.
Why?
Because every base cabinet will eventually align with that reference point.
Use a long level or laser level to identify:
- High spots
- Low spots
- Floor slope
- Uneven transitions
Mark the highest location clearly.
This becomes the starting point for the entire installation.
Establish Level Reference Lines
Once you’ve identified the highest point, create reference lines around the room.
These lines guide every cabinet placement.
Typically, installers mark:
- Finished countertop height
- Top of base cabinets
- Bottom of wall cabinets
- Upper cabinet alignment
- Crown molding reference if applicable
A laser level makes this process remarkably easy, but a traditional spirit level works perfectly with patience.
These lines become your visual roadmap throughout installation.
Locate Every Wall Stud
Wall cabinets depend entirely on secure attachment to structural framing.
Before lifting a single cabinet into position:
Locate every stud.
Mark them clearly.
Transfer those marks onto painter’s tape or directly onto the wall where they’ll remain visible during installation.
Double-check stud locations using:
- Stud finder
- Small finish nail
- Measuring from known framing locations
Never assume a stud is exactly where you expect it.
Verifying now prevents serious problems later.
Install Base Cabinets First
Most professional installers begin with the base cabinets.
They provide the foundation for everything else.
Start with the cabinet positioned at the highest point of the floor.
As each cabinet is installed:
- Check for level.
- Check for plumb.
- Verify alignment.
- Shim where necessary.
- Secure temporarily.
Avoid tightening all screws immediately.
Leaving slight flexibility allows small adjustments as neighboring cabinets are added.
Keep Every Cabinet Perfectly Level
Even tiny variations become obvious once countertops are installed.
After positioning each cabinet:
Check:
- Front to back
- Side to side
- Neighboring cabinet alignment
Wood or composite shims make fine adjustments simple.
Trim excess shim material only after final fastening.
Taking extra time here ensures countertops fit correctly without unnecessary stress or gaps.
Clamp Cabinets Together Before Fastening
Adjacent cabinets should function as one continuous unit.
Before driving screws:
- Align face frames carefully.
- Clamp neighboring cabinets together.
- Confirm the front edges remain flush.
- Recheck level.
Once everything lines up perfectly, fasten the cabinets together using cabinet screws.
This creates smooth, uninterrupted cabinet runs.
Secure Cabinets Properly
Cabinets experience significant weight over their lifetime.
Countertops.
Cookware.
Food.
Small appliances.
Everything depends on secure fastening.
Use screws specifically designed for cabinetry.
Fasten through structural areas such as:
- Cabinet backs
- Hanging rails
- Reinforced mounting strips
Avoid overtightening.
The goal is firm support without distorting the cabinet.
Installing Wall Cabinets Safely
Wall cabinets present unique challenges because of their weight.
Whenever possible, work with another person.
Two people make installation dramatically safer and more accurate.
Many professionals also install a temporary support ledger beneath the cabinets.
This simple board:
- Supports cabinet weight
- Keeps cabinets level
- Frees both hands for fastening
- Reduces installation stress
Once the cabinets are secured, the ledger can be removed.
Start With Corner Cabinets
If your design includes corner cabinets, install them first.
They establish reference points for the remaining wall cabinets.
From there, work outward one cabinet at a time.
Check constantly for:
- Level
- Plumb
- Consistent spacing
- Alignment with neighboring cabinets
Small corrections become much more difficult after multiple cabinets have been installed.
Verify Door and Drawer Operation
After each cabinet is secured, test its moving parts.
Open every door.
Close it gently.
Slide every drawer fully open.
Watch for:
- Rubbing doors
- Uneven gaps
- Drawer interference
- Misaligned hardware
Modern concealed hinges provide several adjustment points that allow remarkably precise corrections.
A few minutes spent adjusting now creates a noticeably more refined finished kitchen.
Install Tall Pantry Cabinets Carefully
Pantry cabinets are often the largest units in the kitchen.
Because of their height, they require special attention.
Confirm:
- Vertical alignment
- Floor support
- Wall attachment
- Front-to-back plumb
Tall cabinets should never rely solely on neighboring cabinets for stability.
Secure them directly to wall framing wherever possible.
Add Toe Kicks
Toe kicks are one of those details people rarely notice consciously.
Yet every comfortable kitchen depends on them.
They allow your feet to move naturally beneath the cabinets while working.
Install toe kicks only after all base cabinets are permanently secured.
This helps maintain consistent alignment across the entire kitchen.
Install Decorative Trim
Trim transforms functional cabinetry into finished furniture.
Common additions include:
- Crown molding
- Light rail molding
- End panels
- Decorative fillers
- Base molding
- Scribes
Take your time fitting each piece.
Even beautifully built cabinets benefit enormously from carefully installed trim.
Make Final Door Adjustments
Once all cabinets are fully installed, perform one complete adjustment session.
Instead of adjusting doors individually during installation, examine the kitchen as a whole.
Look across long cabinet runs.
Check reveal lines.
Verify that:
- Doors align horizontally.
- Vertical gaps remain consistent.
- Drawer fronts appear centered.
- Handles form straight visual lines.
Tiny hinge adjustments often transform a good installation into one that looks professionally completed.
Inspect Every Cabinet One Last Time
Before declaring the project complete, inspect everything carefully.
Create a checklist.
Confirm:
- Cabinets are level.
- Cabinets are plumb.
- Doors close smoothly.
- Drawers operate effortlessly.
- Hardware is secure.
- Shelves fit correctly.
- Trim joints are clean.
- Finish remains undamaged.
Professional installers rarely leave immediately after mounting cabinets.
They spend time inspecting every detail because those final corrections make a tremendous difference.
Clean the Entire Kitchen
Construction leaves behind surprisingly fine dust.
Before installing countertops or loading cabinets:
- Vacuum interiors.
- Wipe shelves.
- Clean drawer boxes.
- Polish finished surfaces.
- Remove protective tape.
- Dispose of packaging materials.
A spotless kitchen allows you to appreciate the craftsmanship you’ve created.
Enjoy the Moment
There comes a point during every cabinet project when the tools are finally put away.
The clamps disappear.
The sawdust is swept from the floor.
The workshop falls quiet.
You walk into your kitchen, open a drawer, close a cabinet door, and suddenly realize something remarkable.
You built this.
Every measurement.
Every cut.
Every joint.
Every adjustment.
What once seemed like an overwhelming challenge has become a beautiful, functional space that your family will use every single day.
That’s a feeling no showroom purchase can ever replicate.
In the final part, we’ll cover the professional secrets that help cabinets last for decades, the most common mistakes to avoid, answers to frequently asked questions, a practical quality-control checklist, and a carefully selected collection of products, tools, and resources that will support your future cabinet-building and woodworking projects.
Part 10 — Professional Secrets, Common Mistakes, FAQ, Bonus, and Products / Tools / Resources
You’ve reached the finish line.
What started as an ambitious idea has become a kitchen filled with custom cabinets built by your own hands.
Along the way, you’ve learned how to plan carefully, choose quality materials, work with precision, build strong cabinet boxes, create beautiful doors and drawers, apply a professional finish, and install everything with confidence.
But before you officially call the project complete, there are a few final lessons worth sharing.
They’re the small details that experienced cabinetmakers often learn only after building dozens—or even hundreds—of cabinets.
Fortunately, you can benefit from those lessons today.
Professional Secrets That Make a Huge Difference
The best cabinetmakers aren’t necessarily the fastest.
They’re the most consistent.
Here are some habits you’ll notice in almost every professional woodworking shop.
Build One Perfect Cabinet First
Treat your first cabinet as a prototype.
Refining one cabinet before building the rest often saves countless hours later.
Label Everything
As projects grow, many parts begin looking identical.
Mark every component clearly before assembly.
You’ll thank yourself during installation.
Buy Better Hardware
Premium hinges and drawer slides usually cost only a small percentage more than budget alternatives.
Yet you’ll experience that quality every single day.
Never compromise here if your budget allows.
Keep Blades Sharp
Sharp blades produce:
- Cleaner cuts
- Less tear-out
- Greater accuracy
- Safer operation
- Better-looking finished edges
Replacing or sharpening blades regularly improves almost every stage of cabinet building.
Stay Organized
Professional shops aren’t tidy simply for appearance.
Organization reduces mistakes.
Store hardware separately.
Label drawers.
Return tools to their proper place.
A clean workspace helps maintain clear thinking.
Common Mistakes to Avoid
Even experienced builders occasionally make mistakes.
Knowing what to watch for can save both time and money.
Measuring Only Once
Always verify important measurements.
One extra minute can prevent hours of rebuilding.
Rushing the Finish
Paint and stain require patience.
Allow adequate drying and curing time.
The finish is one of the first things people notice.
Forgetting About Wood Movement
Solid wood naturally expands and contracts with changes in humidity.
Plan for seasonal movement rather than fighting it.
Skipping Dry Assembly
Always test-fit cabinet parts before applying glue.
Small problems are much easier to solve while everything is still dry.
Ignoring Cabinet Square
If the cabinet isn’t square, everything that follows becomes more difficult.
Doors.
Drawers.
Countertops.
Installation.
Check diagonal measurements every time.
Buying Cheap Hardware
Inferior hinges and slides often become the first components to fail.
Quality hardware provides smoother operation and a noticeably more premium feel.
Underestimating Time
Building cabinets always takes longer than expected.
That’s completely normal.
Focus on quality rather than speed.
Years from now, you won’t remember whether the project took six weeks or ten.
You’ll remember how well the cabinets perform.
Maintaining Your Cabinets for Decades
Well-built cabinets require surprisingly little maintenance.
Simple habits help preserve their appearance.
- Clean spills promptly.
- Avoid harsh chemical cleaners.
- Tighten loose handles occasionally.
- Adjust hinges if doors settle over time.
- Protect finishes from standing water.
- Keep humidity reasonably stable when possible.
With proper care, quality cabinets can serve your family for decades.
Frequently Asked Questions
Is building kitchen cabinets from scratch difficult?
It requires patience and careful planning more than advanced skills.
Many first-time builders successfully complete beautiful kitchens by following a systematic process and taking their time.
How much money can I save?
Savings vary depending on kitchen size, material selection, and local cabinet prices.
Many DIY builders save thousands compared to purchasing professionally built custom cabinetry while still using premium materials.
What wood is best for kitchen cabinets?
Cabinet-grade plywood is widely considered the best choice for cabinet boxes.
For visible components such as doors and face frames, maple, oak, cherry, walnut, and birch are all excellent options depending on your preferred appearance and budget.
Are plywood cabinets strong enough?
Absolutely.
High-quality cabinet-grade plywood has been used in professional cabinetry for decades because of its strength, dimensional stability, and excellent screw-holding ability.
Should I paint or stain my cabinets?
If you love the natural beauty of wood grain, stain is often the better choice.
If you prefer a clean, modern appearance with unlimited color options, paint may be the ideal solution.
Both can produce exceptional results when applied correctly.
How long does it take to build kitchen cabinets?
A small kitchen may take several weekends for an experienced DIY builder.
Larger custom kitchens often require several weeks or more.
Working carefully almost always produces better results than rushing.
Can beginners really build professional-looking cabinets?
Yes.
Professional-quality results come from careful measuring, accurate cutting, and consistent attention to detail—not from decades of experience alone.
Every skilled cabinetmaker started with a first project.
Bonus — Professional Cabinet Builder’s Final Checklist
Before considering your kitchen complete, walk through this final inspection.
Planning
✔ Measurements verified
✔ Appliance clearances confirmed
✔ Cabinet layout reviewed
✔ Cut list completed
Construction
✔ Cabinet boxes square
✔ Joints secure
✔ Glue fully cured
✔ Shelves fit properly
Doors and Drawers
✔ Even spacing
✔ Smooth drawer operation
✔ Soft-close hardware functioning
✔ Handles aligned consistently
Finish
✔ Surfaces smooth
✔ No visible glue residue
✔ Paint or stain evenly applied
✔ Protective topcoat fully cured
Installation
✔ Cabinets level
✔ Cabinets plumb
✔ Securely fastened to wall studs
✔ Trim installed cleanly
✔ Final adjustments completed
Products, Tools, and Resources
One of the rewarding aspects of woodworking is that every completed project prepares you for the next one. As your skills grow, you’ll naturally begin upgrading your tools, experimenting with new materials, and refining your techniques.
Here are some resources and equipment that many experienced cabinetmakers consider worthwhile investments.
Essential Hand Tools
- Tape measure
- Combination square
- Speed square
- Marking knife
- Quality chisels
- Block plane
- Clamps in multiple sizes
Essential Power Tools
- Table saw or track saw
- Circular saw
- Compound miter saw
- Router
- Cordless drill
- Impact driver
- Random orbital sander
- Jigsaw
Recommended Cabinet Hardware
- Soft-close concealed hinges
- Full-extension drawer slides
- Adjustable shelf pins
- High-quality cabinet pulls
- Durable drawer handles
Materials Worth Investing In
- Cabinet-grade plywood
- Hardwood lumber
- Premium wood glue
- Water-resistant finishes
- High-quality primer
- Durable polyurethane topcoat
- Reliable cabinet screws
Helpful Shop Accessories
- Shop vacuum or dust collection system
- Portable workbench
- LED task lighting
- Sawhorses
- Push sticks
- Featherboards
- Safety glasses
- Hearing protection
- Respirator
Continue Building Your Skills
Cabinet making is one of those crafts where every project teaches something new.
Once you’ve completed your kitchen cabinets, you’ll likely find yourself looking at other areas of your home with fresh ideas.
Perhaps you’ll build:
- A custom pantry
- Bathroom vanities
- Built-in bookshelves
- Laundry room cabinets
- Entertainment centers
- Mudroom storage
- Garage cabinets
- Home office furniture
Each project builds on the experience you’ve already gained.
The confidence developed while building your kitchen becomes the foundation for increasingly ambitious woodworking projects in the future.
Final Thoughts
Building kitchen cabinets from scratch is about far more than constructing storage.
It’s about creating something that reflects your vision, your craftsmanship, and your commitment to doing the job well.
Every cabinet represents a series of thoughtful decisions—from the first measurement to the final hinge adjustment.
Along the way, you’ll develop practical skills, solve real-world challenges, and gain an appreciation for the level of precision that goes into truly exceptional cabinetry.
Perhaps the greatest reward isn’t the money you save or even the beautiful kitchen you create.
It’s the confidence that comes from standing back, looking at your finished work, and knowing that every cabinet, every drawer, and every door was built because you had the determination to learn.
Years from now, long after the tools have been put away, your cabinets will continue serving your family every day.
And every time someone asks who built them, you’ll have the satisfaction of answering with quiet pride:
“I did.”