
There is something deeply satisfying about building a birdhouse.
You start with a few plain boards, a pencil, and a handful of measurements. A little while later, there is an actual structure sitting on your bench—a tiny roof, four walls, an entrance, and just enough room inside for a bird to raise a family.
It is one of the simplest woodworking projects you can take on, but that simplicity is deceptive in a good way. A birdhouse teaches you a surprising amount about measuring, cutting, drilling, fitting, fastening, weather protection, and practical design without asking you to commit to an enormous project.
And with the right plan, you do not need a fully equipped workshop.
A saw, a drill, a square, some exterior-rated fasteners, and suitable lumber are enough to get started.
But there is one important distinction worth making before you cut anything.
A birdhouse can be decorative, or it can be built as a functional nesting box.
Those two things overlap, but they are not exactly the same.
A decorative birdhouse can get away with almost any shape, oversized entrance, ornamental perch, and whimsical proportions. A birdhouse intended for real nesting birds needs more thought. Entrance-hole diameter, interior dimensions, ventilation, drainage, roof overhang, clean-out access, wood selection, and placement can all affect how well the finished box actually works.
That is why these free printable birdhouse woodworking plans focus on easy designs that are practical enough for real woodworking and clear enough for beginners to understand.
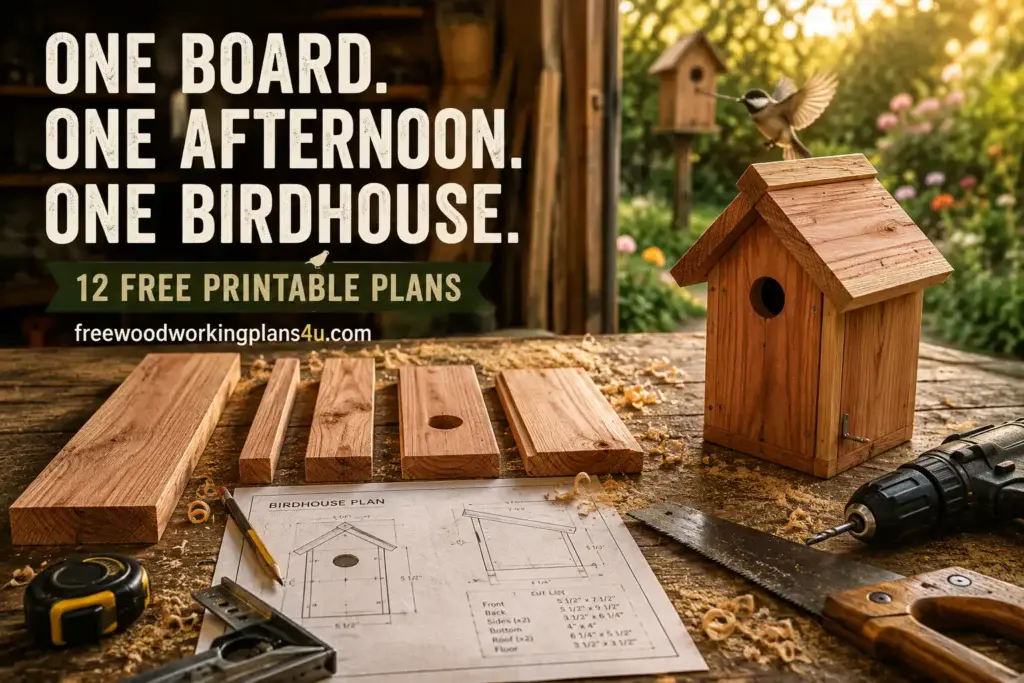
You will find 12 easy birdhouse plans with measurements, cut lists, and step-by-step instructions, including a simple beginner box, a classic gable-roof design, species-oriented houses, a rustic scrap-wood version, a one-board birdhouse, a modern design, and an easy-clean nesting box.
Quick answer: A basic birdhouse can be made from untreated exterior-suitable wood using a front, back, two sides, a floor, and an overhanging roof. Around 3/4-inch-thick lumber is a practical choice for many projects. Add drainage at the bottom, ventilation near the top, a way to open the box for cleaning, and an entrance hole sized for the birds you hope to attract.
Before You Start: What Makes a Birdhouse Actually Work?
A birdhouse is a small structure, but the details matter.
If the goal is to create something birds may actually use, a good design should usually include enough interior nesting space, appropriate ventilation, a way for water to drain, weather protection around the entrance, and access for future cleaning.
There are also a few things a functional nesting box usually does not need.
A decorative perch under the entrance is one of them.
It may look charming. It may even make the project feel more “complete.” But cavity-nesting birds generally do not need a perch to enter a properly sized hole.
Leaving it off keeps the design simpler and more functional.
You should also resist the temptation to assume that every birdhouse should have the same dimensions.
Different bird species use different cavity sizes. If you are hoping to attract a particular species, check recommendations from a reputable bird or wildlife organization in your region before finalizing the entrance diameter, box dimensions, mounting height, or habitat placement.
Think of the plans below as woodworking frameworks.
The construction principles stay familiar.
The dimensions can be adapted where species-specific guidance calls for it.
1. Simple Beginner Birdhouse
If this is your first birdhouse—or your first woodworking project of any kind—start here.
There are no complicated joints, no tricky curves, and no unnecessary flourishes. Just a straightforward wooden nesting box that lets you concentrate on the basics.
Measure carefully.
Cut square.
Fit the pieces together.
That is enough.
Finished Size
A useful starting point is approximately:
- Width: 5 inches
- Depth: 5 inches
- Wall height: about 8 inches
- Overall height: approximately 10–11 inches depending on the roof
These dimensions can be changed if you are building for a particular species.
Cut List
Using roughly 3/4-inch-thick lumber:
- Front: 5″ × 8″
- Back: 5″ × 10″
- Side #1: 5″ × 8″
- Side #2: 5″ × 8″
- Floor: approximately 3 1/2″ × 3 1/2″, adjusted to fit your assembly
- Roof: approximately 7″ × 7″
Actual lumber dimensions vary, so do not rush the floor piece. Dry-fit the walls first and cut the floor to match the real opening you have.
Step-by-Step Instructions
Step 1: Lay Out Every Piece First
Before you switch on a saw, mark the entire project.
Use a tape measure and square to lay out the front, back, sides, floor, and roof.
This takes only a few minutes and can save you from one of the most irritating beginner mistakes: realizing halfway through the build that you cut a piece from the section of lumber you needed for something else.
Step 2: Cut the Panels
Cut along your marked lines using whatever saw you can use safely and accurately.
A circular saw, jigsaw, table saw, miter saw, or handsaw can all work depending on your setup.
You do not need furniture-grade perfection.
You do want the edges reasonably square, because every small error becomes more visible once the box comes together.
Step 3: Drill the Entrance
Mark the entrance on the front panel before assembly.
If the box is intended for real nesting birds, choose the diameter according to the target species rather than simply using whichever hole saw looks convenient.
Drill slowly and support the workpiece securely.
Step 4: Give Rain Somewhere to Go
A sealed wooden box sitting outside will eventually meet moisture.
Drill a few small drainage holes through the floor or relieve the corners slightly so water cannot remain trapped inside.
It is a small detail, but it is one of the differences between a decorative box and a thoughtful nesting-box design.
Step 5: Add Ventilation
Create small ventilation openings near the top of the side panels.
You want airflow without turning the upper section into a collection of large gaps.
Step 6: Assemble the Walls
Attach the sides to the front and back using exterior-rated screws or nails.
Check the box for square as you work.
Do not assume the pieces will naturally pull themselves into alignment.
Step 7: Fit the Floor
Set the floor in place without blocking the drainage openings.
Fasten it securely.
Step 8: Add the Roof
Let the roof project beyond the front wall.
That overhang creates a small sheltered zone around the entrance and helps keep rain away from the opening.
Step 9: Build In Cleaning Access
A birdhouse that cannot be opened may be easy to build today and annoying to deal with later.
Make the roof or one side panel removable, hinged, or pivoting.
Future you will appreciate it.
2. Classic Gable-Roof Birdhouse
There is a reason the peaked-roof birdhouse has become the shape most people imagine when they hear the word “birdhouse.”
It looks familiar.
It feels balanced.
And it adds visual character without making the project dramatically harder.
Suggested Dimensions
A practical starting point is:
- Interior floor: approximately 4″ × 4″
- Wall width: approximately 5 1/2″
- Wall height before peak: approximately 7″
- Total front/back height: approximately 9–10″
- Roof overhang: approximately 1–2″ at the front
Basic Cut List
- Front panel: 5 1/2″ wide with a peaked top
- Back panel: 5 1/2″ wide with a matching peak
- Two side panels: approximately 5″ × 7″
- Floor: sized to fit
- Two roof panels: approximately 7″ × 5″
- Optional mounting strip
How to Build It
Cut the rectangular wall sections first.
Then find the center point along the top of the front and back panels.
Draw matching roof slopes from the center peak down toward the upper corners and cut along those lines.
Once the entrance, ventilation openings, and drainage are prepared, assemble the four walls and floor.
Fit one roof panel first, then bring the second panel up against it so the two meet neatly at the ridge.
For cleaning access, leave one roof panel removable or hinge it along one edge.
Why This Design Is Worth Building
The classic gable birdhouse sits in a sweet spot.
It is simple enough for a beginner, but it looks more finished than a basic box.
It also becomes a useful base design for future experiments. Once you understand the shape, you can change the roof pitch, add subtle trim, use weathered boards, alter the proportions, or create a more decorative version without having to rethink the entire structure.
3. Bluebird House Plan
A bluebird house is where birdhouse woodworking becomes more specific.
You are no longer just building a small wooden box.
You are building around the needs of a particular group of cavity-nesting birds.
That changes how much attention you should give to the entrance, box dimensions, placement, predator protection, and habitat.
Typical Bluebird House Features
A simple bluebird nesting box commonly includes:
- A compact floor
- A tall rectangular body
- A species-appropriate round entrance
- Ventilation near the roofline
- Drainage in the floor
- A generous roof overhang
- An opening side or front for maintenance
- Secure mounting to a post or pole
A floor around 5″ × 5″ is a useful woodworking starting point for many bluebird-style boxes, although final recommendations vary by bluebird species and region.
Example Cut List
- Front: approximately 5 1/2″ × 9″
- Back: approximately 5 1/2″ × 12″
- Sides: approximately 5″ × 9″
- Floor: approximately 4″ × 4″
- Roof: approximately 7″ × 8″
Treat those as construction dimensions, not universal biological specifications.
The Entrance Is Not a Guessing Game
This is one of those moments where being “close enough” is not the goal.
Different bluebird species and different regions can come with different recommendations.
Before drilling, confirm the appropriate entrance-hole dimensions with a reputable bird-conservation source relevant to your location.
Mark the center carefully.
Drill cleanly.
Skip the decorative perch.
Make One Side Open
A pivoting side makes maintenance far easier.
One simple approach is to place two screws high on the side panel so they act as pivot points. Use a removable screw, hook, or latch near the bottom to keep the panel closed.
When it is time to inspect the box, release the lower fastener and swing the side open.
Simple.
Practical.
No dismantling required.
4. Chickadee Birdhouse Plan
Chickadees are cavity nesters, which makes a properly designed nesting box potentially useful in the right habitat.
The construction looks familiar if you have already built the beginner or bluebird box, but the final specifications should still be matched to the chickadee species found in your region.
Suggested Starting Dimensions
For the woodworking structure:
- Floor: around 4″ × 4″
- Box width: around 5″
- Box depth: around 5″
- Overall wall height: around 8–10″
- Roof: large enough to create useful overhang
Cut List
- Front: 5″ × 8″
- Back: 5″ × 10″
- Two sides: approximately 5″ × 8″
- Floor: approximately 3 1/2″ × 3 1/2″
- Roof: approximately 7″ × 7″
Adjust the floor according to the way your side walls overlap.
Give the Nest Some Depth
Do not place the entrance hole just above the floor.
The protected cavity below the entrance is part of the design.
Before drilling, confirm the recommended entrance diameter for the chickadee species in your area.
Do Not Make the Interior Too Slick
A birdhouse interior does not need the kind of silky finish you would want on a tabletop.
A slightly rough interior surface provides more texture.
If your lumber is very smooth, shallow horizontal kerfs beneath the entrance on the inside face can add grip.
Keep them shallow.
You want texture, not a weakened front panel.
5. Wren House Plan
A small wren house is a satisfying little build.
It uses relatively little wood, the components are easy to handle, and the entire project can come together quickly.
Suggested Woodworking Dimensions
Start around:
- Floor: 4″ × 4″
- Width: 5″
- Depth: 5″
- Wall height: 6–8″
- Roof: around 7″ × 7″ or slightly larger for overhang
Cut List
- Front: 5″ × 7″
- Back: 5″ × 9″
- Two sides: 5″ × 7″
- Floor: approximately 3 1/2″ × 3 1/2″
- Roof: 7″ × 7″
Assembly
The build follows the same familiar rhythm:
- Mark the panels.
- Cut the lumber.
- Drill the appropriate entrance.
- Add ventilation.
- Add drainage.
- Assemble the walls.
- Install the floor.
- Create cleaning access.
- Install the roof.
- Mount the finished house appropriately.
Once you have built a few birdhouses, something clicks.
Most simple birdhouse designs are variations on the same underlying structure.
The entrance changes.
The dimensions shift.
The roof takes on a different shape.
But the woodworking principles stay almost comfortingly familiar.
That is exactly why birdhouses make such good beginner projects.
6. Small General-Purpose Birdhouse
Sometimes you are not aiming at a specific bird species.
Maybe you want to practice your woodworking.
Maybe the birdhouse is a garden feature.
Maybe you are building it as a gift.
A general-purpose design works well for those situations, provided you understand that a generic box should not automatically be treated as suitable for every wild bird.
Example Dimensions
- Width: 5 1/2″
- Depth: 5 1/2″
- Wall height: 8″
- Back: 10″
- Roof: approximately 7 1/2″ × 7″
Cut List
- Front: 5 1/2″ × 8″
- Back: 5 1/2″ × 10″
- Sides: 5″ × 8″
- Floor: cut to fit
- Roof: 7 1/2″ × 7″
If the birdhouse will be used outdoors as a nesting box, choose the entrance and final interior dimensions according to the birds most likely to use it where you live.
If it is purely decorative, you have much more freedom.
That distinction matters:
A decorative birdhouse and a functional nesting box can look similar, but they are designed for different priorities.
7. Rustic Scrap-Wood Birdhouse
This is the plan where perfection stops mattering quite so much.
A rustic birdhouse can look better with mismatched grain, weathered surfaces, small color variations, and boards that feel like they already have a story.
The key is knowing which imperfections are charming and which ones are a problem.
What Scrap Wood Can You Use?
Suitable scraps may include clean, untreated pieces of:
- Cedar
- Pine
- Cypress
- Other durable solid woods
Avoid lumber with an unknown history.
An old board might look beautiful, but if you have no idea what it was treated, painted, or soaked with, use something else for a functional nesting box.
Rustic Birdhouse Cut List
You can adapt the layout to the lumber you have available.
A useful starting point is:
- Front: 6″ × 9″
- Back: 6″ × 11″
- Two sides: 5 1/2″ × 9″
- Floor: approximately 4 1/2″ square
- Roof: approximately 8″ × 8″
The attraction of this plan is that not every surface needs to match.
A little variation can make the project feel more handcrafted.
Rustic Does Not Mean Sloppy
The appearance can be relaxed.
The structure should not be.
You still want:
- Sound joints
- Appropriate dimensions
- Drainage
- Ventilation
- Roof protection
- Cleaning access
- Secure mounting
Think of the nesting-box design as the engineering underneath the surface.
The rustic character sits on top of that.
8. One-Board Birdhouse Plan
There is a small thrill in discovering that one ordinary board contains an entire project.
That is the appeal of a one-board birdhouse.
It is not just about saving material.
It makes you think about layout, cutting order, waste, and saw kerf in a way that is surprisingly useful for larger woodworking projects later.
Learn more: 27 One-Board Woodworking Projects You Can Build in a Weekend
Recommended Starting Material
A board around:
1″ × 6″ × 4′
can provide enough material for many compact birdhouse layouts.
Remember that nominal lumber sizes are not the same as actual finished dimensions.
Measure the board in front of you.
Do not design around the label printed on the rack.
Example Cutting Sequence
From one board, you might cut:
- Back: 11″
- Front: 8″
- Side #1: 8″
- Side #2: 8″
- Roof: approximately 7″
- Floor: cut from the remaining stock as the layout allows
The exact order depends on your board and the width of your saw blade.
Saw Kerf Is Small Until It Ruins Your Plan
Every cut removes a thin strip of wood.
That lost material is the kerf.
If your cut list adds up to exactly 48 inches on a 48-inch board, you do not actually have enough material. The blade will consume part of it as you work.
Before you make the first cut:
- Measure the real board.
- Lay out every part.
- Allow for saw kerf.
- Check the sequence.
- Cut only after the layout makes sense.
It is a tiny lesson in material planning.
And it transfers beautifully to shelves, boxes, cabinets, and almost anything else you may build later.
9. Sloped-Roof Birdhouse
If you like clean construction and dislike unnecessary complexity, the single-slope roof is hard to beat.
There is no ridge to align.
No pair of roof panels to match.
Just one broad panel resting across two different wall heights.
Suggested Dimensions
- Width: 5 1/2″
- Depth: 6″
- Front wall: approximately 8″
- Back wall: approximately 10″
- Roof: approximately 8″ × 8″
The taller back wall creates the pitch.
Cut List
- Front: 5 1/2″ × 8″
- Back: 5 1/2″ × 10″
- Two tapered side panels
- Floor: cut to fit
- Roof: approximately 8″ × 8″
Cutting the Side Panels
Mark the front height on one edge of each side panel.
Mark the taller rear height on the opposite edge.
Connect the two points with a straight line and cut along it.
Once both side panels match, the roof should sit naturally across them.
Why the Roof Angle Matters
The slope is not there only for appearance.
It gives rain a direction to go.
That is a useful design principle in outdoor woodworking generally:
If water can sit somewhere, eventually it will.
A simple angle can solve the problem before it starts.
10. Modern Minimalist Birdhouse
Some birdhouses look as if they belong on a weathered fence behind an old farmhouse.
Others look better beside clean architecture, simple landscaping, and modern outdoor spaces.
For that look, remove almost everything decorative.
Design Concept
Use:
- Straight walls
- A single sloping roof
- Minimal visible hardware
- Clean exterior surfaces
- A plain circular entrance
- Natural wood or restrained exterior finishing
Suggested Dimensions
- Width: 6″
- Depth: 6″
- Front height: 9″
- Back height: 11″
- Roof: 8″ × 8″
Cut List
- Front: 6″ × 9″
- Back: 6″ × 11″
- Two tapered sides
- Floor: cut to fit
- Roof: 8″ × 8″
The Trick Is Knowing When to Stop
Minimalist woodworking is not necessarily easier.
It is simply less forgiving of visual clutter.
Keep the cuts clean.
Align the roof deliberately.
Avoid trim that does not serve a purpose.
If you finish the exterior, choose a treatment appropriate for outdoor use and leave the interior simple.
Do not sacrifice cleaning access just to hide every fastener.
A functional birdhouse still needs to be practical long after the photographs are taken.
11. Birdhouse With an Easy Clean-Out Door
If you expect the birdhouse to stay outdoors and be used season after season, this may be the most useful design in the collection.
The reason becomes obvious the first time you need access to the interior.
Basic Dimensions
Use proportions similar to the beginner birdhouse:
- Width: approximately 5 1/2″
- Depth: approximately 5 1/2″
- Height: 8–10″
- Roof: approximately 7″ × 7″
The Useful Detail: A Pivoting Side
Rather than permanently fastening every edge of both side panels, allow one side to open.
How to Make It
Fit the side panel normally.
Near the upper corners, install two screws through the front and back walls so they enter the side panel just enough to hold it while still allowing movement.
Those screws become pivot points.
Near the bottom, add a removable screw, hook, latch, or another secure closure.
When access is needed:
- Release the lower fastener.
- Swing the side upward.
- Inspect or clean the interior.
- Close the panel.
- Secure it again.
No dismantling.
No prying.
No wondering why you permanently sealed a box you knew would eventually need attention.
Design for the Future Version of the Project
This principle reaches beyond birdhouses.
Good woodworking is not only about how something looks the day you finish it.
It is also about how it will be maintained, cleaned, repaired, adjusted, or used later.
12. Easy Birdhouse for Kids and Families
A birdhouse works especially well as a family woodworking project because the transformation is so visible.
A flat board becomes several pieces.
The pieces become a box.
The box gets a roof.
And suddenly it looks like something a child can point to and say, “We made that.”
Adult supervision is essential around saws, drills, fasteners, adhesives, and other tools, but younger helpers can still take part in many stages.
Simple Family Birdhouse Dimensions
- Front: 5 1/2″ × 8″
- Back: 5 1/2″ × 10″
- Sides: 5″ × 8″
- Floor: approximately 4″ square
- Roof: approximately 7″ × 7″
Jobs Younger Helpers Can Take On
Depending on age, ability, and supervision, they may be able to help with:
- Measuring
- Marking cut lines
- Identifying pieces
- Light sanding
- Holding a square
- Sorting screws or nails
- Exterior decorating after assembly
- Choosing where the finished house might go
Adults should handle potentially dangerous power-tool operations unless the child has the necessary experience, instruction, and direct supervision.
Let the Project Continue After the Sawdust Is Gone
Once the birdhouse is installed, keep watching it.
Do birds investigate the entrance?
Does rain reach the inside?
Is the mounting stable?
Does anything need adjusting?
A birdhouse can become more than a one-afternoon project. It can turn into a small lesson in wildlife, observation, design, and problem-solving.
Learn more: The Ultimate Birdhouse Woodworking Plans Guide: 25 Proven Designs That Backyard Birds Actually Use
Birdhouse Dimensions: Why a Few Inches Can Change Everything
After looking through 12 plans, one thing should be clear:
There is no single “correct” birdhouse size.
The reason is simple.
A birdhouse is essentially an artificial cavity, and different cavity-nesting species are adapted to different types of spaces.
Important dimensions include:
| Feature | Why It Matters |
|---|---|
| Floor area | Determines available nesting space |
| Interior height | Controls cavity depth |
| Entrance diameter | Influences which birds can enter |
| Entrance height | Creates protected nesting space below the opening |
| Roof overhang | Helps shelter the entrance from weather |
| Ventilation | Encourages airflow |
| Drainage | Allows moisture to escape |
When you are building for a specific species, species-specific guidance should take priority over generic project dimensions.
Birdhouse Entrance-Hole Sizes: This Is One Measurement Worth Checking Twice
The entrance hole is small.
Its impact is not.
An unnecessarily large opening may allow larger species or other animals to enter.
An opening that is too small may prevent your intended bird from using the box at all.
So resist the urge to grab whichever hole saw happens to be closest.
Instead:
- Identify the bird you want to attract.
- Confirm that species occurs in your area.
- Consult a reputable bird or wildlife authority.
- Verify the recommended entrance diameter.
- Mark the hole accurately.
- Drill it cleanly.
A few minutes of research here are worth more than a decorative detail added later.
What Is the Best Wood for a Birdhouse?
For most DIY birdhouses, untreated solid wood is a straightforward place to begin.
Cedar and pine are two of the most common choices, although they behave differently outdoors.
Cedar
Cedar is popular for a reason.
It handles outdoor exposure well, looks good even without an elaborate finish, and is relatively easy to work.
Advantages include:
- Natural outdoor durability
- Attractive grain
- Good availability in many areas
- The option to leave it unfinished
The main drawback is cost.
Cedar may be noticeably more expensive than basic construction lumber.
Pine
Pine is affordable, widely available, and friendly to beginner tools.
That makes it one of the easiest materials to start with.
Because it is less naturally durable than cedar, good outdoor design becomes especially important. Use a sensible roof overhang, avoid places where water can sit, and protect appropriate exterior surfaces if needed.
Cypress
If cypress is readily available where you live, it can also be a good choice for outdoor projects.
It works well with ordinary woodworking tools and has a long history of exterior use.
Can You Use Plywood?
You can use plywood for many woodworking projects, but solid lumber is often simpler for a small outdoor nesting box.
If plywood is used, exposed edges deserve extra attention because repeated moisture can cause swelling or deterioration depending on the type of plywood.
What About Pressure-Treated Lumber?
For a functional nesting box, avoid casually using chemically treated construction lumber simply because a scrap happens to be lying nearby.
Use clean material whose history you understand.
How Thick Should Birdhouse Wood Be?
For many DIY birdhouse plans, approximately 3/4-inch-thick lumber is a practical choice.
It provides:
- Good rigidity
- More insulation than very thin decorative material
- Enough thickness for screws or nails
- Easy availability
- Straightforward cutting
Nominal 1-inch boards commonly finish at around 3/4 inch thick, which is one reason standard lumber works so well for projects like these.
Very thin panels may be easy to cut, but ease of cutting is not the only consideration.
A birdhouse has to live outdoors.
Tools You Need to Build These Birdhouse Plans
You do not need a dream workshop.
You need enough tools to measure, cut, drill, and fasten accurately.
A practical beginner setup might include:
- Tape measure
- Pencil
- Combination square or speed square
- Saw
- Drill/driver
- Hole saw or suitable drill bit
- Standard drill bits
- Exterior-rated screws or nails
- Sandpaper
- Clamps
Which Saw Works Best?
Use the saw you can operate safely and confidently.
Options include:
- Handsaw
- Jigsaw
- Circular saw
- Miter saw
- Table saw
A table saw is not required for a basic birdhouse.
A jigsaw or circular saw is enough for many of the plans in this guide.
If you are working without a table saw, see our guide to woodworking projects you can build without a table saw for more beginner-friendly ideas.
How to Build a Birdhouse Step by Step
Once you strip away the different roof shapes and dimensions, most birdhouses follow the same fundamental construction process.
That is good news.
Learn the sequence once and every future project feels a little less intimidating.
Step 1: Decide What You Are Actually Building
Is this:
- A decorative project?
- A general woodworking exercise?
- A functional nesting box?
- A house intended for a particular bird species?
That decision should come first because it determines how important biological dimensions become.
Step 2: Choose the Lumber
Look for sound, untreated wood.
Avoid boards with:
- Serious warping
- Deep cracks
- Rot
- Loose knots near critical cuts
- Unknown coatings
- Questionable chemical treatments
You do not need perfect lumber.
You do need material you can trust.
Step 3: Mark the Whole Project
Lay out every panel before you start cutting.
That simple habit prevents a lot of avoidable mistakes.
It is much easier to erase a pencil line than to put 2 inches of wood back onto a board.
Step 4: Cut the Panels
Cut the front, back, sides, floor, and roof.
If the pieces look similar, label them lightly in pencil.
Your future self will thank you when several rectangles are lying on the bench.
Step 5: Dry-Fit Everything
Before drilling or fastening, bring the pieces together.
Check:
- Overall width
- Floor fit
- Roof angle
- Roof overhang
- Wall alignment
This is the moment to catch problems.
Not after the glue is drying.
Step 6: Drill the Entrance
Use species-specific dimensions if you are building for a particular bird.
Clamp or support the workpiece properly.
A hole saw can grab if the panel is loose.
Step 7: Add Drainage
Create small openings in the floor or corners so moisture cannot collect.
Step 8: Add Ventilation
Provide airflow near the upper part of the box.
Keep it discreet.
You are creating ventilation, not windows.
Step 9: Assemble the Walls
Fasten the front, back, and sides.
Check for square as you go.
Step 10: Install the Floor
Fit it securely while preserving drainage.
Step 11: Create Clean-Out Access
Make one side, the front, or the roof removable, hinged, or pivoting.
Maintenance should not require destroying the birdhouse.
Step 12: Attach the Roof
Give the roof enough overhang to help shelter the entrance and walls.
Step 13: Inspect the Interior
Run your eyes—and carefully, your fingers—over the inside.
Look for:
- Protruding screw tips
- Sharp corners
- Loose splinters
- Large accidental gaps
Correct them before installation.
Step 14: Mount the Birdhouse
Choose a site appropriate for the intended species, habitat, and local conditions.
The woodworking is finished.
Now placement takes over.
Should a Birdhouse Have a Perch?
This is one of the most common birdhouse questions because so many decorative designs include one.
For a functional nesting box, a perch is generally unnecessary.
Cavity-nesting birds do not need a little dowel beneath the entrance to get inside.
Leaving it off also keeps the design cleaner and removes one more component that can loosen or break over time.
If your goal is realism and function rather than decoration, skip it unless reliable species-specific guidance gives you a reason to include one.
How to Add Drainage Without Overcomplicating the Design
No outdoor wooden box stays perfectly dry forever.
Rain blows sideways.
Humidity rises.
Condensation happens.
Your job is not to make the birdhouse waterproof like a submarine.
Your job is to make sure water cannot remain trapped inside.
Common drainage methods include:
- Small holes drilled through the floor
- Slightly clipped floor corners
- Narrow intentional gaps at drainage points
Combine that with a good roof overhang and thoughtful placement.
Small details work together.
How to Ventilate a Birdhouse
Ventilation usually belongs near the top of the box.
You can create it with:
- Small drilled holes
- Narrow openings beneath the roof
- Purposeful gaps near the top of the side panels
Do not make the openings larger than necessary.
The idea is gentle airflow while preserving the protected nature of the cavity.
How to Make a Birdhouse Easy to Clean
The easiest birdhouse to clean is the one that was designed to open from the beginning.
That sounds obvious.
Yet it is remarkably easy to finish assembly, admire the box, and only then realize there is no convenient way back inside.
A pivoting side panel is one of the cleanest solutions.
A hinged roof works too.
Whatever method you choose, make sure the opening closes securely when the house is in use.
A cleaning hatch that rattles open in strong wind creates a new problem instead of solving one.
Should You Paint a Birdhouse?
You do not have to.
Natural wood can age beautifully, especially cedar and other materials suited to exterior conditions.
If you decide to finish or paint the exterior, choose a product appropriate for outdoor use and allow it to cure fully.
There is generally no reason to coat the interior of a functional nesting box just to make it look polished.
Birds are unlikely to care whether the inside matches your deck.
Common Birdhouse-Building Mistakes That Are Easy to Avoid
Birdhouses are forgiving projects.
That does not mean every mistake is harmless.
A few problems appear again and again.
Mistake #1: Choosing the Entrance Hole by Eye
The entrance size affects which birds can use the box.
Do not treat it as decoration.
Mistake #2: Adding a Perch Because “Birdhouses Have Perches”
Many decorative birdhouses do.
Functional nesting boxes usually do not need one.
Mistake #3: Forgetting Drainage
A flat, sealed floor can trap moisture.
Make drainage part of the plan before assembly.
Mistake #4: Forgetting Ventilation
It is far easier to drill ventilation holes while the panels are still flat on your bench.
Do it early.
Mistake #5: Permanently Sealing Every Panel
If the box is intended for outdoor use, you will eventually want access to the interior.
Build that access in now.
Mistake #6: Using Scrap Wood With a Mystery History
Weathered wood can look fantastic.
Unknown chemicals are another matter.
If you cannot tell what a board has been treated with, reserve it for another project.
Mistake #7: Choosing a Species After the Box Is Finished
If your goal is to attract a specific bird, research first.
Build second.
It is much easier than trying to retrofit the wrong dimensions later.
How to Make a Birdhouse Last Longer Outdoors
A birdhouse has to tolerate more punishment than most indoor woodworking projects.
It lives through:
- Rain
- Sun
- Wind
- Humidity
- Temperature swings
- Dirt
- Biological material
- Seasonal expansion and contraction
A few design choices can help it survive.
Give the Roof Real Overhang
A roof that ends flush with the front wall looks neat on paper.
Outdoors, extra overhang is useful.
Extend the roof enough to create some shelter around the entrance.
Look for Places Water Can Sit
When the birdhouse is assembled, study it for a moment.
Where could rain collect?
Where does water run?
Are there exposed joints facing upward?
Good outdoor woodworking is often less about adding features and more about removing places where moisture can linger.
Use Exterior-Rated Fasteners
Use screws or nails intended for outdoor exposure.
Rust streaks and failed fasteners are avoidable problems.
Inspect the Box Periodically
Wood moves.
Fasteners loosen.
Roofs weather.
A quick inspection can catch a small problem before the birdhouse starts coming apart.
Where Should You Put a Birdhouse?
There is no universal answer.
The right placement depends on the species, habitat, local predators, climate, and the environment around your home.
Consider:
- Target species
- Habitat type
- Mounting height
- Sun exposure
- Prevailing rain and wind
- Predator access
- Human activity nearby
- Spacing from other nesting boxes
If you are building for a specific bird, consult regional bird-conservation guidance before installation.
Even the most carefully built nesting box may sit empty if it is placed in the wrong habitat.
More helpful ideas:
Cardinal Birdhouse Woodworking Plans: Build the Perfect Safe Haven That Cardinals Actually Love
Ultimate Purple Martin Birdhouse Woodworking Plans: From Beginner DIY to Professional Colony System
Printable Birdhouse Plan Template
If you want to turn any design in this guide into a simple printable shop sheet, use this layout.
Project Name
Target Bird Species
Finished Dimensions
Width: __________
Depth: __________
Height: __________
Entrance
Diameter: __________
Height above floor: __________
Lumber
Species: __________
Thickness: __________
Cut List
| Part | Quantity | Width | Length |
| Front | 1 | ____ | ____ |
| Back | 1 | ____ | ____ |
| Side | 2 | ____ | ____ |
| Floor | 1 | ____ | ____ |
| Roof | 1–2 | ____ | ____ |
Construction Checklist
- Measure and mark pieces
- Cut panels
- Drill entrance
- Add ventilation
- Add drainage
- Dry-fit components
- Assemble walls
- Install floor
- Create clean-out access
- Install roof
- Inspect interior
- Mount appropriately
Print the section, write in your final dimensions, and take it into the workshop.
Sometimes a simple sheet of paper beside the saw is more useful than repeatedly checking a phone with sawdust on your hands.
Which Birdhouse Should You Build First?
If you have never built one before, choose Plan #1: the Simple Beginner Birdhouse.
Do not try to impress yourself.
Try to finish it accurately.
Learn how your square sits against the edge of a board.
Notice how much material your saw blade removes.
Watch what happens when a screw gets too close to the end grain.
Pay attention to the difference between a piece that looked square and one that actually is.
Those tiny lessons accumulate.
The second birdhouse will probably come together faster.
The third will likely look cleaner.
And sooner or later, you will look at a more ambitious woodworking plan and realize the basic skills are no longer unfamiliar.
Frequently Asked Questions About Free Printable Birdhouse Woodworking Plans
“What is the easiest birdhouse to build if I am completely new to this?”
A rectangular birdhouse with four walls, a flat floor, and a single sloping roof is one of the easiest beginner designs.
There are relatively few pieces, no complicated joinery, and the entire construction sequence is easy to understand at a glance.
“What size should I make a basic birdhouse?”
There is no universal birdhouse size because different species have different nesting needs.
For woodworking practice, a small box around 5–6 inches wide and deep and roughly 8–10 inches tall is a useful starting point.
For an actual nesting box, use species-specific dimensions.
“How big should the entrance hole be?”
That depends on the bird species you are hoping to attract.
Do not choose the diameter by appearance alone.
Check current guidance from a reputable bird-conservation or wildlife source in your region before drilling.
“Which wood is easiest to use?”
Untreated solid wood is usually the simplest option.
Cedar is naturally durable outdoors.
Pine is affordable, easy to find, and beginner-friendly.
Around 3/4-inch thickness works well for many birdhouse plans.
“Can I really make a birdhouse from one board?”
Yes.
Many compact designs can be laid out on one nominal 1×6 board.
Just remember to measure the real board and allow for saw kerf before making your cuts.
“Do I need drainage holes?”
For a functional nesting box, drainage is a smart and important feature.
Small floor holes or clipped corners allow moisture to escape instead of pooling inside.
“What about ventilation?”
Ventilation matters too.
Small openings near the upper part of the box help air move through the cavity without exposing it excessively.
“Should I add one of those little perches?”
Usually not.
Cavity-nesting birds generally do not need a perch beneath the entrance.
It may look traditional, but it is not a necessary part of a functional nesting box.
“Should I paint the inside?”
There is normally no need.
Keep the interior simple.
If you finish the exterior, use an appropriate outdoor product and allow it to cure fully.
“How do I clean the birdhouse later?”
Design one panel to open.
A hinged roof, pivoting side, or removable front gives you access for inspection and cleaning at the appropriate time outside active nesting.
“Can I build this without a table saw?”
Yes.
A table saw is not required.
A jigsaw, circular saw, miter saw, or handsaw can handle many simple birdhouse projects.
Learn more: Woodworking Without a Table Saw: 9 Better Alternatives for Every Cut, Project, and Workshop
“How long should a simple birdhouse take?”
Once your lumber and tools are ready, a straightforward birdhouse can often be built in a few hours.
If you are new to woodworking, take longer.
Accurate measuring and careful dry-fitting are more valuable than finishing quickly.
“Should I use nails or screws?”
Either can work.
Exterior-rated screws are convenient when you want a strong connection or need to remove a component later.
Whatever you use, make sure the fasteners are suitable for outdoor exposure.
“How do I keep rain out?”
Use a generous roof overhang, minimize water-trapping joints, provide drainage, and mount the birdhouse thoughtfully.
The goal is not to make the box hermetically sealed.
It is to manage moisture intelligently.
“Why has nothing moved into my birdhouse?”
There may be nothing wrong with the woodworking.
Possible reasons include the wrong dimensions, entrance size, habitat, mounting location, season, predator pressure, competition, or simply the absence of birds looking for a suitable cavity at that moment.
A well-built birdhouse improves the odds.
It does not guarantee a tenant.
Products / Tools / Resources
You do not need a huge tool collection to build any of these free printable birdhouse woodworking plans.
A small, practical setup is enough.
Untreated 1×6 lumber: Pine is inexpensive and easy to work with, while cedar is a strong choice when you want better natural outdoor durability.
Tape measure: A compact 12- or 16-foot tape is more than enough for birdhouse projects.
Combination square or speed square: One of the most useful tools on the bench. It helps you mark straight, square cut lines and quickly check whether your pieces are lining up.
Jigsaw: A good choice if you want one versatile saw for straight cuts, simple roof angles, and small woodworking projects.
Circular saw: Useful for straight cuts and larger boards. Pair it with a clamped straightedge if you want cleaner beginner-friendly results.
Handsaw: Completely workable for simple birdhouses if you prefer basic hand tools or do not own power saws.
Drill/driver: Useful for pilot holes, assembly, ventilation holes, drainage holes, and general fastening.
Hole-saw set: Makes round entrance holes much easier to drill cleanly. Choose the final diameter according to the species you intend to accommodate.
Exterior-rated screws: A simple choice for assembly, particularly when you want strong joints or removable access panels.
Clamps: Even two small clamps can make cutting, drilling, and assembly noticeably easier.
Sandpaper: Medium and fine grits are enough for removing sharp edges and cleaning up rough cuts without over-polishing the interior.
Reputable bird-conservation resources: Before finalizing species-specific entrance sizes, mounting heights, or nesting-box dimensions, check current recommendations from established wildlife organizations in your region.
Printable cut-list sheet: Use the printable birdhouse plan template above to write down the exact dimensions of your chosen design before entering the workshop.