
There is something wonderfully uncomplicated about walking into a lumber aisle and knowing you need only one board.
Not a cart stacked with expensive hardwood. Not a workshop full of machines. Just one straight piece of wood, a handful of familiar tools, and enough open space in the weekend to see where the idea takes you.
That is why one-board woodworking projects are so satisfying. The cost feels manageable. The pile of offcuts stays small. Most importantly, the finish line remains close enough to see.
You can begin on Saturday with a plain board under your arm and end on Sunday with a shelf on the wall, a birdhouse in the garden, or a handmade gift waiting for its first coat of finish to cure.
A one-board woodworking project is a build made primarily from a single piece of dimensional lumber.
You can cut that board into several parts and add glue, screws, nails, hooks, hinges, or other hardware. The “one-board” idea simply means that one purchased board supplies the main wooden components.
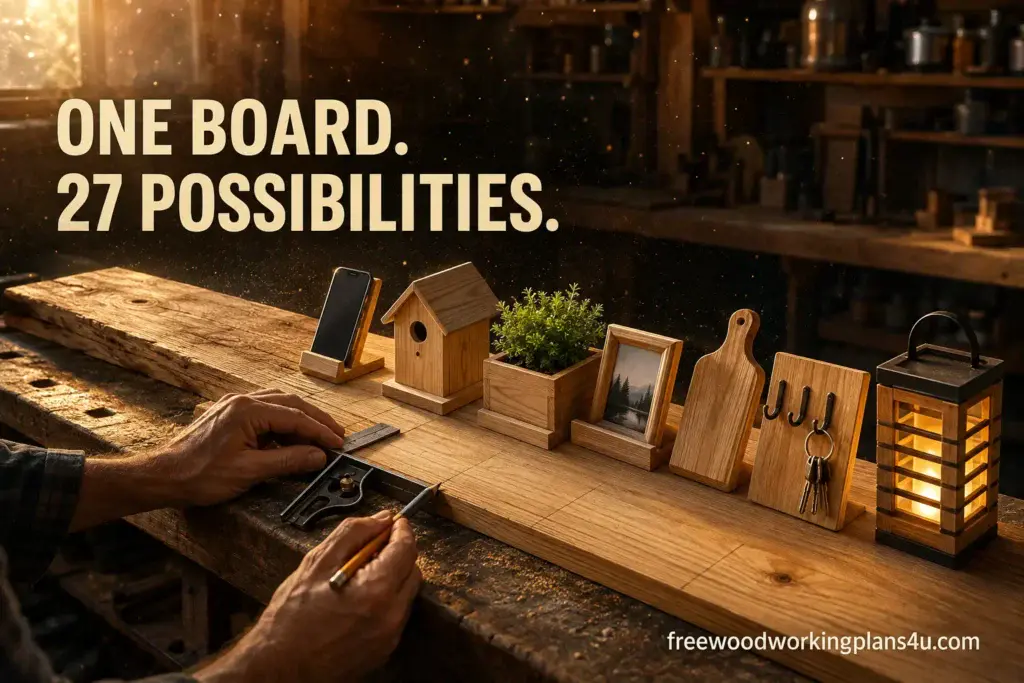
The 27 projects below range from quick beginner builds to more thoughtful weekend challenges. Along the way, you will learn how to choose sound lumber, plan cuts without wasting material, work without a table saw, and avoid the small mistakes that can turn an easy afternoon project into a frustrating one.
Recommended reading: Woodworking Without a Table Saw: 9 Better Alternatives for Every Cut, Project, and Workshop
What Does “One-Board Woodworking Project” Really Mean?
The name sounds almost too literal. In practice, it is flexible.
A one-board project does not have to remain one unbroken slab of wood. An eight-foot 1×6 might become two sides, a base, a back, and several narrow rails. Once those pieces are glued and screwed together, it is still a one-board build because all the main wooden parts came from that original board.
Woodworkers generally approach the idea in one of four ways:
- Strict one-board build: Every wooden component is cut from one board.
- One board plus hardware: All the wood comes from one board, with hooks, screws, hinges, brackets, or similar hardware added.
- One-board body: The main structure comes from one board, while a small dowel, molding strip, or scrap provides a minor detail.
- One-board challenge: You choose a particular board size and try to squeeze the most useful design from it with as little waste as possible.
There is no prize for following the rule so rigidly that the project becomes unsafe or impractical. The point is to create a useful boundary. When the material is limited, the decisions become clearer—and often more creative.
Quick answer: Some of the easiest one-board woodworking projects for beginners are phone stands, bookends, key racks, candle blocks, picture ledges, pencil organizers, and small wall shelves. Most can be built from pine with a saw, drill, sandpaper, wood glue, and a few fasteners.
Why One Board Is Often All a Weekend Needs
Large furniture projects have a habit of expanding. One task becomes five: flattening lumber, matching grain, cutting joinery, assembling panels, correcting a wobble, then waiting through several rounds of sanding and finishing.
A one-board project behaves differently. It keeps the number of choices under control.
There are fewer parts to lose or mislabel. Dry assembly takes minutes instead of hours. Sanding does not consume the entire Sunday afternoon. And if a cut goes wrong, replacing one inexpensive board hurts far less than ruining a stack of carefully selected hardwood.
That makes these projects especially inviting for:
- First-time woodworkers practicing measuring, cutting, drilling, and sanding
- Apartment, balcony, or small-garage woodworkers with limited room
- Parents and children working together under close adult supervision
- Experienced makers experimenting with a new joint or finish
- Anyone who wants to make an affordable, personal gift
- Small-shop sellers testing a product before building inventory
The best weekend project is not always the smallest. It is the one that fits your tools, your experience, your available material, and the hours you honestly have. Choose well, and the work feels energizing rather than rushed.
Start With the Right Board, Not the Prettiest Idea
On a small project, the board has nowhere to hide.
A slight twist that might disappear inside a larger piece of furniture can leave a shelf rocking against the wall. A knot in the wrong place may land exactly where a hook or screw needs to go. Five quiet minutes spent inspecting lumber can save an hour of trying to force unwilling wood into shape.
Pine: Forgiving, Affordable, and Easy to Find
Pine is a sensible starting point for painted décor, indoor shelves, organizers, and first attempts. It is light, readily available, and generally easy to cut with hand or power tools.
It is also soft. A dropped clamp can leave a dent, and large knots may make narrow parts fragile. Still, when the goal is to learn without feeling nervous about the price of every cut, pine is difficult to beat.
Cedar: The Natural Choice for Many Outdoor Builds
Cedar brings warmth, a recognizable scent, and better natural decay resistance than ordinary untreated indoor lumber. It suits birdhouses, feeders, planters, signs, and garden organizers particularly well.
That does not make it immune to weather. Outdoor projects still need drainage, suitable fasteners, thoughtful grain orientation, and a design that allows damp wood to dry.
Poplar: Smooth, Stable, and Made for Paint
Poplar often has fewer disruptive knots than budget pine and usually cuts to a clean surface. It works beautifully for painted boxes, shelves, organizers, and small pieces of furniture.
The natural color can wander from cream to green, brown, or purple. Under a clear finish, that variation is not for everyone. Beneath paint, however, poplar becomes a smooth and dependable canvas.
Oak, Maple, Cherry, and Walnut: When the Wood Is Part of the Gift
A simple design changes character when it is made from hardwood. A phone stand in walnut or a serving board in maple feels substantial before any decoration is added. The grain becomes the ornament.
Hardwoods cost more, and they reward sharp tools, careful pilot holes, and patient sanding. Save them for projects where the surface will be touched, seen, and appreciated—or use an inexpensive prototype to settle the design before cutting into the good board.
Read the Board Before You Buy It
Lift one end and look along the length as though you were sighting down a road. A gentle bow may be manageable, but a board that twists from corner to corner will fight you at every joint. Turn it over. Check the edges. Look for end splits, loose knots, deep dents, and checks that run farther than they first appear.
Do not reject every imperfection. A sound knot can give a small sign or shelf real character. The question is whether the defect falls in a useful place. A rough parts list lets you imagine where each section of the board will end up before you reach the checkout.
Important sizing note: In North America, nominal lumber dimensions are not the board’s finished dimensions. A typical 1×6 measures approximately 3/4 inch thick by 5 1/2 inches wide. A typical 1×8 is approximately 3/4 inch by 7 1/4 inches. Measure the actual board before finalizing a cut list. Common sizes and dimensions may differ by supplier and country.
The Small Tool Kit That Can Build Nearly Everything Here
It is easy to postpone woodworking until you own one more machine. Then another. One-board projects are a useful reminder that a compact set of reliable tools can take you surprisingly far.
For Measuring and Marking
- Tape measure or folding rule
- Combination square
- Sharp pencil or marking knife
- Straightedge
For Cutting
- Handsaw, circular saw, jigsaw, or miter saw
- Miter box when using a handsaw
- Clamps to keep the workpiece from shifting
For Assembly
- Drill/driver and drill bits
- Countersink bit
- Wood glue
- Screws, brads, or finish nails
- Clamps sized for the project
For Sanding and Finishing
- Sandpaper in several grits
- Sanding block or random-orbit sander
- Brush, clean cloth, or applicator pad
- Paint, stain, oil, or clear protective finish
- Eye and hearing protection appropriate to the tools
A table saw makes repeated ripping faster, but most of the projects on this page do not depend on one. A tool you understand and can control safely is always a better choice than a faster machine you are not ready to use.
Learn more: Best Woodworking Tools for Beginners: Build Your First 10 Projects With These Tools and Nothing More
27 One-Board Woodworking Projects Worth Giving Up a Weekend For
Some of these builds are useful. Some are decorative. A few are both. The suggested board size beside each project is a starting point, not an unbreakable rule. Measure your space, your hardware, and the objects the finished piece must hold before you make a cut.
Begin Here: Easy One-Board Projects for New Woodworkers
1. A Wooden Phone Stand You Will Actually Use
Good starting board: 1×4 or 1×6
Difficulty: Very easy
Typical build time: One to two hours
Core skills: Measuring, straight cutting, sanding, and gluing
A phone stand is small enough to feel harmless, which makes it a perfect first project. Yet once it sits on a desk or nightstand, it earns its keep every day.
The simplest design uses a short base, an angled support, and a shallow ledge that stops the phone from sliding. Decide first whether you want the screen upright, sideways, or comfortable in both positions. Leave an opening for a charging cable. Better still, fold a scrap of cardboard into a rough mock-up and test the viewing angle before touching the wood.
For a workshop stand, pine and a clear finish are plenty. For a gift, hardwood and carefully softened edges turn the same modest shape into something quietly elegant.
2. Bookends That Teach the Value of a Square Cut
Good starting board: 1×6
Difficulty: Very easy
Typical build time: About two hours
Core skills: Square cuts, gluing, clamping, and simple reinforcement
A pair of L-shaped bookends looks almost too easy. That simplicity is precisely why the project teaches so much. When there are only two parts in each bookend, the accuracy of the joint has nowhere to hide.
Cut two matching bases and two matching uprights. Glue each upright to its base, then reinforce the joint with screws, dowels, or decorative fasteners. Felt pads beneath the bases protect the shelf and help prevent sliding.
Once the basic pair stands square, shape the uprights into arches, rooflines, mountains, or a clean geometric angle. Function first. Character comes next.
3. A Tea-Light Block With a Warm, Quiet Glow
Good starting board: Thick 2×4 or other solid stock
Difficulty: Easy
Typical build time: One to two hours
Core skills: Layout, drilling, spacing, and edge finishing
A row of recessed lights can make an ordinary piece of construction lumber look surprisingly refined. Mark the centers carefully, clamp the board so it cannot spin or lift, and drill recesses sized for removable holders.
LED tea lights are the safest choice for this project. Wood is combustible. An open flame should never rest directly against it. If real candles are used, they require properly sized noncombustible metal or glass inserts, generous clearance, stable placement, and constant adult supervision.
Round the corners, sand until the block feels pleasant in the hand, and let the restrained shape do the work.
4. A Picture Ledge That Lets the Wall Keep Changing
Good starting board: 1×6 or 1×8
Difficulty: Easy
Typical build time: Two to three hours
Core skills: Rip planning, fastening, finishing, and wall installation
A picture ledge offers something a fixed gallery wall cannot: permission to change your mind. Frames can move, seasonal artwork can come and go, and nothing needs a fresh nail hole every time the arrangement shifts.
The usual design has a vertical back, a narrow shelf, and a low front lip. If you cannot safely rip the board into narrow strips, do not force the issue. Use the board as the main shelf and buy a short length of molding for the lip, or choose a crosscut-only variation.
Find the wall studs or use anchors rated for the wall material and expected load. The joinery may be simple; the mounting still matters.
5. A Pencil Organizer Built Around the Things on Your Desk
Good starting board: 1×4 or 1×6
Difficulty: Easy
Typical build time: About two hours
Core skills: Accurate drilling, depth control, and consistent spacing
The fastest version is a solid block with a neat row of holes. The better version begins with the objects already scattered across your desk.
Place the pencils, scissors, markers, and phone on a piece of paper. Sketch the arrangement. Keep enough wood between holes to preserve strength, and wrap tape around the drill bit to mark the maximum depth. A drill press makes repetition easier, but a handheld drill works when the stock is firmly clamped and the bit is kept upright.
This is also a forgiving home for a visually imperfect piece of hardwood. Once the organizer is full, small marks tend to disappear into the life happening around them.
6. A Key Rack That Ends the Daily Search
Good starting board: 1×4 or 1×6
Difficulty: Easy
Typical build time: One to three hours
Core skills: Hardware spacing, pilot drilling, finishing, and wall mounting
Few projects offer more daily usefulness for less work. Cut a backboard, soften the edges, apply a finish, and add a row of hooks. The build is straightforward. The spacing deserves thought.
Bulky key rings need room to hang without tangling. Mounting screws need clear paths that do not collide with the hooks. If you add a shallow ledge for sunglasses or mail, include those extra pieces in the original cutting plan.
Place the finished rack where people naturally pause after entering. If it will carry bags, umbrellas, or dog leads, use larger hooks and mount it into studs or properly rated anchors.
7. A Small Display Shelf With Room for Something You Love
Good starting board: 1×6 or 1×8
Difficulty: Easy
Typical build time: Three to four hours
Core skills: Repeated cuts, squaring, dry assembly, and fastening
A compact shelf introduces the logic of cabinet construction without asking you to build an entire bookcase. Two sides, one or two horizontal surfaces, perhaps a small back or stretcher—that is enough.
Design it around real objects. Small plants, spice jars, miniatures, and framed photographs all ask for different depths and spacing. Once the pieces are cut, set them together on a flat surface without glue. Measure the diagonals and adjust until the case is square.
If it will hold anything heavy or breakable, include a proper back, stretcher, or secure wall connection. Glue alone should not be asked to solve every structural problem.
One-Board Projects That Quietly Improve a Home
8. A Couch Arm Tray Made to Fit Your Sofa
Good starting board: 1×8, 1×10, or 1×12
Difficulty: Easy to intermediate
Typical build time: Three to five hours
Core skills: Custom measuring, assembly, and edge smoothing
A couch arm tray creates a small, steady landing place for a mug, remote control, or snack plate. It usually consists of a flat top and two side pieces that slip around the upholstered arm.
Measure the sofa in several places. Upholstery compresses, curves, and changes width; it is rarely as square as it looks. Leave a little breathing room instead of forcing a rigid wooden sleeve over the fabric. Felt or nonslip pads on the inside protect the upholstery and help the tray stay put.
A hard-wearing, fully cured finish makes spills easier to wipe away. Until then, keep hot dishes and overflowing cups somewhere safer.
9. A Bathtub Tray for Slow Evenings
Good starting board: 1×8, 1×10, or 1×12
Difficulty: Easy
Typical build time: Three to five hours, plus finishing time
Core skills: Custom measuring, drilling, shaping, and moisture-resistant finishing
At first glance, a bathtub tray is simply a board long enough to cross the tub. The difference between a crude plank and a satisfying finished piece lies in the details: rounded corners, a smooth surface, and underside stops that limit sideways movement.
Measure the tub exactly where the tray will sit. Add shallow recesses or supports only after testing the layout with the objects you expect to use. Because bathroom humidity reaches every surface, seal the underside and end grain as carefully as the top.
Keep plugged-in electrical devices away from water. A wooden tablet or phone holder may add stability, but it cannot remove an electrical hazard.
10. A Mug Rack That Frees the Crowded Cabinet
Good starting board: 1×6
Difficulty: Easy
Typical build time: Two to four hours
Core skills: Hook layout, pilot drilling, and wall mounting
A wall-mounted mug rack transforms an overlooked strip of kitchen wall into storage. The simplest version is a finished board with staggered hooks. Add a narrow top shelf, and it can also hold coffee, tea, or a small plant.
Before marking anything, gather the largest mugs you own. Their handles need room to pass neighboring cups, and the lowest row must clear the counter. What looks generously spaced on an empty board can feel crowded once ceramic begins to overlap.
Use hooks and wall fasteners rated for the combined load. Six heavy mugs weigh more than the eye expects.
11. A Spice Shelf That Keeps Every Jar in Sight
Good starting board: 1×6 or 1×8
Difficulty: Easy to intermediate
Typical build time: Three to five hours
Core skills: Object-based sizing, rail construction, and mounting
Start this project in the kitchen, not the workshop. Spice containers vary wildly in height and width, so measure the jars you actually use.
The ideal shelf is deep enough to support them but shallow enough to prevent a forgotten second row from forming behind the first. A low rail along the front keeps jars from wandering off the edge. If that rail must come from the same board, reserve it on the layout before cutting the larger shelf and side pieces.
Mount the rack away from direct burner heat, splattering oil, and clouds of steam.
12. An Entryway Coat Rack Ready for Real Winter Coats
Good starting board: 1×6 or 1×8
Difficulty: Easy
Typical build time: Three to four hours
Core skills: Hardware spacing, finishing, and secure installation
A handsome board and a row of sturdy hooks can command an entryway without becoming a complicated build. This is one of those projects where restraint usually looks better than ornament.
Choose the length according to the wall and the number of people using it. Leave enough space for coats to hang without swallowing one another. Locate the studs before finalizing the hook pattern so the mounting screws and decorative hardware do not fight for the same space.
A shelf above the hooks is useful, but it increases leverage against the wall. Use the right fasteners and respect the load rating of the entire system—not just the hooks.
13. A Toilet Paper Holder With a Useful Little Shelf
Good starting board: 1×6 or 1×8
Difficulty: Easy to intermediate
Typical build time: Three to five hours
Core skills: Compact layout, hardware installation, and moisture-resistant finishing
In a small bathroom, a few inches of shelf space can feel unexpectedly luxurious. This design combines an ordinary roll holder with a narrow surface for a phone or another lightweight item.
Build around the actual hardware. A full roll must rotate freely without rubbing the wall or shelf support. Round the front edge, where hands will meet it often, and choose a finish that tolerates humidity and regular cleaning.
Mount the unit securely. People may lean on that small shelf even when it was never designed to carry their weight.
14. A Bedside Charging Station Without the Cable Tangle
Good starting board: 1×6 or 1×8
Difficulty: Intermediate
Typical build time: Four to six hours
Core skills: Slot cutting, cable management, and ergonomic layout
Phones, watches, earbuds, and charging leads have a way of spreading across a bedside table. A wooden charging station gives each one a deliberate place.
Arrange the actual devices on a full-size paper sketch. Make sure cable heads—not just the thin cables—fit through every opening. Avoid tight bends, and sand each channel until no sharp edge can scrape the insulation.
The station should organize low-voltage charging leads, not trap power adapters inside an unventilated wooden compartment. Leave heat-producing equipment open to the air.
15. A Wall-Mounted Mail Organizer That Creates Order at the Door
Good starting board: 1×8, 1×10, or 1×12
Difficulty: Intermediate
Typical build time: Four to seven hours
Core skills: Compartment sizing, angled assembly, and secure mounting
Paper clutter often begins with nowhere obvious to land. A wall-mounted organizer catches envelopes before they spread across the kitchen counter.
Use a real envelope as your template. The pocket needs enough depth to hold a small stack without burying the contents. Open sides make cleaning easy; closed sides keep receipts and smaller notes contained. Hooks beneath the pockets can bring keys into the same landing zone.
Labels such as “incoming,” “action,” and “outgoing” turn a wooden box into a simple household rhythm.
One Board, Fresh Air: Projects for the Garden and Porch
16. A Birdhouse Designed for Birds, Not Just People
Good starting board: Cedar 1×6 or another appropriately sized exterior board
Difficulty: Easy to intermediate
Typical build time: Four to six hours
Core skills: Angled cuts, drilling, ventilation, drainage, and outdoor assembly
A birdhouse may be the classic one-board woodworking project, but the best examples begin with the intended bird—not the decorative roof.
Entrance-hole diameter, floor dimensions, internal depth, mounting height, and placement all affect which species can use the house safely. Include drainage holes in the floor and ventilation openings near the top. Build one side or the roof so it can open for seasonal cleaning.
Most cavity-nesting birds do not need an exterior perch, and a perch can sometimes help predators. Use untreated wood inside and keep questionable finishes away from surfaces birds may contact. For exact dimensions and placement, consult a reputable bird-conservation organization familiar with your local species.
17. A Platform Bird Feeder That Is Easy to Keep Clean
Good starting board: Cedar 1×8 or 1×10
Difficulty: Easy
Typical build time: Three to five hours
Core skills: Shallow-tray construction, drainage, and hanging or post mounting
A platform feeder is little more than a shallow tray, yet the details decide whether seed stays fresh. Low retaining edges keep food in place, while small drainage openings let rain escape.
Make the feeding surface easy to reach with a brush. Position the feeder where spilled seed can be managed and birds can see approaching danger. In some areas, rodents or larger wildlife may require a different mounting arrangement.
Feeders need regular cleaning. Follow current local wildlife-health recommendations, particularly during disease outbreaks when temporary removal may be advised.
18. A Railing Planter for Herbs, Flowers, and Bare Balconies
Good starting board: Cedar 1×8, 1×10, or 1×12
Difficulty: Intermediate
Typical build time: Five to eight hours
Core skills: Box assembly, drainage planning, and secure attachment
A narrow planter can change the feeling of a balcony or porch in a single afternoon. The box itself is simple. Water and weight are the real design challenges.
Include drainage holes and make sure water has somewhere safe to go. Individual pots or a removable liner can reduce constant contact between damp soil and the wood. If the planter hangs above a walkway, vehicle, or neighboring property, use a mounting system specifically designed for the railing and expected load.
Remember that wet soil becomes surprisingly heavy. Test the attachment conservatively before filling the planter to the top.
19. A Garden Tool Rack Built Around Your Own Tools
Good starting board: Cedar or treated exterior-rated 1×6
Difficulty: Easy
Typical build time: Three to four hours
Core skills: Tool-based spacing, hook installation, and structural mounting
Garden tools rarely share the same shape. Trowels are compact. Hand forks are wide. Pruners catch on everything. Lay the actual tools across the board before choosing the hook positions.
Give irregular handles and heads enough space to clear one another. Small tools can hang from ordinary hooks, while shovels and rakes may need specialized clips and a more substantial board.
Mount the rack to studs, solid shed framing, or suitable masonry fasteners. A dry, airy location will protect both the rack and its tools more effectively than finish alone.
20. A Wooden Boot Scraper That Earns Its Place by the Door
Good starting board: Exterior-rated 2×4 or 2×6
Difficulty: Intermediate
Typical build time: Four to six hours
Core skills: Repeated layout, rugged assembly, and weather-conscious construction
A boot scraper has one job: stop the garden from following you into the house. Traditional versions hold closely spaced scraping slats between two sturdy rails. A simpler alternative mounts replaceable stiff brushes to a wooden base.
Build the base wide enough to remain steady when pressure arrives from the side. Round exposed corners, choose corrosion-resistant fasteners, and avoid pockets where rainwater can sit.
Place it on firm, level ground and leave enough space for the user to balance. A useful scraper should never become a tripping hazard.
21. An Outdoor LED Lantern Without an Open Flame
Good starting board: Cedar 1×6 or 1×8
Difficulty: Intermediate
Typical build time: Five to eight hours
Core skills: Repeated cuts, squaring a frame, and making decorative openings
A small wooden lantern can give a porch or table a soft pool of light without putting flame inside a combustible enclosure. Build a base, top, and simple slotted sides or corner posts around a removable LED light.
Design the opening so the light can be switched on and lifted out without dismantling the lantern. Follow the light manufacturer’s ventilation requirements, keep the battery compartment away from direct rain, and never block a heat-dissipation area.
If the lantern will remain outdoors, use an LED light specifically rated for that exposure.
One-Board Projects That Feel Personal Enough to Give Away
22. A Wine Bottle and Glass Holder That Looks Like a Balancing Trick
Good starting board: Hardwood 1×6
Difficulty: Intermediate
Typical build time: Three to five hours
Core skills: Accurate drilling, slot cutting, balancing, and fine sanding
This compact holder slips over a bottle neck and supports stemmed glasses in slots on either side. It appears effortless when finished. Reaching that balance takes careful layout.
Make the first version from inexpensive wood before moving to walnut, oak, or another hardwood. Bottle necks and glass stems vary, so size the openings around the set the holder will actually serve. Test it above a protected surface, and never use the holder to carry the bottle.
Paired with glassware or a suitable bottle, it makes a memorable housewarming or host gift.
23. A Wooden Serving Board Where the Grain Does the Decorating
Good starting board: Suitable close-grained hardwood 1×8 or wider
Difficulty: Easy to intermediate
Typical build time: Three to six hours, plus finish-curing time
Core skills: Shaping, sanding, edge treatment, and food-contact finishing
A serving board does not need ornate carving. A confident handle shape, a softened edge, and beautiful grain are often enough.
Draw the profile on paper first. Transfer it to the board, cut just outside the line, and refine the curve gradually through sanding. Choose wood and finish suitable for the intended food-contact use, then follow the manufacturer’s instructions for application and full curing.
Avoid chemically treated wood, unknown reclaimed lumber, and boards with unstable cracks or voids that can trap food residue. A serving board is not automatically a cutting board. Repeated knife use and washing introduce different requirements for species, construction, finish, sanitation, and care.
24. A Jewelry Organizer Shaped Around the Collection
Good starting board: 1×6 or 1×8
Difficulty: Easy
Typical build time: Three to five hours
Core skills: Small-hardware layout, drilling, finishing, and wall mounting
A finished backboard can hold hooks for necklaces, small knobs for rings, and a narrow shelf for earrings, watches, or perfume. The arrangement should follow the jewelry, not the other way around.
Lay several real pieces across the unfinished board. Long necklaces need clear vertical space. Bracelets need wider hooks. Tiny earrings need a holder that will not let them slip behind furniture.
When the board shape, hardware, and finish suit the recipient’s room, the organizer feels personal without needing a name carved across the front.
25. A Keepsake Box That Rewards Patience
Good starting board: 1×6, 1×8, or wider hardwood
Difficulty: Intermediate
Typical build time: Six to ten hours
Core skills: Repeated accurate cuts, box assembly, lid fitting, and detailed sanding
Small boxes are honest objects. A gap of only a few millimeters catches the eye, which makes this one of the most useful skill-building projects in the collection.
For a first version, use a simple butt-jointed body. Cut matching sides as pairs. Assemble on a flat surface and compare the diagonals before the glue begins to set. The lid can lift off, slide in a groove, or pivot on small hinges depending on your tools and confidence.
Felt or cork on the bottom adds a finished touch. Decorative hardware may make the box feel precious, but it should not be mistaken for security.
26. A House-Number Sign That Can Be Read From the Street
Good starting board: Cedar 1×8 or 1×10
Difficulty: Easy
Typical build time: Three to five hours, plus finishing time
Core skills: Exterior finishing, visual layout, and secure mounting
A house-number sign should look good up close, but its first responsibility is to be readable from a distance. Cut and finish the backboard, then attach weather-resistant numbers with strong contrast against the background.
Carry the unfinished layout outside and look at it from the street in daylight and dimmer conditions. Follow local rules for number size and placement, especially where emergency responders need a clear view of the address.
Seal exposed end grain and use exterior-rated mounting hardware. Keep fasteners away from hidden utilities, electrical components, and areas where they could interfere with siding drainage.
27. A Portable Lap Desk Sized for the Person Using It
Good starting board: Straight 1×12 or project panel of suitable width
Difficulty: Easy to intermediate
Typical build time: Four to seven hours
Core skills: Ergonomic sizing, edge shaping, and surface finishing
A broad, straight board is already most of the way to becoming a lap desk. Shape the corners, soften every edge, and add a pencil recess, phone groove, or underside cushion if those details serve a real purpose.
Size the surface around the person and device. A laptop needs open airflow around its intake and exhaust vents, so do not let the design block the manufacturer’s required ventilation. The desk should be wide enough to feel useful without becoming awkward to carry or store.
For a gift, a subtle monogram beneath the work area can feel more personal than a large decorative graphic.
Still Undecided? Match the Project to the Weekend You Have
The wrong choice is not a bad project. It is a project that asks for more tools, time, or patience than you can offer right now.
“I Have Never Built Anything Before”
Begin with the phone stand, bookends, key rack, or pencil organizer. Each introduces a small, manageable group of skills without risking much material.
“My Tool Collection Is Very Small”
Consider the serving board, key rack, house-number sign, or lap desk. Their basic forms rely mainly on crosscuts, drilling, shaping, and sanding.
“I Only Have a Few Hours”
The phone stand, candle block, bookends, or simple key rack can be assembled quickly. Finishing may still take longer than the woodworking. Follow the product’s drying and curing instructions rather than forcing the project to meet an artificial Sunday-night deadline.
“I Want to Solve an Annoying Problem at Home”
Look for the irritation you encounter every day. Keys vanish? Build the rack. Mail spreads over the counter? Make the organizer. Mugs crowd the cabinet? Put them on the wall. A project tied to a real frustration is much more likely to be completed and used.
“I Want Something for the Garden”
Choose the garden tool rack for simplicity, the birdhouse for skill building, or the railing planter for immediate visual impact. Remember that outdoor projects ask for drainage, appropriate fasteners, moisture-resistant materials, and safe mounting.
“I Want to Make a Gift That Does Not Feel Generic”
Try the serving board, jewelry organizer, house-number sign, lap desk, or keepsake box. Match the project to the recipient’s habits. A useful object made specifically for one person’s life carries more feeling than decoration added to something they do not need.
Recommended reading: The Ultimate Woodworking Gift Project Guide: What to Build for Every Person in Your Life
“I Am Curious Whether I Could Sell These”
The key rack, coat rack, serving board, house-number sign, jewelry organizer, and phone stand are easy for buyers to understand and simple to personalize. Before making a pile of inventory, include the lumber, hardware, finish, labor, packaging, selling fees, shipping, and waste in the price—and test whether anyone wants the first version.
Learn more: The Science of High-Profit Woodworking: Why Certain DIY Projects Sell Out While Others Never Sell
Plan the Board Before the Saw Changes It Forever
The first cut is where possibility becomes commitment. A few minutes with a pencil and square can save you from discovering, one piece too late, that the final side no longer fits.
Measure What You Actually Bought
Ignore the nominal label for a moment. Record the real length, width, and thickness. Circle knots, splits, dents, and damaged areas that should not appear in critical parts.
Write Down Every Piece—Even the Tiny Ones
List the main panels, then add the easily forgotten parts: cleats, rails, stops, lips, handles, and decorative blocks. One missing strip is often what turns a one-board woodworking project into an accidental two-board project.
Give the Largest Parts First Choice
Place long and wide components on the layout before the small pieces. A short block can slide around a knot. A thirty-inch shelf cannot.
Leave Room for the Saw Kerf
Every cut turns a thin line of wood into dust. That missing width is the kerf. Measure the kerf made by your actual blade and include it between parts when the cutting plan uses nearly the full board.
Choose a Reference Face and Edge
Mark the cleanest face and straightest edge. Take related measurements from those same references. Switching from side to side invites small inconsistencies that become visible during assembly.
Label Before the Pieces Look Alike
A faint pencil note—“left,” “right,” “top,” “inside”—can prevent a surprising amount of confusion once the board becomes a stack of similar rectangles.
Let the Project Stand Together Before You Add Glue
Dry assembly reveals mistakes while they are still reversible. Check the orientation, compare diagonals, test clearances, and make sure you can reach every screw or piece of hardware.
Use Offcuts as Test Pieces
Small scraps make excellent drill-test blocks, spacers, feet, handles, and finish samples. Stain tested on the same board tells you far more than the color printed on a can.
Recommended reading: Woodworking Cut List vs Materials List: How to Reconcile Them Before You Buy Lumber
No Table Saw? You Still Have Plenty of Options
Many one-board projects are especially friendly to woodworkers without a table saw because they use the full width of the board.
A handsaw and miter box can produce clean crosscuts. A circular saw guided by a firmly clamped straightedge can handle longer work. A jigsaw opens the door to curves and decorative cutouts. A miter saw makes repeated crosscuts quick, though it generally does not replace a table saw for ripping narrow strips.
If a project calls for narrow pieces, pause before improvising a questionable cut. You can:
- Ask whether the lumber supplier offers cutting services.
- Buy a short length of molding for a lip or rail.
- Choose a design based on full-width pieces and crosscuts.
- Use a properly guided circular saw only when the work can be safely supported and clamped.
- Use a suitable rip handsaw with the board secured correctly.
The one-board rule is not worth an unstable cut. Adapting the plan safely is not cheating. It is good judgment.
Recommended reading: Woodworking Without a Table Saw: 9 Better Alternatives for Every Cut, Project, and Workshop
Simple Joints That Let Clean Work Speak for Itself
Complicated joinery can be beautiful, but it is not a requirement for a satisfying small build. Flat mating surfaces, square cuts, suitable fasteners, and patient assembly matter more than showing off.
Glue and Brads
Wood glue creates strong bonds across well-fitted long-grain surfaces. Brads can hold the pieces while the adhesive cures, but brads alone should not be trusted with every structural load.
Screws and Pilot Holes
Screws are approachable, strong, and sometimes removable. Drill pilot holes near board ends and whenever hardwood threatens to split. Use a countersink when the screw head should sit flush rather than crushing the surface fibers.
Pocket Holes
Pocket screws can hide fasteners inside shelves, organizers, and small furniture. Match the jig setting and screw length to the actual stock thickness, and think carefully about which direction the load will pull.
Dowels
Dowels leave no visible screw heads and bring a satisfying sense of precision to a simple project. A doweling guide makes alignment easier; without one, reference marks must be exact.
Dados, Grooves, and Notches
Housed and notched joints can improve alignment and strength, but they also demand additional tools and accuracy. Treat them as optional skill-building upgrades, not an entrance fee to “real” woodworking.
Learn more: The 25 Best Woodworking Joinery Books Every Woodworker Should Own (From Beginner to Master Craftsman)
The Finish Is Where a Simple Project Finds Its Voice
Careful finishing can make an uncomplicated build look intentional. Hurried finishing can make excellent joinery feel unfinished.
Remove milling marks, dried glue, and sharp edges first. Move through sensible sandpaper grits without making huge jumps. Clear away dust between stages and turn the project beneath low, raking light; scratches that disappear under overhead lighting often reveal themselves there.
Let the project’s use guide the finish:
- Paint adds color, hides mismatched grain, and works especially well on pine or poplar.
- Stain changes the color of wood but does not necessarily protect it unless the product is formulated as a combined finish.
- Oil finishes can deepen grain and are often pleasant to apply, although their durability and curing requirements vary.
- Film finishes can offer stronger protection against moisture and wear when applied correctly.
- Exterior finishes must be designed for weather exposure and maintained as they age.
- Food-contact finishes should be chosen and cured according to the manufacturer’s stated use.
On projects exposed to moisture, coat the relevant faces and pay special attention to thirsty end grain. And be patient. A build may be assembled on Sunday while the finish still needs days—or longer—to cure before hard use.
Recommended reading: Woodworking Finishing Supplies for Beginners: 17 Essentials for a Smooth, Durable Finish
Small Mistakes That Make One-Board Projects Harder Than They Need to Be
Grabbing the First Board in the Pile
A twisted board will make every joint feel more difficult than it is. Sight along the lumber and inspect both faces before buying.
Treating Nominal Dimensions as Real Measurements
A plan based on a 5 1/2-inch-wide board will not fit correctly if you assume a 1×6 is exactly six inches wide.
Cutting Before the Full Layout Exists
The forgotten rail, lip, or cleat has ended many one-board challenges. Draw every component before making the first cut.
Forgetting the Kerf
A blade removes material. Across several cuts, those thin losses can consume the final piece you thought would fit perfectly.
Driving Screws Into Dry Ends Without Pilot Holes
One impatient screw can split an otherwise finished part. Test the pilot-hole size on an offcut and keep fasteners away from fragile edges.
Leaving All the Sanding Until After Assembly
Inside corners become awkward once the project is glued together. Sand hard-to-reach surfaces beforehand, then blend joints and finish exposed areas after assembly.
Asking the Finish to Dry Faster Than It Can
Heavy coats and early handling lead to tacky surfaces, fingerprints, and uneven color. The instructions on the product matter more than the weekend clock.
Treating Wall Hardware as Someone Else’s Problem
A beautiful shelf can still come down if it is attached with the wrong anchor. Match every mounting method to the wall material and expected load.
Adding Every Decorative Idea to the First Version
Curves, engraving, hidden joints, distressed paint, and decorative edges can wait. Prove the dimensions and function first. The second version can carry the ambition.
Questions That Usually Surface Before the First Cut
“What Can I Honestly Make From One Board?”
Quite a lot: a phone stand, bookends, shelf, key rack, coat rack, spice organizer, birdhouse, bird feeder, planter, serving board, jewelry organizer, keepsake box, house sign, or lap desk. The real limits are the board’s width, length, species, condition, and the demands of the finished object.
“What Is the Easiest One-Board Woodworking Project?”
A simple phone stand or key rack is difficult to beat. Both use only a few parts and teach the fundamentals—measuring, crosscutting, drilling, sanding, and finishing—without consuming much time or material.
“If I Buy Only One Board Size, Which Is the Most Useful?”
An eight-foot 1×6 or 1×8 can become many small shelves, organizers, racks, birdhouses, and decorative pieces. A 1×10 or 1×12 is better when you need a broad surface for a tray, sign, lap desk, or serving board. Measure the real dimensions before planning.
“Can I Build These Without Power Tools?”
Yes. Many one-board woodworking projects can be made with a handsaw, miter box, hand drill or brace, clamps, sandpaper, glue, and fasteners. Favor designs that use full-width boards and crosscuts when you lack a safe method for ripping narrow pieces.
“What Wood Should a Beginner Buy?”
Pine is widely available, inexpensive, and easy to cut. Poplar is smoother for painted indoor work. Cedar is appropriate for many outdoor builds. Hardwood can elevate a serving piece or gift. Choose according to the load, exposure, finish, and intended use—not appearance alone.
“Will I Really Finish One of These in a Weekend?”
Simple projects may need only one to three hours of active work. Boxes, planters, organizers, and more detailed pieces can consume most of a weekend. Paint, glue, oil, and protective finishes may continue drying or curing after construction ends.
“Could I Sell One-Board Projects?”
Yes, although efficient material use does not automatically create profit. Personalized signs, key racks, coat racks, serving boards, phone stands, and jewelry organizers can appeal to buyers when they solve a clear problem or fit a gift occasion. Price in lumber, hardware, finish, labor, waste, packaging, fees, and shipping before deciding the idea is profitable.
“How Do I Keep the Wood From Splitting Near a Screw?”
Drill a correctly sized pilot hole, keep the fastener away from fragile edges, choose an appropriate screw diameter and length, and stop before overtightening. A countersink allows the head to sit flush without forcing the surface fibers apart.
“Do I Sand Before Assembly or After?”
Both. Sand inside faces and tight areas while they are still easy to reach. After assembly, remove glue residue, blend exposed joints, soften edges, and complete the final sanding sequence.
“How Can One Board Produce More Than One Item?”
Choose projects with small repeated parts, place the largest pieces first, include blade kerf in the layout, and give offcuts a purpose. A full cutting diagram reveals the likely yield before any of the board becomes sawdust.
Products / Tools / Resources
You do not need to buy everything on this list. Start with the tools required for the project you have chosen, then add equipment only when a real need appears.
A Straight, Project-Sized Board
For a first indoor build, a straight pine 1×6 or 1×8 is affordable and forgiving. Choose cedar for many outdoor projects, poplar for painted indoor pieces, and suitable hardwood when the grain and finished surface are central to the design.
Combination Square
A dependable combination square helps mark square crosscuts, repeat offsets, check assemblies, and transfer measurements. On a small project, those quiet jobs influence nearly every visible joint.
Tape Measure and Sharp Pencil
A clear tape measure and fine pencil are more useful than an elaborate tool that is difficult to read. For small components, a marking knife can create an even finer reference line.
Saw Matched to Your Workspace
A handsaw with a miter box is compact and approachable. A circular saw with a clamped guide handles longer cuts. A jigsaw opens up curves. A miter saw makes repeated crosscuts fast. Choose the tool you can support, control, and use safely.
Drill/Driver, Bits, and Countersink
A drill/driver handles pilot holes, hardware installation, and most screw assembly. Keep a set of ordinary twist bits, a few brad-point bits for cleaner wood drilling, and a countersink for flush screw heads.
Clamps
Two or four clamps can transform a shaky assembly into a calm one. Small bar clamps or F-style clamps cover many one-board projects, while a firm work-holding clamp keeps the board from moving during cutting and drilling.
Learn more: 7 Woodworking Clamps Every Serious Builder Owns (And Why Cheap Clamps Cost More)
Wood Glue
Use a woodworking adhesive suitable for the project’s environment. Interior glue belongs indoors; outdoor projects may require a water-resistant or waterproof product. Follow the manufacturer’s clamping and curing instructions.
Appropriate Fasteners and Hardware
Match screw length and diameter to the real board thickness. Outdoor projects need corrosion-resistant fasteners. Wall-mounted racks and shelves need anchors suited to the wall material and expected load—not whichever anchors happen to be in a drawer.
Sandpaper and a Sanding Block
A selection of grits and a simple sanding block can finish every project in this guide. A random-orbit sander saves time on broad surfaces, but hand sanding still matters near edges, corners, and small details.
Finish Chosen for the Job
Use interior paint or clear finish for indoor décor, exterior-rated products for weather-exposed builds, and manufacturer-approved finishes for intended food-contact surfaces. Read the label for surface preparation, ventilation, drying, and full curing times.
Eye, Hearing, and Dust Protection
Safety glasses belong on your face before the first cut. Add hearing protection for loud tools and suitable dust protection when sanding or working with materials that produce harmful dust. Secure loose clothing and hair, keep blades sharp, and clamp work rather than trying to hold it close to a moving cutter.
Printable Plans and Cut Lists
A measured drawing, parts list, and cutting diagram remove much of the uncertainty from a one-board build. Before following any plan, compare its stated dimensions with your actual lumber and the space or object the finished project must fit.