
Most beginners do not need a bigger workshop.
They need a smaller first decision.
A single board is often enough to begin. It gives you a clear boundary, a manageable cost, and just enough material to make something useful without feeling as though one mistake will ruin an expensive pile of lumber.
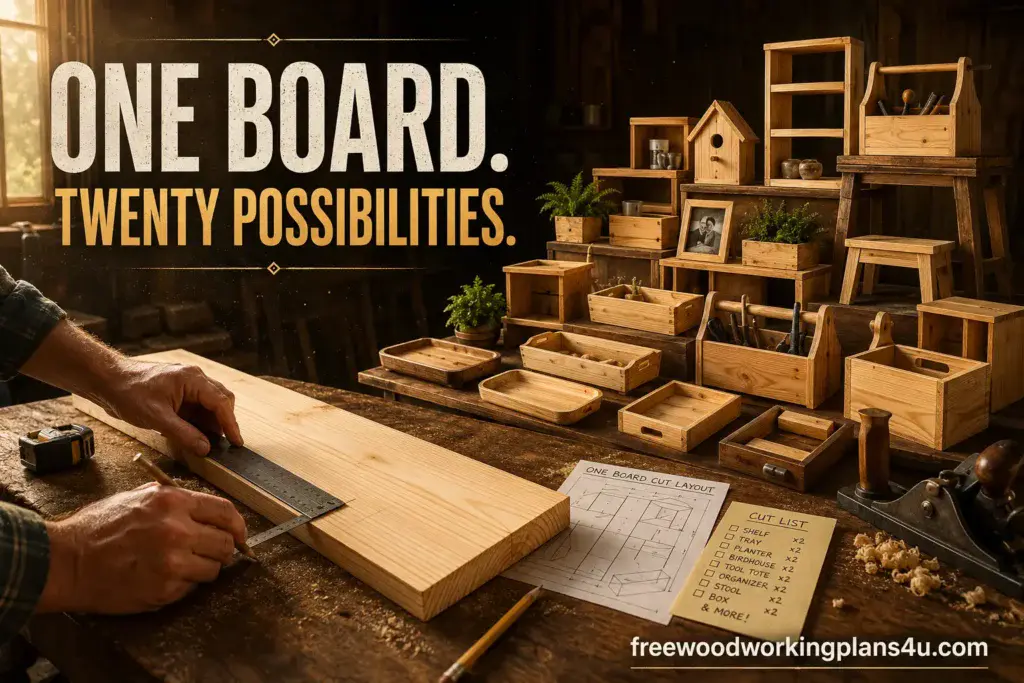
That is the quiet appeal of one board woodworking projects for beginners. The board is not merely raw material. It becomes a lesson in proportion, patience, accuracy, and problem-solving.
There is also something deeply satisfying about watching an ordinary board change character. One moment it is leaning against a wall, smelling faintly of pine and sawdust. A few careful cuts later, it becomes a shelf, a tray, a planter, or a small piece of furniture you made with your own hands.
You do not need every tool in the hardware store. Many of the projects in this guide can be built with a tape measure, combination square, pencil, drill, hand saw or circular saw, sandpaper, and a few basic fasteners.
The important part is not cutting quickly. It is planning before the blade moves. Measure the actual board, account for saw kerf, place the longest cuts first, and treat every offcut as a possible future component.
In this guide, “one board” means the primary wooden parts come from one board. Screws, glue, brackets, dowels, hooks, hinges, finish, and other small materials may still be needed. That makes the projects practical rather than artificially restrictive.
The dimensions are starting points, not rigid commandments. Lumber is commonly sold by nominal dimensions, while its actual size is smaller. A nominal 1×8 board, for example, is usually about ¾ inch thick and 7¼ inches wide. Measure your own board before creating the final cut layout.
Recommended reading: 15 Basic Woodworking Skills for Beginners—Master These Before Your First Serious Build
Quick Answer: What Is the Best One-Board Project for a Beginner?
A wall shelf, serving tray, candle holder, picture ledge, or simple mail organizer is usually the best starting point. These projects require relatively few parts and let you practice measuring, straight cuts, drilling, sanding, and finishing without committing a large amount of material.
If you are choosing your first project, look for one that:
- Can be completed in one afternoon
- Uses mostly straight cuts
- Does not require complicated joinery
- Has forgiving dimensions
- Produces something useful
- Can be adjusted if a measurement is slightly off
A wall shelf is perhaps the simplest choice because it can be made from one cut piece of lumber. A serving tray is equally approachable, but it adds the satisfaction of shaping corners and creating handholds.
The right first project is not necessarily the one that looks most impressive online. It is the one you are most likely to finish carefully.
What Counts as a One-Board Woodworking Project?
A one-board project uses one piece of lumber as its main wooden stock. That board may be crosscut into shorter pieces, ripped into narrower strips, or shaped into a single finished component.
A small planter box, for example, can use one board for the bottom, sides, and end pieces. It may still need screws, glue, drainage holes, and a liner, but it does not require a second primary board.
There are three common types of one-board builds.
Single-piece projects
These begin and end with one main piece of wood. The work comes from shaping, drilling, sanding, or finishing it.
Examples include:
- Serving boards
- Candle holders
- Simple shelves
- Phone docks
- Wall plaques
Multi-part projects
These use several pieces cut from the same board.
Examples include:
- Planter boxes
- Tool totes
- Display boxes
- Birdhouses
- Desktop organizers
One-board projects with purchased hardware
These use one board for the wooden structure while relying on non-wood components for function or installation.
Examples include:
- Coat racks with hooks
- Floating shelves with metal brackets
- Wall organizers with dowels
- Bedside shelves with mounting hardware
A good woodworking plan tells you exactly what comes from the board and what must be purchased separately. That small bit of honesty prevents disappointment at the workbench.
Choose the Right Board Before You Choose the Project
The board in front of you determines which projects are realistic.
Here are several common nominal sizes:
| Nominal size | Approximate actual size | Useful for |
|---|---|---|
| 1×4 | ¾ x 3½ inches | Candle holders, narrow strips, lips |
| 1×6 | ¾ x 5½ inches | Birdhouses, small shelves, organizers |
| 1×8 | ¾ x 7¼ inches | Shelves, trays, planters, display boxes |
| 1×10 | ¾ x 9¼ inches | Laptop stands, totes, caddies |
| 1×12 | ¾ x 11¼ inches | Wide shelves, monitor risers, larger panels |
For most beginners, a straight 1×8 board between 6 and 8 feet long is a versatile choice. It is wide enough for shelves and panels, but still manageable to carry, measure, and cut.
Length is only one part of the decision. Examine the board for:
- Warp
- Twist
- Cracks
- Loose knots
- Damaged ends
- Uneven edges
- Moisture stains
- Signs of rot or insect damage
If the board has a damaged end, do not count that section as usable length. Mark the damaged area and plan your cuts from the sound material.
Recommended reading: How to Buy the Right Lumber for Any Woodworking Project: Choose the Species, Grade, Thickness, and Quantity
Pine
Pine is inexpensive, easy to find, and simple to cut. It works particularly well for shelves, trays, organizers, planters, and practice projects.
Its softer surface can dent easily, so avoid crushing it with clamps. Pine may also absorb stain unevenly. A test piece is worth the few extra minutes.
Cedar
Cedar is lightweight and naturally suited to outdoor projects such as planters and birdhouses. It can be brittle around screws, so predrill holes near the ends and edges.
Hardwood
Oak, maple, beech, and ash can produce beautiful results. Hardwood usually costs more and may require sharper tools, but it is well suited to trays, shelves, display stands, and decorative projects.
Reclaimed wood
Reclaimed lumber can carry remarkable character, but inspect it carefully. Remove nails, screws, staples, dirt, and loose material before cutting.
If you cannot verify where the wood came from or whether it has been exposed to chemicals, choose a safer source for indoor projects.
Recommended reading: Woodworking Crafts with Reclaimed Wood: 35 Stunning Projects That Turn Old Lumber Into Handmade Treasures
Tools and Materials You Actually Need
A modest setup is enough for many one-board woodworking projects.
Measuring and marking tools
- Tape measure
- Pencil
- Combination square
- Straightedge
- Marking knife, optional
- Calculator or cut-list worksheet
A combination square is especially useful because it helps you mark accurate 90-degree lines across a board.
Cutting tools
A hand saw can handle many simple crosscuts. It takes more effort, but it also gives beginners an opportunity to slow down and feel how the tool moves through the wood.
A circular saw becomes much more accurate when used with a straight guide or track. A jigsaw is useful for curves, notches, and handle openings.
A table saw is helpful when a project requires narrow rip cuts. It is not essential for every project in this guide. If you do not have the proper equipment, ask a lumberyard to rip the board or choose a project that uses its full width.
Recommended reading: Woodworking Without a Table Saw: 9 Better Alternatives for Every Cut, Project, and Workshop
Assembly tools
- Drill and driver
- Drill bits
- Countersink bit
- Clamps
- Screwdriver
- Wood glue
- Appropriate screws
- Sandpaper
Safety equipment
- Safety glasses
- Hearing protection when using loud power tools
- Suitable dust protection
- Secure workbench or sawhorses
- Clamps for holding the workpiece
- A clear cutting area
Never hold a small board in your hand while cutting it with a power tool. Support the material securely and keep your hands away from the blade path.
Recommended reading: Beginner Woodworking Safety Checklist: 47 Things to Check Before You Make Your First Cut
The Smart Cut Layout Method
A smart cut layout is what separates a calm afternoon at the workbench from the familiar feeling of realizing the final piece is two inches too short.
Step 1: List every finished part
Write down each component before cutting:
- Part name
- Finished length
- Finished width
- Quantity
- Grain direction
- Whether the part requires a rip cut or crosscut
Do not begin by cutting a few pieces and hoping the design reveals itself. Write the entire plan first.
Step 2: Measure the actual board
Record the board’s true width, thickness, and usable length.
A board sold as a 1×8 may be 7¼ inches wide. That difference matters when you are cutting a bottom panel, shelf lip, or narrow strip.
Step 3: Allow for saw kerf
Saw kerf is the material removed by the blade. Many blades remove roughly ⅛ inch, but the exact amount depends on the blade.
If your layout is tight, include the kerf between every cut. A few narrow pieces can consume more material than expected.
Step 4: Cut long pieces first
Long components have fewer possible homes on a board. Short pieces can often be arranged around them, but a long panel cannot be made from several short leftovers.
Step 5: Rip strips before crosscutting them
If the design requires narrow strips, establish a straight reference edge first. Rip the board into strips, then crosscut those strips to length.
If you do not have a table saw or guided circular saw, use pre-ripped lumber or ask a lumberyard to prepare the strips.
Step 6: Mark the waste side
Place an X on the waste side of every cut line. It is a simple habit, but it prevents many avoidable errors.
Step 7: Keep the offcuts visible
Do not sweep small pieces into the bin immediately. An offcut may become a handle, cleat, shelf lip, spacer, test piece, or mounting block.
Recommended reading: How to Read Woodworking Cut Lists Without Costly Mistakes: Dimensions, Kerf, Grain Direction, and Cutting Order Explained
One Board Project Selector
| Project | Starting stock | Time | Skill focus |
|---|---|---|---|
| Wall shelf | 1×8 | 1–2 hours | Measuring and mounting |
| Picture ledge | 1×8 | 2–4 hours | Ripping and assembly |
| Serving tray | 1×8 | 1–2 hours | Sanding and shaping |
| Recipe stand | 1×10 | 2–3 hours | Small-part assembly |
| Desktop organizer | 1×8 | 2–4 hours | Layout and glue-up |
| Candle holder | 1×4 | 1–2 hours | Drilling and finishing |
| Mail and key board | 1×8 | 1–2 hours | Hardware installation |
| Phone dock | 1×6 | 1–3 hours | Notching and drilling |
| Laptop stand | 1×10 | 3–5 hours | Angles and stability |
| Monitor riser | 1×10 | 2–4 hours | Repeated cuts |
| Planter box | 1×8 | 3–5 hours | Box assembly |
| Tool tote | 1×10 | 4–6 hours | Handles and structure |
| Birdhouse | 1×6 | 3–5 hours | Angled roof assembly |
| Bedside cubby | 1×8 | 4–6 hours | Precision assembly |
| Coat rack with shelf | 1×10 | 3–5 hours | Mounting and hardware |
| Display box | 1×8 | 4–6 hours | Narrow strips |
| Bath caddy | 1×10 | 3–5 hours | Grooves and finishing |
| Spice rack | 1×8 | 4–6 hours | Repeated shelves |
| Book display stand | 1×8 | 3–5 hours | Angled support |
| Wall organizer | 1×10 | 4–6 hours | Rail and shelf layout |
Level One: Six Easy Projects for Building Confidence
The first projects should give you quick feedback. You make a cut, check the result, sand the edge, and see progress in front of you.
1. Simple Wall Shelf
A wall shelf is one of the easiest one board woodworking projects for beginners because it can be made from one cut piece of lumber.
Starting stock: One 1×8 board at least 24 inches long.
Cut list:
- One shelf, 24 to 36 inches long by the actual board width
Sand the board thoroughly and soften the front corners. Apply paint, stain, oil, or clear finish before mounting if that makes the installation easier.
Use two suitable shelf brackets and wall anchors appropriate for the wall structure. The shelf board may come from one piece of lumber, but the mounting system determines how safely it can carry weight.
Start with lightweight objects and test the installation before adding books or heavier items.
Skill checkpoint: Accurate crosscutting, edge sanding, drilling, and safe mounting.
2. Minimalist Picture Ledge
A picture ledge creates a clean display area for photographs, artwork, postcards, or small books.
Starting stock: One 1×8 board at least 6 feet long.
Planning cut list:
- One shelf strip, approximately 5 inches wide and 36 inches long
- One front lip, approximately 2 inches wide and 36 inches long
The strips must be ripped from the board. Use a table saw, guided circular saw, or professional lumber-cutting service. Leave enough width for the saw kerf.
Attach the narrow front lip to the wider shelf strip with glue and screws. Predrill the holes to reduce splitting, particularly near the ends.
The exact strip widths can be adjusted. What matters is that the shelf is deep enough for the items it will hold and that the front lip is high enough to stop them sliding forward.
Skill checkpoint: Rip-cut planning, narrow-strip handling, and aligned assembly.
3. Flat Serving Tray
This project is closer to a handled serving board than a raised-sided box, which is precisely why it is so approachable.
Starting stock: One 1×8 board, 18 to 24 inches long.
Cut list:
- One tray body, 18 to 24 inches long by the actual board width
- Two oval or rectangular hand openings, optional
Round the corners with a jigsaw, rasp, or sanding block. Mark the hand openings carefully and drill starter holes before cutting them.
Sand the edges until they feel comfortable in your hands. For a tray used with food, choose a finish labeled for food-contact surfaces and follow the manufacturer’s instructions. Do not assume every oil, stain, or clear coat is suitable for food use.
Skill checkpoint: Symmetrical layout, drilling, shaping, and smooth sanding.
4. Beginner Recipe or Book Stand
A recipe stand introduces simple assembly while remaining small enough to adjust if the first fit is not perfect.
Starting stock: One 1×10 board at least 48 inches long.
Cut list:
- One main panel, 12 x 9¼ inches
- One front ledge, 12 x approximately 2 inches
- One rear support, 12 x approximately 2 inches
The narrow components require ripping. Attach the front ledge near the lower edge of the main panel. Use a hinge, dowel, or simple support arrangement to hold the panel at an angle.
Place an actual book or tablet on the stand before finishing. The correct angle is the one that feels stable and easy to read.
Skill checkpoint: Small-part layout, pilot holes, and angle testing.
5. Desktop Organizer
A desktop organizer gives you several related parts to measure, cut, and assemble from one board.
Starting stock: One 1×8 board at least 48 inches long.
Cut list:
- One base, 12 x 7¼ inches
- One rear panel, 12 x approximately 4 inches
- Two dividers, approximately 4 x 3½ inches
The rear panel and dividers can be adjusted according to the items the organizer must hold. Use glue and small screws, or glue and brads if available.
Dry-fit everything before applying adhesive. If the dividers are too tight, sand their edges lightly. Forcing them into place can distort the base or split the wood.
Skill checkpoint: Repeated measurements, square assembly, and glue-up.
6. Simple Candle Holder
A candle holder is compact, inexpensive, and excellent for practicing layout and drilling.
Starting stock: One 1×4 board approximately 24 inches long.
Cut list:
- One body, approximately 18 x 3½ inches
- Three or four candle openings
Mark the openings on the centerline and space them evenly. Use a Forstner bit or suitable hole saw to create recesses for metal tea-light cups.
For maximum safety, LED candles are the simplest choice. If real candles are used, never leave them unattended and keep the holder away from paper, curtains, children, pets, and other flammable objects.
Skill checkpoint: Centerline layout, repeated spacing, and controlled drilling.
Level Two: Seven Projects for Learning Assembly
Once a single piece feels comfortable, move to projects where several parts must cooperate. This is where woodworking begins to feel less like cutting lumber and more like solving a three-dimensional puzzle.
7. Mail and Key Organizer
This practical organizer uses one board and a handful of purchased hooks.
Starting stock: One 1×8 board at least 36 inches long.
Cut list:
- One back panel, approximately 24 x 7¼ inches
- Optional narrow shelf from an offcut
- Hooks or small hardware
Sand the panel, mark the hook positions, and predrill the holes. A small metal mail basket can be attached to the lower section, or an offcut can be ripped into a shallow wooden shelf.
Mount the organizer into suitable wall anchors or studs. Keys are light, but coats, bags, and mail can add up quickly.
Skill checkpoint: Hardware layout and functional wall mounting.
8. Wooden Phone Charging Dock
A phone dock can be made from one compact piece of lumber and customized for a particular phone case.
Starting stock: One 1×6 board at least 24 inches long.
Cut list:
- One body, approximately 8 x 5½ inches
- One phone slot, sized to the device and case
- One cable opening
Mark the phone slot along the centerline. Cut it with a router, jigsaw, or carefully controlled saw method. The slot should hold the phone securely without making it difficult to remove.
Drill a cable opening behind the slot and round every edge that will be touched.
Skill checkpoint: Centered layout, notching, and testing fit.
9. Beginner Laptop Stand
A laptop stand introduces angled supports and forces you to think about stability rather than appearance alone.
Starting stock: One 1×10 board at least 36 inches long.
Cut list:
- One top, approximately 18 x 9¼ inches
- Two support legs, approximately 9 x 3½ inches
- Optional front retaining lip from an offcut
The legs can be mounted vertically or angled slightly backward. Add a front lip so the laptop cannot slide forward.
Before applying finish, test the stand with the laptop closed and open. Check for wobble, tipping, sharp edges, and adequate ventilation.
Skill checkpoint: Stability, symmetry, and safe functional design.
10. Monitor Riser
A monitor riser improves desk organization while giving you a useful exercise in repeated cuts.
Starting stock: One 1×10 board at least 6 feet long.
Cut list:
- One top, 30 x 9¼ inches
- Two legs, approximately 9 x 5½ inches
The legs require a rip cut, or they can be replaced with suitable metal supports. Position them symmetrically beneath the top and use glue with screws.
The correct height depends on your monitor, chair, desk, and posture. Test the height temporarily with books before committing to final leg dimensions.
Skill checkpoint: Repeated dimensions, alignment, and load distribution.
11. One-Board Planter Box
A planter box is a satisfying intermediate project because it transforms one long board into a complete object with sides, ends, and a bottom.
Starting stock: One 1×8 board at least 8 feet long.
Cut list:
- Two long sides, 18 x 7¼ inches
- Two end pieces, approximately 7 x 5½ inches
- One bottom, approximately 18 x 5½ inches
The narrower pieces require ripping. Assemble the sides around the bottom with exterior-rated screws and glue suitable for the intended environment.
Drill drainage holes and use a liner or inner container if the box will hold wet soil. Water exposure can shorten the life of untreated wood, so design the box so it can drain and dry.
Skill checkpoint: Box construction, drainage planning, and outdoor durability.
12. Portable Woodworking Tool Tote
A tool tote is useful long after the build is finished, which makes the extra assembly effort worthwhile.
Starting stock: One 1×10 board at least 8 feet long.
Cut list:
- One bottom, 18 x 9¼ inches
- Two long sides, 18 x 5½ inches
- Two end pieces, 9¼ x 5½ inches
- One purchased wooden dowel for the handle
Rip the side and end strips, then crosscut them to length. Drill matching handle holes in the end pieces before assembly.
The handle should fit securely and support the intended load. Start by carrying lightweight hand tools and test the tote before loading it with heavier equipment.
Skill checkpoint: Symmetry, handle placement, and structural assembly.
13. Beginner Birdhouse
A birdhouse uses several small pieces from one board and introduces angled roof assembly.
Starting stock: One 1×6 board at least 6 feet long.
Cut list:
- Two front and back panels, approximately 8 x 5½ inches
- Two side panels, approximately 8 x 4 inches
- Two roof pieces, approximately 10 x 4 inches
- One floor, approximately 4 x 4 inches
The roof pieces may require ripping. Choose the entrance opening according to the type of bird you hope to attract and follow local wildlife guidance where appropriate.
Provide drainage and ventilation. Avoid placing the birdhouse where predators can easily reach it.
Skill checkpoint: Repeated parts, roof alignment, and outdoor construction.
Level Three: Seven Projects for Precision and Design
These projects are still accessible, but they reward patience. The difference between an ordinary result and a polished one often comes down to small details: an even reveal, a clean edge, a carefully chosen grain direction, or hardware that sits exactly where it should.
14. Floating Bedside Cubby
This compact cubby teaches you how to assemble a small box from a single board.
Starting stock: One 1×8 board at least 6 feet long.
Cut list:
- Two panels, 18 x 7¼ inches
- Two side pieces, 6 x 7¼ inches
- Optional wall cleat from an offcut
Use the two long panels as the top and bottom. Attach the side pieces between them, keeping every corner square.
A bedside cubby must be mounted securely because it may hold books, a lamp, or personal items. Use a cleat, brackets, or wall anchors appropriate for the wall structure.
Skill checkpoint: Small-box assembly and precision mounting.
15. Wall-Mounted Coat Rack With Shelf
This project combines storage, decorative design, and hardware installation in one compact piece.
Starting stock: One 1×10 board at least 8 feet long.
Cut list:
- One back panel, 24 x 9¼ inches
- One shelf, 24 x approximately 4 inches
- One front lip, 24 x approximately 1½ inches
- Purchased hooks
The shelf and lip require ripping. Attach the shelf near the lower section of the back panel, then add the lip to keep small objects from sliding forward.
Space the hooks according to the coats, bags, or tools the rack will hold. Mark all positions before drilling.
Skill checkpoint: Multi-function layout, hardware spacing, and wall anchoring.
16. Small Wooden Display Box
A display box can hold collectibles, photographs, books, or small plants. It also gives you a chance to make simple construction look deliberate.
Starting stock: One 1×8 board at least 8 feet long.
Cut list:
- One back panel, 18 x 7¼ inches
- Two top and bottom strips, 18 x approximately 2½ inches
- Two side strips, approximately 7¼ x 2½ inches
Rip the narrow strips from the board. Dry-fit the frame around the back panel before applying glue.
Use clamps to keep the box square. A contrasting back panel, painted interior, or clear finish can change the appearance dramatically without changing the basic construction.
Skill checkpoint: Narrow-strip accuracy, clamping, and square assembly.
17. Wooden Bath Caddy
A bath caddy is a long panel with small supports that rest on the sides of a bathtub.
Starting stock: One 1×10 board at least 6 feet long.
Cut list:
- One main panel, approximately 30 x 9¼ inches
- Two support strips, approximately 9 x 1½ inches
- Optional phone or book groove
- Optional handle openings
Measure the tub carefully before finalizing the length. The caddy should rest securely without forcing the tub walls outward or sliding easily.
Sand every edge smoothly and choose a finish appropriate for occasional moisture. Non-slip pads may help, but test the caddy with lightweight objects before placing it near water.
Skill checkpoint: Custom measuring, edge treatment, and moisture-aware design.
18. Narrow Spice Rack
A narrow spice rack is an efficient way to use a single board while practicing repeated shelf construction.
Starting stock: One 1×8 board at least 8 feet long.
Cut list:
- One back panel, 24 x 7¼ inches
- Two shelves, 20 x approximately 2½ inches
- Two front lips, 12 x approximately 1¼ inches
The shelves and lips require ripping. Center the shorter lips on the front of each shelf, leaving enough room for jars to remain visible.
Mount the rack securely and keep the load modest. Spices are light, but repeated movement around nearby cabinets can create vibration.
Skill checkpoint: Repeated dimensions, narrow strips, and installation.
19. Book or Record Display Stand
This stand is useful for showing a favorite book, album, artwork, or tablet.
Starting stock: One 1×8 board at least 6 feet long.
Cut list:
- One base, 16 x 7¼ inches
- One back support, 16 x 7¼ inches
- One front lip, 16 x approximately 1½ inches
Connect the base and back support with hinges, dowels, or a carefully planned angled joint. Attach the front lip to the base so the displayed item remains in position.
Test the viewing angle and stability before applying the final finish.
Skill checkpoint: Angled support, hinge placement, and visual proportion.
20. Wall Organizer With Dowel Rail
This final build combines a back panel, shelf, rail, and small hanging points.
Starting stock: One 1×10 board at least 8 feet long.
Cut list:
- One back panel, 24 x 9¼ inches
- One shelf, 24 x approximately 4 inches
- One front lip, 24 x approximately 1½ inches
- One purchased dowel or rail
- Small hooks or pegs
Attach the shelf to the lower section of the back panel. Add the lip, then install the dowel rail or pegs above it.
The organizer can hold keys, mail, lightweight accessories, or small household items. Keep heavier objects on a properly supported shelf rather than relying on small pegs.
Skill checkpoint: Combining several functions while keeping the design visually balanced.
Build Your Skills Without Rushing the Process
The projects become more rewarding when you treat them as a progression rather than twenty unrelated ideas.
Begin with a single-piece project
Choose a wall shelf, serving tray, candle holder, or mail organizer. These teach:
- Measuring
- Marking
- Straight cuts
- Sanding
- Drilling
- Basic finishing
Move into simple assembly
Next, try a phone dock, desktop organizer, planter box, birdhouse, or monitor riser. These introduce:
- Pilot holes
- Screw placement
- Glue application
- Square corners
- Repeated measurements
- Basic structural thinking
Finish with precision projects
Once basic assembly feels natural, move toward a bedside cubby, display box, spice rack, bath caddy, or wall organizer. These projects introduce:
- Narrow strips
- Custom dimensions
- Angled supports
- Mounting hardware
- Visual proportion
- More demanding cut layouts
The point is not to build the most impressive object first. It is to build something carefully enough that you want to make the next one.
Recommended guide: 27 One-Board Woodworking Projects You Can Build in a Weekend
The Universal Build Process for Every Project
1. Read the plan completely
Do not start cutting after reading only the first measurement. Understand the assembly order and how each component relates to the others.
2. Prepare the work area
Clear the bench and floor. Make sure the board is supported and that the cutting path is open.
3. Mark the reference face
Choose the best-looking face of the board and mark it. Also mark one reference edge. Use those same references throughout the project.
4. Cut conservatively
When possible, leave a small amount of material and sneak up on the final dimension through careful sanding. Removing wood is easy. Putting it back is not.
5. Dry-fit the components
Put the project together without glue. Check:
- Overall dimensions
- Square corners
- Grain direction
- Screw positions
- Mounting clearance
- Hinges or moving parts
6. Drill pilot holes
Pilot holes reduce splitting, especially near board ends and edges. Use a countersink when you want screw heads to sit below the surface.
7. Assemble in stages
Apply glue sparingly and wipe away squeeze-out before it hardens. Use clamps for alignment, but do not tighten them so aggressively that the wood bends or shifts.
8. Sand progressively
A practical sanding progression is:
- Coarse paper for rough defects
- Medium paper for scratches and uneven areas
- Fine paper for final preparation
Do not move to very fine sandpaper while saw marks are still visible.
9. Test the finish
Apply the finish to an offcut or hidden area first. Pine, cedar, and hardwood can all react differently.
10. Test the finished project carefully
A shelf, rack, or organizer may look strong but still have weak mounting points. Begin with a light load before trusting it with heavier objects.
Recommended reading: How to Read Dimensions on Woodworking Plans: A Beginner’s Visual Guide to Every Number, Line, and Symbol
Finish the Wood for the Life You Expect It to Have
The best finish is not always the darkest or glossiest one. It is the one suited to how the project will be used.
Paint
Paint hides differences in color and can give inexpensive pine a crisp, modern appearance. Sand and remove dust before applying primer or paint.
Stain
Stain emphasizes grain, but softwoods can absorb it unevenly. Always test the color on scrap from the same board.
Clear coat
A clear finish preserves the natural appearance of the wood. Apply thin, even coats and follow the product’s drying instructions.
Oil
Oil can create a warm, tactile surface. Choose a product appropriate for the project’s intended use rather than assuming all oils are interchangeable.
Outdoor protection
Planters and birdhouses face moisture, sunlight, and temperature changes. Provide drainage, avoid trapping water, and select materials and finishes intended for outdoor exposure.
The Beginner Mistakes That Cause the Most Trouble
Cutting before creating the complete layout
This is the quickest way to waste a board. Create the full cut list before making the first cut.
Forgetting actual board dimensions
A nominal 1×8 is usually not 8 inches wide. Measure the lumber in front of you.
Ignoring saw kerf
Several cuts can remove enough material to make a tight layout fail.
Making every component the same length
In boxes, shelves, and frames, some parts must be shortened to fit between other parts. Do not copy a measurement without understanding where the component belongs.
Using screws that are too long
A screw can emerge through the visible surface or split the board if it is too long. Check the combined thickness of the pieces before drilling.
Skipping dry assembly
Glue makes mistakes harder to correct. Fit the project together first.
Sanding only what is visible
Edges and corners influence how a project feels in the hand. Sand every surface that will be touched or seen.
Overloading wall-mounted projects
The strength of a shelf depends on the board, fasteners, brackets, wall material, and installation method.
Treating a small mistake as a disaster
A slightly short cut can sometimes be corrected with sanding, a redesigned edge, a shorter matching component, or a decorative trim piece. Learning how to recover is part of woodworking.
How to Get More From One Board
Efficient cutting is practical, but it also adds a quiet sense of control to the project.
Design around defects
A knot may look beautiful on a visible surface but be unsuitable for a screw location. Place defects where they will not weaken the structure.
Reserve attractive grain for visible parts
Mark the board before cutting so the most attractive sections become the front surfaces.
Standardize repeated components
If a project needs two sides or two shelves, cut them from the same setup when possible. Matching parts make assembly easier.
Separate appearance parts from structural parts
The best-looking section of the board may belong on the front of a shelf, while a less attractive portion can become a hidden support.
Save every useful offcut
A short piece can become a handle, spacer, cleat, test block, shelf lip, or mounting support.
The Questions Beginners Usually Ask Before Making the First Cut
What is the easiest one-board woodworking project?
A wall shelf, flat serving tray, candle holder, or simple mail organizer is usually the easiest. Each uses few parts and allows you to practice measuring, sanding, and drilling without complicated joinery.
Can I make these projects without power tools?
Yes. A hand saw, drill, measuring tools, clamps, and sandpaper are enough for many of the designs. Choose crosscut-only projects until you have a safe method for making narrow rip cuts.
What board size is best for beginners?
A straight 1×8 board between 6 and 8 feet long is versatile enough for shelves, trays, organizers, planters, and several small furniture projects. Measure its actual width and thickness before cutting.
Does “one board” mean I need no other materials?
Not necessarily. The main wooden components may come from one board, but most projects still require screws, glue, sandpaper, finish, brackets, hooks, dowels, hinges, or wall anchors.
How do I avoid wasting my only board?
Create the complete cut list, measure the actual board, account for saw kerf, cut the longest parts first, mark the waste side, and use an offcut as a test piece before drilling or applying finish.
What can I build with a 1×8 board?
A 1×8 board can become a wall shelf, picture ledge, serving tray, planter box, desktop organizer, birdhouse, display box, spice rack, bedside cubby, or wall organizer, depending on its length.
Is pine good for one-board projects?
Pine is an excellent beginner material because it is affordable and easy to cut. It can dent and absorb finish unevenly, so sand carefully and test the finish on scrap.
Can I use reclaimed wood?
Yes, if the board is structurally sound and free from hidden nails, screws, staples, rot, chemicals, and excessive damage. Inspect and prepare reclaimed wood carefully before cutting.
Should I use glue or screws?
Many projects benefit from both. Glue bonds the surfaces while screws provide clamping pressure and mechanical support. Predrill near edges to reduce splitting.
Which project should I build first?
Choose a serving tray if you want to practice shaping and sanding, a wall shelf if you want the simplest useful build, or a desktop organizer if you want to learn basic assembly.
Products / Tools / Resources
Measuring and layout tools
- A sturdy tape measure with clear markings
- A combination square for accurate 90-degree lines
- A straightedge for longer layout marks
- A sharp pencil or marking knife
- A notebook or printable cut-list worksheet
Cutting tools
- A basic hand saw for simple crosscuts
- A circular saw with a straight guide for longer cuts
- A jigsaw for handle openings, curves, and notches
- A table saw or professional cutting service for narrow rip strips
Drilling and assembly tools
- Cordless drill and driver
- General-purpose drill-bit set
- Countersink bit
- Clamps
- Wood glue
- Appropriately sized screws
- Small hinges, hooks, brackets, or dowels
Sanding and finishing supplies
- Coarse, medium, and fine sandpaper
- Sanding block or random-orbit sander
- Paint, stain, oil, or clear finish
- Finish-specific brushes or cloths
- A scrap piece for testing color and absorption
Safety equipment
- Safety glasses
- Hearing protection
- Suitable dust protection
- Stable sawhorses or workbench
- Clamps for securing boards
- A clean, well-lit workspace
Helpful woodworking resources
- Beginner woodworking safety checklist
- Woodworking cut-list guide
- Lumber-buying guide
- Woodworking dimensions guide
- Beginner tool guide
- Printable woodworking plans
- Free woodworking plans and The Art of Woodworking guide book