
There is a moment in almost every workshop when the room seems to hold its breath.
The board is lined up. The fence is set. Your hand is near the switch. The machine has not started yet, but the decision has already been made—or has it?
That small pause is where good woodworking safety begins.
Injury prevention is often presented as a shopping list: safety glasses, ear protection, a dust mask, perhaps a push stick tucked somewhere near the saw. Those items matter. They are not the whole story.
A safer workshop is a place where the layout, equipment, lighting, storage, workholding, maintenance, and daily habits quietly steer you away from avoidable danger.
The best safety systems are almost invisible when they work. They keep a long board from forcing you backward. They make the push stick the nearest object to your hand. They stop dust at the tool instead of after it has filled the room. They make it normal to pause when something feels wrong.
This guide explains how to prevent woodworking injuries by building those decisions into the workshop itself.
Quick Answer: How Do You Prevent Woodworking Injuries?
To prevent woodworking injuries, use layers of protection rather than relying on one piece of equipment:
- Arrange the shop so people, boards, offcuts, and cords can move without creating obstacles.
- Keep guards, fences, riving knives, spreaders, anti-kickback devices, and other safeguards installed and functional.
- Inspect every tool, blade, accessory, cord, hose, and workpiece before use.
- Match the machine, blade, bit, speed, and setup to the material and operation.
- Support and secure the workpiece with clamps, stops, jigs, push devices, or outfeed support when appropriate.
- Keep hands outside the line of cut and keep your body away from likely kickback or ejection paths.
- Use task-appropriate eye, hearing, respiratory, skin, and foot protection.
- Capture wood dust at its source and manage noise, finishes, solvents, heat, and fire hazards.
- Stop when you are rushed, distracted, fatigued, uncertain, or dealing with damaged equipment.
- Disconnect or de-energize machinery before changing, cleaning, clearing, or repairing it.
A safer woodworking shop is built through layout, machine guarding, workpiece control, maintenance, training, exposure control, PPE, and repeatable habits. Personal protective equipment is essential, but it cannot make a missing guard, unstable workpiece, damaged blade, or unsuitable setup safe.
Safety note: This article is educational information for home woodworkers and hobbyists. It is not a substitute for the owner’s manual for a particular tool, competent hands-on training, applicable workplace or electrical requirements, respiratory-protection guidance, safety data sheets, or professional medical advice. When a setup is unclear, stop and obtain qualified help before continuing.
What This Guide Covers
A woodshop does not have one single hazard. It has a chain of connected conditions:
- where people stand;
- how lumber enters and leaves the room;
- whether a machine is guarded and maintained;
- whether the workpiece is supported;
- whether the operator can see the cut;
- what dust, noise, fumes, and heat are being created;
- how fatigue affects judgment;
- what happens when something goes wrong.
The ten-step system below follows that chain from the room itself to the moment after a near miss. It also includes a 47-point checklist, a practical equipment roadmap, genuine reader questions, internal-link prompts, and publication metadata.
Step 1: Stop Treating Safety as Something Added at the End
A workshop can look impressive and still be badly designed.
A new table saw, a wall of clamps, and a bright collection of hand tools do not automatically create a safe working environment. Safety begins when you decide how a job will be done, where the material will travel, what can move unexpectedly, and how the operator will respond when the plan changes.
The Health and Safety Executive’s woodworking guidance treats workshop assessment, maintenance, safeguarding, training, wood dust, manual handling, noise, and hazardous substances as related parts of the same problem. That wider view is valuable in a home shop. It reminds us that a saw is not isolated from its surroundings.
A poorly positioned saw can make a safe cut awkward. A cluttered floor can turn an ordinary step into a stumble. A blocked dust hose can turn a controlled operation into a cloud of airborne particles. The room participates in the risk.
Ask the Right Questions Before the Machine Starts
Before buying equipment or beginning a project, ask:
- Where is the point of operation?
- Which components rotate, cut, pinch, eject, heat, or move unexpectedly?
- What might happen if the workpiece twists, binds, slips, breaks, or falls?
- Where will the operator stand during the cut?
- Where will the finished piece, scrap, and offcut go?
- What support is needed before, during, and after the operation?
- What will make you stop?
- Can the operation be simplified, moved, guarded, supported, or avoided?
These questions slow the work down by seconds and often save much more time later.
Use a Hierarchy of Controls
The safest answer is not always “wear more PPE.” A more durable approach is to control the hazard as close to its source as possible.
| Layer | Question to ask | Examples in a woodshop |
|---|---|---|
| Eliminate | Can the hazardous operation be avoided? | Redesign the cut, use a safer sequence, or outsource a difficult operation |
| Substitute | Can another material, process, or tool reduce the risk? | Select a lower-hazard finish or a tool better suited to the stock |
| Engineer | Can a physical control keep the hazard away? | Guards, fences, supports, dust collection, clamps, barriers |
| Organize | Can the workflow make a mistake less likely? | Training, checklists, maintenance, clear paths, controlled access |
| Protect | What exposure remains? | Eye, hearing, respiratory, skin, and foot protection |
This hierarchy changes the emotional experience of the shop. Instead of feeling that every cut depends on perfect concentration, you begin creating a room that helps you concentrate.
Remove Awkwardness Before It Becomes a Risk
Many injuries begin with a task that has quietly become difficult.
The board is longer than the available support. The cut is too small to hold comfortably. The machine is positioned so that your shoulder twists on the final movement. The correct accessory is in another room, and the wrong one is already installed.
Those are not minor inconveniences. They are warning signs.
Pause. Add a support. Change the sequence. Use a suitable jig. Move the operation to a better location. Ask someone to help with the material. The extra preparation may feel like lost momentum, but it restores control—the quality that matters most.
Make the Safer Action the Convenient Action
A push stick should live beside the operation, not behind three boxes. PPE should be easy to reach. Dust hoses should not need to cross a walkway. The light should reveal the floor before you carry a sheet of plywood through the door.
Good engineering controls reduce the number of decisions you have to make under pressure. The shop begins to carry some of the safety burden for you.
Give Fatigue Fewer Opportunities
Training, written procedures, inspections, and maintenance records are not bureaucratic decorations. They are memory aids for the day when your attention is thinner than usual.
A consistent pre-use check can catch what confidence overlooks. A rule that damaged equipment is removed from service prevents the familiar phrase “it will probably be fine” from becoming part of the process.
Step 2: Let the Workshop Reveal Its Weak Spots
A proper workshop audit is a slow walk with an uncomfortable question in mind:
Where could a person, board, tool, or offcut suddenly lose control?
Walk through the room before moving anything. Then walk through it again while imagining the actual project. Carry a long board in your mind. Turn with a sheet of plywood. Picture the finished piece leaving the machine. Notice the places where your body would have to twist, step around something, reach backward, or hold material in the air.
The HSE workplace-management guidance stresses that layout affects safety, that machines should allow safe movement of people and materials, that timber should be stacked safely, and that workspaces should remain free of obstacles. The same logic applies to a basement shop or a single-car garage.
Follow the Material, Not Just the Floor Plan
A plan may look sensible from above and still feel dangerous when a real board is in your hands.
Trace the route from storage to rough cutting. From rough cutting to the machine. From the machine to assembly, sanding, or finishing. Then trace the route of the offcut. If that route crosses a doorway or another operator’s space, the problem is already visible.
The safest arrangement is not automatically the one that holds the most machines. It is the one that permits steady movement and clear sightlines.
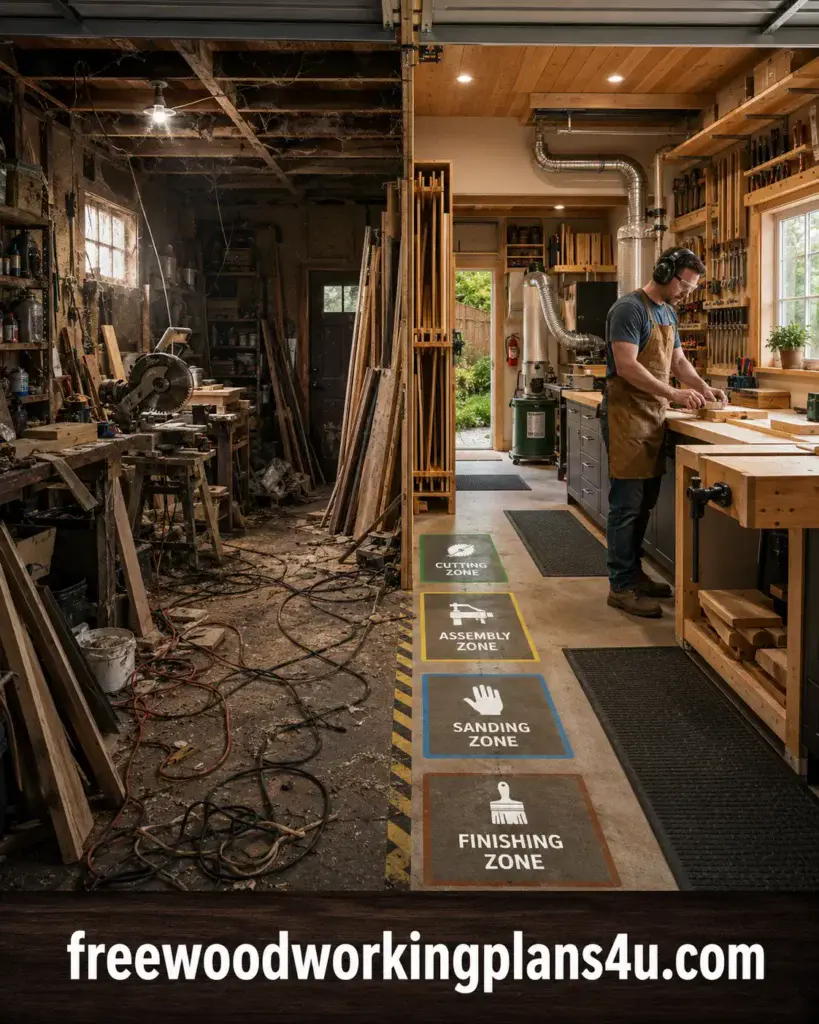
Divide the Room Into Working Zones
Even a compact shop benefits from recognizable zones:
- Storage: lumber, sheet goods, hardware, fasteners, and accessories.
- Rough cutting: breaking down long or oversized material before finer operations.
- Machine work: sawing, routing, drilling, planing, jointing, and sanding.
- Assembly: workbench, clamps, glue, layout tools, and temporary supports.
- Sanding: dust capture, good lighting, and a surface that can be cleaned.
- Finishing: ventilation, drying space, chemical storage, and ignition control.
- Clearance: the space needed for material to enter, leave, rotate, or be supported.
A small shop may need to use folding supports or moveable benches. That is fine. The zones do not need permanent walls; they need clear purpose.
Use This Layout Audit
| Area | Warning signs | Better response |
|---|---|---|
| Floors and paths | Offcuts, spills, dust, cords, slippery areas | Clean between operations and route cords away from traffic |
| Around machines | Not enough infeed, outfeed, or side clearance | Reposition equipment or add stable folding support |
| Lumber storage | Leaning boards, unstable stacks, heavy sheets stored overhead | Use racks, restraints, and a storage method suited to the material |
| Lighting | Glare, shadows, dark corners, poor view of the workpiece | Add task lighting without creating glare or electrical hazards |
| Electrical access | Damaged cords, overloaded outlets, awkward extension-cord runs | Repair or replace equipment and use an appropriate installation |
| Dust control | Leaking hoses, blocked filters, visible dust, poor capture | Improve source capture and maintain the collection system |
| Finishing area | Solvent vapor, ignition sources, piles of rags, poor ventilation | Follow labels, safety data sheets, ventilation guidance, and local fire rules |
| Emergency access | Blocked exit, hidden shutoff, buried first-aid kit | Keep emergency equipment visible and reachable |
Clean the Floor Before It Changes Your Body Position
A cluttered floor does more than create a trip hazard. It changes how you stand.
You step around an offcut. You lean farther over the bench. You carry a board with one shoulder raised to avoid a cord. Then, when the material shifts, your body is already in a poor position to respond.
Remove scraps as the project moves from one operation to the next. Avoid cleaning methods that throw dust into the air or back through the breathing zone. Use a method appropriate to the dust and equipment, following the vacuum or collector manufacturer’s instructions.
Make Emergencies Easy to Find
You should not need to search for the answer to these questions:
- How do I stop each machine?
- Where is the main power isolation, if one applies?
- Can I reach the exit without moving material?
- Where is the first-aid kit?
- Where is the fire extinguisher?
- How do I contact local emergency services?
- Which situations require a qualified technician or medical professional?
If someone else uses the room, the information should be obvious to them as well.
Recommended reading: Build a Safer Workshop: The Ultimate Beginner-to-Pro Woodworking Safety Equipment Roadmap
Step 3: Make Every Tool Pass a Readiness Test
A machine can be switched on and still not be ready.
Readiness means the tool is suitable for the operation, the accessory is correct, safeguards are in place, the workpiece is supported, the operator knows the procedure, and the surrounding space allows the material to move safely.
The HSE’s guidance on safe use of woodworking machinery emphasizes information, training, guarding, and competent operation. OSHA likewise describes machine guards, operator training, inspections, maintenance, and correct equipment as connected parts of safe woodworking.
Inspect Before You Trust
Before starting, look at:
- guards and protective covers;
- blades, bits, cutters, wheels, and abrasives;
- mounting, tension, alignment, and fasteners;
- cords, plugs, switches, batteries, and visible electrical damage;
- fences, tables, guides, miter gauges, bases, and supports;
- dust hoses, hoods, filters, and collection connections;
- emergency stops and normal shutoffs;
- unusual movement, looseness, vibration, sound, heat, or residue.
If a safety device is not functioning, do not work around it. Remove the machine from service and consult the manufacturer, a qualified repair professional, or someone with appropriate technical competence.
OSHA explains that guards should prevent contact with dangerous parts, remain secure, and protect against flying splinters and broken machine parts. Its machine-guarding guidance also warns that guards should be designed and installed by technically competent and qualified people.
Know Where the Danger Is
The point of operation is where the tool acts on the material. On one machine it is a blade; on another, a router bit, drill bit, cutter head, sanding surface, or feed mechanism.
Before beginning, locate that point physically. Then consider your hands, sleeves, hair, and body in relation to it. Finally, imagine what could happen if the stock twists or is ejected.
A good stance can reduce exposure to a likely path of movement. It cannot replace a guard or make an unsuitable operation acceptable.
Table Saw: Control the Cut and the Kickback Path
A table saw combines several hazards at once: blade contact, kickback, flying material, dust, and moving parts beneath the table.
Before a cut:
- confirm that the blade, guard, riving knife or spreader, fence, and applicable anti-kickback devices are installed correctly;
- select a blade intended for the operation and material;
- inspect the stock and provide support for the infeed, outfeed, scrap, and finished piece;
- keep hands out of the cut line;
- use a push stick, push block, or suitable device when the operation requires more distance from the blade;
- make sure the fence and support arrangement do not encourage twisting or binding;
- stand where you are not directly in the expected kickback path;
- never reach for an offcut while the blade is moving;
- wait until the blade has stopped before clearing material or changing a measurement;
- disconnect power before blade changes, cleaning beneath the table, or maintenance.
OSHA describes kickback as a blade seizing stock and throwing it toward the operator. Binding, poor blade condition, unsuitable lumber, incorrect setup, and missing safeguards can all contribute. Its kickback guidance and table-saw safety guidance provide further machine-specific information.
Recommended reading: Woodworking Without a Table Saw: 9 Better Alternatives for Every Cut, Project, and Workshop
Miter Saw: Do Not Let the Familiar Arc Lower Your Guard
A miter saw can feel controlled because the blade follows a visible path. That sense of containment is exactly what can make hand placement casual.
Keep the blade guard working as intended. Support long material so it does not pivot as the cut finishes. Clamp awkward stock when the manual calls for it. Keep hands outside the danger area. Do not remove scraps, move the workpiece, or reach beneath the blade until movement has completely stopped.
A good setup lets you see the cut without leaning over the machine or holding a long board in midair.
Circular Saw: Stable Support Comes First
A circular saw needs a stable base, a clear path, a functioning guard, the correct blade, and a cord or battery arrangement that will not pull the tool or trip the operator.
Support the work so the kerf does not close on the blade and the offcut does not fall unpredictably. Keep the cord away from the cutting path. Do not begin until the base is stable and the guard can move freely. Follow the manufacturer’s instructions for cutting depth, material, blade choice, and operation.
Router: Respect Speed and Reaction
A router’s cutter spins at high speed, and the tool can push or pull when the bit engages the wood.
Use the right bit and install it according to the manual. Secure the workpiece. Use the intended hand position for the tool. Maintain a stable stance and follow the manufacturer’s direction for the operation. Connect dust collection where compatible. Never adjust the bit while the router is connected to power.
Learn more: 10 Router Basics Every Woodworker Must Master Before Their First Project
Jointer and Planer: Feed Control Is Not Optional
Jointers and planers bring rotating cutter heads, feed movement, noise, dust, and possible ejection into the same operation.
Use guards and supports as designed. Inspect the material for defects and foreign objects. Use push blocks or other devices where the operation calls for them. Keep hands away from cutter heads and never reach into a machine to retrieve stock while parts are moving.
Drill Press and Bandsaw: Small Work Can Still Move Fast
On a drill press, secure small or irregular pieces instead of trying to hold them against a rotating bit. Remove the chuck key before starting. Keep loose clothing, hair, jewelry, and sleeves away from rotating parts.
On a bandsaw, use the blade guard and guides, maintain the machine as instructed, and keep your hands positioned so a slip does not carry them toward the blade. Do not force the stock or attempt a turn beyond the machine’s intended capability.
Sanders and Handheld Tools Deserve the Same Respect
Sanding may look gentle compared with sawing, but it produces dust, noise, vibration, and repetitive strain. Secure the work. Use suitable eye and hearing protection. Connect dust extraction when appropriate. Let the abrasive do the work instead of forcing the tool.
For drills, impact drivers, grinders, and similar handheld equipment, inspect the accessory, grip, battery or cord, switch, workpiece, and exit path. A portable tool is still a moving tool.
Step 4: Solve the Difficult Part Before the Blade Spins
The safest cut is often designed before the first piece of lumber reaches the bench.
A blueprint or cut list does more than tell you what size to make. It lets you identify long material, small parts, awkward angles, repetitive work, and operations that will demand more support or attention.
This is where how to read woodworking plans becomes part of injury prevention.
Read the Project as a Chain of Operations
Before cutting, identify:
- the longest and heaviest parts;
- the pieces that need extra support;
- small parts that may be hard to control;
- operations that bring hands close to the point of operation;
- reclaimed lumber that may contain nails or other metal;
- finished, glued, painted, treated, or engineered material;
- repetitive tasks that could create fatigue;
- the order that preserves stable reference surfaces.
The assembly may be simple while the cutting sequence is awkward. Change the sequence if doing so gives you better support or keeps your hands farther from the hazard.
Inspect the Stock With Suspicion
Look for cracks, splits, severe warping, loose material, sharp edges, embedded fasteners, and anything that might change the way the board behaves.
Reclaimed boards, MDF, plywood, painted lumber, treated material, and old furniture parts should not automatically be treated like clean, identified solid wood. If you do not know what a material contains, pause until you can identify it and choose controls appropriate to it.
Match the Machine to the Actual Job
The wrong blade or accessory can make a normal operation feel like a fight.
Match the tool and accessory to:
- material type and thickness;
- cut direction;
- manufacturer-rated capacity;
- required speed and installation;
- support available in the room;
- dust and chip-control needs.
OSHA’s kickback guidance warns that incorrect equipment and improperly fitted blades, cutter heads, or collars can create serious injury hazards.
Give the Workpiece Something Better Than Your Hand
A hand is not a workholding system.
Use clamps, stops, jigs, sacrificial surfaces, outfeed support, roller support, or another method suited to the operation. The support should be stable, should not create a pinch point, and should not interfere with the guard.
Long stock may need support at both ends. A small part may need a dedicated holding jig. A large sheet may require a second person, a panel carrier, or mechanical assistance. Choose the control that gives the operator the most predictable movement.
Map the Line of Fire
Before switching on, identify:
- the blade, bit, or cutter path;
- the direction of material travel;
- the likely path of the offcut;
- possible ejection paths;
- a clear place to step if the operation changes.
Keep your hands out of the line of cut. Do not reach over or behind moving equipment. If the stock binds, the guard shifts, or the material stops behaving as expected, stop and isolate the equipment before investigating.
Use a Five-Question Pre-Cut Gate
Ask:
- Is this the correct tool and accessory for the material?
- Are the guard, support, workholding, and dust controls ready?
- Is the workpiece stable from the first movement through the last?
- Are my hands, body, clothing, and exit path clear?
- What will I do first if the material moves unexpectedly?
If any answer is uncertain, the cut is not ready.
Recommended reading: 15 Basic Woodworking Skills for Beginners—Master These Before Your First Serious Build
Step 5: Build a PPE Habit That Matches the Hazard
PPE is important precisely because other controls cannot remove every exposure.
It is also easy to misuse. A person puts on safety glasses and feels protected from everything. A disposable mask is treated as interchangeable with a properly selected respirator. Gloves are worn automatically near every machine, even when they create an entanglement concern.
Protection must match the task.
Protect Your Eyes First
Use eye protection suited to flying chips, dust, splinters, and the operation being performed. It should fit securely, remain in good condition, and not interfere with the machine guard or other protective equipment.
If the process can throw material toward the face, determine whether additional face protection is appropriate. Use the tool manual, product instructions, and applicable requirements as the starting point.
Protect Hearing Before the Noise Feels Loud
Woodworking machines can produce damaging sound even when the operator becomes accustomed to it.
Use hearing protection appropriate to the environment and exposure. Earplugs, earmuffs, or both may be appropriate depending on the task. Maintain the ability to notice important changes in the machine and to hear emergency communication.
If you work alone, make sure hearing protection does not prevent you from hearing a timer, phone, alarm, or person who may need your attention.
Control Wood Dust at the Source
Wood dust should not be treated as harmless background scenery. OSHA associates wood-dust exposure with dermatitis, allergic respiratory effects, mucosal and nonallergic respiratory effects, and cancer. Its wood-dust guidance emphasizes controlling dust near the point where it is produced.
Respiratory protection must be selected for the actual exposure. OSHA notes that appropriate respirator selection requires knowledge of the workplace, contaminants, and concentrations, and that respirator use may require a respiratory-protection program. In a home workshop, follow the product instructions and local occupational-health guidance. Do not assume a generic face covering provides adequate respiratory protection.
Reduce airborne dust by:
- connecting source capture when compatible;
- keeping hoods close to the emission point;
- maintaining filters, hoses, ducts, and collection bins;
- repairing leaks;
- keeping dusty work away from living areas;
- adding respiratory protection when the hazard assessment calls for it.
The OSHA wood-dust solutions resource explains why engineering controls such as local exhaust ventilation are preferred and why respirators need careful selection.
Keep Clothing and Hair Out of the Machinery
Wear fitted clothing. Secure long hair. Remove rings, bracelets, necklaces, dangling cords, and any item that could catch on a rotating or moving component.
Wear footwear that supports stable footing and protects against dropped material. Loose clothing should never be allowed to enter a guard opening or catch on a handle.
Do Not Treat Gloves as Automatic Protection
Gloves may be useful for handling rough boards, some finishing work, or certain cleanup tasks. Near rotating machinery, however, a loose glove or piece of material can catch and draw the hand toward the hazard.
Follow the instructions for the specific operation. Use gloves only when they are appropriate for that task, and never let them encourage closer hand placement around moving parts.
Keep PPE Ready, Clean, and Honest
Replace scratched eye protection, damaged ear protection, contaminated filters, broken straps, and worn footwear. Store PPE where the decision happens—at the workshop entrance or beside the machine.
A useful test is simple: if you must search for it, you are more likely to start without it..
Step 6: Respect the Hazards You Cannot Always See
A sharp blade gets your attention. Fine dust does not. Neither does cumulative hearing damage, a slow buildup of solvent vapor, or a pile of contaminated rags left near a heat source.
A safer shop pays attention to quiet hazards before they become familiar.
Capture Dust Where It Is Created
Local exhaust ventilation and source capture work by removing dust near the point of emission. OSHA identifies source capture as the primary method for controlling wood dust and recommends positioning exhaust hoods as close as possible to the source. It also emphasizes regular maintenance of collection systems.
There is no single dust collector that is automatically right for every tool. A sander, router, planer, and saw may have very different collection needs. Match the system to the machine and operation.
Inspect for:
- hoses that have come loose;
- leaks at joints;
- blocked filters;
- full bags or bins;
- damaged ducts;
- hoods that have shifted away from the source;
- dust escaping from an enclosure;
- installation or grounding issues identified by the equipment instructions.
Clean the Room Without Releasing the Dust Again
Cleanup should remove dust, not simply relocate it into the air.
Avoid creating a visible cloud or blowing dust through your breathing zone. Use a vacuum or method appropriate to the dust and equipment. Pay attention to ledges, motors, lights, heaters, and other surfaces where dust can collect.
Accumulated fine combustible dust can create serious fire and explosion concerns in industrial environments. Workshop practices should follow the equipment manufacturer’s instructions and local fire guidance. OSHA provides a combustible-dust safety bulletin for background on the issue.
Listen to Changes in Sound
A machine may be loud and still sound normal. A new rattle, scrape, vibration, or change in pitch is different.
An unusual sound may indicate a loose guard, damaged bearing, dull blade, unstable stand, or another mechanical problem. Stop the tool safely, isolate it, and investigate according to the manual. Do not lean into a running machine to find the source.
Give Finishing Its Own Space
Finishes, solvents, lacquers, stains, adhesives, and coatings introduce inhalation, skin, flammability, and fire hazards. The OSHA guidance on finishing chemicals warns that many materials are extremely flammable and that ventilation matters during coating and gluing.
Read the label and safety data sheet. Provide ventilation appropriate to the product. Keep ignition sources away. Do not spray in an unsuitable enclosed room. Store products according to the manufacturer’s directions and local requirements.
Used rags can require specific storage and disposal practices. Follow the product instructions and local fire guidance instead of leaving solvent- or oil-contaminated rags in a warm pile.
Plan for Fire Without Becoming the Next Emergency
Keep the exit clear. Make the extinguisher accessible and appropriate to the hazards present. Control dust accumulation. Store flammable products properly. Manage heaters, sparks, batteries, and other ignition sources.
If a fire is growing or the situation is uncertain, leave and contact emergency services. A workshop can be rebuilt. A person cannot be replaced.
Step 7: Make the Safe Choice Automatic
Woodworkers already understand ritual.
You sharpen before a fine cut. You check a measurement twice. You dry-fit a joint before spreading glue. You sweep the bench before finishing.
Safety becomes stronger when it is given the same status—not a dramatic interruption, but part of the work.
Begin Every Session With a Reset
Before the first operation:
- Turn on the lights and look at the floor.
- Check the exit and primary walkways.
- Put on the PPE required for the first task.
- Inspect the machine, guard, accessory, support, and controls.
- Connect dust collection when appropriate.
- Remove distractions from the immediate work area.
- Decide what would make you stop.
The routine creates a boundary between ordinary life and focused work. It also gives you a chance to notice the hazard that was invisible yesterday.
Pause at the Switch
The instant before the machine starts is a useful behavioral checkpoint.
Look at the workpiece. Look at the guard. Look at your hands. Look at the path around the machine. Ask whether the setup still matches the plan.
That pause interrupts automatic behavior—the state in which a familiar cut can become more dangerous precisely because it feels routine.
Stop at the First Sign of Change
Stop if you notice:
- unexplained vibration;
- smoke, burning odor, or unusual heat;
- a new sound;
- material binding or shifting;
- a guard that does not move or return correctly;
- dust collection that has failed;
- poor visibility;
- a workpiece that is no longer supported;
- uncertainty about the next movement.
Do not reach into a problem while the equipment is connected or coasting. Follow the proper shutoff and isolation procedure, wait for moving parts to stop, and consult the manual before clearing or adjusting the machine.
Protect Your Attention
Rushing often disguises itself as commitment.
You want to finish before dinner. You have already spent three hours on the project. You are answering a message between cuts. You slept badly but promised yourself one more operation.
That is when the attention budget runs out.
Use a clear stop rule:
- tired means pause;
- distracted means pause;
- confused means pause;
- angry means pause;
- rushed means pause;
- damaged equipment means pause.
The project will still be there tomorrow.
Keep Visitors Outside the Operating Zone
Children, pets, and visitors may not understand the danger area around a machine, the time it takes for a blade to stop, or the way a sudden question can break concentration.
Set a clear access rule. People should remain outside the operating area unless they are trained, authorized, and able to follow the workshop’s safety procedures. Do not assume that shouting a warning over a running machine is enough.
Close the Room in the Same Spirit
At shutdown:
- switch off and isolate equipment as required;
- wait for moving components to stop;
- remove scraps and offcuts;
- clean using a suitable method;
- return tools and PPE to known locations;
- check for heat, sparks, leaks, and unusual smells;
- store finishes, batteries, and materials correctly;
- record repairs or maintenance needs before leaving.
A good shutdown gives the next session a safer beginning.
Step 8: Design Around the Body You Actually Have
A workshop may be technically sound and still ask too much of the person using it.
Repeated reaching, twisting, lifting, squinting, gripping, and balancing slowly erode control. By the end of a long session, the operator may be making decisions with a tired back, tense shoulders, and less precise hands.
Ergonomics is not separate from woodworking safety. It is one of the conditions that makes safe judgment possible.
Adjust the Work Surface to the Operation
The height that feels comfortable for assembly may be wrong for sanding, hand planing, carving, or detail work. Use a surface that supports a neutral posture for the task. Adjustable platforms and temporary supports can help when one bench serves several purposes.
Do not build a project around hunched shoulders, locked wrists, or long reaches if a small change in height or support can remove the strain.
Plan Heavy Material Before You Lift It
Large boards and sheet goods change balance as they move. Decide where the material will go before lifting it. Clear the route. Use a helper, cart, panel carrier, support stand, or other appropriate aid when the size or weight exceeds comfortable control.
Do not carry a large panel through a crowded room and trust yourself to improvise the final turn.
Break Up Repetitive Work
Sanding, scraping, drilling, clamping, and repetitive hand-tool operations can strain the hands, wrists, shoulders, and back.
Change position. Alternate tasks. Use a tool that reduces unnecessary force. Take a break before discomfort changes your grip or coordination.
Persistent pain, numbness, tingling, or reduced function deserves attention from a qualified healthcare professional.
Light the Work Without Creating New Problems
Good lighting should reveal the workpiece, guard, blade area, floor, and surrounding obstacles. Task lighting can help, but glare and confusing shadows can make a setup harder to read.
You should never have to lean toward the hazard simply to see the line.
Build for Ordinary Human Limits
A safety plan that works only when the operator is perfectly rested, strong, calm, and attentive is not a strong plan.
Design for the ordinary day. Leave room for fatigue. Make supports easy to reach. Keep emergency equipment visible. Place the things you need where you naturally look for them.
Step 9: Use Near Misses to Repair the System
A near miss is not merely a lucky escape. It is a warning from the workshop.
The board shifted. The clamp slipped. The support was too short. The guard was awkward to adjust. The operator was tired. The work sequence required a reach that should never have been necessary.
The useful question is not “How close was that?” It is “What changes before this operation is repeated?”
Secure the Scene Before You Investigate
If something unexpected happens:
- Stop the machine using the normal or emergency control.
- Keep hands away from moving or coasting parts.
- Wait for all movement to stop.
- Disconnect or de-energize the equipment before clearing or adjusting it.
- Keep other people away from the hazard.
- Do not restart until the cause is understood and corrected.
If someone is injured, prioritize immediate safety and seek local emergency assistance or qualified medical care when appropriate. Serious bleeding, eye injuries, loss of function, significant burns, crushing injuries, breathing difficulty, or uncertainty about the seriousness of an injury should not be handled by guesswork.
Write Down What Actually Happened
Record:
- the operation in progress;
- what changed;
- where the operator and material were positioned;
- which safeguard, support, or habit failed;
- what repair, redesign, training, or procedure will prevent a repeat.
A short record can expose patterns. If the same hose disconnects whenever the bench moves, or the same clamp slips on small parts, the problem is no longer mysterious.
Replace the Bravery Story With a Learning Story
Some workshop cultures turn close calls into anecdotes. The operator “got away with it,” which can sound like proof of competence.
A more useful identity is quieter:
“I found a weak point and strengthened it.”
That is not timidity. It is professional thinking.
Step 10: Use the 47-Point Safer-Workshop Checklist
Run this checklist before a new project, after rearranging equipment, or after a near miss. It is designed to catch the small conditions that often precede a larger problem.
Workshop Environment
- The floor is clear of offcuts, scraps, spills, and loose material.
- Main walking paths are visible and free of trip hazards.
- Cords and hoses are routed away from foot traffic.
- Lighting reveals the workpiece, machine, floor, and exits.
- The exit can be reached without moving tools or materials.
- A suitable, accessible fire extinguisher is present according to local guidance.
- First-aid supplies are easy to find and adequately stocked.
- Ventilation is appropriate for the work being performed.
- Lumber and sheet goods are stored so they cannot fall unexpectedly.
- Finishes, solvents, adhesives, batteries, and contaminated rags are managed according to labels, safety data sheets, and local fire guidance.
Machine Readiness
- The operator has read the tool’s manual and understands the intended operation.
- The operator has received suitable instruction or competent hands-on training.
- Guards and protective covers are installed and functioning.
- The blade, bit, cutter, wheel, or abrasive is correct for the operation.
- Cutting or abrasive parts are free of cracks, damage, and excessive wear.
- Fences, tables, guides, and supports are correctly adjusted.
- The emergency stop or normal shutoff is known and reachable.
- Power will be disconnected or de-energized before changes, cleaning, or maintenance.
- Dust collection or source capture is connected when appropriate.
- The machine is stable, maintained, and free of unexplained vibration or looseness.
Workpiece and Project Planning
- The material has been identified and is suitable for the operation.
- The workpiece has been checked for nails, screws, staples, or foreign objects.
- Cracks, splits, severe warping, loose knots, and other defects have been assessed.
- The cut list and operation sequence are clear.
- Long, large, heavy, or flexible stock has adequate support.
- Clamps, stops, jigs, push devices, or workholding aids are ready.
- The offcut and finished piece have somewhere safe to go.
- Hands will remain outside the line of cut and point-of-operation hazard.
- The operator’s body is positioned away from the expected kickback or ejection path.
- The first safe response to binding, vibration, or unexpected movement is understood.
PPE and Exposure Control
- Appropriate eye protection is worn and in good condition.
- Hearing protection is available and suitable for the task.
- Respiratory protection is selected and used according to the exposure and applicable guidance.
- Clothing is fitted and free of loose sleeves, dangling cords, and entanglement hazards.
- Hair is secured and jewelry is removed around rotating or moving equipment.
- Footwear provides stable footing and protection from dropped material.
- Gloves are used only when appropriate for the specific task and machine.
- Finishing PPE is selected from the product label and safety data sheet.
- Dust filters, hoses, collection bins, and extraction components are maintained.
- The cleanup method will not create an avoidable dust cloud.
Habits and Emergency Readiness
- The operator is not rushed, impaired, distracted, or dangerously fatigued.
- Visitors, children, and pets are outside the operating area.
- Only trained and authorized people are using the machine.
- The operator pauses for a final setup check before starting.
- Material and scraps are never reached for while a tool is moving or coasting.
- The machine is allowed to stop fully before material is removed or measurements are changed.
- Repairs, maintenance needs, and near misses are recorded before the next session.
A checklist cannot replace judgment. It can make good judgment easier to remember.
A Safety-Upgrade Roadmap That Follows Real Need
A safer workshop does not require buying everything at once. Prioritize the controls that remove the most recurring difficulty.
Start With Visibility and Basic Protection
Begin with suitable eye protection, hearing protection, stable footwear, fitted clothing, task lighting, a first-aid kit, and an accessible fire extinguisher appropriate to the hazards and local requirements.
Add Workholding Before Accessories That Only Add Convenience
Clamps, stable supports, outfeed support, push devices, stops, sacrificial surfaces, and suitable jigs often improve both accuracy and safety. They help the workpiece stay predictable, which reduces the temptation to hold it with your hands.
Upgrade Machine Safeguards
Verify that frequently used machines have the manufacturer’s intended guards and safety devices. Replace damaged components. Do not assume a popular modification is compatible or safe simply because it appears in a video or forum post.
When a guard, electrical component, or structural part is uncertain, obtain competent advice.
Improve Dust and Air Control
Capture dust at the source. Maintain filters, hoses, ducts, and collection bins. Keep dusty processes away from living areas. Add respiratory protection selected for the actual exposure and applicable guidance.
Rework the Layout
Move machines, add storage, improve material flow, and eliminate repeated twisting, carrying, reaching, and stepping around obstacles.
Often the most valuable safety improvement is not a new tool. It is removing the reason you keep working awkwardly.
FAQs Woodworkers Actually Ask
“What is the single most important way to prevent a woodworking injury?”
There is no single item that controls every woodworking hazard. The strongest approach combines functional guards, correct tooling, stable workholding, tool and material inspections, dust and noise control, suitable PPE, training, and the willingness to stop when something feels wrong.
Safety glasses matter. So does the floor beneath your feet.
“How should I arrange a small garage woodshop?”
Start with material flow. Identify where lumber is stored, where long stock is broken down, where machines need infeed and outfeed space, and how finished parts leave the area.
Keep exits and walkways clear. Position machines so long material does not force you into a wall, doorway, or another operating area. Use folding supports or movable benches if the room must serve several purposes. Follow the manufacturer’s clearance instructions and local requirements rather than copying a generic layout.
Recommended reading: The Complete Beginner’s Blueprint: Start a Small Woodworking Shop From Scratch (Even If You Have Limited Space and Budget)
“Is PPE enough if the machine itself is not ideal?”
No. PPE is a final layer of protection. It does not compensate for a missing guard, damaged blade, unstable workpiece, poor support, or incorrect accessory.
If the machine is not ready, the answer is to fix the condition, change the operation, or stop—not to add another layer of equipment and hope.
“Should I wear gloves around woodworking machines?”
Not automatically. Gloves can help with some handling, finishing, or cleanup tasks, but loose material near rotating parts can catch and pull the hand toward the hazard.
Use the machine manual and task-specific guidance. Wear gloves only when they are appropriate for that operation, and never allow them to encourage closer contact with moving parts.
“How can I prevent table saw kickback?”
Use the correct blade and setup. Maintain the blade. Keep the workpiece supported and aligned. Use the applicable guard, spreader or riving knife, anti-kickback devices, fence, and push equipment. Keep your body away from the expected kickback path.
If the stock binds, twists, or behaves unexpectedly, do not force it through. Stop safely, wait for the blade to stop, isolate power before investigating, and correct the cause.
“What is the best way to control wood dust in a home workshop?”
Begin with source capture. Use a collection system suited to the machine, keep hoses and filters maintained, and place the hood near the point where dust is created. Clean without sending dust back into the air. Improve ventilation where appropriate and use respiratory protection selected for the actual exposure.
The OSHA wood-dust resources explain why engineering controls such as local exhaust ventilation are preferred and why respirators must be chosen carefully.
“Are hand tools safer than power tools?”
Hand tools remove some powered-machine hazards, but they still involve sharp edges, slips, flying chips, excessive force, and repetitive strain.
A sharp, well-maintained hand tool used on a secured workpiece can provide excellent control. A dull chisel, unstable board, or hurried cut can still cause injury.
Recommended reading: 25 Woodworking Projects With Hand Tools That Build Real Skills (Beginner to Advanced)
“What should I do after a near miss?”
Stop the work. Make the area safe. Isolate the equipment before clearing or adjusting it. Identify what failed and change the setup before repeating the operation.
Write down the lesson. A near miss becomes valuable only when the workshop changes because of it.
“Is it safe to work alone in a woodshop?”
Working alone makes reliable controls and emergency planning more important. Keep communication available, make sure another person knows where you are, keep the exit clear, and avoid operations beyond your training or physical ability.
Arrange help for unusually heavy material, complex setups, or operations whose consequences would be difficult to manage alone.
“How often should woodworking tools be inspected?”
Inspect tools before each use and perform more detailed maintenance at intervals suited to the machine, frequency of use, manufacturer instructions, and shop conditions.
Inspect immediately after unusual vibration, noise, impact, overheating, or a near miss. Record defects and repairs so a known problem does not become tomorrow’s surprise.
Products / Tools / Resources
Products to Consider
- suitable impact-resistant safety glasses or other appropriate eye protection;
- hearing protection matched to the workshop environment;
- task lighting;
- dust-extraction equipment suited to the machines being used;
- replacement filters, hoses, and collection bags;
- clamps and stable workholding accessories;
- push sticks, push blocks, featherboards, and jigs appropriate to the operation;
- stable lumber and sheet-goods storage;
- a first-aid kit;
- an accessible fire extinguisher appropriate to local guidance;
- fitted work clothing and stable footwear;
- finishing-area ventilation and storage equipment suited to the products used.
Choose products because they control a specific hazard, not because they look impressive. Read the instructions and verify compatibility before installing guards, accessories, extraction equipment, or electrical components.
Tools That Improve Control
- a reliable square and accurate measuring tools;
- marking knives or pencils;
- clamps in several useful sizes;
- bench dogs or stops where suitable;
- outfeed and roller support;
- a stable workbench;
- push devices for operations that require them;
- a shop vacuum or dust collector matched to the work;
- a clearly labeled maintenance area;
- storage that keeps frequently used PPE and safety equipment within reach.
Authoritative Resources
- OSHA Woodworking eTool
- OSHA Wood Dust: Possible Solutions
- OSHA Woodworking Machine Hazards: Kickbacks
- OSHA Woodworking Table Saws
- Health and Safety Executive: Getting Started in Woodworking
- Health and Safety Executive: Workplace Management
- Health and Safety Executive: Safe Use of Woodworking Machinery
- the owner’s manual for every machine;
- the safety data sheet for every finish, adhesive, solvent, or coating;
- local fire, electrical, occupational-health, and emergency guidance.