
A workbench can be useful in one corner of the shop and in the way everywhere else. This compact design rolls where you need it, then parks against a wall when the floor needs to open up.
These free woodworking plans for a mobile workbench with storage build a bench with a double-layer plywood top, an open lower shelf, and four locking casters. The top measures 47½ × 23½ inches (about 1207 × 597 mm) and stands 34 inches (864 mm) above the floor. The plan uses four 4×4 legs, 2×4 rails, and one sheet of ¾-inch plywood. The finished height assumes casters with a 4-inch mounting height—the distance from the floor to the caster’s mounting plate.
The plan at a glance
| Feature | Dimension or specification |
|---|---|
| Workbench top | 47½ × 23½ in (1207 × 597 mm) |
| Finished height | 34 in (864 mm) |
| Top thickness | 1½ in (38 mm), two plywood layers |
| Lower shelf | 40½ × 16½ in (1029 × 419 mm) |
| Storage | Open shelf with about 17¾ in (451 mm) clearance below the top |
| Casters | Four swivel plate casters; plan assumes 4 in mounting height |
| Skill level | Beginner to intermediate; pocket-hole joinery |
Recommended guide: How to Follow Woodworking Plans Step by Step Without Wasting Lumber: 10 Accuracy Checkpoints
The open shelf keeps this build simple and leaves space for bins, tools, and shop supplies. The cut list below includes every frame piece, both top layers, and the shelf.
Start with the height and the space you have
A 34-inch work surface suits many general workshop tasks and often aligns with a table saw. But one height doesn’t fit every woodworker: hand-planing can feel better on a lower bench, while sanding or assembly may be more comfortable a little higher.
Before cutting the legs, measure from the floor to the caster mounting plate.
The leg length for this plan is:
Target bench height − caster mounting height − top thickness = leg length
For a 34-inch bench with 4-inch mounting-height casters and a 1½-inch top:
34 − 4 − 1½ = 28½-inch legs
If your casters have a different mounting height, adjust the leg length by the same amount. Casters with a 4½-inch mounting height, for example, need legs that are ½ inch shorter to keep the same finished height.
The dimensions assume North American surfaced lumber: a 2×4 measures about 1½ × 3½ inches, and a 4×4 about 3½ × 3½ inches. Metric values in the cut list are rounded. If you’re buying metric stock with different actual dimensions, adjust the frame cuts to fit it before cutting.
Recommended reading: How to Buy the Right Lumber for Any Woodworking Project: Choose the Species, Grade, Thickness, and Quantity
Gather the lumber, hardware, and tools
Materials
- Two straight, dry 4×4×8-foot posts for the legs
- Four straight 2×4×8-foot boards for the rails and braces; the cut list uses about three boards
- One sheet of ¾-inch plywood, 4×8 feet
- Four swivel plate casters with a 4-inch mounting height and locks
- 2½-inch coarse-thread pocket-hole screws
- 1¼-inch wood screws for joining the plywood top layers
- 2½-inch wood screws for attaching the top to the frame
- Wood glue
- Caster fasteners specified by the caster manufacturer
- Sandpaper and an optional workshop-suitable finish
Tools
- Pocket-hole jig and drill
- Circular saw or table saw
- Drill/driver and drill bits
- Tape measure, pencil, square, and clamps
- Eye and hearing protection
Check the caster plate dimensions before buying. The plates need to fit the bottoms of the legs, and the fasteners need to match the caster maker’s instructions. Choose casters for the complete, loaded bench rather than adding four individual ratings together: weight may not be distributed evenly, and floor conditions affect how casters carry a load.
Cut list for the mobile workbench
The upper and lower frames fit between the four legs. Each frame has two 40½-inch rails and shorter pieces that fit between them.
| Part | Material | Quantity | Cut size (inches) | Approx. metric |
|---|---|---|---|---|
| Legs | 4×4 | 4 | 28½ | 724 mm |
| Long upper and lower rails | 2×4 | 4 | 40½ | 1029 mm |
| Short upper-frame pieces | 2×4 | 4 | 13½ | 343 mm |
| Short lower-frame pieces | 2×4 | 3 | 13½ | 343 mm |
| Worktop layers | ¾-in plywood | 2 | 47½ × 23½ | 1207 × 597 mm |
| Lower shelf | ¾-in plywood | 1 | 40½ × 16½ | 1029 × 419 mm |
The four short upper-frame pieces are two end rails and two cross braces. The three short lower-frame pieces are two end rails and one center brace.
One 4×8 plywood sheet should be enough for the top and shelf. Check its actual dimensions first. For one possible layout, rip two strips 23½ inches wide. Cut both 47½-inch top layers from one strip, then cut the 40½ × 16½-inch shelf from the other.
Recommended reading: Woodworking Cut List vs Materials List: How to Reconcile Them Before You Buy Lumber
Build the workbench step by step
1. Cut, label, and drill the parts
Cut the four legs, the 40½-inch rails, and the 13½-inch rails and braces. Label each piece so the upper and lower frames don’t get mixed up.
Cut the plywood top layers and shelf. Check that the two top pieces match. Drill pocket holes at the ends of the frame rails and braces, using the jig setting for 1½-inch-thick stock.
2. Assemble the upper frame
Make a rectangle from two 40½-inch rails and two 13½-inch end rails. Fit the short end rails between the long rails. Measure diagonally from corner to corner in both directions; shift the frame until both measurements match.
Fit the remaining two short pieces between the long rails as cross braces, spaced roughly one-third and two-thirds along the frame. Attach the braces with pocket-hole screws.
3. Assemble the lower frame
Build a second rectangle from the remaining 40½-inch rails and two 13½-inch end rails. Add the last short piece as a center brace. Check the frame for square and make sure the rails and brace are level with one another; the shelf will rest on them.
4. Attach the frames to the legs
Set the legs on a flat surface, with their inside faces toward the frames. Position the upper frame between the legs, with its top edges flush with the ends of the legs. Clamp it in place and check that the legs are square to the frame.
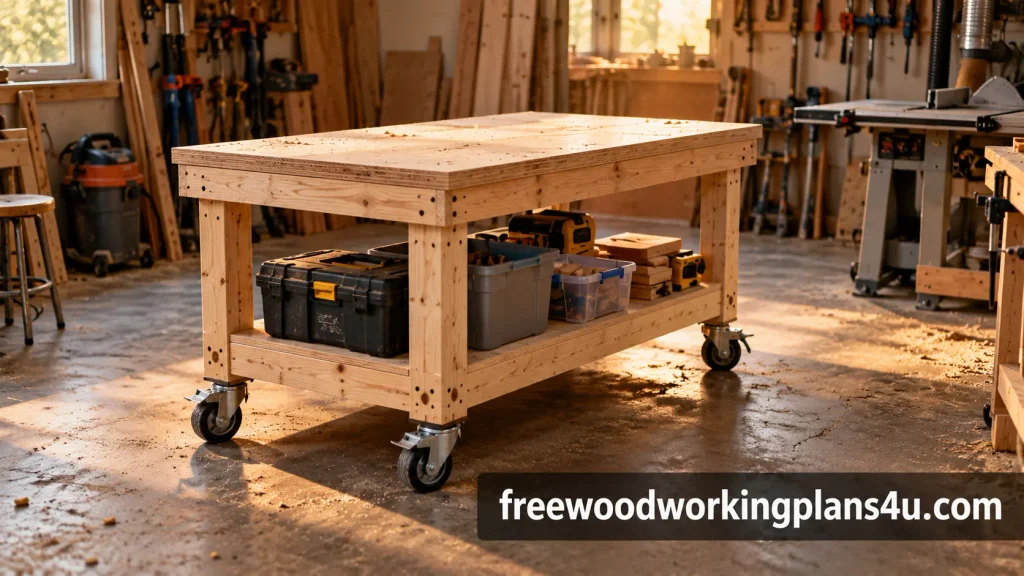
Use pocket-hole screws through the rails to secure the frame to the legs. If you built the frames separately, drill additional pocket holes where the rails meet the legs, making sure the screws enter the posts securely.
For the lower frame, measure 6½ inches up from the bottom of each leg and mark the frame’s bottom edge. Clamp the frame to those marks, check that it is level on all sides, then fasten it to the legs.
5. Fit the lower shelf
Lay the 40½ × 16½-inch shelf panel on top of the lower frame. Its edges should rest over the rails, with the center brace supporting the middle.
Fasten the shelf with 1¼-inch screws spaced along the rails and brace. The screws hold the panel in place; the frame beneath it supports the stored items.
6. Laminate and attach the top
Spread wood glue evenly over one plywood panel. Set the second panel on top, align the edges, and clamp the layers together. Drive 1¼-inch screws in a grid about 6 to 8 inches apart, keeping them clear of the edges. Countersink the heads.
When the glue has cured, place the top on the frame and align its edges with the outside faces of the legs. Secure it with 2½-inch screws through the top into the rails and posts. Countersink the screw heads so they won’t catch on workpieces.
7. Mount the casters
Turn the workbench upside down on a padded surface. Center a caster plate beneath each leg. Check that the plate fits the leg footprint and that its mounting holes are not too close to the edges.
Pre-drill the holes and attach each caster using the fasteners specified by its manufacturer. Lock all four casters before turning the bench upright.
8. Sand and test the bench
Ease the sharp plywood edges with sandpaper. Apply a suitable finish if you want one, following the finish maker’s instructions.
Test the bench on a level floor before loading it. Roll it slowly, check that each caster turns freely, and confirm that the locks hold.
Add tools and materials gradually, keeping heavier items low. This plan does not claim a tested load capacity; the safe load depends on the lumber, joints, caster selection, fasteners, and floor.
Questions that come up before the first cut
Will a 34-inch work surface feel right for me?
It’s a useful starting point for many general workshop tasks. If you can, mark the height on a wall or temporarily stack boards to test it before cutting the legs. Choose a height that feels comfortable for the work you do most.
What do I change if my casters aren’t 4 inches high?
Change the leg length using the height formula: subtract the caster mounting height and the 1½-inch top thickness from your target bench height. Keep the other frame dimensions the same.
Can I build this with metric lumber?
Yes, but measure its actual cross-section and recalculate the frame clearances. The plan assumes 2×4 stock measuring about 1½ × 3½ inches and 4×4 stock measuring about 3½ × 3½ inches.
How much weight can this workbench carry?
This guide doesn’t assign a tested load limit. Choose casters and fasteners according to their manufacturers’ capacity guidance, and test the finished bench carefully with a light load before storing heavier tools on it.
Could I add drawers later?
You can, but plan the drawer openings and slide clearances before changing the frame. Drawers take up space that the open shelf uses for bins and larger items.
Products / Tools / Resources
- Lumber: straight, dry 4×4 posts and 2×4 boards sized to the plan
- Plywood: one flat sheet of ¾-inch plywood for the two-layer top and lower shelf
- Casters: four swivel plate casters with locks and a mounting height that matches the leg calculation
- Joinery supplies: pocket-hole jig, 2½-inch coarse-thread pocket-hole screws, wood glue, and plywood screws
- Shop tools: saw, drill/driver, square, tape measure, clamps, and sandpaper