
There is a particular kind of silence in a workshop just after a cut.
The saw has stopped. The board is still warm at the edge. You turn the piece over in your hands and notice that something feels wrong—not dramatically wrong, perhaps.
A dimension is a little short. A joint sits a little too tight. The left side looks suspiciously like the right side.
This is where many woodworking projects begin to unravel.
The mistake usually did not happen at the saw. It happened several minutes earlier, when a drawing was read too quickly, a measurement was taken from the wrong edge, or a cut list was mistaken for a cutting order. Woodworking plans are maps, not magic. They still have to be translated into real lumber, real tools, and real decisions.
The process below shows how to follow woodworking plans step by step without wasting lumber. It is built around ten checkpoints—small pauses placed exactly where a mistake would otherwise become expensive.
You will see how to read the drawings, measure actual stock, account for saw kerf, test your setup, label parts, dry-fit assemblies, correct errors, and inspect the finished project.
The aim is not to make you timid. It is to make you difficult to surprise.
Quick Answer: How Do You Follow Woodworking Plans Without Wasting Lumber?
To follow woodworking plans without wasting lumber, read the entire plan before cutting, confirm every dimension and part, measure the actual stock, and create a cutting layout that allows for defects, milling, and saw kerf. Make a test cut, label each component and reference face, cut progressively, dry-fit the project, and check squareness before glue or permanent fasteners.
The ten accuracy checkpoints are:
- Validate the plan before starting.
- Measure the actual materials.
- Create a complete cutting layout.
- Make test pieces first.
- Label every part and reference face.
- Cut progressively instead of cutting everything at once.
- Dry-fit before glue or permanent fasteners.
- Verify squareness during assembly.
- Correct structural problems before finishing.
- Inspect the completed project for fit, strength, and safety.
If you remember only one rule, make it this: do not make an irreversible cut until you know what the part does, which face the dimension belongs to, and how that part affects the rest of the assembly.
The Ten Checkpoints at a Glance
| Checkpoint | The question to answer | What it protects |
|---|---|---|
| 1 | Do I understand the complete plan? | Time and unsuitable materials |
| 2 | Does my actual lumber match the assumptions? | Thickness, fit, and available stock |
| 3 | Can I get every part from the material I have? | Lumber and grain direction |
| 4 | Does my tool setup produce the result I expect? | Good boards and repeated parts |
| 5 | Can I identify every part after cutting? | Orientation and assembly accuracy |
| 6 | Is this part correct before I make another? | A whole batch of components |
| 7 | Does the project fit together dry? | Glue, fasteners, and frustration |
| 8 | Is the assembly square while it can still move? | Final geometry |
| 9 | Is the problem cosmetic or structural? | Strength and long-term reliability |
| 10 | Is the finished project safe and usable? | The completed build |
Why Woodworking Projects Waste Lumber Before the First Cut
A board can be wasted by a blade, but it can also be wasted by an assumption.
The plan may show the finished size of a shelf while your mind quietly reads it as the size of the board to buy. The drawing may show two mirrored legs, but the cut list may not explain which face should point outward. A plywood panel may be labeled as three-quarter inch even though its measured thickness is slightly different. None of these details feels catastrophic on its own. Together, they can make a project impossible to assemble.
There is another trap: treating the cut list as a script.
A cut list tells you which parts the finished project needs. It does not necessarily tell you the safest order in which to produce them. Some parts should remain oversized until a later measurement is confirmed. Some components need to be milled before final cutting. Some dimensions depend on the thickness of a panel, the actual size of a piece of hardware, or the result of a preceding subassembly.
Then there is the blade itself. Every cut removes a narrow strip of material—the saw kerf. When you are working with a generous board, kerf may disappear into the margin. When you are cutting a series of narrow parts from a tight layout, it becomes the difference between having enough stock and coming up short.
Good plan-following therefore happens in three layers:
- Interpretation: What does the plan actually show?
- Verification: Do the drawing, materials, tools, and hardware agree?
- Execution: Can I complete this step and check it before moving on?
Once you begin to see the build that way, caution stops feeling like delay. It becomes part of the craft.
Checkpoint 1: Validate the Woodworking Plan Before the First Cut
The first step in how to follow woodworking plans step by step is not cutting. It is reading the plan slowly enough that the project begins to make sense in your head.
A good plan should let you understand the finished object, identify its parts, prepare the materials, and assemble the project without inventing a critical dimension. That does not mean every free woodworking plan will be perfect. It means you should know what information is present, what information is missing, and what information still needs to be verified.
Confirm the Finished Dimensions
Write down the finished width, height, depth, and any dimensions tied to the project’s purpose.
For a bench, seat height and seat depth matter. For a cabinet, opening size, shelf spacing, door clearance, and overall depth matter. For a wall shelf, the location of the mounting hardware and the expected load may matter more than a decorative overhang.
Then ask what each number actually describes:
- Is it the finished project?
- Is it rough stock before milling?
- Is it the outside of an assembly?
- Is it the inside of an opening?
- Is it the size of one component?
- Does it include the thickness of adjoining parts?
Those distinctions are easy to skip because the numbers look familiar. They are also where many projects quietly go wrong. A shelf that fits inside a cabinet cannot be cut to the cabinet’s outside width. A leg that belongs between two rails must not be cut to the full outside height unless the plan says so.
Check Whether Every Part Appears Somewhere
Put the drawing, cut list, bill of materials, hardware list, and assembly instructions side by side. Read them as one document.
Look for:
- Parts shown in the drawing but absent from the cut list
- Cut-list parts with no obvious location in the finished assembly
- Hardware named in the instructions but missing from the materials list
- Dimensions that change from one view to another
- Joinery that is mentioned but not illustrated
- Parts whose quantity is unclear
- A final dimension that cannot be reached from the listed components
This is a particularly important check with plans that have been copied, simplified, or adapted over time. A missing decorative detail is usually manageable. A missing measurement for a load-bearing joint is not.
If something critical is unclear, mark it in pencil. Do not rely on remembering it later. A question written on the plan becomes a problem you can solve; a question left in your head tends to become a cut made in a hurry.
Match the Plan to Your Skill and Equipment
A plan may be accurate and still be the wrong project for your current setup.
Mortise-and-tenon joinery, compound angles, large glue-ups, and full-size panels each create different demands. A builder with a table saw may approach a part differently from someone working with a circular saw and a straightedge. Neither approach is automatically better. The important thing is that the method is safe and capable of producing the required result.
Ask yourself:
- Can my tools safely make the cuts shown?
- Do I understand the joinery?
- Can I support the stock through the cut?
- Do I have enough clamps for the glue-up?
- Is my work surface flat enough for the assembly?
- Will I be able to check the critical dimensions?
- Would a simpler project teach the same skill first?
Choosing a realistic starting point is not a retreat from serious woodworking. It is how you protect good material while building the judgment that more demanding projects require.
Stop-check: If you cannot explain what every major part does and where it belongs, keep reading the plan before you cut the lumber.
Recommended guide: How to Read Woodworking Plans: A Beginner’s Guide to Symbols, Cut Lists and Diagrams
Checkpoint 2: Measure the Actual Materials, Not the Label
A board’s name is not its measurement.
Lumber is commonly sold by nominal dimensions, while the surfaced board in your workshop has actual dimensions. A board described by one size may be milled to a smaller thickness and width. Plywood can also vary slightly from its advertised thickness. In a loose decorative project, that difference may be harmless. In a dado, rabbet, groove, drawer, or panel fit, it can determine whether the parts cooperate.
Record Actual Thickness, Width, and Length
Before you finalize the cut list, measure the stock you truly have. Do not measure just one point and assume the board is uniform if the fit is critical.
Record:
- Actual thickness
- Actual width
- Usable length
- Board condition
- Defects and damaged areas
- Grain direction
- Material type and grade
A simple stock record might look like this:
| Stock ID | Material | Actual thickness | Actual width | Usable length | Defects or notes |
|---|---|---|---|---|---|
| A | Pine board | Measure it | Measure it | Measure it | Knot near one end |
| B | Plywood | Measure it | Full sheet | Full sheet | Veneer direction |
This small act of measurement changes the relationship between you and the plan. You are no longer trying to force your materials to match an idea. You are building from the material that is physically on the bench.
Mark Defects Before You Plan the Cuts
Walk the boards with a pencil or piece of chalk. Circle knots, checks, splits, stains, crushed corners, excessive bowing, and areas that will disappear during squaring.
Then decide what each defect means:
- Remove it from the usable layout.
- Hide it on an interior face.
- Place it in a short noncritical part.
- Keep it because it adds character.
- Reject the board for this project.
Do not position a narrow leg, stretcher, or critical rail across a section you already distrust. A crack can grow when the board is cut. A knot can weaken a screw location. A defect that looked cosmetic in the full board can become central once the board is reduced to a small component.
Account for Milling and Squaring
If the stock needs to be jointed, planed, ripped, or squared, reserve material for that work. Removing twist and tear-out costs thickness. Squaring a damaged end costs length. Turning a rough board into reliable stock is part of the project, not an invisible step that happens for free.
This is why the shopping list and the cut list are not identical. The cut list describes the finished pieces you need. The shopping list must also account for preparation allowance, defects, saw kerf, and the occasional mistake.
Stop-check: If your actual stock cannot produce the required parts with a sensible allowance, change the material or revise the design before making a cut.
Recommended guide: How to Estimate Lumber From Woodworking Plans When There Is No Cut List: Reverse-Engineer Any Project With Confidence
Checkpoint 3: Create a Complete Cutting Layout
A cut list tells you what to make. A cutting layout tells you how to get there without sacrificing material unnecessarily.
This is where the abstract plan meets the physical board. You decide which pieces belong on which section of stock, which faces should be visible, which parts need extra length, and which offcuts are worth saving.
Separate Final Parts From Rough Blanks
Not every line on a cut list deserves an immediate final cut.
Some pieces should begin as oversized blanks because:
- The board still needs milling.
- The final length depends on another assembly.
- Several parts need to be matched.
- The part will be trimmed after a dry fit.
- A clean reference edge has not yet been established.
Mark each item as a rough blank, final dimension, matching part, dependent part, test piece, or reusable offcut. That label tells you how much certainty you need before reaching for the saw.
Cutting every line to its final number at the beginning feels efficient. It often is not. A little extra material can preserve your options; a part cut too short has already made the decision for you.
Place the Longest and Most Important Parts First
Lay out the longest components before the shorter ones. Reserve the clearest, most attractive grain for visible faces, and think about how neighboring parts will look when they meet.
For a tabletop, cabinet door, or panel, grain direction and veneer orientation deserve attention. For furniture, adjacent rails and legs may look more intentional when their grain flows in a consistent direction. For structural parts, grain direction can also influence strength and movement.
Leave enough material at board ends for safe handling and final squaring. A layout that uses every last millimeter may look efficient on paper but leave you with no room to remove a damaged end or correct a slightly wandering cut.
Allow for Saw Kerf
Saw kerf is the width of material removed by the blade. It is easy to forget because it does not appear as a line on the finished project. The board simply gets a little narrower each time the blade passes through it.
Kerf becomes especially important when you are:
- Cutting many repeated parts
- Breaking a plywood sheet into strips
- Making narrow rails or battens
- Working with a thick-kerf blade
- Using stock with almost no extra length
The kerf printed on a blade package is a useful reference, but your actual result can vary with the blade, material, feed rate, and saw setup. When the layout is tight, make a test cut and measure what the blade really removes.
Learn more: Saw Kerf Allowance in Woodworking: The Exact Formula, Examples, and Cut-List Method
Keep a Plan for Offcuts
An offcut is not automatically rubbish. A short piece can become a test block, spacer, sanding block, clamping caul, template blank, or future project component.
Write the dimensions on useful scraps before you put them away. A box of anonymous pieces becomes clutter; a small rack of labeled stock becomes a material library.
Stop-check: Trace every planned cut onto the board or sheet before making the first irreversible cut.
Checkpoint 4: Make Test Pieces Before Cutting Valuable Stock
Scrap wood is not wasted wood when it prevents a mistake in the good board. It is tuition you can afford.
A drawing can tell you where a joint belongs. It cannot tell you whether your blade is drifting, whether your fence is aligned, whether the plywood fits the groove, or whether the physical hinge you bought matches the illustration.
Test the Machine Setup
Use scrap from the same material—or something close enough to behave similarly—to test:
- Blade height and angle
- Fence or guide alignment
- Miter gauge accuracy
- Stop-block position
- Drill-bit size and depth
- Router-bit setting
- Sanding sequence
- Finish absorption
The point is not to create a beautiful test piece. The point is to expose the behavior of the setup before the setup touches the part that matters.
A loose fence, a slightly damaged blade, or a measurement taken from the wrong reference point can repeat the same error across every component. Testing one piece gives you a chance to catch the pattern while it is still a single piece.
Test the Joinery Fit
Make a sample joint whenever a project depends on a dado, rabbet, mortise, tenon, dowel, pocket hole, spline, or other precise connection.
Use the actual material and the actual tool settings. A test cut in a different thickness of wood may give you false confidence.
A joint that is too tight can split the surrounding wood or prevent the assembly from closing. A joint that is too loose may leave a visible gap and ask glue to perform a job the joint was never designed to do. Test until the fit is snug, repeatable, and appropriate for the material.
Test Hardware Placement
Hinges, drawer slides, brackets, handles, catches, and other hardware have physical dimensions that may not match a generic drawing exactly.
Use scrap or a temporary layout to confirm:
- Screw length
- Hole spacing
- Clearance
- Mounting depth
- Orientation
- Opening or closing movement
Measure the hardware in your hand. The manufacturer’s dimensions are useful, but the object in front of you is the one that must fit the project.
Stop-check: If the test piece behaves differently from the plan, adjust the tool setup or the design decision—not the good lumber.
Checkpoint 5: Label Every Part and Establish a Reference Face
A part can be perfectly cut and still be wrong when it reaches the assembly table.
This is especially common with mirrored legs, cabinet doors, drawer components, rails, and pieces that have joinery on only one face. Once several similar parts are spread across the bench, memory becomes a poor labeling system.
Use a Consistent Part-Labeling System
Give every component a short code from the plan. L1 might be the left leg, R1 the right leg, S1 the shelf, and P1 the first panel.
Write the code on painter’s tape or on a hidden surface. For repeated parts, add an orientation mark. A small triangle or cabinetmaker’s mark can show which edges belong together and which face points outward.
The mark does not need to be attractive. It needs to remain legible until the part is installed.
Mark the Reference Face and Reference Edge
Choose one reliable face and one reliable edge as your references. Mark them consistently on related components, then measure from those same surfaces whenever possible.
This is one of the quiet habits that separates a calm build from a confusing one. If you measure one part from the top face, another from the bottom face, and a third from a rough edge, each small difference can travel into the assembly.
A reference face creates a common language between the plan and the lumber. It gives every measurement a known starting point.
Mark Grain and Orientation
Use arrows, letters, or a simple triangle to identify:
- Grain direction
- The visible face
- Top and bottom
- Inside and outside
- Front and back
- Left and right
Mark before cutting, drilling, or routing. It is much easier to understand the orientation while the piece is still part of the board than after several similar rectangles are lying on the bench.
Stop-check: Before cutting or drilling, point to the drawing and identify the exact face and edge from which the dimension is taken.
Checkpoint 6: Cut Progressively Instead of Cutting Everything at Once
There is a seductive rhythm to batch cutting. Measure a line, make a cut, move to the next line. Soon the board is full of parts and the workbench looks productive.
But accuracy improves when the process includes places to stop and verify.
Cut Long to Short and Rough to Final
When practical, begin with long components and rough blanks. Preserve extra material until the critical dimensions are confirmed.
Cut final lengths only when the assembly sequence makes them certain. If a shelf’s final length depends on the actual thickness of the sides, or if a panel must fit into a frame that has not yet been dry-fitted, leave yourself room to respond.
For repeated parts, create one accurate master part first. Use that piece to verify the plan, then use a stop block, template, or carefully controlled setup to reproduce the others.
Recheck the Part After Each Major Operation
After ripping, crosscutting, milling, or cutting joinery, confirm:
- Length
- Width
- Thickness
- Squareness
- Orientation
- Grain direction
- Joint location
Do not assume that a part remains correct because its first cut was correct. A new reference edge may have been created. The board may have shifted. A second operation may have removed material from the wrong side.
A quick measurement after each major operation feels almost too simple to matter. That is why it works. The check is small enough to happen consistently.
Use Safe Cutting Habits
Wear appropriate eye and hearing protection. Keep hands away from blades. Use guards, push devices, guides, and supports as intended. Secure the work. Disconnect power before changing a blade or adjusting a machine, and follow the manufacturer’s instructions for every tool.
Safety and accuracy are not separate concerns. An unstable cut is more likely to damage the stock, and a hurried operator is more likely to overlook an error.
Stop-check: Measure the first completed part before repeating its cut on the rest of the batch.
Checkpoint 7: Dry-Fit Before Glue or Permanent Fasteners
Dry-fitting is the project’s rehearsal.
You assemble the parts without glue or permanent fastening and give the whole structure a chance to reveal what the individual measurements could not. This is where the plan, the material, the cut list, and the orientation marks either agree—or disagree in public.
Check the Main Dimensions
Measure the dry-fit assembly against the plan. Check the overall width, height, depth, opening size, overhangs, and clearances.
A component can be individually correct and still create the wrong overall dimension when the plan includes overlapping parts, recessed joints, or material thicknesses that were misunderstood.
For a cabinet, measure the opening before installing the door. For a bench, check the seat height and leg spacing before fastening the supports. For a box, check that the lid or drawer has the clearance it needs to move.
Check the Joints and Gaps
Look for:
- Gaps at shoulders or miters
- Joints that bottom out too early
- Tenons that are too long or too short
- Panels that cannot move as expected
- Fastener holes that do not align
- Parts installed backward or upside down
- Edges that should be flush but are proud or recessed
Do not force the dry fit. Pressure can damage an edge, disguise the actual problem, or make disassembly harder.
A snug joint is not the same as a joint that must be hammered into place. The material, adhesive, and design determine what “good fit” means. If you are uncertain, test the joint on scrap before altering the project part.
Check for Square
For a rectangular frame, cabinet, or box, measure both diagonals. If the diagonals are equal, the assembly is generally square; if they differ, adjust it before fastening.
Use a reliable square on accessible corners, but do not trust one corner alone. A twisted assembly can appear square at one point and still be out of alignment elsewhere.
Stop-check: If the project does not dry-fit cleanly, do not apply glue in the hope that clamps will solve it.
Checkpoint 8: Verify Squareness During Assembly
Glue-up has a clock attached to it.
Once adhesive is spread and the clamps begin to close, you have less time to think and less freedom to change the geometry. The assembly must be prepared before the glue comes out, then checked while it is still adjustable.
Prepare the Glue-Up Before Applying Glue
Do a complete dry run with the clamps, cauls, fasteners, squares, and cleanup supplies in position.
Confirm:
- The parts can be assembled in the required order.
- Every clamp reaches its intended location.
- The joints remain accessible.
- You can measure the diagonals.
- You have a way to protect finished surfaces.
- Glue squeeze-out can be cleaned without panic.
A dry run often reveals a clamp that is too short or a joint that becomes inaccessible once another part is installed. Discovering that before glue is calm. Discovering it after glue has begun to skin over is a different experience.
Use Clamps to Hold Alignment, Not to Force Bad Geometry
Clamps should maintain a correct assembly. They should not bend a badly cut part into position or close a large structural gap.
Apply pressure gradually. Alternate clamp positions when necessary. Excessive pressure can bow panels, shift joints, or squeeze too much adhesive from the joint.
If a part moves as the clamp tightens, stop and understand why. A clamp is not a substitute for a reference surface.
Measure Diagonals Before the Glue Sets
As soon as the assembly is lightly clamped, measure the diagonals again. Make small adjustments with clamp pressure or gentle movement while the adhesive remains workable.
Check more than one point. Inspect the faces for flushness, confirm that the parts have not slid, and look for gaps that only appear after pressure is applied.
This is a short window, but it is an important one. The project is still willing to change.
Allow the Assembly to Cure Properly
Follow the adhesive manufacturer’s instructions for clamp time and handling strength. A joint can look closed while remaining weak if the assembly is moved too soon.
Do not confuse “the glue has stopped feeling wet” with “the joint has reached its intended strength.” Give the assembly the time the adhesive requires.
Stop-check: Before leaving the project to cure, confirm dimensions, diagonal measurements, flushness, joint seating, and visible glue coverage.
Checkpoint 9: Correct Structural Problems Before Finishing
Sanding can soften a scratch. Finish can deepen the color of good grain. Neither one can turn a weak joint into a sound one.
Before you begin making the project beautiful, decide whether every problem is cosmetic or structural.
Separate Cosmetic Problems From Structural Problems
A light pencil mark, small surface scratch, or minor glue spot may be cosmetic. A loose joint, split rail, out-of-square cabinet, undersized support, or badly aligned fastener is structural or functional.
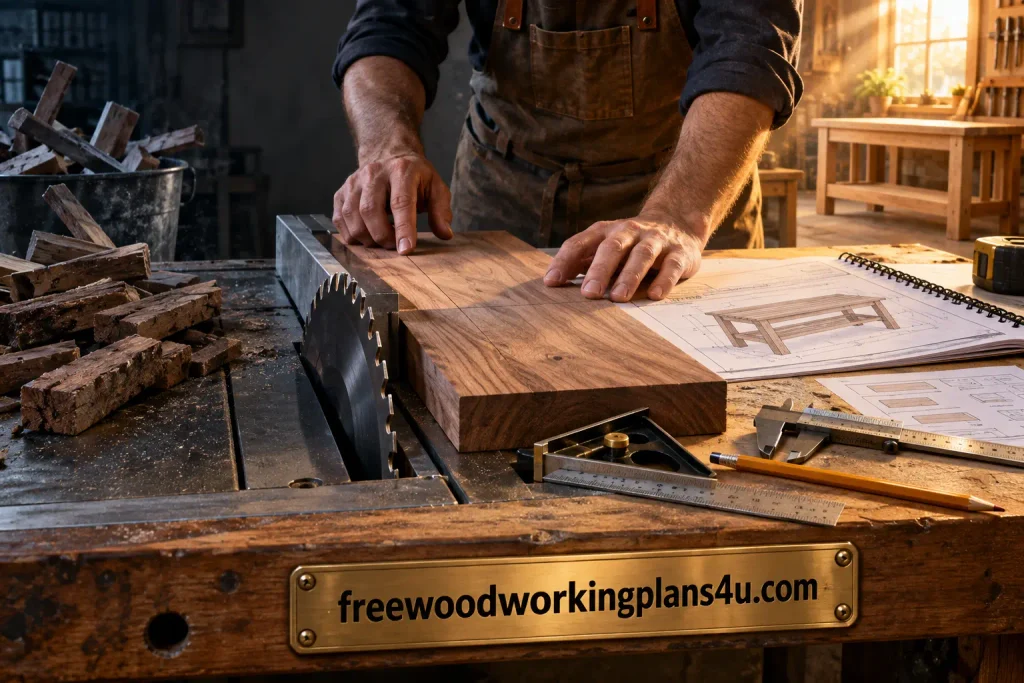
Deal with structural issues first. That may mean disassembling, recutting, reinforcing, or remaking a part. The cost of one replacement component is usually lower than the cost of finishing a project that cannot perform its intended job.
Troubleshoot by Symptom
| Symptom | Likely cause | Safer response |
|---|---|---|
| Part is too short | Wrong reference point, saw kerf, or measuring error | Recut the part or redesign the joint; do not stretch the assembly |
| Joint is too tight | Material thickness or tool setting was wrong | Remove small amounts gradually and retest |
| Joint has a large gap | Inaccurate cut, warped stock, or wrong dimension | Decide whether the gap is cosmetic or structural before filling it |
| Frame is out of square | Unequal diagonals or shifting during glue-up | Adjust before fastening or while adhesive remains workable |
| Holes do not align | Part reversed, hardware measured incorrectly, or layout error | Recheck orientation and hardware dimensions before drilling again |
| Wood split around a screw | No pilot hole, excessive screw length, or edge too close | Repair or replace the area and revise the fastening method |
The table is useful because it interrupts the emotional rush to hide the problem. It gives you a moment to name what happened before choosing a repair.
Decide Whether to Repair or Recut
A repair may be appropriate when the defect is noncritical and the correction will remain strong, stable, and visually acceptable.
Recutting is usually the better choice when the error affects:
- A structural joint
- A load-bearing component
- Visible symmetry
- A critical dimension
- Hardware function
- User safety
Ask yourself: will I trust this correction after the project has been used repeatedly?
If the answer is uncertain, remake the part. The replacement is not a confession of failure. It is the point where the project stops carrying an error forward.
Recommended reading: Woodworking Hardware Installation: The No-Guesswork Guide to Perfect Hinges, Drawer Slides, Knobs and Pulls
Stop-check: Never use filler, extra glue, or a hidden fastener to conceal a structural problem you have not understood.
Checkpoint 10: Finish and Inspect the Completed Project
The last checkpoint begins before the finish goes on.
A finished project is not merely one that looks complete. It is one that fits, moves, supports, opens, closes, stands, or hangs as intended.
Prepare the Surface Without Destroying the Design
Sand progressively and preserve important edges, shoulders, profiles, and joinery. Over-sanding can change the fit of a joint. Over-rounding a corner can alter the character of a piece or erase a clean reference edge.
Remove dust before finishing. Test stain, paint, oil, or clear coat on scrap from the same material whenever possible. Different species—and sometimes different boards from the same species—can absorb finish differently.
Look at the surface under the light in which the project will live. Raking light can reveal scratches that disappear under ordinary overhead lighting.
Install and Test the Hardware
Check that doors open, drawers move, lids clear their stops, and handles or brackets are secure. Confirm that screws are not protruding and that hardware does not interfere with moving parts.
Open and close anything that moves several times. A hinge that feels fine once may bind on the third cycle. A drawer may work empty and sag when loaded. Function deserves the same patience as appearance.
Test Strength and Stability
Place the project on a level surface. Check for rocking, twisting, loose joints, sharp edges, and unexpected movement. Apply only reasonable test pressure appropriate to the project and its intended use.
Furniture, shelves, steps, children’s items, and load-bearing structures deserve especially careful inspection. If a project will carry weight or protect someone from a fall, follow appropriate building and safety standards rather than relying on appearance alone.
Record What Changed
Keep the marked-up plan, final dimensions, material substitutions, hardware changes, and any adjustments you made.
The next time you use a similar woodworking plan, those notes will save you from solving the same problem twice. A build journal can be as simple as a few measurements written on the printed plan. It does not need to become a performance.
When the Plan and Reality Disagree
A plan can be clear and your materials can be sound, yet the two may still fail to agree.
Perhaps the plywood is thicker than expected. Maybe the actual hinge takes up more room than the drawing suggests. Perhaps a board lost more width during milling than you planned for. This is the moment when guessing becomes expensive.
Use this sequence:
- Stop cutting and identify the exact disagreement.
- Decide whether it affects appearance, fit, strength, or safety.
- Recheck the drawing, cut list, actual material, and hardware.
- Make a small test piece or full-size paper template.
- Revise dependent dimensions—not only the part that first exposed the problem.
- Write the change on the plan before continuing.
Suppose a plywood panel is thicker than the plan specifies. Widening one groove may not solve the whole problem. The thicker panel can also change the outside dimension, door clearance, shelf spacing, and hardware position.
Trace the change through the assembly. Ask what touches the altered part, what supports it, what surrounds it, and what must still move.
The most dangerous response is to correct one visible problem without following its consequences downstream.
A Practical Pre-Cut Worksheet
Before making the first cut, answer these questions on paper:
- What are the finished overall dimensions?
- Which dimensions describe final parts, and which describe rough stock?
- Have I measured the actual thickness and width of the materials?
- Which boards contain defects, and where will those defects go?
- Does every part appear in both the drawing and the cut list?
- What is the correct cutting order?
- Where must I allow for saw kerf?
- Which parts need to remain oversized until a later stage?
- Which face and edge are my references?
- Have I tested the blade, fence, joint, drill bit, or hardware?
- How will I dry-fit the assembly?
- How will I check square before the glue sets?
- Which dimensions are dependent on other components?
- What will I do if the plan and the material disagree?
If one answer is missing, that is not an invitation to improvise. It is a signal that one more small piece of preparation belongs between the plan and the saw.
Frequently Asked Questions About Following Woodworking Plans
I’m staring at the plan and don’t know where to begin. What comes first?
Read the entire plan before touching the lumber. Identify the finished dimensions, drawing views, cut list, materials, hardware, joinery, and assembly order. Then compare those requirements with the actual stock, tools, and workspace available to you.
The cut list says one thing and my board measures another. Which one should I trust?
Trust the measured material in front of you, then determine whether the plan assumes nominal or actual dimensions. Recheck the assembly and dependent parts before changing one measurement. A small change in board thickness can affect grooves, openings, outside dimensions, and hardware placement.
Do I really need to make a test cut?
A test cut is worthwhile whenever accuracy matters. It lets you check the blade, fence, miter gauge, router setting, drill bit, joint fit, or hardware placement before the good lumber is involved. One scrap piece can reveal an error that would otherwise repeat across an entire project.
How can I avoid wasting lumber on repeated parts?
Make one accurate master part first. Confirm its dimensions, orientation, grain direction, and fit. Then use a stop block, template, or controlled setup to reproduce the remaining parts. Account for saw kerf, and measure the first repeated piece before cutting the rest.
What is saw kerf, and why does it keep making my last piece too short?
Saw kerf is the width of material removed by the blade. Every cut consumes a little more stock. When several narrow parts are laid out tightly on one board or sheet, ignoring kerf can leave the last part short even though the arithmetic appears correct.
Learn more: What Is Saw Kerf in Woodworking? The Hidden Width Behind Every Cut
Why do experienced woodworkers mark a reference face?
A reference face and reference edge give measurements a consistent starting point. Without them, a builder may measure one component from one side and the next component from another, allowing small inaccuracies to accumulate through the assembly.
I cut a part too short. Can I just fill the gap?
First find out why the part is short and whether the affected area is structural, visible, or safety-related. A decorative gap may have a suitable repair, but filler is not a substitute for a load-bearing joint. Recutting or redesigning the connection is often the more trustworthy solution.
My dry fit is tight. Should I use a mallet or more clamp pressure?
Do not force the joint until you understand the fit. It may be tight because of swelling, an incorrect material thickness, a tool setting, or a dimension taken from the wrong reference. Test the joint on scrap if possible, then remove material gradually and retest.
How do I know whether my rectangular frame is square?
Measure both diagonals. Equal diagonal measurements indicate that the frame is generally square. Also inspect the corners and check for twist, because a frame can appear square in one area while remaining distorted elsewhere.
Can I change the dimensions in a woodworking plan?
You can modify a plan, but trace every change through the design. Altering length, width, thickness, material, or joinery can affect clearances, strength, symmetry, hardware placement, and wood movement. Test the change on scrap or with a full-size paper template before committing good lumber.
How do I tell whether a mistake is cosmetic or structural?
Ask whether the defect affects strength, stability, fit, movement, hardware function, or safe use. A surface mark may be cosmetic. A loose joint, split rail, out-of-square cabinet, or undersized support is more serious and should be corrected before sanding or finishing.
What should I inspect before I apply the finish?
Check the final dimensions, joint seating, squareness, flushness, hardware movement, stability, sharp edges, and structural strength. Finish can make a project look more complete, but it should not be used to hide an unresolved problem.
Final 10-Point Accuracy Checklist
Before calling the project finished, verify that you have:
- Audited the plan.
- Measured the real materials.
- Planned the cuts and allowed for kerf.
- Tested the tool setup and joinery.
- Labeled parts and reference faces.
- Checked the first part before repeating it.
- Dry-fitted the complete assembly.
- Measured diagonals and verified square.
- Corrected structural problems before sanding and finishing.
- Tested the finished project for fit, strength, stability, and safety.
Products / Tools / Resources
You do not need a workshop full of expensive machinery to follow woodworking plans accurately. A few dependable basics will do more for your results than a bench crowded with tools you rarely use.
Measuring and Layout Tools
A rigid tape measure is useful for larger dimensions, but a combination square, steel rule, marking knife, sharp pencil, and small caliper are what help those dimensions become repeatable. A combination square is particularly valuable for checking 90-degree corners, transferring short measurements, and marking across the face of a board.
For angled work, add a bevel gauge. For repeated dimensions, a story stick can be faster and less error-prone than returning to the tape measure every time.
Cutting and Setup Tools
Choose blades appropriate to the material and operation, and keep a reliable straightedge or guide available for controlled cuts. A properly supported circular saw can handle many sheet-goods tasks; a table saw, miter saw, or hand saw may be preferable for other cuts. The right choice depends on the plan, the stock, and your ability to make the cut safely.
Push sticks, featherboards, clamps, sawhorses, and work supports are not glamorous purchases, but they make accurate cutting easier and safer.
Joinery and Assembly Supplies
Keep a selection of clamps, cauls, a reliable square, drill bits, countersink bits, screwdrivers, pilot-hole tools, wood glue, and appropriate fasteners close at hand. Match the screw, dowel, hinge, bracket, or other hardware to the material and the load rather than choosing solely by appearance.
A small offcut from the project is useful here: test the joint, test the screw, and test the hardware before committing to the finished part.
Sanding and Finishing Supplies
Useful finishing supplies include several grits of sandpaper, sanding blocks, dust-control equipment, a tack cloth or clean lint-free cloth, and a finish suited to the material and intended use. Keep scrap available for finish tests. A small sample can show you how the wood will absorb stain or how many coats of protection the surface needs.
Plan and Project Resources
The most valuable resource is a woodworking plan that shows clear dimensions, multiple views, a complete cut list, materials, hardware, joinery, and assembly details. A printable pre-cut worksheet, a labeled stock record, and a simple build journal can make that plan even more useful.
If you are choosing a new project, look for beginner-friendly woodworking plans with honest tool requirements, readable drawings, realistic material lists, and enough visual guidance to let you check your work as you go.