
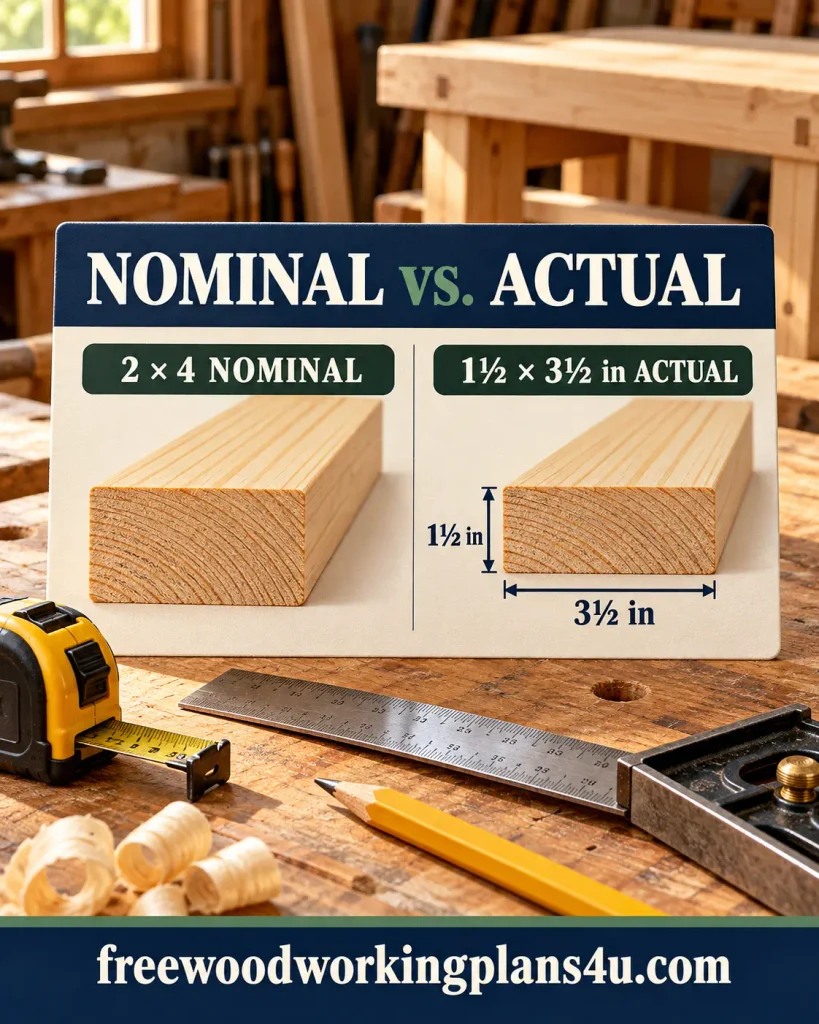
The plan says 2 × 4. The board in your hands measures 1½ × 3½ inches.
For a moment, it’s easy to think you picked up the wrong lumber. You probably didn’t. In common North American retail lumber, 2 × 4 is the board’s nominal size—the name used to identify it. The actual size is what you measure after the lumber has been dried and planed.
If the plan adds a third number, that usually gives the board’s length. Check its notes and units before cutting.
Once you know which numbers name the stock and which describe a finished piece, a woodworking plan becomes far less mysterious.
You can buy the right boards, match the cut list to the drawings, and avoid discovering a sizing problem halfway through the build.
Nominal and actual lumber sizes, in plain English
A nominal size is the familiar label—2 × 4, 1 × 6, 4 × 4. The actual size is the board’s measured thickness and width.
Lumber is dried and planed before it reaches the store. Drying reduces moisture, and planing smooths the surfaces, so the finished board is smaller than its nominal label suggests. A common retail 2 × 4, for example, measures about 1½ × 3½ inches.
Here are a few common North American surfaced softwood sizes:
| Nominal size | Approximate actual size |
|---|---|
| 1 × 2 | ¾ × 1½ in |
| 1 × 4 | ¾ × 3½ in |
| 1 × 6 | ¾ × 5½ in |
| 2 × 2 | 1½ × 1½ in |
| 2 × 4 | 1½ × 3½ in |
| 2 × 6 | 1½ × 5½ in |
| 2 × 8 | 1½ × 7¼ in |
| 4 × 4 | 3½ × 3½ in |
Treat the chart as a quick reference, not a promise about every board. Products and suppliers can vary. If a joint or fit depends on a precise measurement, check the lumber itself before you cut.
How to read a callout such as 2 × 4 × 8
In common North American softwood notation, the first two numbers identify the board’s nominal thickness and width. A third number gives its length:
- 2 × 4 names the nominal thickness and width.
- 2 × 4 × 8 ft adds an 8-foot length.
- 2 × 4 × 96 in gives the length in inches.
The plan should tell you which units it uses. Sometimes that information appears in a heading or note rather than beside every measurement. Lowe’s uses the example 2 × 4 × 96 to show thickness, width, and length in that order.
If the plan’s notation looks different, look for its key or materials notes before assuming what the numbers mean. A label can be easy to misread when you’re eager to get started—but checking it now is quicker than recutting a part later.
The important question: what does the plan mean by “2 × 4”?
A materials list, cut list, and drawing can describe the same piece in different ways.
The materials list usually tells you what stock to buy. For example:
4 — 2 × 4 × 8 ft boards
That typically means four nominal 2 × 4 boards, each 8 feet long.
The cut list tells you how many parts to make and how long to cut them. It might say:
Part A: 2 pieces, 28½ in long
Part B: 2 pieces, 36 in long
If those parts are cut from 2 × 4 stock, their cross-section will typically remain about 1½ × 3½ inches unless the instructions say to rip, plane, or otherwise resize them.
The drawings and notes help clarify what the finished pieces should be. A drawing might give an exact finished thickness or width, while the materials list uses the nominal size of the board you’ll purchase.
Plans don’t all use the same conventions. Before cutting, check these three things together:
- Materials list: What stock does the plan ask you to buy?
- Cut list: How many parts do you need, and what lengths should they be?
- Drawings and notes: Do they specify a finished thickness, width, or other fit-critical measurement?
If the numbers seem to disagree, pause and check the plan. Don’t guess your way through a dimension that affects how the parts fit.
Recommended reading: Woodworking Cut List vs Materials List: How to Reconcile Them Before You Buy Lumber
Follow one board from the shopping list to the workbench
Picture a simple bench plan that calls for 2 × 4 boards and lists lengths for the legs and rails.
The 2 × 4 tells you the nominal stock size to look for. A common surfaced retail board will measure about 1½ × 3½ inches across its face. The cut list’s measurements—perhaps 18 inches for a leg and 42 inches for a rail—tell you how long those pieces should be.
Before making the cuts, check that the plan expects the parts to keep the board’s actual cross-section. If the drawing calls for a finished part exactly 2 inches thick, a standard surfaced 2 × 4 won’t provide that thickness. Follow the plan’s material instructions instead.
That check matters most around joints. A piece can have the correct length and still fit poorly if its thickness or width is different from what the plan expects.
A quick check before you make the first cut
Keep this short list beside the plan:
- Confirm the units. Are the measurements in inches, feet, millimeters, or a combination?
- Separate stock sizes from part dimensions. Find out whether each number tells you what to buy or what size to make.
- Measure the board. Use a tape measure for length and a ruler or caliper when thickness or width needs to be precise.
- Match the cut list to the drawing. Make sure the part labels refer to the same pieces in both places.
- Allow for the saw kerf. The blade removes a small amount of wood with each cut. Include that space when planning several cuts from one board.
- Dry-fit important joints. Check the fit before glue or final assembly.
A few minutes of checking can save material and spare you an annoying surprise at the assembly stage.
Lumber-size mistakes that can throw off a project
Expecting a 2 × 4 to measure exactly 2 × 4 inches
That label usually names the board; it isn’t the board’s measured size. Use the plan’s instructions and check actual dimensions where fit matters.
Mistaking the last number for another cross-section measurement
In a callout such as 2 × 4 × 8 ft, the third number is the length. Check whether the plan gives it in feet, inches, or another unit.
Assuming every plan uses the same cut-list convention
Some plans list nominal stock sizes and cut lengths. Others specify finished dimensions. The notes, legend, and drawings should help you tell the difference.
Using a softwood chart for every kind of lumber
The chart above is for common North American surfaced softwood lumber. Hardwood is often described differently: sellers may quote thickness in quarters, sell by board foot, or specify how many surfaces have been milled. Those details affect the dimensions you receive, so check the supplier’s description and measure the board when the finished size matters.
Treating a metric label as an exact substitute
The actual size of a common 2 × 4—1½ × 3½ inches—converts to approximately 38 × 89 mm. That conversion helps with comparison, but lumber labels and standards differ between markets. Check the plan and the board available from your supplier rather than relying on the conversion alone.
“Wait—does my plan mean the size I buy or the size I cut?”
Does a 2 × 4 actually measure 2 × 4 inches?
Usually not when it’s common surfaced North American retail softwood lumber. A nominal 2 × 4 typically measures about 1½ × 3½ inches. Measure your board if the project depends on its exact size.
What does 2 × 4 × 8 mean on a woodworking plan?
It usually means nominal thickness × nominal width × length. Check the plan’s notes to see whether the length is in feet or another unit. The first two numbers describe the nominal size, not the board’s exact measured cross-section.
Should I use the nominal size or the actual size when I build?
Use the plan’s notes to see what each measurement describes. Nominal size often tells you what stock to buy. A finished or actual dimension tells you the measured size a part should be. If the fit matters, measure your lumber before cutting.
Are nominal and actual sizes always different?
No. Many common surfaced softwood boards have different nominal and actual dimensions, but products and conventions vary. Rough-sawn lumber, hardwood, sheet goods, and lumber sold in other markets may be described differently. Check the product details and the plan.
What if the lumber sizes in my plan don’t seem to match?
Compare the materials list, cut list, drawings, and any sizing notes. If they still conflict, ask the plan’s author or supplier before cutting. It’s much easier to confirm one measurement now than to rebuild a part later.
Recommended reading: How to Estimate Lumber From Woodworking Plans When There Is No Cut List: Reverse-Engineer Any Project With Confidence
Products / Tools / Resources
A few basic tools make plan-reading easier:
- Tape measure: Check board lengths and mark cut lines.
- Steel ruler or combination square: Check short measurements and keep marks square.
- Digital caliper: Useful when a joint depends on a close thickness or width.
- Pencil and cut-list notes: Mark the part name, quantity, and cut length as you work through the plan.
- Calculator: Add up cut lengths and allow for blade kerf when laying out several pieces on one board.
- Lumber-size chart: Keep a printed or saved copy of the common nominal and actual dimensions nearby.