
A complete woodworking guide to building functional birdhouses that attract real backyard birds—not just compliments from the neighbors.
Table of Contents
- Introduction: Why Most DIY Birdhouses Never Get Used (You’re Here)
- Birdhouse Design Fundamentals: What Backyard Birds Really Need
- Tools, Lumber & Materials: Building for Decades, Not Seasons
- Birdhouse Plans #1–#7: Beginner-Friendly Projects
- Birdhouse Plans #8–#13: Intermediate Projects
- Birdhouse Plans #14–#19: Advanced Projects
- Birdhouse Plans #20–#25: Specialty Birdhouses
- Birdhouse Dimensions by Bird Species
- Installing Your Birdhouse for Maximum Nesting Success
- Maintenance, Cleaning & Long-Term Care
- Expert Tips, Common Mistakes & Reader FAQs
- Products / Tools / Resources
Part 1: Why Most DIY Birdhouses Never Get Used
Walk through any garden center on a Saturday afternoon and you’ll see rows of colorful birdhouses hanging from display racks. Tiny cottages. Rustic cabins. Mini barns with painted shutters. Some are beautifully crafted, others are little more than decorative ornaments.
Most of them have one thing in common.
Very few will ever become a home.
That realization surprises many first-time woodworkers. After all, if a birdhouse looks inviting to us, shouldn’t it be inviting to birds?
Nature doesn’t work that way.
A nesting bird isn’t looking for charming details or decorative trim. It isn’t impressed by bright paint, tiny front porches, or intricate carvings. Every decision it makes is guided by one instinct above all others: survival.
A successful nest box protects eggs from predators. It stays cool during hot afternoons, sheds rain during storms, and remains sturdy through changing seasons. Every opening, measurement, and material plays a role in helping birds raise the next generation safely.
That’s exactly what this guide is about.
Rather than showing you how to build decorative birdhouses that spend their lives hanging empty in the garden, you’ll learn how to build nesting boxes based on proven woodworking principles and practical bird biology.
By the end of this guide, you’ll understand not only how to build birdhouses—but why certain designs consistently succeed while others quietly fail.
This Isn’t Just Another DIY Project
Most woodworking projects end when the final coat of finish dries.
Birdhouses are different.
The real reward comes weeks—or even months—later.
One spring morning you glance out the kitchen window and notice a small bird perched at the entrance you’ve carefully measured and drilled. A few days later, it returns carrying nesting material. Before long, the quiet little box you built in your workshop becomes the center of an entirely new story.
That moment is difficult to describe until you’ve experienced it.
Your woodworking project has become part of the landscape.
More importantly, it’s become someone’s home.
Why Birdhouses Matter More Than Ever
Across many communities, older trees with natural nesting cavities are becoming less common. Dead limbs are removed for safety, aging trees are replaced, and new developments often lack the mature habitats many cavity-nesting birds once depended on.
A thoughtfully built birdhouse doesn’t replace nature.
It helps fill a gap.
When designed correctly and installed in suitable habitat, a nest box can provide a safe alternative where natural cavities are limited. For homeowners, gardeners, woodworkers, and bird enthusiasts, it’s one of the simplest ways to support local wildlife while enjoying a meaningful outdoor project.
What You’ll Learn Throughout This Guide
This guide is designed to take you from your first cuts in the workshop to confidently building birdhouses tailored to different backyard bird species.
Along the way, you’ll learn:
- How birds evaluate potential nesting sites
- The essential features every functional birdhouse should include
- Which lumber stands up best to years of outdoor weather
- The tools that make birdhouse building easier and more accurate
- Step-by-step plans for 25 proven birdhouse designs
- How to install birdhouses where birds are most likely to use them
- Practical maintenance routines that extend the life of every project
- Common mistakes that keep birdhouses empty
Whether you’ve never picked up a drill before or you’ve spent decades in a woodworking shop, each chapter builds naturally on the one before it.
The Biggest Myth About Birdhouses
Ask ten people what makes a good birdhouse and you’ll probably hear the same answer.
“It should look nice.”
It’s understandable. Humans naturally judge objects by appearance.
Birds don’t.
A nesting bird doesn’t care whether the roof has decorative shingles or whether the front panel features hand-painted flowers.
Instead, it notices things most people never think about:
- Is the entrance the right size?
- Does the cavity feel secure?
- Will rain stay outside?
- Can predators reach the nest?
- Is there enough ventilation on a warm afternoon?
- Does the location feel safe?
Those quiet details determine whether a birdhouse becomes occupied—or ignored.
Ironically, the simplest birdhouses often perform the best because they focus on function rather than decoration.
Why So Many DIY Birdhouses Stay Empty
If you’ve ever built a birdhouse that never attracted a single visitor, don’t assume the birds rejected your woodworking skills.
More often than not, one or two small design decisions made all the difference.
The Entrance Hole Was Too Large
The entrance controls who can—and can’t—use the birdhouse.
An oversized opening may invite larger, more aggressive birds or increase the risk of predators reaching inside.
A properly sized entrance helps create a safer nesting environment for the intended species.
The Design Prioritized Decoration
Decorative windows.
Tiny balconies.
Oversized porches.
While these additions can make a birdhouse charming to people, they rarely improve its usefulness for birds and may even reduce its effectiveness.
The most successful birdhouses usually have surprisingly clean, uncomplicated designs.
There Wasn’t Enough Ventilation
Summer temperatures inside a small wooden box can rise quickly.
Without airflow, excessive heat and humidity may create uncomfortable conditions for eggs and nestlings.
Simple ventilation gaps placed beneath the roofline help warm air escape naturally.
Drainage Was Overlooked
Rain has a way of finding even the smallest opening.
Without drainage holes, moisture can collect inside the birdhouse, shortening the life of the wood and creating poor nesting conditions.
Good drainage is almost invisible—but incredibly important.
The Wrong Materials Were Used
Not every board belongs outdoors.
Materials designed primarily for indoor projects often deteriorate quickly when exposed to changing weather.
Naturally durable woods such as cedar and cypress have earned their reputation because they withstand moisture, resist decay, and require relatively little maintenance.
What Birds Actually Want
Strip away every unnecessary decoration and nearly every successful birdhouse comes back to the same handful of essentials.
A nesting box should provide:
- A properly sized entrance for the target species
- Adequate interior space
- Protection from rain
- Ventilation near the roof
- Drainage through the floor
- Easy access for annual cleaning
- Durable construction that withstands changing seasons
Everything else is optional.
That’s encouraging news for new woodworkers because it means you don’t need elaborate joinery or expensive equipment to build a birdhouse birds will actually use.
Careful planning matters far more than complexity.
Who This Guide Is Written For
This guide is for anyone who enjoys creating something useful with their hands.
Maybe you’re setting up your very first workshop.
Perhaps you’ve been woodworking for years and want a rewarding weekend project.
You might simply enjoy watching birds visit your backyard and want to offer them a safe place to nest.
Whatever brought you here, you’ll find projects suited to different skill levels, budgets, and workshop setups.
Some birdhouses can be completed in an afternoon with basic tools.
Others introduce more advanced woodworking techniques that challenge even experienced builders.
The common thread is simple: every project puts the needs of birds first.
Before You Build Your First Birdhouse
Resist the temptation to head straight to the workshop.
The most successful birdhouses begin with understanding rather than cutting.
Knowing why one entrance hole works better than another—or why roof overhang matters more than decorative trim—will improve every project you build from this point forward.
That knowledge doesn’t just help you build better birdhouses.
It makes you a better woodworker.
Because once you understand the purpose behind every measurement, you’re no longer following plans.
You’re making informed decisions.
And that’s where real craftsmanship begins.
Next Up
In Part 2: Birdhouse Design Fundamentals, we’ll look inside a truly successful birdhouse. You’ll learn why dimensions matter, how cavity-nesting birds choose a home, and the design principles that separate functional nest boxes from decorative garden ornaments.
Part 2: Birdhouse Design Fundamentals: What Backyard Birds Really Need
A birdhouse can be beautifully built, perfectly sanded, and finished with meticulous care—and still remain empty for years. The difference isn’t usually craftsmanship. It’s design. Birds don’t judge a birdhouse the way we do. They evaluate it through instinct, shaped by thousands of generations of survival.
Think like a bird, and you’ll build better birdhouses.
In This Chapter
- Why birds reject some birdhouses immediately
- The science behind cavity-nesting birds
- The anatomy of a successful birdhouse
- The five principles of bird-friendly design
- Entrance hole sizing
- Interior dimensions
- Ventilation and drainage
- Roof design
- Predator-resistant features
- Design mistakes to avoid
The Birdhouse Test You Never See
Long before a bird carries the first blade of grass into your birdhouse, something remarkable happens.
It watches.
Sometimes from a nearby branch.
Sometimes while flying past.
Sometimes over several days.
To us, the birdhouse is simply another object in the yard. To a nesting bird, it’s a potential nursery—a place where eggs will be laid, chicks will hatch, and every decision could determine whether they survive.
That instinct changes everything.
Birds aren’t searching for the prettiest birdhouse.
They’re searching for the safest one.
Every feature you build either strengthens that feeling of safety or quietly works against it.
Understanding Cavity-Nesting Birds
One of the biggest misconceptions among beginners is believing that every backyard bird will happily move into a birdhouse.
In reality, only certain species naturally nest inside enclosed spaces.
These birds are known as cavity nesters.
In the wild, they typically choose places such as:
- Natural tree cavities
- Abandoned woodpecker holes
- Hollow limbs
- Decayed trunks
- Occasionally, suitable man-made nest boxes
As mature trees become less common in many neighborhoods, thoughtfully designed birdhouses can help provide additional nesting opportunities.
Common backyard cavity nesters include:
- House wrens
- Chickadees
- Nuthatches
- Tufted titmice
- Eastern bluebirds
- Tree swallows
- Screech owls
- Wood ducks (in appropriate habitat)
Each species has evolved with slightly different nesting preferences, which is why “one-size-fits-all” birdhouses rarely deliver consistent results.
Birds Notice the Details You Don’t
Imagine walking into a hotel room.
Before unpacking your bags, you notice the lighting, temperature, cleanliness, noise, and overall comfort.
Birds perform a surprisingly similar evaluation.
Although they don’t think in words, instinct drives them to assess critical features almost immediately.
Questions their behavior effectively answers include:
- Is this cavity large enough?
- Can predators reach inside?
- Will rain stay out?
- Is there enough ventilation?
- Can my young leave safely when they’re ready?
Your job as the builder is to answer “yes” before the bird ever arrives.
The Anatomy of a Functional Birdhouse
Every successful birdhouse is built around a handful of essential components.
Each one serves a purpose.
Remove one, and the entire design becomes less effective.
The Roof
A roof does much more than keep rain out.
It creates shade.
It reduces heat.
It protects the entrance from direct weather.
A properly designed roof should extend beyond the walls on every side, especially above the entrance hole.
That extra overhang may seem like a small detail in the workshop.
Outside, it becomes one of the birdhouse’s most valuable features.
The Entrance Hole
The entrance isn’t simply an opening.
It’s a security system.
Its diameter determines:
- Which birds can enter
- Which competitors are discouraged
- How exposed the nest remains
- How secure the nesting chamber feels
A difference of only a fraction of an inch can completely change which species chooses your birdhouse.
That’s why you’ll notice species-specific measurements throughout this guide.
They’re based on practical field experience—not decoration.
The Nesting Chamber
Inside the birdhouse, simplicity wins.
Birds don’t need shelves.
They don’t need paint.
They certainly don’t need miniature furniture.
They need an unobstructed cavity with enough space to build a nest while still feeling protected.
A chamber that’s too large can actually make birds feel less secure.
Nature tends to favor efficient spaces rather than oversized ones.
The Floor
The floor quietly performs one of the most overlooked jobs in the entire structure.
It supports the nest while allowing moisture to escape.
Small drainage holes prevent water from pooling inside after storms or periods of heavy humidity.
Without them, even the strongest birdhouse can begin to deteriorate from the inside out.
The Side Panels
Strong walls help regulate temperature while resisting years of seasonal movement.
Many experienced builders also incorporate a removable side panel or hinged access door.
You’ll appreciate this feature long after construction is complete.
Annual maintenance becomes dramatically easier when the birdhouse was designed with cleaning in mind.
Five Principles Every Bird-Friendly Birdhouse Should Follow
Once you’ve studied enough successful nest boxes, a pattern begins to emerge.
No matter the style or species, nearly all effective birdhouses share these five characteristics.
1. Build for One Bird Species
Trying to attract every bird often results in attracting none.
Choose one species.
Build specifically for it.
That single decision influences nearly every measurement that follows.
2. Keep the Interior Simple
Birds evolved to nest inside natural tree cavities.
Those spaces are remarkably uncomplicated.
The best birdhouses reflect that same simplicity.
Leave the interior unfinished and free from unnecessary additions.
3. Let Air Move Naturally
A birdhouse isn’t airtight—and it shouldn’t be.
Warm air rises.
Ventilation openings placed near the roofline allow heat to escape without exposing the nest to rain.
Good airflow makes the nesting chamber more comfortable throughout changing weather.
4. Water Should Always Have a Way Out
No roof is perfect.
Eventually, some moisture will find its way inside.
Drainage holes in the floor ensure that water doesn’t stay there.
This tiny detail protects both the birds and the wood you’ve worked so hard to shape.
5. Make Maintenance Part of the Design
Imagine trying to clean a birdhouse that never opens.
It isn’t impossible.
It’s simply frustrating.
Adding a hinged roof or removable panel during construction saves countless headaches later.
Good woodworking anticipates future maintenance before the first screw is driven.
Bigger Isn’t Better
Many first-time builders instinctively increase the size of a birdhouse.
After all, more room must be more comfortable…
Right?
Not necessarily.
Birds evolved around naturally sized cavities.
Oversized nesting chambers may feel exposed rather than secure.
Matching dimensions to the intended species usually produces better results than simply making everything larger.
The goal isn’t maximum space.
It’s appropriate space.
Roof Design: The Unsung Hero
Spend enough time examining successful birdhouses and you’ll notice one common feature.
Generous roofs.
A roof should extend beyond:
- The front
- Both sides
- The rear
Those extra inches perform several important jobs:
- They shed rain away from the walls.
- They reduce direct sunlight entering the cavity.
- They help the birdhouse weather more gracefully over time.
Few design elements work harder while asking for so little attention.
Why Ventilation Matters More Than You Think
Picture a parked car on a sunny afternoon.
Now imagine a small wooden box sitting in full sun.
Without airflow, temperatures can climb surprisingly quickly.
Ventilation openings positioned beneath the roof allow warm air to escape naturally.
The result is a more stable environment for eggs and nestlings throughout the nesting season.
Drainage: The Feature Nobody Notices Until It’s Missing
Rainwater isn’t the only source of moisture.
Morning dew.
Humidity.
Condensation.
Even nesting material itself can retain moisture.
A few carefully drilled drainage holes solve a surprisingly large problem.
Simple.
Invisible.
Essential.
Designing with Predators in Mind
A birdhouse attracts more than birds.
Raccoons, squirrels, snakes, and other wildlife are constantly searching for food.
Good design can’t eliminate every risk, but it can make access more difficult.
Helpful design choices include:
- Appropriate cavity depth
- Correct entrance size
- Strong construction
- Secure mounting
- Avoiding decorative exterior perches
Every small improvement adds another layer of protection.
Functional Birdhouses Can Still Be Beautiful
One of the most encouraging lessons for woodworkers is this:
You don’t have to choose between beauty and function.
A birdhouse can feature:
- Clean proportions
- Beautiful cedar grain
- Crisp joinery
- Elegant rooflines
- Thoughtful craftsmanship
without sacrificing the needs of nesting birds.
In fact, restrained design often ages more gracefully than heavily decorated alternatives.
Timeless woodworking rarely needs excessive ornamentation.
Design Mistakes Worth Avoiding
Before moving into the workshop, watch for these common problems:
- Oversized entrance holes
- Decorative perches
- Thin roofing material
- No roof overhang
- Missing ventilation
- Missing drainage
- Difficult cleaning access
- Weak joinery
- Poor-quality outdoor materials
Each one seems minor in isolation.
Together, they can make the difference between a birdhouse that’s occupied every spring and one that remains untouched.
Before You Build
Ask yourself a few simple questions.
Am I building for a specific bird?
Have I chosen the right dimensions?
Will rain stay outside?
Can warm air escape?
Can I clean this birdhouse easily next year?
If the answer to each is yes, you’re already thinking like an experienced birdhouse builder.
And that’s exactly where successful projects begin.
Continue Reading
In Part 3: Tools, Lumber & Materials, we’ll move from design theory into the workshop. You’ll learn why cedar has become the gold standard for birdhouse construction, which tools genuinely make the job easier, and how choosing the right materials at the beginning can add years to the life of every birdhouse you build.
Part 3: Tools, Lumber & Materials: Building for Decades, Not Seasons
Every memorable woodworking project begins long before the first cut. It starts with the quiet decisions most people never see—the board you choose from the lumber rack, the screw you reach for without thinking, the extra minute spent checking a measurement instead of hoping it’s close enough. Those decisions don’t just shape the birdhouse. They determine how it performs through years of changing seasons.
A birdhouse isn’t built for today. It’s built for every spring that follows.
In This Chapter
- Choosing the best wood for outdoor birdhouses
- Essential woodworking tools
- Measuring and layout equipment
- Cutting and drilling tools
- Hardware that stands up to the weather
- Wood glue and finishes
- Workshop safety
- Material planning
- Budget-friendly buying tips
- Complete project checklist
The Foundation of Every Great Birdhouse
Walk through a lumberyard and it’s easy to become distracted by beautiful grain patterns or perfectly straight boards.
Experienced woodworkers notice something else first.
They ask a different question.
How will this piece of wood look after five summers?
Because that’s the real test.
Birdhouses spend their lives outdoors. They bake under the summer sun, sit through heavy rain, endure freezing winters, and expand and contract with every change in humidity.
A board that looks perfect today has to keep doing its job years from now.
That’s why choosing materials isn’t simply the first step of the project.
It’s one of the most important.
The Best Wood for Birdhouses
If you ask ten experienced birdhouse builders what wood they reach for most often, you’ll hear one answer again and again.
Cedar.
There’s a reason it has earned that reputation.
It naturally resists decay, handles moisture exceptionally well, remains relatively lightweight, and is pleasant to work with in almost every workshop.
Unlike some materials that demand constant maintenance, cedar ages gracefully. Over time, it develops a soft silver-gray patina that many woodworkers appreciate just as much as its fresh color.
If you’re looking for one material that consistently performs well outdoors, cedar is difficult to beat.
Cedar
Why Woodworkers Love It
- Naturally resistant to decay
- Excellent weather resistance
- Stable in changing seasons
- Lightweight and easy to handle
- Minimal maintenance
- Pleasant aroma while cutting and sanding
Best For
- Permanent backyard birdhouses
- Beginner projects
- Advanced woodworking builds
- Long-term outdoor use
Cypress
If cedar isn’t readily available in your area, cypress deserves serious consideration.
It shares many of cedar’s strengths, including excellent resistance to moisture and insects, while remaining easy to machine with standard woodworking tools.
Many professional builders consider the two woods interchangeable for outdoor nesting boxes.
Redwood
Redwood combines durability with beautiful color and grain.
Its natural resistance to decay makes it an excellent choice for premium birdhouses, although it can be more expensive and less widely available than cedar.
If appearance matters as much as longevity, redwood offers an appealing balance of both.
Pine
Pine often becomes a beginner’s first woodworking material—and for good reason.
It’s affordable.
It’s widely available.
It’s easy to cut, drill, and sand.
Although pine isn’t naturally as weather resistant as cedar or cypress, a well-built pine birdhouse can still provide years of service when maintained regularly.
For many woodworkers, pine offers an accessible way to begin learning without making a large investment in materials.
Exterior-Grade Plywood
Exterior-grade plywood has its place in certain birdhouse designs, particularly where large roof panels or stable sheet goods are helpful.
If you choose plywood:
- Protect exposed edges where practical.
- Select exterior-rated products.
- Avoid lower-quality sheets that may separate after prolonged moisture exposure.
Woods Best Left in the Workshop
Not every woodworking material belongs outdoors.
Some products simply aren’t designed for long-term exposure to weather.
Avoid using:
- MDF
- Particleboard
- Interior-grade plywood
- Severely cracked or rotting lumber
These materials tend to absorb moisture, weaken over time, or deteriorate far more quickly than naturally durable woods.
A little extra care at the lumber rack saves a lot of disappointment later.
Choosing the Right Thickness
A birdhouse isn’t just a box.
Its walls help insulate the nesting chamber from heat and cold.
For most projects in this guide, lumber around ¾ inch (19 mm) thick provides an excellent balance between strength, insulation, and ease of construction.
Thicker material generally creates a sturdier birdhouse that withstands years of outdoor exposure without feeling unnecessarily heavy.
The Essential Tool Kit
One of the most encouraging things about birdhouse woodworking is that it doesn’t demand a professional cabinet shop.
Many outstanding birdhouses are built with a modest collection of reliable tools.
Skill matters far more than owning every machine available.
Measuring Tools: Where Accuracy Begins
Every successful build starts with careful layout.
The more accurately you measure, the easier every step that follows becomes.
A dependable measuring kit includes:
- Tape measure
- Combination square
- Speed square
- Steel ruler
- Carpenter’s pencil
- Marking knife (optional)
Experienced woodworkers often say they spend more time measuring than cutting.
There’s wisdom in that.
Cutting Tools
The “best” saw depends less on popularity than on the projects you enjoy building and the space you have available.
Table Saw
Perfect for:
- Straight rip cuts
- Repeatable dimensions
- Batch production
Ideal if you expect to build multiple birdhouses over time.
Miter Saw
Excellent for:
- Crosscuts
- Accurate length cuts
- Fast stock preparation
Many builders consider it one of the most useful tools in a small woodworking shop.
Circular Saw
A practical solution for:
- Small workshops
- Portable workspaces
- Breaking down long boards
With a quality guide, it can produce remarkably accurate results.
Jigsaw
Useful whenever a project calls for:
- Curved rooflines
- Decorative profiles
- Rounded corners
- Custom exterior shapes
A little creativity goes a long way here.
Hand Saw
Never underestimate traditional hand tools.
A sharp hand saw rewards patience with quiet, precise cuts and offers complete freedom from extension cords and batteries.
Drilling Tools
Every birdhouse requires several carefully placed holes.
Some are obvious.
Others are easy to overlook.
You’ll commonly drill:
- Entrance holes
- Drainage holes
- Ventilation openings
- Pilot holes
- Mounting holes
Each serves a different purpose, but together they transform a simple wooden box into a functional nesting space.
Cordless Drill
If you could own only one power tool for birdhouse building, a reliable cordless drill would be difficult to replace.
It handles drilling, driving screws, and much of the assembly process with ease.
Hole Saws and Forstner Bits
The entrance hole deserves special attention.
A clean, accurately sized opening improves both appearance and function.
Forstner bits are especially valued for producing smooth, crisp holes with minimal tear-out.
Sanding Tools
Good sanding isn’t about making every surface perfectly smooth.
It’s about removing sharp edges, splinters, and rough spots while preserving the character of the wood.
Useful sanding tools include:
- Random orbital sander
- Sanding block
- Detail sander
- Sandpaper in several grits
One important exception:
Leave the inside of the nesting chamber only lightly sanded. A slight natural texture can help young birds grip the walls as they prepare to leave the nest.
Clamps: Your Most Reliable Assistant
Ask experienced woodworkers about the most underrated tool in the shop and many will answer the same way.
Clamps.
They hold parts steady while you align joints, drive screws, or allow glue to cure.
Even a small collection can make assembly noticeably easier.
Useful choices include:
- Bar clamps
- Spring clamps
- Corner clamps
- Quick-grip clamps
Hardware That Lasts
Beautiful lumber deserves hardware that won’t fail after a few seasons outdoors.
Choose fasteners designed for exterior use whenever possible.
Good options include:
- Stainless steel screws
- Galvanized screws
- Exterior-rated fasteners
Screws are generally preferred over nails because they simplify repairs and seasonal maintenance.
Hinges and Access Panels
Earlier in this guide, you learned why cleaning access matters.
Now’s the time to plan for it.
Small exterior-rated hinges make excellent additions to:
- Hinged roofs
- Side-opening panels
- Inspection doors
A birdhouse that’s easy to maintain is far more likely to remain useful year after year.
Choosing the Right Glue
Wood glue isn’t simply about holding boards together.
Outdoor projects demand adhesives designed to withstand moisture, changing temperatures, and seasonal wood movement.
Look for:
- Exterior-rated wood glue
- Waterproof formulations
- Products specifically intended for outdoor woodworking
Combined with quality fasteners, the right glue creates joints that remain dependable through years of weather.
Should You Paint a Birdhouse?
This question comes up almost every time birdhouses are discussed.
The short answer?
You can finish the exterior if you choose.
The interior should remain unfinished.
If you decide to add color:
- Paint or finish only the outside.
- Keep ventilation and drainage openings clear.
- Allow finishes to cure completely before installation.
- Choose natural, subdued colors that blend comfortably into the landscape.
Many woodworkers simply leave cedar unfinished and allow nature to do the rest.
Workshop Safety Never Goes Out of Style
No project is successful if someone gets hurt building it.
Before every session, make sure you have:
- Safety glasses
- Hearing protection
- Dust mask or respirator
- Appropriate work clothing
- Push sticks for table saw work when needed
- A clean, organized workspace
Good habits become second nature—and they tend to produce better woodworking, too.
Save Money Without Sacrificing Quality
Building birdhouses doesn’t have to become an expensive hobby.
A few practical strategies help stretch your budget:
- Buy longer boards and cut multiple projects from them.
- Check lumberyards for offcuts.
- Use clean reclaimed cedar when appropriate.
- Batch similar projects to reduce waste.
- Plan every cut before turning on a saw.
Efficient woodworking isn’t just economical.
It’s satisfying.
Before the First Cut
Experienced builders rarely rush into cutting lumber.
Instead, they pause.
They inspect each board.
They study the grain.
They mark every piece.
They think several steps ahead.
That quiet preparation often determines how smoothly the rest of the project unfolds.
Sometimes the fastest way to finish is to slow down at the beginning.
Workshop Readiness Checklist
Before starting any birdhouse in this guide, make sure you can answer “yes” to each question.
✔ Is the lumber straight and dry?
✔ Have all measurements been checked?
✔ Are your tools clean and ready?
✔ Do you have the correct hardware?
✔ Is your safety equipment nearby?
✔ Have you reviewed the plans before cutting?
If so, you’re ready to begin building with confidence.
Continue Reading
In Part 4: Birdhouse Plans #1–#7: Beginner-Friendly Projects, the planning ends and the sawdust begins. You’ll build your first birdhouses step by step, learning practical woodworking techniques while creating nesting boxes designed for real backyard birds—not just decorative display.
Part 4: Birdhouse Plans #1–#7: Beginner-Friendly Projects
There comes a point in every woodworking project when planning gives way to action. The measurements are marked, the tools are laid out, and that first cut finally slices through the board. For many builders, this is where the hobby truly begins. These first seven birdhouse plans aren’t simply projects—they’re opportunities to develop confidence, refine technique, and create something that can become part of your backyard for years to come.
Every experienced woodworker remembers the first project that taught them precision. Let these birdhouses be yours.
In This Chapter
- Plan #1: One-Board Birdhouse
- Plan #2: Classic Wren House
- Plan #3: Eastern Bluebird Nest Box
- Plan #4: Cedar Garden Birdhouse
- Plan #5: Hanging Songbird Birdhouse
- Plan #6: Chickadee Nest Box
- Plan #7: Family Weekend Birdhouse
Each project includes:
- Recommended bird species
- Skill level
- Estimated build time
- Materials
- Core construction steps
- Practical workshop advice
- Installation notes
Before You Make the First Cut
Take a moment before switching on the saw.
Look at your board.
Notice the grain.
Find the knots.
Decide which face will become the front of the birdhouse and which edge will carry the roof.
Experienced woodworkers rarely rush into cutting. They spend time visualizing the finished project before removing the first piece of material.
That small habit prevents mistakes—and often produces cleaner, stronger work.
Before every project in this chapter:
✔ Confirm every measurement.
✔ Mark all components clearly.
✔ Dry-fit major pieces before assembly.
✔ Keep your tools within easy reach.
✔ Wear eye and hearing protection.
Once the first cut is made, every decision becomes easier.
Birdhouse Plan #1: The One-Board Birdhouse
Best For: First-time builders
Target Birds: Small cavity-nesting birds such as wrens or chickadees (with the appropriate entrance size)
Skill Level: ★☆☆☆☆
Estimated Build Time: 1–2 Hours
Why This Is the Perfect First Project
Every woodworker remembers the project that transformed measurements on paper into something real.
This is that project.
The one-board birdhouse strips away unnecessary complexity while teaching the fundamentals that carry into every future build.
You’ll practice:
- Measuring accurately
- Making square cuts
- Drilling clean entrance holes
- Assembling simple joinery
- Installing a functional roof
The finished birdhouse may be simple, but simplicity is often exactly what birds prefer.
Materials
- One cedar 1 × 6 board
- Exterior wood screws
- Waterproof wood glue
- Sandpaper
Basic Build Sequence
- Lay out every component before cutting.
- Cut the panels.
- Drill the entrance hole.
- Add ventilation near the roof.
- Drill drainage holes in the floor.
- Assemble the box.
- Install the roof using a removable fastener for future cleaning.
Workshop Insight
Resist the urge to tighten screws immediately.
Bring the entire birdhouse together loosely first, check that it’s square, and then tighten each fastener.
That extra minute often produces a noticeably cleaner result.
Birdhouse Plan #2: Classic Wren House
Target Bird: House Wren
Skill Level: ★☆☆☆☆
Estimated Build Time: Around 2 Hours
Why Wrens Appreciate Simplicity
House wrens are surprisingly practical.
They’re not searching for elaborate architecture.
They’re searching for a cavity that feels protected.
A compact birdhouse with a properly sized entrance offers exactly that.
Design Highlights
- Compact footprint
- Deep nesting chamber
- Small entrance hole
- Good roof protection
- Easy seasonal cleaning
Materials
- Cedar or cypress
- Exterior screws
- Waterproof wood glue
Construction Overview
Measure carefully.
Cut accurately.
Keep every corner square.
Install the roof last after confirming that all four walls align properly.
Small details matter more than decorative features.
Skill You’ll Develop
Learning to assemble perfectly square boxes—a technique you’ll use in countless future woodworking projects.
Birdhouse Plan #3: Eastern Bluebird Nest Box
Target Bird: Eastern Bluebird
Skill Level: ★★☆☆☆
Estimated Build Time: 2–3 Hours
A Backyard Favorite
Few birds capture people’s attention quite like bluebirds.
Seeing one inspect a birdhouse you’ve built is immensely rewarding.
Bluebirds naturally prefer more open landscapes, and a properly designed nest box can provide an inviting alternative where natural nesting cavities are limited.
Key Features
- Larger entrance hole
- Spacious nesting chamber
- Extended roof
- Cleaning access
- Thick wooden walls
Materials
- Cedar lumber
- Exterior screws
- Waterproof glue
- Optional hinge for side access
Construction Steps
Begin by preparing every component before assembly.
Drill the entrance hole while the front panel remains flat on your workbench.
Add ventilation and drainage before fastening the box together.
Install the removable panel last.
Workshop Insight
Large entrance holes deserve clean edges.
Using a sharp Forstner bit often produces smoother results than forcing a dull hole saw through the wood.
Birdhouse Plan #4: Cedar Garden Birdhouse
Best For: General backyard songbirds
Skill Level: ★★☆☆☆
Estimated Build Time: Half Day
The Beauty of Cedar
Freshly cut cedar has a distinctive aroma that many woodworkers recognize instantly.
Beyond its pleasant smell, it’s also remarkably durable outdoors.
This project embraces cedar’s natural character rather than hiding it beneath heavy finishes.
Design Goals
Create a birdhouse that’s equally at home in a flower garden or beneath mature shade trees.
Its clean proportions allow the wood itself to become the focal point.
Features
- Wide roof overhang
- Natural cedar finish
- Easy maintenance
- Strong weather resistance
- Functional interior layout
Optional Exterior Detail
Ease the roof edges with sandpaper or a small router bit.
The softer profile improves both appearance and rain runoff.
Birdhouse Plan #5: Hanging Songbird Birdhouse
Suitable For: Various small cavity-nesting birds where local conditions are appropriate
Skill Level: ★★☆☆☆
When Hanging Makes Sense
Not every backyard has a fence post or dedicated mounting pole.
Sometimes the best location is beneath a covered pergola, garden structure, or another suitable support.
A hanging birdhouse offers flexibility—but balance becomes especially important.
Materials
- Cedar lumber
- Exterior screws
- Waterproof glue
- Weather-resistant hanging hardware
Construction Notes
Locate the hanging point directly above the center of the completed birdhouse whenever possible.
A balanced birdhouse experiences less movement during windy conditions.
Skill You’ll Develop
Understanding weight distribution in suspended woodworking projects.
Birdhouse Plan #6: Chickadee Nest Box
Target Bird: Chickadees
Skill Level: ★★☆☆☆
Estimated Build Time: Half Day
Building for Smaller Birds
Chickadees don’t require large nesting chambers.
Instead, they benefit from carefully proportioned interiors that feel secure and well insulated.
Precision matters more than size.
Design Features
- Small entrance opening
- Deep nesting chamber
- Thick wooden walls
- Ventilation beneath the roof
- Easy cleaning panel
Construction Sequence
Prepare the stock.
Cut each component carefully.
Drill the entrance hole.
Install the floor.
Assemble the walls.
Finish with the roof.
Simple.
Methodical.
Reliable.
Workshop Insight
Clamp the front panel securely before drilling the entrance hole.
The cleaner the cut, the more professional the finished birdhouse will appear.
Birdhouse Plan #7: Family Weekend Birdhouse
Perfect For:
- Parents and children
- Scout groups
- School workshops
- Community events
Skill Level: ★☆☆☆☆
More Than a Woodworking Project
Some birdhouses become family traditions.
Children remember measuring boards, sanding rough edges, and helping drive the final screw into place.
Years later, they’ll remember watching birds raise their first brood inside something they helped build.
Few woodworking projects create memories quite like this one.
Simplified Materials
- Cedar or pine board
- Exterior screws
- Waterproof glue
Safety Tips
Adults should always operate power tools.
Young builders can participate by:
- Measuring
- Marking
- Sanding
- Organizing hardware
- Helping with final assembly under supervision
Building together often matters just as much as the finished birdhouse.
Which Beginner Project Should You Choose?
| Project | Skill Level | Build Time | Ideal For |
|---|---|---|---|
| One-Board Birdhouse | Beginner | 1–2 hrs | First woodworking project |
| Classic Wren House | Beginner | 2 hrs | Small gardens |
| Bluebird Nest Box | Easy–Moderate | 2–3 hrs | Open landscapes |
| Cedar Garden Birdhouse | Moderate | Half day | Long-lasting outdoor use |
| Hanging Birdhouse | Moderate | Half day | Flexible mounting options |
| Chickadee Nest Box | Moderate | Half day | Woodland backyards |
| Family Weekend Birdhouse | Beginner | Half day | Group projects |
Small Habits That Make a Big Difference
As you work through these projects, pay attention to the habits that experienced builders rely on almost automatically.
Measure before every cut.
Keep the workpiece supported.
Drill pilot holes near board edges.
Dry-fit before applying glue.
Check for square repeatedly—not just once.
These habits may seem repetitive at first.
Soon they’ll become second nature.
And when they do, every project becomes easier.
Mistakes Every Beginner Makes (And How to Avoid Them)
Nobody builds a perfect birdhouse on the first attempt.
Fortunately, most mistakes are easy to prevent.
Watch for:
- Crooked entrance holes
- Forgetting ventilation
- Omitting drainage holes
- Overtightening screws
- Rushing glue-up
- Uneven roof alignment
- Using indoor hardware outdoors
Treat each mistake as feedback rather than failure.
That’s how woodworking skills grow.
Before You Install Your Birdhouse
Take one final look before carrying it outside.
Run your hand along every edge.
Open the cleaning panel.
Check the roof.
Make sure drainage holes remain clear.
Stand back and admire what you’ve built.
Not because it’s perfect.
Because it’s real.
It started as a rough board.
Now it’s ready to become a home.
Continue Reading
In Part 5: Birdhouse Plans #8–#13: Intermediate Projects, we’ll expand your woodworking skills with hinged access doors, predator-resistant features, pole-mounted designs, and refined construction techniques that make each birdhouse easier to maintain and better prepared for years of outdoor use.
Part 5: Birdhouse Plans #8–#13: Intermediate Projects
Somewhere between your first successful birdhouse and your fifth, something changes.
You stop checking the instructions every few minutes.
You instinctively know which board should become the roof. You begin noticing grain direction before making a cut. You tighten screws just enough—not too much. Your hands start working with the confidence your eyes didn’t have a few projects ago.
That’s where these six projects begin.
They’re designed for builders who’ve mastered the basics and are ready to think a little differently—not just about how a birdhouse is built, but why certain design choices make it easier to maintain, more resistant to weather, and more attractive to the birds it’s intended to shelter.
Good woodworking is about building something that lasts. Great woodworking is about making it easy to care for once it’s built.
In This Chapter
- Plan #8: Chickadee Woodland Nest Box
- Plan #9: Tree Swallow Nest Box
- Plan #10: Decorative Cedar Cottage
- Plan #11: Pole-Mounted Birdhouse
- Plan #12: Easy-Clean Side-Opening Birdhouse
- Plan #13: Predator-Resistant Nest Box
Each project introduces one or more new woodworking techniques while staying grounded in practical, bird-friendly design.
The Difference Between Beginner and Intermediate Woodworking
The jump isn’t measured by how many tools you own.
It’s measured by how you think.
Instead of asking:
“How do I build this?”
You begin asking:
“How will this hold up after five winters?”
“Will cleaning this be simple?”
“Can I replace a damaged roof without rebuilding the entire birdhouse?”
Those questions change the quality of every project you build from this point forward.
Birdhouse Plan #8: Chickadee Woodland Nest Box
Target Bird: Chickadees
Skill Level: ★★☆☆☆
Estimated Build Time: 3–4 Hours
Built for Quiet Corners
Walk through a mature woodland early in the morning and you’ll quickly notice something about chickadees.
They rarely choose the busiest places.
They prefer calm.
Shelter.
Natural cover.
This birdhouse reflects those preferences with a compact nesting chamber, thick walls, and a simple exterior that blends comfortably into wooded landscapes.
Why This Design Works
Unlike decorative garden birdhouses, this design focuses almost entirely on comfort and protection.
Features include:
- Deep nesting chamber
- Thick cedar walls
- Small species-specific entrance
- Large roof overhang
- Hinged inspection panel
Everything has a purpose.
Nothing has been added simply for appearance.
Materials
- Cedar boards
- Exterior screws
- Waterproof wood glue
- Stainless-steel hinge
- Exterior latch or retaining screw
Build Overview
Begin by cutting every component before assembling the box.
Install the hinge only after confirming the access panel opens freely without binding.
Finally, test the cleaning door several times before tightening the last screw.
You’ll thank yourself next season.
Workshop Insight
Doors don’t fail because of poor hinges.
They fail because the surrounding frame wasn’t perfectly square.
Take your time here.
Birdhouse Plan #9: Tree Swallow Nest Box
Target Bird: Tree Swallows
Skill Level: ★★☆☆☆
Estimated Build Time: Half Day
Built for Open Skies
Tree swallows are fast.
Remarkably fast.
They thrive in open landscapes where they can swoop effortlessly across fields and ponds in pursuit of flying insects.
Their birdhouse should reflect that same sense of openness.
Design Features
- Spacious nesting chamber
- Deep cavity
- Excellent ventilation
- Wide roof overhang
- Easy inspection panel
Ideal Placement
This birdhouse performs best near:
- Meadows
- Wetlands
- Open fields
- Fence lines
- Ponds
Dense woodland isn’t usually their first choice.
Give them room to fly.
New Skill You’ll Learn
Building repeatable wall assemblies that remain perfectly square during glue-up.
Birdhouse Plan #10: Decorative Cedar Cottage
Best For
- Landscaped gardens
- Backyard displays
- Functional outdoor décor
Skill Level: ★★★☆☆
Estimated Build Time: One Day
Beauty Doesn’t Have to Compromise Function
Many decorative birdhouses earn compliments from people while being ignored by birds.
This project aims for something different.
It combines elegant woodworking with proven birdhouse proportions.
The result is attractive enough for the garden yet practical enough to become an active nesting site.
Design Details
Subtle touches make the difference.
Consider:
- Chamfered roof edges
- Rounded corners
- Decorative shadow lines
- Carefully proportioned roof overhangs
Notice what’s missing?
Tiny porches.
Plastic flowers.
Decorative windows.
Birds won’t miss them.
Workshop Insight
Good design often comes from knowing what not to include.
Birdhouse Plan #11: Pole-Mounted Birdhouse
Target Birds
Suitable for several cavity-nesting species depending on entrance dimensions and placement.
Skill Level: ★★★☆☆
Why Many Experienced Builders Prefer Poles
Trees may feel natural.
Poles are often practical.
A properly installed pole makes seasonal inspections easier, allows more flexibility in placement, and can accommodate compatible predator guards when needed.
It also simplifies future maintenance.
For many backyards, it’s the most versatile mounting option.
Construction Features
- Reinforced rear panel
- Heavy-duty mounting points
- Strong roof support
- Easy access for cleaning
New Skill You’ll Learn
Accurately locating mounting hardware before final assembly.
Small alignment errors become much more noticeable once the birdhouse is installed.
Birdhouse Plan #12: Easy-Clean Side-Opening Birdhouse
Best For
Anyone planning to maintain birdhouses year after year.
Skill Level: ★★★☆☆
Future You Will Appreciate This Project
Cleaning isn’t exciting.
But trying to clean a birdhouse that was never designed to open is even less exciting.
This project places maintenance at the center of the design process.
The result is a birdhouse that’s just as enjoyable to own five years from now as it is to build today.
Features
- Full-height access door
- Hidden hinge
- Secure latch
- Reinforced frame
- Weather-resistant fit
Assembly Sequence
Construct the main body first.
Install the door second.
Only then fit the hinge.
That sequence gives you much greater control over alignment.
Workshop Insight
Always test moving parts several times before applying finish.
Wood moves.
It’s much easier to make adjustments now than after installation.
Birdhouse Plan #13: Predator-Resistant Nest Box
Skill Level: ★★★☆☆
Estimated Build Time: One Day
Designed with Survival in Mind
Every nesting season presents challenges.
While no birdhouse can eliminate every risk, thoughtful design can help reduce opportunities for predators.
This project focuses on strengthening the structure rather than relying on decorative additions.
Key Features
- Deep nesting chamber
- Reinforced front panel
- Thick cedar walls
- Large roof overhang
- Secure inspection door
- Strong joinery
Optional Enhancements
Depending on where you’ll install the birdhouse, you may later add compatible predator guards or baffles.
Those options will be explored in detail in Part 9: Installing Your Birdhouse for Maximum Nesting Success.
New Skill You’ll Learn
Thinking beyond construction and considering how the birdhouse performs once wildlife begins using it.
Intermediate Techniques That Change Everything
By now you’ve probably noticed that intermediate woodworking isn’t dramatically more complicated.
It’s simply more intentional.
Dry-Fit Every Assembly
Before opening the glue bottle, assemble the project without adhesive.
This simple step helps reveal alignment issues while they’re still easy to correct.
Countersink Exterior Screws
Flush screw heads create a cleaner appearance while reducing places where water can collect.
Small details often make the biggest difference over time.
Check for Square Repeatedly
Don’t wait until the final panel goes on.
Check after every major assembly step.
Correcting a slight twist early is far easier than fixing it after the glue has cured.
Think About Maintenance While Building
Ask yourself one question throughout construction:
“If I need to inspect this birdhouse next year, will I be glad I built it this way?”
That mindset quietly improves every design decision.
Which Intermediate Project Fits Your Goals?
| Project | Skill Level | Build Time | Best Choice For |
|---|---|---|---|
| Chickadee Woodland Nest Box | Moderate | 3–4 hrs | Woodland backyards |
| Tree Swallow Nest Box | Moderate | Half day | Open landscapes |
| Decorative Cedar Cottage | Moderate | 1 day | Functional garden display |
| Pole-Mounted Birdhouse | Moderate | Half day | Flexible installation |
| Easy-Clean Birdhouse | Moderate | Half day | Long-term maintenance |
| Predator-Resistant Nest Box | Moderate | 1 day | Wildlife-rich properties |
Mistakes That Become More Noticeable at This Level
As your skills improve, your expectations naturally rise.
Pay attention to:
- Uneven door gaps
- Misaligned hinges
- Roof panels that don’t sit flush
- Hardware installed without pilot holes
- Decorative trim that blocks ventilation
- Poorly planned cleaning access
None of these mistakes are catastrophic.
But correcting them is what separates solid woodworking from exceptional craftsmanship.
Before Moving On
Take a look at the birdhouses you’ve built so far.
You’ll probably notice something.
They’re cleaner.
Straighter.
Better proportioned.
Not because the projects became easier.
Because you became better.
That’s how woodworking works.
Progress isn’t dramatic.
It’s cumulative.
One careful cut.
One accurate measurement.
One successful project at a time.
Continue Reading
In Part 6: Birdhouse Plans #14–#19: Advanced Projects, you’ll move beyond traditional backyard birdhouses into larger, more specialized builds designed for species such as screech owls and wood ducks. Along the way, you’ll learn stronger joinery, larger-scale construction techniques, and the kind of precision that transforms practical woodworking into true craftsmanship.
Part 6: Birdhouse Plans #14–#19: Advanced Projects
Every woodworker reaches a moment when following plans is no longer enough.
You begin looking at a finished project and asking questions that never crossed your mind before.
Could this joint be stronger?
Would a different roof angle shed water more effectively?
How can I make this easier to maintain ten years from now?
Those questions mark a turning point.
You’re no longer just assembling a birdhouse. You’re engineering one.
The six projects in this chapter are designed for builders who enjoy solving problems as much as building beautiful things. They’re larger, more demanding, and often built for bird species with very specific nesting requirements. Every measurement has a reason. Every design decision serves a purpose.
Advanced woodworking isn’t about complexity for its own sake. It’s about creating something so thoughtfully built that it quietly performs its job for years without asking for attention.
In This Chapter
- Plan #14: Multi-Compartment Purple Martin House
- Plan #15: Screech Owl Nest Box
- Plan #16: Wood Duck Nest Box
- Plan #17: Modern Architectural Birdhouse
- Plan #18: Cabinet-Style Premium Birdhouse
- Plan #19: Custom Hardwood Showcase Birdhouse
Each project introduces new construction techniques while reinforcing the principles you’ve already mastered.
A Different Way of Thinking
The biggest change at this level isn’t found in your toolbox.
It’s found in your mindset.
Instead of thinking about individual boards, you begin thinking about systems.
How water moves across the roof.
How seasonal humidity affects joinery.
How future maintenance influences today’s construction choices.
Every project becomes an exercise in long-term problem solving.
Ironically, that often leads to simpler, cleaner designs—not more complicated ones.
Birdhouse Plan #14: Multi-Compartment Purple Martin House
Target Bird: Purple Martins (where naturally established)
Skill Level: ★★★★☆
Estimated Build Time: Weekend
Building for Birds That Prefer Neighbors
Most backyard birdhouses are designed for a single family.
Purple martins are different.
In areas where healthy martin populations exist, they naturally nest in colonies, making multi-compartment housing an effective option when properly managed.
This project isn’t simply one birdhouse.
It’s a carefully organized collection of individual nesting chambers working together.
What Makes This Build Different?
Unlike earlier projects, consistency becomes critical.
Each compartment should be:
- Identical in size
- Properly ventilated
- Easy to inspect
- Easy to clean
- Structurally independent within the larger frame
When every compartment matches, construction becomes cleaner and future maintenance becomes much easier.
Materials
- Cedar boards
- Exterior-grade plywood for selected roof components
- Stainless steel screws
- Waterproof exterior glue
- Heavy-duty mounting hardware
New Skill You’ll Develop
Building repeatable assemblies with production-level accuracy.
This is excellent practice for larger woodworking projects beyond birdhouses.
Birdhouse Plan #15: Screech Owl Nest Box
Target Bird: Screech Owl
Skill Level: ★★★★☆
Estimated Build Time: Weekend
Bigger Doesn’t Mean Easier
Larger panels introduce new challenges.
Boards become heavier.
Clamping becomes more important.
Keeping everything square requires greater attention.
Fortunately, you’ve already built the habits that make those challenges manageable.
Design Priorities
A successful owl box emphasizes:
- Deep nesting cavity
- Thick insulated walls
- Large protective roof
- Secure inspection access
- Strong mounting system
The appearance remains intentionally understated.
Its purpose isn’t to attract attention.
It’s to provide quiet shelter.
Workshop Insight
Whenever a project grows in size, increase the number of dry-fit checks.
Small alignment errors multiply quickly on larger assemblies.
Birdhouse Plan #16: Wood Duck Nest Box
Target Bird: Wood Duck
Skill Level: ★★★★★
Estimated Build Time: Weekend
One of the Most Rewarding Projects in the Guide
Building a wood duck nest box feels different.
Perhaps because of its scale.
Perhaps because of the specialized design.
Or perhaps because it reminds you that woodworking can directly support wildlife conservation.
Unlike many backyard songbirds, wood ducks require a much taller nesting cavity and several unique design features.
Every dimension serves a specific biological purpose.
Key Features
- Tall nesting chamber
- Larger entrance opening
- Reinforced floor
- Hinged inspection door
- Interior climbing surface below the entrance
- Heavy-duty construction
These aren’t decorative additions.
They’re functional solutions developed through years of field experience.
New Skill You’ll Develop
Managing larger projects while maintaining precise alignment across multiple assemblies.
Birdhouse Plan #17: Modern Architectural Birdhouse
Suitable For
Various cavity-nesting songbirds when built with species-appropriate dimensions.
Skill Level: ★★★★☆
Simplicity Can Be Striking
Modern woodworking often celebrates clean lines.
Minimal details.
Perfect proportions.
This birdhouse follows that same philosophy.
Its visual appeal comes from precision rather than ornament.
Every joint is intentional.
Every edge has purpose.
Design Features
- Hidden fasteners
- Flush joints
- Crisp geometry
- Extended roof
- Concealed maintenance access
It feels contemporary without forgetting that birds—not people—are the intended occupants.
Workshop Insight
Perfect alignment becomes the decoration.
When every line meets exactly where it should, additional trim becomes unnecessary.
Birdhouse Plan #18: Cabinet-Style Premium Birdhouse
Skill Level: ★★★★★
Estimated Build Time: Weekend
Borrowing Techniques from Fine Furniture
This project asks you to think less like a DIY builder and more like a cabinetmaker.
Joinery receives greater attention.
Fit becomes more precise.
Every component is refined before assembly.
The result is a birdhouse that feels as satisfying to build as it is to admire.
Construction Features
- Precision joinery
- Reinforced corners
- Thick roof assembly
- Premium hardware
- Smooth maintenance access
Whether you choose rabbets, dados, box joints, or carefully reinforced butt joints, the emphasis remains the same:
Build for longevity.
New Skill You’ll Develop
Selecting joinery based on structural requirements rather than habit.
Birdhouse Plan #19: Custom Hardwood Showcase Birdhouse
Purpose: Display-quality woodworking with fully functional design
Skill Level: ★★★★★
A Project That Celebrates Craftsmanship
This isn’t a birdhouse built because you need another birdhouse.
It’s built because you’ve fallen in love with the craft itself.
Beautiful grain.
Clean joinery.
Balanced proportions.
The kind of project that encourages visitors to stop, look closely, and ask how it was made.
Yet beneath the refined appearance remains everything that matters most to the birds.
Function never gives way to decoration.
Thoughtful Details
You might incorporate:
- Chamfered edges
- Subtle routed profiles
- Decorative maker’s mark
- Contrasting hardwood accents on the exterior
- Carefully shaped roof lines
Notice the emphasis.
Exterior.
The nesting chamber stays practical, simple, and unfinished.
Workshop Insight
The most elegant woodworking rarely announces itself loudly.
It reveals itself slowly through thoughtful details.
Advanced Techniques That Change Every Future Project
These birdhouses introduce skills you’ll use far beyond wildlife woodworking.
Story Sticks
Instead of measuring every dimension repeatedly, create a reusable reference stick marked with critical measurements.
It’s faster.
More accurate.
And surprisingly satisfying to use.
Knife Lines Instead of Pencil Lines
A sharp marking knife creates cleaner layout lines and helps guide saw blades more accurately than a thick pencil mark.
Tiny improvements like this accumulate over the course of a project.
Controlled Glue Application
More glue doesn’t create stronger joints.
It creates more cleanup.
Apply only what the joint requires.
The result is cleaner construction and less sanding later.
Let Clamps Do the Work
Forcing pieces together often introduces unnecessary stress.
Well-positioned clamps apply steady, even pressure while allowing joints to settle naturally.
Patience nearly always produces stronger assemblies.
Planning for Decades, Not Seasons
Advanced woodworking asks a different question.
Not:
“Will this work?”
Instead:
“Will this still work ten years from now?”
That perspective changes everything.
Roof overhangs become slightly larger.
Hardware becomes slightly stronger.
Maintenance access becomes easier.
The entire project becomes more durable without becoming noticeably more complicated.
Which Advanced Project Should You Build?
| Project | Skill Level | Build Time | Best For |
|---|---|---|---|
| Purple Martin House | Advanced | Weekend | Multi-compartment construction |
| Screech Owl Box | Advanced | Weekend | Woodland habitats |
| Wood Duck Box | Expert | Weekend | Wetland conservation |
| Modern Birdhouse | Advanced | Weekend | Contemporary landscapes |
| Cabinet-Style Birdhouse | Expert | Weekend | Precision joinery |
| Hardwood Showcase Birdhouse | Expert | Weekend | Display-quality craftsmanship |
Mistakes That Separate Good from Great
At this stage, obvious mistakes become less common.
The differences are subtle.
Watch for:
- Tiny alignment errors
- Uneven reveal lines
- Inconsistent joinery
- Poor clamp placement
- Hardware that’s technically functional but visually distracting
- Rushing the final assembly after hours of careful preparation
Excellence often lives inside details few people consciously notice.
A Quiet Milestone
Somewhere during these projects you’ll realize something.
You’re no longer building birdhouses because you need birdhouses.
You’re building them because the process itself has become rewarding.
The careful measuring.
The scent of freshly cut cedar.
The satisfaction of joints coming together perfectly.
Watching rough lumber slowly become something useful.
That’s one of woodworking’s greatest gifts.
The finished project matters.
But so does every step that brought it to life.
Continue Reading
In Part 7: Birdhouse Plans #20–#25: Specialty Projects, we’ll finish the collection with some of the most creative builds in the guide. From reclaimed wood birdhouses and rustic log designs to winter roost boxes and premium all-weather cedar projects, you’ll discover how thoughtful craftsmanship, sustainability, and imagination can come together without losing sight of what birds actually need.
Part 7: Birdhouse Plans #20–#25: Specialty Projects
By the time you’ve reached this chapter, you’ve already built more than birdhouses.
You’ve developed patience.
You’ve learned to trust careful measurements over quick guesses. You’ve discovered that a clean joint is usually the result of preparation rather than talent. And perhaps most importantly, you’ve started seeing a simple piece of lumber not for what it is—but for what it could become.
These final six projects celebrate that transformation.
They’re a little more creative.
A little more personal.
And in many cases, they’re the kind of birdhouses you’ll find yourself building simply because you want to—not because you need another nest box in the backyard.
Some emphasize sustainability. Others showcase craftsmanship. A few explore designs inspired by nature itself.
The one thing they all have in common is this:
Every project still puts birds first.
The most memorable woodworking projects don’t ask you to choose between beauty and purpose. They quietly achieve both.
In This Chapter
- Plan #20: Rustic Log Birdhouse
- Plan #21: Reclaimed Wood Birdhouse
- Plan #22: Winter Roost Box
- Plan #23: Eco-Friendly Birdhouse
- Plan #24: Decorative Garden Birdhouse
- Plan #25: Premium All-Weather Cedar Birdhouse
Each design explores a different idea while remaining grounded in practical birdhouse construction.
Why Build Specialty Birdhouses?
At some point, every woodworker begins experimenting.
Not recklessly.
Curiously.
You start wondering what would happen if you used reclaimed cedar instead of fresh lumber.
Or whether a birdhouse could blend seamlessly into a woodland landscape.
Or whether a project could become both a conversation piece and a functional nesting box.
Specialty birdhouses invite those questions.
They encourage creativity—but with discipline.
The birds should never have to compromise because the builder wanted to be artistic.
When function leads, beauty usually follows.
Birdhouse Plan #20: Rustic Log Birdhouse
Best For
- Woodland gardens
- Nature trails
- Cabins
- Forest landscapes
Skill Level: ★★★☆☆
Estimated Build Time: One Day
Let Nature Do Most of the Designing
Some woodworking projects demand perfect symmetry.
This isn’t one of them.
The charm of a rustic log birdhouse comes from embracing the natural shape, texture, and character of the wood.
Every knot.
Every crack in the bark.
Every irregular curve tells part of the story.
Instead of hiding those features, this project celebrates them.
What You’ll Need
- Untreated log section or thick cedar stock
- Exterior screws
- Waterproof wood glue
- Optional hinge for maintenance access
Construction Approach
Begin by selecting sound material.
A beautiful log with hidden rot will never become a successful birdhouse.
Once you’ve established a solid foundation, carefully create the nesting cavity while preserving enough wall thickness to provide insulation.
Natural doesn’t mean random.
Thoughtful craftsmanship still guides every step.
Workshop Insight
Work with the grain—not against it.
Irregular lumber rewards patience more than force.
Birdhouse Plan #21: Reclaimed Wood Birdhouse
Best For
- Sustainable woodworking
- Garden projects
- Rustic landscapes
- Upcycling enthusiasts
Skill Level: ★★★☆☆
Every Board Has a Story
Fresh lumber is predictable.
Reclaimed lumber has character.
Old nail holes.
Weathered edges.
Subtle color variation.
Perhaps even marks left by another craftsman decades ago.
Building with reclaimed wood creates birdhouses that feel connected to history in a way brand-new lumber rarely can.
Before You Begin
Always inspect reclaimed material carefully.
Remove:
- Nails
- Screws
- Staples
- Damaged sections
Avoid boards with unknown chemical treatments or severe deterioration.
Good reclaimed wood deserves the same careful preparation as any premium hardwood.
New Skill You’ll Develop
Learning to adapt your design around the material rather than forcing the material to fit the design.
Birdhouse Plan #22: Winter Roost Box
Purpose: Cold-weather shelter
Skill Level: ★★★☆☆
Estimated Build Time: Half Day
Not Every Birdhouse Is Built for Spring
When temperatures fall, many small birds search for sheltered places to escape harsh weather.
A winter roost box serves a different purpose than a nesting box.
Instead of raising young, it provides temporary refuge during cold nights and severe weather.
That shift in purpose influences every design decision.
Design Considerations
Compared with traditional nest boxes, winter roost boxes often feature:
- Thicker walls
- Modified ventilation
- Interior surfaces that assist birds in moving within the box
- Strong weather protection
If you’re building specifically for winter shelter, research the needs of local bird species before finalizing your design.
Workshop Insight
Sometimes the most valuable project you build isn’t the one used most often.
It’s the one that’s needed most during difficult conditions.
Birdhouse Plan #23: Eco-Friendly Birdhouse
Perfect For
- Sustainable landscapes
- Wildlife gardens
- Conservation projects
- Environmentally conscious woodworkers
Skill Level: ★★★☆☆
Waste Less. Build Better.
Sustainability isn’t only about choosing the right lumber.
It’s also about how efficiently you use it.
This project encourages thoughtful planning from the very beginning.
Every offcut saved.
Every reusable board selected.
Every unnecessary cut avoided.
Those small choices add up surprisingly quickly.
Sustainable Building Ideas
Consider using:
- FSC-certified lumber where available
- Clean reclaimed wood
- Stainless steel hardware for longevity
- Efficient cutting layouts
- Durable materials that reduce future replacement
Good woodworking naturally minimizes waste.
New Skill You’ll Develop
Planning projects around material efficiency rather than simply purchasing more lumber.
Birdhouse Plan #24: Decorative Garden Birdhouse
Purpose
Functional birdhouse with refined visual appeal
Skill Level: ★★★★☆
When Craftsmanship Becomes Landscape Design
A well-designed birdhouse doesn’t have to hide in the background.
It can become part of the garden itself.
The challenge is achieving visual elegance without sacrificing the practical features birds rely on.
That’s where thoughtful restraint matters.
Design Possibilities
Consider adding:
- Soft chamfers
- Routed roof profiles
- Contrasting wood species
- Layered roof details
- Hand-burned maker’s mark
Notice that none of these features interfere with the nesting chamber.
Decoration belongs outside.
Function remains inside.
Workshop Insight
The best decorative details feel intentional—not excessive.
Birdhouse Plan #25: Premium All-Weather Cedar Birdhouse
Skill Level: ★★★★★
Estimated Build Time: Weekend
Everything You’ve Learned Comes Together Here
This project isn’t difficult because of unusual joinery.
It’s demanding because every detail matters.
Material selection.
Roof alignment.
Drainage.
Ventilation.
Maintenance access.
Hardware placement.
Nothing is accidental.
By the time you complete this birdhouse, you’ll notice something satisfying.
You’re no longer following instructions.
You’re making informed design decisions.
Premium Features
- Thick cedar construction
- Reinforced roof assembly
- Flush hardware installation
- Hidden maintenance access
- Excellent ventilation
- Efficient drainage
- Long-term durability
It’s designed to age gracefully through years of changing seasons.
Workshop Insight
The difference between a good birdhouse and an exceptional one is rarely dramatic.
It’s usually the accumulation of dozens of thoughtful decisions.
Personalizing Your Birdhouses
Once you’ve built several projects, customization becomes almost irresistible.
That’s perfectly natural.
The key is knowing what can change—and what shouldn’t.
Safe ways to personalize include:
- Soft edge profiles
- Custom roof shapes
- Decorative engraving
- Maker’s marks
- Natural exterior finishes
- Contrasting wood species
Avoid altering:
- Entrance dimensions
- Interior cavity size
- Ventilation
- Drainage
- Cleaning access
Those features exist for the birds—not for visual effect.
Building More Than One Birdhouse
Many woodworkers eventually discover that building a single birdhouse isn’t the most efficient approach.
The saw is already set.
The drill is already out.
The lumber is already measured.
Why not build three?
Or six?
Batch construction offers several advantages:
- Less setup time
- Better material efficiency
- More consistent dimensions
- Faster assembly
- Improved workflow
It’s one of the simplest ways to become a more confident builder.
Turning Birdhouse Building Into a Tradition
One birdhouse often leads to another.
Then someone asks if you’ll build one for their garden.
A neighbor notices yours.
A grandchild wants to help.
A local nature group invites you to a community workshop.
Without realizing it, a weekend hobby becomes something shared.
Birdhouses have a remarkable way of bringing people together because they combine craftsmanship with something universally appreciated:
Helping wildlife.
Choosing Your Specialty Project
| Project | Skill Level | Build Time | Best For |
|---|---|---|---|
| Rustic Log Birdhouse | Moderate | One Day | Woodland settings |
| Reclaimed Wood Birdhouse | Moderate | Half Day | Sustainable woodworking |
| Winter Roost Box | Moderate | Half Day | Cold-weather shelter |
| Eco-Friendly Birdhouse | Moderate | Half Day | Conservation-focused projects |
| Decorative Garden Birdhouse | Advanced | One Day | Landscape design |
| Premium Cedar Birdhouse | Expert | Weekend | Long-term outdoor performance |
Creative Mistakes Worth Avoiding
Creative freedom is exciting.
It can also become distracting.
As you experiment, remember these common pitfalls:
- Prioritizing appearance over function
- Blocking ventilation with decorative trim
- Adding unnecessary weight
- Ignoring maintenance access
- Using finishes inside the nesting chamber
- Changing entrance sizes without understanding species requirements
Creativity works best when supported by good design—not substituted for it.
The Most Rewarding Discovery
Somewhere along the way, you may notice that people stop asking about the birdhouse itself.
Instead, they ask:
“Have any birds moved in yet?”
That’s a wonderful shift.
Because it means the project has succeeded in exactly the way it was intended to.
The woodworking fades quietly into the background.
The wildlife becomes the focus.
And that’s perhaps the highest compliment a birdhouse builder can receive.
Continue Reading
In Part 8: Birdhouse Dimensions by Bird Species, we’ll move beyond construction and into one of the most important subjects in the entire guide. You’ll discover how entrance hole size, floor dimensions, cavity depth, mounting height, and habitat preferences influence whether a birdhouse becomes a successful nesting site—or remains empty despite excellent craftsmanship.
Part 8: Birdhouse Dimensions by Bird Species
You can build the most beautiful birdhouse in your neighborhood.
Perfect joints.
Silky-smooth cedar.
A roof that fits like fine furniture.
And yet…spring arrives, summer passes, and the birdhouse stays empty.
It’s frustrating because the problem often isn’t the quality of the woodworking.
It’s a measurement.
Sometimes it’s as small as an entrance hole that’s only a fraction of an inch too wide.
That’s all it takes.
Birds don’t judge a birdhouse the way people do. They judge it by instinct. Every dimension tells them something about safety, comfort, and whether it’s worth trusting with the next generation.
Once you understand those signals, your success rate changes dramatically.
The most important measurement in your birdhouse isn’t the outside. It’s the space the birds experience on the inside.
In This Chapter
- Why dimensions matter more than appearance
- Understanding birdhouse anatomy
- Entrance hole sizes
- Interior floor dimensions
- Nesting chamber depth
- Mounting heights
- Habitat preferences
- Species-by-species planning guide
- Quick-reference sizing charts
Why Birds Are Surprisingly Picky
Imagine you’re choosing a home.
You wouldn’t look only at the front door.
You’d notice the neighborhood.
The room sizes.
The roof.
The security.
The overall feeling.
Birds do something remarkably similar.
They don’t consciously compare blueprints, of course, but millions of years of evolution have refined their instincts until they can evaluate a potential nesting cavity astonishingly quickly.
If something feels wrong…
Too exposed.
Too shallow.
Too large.
Too small.
They simply keep looking.
That’s why dimensions matter so much.
You’re not building a decorative box.
You’re recreating something birds have been selecting naturally for thousands of generations.
Every Measurement Tells a Story
A birdhouse is made up of several measurements, but each one answers a different question for the bird.
Understanding those questions is more valuable than memorizing numbers.
Entrance Hole Diameter
The entrance is the first feature every bird evaluates.
Its size determines:
- Which species can enter
- Which larger competitors are discouraged
- How protected the nesting cavity feels
- How easily predators might reach inside
Many first-time builders accidentally think larger is safer.
For birds, the opposite is often true.
An entrance that’s just large enough—and no larger—creates a greater sense of security.
Floor Dimensions
The floor supports far more than nesting material.
It determines how much room parents have to care for young birds while still maintaining the enclosed feeling cavity nesters naturally prefer.
Too little space creates crowding.
Too much space can make the cavity feel unusually exposed.
Nature generally favors balance.
Interior Height
This measurement influences more than comfort.
Adequate interior height helps:
- Regulate temperature
- Separate the nest from the roof
- Provide room for growing chicks
- Improve overall nesting conditions
It’s another reminder that successful birdhouses are carefully proportioned—not simply scaled larger.
Entrance Height Above the Floor
One of the simplest ways to improve nest security is to increase the distance between the entrance hole and the nest itself.
A deeper cavity makes it more difficult for predators to reach eggs or nestlings.
Small measurement.
Significant impact.
Mounting Height
Not every bird naturally nests at the same elevation.
Some species feel comfortable only a few feet above the ground.
Others routinely choose much higher nesting locations.
Matching your installation height to the habits of your chosen species gives your birdhouse a much better chance of being occupied.
Quick Birdhouse Dimension Reference
The chart below provides general planning dimensions for several common cavity-nesting birds. Local recommendations may vary, so treat these measurements as a starting point rather than an absolute rule.
| Bird Species | Entrance Hole | Floor Size | Interior Height | Typical Mounting Height* |
|---|---|---|---|---|
| House Wren | 1¼ in (32 mm) | 4 × 4 in | 8–10 in | 5–10 ft |
| Chickadee | 1⅛ in (29 mm) | 4 × 4 in | 8–10 in | 5–15 ft |
| Tufted Titmouse | 1¼ in (32 mm) | 4 × 4 in | 8–10 in | 5–15 ft |
| White-Breasted Nuthatch | 1¼ in (32 mm) | 4 × 4 in | 8–10 in | 5–20 ft |
| Eastern Bluebird | 1½ in (38 mm) | 5 × 5 in | 8–12 in | 4–6 ft |
| Tree Swallow | 1½ in (38 mm) | 5 × 5 in | 8–12 in | 5–10 ft |
| Screech Owl | About 3 in (76 mm) | Larger floor | 16–24 in | 10–30 ft |
| Wood Duck | Oval entrance | Larger floor | 20–24 in | 6–20 ft |
| Purple Martin** | Multi-compartment housing | Species-specific | Varies | Elevated installation |
*General recommendations. Habitat and regional conditions can influence placement.
**Purple martins require specialized housing and management practices.
House Wrens: Small Space, Big Personality
House wrens have never needed large homes.
What they value is protection.
A compact birdhouse tucked into suitable habitat often feels more inviting than a large decorative structure.
Ideal characteristics include:
- Small entrance hole
- Compact floor
- Good roof coverage
- Effective drainage
- Easy maintenance access
Simple designs consistently outperform elaborate ones.
Chickadees: Security Above All Else
Watch chickadees for long enough and you’ll notice they’re cautious birds.
They inspect.
Pause.
Inspect again.
Their preferred birdhouses reflect that behavior.
They appreciate:
- Thick wooden walls
- Smaller entrances
- Deep nesting chambers
- Quiet surroundings
- Natural-looking placement
The less a birdhouse draws attention, the more comfortable it often feels.
Tufted Titmice and Nuthatches
These species share many of the same preferences.
They generally favor birdhouses that provide:
- Modest interior dimensions
- Reliable weather protection
- Stable mounting
- Mature surrounding vegetation
They don’t require elaborate architecture.
Just thoughtful construction.
Eastern Bluebirds: Open Spaces Matter
Bluebirds break one common assumption.
People often mount every birdhouse close to trees.
Bluebirds frequently prefer something different.
They thrive in:
- Meadows
- Open lawns
- Fence lines
- Pastures
- Lightly wooded edges
The birdhouse itself matters.
The landscape around it matters just as much.
Bluebird Design Priorities
A successful bluebird nest box includes:
- Properly sized entrance
- Spacious nesting chamber
- Excellent roof protection
- Convenient cleaning access
These simple features have made bluebird conservation one of North America’s great wildlife success stories.
Tree Swallows: Built for Flight
Tree swallows spend much of their lives in motion.
Fast.
Graceful.
Constantly hunting insects on the wing.
Their preferred nesting sites reflect that lifestyle.
Open flight paths matter.
Clear approaches matter.
A birdhouse surrounded by dense branches is less attractive than one with room to maneuver.
Sometimes what isn’t around the birdhouse matters just as much as what is.
Screech Owls: Thinking Bigger
Building for owls requires a different mindset.
Everything scales upward.
The walls.
The roof.
The nesting chamber.
The mounting system.
A larger birdhouse naturally places greater demands on construction quality.
Strong joinery becomes even more important because the structure must support significantly more weight over many years.
Wood Ducks: Built for a Different World
Wood ducks aren’t backyard songbirds.
They’re wetland birds.
That distinction changes almost everything.
Their nest boxes require:
- Taller interiors
- Larger entrances
- Secure mounting near appropriate habitat
- Interior climbing surfaces
- Durable weather-resistant construction
Without suitable habitat nearby, even a perfectly built wood duck box is unlikely to be used.
Why Bigger Rarely Helps
One of the most persistent myths in birdhouse building is that extra space automatically benefits birds.
It feels logical.
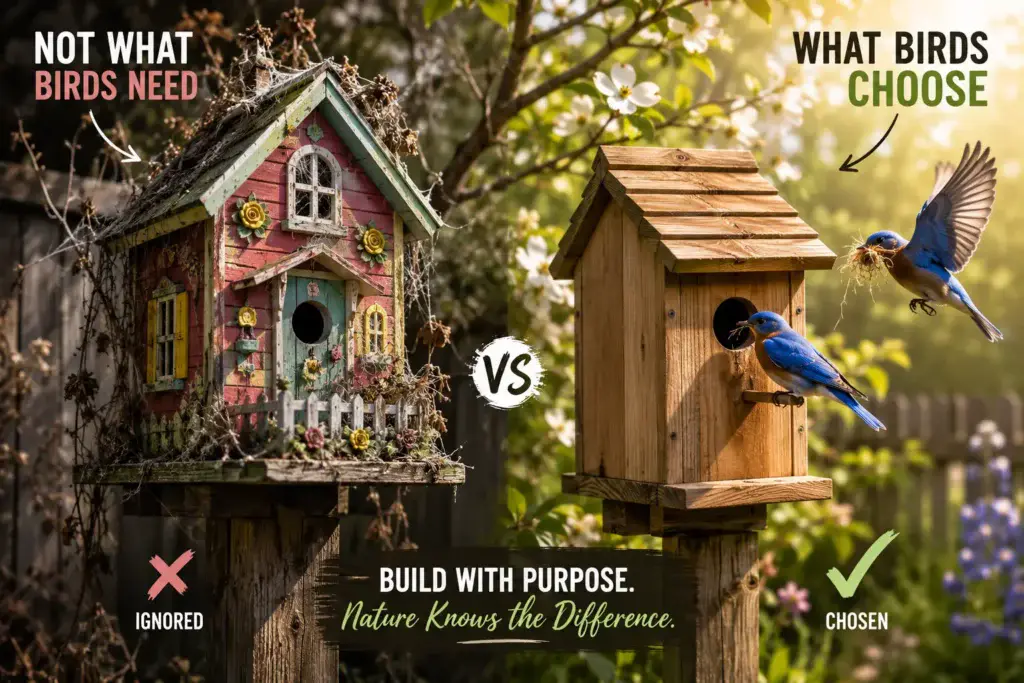
More room should be more comfortable.
Yet cavity-nesting birds evolved in naturally enclosed spaces.
Oversized chambers may feel unusually exposed.
Appropriate dimensions usually outperform oversized ones.
The goal isn’t to maximize space.
It’s to match nature as closely as practical.
Roof Overhang: A Small Detail With Big Consequences
Spend time watching rain during a storm.
Notice how water runs.
Where it drips.
Where it lingers.
Roof overhangs influence all of it.
A generous roof helps:
- Protect the entrance
- Reduce direct rainfall
- Shade the front wall
- Extend the life of the birdhouse
Few design decisions deliver so much benefit for so little effort.
Ventilation and Drainage Work Together
Think of these two features as partners.
Ventilation removes warm, moist air.
Drainage removes water.
One without the other leaves the birdhouse less effective.
Neither should ever be blocked by paint, caulk, decorative trim, or misplaced hardware.
Habitat Is the Final Dimension
Measurements don’t stop with the birdhouse itself.
The surrounding landscape becomes part of the design.
Woodland species usually appreciate:
- Mature trees
- Natural cover
- Quiet settings
Open-country species often prefer:
- Meadows
- Pastures
- Large lawns
- Fence rows
Wetland species require:
- Water nearby
- Appropriate vegetation
- Suitable mounting locations
The best birdhouse in the wrong habitat rarely performs as well as a simpler design installed in the right place.
Planning More Than One Birdhouse
If your property supports different habitats, consider building for several species instead of trying to attract every bird with a single design.
A collection of species-specific birdhouses often produces:
- Better occupancy
- Greater bird diversity
- More interesting seasonal observations
- Better long-term results
Diversity begins with thoughtful planning.
Before You Cut Lumber
Ask yourself five questions.
Who am I building for?
Does the entrance match that species?
Are the interior dimensions appropriate?
Will this birdhouse be installed in suitable habitat?
Have I resisted changing the plans simply to make the birdhouse larger?
If you can answer each confidently, you’re already ahead of where most first-time builders begin.
Continue Reading
In Part 9: Installing Your Birdhouse for Maximum Nesting Success, you’ll discover why placement is just as important as construction. We’ll explore mounting methods, habitat selection, predator awareness, seasonal timing, and the practical decisions that often determine whether a birdhouse becomes a thriving nest—or remains quietly unnoticed from one year to the next.
Part 9: Installing Your Birdhouse for Maximum Nesting Success
You’ve measured carefully. Chosen durable lumber. Built solid joints. Sanded every edge. The birdhouse is finished, and it looks exactly the way you imagined.
Then comes the question that determines everything:
Where should it go?
This is where many otherwise excellent birdhouses quietly fail.
A nest box can be perfectly built yet never attract a single bird simply because it’s mounted in the wrong place. Installation isn’t the final step in the project—it’s the moment where woodworking meets wildlife.
A thoughtfully chosen location can make an ordinary birdhouse remarkably successful. A poor location can prevent even the finest craftsmanship from ever being used.
Birds don’t choose the best-built birdhouse. They choose the one that feels safest.
In This Chapter
- Why placement matters as much as construction
- Matching habitat to bird species
- Choosing the best mounting method
- Recommended installation heights
- Entrance orientation
- Predator awareness
- Seasonal timing
- Monitoring without disturbing wildlife
- Common installation mistakes
A Bird’s First Impression
Imagine walking into a neighborhood you’ve never visited before.
Before you ever step inside a house, you’ve already noticed the surroundings.
Is it quiet?
Busy?
Safe?
Comfortable?
Birds make similar judgments.
Long before entering a birdhouse, they evaluate everything around it.
The nearby trees.
The open space.
The approach to the entrance.
Potential escape routes.
Possible dangers.
The birdhouse itself is only part of the decision.
The environment tells the rest of the story.
Start With Habitat, Not Hardware
Many people focus first on mounting brackets, poles, or screws.
Experienced birdhouse builders usually begin somewhere else.
They study the landscape.
Different birds evolved in different environments, and those preferences haven’t changed simply because a wooden nest box is available.
If the surrounding habitat feels wrong, birds rarely stay long enough to inspect the entrance.
Woodland Species
Birds such as chickadees, nuthatches, and screech owls naturally associate nesting with mature trees and sheltered environments.
Ideal locations often include:
- Established woodland edges
- Quiet backyards with mature trees
- Light canopy openings
- Areas with nearby natural cover
Too much open space can leave these species feeling exposed.
Open-Country Species
Bluebirds and tree swallows tell a very different story.
They generally prefer landscapes with room to fly.
Think:
- Meadows
- Fence rows
- Open lawns
- Pastures
- Agricultural edges
Installing a bluebird box deep inside dense woodland may produce beautiful photographs—but rarely successful nesting.
Wetland Species
Wood ducks follow an entirely different set of instincts.
Suitable habitat usually includes:
- Ponds
- Marshes
- Slow-moving streams
- Wetland vegetation
Without nearby water, even a perfectly constructed wood duck box is unlikely to be occupied.
Choosing the Right Mounting Method
The mounting system should support both the birdhouse and your long-term maintenance routine.
The best option isn’t always the most permanent.
It’s the one that balances stability, accessibility, and habitat suitability.
Pole Mounting
Many experienced birdhouse enthusiasts eventually settle on poles for a simple reason.
They make life easier.
Pole-mounted birdhouses are often:
- Easier to inspect
- Easier to clean
- Easier to relocate if necessary
- Compatible with many predator-guard systems
They’re especially useful in open landscapes where trees may not provide ideal placement.
Mounting on Buildings
Garden sheds, barns, workshops, and other outbuildings can provide suitable locations when they aren’t subject to constant activity.
Look for places that remain relatively quiet throughout the nesting season.
Avoid mounting directly beside:
- Frequently used doors
- Loud machinery
- Outdoor gathering areas
- Bright security lights
A little distance can make a significant difference.
Tree Mounting
Trees feel like the obvious choice because many cavity-nesting birds naturally use them.
When mounting to a tree:
- Avoid damaging the trunk unnecessarily.
- Allow room for future growth.
- Check mounting hardware during annual maintenance.
- Position the birdhouse where branches won’t block the entrance.
Healthy trees and thoughtful installation work well together.
Height Matters—But Not as Much as You Think
One of the most common questions new builders ask is:
“Exactly how high should I install my birdhouse?”
The honest answer is that height matters—but it’s only one piece of a much larger picture.
A birdhouse mounted at the perfect elevation in poor habitat is still unlikely to succeed.
General recommendations include:
| Bird Species | Typical Mounting Height |
|---|---|
| House Wren | 5–10 ft |
| Chickadee | 5–15 ft |
| Titmouse | 5–15 ft |
| Nuthatch | 5–20 ft |
| Eastern Bluebird | 4–6 ft |
| Tree Swallow | 5–10 ft |
| Screech Owl | 10–30 ft |
| Wood Duck | 6–20 ft near suitable wetland habitat |
Use these as flexible guidelines rather than rigid rules.
Give Birds a Clear Flight Path
Birdhouses should be easy to approach.
Before mounting yours, stand back and imagine flying toward the entrance.
Would branches force awkward turns?
Would climbing vines block the opening?
Would hanging decorations swing into the flight path?
Small obstacles that seem insignificant to us may discourage birds from using the box.
A clean approach often makes all the difference.
Weather Is Part of the Design
A birdhouse never experiences perfect conditions.
It faces:
- Wind
- Rain
- Snow
- Summer heat
- Seasonal humidity
Thoughtful placement helps reduce those stresses.
Whenever practical:
- Position the roof so it sheds rain naturally.
- Avoid locations where water collects beneath the birdhouse.
- Provide some afternoon shade in particularly hot climates.
- Keep ventilation openings unobstructed.
Good design and good placement work together.
Neither can fully compensate for the other.
Think Like a Predator
One of the most valuable habits you can develop is looking at every installation from a predator’s perspective.
Ask yourself:
“If I were trying to reach this nest, how would I do it?”
That simple exercise often reveals problems immediately.
Nearby fence rails.
Overhanging branches.
Dense shrubs that create easy access.
Correcting these issues before installation is far easier than after birds have moved in.
Predator Guards
Depending on your mounting method, compatible predator guards or baffles may provide an additional layer of protection.
They’re not a substitute for good placement.
They’re most effective when combined with thoughtful installation from the very beginning.
Which Direction Should the Entrance Face?
It’s one of the oldest birdhouse questions.
The surprising answer?
There isn’t a universal compass direction that’s correct everywhere.
Instead, consider local conditions.
Aim to:
- Reduce exposure to driving rain.
- Avoid prolonged afternoon heat where summers are especially hot.
- Maintain a clear approach to the entrance.
- Take advantage of natural shelter already present in the landscape.
Birds care far more about comfort and safety than precise compass bearings.
Can You Install More Than One Birdhouse?
Absolutely.
In fact, many properties can support several nest boxes.
The key is variety—not crowding.
Different bird species use different habitats and tolerate neighbors differently.
Instead of clustering birdhouses together, spread them throughout appropriate areas of your property whenever practical.
Each one should feel like its own secure nesting opportunity.
Timing Matters More Than You Might Expect
Many builders assume birdhouses should only be installed in spring.
In reality, waiting until nesting season begins can mean missing valuable preparation time.
Installing birdhouses before birds begin searching for nest sites gives wildlife an opportunity to become familiar with the new structure.
It also allows you to:
- Check stability
- Make adjustments
- Observe the surrounding habitat
- Complete any final maintenance
A birdhouse that’s already part of the landscape often feels more natural when nesting season arrives.
Watching Without Interrupting
One of the greatest rewards of building birdhouses is seeing them used.
It’s also where restraint becomes important.
Observe from a comfortable distance.
Let the birds behave naturally.
Avoid repeated visits to the nest box while it’s occupied.
The less your presence changes their routine, the better.
Sometimes the most respectful thing a birdhouse builder can do is simply enjoy watching quietly.
Seasonal Installation Routine
Late Winter
- Inspect existing birdhouses
- Tighten hardware
- Complete repairs
- Install new projects
Spring
- Watch for nesting activity
- Limit disturbance
- Keep pets away from active nest sites
Summer
- Observe fledging from a distance
- Note which locations attracted birds
Autumn
- Clean birdhouses after the nesting season
- Replace worn hardware
- Prepare for winter weather
Winter
- Plan improvements
- Build additional birdhouses
- Evaluate which placements worked best
Each season teaches something useful for the next.
Installation Mistakes That Quietly Reduce Success
The biggest problems are rarely dramatic.
They’re often small oversights.
Such as:
- Mounting beside busy walkways
- Blocking the entrance with vegetation
- Ignoring surrounding habitat
- Forgetting future maintenance access
- Choosing convenience over proper placement
- Installing the birdhouse where predators have easy access
Individually, these decisions may seem minor.
Together, they shape whether birds view the birdhouse as a safe place to nest.
Before You Walk Away
Once your birdhouse is mounted, resist the temptation to leave immediately.
Pause.
Step back.
Look at it from different angles.
Can rain reach the entrance easily?
Is the flight path clear?
Does the roof provide enough protection?
Can you still reach the cleaning panel next season?
That final inspection often catches details you never notice while standing only a few feet away.
A Different Kind of Satisfaction
The workshop taught you how to build.
The backyard teaches you how well you built.
Some birdhouses attract visitors quickly.
Others take time.
Patience becomes part of the craft.
When a bird finally chooses the home you’ve created, it isn’t simply validating your woodworking.
It’s confirming that every careful measurement, every thoughtful design decision, and every hour spent in the workshop came together exactly as intended.
Continue Reading
In Part 10: Maintenance, Cleaning & Long-Term Care, you’ll learn how to protect both your woodworking investment and the birds that depend on it. From seasonal inspections and cleaning routines to repairing weather damage and extending the life of cedar birdhouses, the next chapter ensures your projects continue serving wildlife year after year.
Part 10: Maintenance, Cleaning & Long-Term Care
The first nesting season is exciting.
You notice a bird carrying twigs toward the entrance. A few days later, there’s constant activity. Parents arrive with insects, disappear inside for a moment, then rush off again. Before long, tiny heads appear at the opening, and one morning the birdhouse falls silent.
For many builders, that’s where the story ends.
For experienced woodworkers, it’s where the next chapter begins.
Because a birdhouse isn’t a one-season project.
It’s an outdoor structure built to weather storms, changing temperatures, insects, moisture, and years of use. The way you care for it after each nesting season has just as much influence on its lifespan as the quality of the lumber you chose on day one.
A few minutes of thoughtful maintenance each year can add many more years to the life of your work.
The best birdhouses aren’t simply well built—they’re well cared for.
In This Chapter
- Why maintenance matters
- When to clean a birdhouse
- Step-by-step seasonal cleaning
- Inspecting for damage
- Common repairs
- Managing moisture
- Hardware maintenance
- Exterior care
- Pest management
- Extending the life of your birdhouse
A Birdhouse Never Stops Aging
Unlike furniture inside your home, a birdhouse never gets a day off.
It faces:
- Heavy rain
- Summer heat
- Freezing temperatures
- Wind-driven moisture
- Expanding and shrinking wood
- Constant ultraviolet exposure
Every season leaves its mark.
The remarkable thing is that most damage begins quietly.
A tiny crack.
A loose hinge.
A screw that’s backed out only slightly.
Left alone, these become repairs.
Caught early, they’re simple maintenance.
Why Cleaning Matters
When birds leave at the end of the nesting season, the birdhouse isn’t empty.
Inside you’ll often find:
- Old nesting material
- Loose feathers
- Dust
- Small twigs
- Natural debris
Cleaning isn’t about making the birdhouse look new again.
It’s about preparing it for another successful season while giving yourself an opportunity to inspect the structure closely.
Maintenance and observation naturally go hand in hand.
The Right Time to Open a Birdhouse
One question appears again and again among first-time builders:
“When should I clean it?”
The answer is refreshingly simple.
Only after you’re certain the nesting cycle has finished and the birdhouse is no longer occupied.
Before opening the access panel:
Watch the birdhouse for several days.
Confirm that adults and young birds have completely left.
If you’re uncertain, wait a little longer.
Patience protects wildlife.
Cleaning Step by Step
Maintenance doesn’t require expensive equipment or complicated procedures.
A calm, methodical approach works best.
Step 1: Open the Access Panel
If you’ve followed the designs throughout this guide, your birdhouse already includes a hinged roof or removable side panel.
Open it carefully.
Take a moment to observe the interior before removing anything.
You’ll often learn a surprising amount simply by looking.
Step 2: Remove Old Nesting Material
Lift out the remaining nesting material gently.
There’s no need to scrape aggressively or force anything loose.
The goal is simply to clear the chamber for future occupants.
Wear gloves if you prefer, especially when handling old nesting material.
Step 3: Inspect the Interior
This is where careful builders gain valuable information.
Look for signs of:
- Moisture damage
- Loose joints
- Cracks
- Blocked drainage holes
- Mold
- Insect activity
- Exposed fasteners
Most problems reveal themselves long before they become serious.
Step 4: Remove Remaining Debris
A small hand brush works remarkably well.
Dust.
Fine wood particles.
Loose debris.
A few gentle strokes usually leave the interior clean enough for the next season.
Step 5: Allow Everything to Dry
If moisture is present, leave the birdhouse open in a dry, sheltered location until the interior has completely dried.
Closing damp wood traps moisture.
Dry wood lasts longer.
The Annual Inspection
Think of this as your birdhouse’s yearly checkup.
Every inspection should include four main areas.
The Roof
The roof works harder than any other part of the birdhouse.
Check for:
- Loose screws
- Warping
- Cracks
- Water stains
- Separation at joints
Even a minor roof problem can eventually affect every panel beneath it.
The Walls
Inspect each side carefully.
Look for:
- Splits
- Soft spots
- Loose glue joints
- Excessive movement
Most naturally durable woods hold up exceptionally well, but every outdoor project benefits from regular inspection.
The Floor
Because it sits at the lowest point, the floor often reveals moisture problems first.
Confirm that:
- Drainage holes remain open.
- No standing water is present.
- The wood remains structurally sound.
- Fasteners remain tight.
A healthy floor usually means the entire birdhouse has been shedding water effectively.
Hardware
Time affects hardware differently than wood.
Inspect:
- Hinges
- Screws
- Latches
- Mounting brackets
- Pole connections
A five-minute inspection today can prevent a much larger repair later.
Small Repairs That Make a Big Difference
One of the pleasures of woodworking is that most repairs are surprisingly manageable.
Birdhouses are no exception.
Tightening Loose Hardware
Sometimes the solution really is that simple.
Check every screw before assuming something more serious is wrong.
Wood naturally expands and contracts with changing seasons.
Occasionally, hardware simply needs a quick adjustment.
Replacing a Damaged Roof
Roofs experience years of direct exposure.
If yours begins showing significant wear, replacing it often restores the entire birdhouse.
Because many of the projects in this guide use removable roof assemblies, this repair is usually straightforward.
Repairing Cracks
Small cracks don’t always require immediate replacement.
Evaluate whether they’re cosmetic or structural.
If a crack begins affecting strength or weather resistance, replacing the affected panel is generally the better long-term solution.
Adjusting Hinges
Cleaning doors should open easily.
If a hinge begins binding:
- Check alignment.
- Tighten hardware.
- Confirm the frame remains square.
Small adjustments often restore smooth operation.
Moisture Is the Real Enemy
Many people blame sunlight for outdoor deterioration.
Experienced builders often point somewhere else.
Water.
Moisture quietly shortens the life of more birdhouses than almost anything else.
Protect your project by ensuring:
- Roof joints remain tight.
- Drainage holes stay open.
- Ventilation remains unobstructed.
- Roof overhangs continue directing water away from the walls.
Managing moisture is less about reacting to problems and more about preventing them.
Should You Refinish the Exterior?
The answer depends largely on the material you chose.
If your birdhouse is built from cedar or cypress, refinishing is often unnecessary.
Many builders enjoy watching these woods weather naturally into soft gray tones.
If you do apply an exterior finish:
- Inspect it annually.
- Remove peeling material before refinishing.
- Keep finishes on the outside only.
- Allow adequate curing time before reinstalling the birdhouse.
The nesting chamber itself should remain unfinished.
Looking After the Hardware
Wood may receive most of the attention, but hardware deserves a yearly inspection too.
Replace components showing significant:
- Rust
- Corrosion
- Bending
- Wear
- Looseness
High-quality stainless steel or galvanized hardware often rewards that initial investment with years of dependable performance.
What About Insects?
Occasionally you’ll discover:
- Small spiders
- Wasps
- Ants
- Other insects
Inspect carefully before taking action.
If removal becomes necessary, wait until the birdhouse is no longer occupied.
Avoid introducing pesticides into the nesting chamber.
Maintaining a clean, dry birdhouse naturally discourages many unwanted visitors.
Mold Is Usually a Symptom
Mold rarely appears without a reason.
Rather than focusing only on removing it, ask why it developed.
Common causes include:
- Poor ventilation
- Blocked drainage
- Roof leaks
- Excessive moisture retention
Solve the underlying issue and the problem is far less likely to return.
Keeping a Maintenance Journal
One habit separates many experienced builders from beginners.
They write things down.
Nothing elaborate.
Just simple notes.
For example:
- Installation date
- Bird species observed
- Repairs completed
- Cleaning dates
- Material performance
- Ideas for future improvements
After several seasons, those notes become surprisingly valuable.
Patterns begin to appear.
You’ll discover which designs perform best, which mounting locations attract birds most consistently, and which construction methods deserve repeating.
A Simple Yearly Maintenance Checklist
Before each nesting season, confirm:
Exterior
✔ Roof secure
✔ Walls sound
✔ Mounting stable
✔ Hardware tight
Interior
✔ Clean nesting chamber
✔ Drainage holes open
✔ Ventilation unobstructed
✔ No exposed fasteners
Access Panel
✔ Opens easily
✔ Closes securely
✔ Hinge aligned
✔ Latch functioning properly
Knowing When It’s Time to Start Fresh
Good woodworking lasts.
It doesn’t last forever.
Eventually every outdoor project reaches a point where repair no longer makes practical sense.
Consider replacing a birdhouse if you notice:
- Extensive rot
- Major structural failure
- Persistent roof leaks
- Severe warping
- Unsafe mounting points
- Significant deterioration affecting stability
Replacing one aging birdhouse creates an opportunity to build an even better version using everything you’ve learned since the first.
Maintenance Is Part of the Craft
There’s something deeply satisfying about caring for projects you’ve built yourself.
Every repair reminds you of the day it was assembled.
Every inspection reveals how your skills have evolved.
Over time, maintenance stops feeling like another chore.
It becomes another form of woodworking.
Quieter.
Slower.
More reflective.
And every spring, when another bird chooses that carefully maintained nest box, it becomes clear that those few hours of annual care were well spent.
Continue Reading
In Part 11: Expert Tips, Common Mistakes & Reader FAQs, we’ll gather the practical lessons that experienced birdhouse builders learn over years in the workshop. You’ll discover subtle techniques that improve every project, avoid the mistakes that quietly reduce nesting success, and find answers to the questions almost every woodworker asks sooner or later.
Part 11: Expert Tips, Common Mistakes & Reader FAQs
Some lessons come from books.
Others come from standing in the workshop, staring at a birdhouse that didn’t quite turn out the way you expected.
Perhaps the roof doesn’t sit perfectly flat.
Maybe the entrance hole wandered just enough to catch your eye every time you walk past it.
Or perhaps the craftsmanship is excellent—but after two springs, not a single bird has moved in.
Every experienced woodworker has projects like that.
The difference isn’t that they avoided mistakes.
It’s that they paid attention to them.
Over time, those small lessons become instinct. You begin seeing potential problems before they happen. You build cleaner, work slower, and make decisions that future-you will appreciate during maintenance season.
This chapter gathers many of those lessons into one place.
Not as rigid rules, but as practical advice earned one project at a time.
Mastery isn’t measured by never making mistakes. It’s measured by making fewer of the same ones each time you build.
In This Chapter
- Habits of experienced birdhouse builders
- Small changes that dramatically improve results
- Common design mistakes
- Troubleshooting empty birdhouses
- Reader questions answered naturally
- Fine-tuning your woodworking process
The Difference Between Building and Craftsmanship
Anyone can follow measurements.
Craftsmanship begins when you start noticing the things measurements can’t teach.
The way grain direction affects a cut.
The sound a sharp blade makes compared with a dull one.
How a board feels when it’s perfectly square before you even reach for the measuring tape.
Those observations can’t be rushed.
They accumulate quietly with every project.
And birdhouses are wonderful teachers because they’re small enough to encourage experimentation while still demanding accuracy.
Lesson #1: Build for Birds, Not for Compliments
This sounds obvious.
Yet it’s one of the easiest traps to fall into.
It’s tempting to add decorative shutters.
Tiny balconies.
Miniature fences.
Painted windows.
They’re charming.
People love them.
Birds rarely care.
Every unnecessary addition introduces another opportunity for moisture retention, maintenance issues, or obstacles near the entrance.
The projects that attract the most birds are often the simplest to look at.
Good design is usually quieter than we expect.
Lesson #2: Buy Better Lumber Once
Few woodworking decisions influence long-term durability more than lumber selection.
Quality cedar or cypress may cost a little more at the beginning.
Years later, that extra cost is often forgotten.
The birdhouse is still standing.
The cheaper alternative may already have been replaced.
Sometimes spending slightly more once is less expensive than rebuilding twice.
Lesson #3: Design for Future Maintenance
One question changes everything.
“How will I clean this next year?”
Ask it while you’re still building.
Not after installation.
A well-positioned hinge.
A removable roof.
An access panel that’s easy to reach.
These details rarely attract attention when the project is finished.
They become priceless after several nesting seasons.
Lesson #4: Build More Than One
The first birdhouse teaches you the process.
The second teaches efficiency.
The third begins teaching consistency.
By the fifth, you’ll notice something interesting.
You’re no longer thinking about every individual cut.
You’re thinking about workflow.
Batch-building several birdhouses often produces:
- More accurate dimensions
- Less wasted lumber
- Faster assembly
- Greater confidence
It’s one of the fastest ways to improve your woodworking.
Lesson #5: Keep a Notebook
Memory is surprisingly unreliable.
Write things down.
Not because you have to.
Because future-you will appreciate it.
Record:
- The wood you used
- The finish you applied
- The date of installation
- Which species visited
- Repairs completed
- Ideas for improving the next version
After a few years, those notes become a personalized woodworking guide no book can replace.
Eleven Mistakes That Quietly Reduce Success
Most unsuccessful birdhouses don’t fail because of one dramatic error.
They fail because of several small ones.
Let’s look at the most common.
1. Building for Every Bird Instead of One
Specific designs consistently outperform generic ones.
Choose your target species first.
Everything else becomes easier.
2. Oversized Entrance Holes
An entrance that’s too large changes far more than appearance.
It can alter which birds use the nest box and affect how secure the cavity feels.
Precision matters.
3. Forgetting Ventilation
Warm air needs somewhere to go.
A few properly placed openings beneath the roof make an enormous difference during summer.
4. Ignoring Drainage
Rain doesn’t always arrive from above.
Condensation and humidity create moisture too.
Drainage protects both birds and lumber.
5. Choosing Indoor Materials
MDF.
Particleboard.
Interior plywood.
They belong inside the workshop—not outside in the weather.
Outdoor projects deserve outdoor materials.
6. Making Cleaning Difficult
If maintenance becomes frustrating, it often gets postponed.
Design for easy access from the beginning.
7. Using Decorative Perches
Many people assume birds need them.
Most cavity-nesting birds don’t.
Leaving them off usually creates a cleaner, more functional design.
8. Installing in the Wrong Habitat
A perfect birdhouse in the wrong environment often performs worse than a simple one placed thoughtfully.
Habitat always matters.
9. Forgetting About Predators
Look beyond the birdhouse itself.
Nearby branches.
Fence rails.
Low roofs.
Think about how easily something could reach the entrance.
10. Rushing the Final Assembly
The closer we get to finishing a project, the more tempting it becomes to hurry.
Resist it.
The last hour deserves the same patience as the first.
11. Thinking Every Empty Birdhouse Is a Failure
Sometimes birds simply need time.
New birdhouses may remain unoccupied during their first season.
That doesn’t necessarily mean something is wrong.
Patience is part of birdhouse building too.
“Why Isn’t Anything Using My Birdhouse?”
This is probably the question every builder asks at least once.
The answer is rarely as discouraging as it feels.
Instead of assuming the birdhouse is defective, work through a few possibilities.
Is it designed for a specific species?
Does the surrounding habitat match that species?
Is the entrance correctly sized?
Has the birdhouse only recently been installed?
Has it been cleaned and inspected?
Is there excessive human activity nearby?
Most occupancy problems can be traced to one or more of these factors.
Fortunately, they’re usually easier to correct than rebuilding from scratch.
Small Workshop Habits That Pay Off Forever
Some improvements have nothing to do with expensive tools.
Instead, they’re habits.
Label every component before assembly.
Dry-fit before applying glue.
Sharpen blades regularly.
Measure twice without apology.
Pause before every important cut.
These routines don’t slow you down.
They reduce the number of times you have to do something twice.
The Backyard Matters Too
Building birdhouses is only part of creating bird-friendly spaces.
The landscape around them tells birds whether they’re welcome.
Simple improvements include:
- Planting native trees and shrubs
- Providing fresh water
- Leaving some natural cover
- Reducing unnecessary pesticide use
- Allowing parts of the garden to remain a little wild
Birdhouses work best when they become part of a larger habitat—not isolated decorations.
Questions Readers Ask Again and Again
“Should I design my own birdhouse or follow proven plans?”
If you’re beginning, start with established designs.
Once you understand why those dimensions work, you’ll have the confidence to modify them thoughtfully or create your own.
Knowledge should come before experimentation.
“Is cedar really worth the extra cost?”
For most builders, yes.
Its natural durability, stability, and weather resistance often make it the best long-term investment.
“Can I build with reclaimed lumber?”
Absolutely.
Just inspect it carefully.
Remove old fasteners.
Avoid chemically treated boards.
Choose pieces that remain structurally sound.
Some of the most beautiful birdhouses are built from reclaimed wood with decades of history already built into the grain.
“Should every birdhouse have a perch?”
Usually not.
Most cavity-nesting birds don’t need one, and many proven birdhouse designs intentionally leave them off.
“How many birdhouses should I install?”
As many as your property can support thoughtfully.
Several well-placed birdhouses almost always outperform many crowded together.
Quality of placement matters more than quantity.
One Final Piece of Advice
Every birdhouse teaches something.
Even the imperfect ones.
Especially the imperfect ones.
Maybe you’ll discover a faster way to cut roof panels.
A stronger hinge placement.
A cleaner assembly sequence.
Those improvements don’t happen because someone else wrote better plans.
They happen because you kept building.
That’s the quiet reward of woodworking.
No project is ever wasted.
Every one becomes experience.
Before Turning the Page
If you’ve worked through this guide from the beginning, you’ve already learned far more than how to build birdhouses.
You’ve learned to slow down.
To measure carefully.
To think ahead.
To build for durability instead of shortcuts.
Those habits extend well beyond birdhouses.
They’ll improve every woodworking project you tackle in the future.
And perhaps that’s the greatest value hidden inside a simple nest box.
Not what it teaches birds.
What it teaches the builder.
Continue Reading
In Part 12: Products / Tools / Resources, we’ll finish the guide with carefully selected woodworking tools, recommended materials, books, conservation organizations, planning resources, and helpful products that can support your future birdhouse projects and help you continue growing as both a woodworker and a backyard wildlife enthusiast.
Part 12: Products / Tools / Resources
Every woodworker eventually discovers the same truth.
The tools matter.
The lumber matters.
The plans matter.
But none of those things matter quite as much as the willingness to keep learning.
The first birdhouse teaches you how to measure.
The second teaches efficiency.
The tenth teaches patience.
Years later, you realize you were never just building birdhouses—you were building judgment.
This final chapter isn’t a conclusion. Think of it as a well-organized workshop shelf: a collection of trusted resources, practical recommendations, and project-planning tools you’ll return to long after this guide is finished.
Whether you’re preparing for your next weekend build or planning a backyard filled with nesting boxes, these resources will help you work smarter, build better, and enjoy the process even more.
Products / Tools / Resources
Essential Hand Tools
You don’t need a professional cabinet shop to build excellent birdhouses.
A small collection of dependable tools will handle nearly every project in this guide.
Measuring & Layout
- 25-foot tape measure
- Combination square
- Speed square
- Steel ruler
- Carpenter’s pencils
- Fine-point marking knife
- Compass for laying out entrance holes
Best for: Accurate layouts, repeatable measurements, and cleaner joinery.
Cutting Tools
Depending on your workshop, consider adding:
- Miter saw
- Circular saw with guide rail
- Table saw
- Jigsaw
- Japanese pull saw
- Crosscut hand saw
Best for: Straight cuts, angled roof panels, curved profiles, and precise trimming.
Drilling & Assembly
A quality drill quickly becomes the most-used tool in most birdhouse workshops.
Recommended additions include:
- Cordless drill/driver
- Drill bit set
- Countersink bit
- Hole saw kit
- Forstner bit set
- Impact driver (optional)
Helpful Tip: Keep one drill set up for drilling and another for driving screws if you build projects regularly.
Clamps Worth Owning
Clamps are like extra hands.
You almost never have enough.
Start with:
- Quick-grip clamps
- Bar clamps
- Corner clamps
- Spring clamps
Good clamping pressure improves alignment, reduces frustration, and makes assembly noticeably easier.
Sanding Equipment
Smooth surfaces aren’t only about appearance.
Proper sanding also removes splinters, eases sharp edges, and prepares exterior surfaces for years outdoors.
Useful supplies include:
- Random orbital sander
- Sanding block
- 80-, 120-, 180-, and 220-grit sandpaper
- Detail sanding sponges
Leave the inside of the nesting chamber lightly textured for better grip.
Recommended Lumber
Choosing quality lumber is one of the best investments you can make.
Cedar
Ideal for most birdhouse projects because it offers:
- Excellent weather resistance
- Natural decay resistance
- Stable performance outdoors
- Minimal maintenance
- Attractive aging characteristics
Cypress
Another excellent option for outdoor birdhouses.
Benefits include:
- Long service life
- Resistance to insects and moisture
- Easy machining
- Reliable stability
Pine
Perfect for:
- Practice projects
- Beginner builds
- Classroom workshops
- Family woodworking days
While pine requires more maintenance outdoors, it remains an affordable and widely available choice.
Reclaimed Lumber
Great for rustic or eco-conscious projects, provided the wood is:
- Structurally sound
- Free from rot
- Free of embedded nails or screws
- Untreated with harmful chemicals
Every reclaimed board brings a unique character to the finished birdhouse.
Hardware Recommendations
Outdoor woodworking deserves outdoor hardware.
Choose:
- Stainless-steel screws
- Galvanized screws
- Exterior-rated hinges
- Weather-resistant latches
- Corrosion-resistant mounting hardware
Quality fasteners help ensure your birdhouse remains secure through years of changing weather.
Adhesives
For exterior birdhouses, select waterproof wood glue specifically designed for outdoor use.
A reliable adhesive:
- Strengthens joints
- Helps reduce movement
- Improves long-term durability
- Works alongside mechanical fasteners for a stronger structure
Remember: glue complements screws—it doesn’t replace them.
Helpful Workshop Accessories
Small additions often make woodworking more enjoyable.
Consider keeping these within reach:
- Magnetic parts tray
- Shop vacuum
- Dust collection hose
- LED task light
- Safety glasses
- Hearing protection
- Dust mask or respirator
- Push sticks
- Bench brush
- Moisture meter for lumber
A tidy workshop is usually a safer and more productive one.
Birdhouse Planning Templates
Before starting a new project, take a few minutes to answer these questions.
Project Planning Sheet
Target bird species: _______________________
Project name: ____________________________
Lumber selected: _________________________
Estimated build time: ____________________
Installation location: ____________________
Cleaning access included? □ Yes □ No
Ventilation added? □ Yes □ No
Drainage holes complete? □ Yes □ No
Hardware checked? □ Yes □ No
A few minutes of planning often prevents hours of unnecessary rework.
Seasonal Maintenance Planner
Late Winter
- Inspect every birdhouse
- Tighten hardware
- Replace damaged components
- Install new nest boxes
Spring
- Observe nesting activity from a distance
- Avoid disturbing occupied birdhouses
- Record bird species using each box
Summer
- Inspect mounting systems
- Monitor weather-related wear
- Note any improvements for future builds
Autumn
- Clean nest boxes after the breeding season
- Check roofs and hinges
- Repair minor damage before winter
Winter
- Build new birdhouses
- Sharpen workshop tools
- Organize lumber
- Experiment with new designs
Every season teaches something valuable.
Books Worth Adding to Your Shelf
As your woodworking skills grow, so will your curiosity.
Look for books covering topics such as:
- Bird-friendly landscaping
- Outdoor woodworking
- Wood identification
- Joinery techniques
- Nature observation
- Garden habitat design
The best workshops usually include both tools and books.
Online Learning Resources
Consider following organizations and educational platforms that publish reliable information about:
- Bird conservation
- Native landscaping
- Woodworking techniques
- Tool maintenance
- Backyard habitat improvement
Combining practical woodworking with sound wildlife knowledge leads to better results than focusing on either subject alone.
Helpful Backyard Additions
Birdhouses are only one piece of a welcoming habitat.
You may also enjoy adding:
- Bird feeders
- Platform feeders
- Bird baths
- Pollinator gardens
- Native shrubs
- Nesting-friendly trees
- Bat houses
- Bee hotels
- Butterfly shelters
Together, these features create a landscape that supports wildlife throughout the year.
Your Next Woodworking Projects
If birdhouse building has sparked a deeper interest in woodworking, consider expanding into:
- Window bird feeders
- Garden planter boxes
- Potting benches
- Outdoor storage cabinets
- Compost bin enclosures
- Garden trellises
- Rustic benches
- Small garden gates
- Mailbox posts
- Adirondack chairs
Many of the measuring, cutting, and assembly skills you’ve practiced throughout this guide transfer naturally to these larger builds.
Workshop Habits That Never Go Out of Style
Long after you forget individual measurements, these habits will continue paying dividends.
Always:
- Measure twice before cutting.
- Dry-fit before gluing.
- Keep blades sharp.
- Label every project part.
- Clean the workshop after each session.
- Store lumber properly.
- Replace worn hardware promptly.
- Keep notes on completed builds.
Good habits outlast good tools.
Build a Backyard That Grows With You
One birdhouse often becomes two.
Then five.
Soon you’ll begin noticing subtle changes in your backyard.
Different birds arriving each spring.
More birdsong in the morning.
Children or grandchildren checking nest boxes with excitement.
Neighbors asking questions about your latest project.
Those moments rarely happen because you built the most elaborate birdhouse.
They happen because you built one that worked.
Then another.
And another.
Keep Exploring
Woodworking is one of those rare hobbies where there is always another skill to learn.
Another joint to perfect.
Another design to improve.
Another project waiting on the workbench.
That’s part of the appeal.
No matter how experienced you become, every new build offers an opportunity to refine your craft.
Birdhouses simply happen to be one of the most rewarding places to begin.
Quick Resource Checklist
Essential Materials
✔ Cedar or cypress lumber
✔ Exterior screws
✔ Waterproof wood glue
✔ Sandpaper
✔ Stainless-steel hinges
Essential Tools
✔ Tape measure
✔ Combination square
✔ Cordless drill
✔ Saw
✔ Clamps
✔ Safety equipment
Before Installation
✔ Ventilation complete
✔ Drainage holes drilled
✔ Entrance sized correctly
✔ Roof securely fitted
✔ Cleaning access tested
✔ Mounting location selected
Internal Reading Suggestions
If you’re revisiting specific topics in this guide, here are a few helpful places to return to:
- Part 2 for birdhouse design fundamentals before modifying an existing plan.
- Part 3 when choosing lumber, hardware, or workshop tools.
- Part 8 to confirm birdhouse dimensions for different species.
- Part 9 before installing a newly completed birdhouse.
- Part 10 each year as part of your seasonal maintenance routine.
You’ll likely find that each revisit reveals something you missed the first time.
That’s one of the quiet pleasures of both woodworking and nature—there’s always something new to notice.