
Part 1: Why a Buffet Cabinet Is the Perfect First Woodworking Project
Table of Contents
Part 1: Why a Buffet Cabinet Is the Perfect First Woodworking Project (You’re Here)
Part 2: Planning Your Buffet Cabinet: Size, Style, Budget & Design
Part 3: Tools and Materials Every Beginner Actually Needs
Part 4: Complete Buffet Cabinet Plans: Dimensions, Cut List & Layout
Part 5: Building the Cabinet Step by Step
Part 6: Building Doors, Shelves & Optional Drawers
Part 7: Sanding, Painting, Staining & Professional Finishing
Part 8: Common Beginner Mistakes (and How to Avoid Them)
Part 9: Customize Your Buffet Cabinet for Any Home Style
Part 10: Care, FAQs & Products / Tools / Resources
Everyone Starts Somewhere
Every experienced woodworker can point to one project that changed everything.
It wasn’t necessarily the most beautiful piece they ever built. It probably wasn’t flawless, either. There may have been a drawer that stuck, a door that needed adjusting, or a finish that didn’t turn out quite the way they imagined.
What mattered was that they built it.
That first project transformed a pile of lumber into something useful—a piece of furniture they could point to and say, “I made that.”
If you’re standing at the beginning of your woodworking journey, wondering whether you’re capable of building furniture, this buffet cabinet is exactly where you should start.
Not because it’s the easiest project you’ll ever tackle.
Because it teaches nearly every foundational skill you’ll use for the rest of your woodworking life without overwhelming you along the way.
Why a Buffet Cabinet Makes So Much Sense for Beginners
When people first discover woodworking, they often begin with projects that are intentionally tiny.
A cutting board.
A simple floating shelf.
Those projects absolutely have value, but they don’t always prepare you for building furniture. They teach individual techniques without showing how those techniques come together to create something substantial.
A buffet cabinet is different.
It introduces you to real furniture construction while keeping the process approachable. You’ll learn how cabinets are assembled, how doors fit, how shelves are supported, and how careful planning turns dozens of individual pieces into one cohesive design.
By the time you’re finished, you won’t just own a new cabinet—you’ll understand the fundamentals behind building bookcases, media consoles, bathroom vanities, storage cabinets, and even kitchen cabinetry.
That’s why this project feels less like an ending and more like the beginning of something much bigger.
So, What Exactly Is a Buffet Cabinet?
Traditionally, a buffet cabinet sits in the dining room, providing storage for everything that doesn’t belong on the table until it’s needed.
Think:
- Dinner plates
- Serving bowls
- Holiday platters
- Glassware
- Table linens
- Candles
- Serving utensils
The broad top surface becomes extra serving space during family gatherings, while the cabinets below keep everyday clutter neatly tucked away.
Today, however, buffet cabinets have evolved far beyond the dining room.
Walk through almost any modern home, and you’ll find them serving completely different purposes.
Some become elegant coffee stations complete with mugs and espresso supplies.
Others transform into media consoles beneath a television.
Some organize craft rooms, while others quietly store shoes, backpacks, and mail in an entryway.
That’s one of the reasons they’re such a satisfying woodworking project—you aren’t building a piece of furniture with a single purpose. You’re creating something flexible enough to adapt as your home changes.
More Than a Cabinet—It’s a Skill Builder
At first glance, a buffet cabinet looks complicated.
Large panels.
Doors.
Shelves.
Hardware.
A finished top.
It seems like a project reserved for experienced woodworkers.
In reality, it’s simply a collection of smaller tasks completed one step at a time.
Each stage introduces a new skill without expecting you to master everything at once.
You’ll learn how to:
- Measure accurately before making a cut.
- Break down plywood safely.
- Assemble a cabinet that’s square and stable.
- Install adjustable shelving.
- Build simple cabinet doors.
- Sand surfaces until they’re ready for paint or stain.
- Apply a finish that protects the wood and highlights your work.
Those same techniques appear again and again in furniture making.
Once you’ve built one cabinet, countless future projects suddenly become much less intimidating.
The Confidence You Can’t Buy
One of the most surprising things about woodworking isn’t the furniture.
It’s the confidence.
There’s something deeply satisfying about creating an object that solves a real problem inside your own home.
Instead of scrolling through furniture websites comparing prices and hoping something fits your space, you begin thinking differently.
“I could build that.”
It’s a subtle shift, but it’s powerful.
That mindset doesn’t arrive after reading books or watching videos.
It develops the first time you tighten the final screw, step back, and realize the cabinet standing in front of you didn’t exist yesterday.
You built it.
A Project That Grows With You
The design in this guide intentionally favors straightforward construction over unnecessary complexity.
There are no intricate dovetails.
No elaborate carvings.
No specialty joinery requiring years of practice.
Instead, you’ll rely on beginner-friendly techniques that produce strong, attractive furniture without making the process frustrating.
As your experience grows, you can revisit the same cabinet design and expand it with:
- Soft-close hinges
- Additional drawers
- Decorative molding
- Glass cabinet doors
- Built-in wine storage
- Integrated lighting
- Hardwood tops
- Custom shelving
The basic structure remains the same.
Only your creativity changes.
Built With Real Homes in Mind
One reason this project has remained popular among DIY builders is its versatility.
A standard buffet cabinet fits comfortably in most homes while offering generous storage.
You might use yours as:
A Dining Room Buffet
Perfect for dishes, serving trays, seasonal tableware, and linens.
A Coffee Bar
Keep coffee beans, mugs, syrups, filters, and your favorite brewing equipment in one organized place.
An Entryway Cabinet
Store shoes, umbrellas, pet supplies, bags, and everyday essentials while creating an inviting first impression.
A Living Room Console
Hide gaming systems, board games, remote controls, and electronics behind clean cabinet doors.
A Home Office Storage Cabinet
Organize printers, paper, charging cables, files, and office supplies without cluttering your workspace.
One project.
Countless possibilities.
How Difficult Is It, Really?
This is probably the question you’re asking yourself right now.
“Can someone who’s never built furniture actually do this?”
The honest answer?
Yes.
But not because the project is effortless.
Because every step builds naturally on the one before it.
You won’t wake up on Saturday morning expected to construct cabinet doors immediately.
You’ll begin by learning how to measure accurately.
Then you’ll cut a few panels.
Then you’ll assemble a simple cabinet box.
Each milestone adds another layer of confidence.
Before long, the project that once seemed intimidating starts feeling surprisingly manageable.
What You’ll Learn Along the Way
By the time your buffet cabinet is finished, you’ll have gained hands-on experience with many of woodworking’s most valuable fundamentals.
You’ll become comfortable:
- Reading woodworking plans
- Measuring and marking accurately
- Cutting plywood safely
- Using a drill and driver
- Building strong cabinet boxes
- Installing shelves
- Hanging cabinet doors
- Sanding furniture properly
- Applying paint or stain
- Protecting wood with a durable finish
- Installing hardware cleanly
These aren’t isolated skills.
They’re the building blocks behind nearly every furniture project you’ll ever tackle.
The Weekend Goal
The title of this guide promises a buffet cabinet in one weekend.
That’s certainly possible, especially if your materials are purchased ahead of time and you dedicate two full days to the build.
A realistic schedule might look something like this:
Saturday
- Prepare the workspace.
- Cut all plywood and lumber.
- Assemble the cabinet box.
- Install shelves and structural supports.
- Build the face frame.
Sunday
- Build and hang the doors.
- Fill screw holes.
- Sand every surface.
- Apply primer or stain.
- Add the first protective finish coat.
If you’re taking your time—or waiting for finishes to cure properly—there’s absolutely nothing wrong with stretching the project over several evenings instead.
Furniture rewards patience far more than speed.
What This Guide Will Cover
Over the next nine chapters, you’ll move through the project exactly as a furniture builder would.
We’ll begin by planning the cabinet around your space and budget.
Then you’ll gather the right tools and materials, cut every component, assemble the cabinet, build the doors, apply a professional-looking finish, troubleshoot common mistakes, and finally customize the project so it feels completely your own.
Whether your goal is to save money, learn a new skill, or simply enjoy making something with your hands, every chapter is designed to move you forward with confidence.
And by the time you reach the final page, you won’t just have a buffet cabinet.
You’ll have built the kind of practical experience that makes the next woodworking project feel possible before you’ve even picked up your tools.
Up Next: Part 2
In Part 2: Planning Your Buffet Cabinet: Size, Style, Budget & Design, we’ll map out the project before a single board is cut. You’ll learn how to choose the right dimensions for your space, estimate material costs, select a design style that complements your home, and create a plan that makes the entire build smoother from the very beginning.
Part 2: Planning Your Buffet Cabinet: Size, Style, Budget & Design
A great build rarely starts with a saw. It starts with a tape measure, a notebook, and a clear picture of what you’re trying to create.
Before you buy lumber or charge a drill battery, spend some time planning. It isn’t the most exciting part of woodworking, but it’s the stage that quietly determines whether the entire project feels enjoyable or frustrating.
Experienced furniture makers don’t avoid mistakes because they’re naturally better at woodworking. They avoid them because they solve most problems before they ever touch a board.
That’s exactly what you’ll do in this chapter.
Table of Contents
- Part 1: Why a Buffet Cabinet Is the Perfect First Woodworking Project
- Part 2: Planning Your Buffet Cabinet: Size, Style, Budget & Design (You’re Here)
- Part 3: Tools and Materials Every Beginner Actually Needs
- Part 4: Complete Buffet Cabinet Plans: Dimensions, Cut List & Layout
- Part 5: Building the Cabinet Step by Step
- Part 6: Building Doors, Shelves & Optional Drawers
- Part 7: Sanding, Painting, Staining & Professional Finishing
- Part 8: Common Beginner Mistakes (and How to Avoid Them)
- Part 9: Customize Your Buffet Cabinet for Any Home Style
- Part 10: Care, FAQs & Products / Tools / Resources
Start With the Room, Not the Cabinet
One of the biggest mistakes first-time builders make is falling in love with a design before they’ve measured the space.
It happens more often than you’d think.
You find a beautiful buffet cabinet online, build it exactly as shown, move it into your dining room…and suddenly it’s blocking a doorway or overwhelming the room.
Furniture should feel like it belongs where it lives.
Before thinking about style or materials, stand in the space where the cabinet will go.
Imagine using it every day.
Will someone walk past it carrying groceries? Will chairs slide back near it? Will the cabinet doors have enough room to open comfortably?
These questions matter just as much as the measurements themselves.
Measure Everything—Then Measure Again
Grab a tape measure and record the dimensions of the area.
Don’t rely on memory. Write everything down.
At a minimum, measure:
- Overall wall width
- Ceiling height
- Distance to nearby doors
- Window placement
- Electrical outlets
- Baseboard thickness
- Heating vents
- Walkway clearance
A rough sketch on a sheet of paper is often more useful than a perfectly drawn diagram.
As you add measurements, you’ll begin to see how the cabinet fits naturally into the room instead of competing with it.
Leave Space to Live
Furniture isn’t just about filling empty walls.
It’s about creating comfortable spaces that people can move through effortlessly.
As a general guideline:
| Area | Recommended Clearance |
|---|---|
| Walking space in front of cabinet | 36 inches (91 cm) minimum |
| Comfortable dining clearance | 42–48 inches (107–122 cm) |
| Door swing clearance | At least the full door width |
If the room feels crowded on paper, it’ll almost certainly feel crowded in real life.
A slightly smaller cabinet often looks more elegant than one that’s squeezed into every available inch.
Choosing the Right Size
There isn’t a universal “perfect” buffet cabinet.
The right size depends on your room, your storage needs, and how you plan to use it.
For most beginners, these dimensions work exceptionally well.
| Size | Width | Depth | Height | Ideal For |
|---|---|---|---|---|
| Compact | 48 in | 16–18 in | 34–36 in | Apartments & entryways |
| Standard | 60 in | 18–20 in | 34–36 in | Most homes |
| Large | 72 in | 18–20 in | 34–38 in | Large dining rooms |
Throughout this guide, we’ll build a 60-inch-wide buffet cabinet because it strikes an excellent balance between storage capacity and manageable construction.
It’s large enough to feel substantial without becoming intimidating for a first furniture project.
Think About What You’ll Actually Store
This is where custom furniture begins to separate itself from store-bought pieces.
Instead of asking,
“How big should the cabinet be?”
Ask,
“What needs to fit inside it?”
Walk through your home and gather the items you expect to store.
Maybe it’s:
- Everyday dinner plates
- Holiday serving platters
- Wine glasses
- Table runners
- Small kitchen appliances
- Coffee supplies
- Board games
- Photo albums
Seeing everything together often changes your design decisions.
You may realize you need taller shelves instead of more shelves—or perhaps a drawer would be more useful than another cabinet compartment.
Design should always follow function.
Sketch Before You Build
Don’t worry if you can’t draw like an architect.
A simple hand sketch is more than enough.
Start with a rectangle representing the cabinet.
Then add:
- Doors
- Shelves
- Drawers (if you want them)
- The top
- Decorative trim
- Overall dimensions
As you sketch, you’ll naturally begin asking useful questions.
Should the shelves be adjustable?
Would the cabinet look better with a thicker top?
Would two doors feel balanced—or would three make more sense?
This is exactly why sketching is so valuable.
It’s much easier to erase pencil lines than rebuild plywood.
Finding a Style That Feels at Home
The structure of your buffet cabinet will remain largely the same regardless of style.
What changes are the details.
Those details tell the story.
Let’s explore a few popular directions.
Modern
Modern furniture embraces restraint.
No unnecessary decoration.
No complicated moldings.
Just clean lines, thoughtful proportions, and beautifully finished surfaces.
Common features include:
- Flat or Shaker doors
- Slim hardware
- Matte finishes
- Hidden hinges
- Straight bases
If you appreciate uncluttered spaces, modern is an excellent choice.
Farmhouse
Few styles feel as welcoming as farmhouse furniture.
It combines practicality with warmth.
Typical characteristics include:
- Painted cabinet body
- Natural wood top
- Black hardware
- Shaker doors
- Soft neutral colors
The style is wonderfully forgiving, making it a favorite among beginner woodworkers.
Tiny imperfections often add character rather than detract from it.
Scandinavian
Scandinavian design celebrates simplicity without feeling cold.
Think:
- Light woods
- White finishes
- Minimal hardware
- Clean geometry
- Bright, airy spaces
This style works especially well in smaller rooms because it reflects light and avoids visual clutter.
Rustic
Rustic furniture tells a different story.
Instead of hiding the wood’s character, it celebrates it.
Visible grain.
Rich stain.
Substantial proportions.
Black iron hardware.
Every knot and variation becomes part of the finished piece’s personality.
Traditional
Traditional furniture tends to include more decorative elements.
You might add:
- Crown molding
- Raised-panel doors
- Decorative feet
- Rich stains
- Antique brass hardware
These details create timeless elegance, though they usually require a bit more patience during construction.
Choosing the Right Wood
The material you choose influences everything from cost to durability to the final appearance.
For beginners, these options stand out.
Cabinet-Grade Plywood
This will form the backbone of the project.
It’s:
- Strong
- Stable
- Resistant to warping
- Easy to paint
- Readily available
Quality plywood also minimizes seasonal movement compared to wide solid boards.
Pine
Pine is often the first wood beginners work with.
Why?
Because it’s affordable, forgiving, and available almost everywhere.
It’s ideal if you’re planning to paint the cabinet.
Poplar
If you’re looking for a smoother painted finish, poplar is worth considering.
It machines beautifully, has minimal knots, and sands easily.
Many custom cabinet makers use poplar for face frames and doors.
Oak
Oak rewards patience.
It’s heavier, harder, and generally more expensive, but its distinctive grain creates stunning furniture when stained.
For a first project, many builders combine plywood with pine or poplar, then experiment with hardwoods on future builds.
Set a Budget Before Shopping
Walking into a home improvement store without a budget is a little like grocery shopping when you’re hungry.
Everything suddenly seems essential.
Instead, decide on your spending limit before you buy anything.
Here’s a realistic estimate for a standard painted buffet cabinet.
| Item | Estimated Cost |
|---|---|
| Cabinet-grade plywood | $90 |
| Solid wood boards | $45 |
| Screws & fasteners | $20 |
| Hinges | $25 |
| Cabinet pulls | $30 |
| Wood glue & filler | $15 |
| Sandpaper | $15 |
| Primer & paint | $55 |
| Clear protective finish | $25 |
Estimated Total: $320
Already own paint or hardware?
Great—you’ll likely come in under budget.
Planning ahead also helps you decide where it’s worth spending a little more.
For example, upgrading to better hinges or a higher-quality finish often provides more long-term value than buying expensive decorative trim.
Plan Your Build Like a Weekend Project
Breaking the project into manageable stages makes it feel far less overwhelming.
Here’s one approach.
Day One
- Buy materials.
- Organize your workspace.
- Cut all cabinet parts.
- Label every piece.
Day Two
- Assemble the cabinet box.
- Install shelves.
- Build the face frame.
Day Three
- Construct the doors.
- Install hardware.
- Dry-fit everything.
Day Four
- Sand thoroughly.
- Prime or stain.
- Apply the first finish coat.
Whether you spread the work across one weekend or several evenings, progress feels much more satisfying when you focus on completing one stage at a time.
Build a Collection of Inspiration
Before you commit to colors or hardware, spend some time collecting ideas.
Save photos of buffet cabinets that catch your eye.
Look closely at details like:
- Door styles
- Paint colors
- Wood finishes
- Hardware
- Legs
- Trim profiles
- Top thickness
Over time, patterns begin to emerge.
You’ll discover that your favorite designs often share the same proportions or finishes, making your own design decisions much easier.
A Few Minutes of Planning Can Save Hours of Work
There’s a quiet confidence that comes from beginning a project with a clear plan.
You know where each board belongs.
You know how much material to buy.
You know how the finished cabinet should look.
That confidence carries through every cut and every assembly step.
Woodworking becomes less about guessing and more about building.
And that’s exactly where you want to be before the first piece of plywood meets the saw.
Up Next: Part 3
Now that your project is mapped out, it’s time to stock the workshop. In Part 3: Tools and Materials Every Beginner Actually Needs, we’ll separate the essentials from the nice-to-haves, helping you choose the right tools, lumber, hardware, and supplies without overspending or overcomplicating your first furniture build.
Part 3: Tools and Materials Every Beginner Actually Needs
The right tools don’t make a great woodworker. They simply make it easier for a careful woodworker to do great work.
If you’ve ever wandered through the tool aisle at a home improvement store, you already know how overwhelming it can feel. There are rows of drills, shelves packed with saws, dozens of sanding accessories, and enough clamps to fill an entire wall.
It’s easy to walk away thinking you need a fully equipped workshop before you can build a single piece of furniture.
You don’t.
One of the biggest myths about woodworking is that expensive tools create beautiful projects. In reality, good furniture is built through careful planning, accurate measuring, and patient craftsmanship. The tools simply help you get there.
This chapter focuses on what you actually need to build your first buffet cabinet—and just as importantly, what you can safely leave on the store shelf for now.
Build Your Workshop One Project at a Time
There’s something exciting about buying new tools.
It’s also where many beginners accidentally overspend.
A common assumption is that a larger workshop automatically leads to better furniture. The truth is almost the opposite.
Most experienced woodworkers didn’t buy everything at once. Their workshops grew naturally. One project justified a new clamp. Another introduced a router. A third made a table saw worthwhile.
That’s a much smarter approach.
Instead of chasing every new gadget, focus on buying tools that you’ll use again and again. Versatile, reliable equipment will serve you far longer than specialized tools that spend most of their lives collecting dust.
Your Core Tool Kit
The following tools are enough to build the buffet cabinet featured in this guide. If you already own most of them, you’re closer than you think.
Tape Measure: The Tool You’ll Use More Than Any Other
Before a single board is cut, everything begins with accurate measurements.
A quality tape measure should feel solid in your hand and lock securely without bending excessively.
Look for one that offers:
- Easy-to-read markings
- A durable locking mechanism
- A 25-foot blade
- Clearly printed fractional measurements
One habit separates experienced builders from beginners:
They measure calmly.
They don’t rush.
Because they know every successful cut starts here.
Pro Tip: Buy one quality tape measure and use it for the entire project. Different tape measures can vary slightly, and even tiny differences can affect the fit of your cabinet.
Carpenter’s Pencil and Marking Tools
Precise layout lines make every other task easier.
A carpenter’s pencil works well for rough construction, while a mechanical pencil creates finer lines for more detailed work.
Many woodworkers also keep a marking knife nearby for extremely accurate layout work, especially around joinery.
Thin lines lead to accurate cuts.
Thick lines create uncertainty.
Keep a sharp pencil nearby at all times. It’s surprising how much time you lose searching for one halfway through a project.
Speed Square
Simple.
Inexpensive.
Remarkably useful.
A speed square helps you:
- Mark 90-degree cuts
- Check corners
- Guide a circular saw
- Verify cabinet alignment
- Lay out repeatable measurements
It may become the tool you reach for most often after your tape measure.
For many beginners, this humble tool quickly becomes one of the best purchases they make.
Cordless Drill and Driver
If there were a single power tool every beginner should own, this would probably be it.
A cordless drill handles nearly every stage of furniture building.
You’ll use it for:
- Drilling pilot holes
- Driving screws
- Installing hinges
- Attaching hardware
- Assembling the cabinet
Choose a model with:
- Variable speed
- Adjustable clutch
- Two batteries
- Comfortable grip
A second battery may not seem important until the first one dies halfway through assembling the cabinet.
Nothing interrupts momentum like waiting for batteries to recharge.
Choosing the Right Saw
This is where many beginners become uncertain.
Do you need a table saw?
A miter saw?
A circular saw?
The answer depends more on your budget than your ability.
Circular Saw: The Best Starting Point
If you’re building your first buffet cabinet, a quality circular saw paired with a straightedge guide can handle nearly every major cut.
You’ll use it to cut:
- Cabinet sides
- Shelves
- Top panel
- Face-frame stock
- Plywood sheets
With careful setup, the results are surprisingly accurate.
Don’t underestimate this tool.
Many beautiful pieces of furniture have been built with nothing more than a circular saw and patience.
If you’re buying only one saw for this project, make it this one.
Miter Saw: A Welcome Upgrade
While not essential, a miter saw makes repetitive crosscuts quicker and more consistent.
It’s especially helpful when cutting:
- Face-frame rails
- Door components
- Trim
- Decorative molding
If your budget allows for one later, you’ll probably wonder how you managed without it.
It isn’t about speed alone. Consistent, repeatable cuts make furniture assembly much smoother.
Do You Need a Table Saw?
Eventually?
Probably.
For this project?
Not necessarily.
A table saw excels at ripping boards and making repeatable cuts, but it isn’t required for building this buffet cabinet.
Many beginners successfully complete furniture projects long before investing in one.
That should come as a relief if you’re working in a garage or small workshop where space is limited.
The Tool That Makes Beginners Look Better
Random Orbital Sander
Few tools improve the appearance of a project as dramatically as an orbital sander.
It removes:
- Saw marks
- Minor imperfections
- Glue residue
- Surface inconsistencies
More importantly, it prepares the wood for paint or stain.
Furniture finishing begins long before the finish itself.
It begins with careful sanding.
A beautifully applied finish can never hide poor surface preparation—but excellent sanding makes every finish look better.
Clamps: The Unsung Heroes
Ask experienced woodworkers which tool they never seem to have enough of.
Most will answer the same way.
Clamps.
They act like an extra pair of hands during assembly.
For this project, a basic collection might include:
- Four 24-inch bar clamps
- Two smaller clamps
- A few spring clamps
You’ll use them constantly.
During glue-ups.
Door assembly.
Face-frame installation.
Even while checking alignment.
There’s an old saying in woodworking:
“You can never own too many clamps.”
After your first project, you’ll understand exactly why.
Safety Equipment Isn’t Optional
Good woodworking starts with safe habits.
Keep these nearby every time you work:
- Safety glasses
- Hearing protection
- Dust mask or respirator
- Work gloves for handling lumber
- First-aid kit
Notice what’s missing?
Gloves while operating spinning tools.
Loose gloves can catch on rotating blades and bits, making them unsafe around most power equipment.
When using saws, drills, or sanders, clean hands are often the safer choice.
Building safely isn’t about slowing down—it’s about making sure you’ll be able to enjoy your next project too.
One Tool That’s Worth Every Penny
Pocket-Hole Jig
If there were a “secret weapon” for beginner furniture builders, this might be it.
A pocket-hole jig creates strong, hidden joints quickly and consistently.
It’s particularly useful for:
- Face frames
- Cabinet boxes
- Door frames
- Structural supports
The learning curve is short, but the results are impressive.
Many custom furniture builders continue using pocket-hole joinery throughout their careers because it’s both efficient and dependable.
If your budget allows for one optional tool, this should be near the top of your list.
Helpful Tools That Aren’t Required
As your projects become more ambitious, you’ll likely appreciate adding:
- Brad nailer
- Router
- Flush-trim bit
- Combination square
- Forstner bits
- Stud finder
- Shop vacuum
- Workbench
- Drill guide
None of these are mandatory for your first buffet cabinet.
Think of them as future upgrades rather than immediate necessities.
As your confidence grows, so will your workshop.
Choosing the Right Lumber
Good furniture begins with good materials.
Fortunately, you don’t need exotic hardwoods to build something beautiful.
Cabinet-Grade Plywood
Most of the cabinet will be constructed from ¾-inch cabinet-grade plywood.
Why plywood?
Because it’s:
- Strong
- Dimensionally stable
- Resistant to seasonal movement
- Available in large sheets
- Easy to paint or edge-band
Avoid low-quality construction plywood if possible.
Furniture deserves furniture-grade material.
Although cabinet-grade plywood costs a little more, the smoother veneer and cleaner edges make the extra investment worthwhile.
Solid Wood
For the face frame, doors, and decorative trim, solid wood offers durability and a refined appearance.
Popular beginner choices include:
Pine
Affordable.
Easy to cut.
Easy to sand.
Perfect for painted furniture.
It’s widely available and forgiving if you make small mistakes.
Poplar
A favorite among cabinet makers.
Smooth grain.
Minimal knots.
Excellent paint finish.
If your cabinet will be painted, poplar is difficult to beat.
Oak
Oak adds beautiful grain and exceptional durability.
It’s heavier and slightly more challenging to work with than pine or poplar, but the finished results are stunning—especially with stain.
If you’re aiming for a natural wood finish, oak is well worth considering.
Don’t Grab the First Board You See
Buying lumber is part of the woodworking process.
Take your time.
Lift each board.
Look down its length.
Ask yourself:
- Is it straight?
- Is it twisted?
- Are there cracks?
- Are the edges damaged?
- Is the grain attractive?
Choosing better boards now makes every later step easier.
Five extra minutes in the lumber aisle can save hours of frustration in the workshop.
Hardware: The Small Details That Matter
Hardware may represent only a small percentage of your budget, but it has an outsized effect on the finished cabinet.
For this project you’ll need:
- Concealed hinges
- Cabinet pulls or knobs
- Wood screws
- Pocket-hole screws
- Shelf pins (optional)
Soft-close hinges are worth considering if your budget allows.
They’re one of those upgrades you appreciate every single day.
Quality hardware also makes the cabinet feel more substantial every time you open a door.
Adhesives and Fillers
Every woodworking shop should have a few essentials within easy reach.
Wood Glue
Strong.
Reliable.
Easy to use.
Apply only a thin, even layer.
Too much glue creates unnecessary cleanup and can interfere with stain later.
Remember, a properly clamped joint needs surprisingly little glue to create incredible strength.
Wood Filler
Perfect for hiding:
- Screw holes
- Nail holes
- Small dents
- Minor imperfections
If you’re staining rather than painting, choose a stainable filler that closely matches your wood.
Small details like this make the finished cabinet look cleaner and more professional.
Sandpaper Isn’t Just Sandpaper
Different grits serve different purposes.
Here’s a simple guide.
| Grit | Best Use |
|---|---|
| 80 | Heavy shaping and rough surfaces |
| 120 | Initial smoothing |
| 150 | General sanding |
| 180 | Surface preparation |
| 220 | Final finish sanding |
| 320 | Between finish coats |
Working gradually through the grits creates a noticeably smoother finish than skipping ahead.
Think of sanding as refining the surface rather than simply making it smooth.
Paint or Stain?
You don’t have to decide immediately, but it’s helpful to think ahead.
Choose paint if you want:
- Farmhouse style
- Modern furniture
- Bold color choices
- Better coverage of minor imperfections
Choose stain if you love:
- Visible wood grain
- Natural warmth
- Traditional furniture
- Rich hardwood character
Neither choice is right or wrong.
The best finish is the one that fits your home and reflects your personal style.
Organize Before You Build
Once you get your materials home, resist the temptation to start cutting immediately.
Instead:
- Stack lumber flat.
- Let the wood acclimate to the room.
- Label every board.
- Organize screws and hardware.
- Charge your batteries.
- Clear your workspace.
It might feel like you’re delaying the project.
You’re actually preparing for success.
A clean, organized workspace reduces mistakes and helps the entire build feel more enjoyable from beginning to end.
Your Beginner Shopping Checklist
Before moving on, make sure you have everything you’ll need.
Essential Tools
- ✔ Tape measure
- ✔ Speed square
- ✔ Carpenter’s pencil
- ✔ Cordless drill and driver
- ✔ Circular saw
- ✔ Random orbital sander
- ✔ Clamps
- ✔ Safety glasses
- ✔ Hearing protection
- ✔ Dust mask
Materials
- ✔ ¾-inch cabinet-grade plywood
- ✔ ¼-inch plywood for the back
- ✔ Pine or poplar boards
- ✔ Pocket-hole screws
- ✔ Wood screws
- ✔ Wood glue
- ✔ Wood filler
- ✔ Sandpaper
- ✔ Cabinet hinges
- ✔ Cabinet pulls
- ✔ Primer
- ✔ Paint or stain
- ✔ Clear protective finish
Buy Skills Before You Buy More Tools
It’s tempting to believe that another tool is the answer.
Sometimes it is.
Most of the time, though, better results come from slowing down, measuring carefully, and practicing the basics.
A builder with a circular saw, a drill, and good habits will almost always produce better furniture than someone with a shop full of expensive equipment and no plan.
That’s encouraging news.
Because it means you’re already much closer to building beautiful furniture than you might have believed.
Up Next: Part 4
With your workshop ready and your materials organized, it’s time to turn ideas into a working blueprint. In Part 4: Complete Buffet Cabinet Plans: Dimensions, Cut List & Layout, we’ll break down every measurement, panel size, and component so you can cut with confidence and assemble your cabinet without second-guessing yourself.
Part 4: Complete Buffet Cabinet Plans: Dimensions, Cut List & Layout
There comes a point in every woodworking project where ideas stop living on paper and start becoming something tangible.
This is that moment.
The planning is finished. Your tools are ready. The lumber is stacked neatly in the workshop, waiting for the first cut. Before you reach for the circular saw, though, there’s one more step that deserves your full attention.
A good plan.
Professional woodworkers rarely build from memory. They rely on accurate dimensions, detailed cut lists, and a clear assembly strategy. That isn’t because they lack experience—it’s because experience has taught them that precision at the beginning prevents problems later.
This chapter is your blueprint.
By the time you’ve finished reading it, you’ll know exactly what to cut, why each piece matters, and how everything fits together before a single screw is driven.
Project Overview
This buffet cabinet is designed to strike a balance between generous storage and beginner-friendly construction.
It’s large enough to serve as a dining room centerpiece, yet compact enough to fit comfortably in most homes.
The design features:
- Two full-height cabinet doors
- Adjustable interior shelving
- A sturdy plywood cabinet box
- A solid wood face frame
- A furniture-style top with a slight overhang
- A recessed toe kick for comfortable standing
The result is a cabinet that looks custom built without requiring advanced woodworking techniques.
Finished Dimensions
These plans are based on a standard buffet cabinet that’s well suited to dining rooms, kitchens, entryways, or living spaces.
| Measurement | Size |
|---|---|
| Overall Width | 60 inches (1524 mm) |
| Overall Height | 36 inches (914 mm) |
| Overall Depth | 18 inches (457 mm) |
These dimensions include the finished top overhang.
If your available space differs, don’t worry. Once you understand the cabinet’s structure, adjusting the width or height becomes much easier.
Understanding the Cabinet Design
Before making your first cut, it’s helpful to understand how the cabinet is built.
Although it looks like a complex piece of furniture, the construction is surprisingly straightforward.
Think of it as five major components working together.
- The cabinet box
- The face frame
- The interior shelving
- The cabinet doors
- The finished top
Each section builds on the one before it.
Instead of trying to imagine the entire project at once, focus on completing one component at a time.
That’s exactly how experienced furniture makers approach large builds.
Materials You’ll Need
The cut list in this guide is based on readily available materials that are easy for beginners to find.
Sheet Goods
- Two sheets of ¾-inch cabinet-grade plywood
- One sheet of ¼-inch plywood for the back panel
Cabinet-grade plywood provides smoother surfaces, fewer internal voids, and cleaner edges than construction-grade plywood.
It costs a little more, but the difference becomes obvious during assembly and finishing.
Solid Wood
You’ll also need solid wood for the face frame, cabinet doors, and trim.
Recommended options include:
- 1×2 boards for the face frame
- 1×3 boards for the doors
- 1×4 boards for optional decorative edging
Poplar is an excellent choice if you plan to paint the cabinet, while oak or maple creates a beautiful stained finish.
Complete Plywood Cut List
Before cutting anything, double-check every measurement.
Remember that plywood thickness can vary slightly between manufacturers, so it’s always worth measuring your material before finalizing dimensions.
¾-Inch Plywood Components
| Part | Quantity | Dimensions |
|---|---|---|
| Left Side | 1 | 34½ × 18 in |
| Right Side | 1 | 34½ × 18 in |
| Cabinet Bottom | 1 | 58½ × 18 in |
| Fixed Shelf | 1 | 58½ × 18 in |
| Adjustable Shelves | 2 | 28½ × 16¾ in |
| Top Support | 1 | 58½ × 4 in |
| Center Divider (Optional) | 1 | 33¾ × 18 in |
¼-Inch Plywood
| Part | Quantity | Dimensions |
|---|---|---|
| Cabinet Back | 1 | 60 × 34½ in |
The back panel plays an important structural role. Once attached, it helps lock the cabinet into a perfectly square shape.
Face Frame Cut List
The face frame hides the exposed plywood edges and gives the cabinet a polished, furniture-quality appearance.
Using 1×2 lumber, cut:
| Part | Quantity | Length |
|---|---|---|
| Vertical Stiles | 4 | 34½ in |
| Top Rail | 1 | 60 in |
| Bottom Rail | 1 | 60 in |
| Center Rails | 2 | 17 in |
Label each piece immediately after cutting.
Many of these boards are similar in size, and keeping them organized will save you time later.
Door Components
We’ll build two simple Shaker-style cabinet doors.
Each door consists of:
- Two vertical stiles
- Two horizontal rails
- One center panel
Suggested dimensions:
| Part | Quantity | Length |
|---|---|---|
| Door Stiles | 4 | 27 in |
| Door Rails | 8 | 12 in |
Always build the cabinet first and measure the actual openings before making your final door cuts.
Even careful assembly can introduce slight variations, and measuring the finished cabinet ensures a better fit.
Top Panel
The top is one of the cabinet’s defining visual features.
Rather than making it flush with the cabinet box, we’ll create a small overhang that gives the finished piece a more refined appearance.
| Part | Quantity | Dimensions |
|---|---|---|
| Cabinet Top | 1 | 61½ × 19½ in |
This creates approximately ¾ inch of overhang on the front and sides.
It’s a subtle detail, but it makes the cabinet feel much more like a custom-built piece of furniture.
Hardware Checklist
Gather all hardware before you begin assembly.
Nothing slows momentum faster than discovering you’re missing hinges halfway through the project.
You’ll need:
Fasteners
- 1¼-inch pocket-hole screws
- 2-inch wood screws
- 1¼-inch brad nails (optional)
Hardware
- Four concealed cabinet hinges
- Two cabinet pulls or knobs
- Shelf support pins (optional)
Supplies
- Wood glue
- Wood filler
- Sandpaper
- Painter’s tape
- Finish nails (optional)
Keeping everything in labeled containers makes assembly much more enjoyable.
Visualizing the Layout
Imagine looking directly at the completed cabinet.
The layout is intentionally symmetrical.
 ____________________________________________
|                                            |
|                 Cabinet Top                |
|____________________________________________|
|                                            |
|     Shelf Area     |     Shelf Area        |
|                    |                       |
|--------------------|-----------------------|
|                    |                       |
|                    |                       |
|     Left Door      |     Right Door        |
|                    |                       |
|____________________|_______________________|
This balanced layout is forgiving for beginners and visually appealing in almost any room.
Plan Your Cuts Before You Cut
Large sheets of plywood are expensive.
Making one incorrect cut can quickly turn a good board into scrap.
Before switching on your saw, spend a few minutes arranging all the parts on paper.
Cut the largest components first.
A practical order looks like this:
- Cabinet sides
- Bottom panel
- Fixed shelf
- Top support
- Adjustable shelves
- Divider
- Smaller blocking pieces
Working from largest to smallest reduces waste and leaves room for unexpected adjustments.
Label Every Piece Immediately
This may sound obvious.
It isn’t.
After cutting six or seven plywood panels, many of them begin looking almost identical.
Instead of relying on memory, label every component as soon as it’s cut.
Simple names work perfectly:
- Left Side
- Right Side
- Bottom
- Fixed Shelf
- Shelf A
- Shelf B
- Top Support
- Divider
A strip of painter’s tape works well because it peels away cleanly before finishing.
Pay Attention to Grain Direction
If you’re painting the cabinet, grain direction isn’t especially noticeable.
If you’re staining it, however, grain orientation becomes much more important.
Whenever possible:
- Run vertical grain on cabinet sides.
- Keep shelf grain running left to right.
- Match door grain for a balanced appearance.
- Position the most attractive grain on visible surfaces.
These subtle decisions help homemade furniture look professionally designed.
Make Test Cuts First
Before cutting expensive plywood, use a scrap piece to check your setup.
Test:
- Saw blade alignment
- Guide accuracy
- Blade depth
- Cut quality
A two-minute test cut can prevent a very expensive mistake.
It’s one of those habits experienced woodworkers rarely skip.
Check Every Measurement Twice
Before every cut, pause and ask yourself:
- Am I cutting the correct board?
- Have I accounted for the blade’s kerf?
- Am I cutting on the waste side of the line?
- Is the board fully supported?
- Is the measurement confirmed?
These simple questions become second nature over time.
For now, keep them nearby until they become habit.
Dry-Fit Before Assembly
Once every piece has been cut, resist the urge to start gluing immediately.
Instead, assemble the major components without screws or glue.
Stand the sides upright.
Position the bottom.
Insert the fixed shelf.
Lay the top support in place.
This “practice assembly” reveals small issues while they’re still easy to fix.
If something feels tight, now is the time to adjust it.
If everything slides neatly into place, you’ll move into assembly with confidence instead of uncertainty.
Your Pre-Build Checklist
Before moving to the next chapter, make sure you’ve completed each of these steps.
- ✔ All plywood panels are cut.
- ✔ Face-frame pieces are prepared.
- ✔ Door stock is cut or ready to size later.
- ✔ Every part is labeled.
- ✔ Hardware is organized.
- ✔ Measurements have been verified.
- ✔ A complete dry-fit has been performed.
- ✔ Your workspace is ready for assembly.
Once every box is checked, the hardest part of the planning process is officially behind you.
The next time you pick up your drill, you won’t be measuring or second-guessing.
You’ll be building.
Up Next: Part 5
Everything you’ve done so far has been preparing for this moment. In Part 5: Building the Cabinet Step by Step, we’ll assemble the cabinet box from the ground up, install the shelves, attach the face frame, and transform a neatly organized stack of lumber into a solid, furniture-grade buffet cabinet.
Part 5: Building the Cabinet Step by Step
This is where everything starts to feel real.
Up to this point, you’ve been planning, measuring, cutting, and organizing. The workshop is full of neatly labeled parts that, on their own, don’t look particularly impressive. But over the next few hours, those individual pieces will come together into something recognizable—a cabinet with shape, structure, and purpose.
There’s a satisfying moment that happens during every furniture build. It’s the instant when the cabinet can stand on its own for the first time. Suddenly, the project stops feeling like a collection of boards and starts looking like the piece of furniture you imagined from the beginning.
Take your time through this chapter. Precision now will make every step that follows—from hanging doors to applying the finish—far easier.
Before You Drive the First Screw
Spend a few minutes setting yourself up for success.
Lay every cut piece where you can easily reach it, and clear enough floor space to assemble the cabinet without constantly moving parts around.
Before you begin, confirm that:
- Every panel is labeled.
- All measurements have been checked.
- Your drill batteries are fully charged.
- Clamps are within easy reach.
- Screws, glue, and measuring tools are nearby.
- The floor or workbench is reasonably flat.
A little preparation now keeps the build moving smoothly later.
Step 1: Assemble the Cabinet Box
The cabinet box is the backbone of the entire project.
Everything else—the shelves, doors, face frame, and top—depends on this structure being square and solid.
Rather than rushing through assembly, think of this as building the foundation of a house. If it’s accurate, every later step becomes easier.
Position the Side Panels
Lay both side panels on a flat surface with the inside faces pointing upward.
Take a moment to identify:
- Front edges
- Back edges
- Top
- Bottom
It sounds simple, but many first-time builders accidentally flip a panel during assembly. Spending thirty seconds checking orientation can save hours of frustration later.
Install the Bottom Panel
Run a thin, continuous bead of wood glue along the edges where the bottom panel meets both cabinet sides.
Slide the bottom into position and clamp it lightly before fastening.
Secure it using either:
- Pocket-hole screws, or
- Wood screws driven through pre-drilled pilot holes.
As you tighten the fasteners, alternate from one side to the other instead of fully tightening one side first. This helps pull the cabinet together evenly.
Step 2: Make Sure the Cabinet Is Square
This is one of the most important checks you’ll perform during the entire project.
It only takes a minute, but it affects nearly everything that comes afterward.
Measure diagonally from:
- Top left to bottom right
- Top right to bottom left
If both measurements match, your cabinet is square.
If they don’t, don’t panic.
Loosen the screws slightly, shift the cabinet until the diagonal measurements match, then tighten everything again.
A cabinet that’s square now means doors that fit properly later.
Step 3: Install the Fixed Shelf
The fixed shelf does more than create storage.
It adds strength to the entire cabinet by tying the two sides together.
Measure carefully from the bottom of the cabinet and mark the shelf location on both side panels.
Double-check the marks before attaching anything.
Even a difference of a sixteenth of an inch can become noticeable later.
Apply wood glue to the shelf edges, slide it into position, and clamp it securely.
Fasten it using pocket-hole screws or wood screws driven through the cabinet sides.
Once installed, check for square again.
You’ll be surprised how much stronger the cabinet already feels.
Step 4: Install the Top Support
Instead of using a full plywood panel beneath the top, this design uses a support rail.
It serves several purposes.
It:
- Reduces weight
- Saves material
- Provides excellent support
- Leaves more interior storage space
Center the support rail between the cabinet sides and fasten it securely.
Make sure the top edges remain perfectly flush.
This is where your finished top will eventually rest.
Step 5: Add the Center Divider (Optional)
If you’ve chosen a two-section layout, now is the time to install the center divider.
This piece helps organize the interior while providing additional structural support.
Measure from both cabinet sides before attaching it.
The divider should sit exactly where you planned during the layout stage.
Clamp it in place first.
Then drive the screws.
It’s much easier to correct alignment before fasteners are fully tightened.
Step 6: Attach the Back Panel
Many beginners assume the back panel is simply there to close off the cabinet.
In reality, it’s one of the most important structural components.
Once attached, it helps lock the cabinet into a perfectly square shape.
Lay the cabinet face down on a blanket or sheet of cardboard to protect the front edges.
Position the back panel carefully, making sure all sides are flush.
Secure it with:
- Brad nails
- Narrow crown staples
- Small wood screws
Space the fasteners roughly every six to eight inches around the perimeter.
Before driving the final few fasteners, check the cabinet for square one last time.
Step 7: Build the Face Frame
The face frame is one of those details people notice immediately—even if they don’t realize why.
It hides exposed plywood edges and gives the cabinet a more refined, furniture-quality appearance.
Lay the rails and stiles on a flat surface before joining them.
Check:
- Overall width
- Corner alignment
- Rail spacing
- Door openings
Pocket-hole joinery works exceptionally well here because the screws remain hidden on the back side.
Once assembled, place the face frame against the cabinet to confirm the fit before applying glue.
Step 8: Attach the Face Frame
Spread a thin layer of wood glue around the cabinet’s front edges.
Carefully position the face frame and clamp it into place.
Work slowly.
Small adjustments now make a noticeable difference in the finished cabinet.
Fasten the frame using:
- Brad nails, or
- Pocket-hole screws driven from inside the cabinet
As soon as the frame is secure, wipe away any excess glue with a damp cloth.
Dried glue is much harder to remove later and can interfere with paint or stain.
Step 9: Drill Shelf Pin Holes
If you want adjustable shelves, now is the easiest time to prepare them.
Using a shelf pin jig—or careful measuring—drill matching holes on both cabinet sides.
Keep the spacing consistent.
Most builders place shelf pin holes every inch.
Whatever spacing you choose, make sure both sides match perfectly.
Otherwise, your shelves won’t sit level.
Step 10: Test-Fit the Shelves
Insert the shelf pins and place each shelf inside the cabinet.
The shelves should:
- Slide into place without force.
- Sit level.
- Rest securely on all four pins.
- Lift out easily when adjustments are needed.
If a shelf feels too tight, don’t force it.
Lightly sand the edges until it fits comfortably.
Small adjustments now produce a much cleaner result than trying to trim a finished cabinet later.
Step 11: Install the Cabinet Top
The top is one of the first things people notice.
That slight overhang around the front and sides gives the cabinet the appearance of professionally built furniture.
Position the top carefully so the overhang is equal on both sides.
The back should remain flush with the cabinet.
Once you’re satisfied with the alignment, clamp it securely.
Fasten the top from inside the cabinet using screws driven upward into the underside of the panel.
Be careful not to use screws that are too long.
Nothing ruins a project faster than a screw emerging through the finished top.
Step 12: Fill Small Imperfections
With the cabinet fully assembled, take a slow walk around it.
Run your hand across every surface.
Look for:
- Screw holes
- Tiny gaps
- Nail holes
- Minor dents
- Small chips along plywood edges
Apply wood filler wherever needed.
Don’t rush this stage.
The smoother the cabinet is now, the more professional it will look after painting or staining.
Allow the filler to dry completely before sanding.
Give the Cabinet One Thorough Inspection
Before moving on, inspect the cabinet from every angle.
Check that:
- The cabinet stands without rocking.
- Every joint feels tight.
- The top is centered.
- Shelves fit properly.
- The face frame sits flush.
- No screws are protruding.
- Glue squeeze-out has been removed.
This final inspection is your opportunity to correct small issues before doors, hardware, and finishes are added.
Think of it as quality control before the project enters its final stages.
Troubleshooting During Assembly
Even with careful preparation, it’s completely normal to encounter small challenges.
The good news?
Most are easy to fix.
The Cabinet Wobbles
A cabinet that rocks usually points to one of two things:
- An uneven floor, or
- A frame that’s slightly out of square.
Test the cabinet on a known flat surface before making adjustments.
If it sits flat there, the problem is probably the floor rather than your build.
Panels Don’t Line Up Perfectly
Small misalignments often happen because clamps shifted during assembly.
Loosen the fasteners slightly, reposition the panel, and tighten everything again while the pieces are clamped.
Trying to force panels into alignment without loosening the screws usually makes things worse.
Small Gaps in the Joints
Tiny gaps aren’t uncommon, especially on a first furniture project.
If you’re painting the cabinet, quality wood filler usually makes them disappear.
If you’re staining, take a little more time adjusting the joint before moving forward.
Good joinery is always easier than hiding mistakes later.
Splintered Plywood Edges
Even sharp blades occasionally leave small chips along plywood edges.
Light sanding usually removes minor tear-out.
For visible edges, edge banding or the face frame will cover most imperfections completely.
A Builder’s Progress Checklist
Before moving to the next chapter, make sure you’ve completed each of the following:
- ✔ Cabinet box assembled
- ✔ Cabinet checked for square
- ✔ Fixed shelf installed
- ✔ Top support secured
- ✔ Back panel attached
- ✔ Face frame installed
- ✔ Shelf pin holes drilled (if using adjustable shelves)
- ✔ Shelves test-fitted
- ✔ Top installed
- ✔ Screw holes filled
- ✔ Glue cleaned away
If every box is checked, you’ve completed the structural heart of the project.
Take a moment to appreciate that.
You’re no longer looking at a pile of lumber.
You’re looking at a real piece of furniture.
And perhaps more importantly, you’re beginning to think like a furniture builder.
Up Next: Part 6
With the cabinet structure complete, it’s time to add the details that bring it to life. In Part 6: Building Doors, Shelves & Optional Drawers, you’ll learn how to build clean, professional-looking Shaker doors, install hinges with confidence, fit adjustable shelves, and even add simple drawers if you want extra storage and functionality.
Part 6: Building Doors, Shelves & Optional Drawers
Up to this point, your buffet cabinet has been all about structure.
The cabinet box is solid. The face frame is in place. The top is attached, and the project finally resembles a real piece of furniture.
Now comes the part that gives it personality.
Cabinet doors, shelves, and drawers aren’t just functional—they’re what people notice first. A pair of well-aligned doors instantly makes a project look polished. Smooth-sliding drawers and perfectly level shelves create the kind of experience people associate with professionally built furniture.
The good news?
You don’t need years of cabinet-making experience to achieve those results.
With careful measuring, patient adjustments, and a willingness to slow down when it matters most, you’ll be surprised by just how refined your first cabinet can look.
Choosing the Right Door Style
There are countless cabinet door styles, but not all of them are beginner friendly.
Raised-panel doors require specialized router bits.
Glass doors demand additional hardware and precision.
Decorative profiles often involve extra tools and more complicated joinery.
For a first furniture project, there’s one clear winner.
Shaker Doors
Simple.
Timeless.
Versatile.
Shaker-style doors have remained popular for more than a century because they work almost anywhere.
Whether your home leans toward farmhouse, modern, Scandinavian, transitional, or traditional design, Shaker doors never feel out of place.
Their clean lines also make them incredibly forgiving for first-time builders.
Understanding Door Construction
A cabinet door might look like a single piece, but it’s actually built from several carefully joined components.
Each door consists of:
- Two vertical stiles
- Two horizontal rails
- One center panel
Breaking the door into smaller parts makes construction much easier than trying to build one large solid panel.
It also allows the door to remain stable as the seasons change.
Measure the Opening—Not the Drawing
Here’s a habit professional cabinet makers follow without exception:
They measure the finished cabinet before building the doors.
Even if your cut list is perfectly accurate, tiny variations during assembly can slightly change the final opening.
Instead of trusting the plans blindly, measure:
- Door opening height
- Door opening width
- Face-frame spacing
- Reveal gaps
Building doors to fit the actual cabinet almost always produces better results.
Recommended Door Dimensions
For the buffet cabinet in this guide, each door should leave a consistent reveal around every edge.
A common layout is:
| Measurement | Recommended Gap |
|---|---|
| Top reveal | ⅛ inch |
| Bottom reveal | ⅛ inch |
| Side reveal | ⅛ inch |
| Gap between doors | ⅛ inch |
Those narrow, even gaps are one of the details that give handmade furniture a clean, professional appearance.
Build One Door at a Time
It may be tempting to build both doors simultaneously.
Resist the urge.
Complete the first door from start to finish before assembling the second.
Doing so allows you to:
- Verify your measurements.
- Check for square.
- Make small adjustments.
- Improve your technique before repeating the process.
The second door almost always comes together faster and more accurately.
Assemble the Door Frame
Lay the rails and stiles on a flat work surface.
Before applying glue, dry-fit every component.
Check that:
- Corners meet cleanly.
- The center panel fits comfortably.
- Opposite corners measure equally.
- Nothing rocks or twists.
Think of this as a rehearsal.
It’s far easier to make corrections before glue enters the picture.
Choosing a Joinery Method
Several methods work well for cabinet doors.
For beginners, one stands above the rest.
Pocket-Hole Joinery
Pocket-hole joinery is:
- Strong
- Fast
- Beginner friendly
- Hidden from view
The screws remain on the inside of the door, leaving the visible face clean and uncluttered.
Add a thin layer of wood glue before driving the screws for even greater strength.
Dowel Joinery
Dowels create beautiful hidden joints but require more precise drilling.
If you’ve worked with dowels before, they’re an excellent option.
If not, pocket holes will make this project considerably easier.
Traditional Mortise and Tenon
This classic technique creates incredibly strong doors.
It also demands specialized tools and more advanced skills.
It’s a rewarding technique to learn—but probably not on your very first cabinet.
Installing the Center Panel
The center panel is what completes the Shaker door.
Most beginners use plywood because it’s:
- Stable
- Affordable
- Easy to finish
- Resistant to seasonal movement
Slide the panel into the frame before tightening the final joints.
If you’re using solid wood instead of plywood, avoid gluing the panel inside the frame.
Wood naturally expands and contracts with changes in humidity, and it needs room to move.
Sand the Doors Before Hanging Them
This is one of those small decisions that makes the entire project easier.
It’s much simpler to sand loose doors than doors already attached to the cabinet.
Work through the grits gradually.
A typical progression looks like this:
- 120 grit
- 150 grit
- 180 grit
- 220 grit (optional)
Pay extra attention to:
- Outside edges
- Corners
- Face-frame joints
- Panel surfaces
Run your hand across the surface occasionally.
Your fingertips will often notice imperfections before your eyes do.
Installing Concealed Hinges
Modern concealed hinges make cabinet installation surprisingly forgiving.
Unlike older hinges, they allow for small adjustments after the doors are mounted.
That flexibility removes much of the stress from installation.
Mark the Hinge Locations
Most cabinet doors use two hinges.
A good starting point is:
- 3 to 4 inches from the top
- 3 to 4 inches from the bottom
Measure carefully so both doors mirror one another.
Consistency is more important than the exact measurement itself.
Drill the Hinge Cups
Most concealed hinges require a 35 mm hole drilled into the back of each door.
A Forstner bit creates clean, flat-bottomed holes that fit the hinge perfectly.
Before drilling:
- Clamp the door securely.
- Mark the center point.
- Set the correct drilling depth.
- Practice on scrap wood if you’re unfamiliar with the process.
This isn’t a step to rush.
Slow, controlled drilling produces cleaner results.
Hanging the Doors
This is one of the most satisfying moments of the entire build.
The cabinet suddenly begins looking complete.
A helpful trick is to place a few playing cards or wooden shims beneath the door while attaching the hinges.
The temporary support keeps the reveal consistent and frees both hands while you install the screws.
Once both doors are attached, check:
- Side spacing
- Top reveal
- Bottom reveal
- Gap between doors
Don’t worry if everything isn’t perfect immediately.
That’s exactly what hinge adjustments are for.
Fine-Tuning the Fit
Almost every concealed hinge includes adjustment screws.
These allow you to move the door:
- Left or right
- Up or down
- In or out
Make tiny adjustments.
Then close the doors.
Step back.
Look again.
It’s surprising how a movement of less than a millimeter can completely change the appearance of the cabinet.
Installing Adjustable Shelves
With the cabinet doors fitted, it’s time to finish the interior.
If you drilled shelf-pin holes earlier, installation is wonderfully simple.
Insert four shelf pins at the desired height.
Set the shelf onto the pins.
Check that it:
- Sits flat.
- Doesn’t wobble.
- Slides in easily.
- Lifts out without binding.
If a shelf feels slightly tight, sand the edges lightly instead of forcing it into place.
Wood always deserves patience.
Prefer Fixed Shelves?
Some builders prefer the added rigidity of fixed shelving.
If that’s your plan:
- Apply glue to the shelf edges.
- Clamp it in position.
- Secure it using pocket-hole screws or wood screws.
Fixed shelves increase strength but reduce flexibility later.
Think about how you expect to use the cabinet before making the decision.
Adding Optional Drawers
A buffet cabinet doesn’t need drawers.
But they’re certainly nice to have.
Drawers are perfect for storing:
- Table linens
- Serving utensils
- Napkins
- Candles
- Small kitchen tools
- Coffee accessories
Even one shallow drawer can make the cabinet much more practical.
Build a Simple Drawer Box
Drawer construction doesn’t need to be complicated.
Each drawer consists of:
- Front
- Back
- Two sides
- Bottom panel
Half-inch plywood works well for the drawer box, while quarter-inch plywood is commonly used for the bottom.
Assemble everything square before installing the bottom panel.
Just like the cabinet itself, a square drawer operates far more smoothly.
Installing Drawer Slides
Side-mounted ball-bearing slides remain one of the easiest options for beginners.
To ensure smooth operation:
- Keep both slides level.
- Measure carefully from the cabinet floor.
- Use temporary spacers during installation.
- Tighten screws only after confirming alignment.
Open and close the drawer several times before attaching the finished drawer front.
It’s much easier to correct alignment while everything is still accessible.
Choosing Cabinet Hardware
Hardware may be one of the final steps, but it has an enormous impact on the finished appearance.
Think of cabinet pulls as the finishing touch that ties everything together.
Popular finishes include:
Matte Black
A favorite for:
- Farmhouse
- Modern
- Industrial
Brushed Nickel
Works beautifully with:
- Transitional
- Contemporary
- Coastal interiors
Satin Brass
Adds warmth without feeling overly traditional.
Excellent for:
- Scandinavian
- Mid-century modern
- Classic interiors
Antique Bronze
Perfect for:
- Rustic
- Cottage
- Vintage-inspired furniture
Choose hardware that complements the rest of the room rather than competing with it.
Installing Cabinet Pulls
This is one of those jobs where careful measuring pays off.
Before drilling:
- Mark the location with painter’s tape.
- Measure from both edges.
- Double-check your spacing.
- Clamp scrap wood behind the door to prevent tear-out.
Once the holes are drilled, installing the pulls takes only a few minutes.
Getting the measurements right beforehand is what matters.
Final Door Adjustments
With everything installed, open and close each door several times.
Watch how they move.
Listen for rubbing.
Look closely at the reveal around the edges.
If something feels slightly off, adjust it now.
Tiny refinements at this stage separate a cabinet that looks homemade from one that looks professionally built.
Common Door Problems—and Easy Fixes
| Problem | Likely Cause | Solution |
|---|---|---|
| Uneven gaps | Hinge adjustment needed | Fine-tune hinge screws |
| Doors rub together | Doors mounted too close | Adjust hinges sideways |
| Door won’t stay closed | Catch or hinge alignment | Realign hardware or add a magnetic catch |
| Shelf rocks | Shelf pins uneven | Reposition all four pins |
| Drawer sticks | Slides misaligned | Loosen, adjust, and retighten slides |
Remember, almost every issue here is adjustable.
Very few require rebuilding anything.
Final Hardware Checklist
Before moving on to finishing, confirm the following:
- ✔ Both doors open smoothly.
- ✔ Gaps are even around each door.
- ✔ Hinges are fully tightened.
- ✔ Shelves sit level.
- ✔ Drawers slide freely (if installed).
- ✔ Cabinet pulls are secure.
- ✔ Nothing rubs, binds, or catches.
Once you’ve completed these checks, your buffet cabinet is officially functional.
The only thing left is transforming raw wood into beautiful furniture.
Up Next: Part 7
Your cabinet is built, fitted, and fully operational. Now it’s time for the transformation everyone notices first. In Part 7: Sanding, Painting, Staining & Professional Finishing, you’ll learn how to prepare every surface, choose the right finish, avoid common finishing mistakes, and create a smooth, durable result that looks like it came straight from a custom furniture workshop.
Part 7: Sanding, Painting, Staining & Professional Finishing
If you’ve made it this far, take a moment to appreciate what you’ve accomplished.
Just a short while ago, your workshop was filled with sheets of plywood, rough boards, and boxes of screws. Now there’s a buffet cabinet standing in front of you—solid, functional, and unmistakably handmade.
But one final transformation is still waiting.
This is the stage where woodworking quietly becomes furniture making.
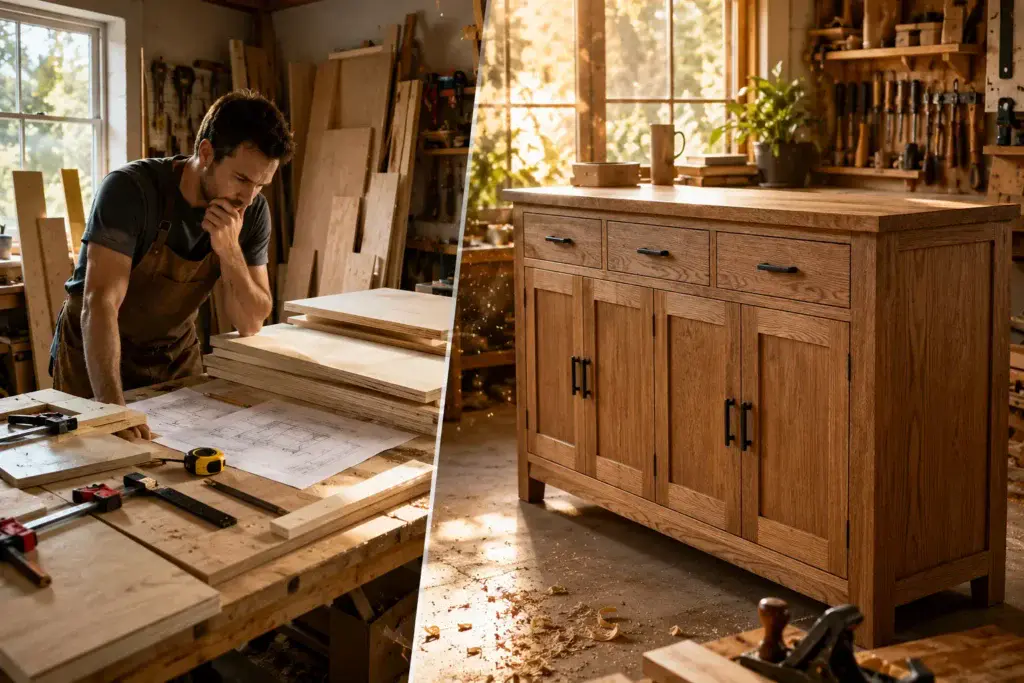
A flawless finish doesn’t happen because someone owns expensive brushes or a professional spray booth. It happens because they slow down, prepare carefully, and understand that every layer builds on the one before it.
Paint can hide color.
Stain can highlight grain.
Neither can hide rushed preparation.
If you invest your time anywhere in this project, let it be here.
Why the Finish Deserves Your Patience
Many first-time builders assume the hard part is over once the cabinet is assembled.
Ironically, finishing is where a project often succeeds—or falls short.
Think about the furniture you’ve admired in showrooms.
Most people don’t notice the joinery first.
They notice how smooth the surface feels.
How evenly the color flows across the wood.
How light reflects softly from the finish.
Those details don’t happen by accident.
They come from careful preparation long before the first coat of paint or stain is applied.
Create the Right Environment
Dust is one of the biggest enemies of a beautiful finish.
Before opening a can of paint, take a few minutes to prepare your workspace.
Aim for an area that’s:
- Clean
- Well ventilated
- Brightly lit
- Free from excessive dust
- Comfortable to work in
If you’re working in a garage, sweep the floor first, then give the dust time to settle before you begin.
A clean environment doesn’t just improve the finish—it also makes the entire process more enjoyable.
Step 1: The Final Sanding
Even if you sanded individual parts before assembly, the completed cabinet still needs one final pass.
Assembly introduces tiny imperfections.
Glue squeeze-out.
Minor scratches.
Small dents from clamps.
This final sanding blends everything into one smooth surface.
Work Through the Grits
There’s no shortcut here.
Each grit removes the scratches left by the previous one.
A good progression is:
| Grit | Purpose |
|---|---|
| 120 | Remove minor imperfections |
| 150 | Smooth the surface |
| 180 | Prepare for finishing |
| 220 | Final sanding before paint or stain |
Moving gradually through the grits produces a finish that’s noticeably smoother than skipping ahead.
Sand With the Grain
This simple habit makes a remarkable difference.
Always move the sander—or your sanding block—in the same direction as the wood grain.
Cross-grain scratches often remain invisible until stain or clear finish is applied.
Then suddenly they’re impossible to ignore.
Take your time around highly visible areas like:
- Cabinet doors
- Face frame
- Top panel
- Front edges
These are the surfaces everyone sees first.
Ease the Sharp Edges
Furniture feels more comfortable when its edges aren’t razor sharp.
Using fine sandpaper, lightly soften exposed corners.
You’re not trying to round them over dramatically.
Just remove the sharpness.
The result feels more natural to the touch and helps the finish adhere more evenly along the edges.
Dust Has a Way of Finding Wet Paint
Once sanding is complete, resist the urge to start painting immediately.
Instead, remove every trace of dust.
A simple routine works well:
- Vacuum the entire cabinet.
- Blow dust from corners and joints if you have compressed air.
- Wipe every surface with a microfiber cloth.
- Finish with a tack cloth.
It may seem like overkill.
It isn’t.
Tiny dust particles become surprisingly noticeable once they’re trapped beneath a smooth finish.
Step 2: Repair Small Imperfections
Now is the perfect time to inspect every surface under bright light.
Run your hand across the cabinet.
You’ll often feel imperfections before you see them.
Look for:
- Nail holes
- Screw holes
- Small dents
- Tiny gaps
- Hairline cracks
- Slight chips along plywood edges
Fill these areas with quality wood filler.
Once dry, sand them smooth until they disappear into the surrounding surface.
This extra attention pays dividends when the finish goes on.
Paint or Stain?
There isn’t a universally correct answer.
The better choice is the one that matches your vision for the finished cabinet.
Let’s look at both options.
Painting Your Buffet Cabinet
Paint creates a fresh, clean appearance that’s incredibly versatile.
It works beautifully in homes with:
- Farmhouse décor
- Modern interiors
- Coastal design
- Scandinavian influences
- Transitional styling
Another advantage?
Paint tends to disguise small imperfections that naturally occur during a first furniture build.
That’s one reason many beginners choose it.
Choosing a Paint Color
Neutral colors have remained popular for years because they’re easy to decorate around.
Some favorites include:
- Soft white
- Warm cream
- Sage green
- Charcoal gray
- Navy blue
- Matte black
Don’t feel pressured to follow trends.
Choose a color you’ll enjoy seeing every day.
Staining Your Buffet Cabinet
If you’ve chosen beautiful hardwood—or simply love the natural warmth of wood—a stain allows the grain to become part of the design.
Rather than covering the material, stain celebrates it.
Popular stain colors include:
- Natural
- Golden oak
- Early American
- Provincial
- Walnut
- Dark espresso
Always test the stain on an offcut before applying it to the cabinet itself.
Wood species can dramatically change the final color.
Prime Before You Paint
Primer may not be exciting.
It is, however, incredibly important.
A quality primer:
- Improves paint adhesion
- Creates an even base color
- Seals porous wood
- Helps block knots and tannins
- Produces a smoother final finish
Apply one even coat.
Allow it to dry completely.
Then sand lightly with 220-grit sandpaper before applying paint.
That light sanding makes the finished surface feel remarkably smooth.
Applying Paint Like a Professional
The biggest mistake beginners make?
Trying to achieve full coverage in one coat.
Professional-looking paint finishes are built gradually.
Think thin.
Not thick.
Apply several light coats rather than one heavy one.
The results are cleaner, smoother, and far less likely to drip.
Foam Roller
A high-density foam roller is ideal for:
- Cabinet sides
- Doors
- Top panels
- Large flat surfaces
It produces minimal texture and helps create an almost sprayed appearance.
Quality Brush
Use a premium brush for:
- Corners
- Face frames
- Inside edges
- Decorative trim
Work slowly.
Finish each section with long, smooth strokes.
Paint Sprayer
If you already own a sprayer, this project is an excellent candidate.
A sprayer creates an exceptionally smooth finish.
It also requires more preparation, masking, and cleanup.
For most beginners, a foam roller and quality brush produce excellent results.
Applying Stain
Stain behaves differently than paint.
Instead of sitting on top of the wood, it penetrates the fibers.
A simple process works well:
- Stir the stain thoroughly.
- Apply generously with a cloth or brush.
- Allow it to penetrate for several minutes.
- Wipe away the excess.
The longer the stain remains before wiping, the deeper the color generally becomes.
Consistency is the key.
Try to keep your timing similar across the entire cabinet.
Protecting Your Hard Work
Whether you’ve painted or stained the cabinet, it still needs protection.
Without a durable topcoat, everyday use will gradually wear away the finish.
A buffet cabinet often supports serving dishes, coffee makers, decorative pieces, and seasonal décor.
The top deserves extra protection.
Choosing a Protective Finish
Water-Based Polyurethane
A favorite for painted furniture.
Benefits include:
- Clear finish
- Fast drying
- Low odor
- Excellent durability
- Minimal yellowing over time
It’s especially well suited to light-colored cabinets.
Oil-Based Polyurethane
Oil-based finishes offer exceptional durability and a warm appearance.
Advantages include:
- Rich depth
- Excellent scratch resistance
- Long-lasting protection
Keep in mind that they require longer drying times and naturally deepen the color of the wood.
Furniture Wax
Wax creates a soft, hand-rubbed appearance.
While beautiful, it provides less protection than polyurethane.
It’s best suited to decorative furniture that won’t experience heavy daily use.
Applying the Topcoat
Regardless of which protective finish you choose, the process remains similar.
Apply:
- Thin coats
- Even pressure
- Long strokes
- Minimal brushing
Allow each coat to dry completely.
Then sand lightly with 320-grit sandpaper before applying the next.
Two to three coats usually provide excellent protection.
The cabinet top often benefits from an extra coat because it receives the most wear.
Don’t Confuse Dry With Cured
This catches many beginners by surprise.
A finish may feel dry after a few hours.
That doesn’t mean it’s fully cured.
Depending on the product, complete curing can take several days—or even longer.
During that time:
- Avoid heavy objects.
- Protect the surface from moisture.
- Open cabinet doors gently.
- Keep the room well ventilated.
Patience now helps the finish reach its maximum durability.
Install the Hardware
Once the finish has cured sufficiently, reinstall everything that was removed during finishing.
Attach:
- Cabinet doors
- Hinges
- Drawer fronts
- Pulls
- Knobs
- Shelf pins
Open every door several times.
Adjust hinges if necessary.
Tiny adjustments often make the finished cabinet feel noticeably more refined.
Troubleshooting Common Finishing Problems
Even experienced woodworkers occasionally encounter finishing issues.
Fortunately, most are easy to correct.
| Problem | Cause | Solution |
|---|---|---|
| Brush marks | Finish applied too heavily | Sand lightly and apply a thinner coat |
| Dust particles | Dust settled on wet finish | Sand smooth and recoat |
| Runs or drips | Too much finish | Allow to dry, sand flat, and apply another coat |
| Uneven stain | Uneven absorption | Sand lightly and reapply after using wood conditioner if needed |
| Rough texture | Surface wasn’t cleaned thoroughly | Sand with fine grit and apply another finish coat |
Almost every finishing mistake is repairable.
The key is resisting the temptation to keep brushing wet finish in an attempt to “fix” it immediately.
Often, letting it dry and correcting it later produces far better results.
The Final Inspection
Stand back.
Walk around the cabinet.
View it from different angles and in different lighting.
Look closely at:
- Paint coverage
- Stain consistency
- Smoothness
- Door operation
- Hardware alignment
- Dust nibs
- Overall appearance
Run your hand across the top.
A smooth finish should feel almost silky beneath your fingertips.
That tactile quality is one of the quiet signs of careful craftsmanship.
The Difference Is in the Details
Beautiful furniture rarely announces how much work went into it.
Instead, it feels effortless.
Even.
Balanced.
That’s because the final stages aren’t about dramatic changes.
They’re about dozens of tiny improvements that add up over time.
One more careful sanding pass.
One extra coat of finish.
One final hinge adjustment.
Individually, they seem insignificant.
Together, they’re what separate a good project from one you’re genuinely proud to display in your home.
Up Next: Part 8
With the finish complete, your buffet cabinet is nearly ready for everyday use. Before you call the project finished, though, it’s worth learning from the challenges that every woodworker encounters. In Part 8: Common Beginner Mistakes (and How to Avoid Them), we’ll explore the small errors that can cause big frustrations—and the practical habits that help you build with greater confidence on every future project.
Part 8: Common Beginner Mistakes (and How to Avoid Them)
Here’s something every skilled woodworker understands, even if they don’t always say it out loud:
Every beautiful piece of furniture has a story behind it.
Sometimes it’s a board that was cut an inch too short.
Sometimes it’s a cabinet door that refused to line up.
Sometimes it’s realizing—far too late—that the left side was accidentally installed on the right.
Mistakes aren’t proof that you aren’t good at woodworking.
They’re proof that you’re learning.
In fact, one of the fastest ways to improve isn’t building more projects. It’s understanding why mistakes happen and learning how to prevent them before they become expensive.
This chapter isn’t about perfection.
It’s about confidence.
The kind that comes from knowing that even if something goes wrong, you’ll know how to fix it.
Mistake #1: Rushing the Measuring Process
Nearly every woodworking mistake can be traced back to one moment.
A measurement that wasn’t checked.
It sounds almost too simple, but inaccurate measurements are responsible for more wasted lumber than dull saw blades or broken tools.
Most experienced builders follow a quiet routine.
Measure.
Check.
Measure again.
Only then do they make the cut.
It may feel slow at first, but those extra seconds often save entire boards.
Build Better Measuring Habits
Before every cut, ask yourself:
- Is this the correct measurement?
- Am I cutting the right board?
- Am I measuring from the correct edge?
- Have I allowed for the blade width?
- Have I verified the cut against the plans?
Eventually, these questions become automatic.
Until then, make them part of your routine.
Mistake #2: Trusting Every Board at the Lumber Store
Not every piece of lumber deserves to come home with you.
Some boards are bowed.
Others twist.
Some have deep cracks hidden beneath price stickers.
The temptation is to grab the first board you see and move on.
Resist it.
A few extra minutes selecting straight lumber can eliminate hours of frustration later.
What to Look For
Hold the board at one end and sight down its length.
You’re looking for:
- Straight edges
- Minimal bowing
- No twisting
- Tight grain
- Clean corners
- Few knots where strength matters
Good lumber doesn’t guarantee a perfect project.
Poor lumber almost guarantees unnecessary challenges.
Mistake #3: Forgetting That Wood Moves
Wood is alive in a way that many new builders don’t expect.
Even after it’s been milled and turned into furniture, it continues responding to seasonal humidity.
That movement is completely natural.
Ignoring it isn’t.
Solid wood expands and contracts throughout the year.
If parts are assembled without allowing for that movement, problems eventually appear.
Doors begin sticking.
Panels crack.
Joints separate.
That’s one reason plywood is such a smart choice for beginner cabinet projects.
Its layered construction dramatically reduces seasonal movement while remaining strong and stable.
Mistake #4: Skipping the Dry Fit
You’ve spent hours cutting every piece accurately.
The glue bottle is open.
Everything is ready.
It’s tempting to assemble immediately.
Don’t.
Dry-fitting every major component before adding glue gives you one last opportunity to catch problems while they’re still easy to solve.
During a dry fit, check:
- Panel alignment
- Shelf locations
- Cabinet width
- Face-frame fit
- Door openings
It feels like an extra step.
In reality, it’s one of the quickest ways to prevent expensive mistakes.
Mistake #5: Assuming the Cabinet Is Square
A cabinet can look perfectly fine and still be out of square.
Unfortunately, cabinet doors have an uncanny ability to reveal even the smallest inaccuracies.
If your cabinet isn’t square, you may notice:
- Uneven door gaps
- Shelves that don’t fit correctly
- Drawers that bind
- A cabinet that rocks
Fortunately, checking for square is easy.
Measure the cabinet diagonally in both directions.
Matching measurements mean the cabinet is square.
Different measurements mean it’s time to make adjustments before moving on.
This simple habit can save hours of frustration later.
Mistake #6: Using Too Much Wood Glue
One of the biggest surprises for beginners is how little glue is actually required.
A thick bead of glue doesn’t create a stronger joint.
It usually creates a bigger mess.
Excess glue can:
- Squeeze onto visible surfaces
- Prevent stain from penetrating evenly
- Increase sanding time
- Leave visible finish defects
A thin, consistent bead is all you need.
If a small amount squeezes out when you clamp the joint, you’ve probably used the right amount.
Mistake #7: Driving Screws Without Pilot Holes
It’s easy to assume modern drills are powerful enough to drive screws anywhere.
Sometimes they are.
That doesn’t mean they should.
Without pilot holes, wood can split unexpectedly—especially near the ends of boards.
Pilot holes also help screws pull joints together more cleanly.
Whenever practical:
- Drill pilot holes.
- Countersink visible screws.
- Drive screws at a steady pace.
- Let the drill do the work.
The result is cleaner, stronger joinery with far less stress on the material.
Mistake #8: Treating Sanding Like an Afterthought
Ask experienced furniture makers where they spend the most unexpected amount of time.
Many will answer:
“Sanding.”
Not because it’s exciting.
Because it’s important.
Paint and stain don’t hide scratches.
They often highlight them.
Good sanding isn’t about making wood smooth.
It’s about creating a surface that’s consistent from one end of the cabinet to the other.
Work patiently through the grit sequence instead of skipping steps.
Your future self will thank you.
Mistake #9: Rushing the Finish
This mistake usually happens near the end of a project.
You’re excited.
The cabinet looks finished.
You want to move it inside.
So you apply another coat before the previous one has cured properly.
The result?
Sticky surfaces.
Brush marks.
Cloudy finishes.
Sometimes even peeling paint.
Read the manufacturer’s drying recommendations—and trust them.
Woodworking teaches patience in subtle ways.
This is one of them.
Mistake #10: Drilling Hardware Holes Without Double-Checking
Cabinet pulls may seem like a small detail.
They’re not.
Even a slight difference in placement becomes obvious once both doors are side by side.
Before drilling:
- Mark both doors carefully.
- Measure from the same reference point.
- Use a hardware template if possible.
- Double-check every measurement.
Remember:
It’s much easier to spend another minute measuring than it is to repair an incorrectly drilled hole.
Mistake #11: Buying Cheap Hardware
Not all hinges feel the same.
Not all drawer slides operate smoothly.
And not all cabinet pulls remain tight after years of use.
Hardware is one of the few areas where spending a little more often pays off every single day.
Quality hinges close more smoothly.
Quality drawer slides feel effortless.
Quality handles remain solid after years of use.
You don’t need luxury hardware.
You simply need hardware you’ll enjoy touching every day.
Mistake #12: Ignoring Workshop Safety
Confidence is valuable.
Overconfidence is dangerous.
Many accidents happen not because someone lacks experience—but because they become comfortable enough to skip simple precautions.
Before every work session:
- Wear eye protection.
- Protect your hearing.
- Use a dust mask when sanding.
- Secure workpieces before cutting.
- Keep blades sharp.
- Remove distractions.
Most woodworking injuries are preventable.
Building safely should always be part of the project.
Mistake #13: Expecting Perfection on Your First Build
This may be the biggest mistake of all.
Social media has a way of making every project look effortless.
Perfect joints.
Perfect finishes.
Perfect lighting.
What you don’t see are the years of practice behind those projects.
Or the mistakes that taught those builders what they know today.
Your first buffet cabinet doesn’t need to impress the internet.
It only needs to teach you something.
Maybe you’ll learn to measure more carefully.
Maybe your door alignment will improve.
Maybe you’ll finally understand why wood grain matters.
Every lesson becomes part of your next project.
That’s how woodworking works.
Quick Troubleshooting Guide
Even careful builders occasionally run into problems.
Here’s a quick reference if something doesn’t look quite right.
| Problem | Possible Cause | Simple Solution |
|---|---|---|
| Cabinet rocks | Uneven floor or frame | Check on a flat surface, then use furniture levelers if needed |
| Doors won’t line up | Hinges need adjustment | Fine-tune the concealed hinge screws |
| Shelf doesn’t fit | Slightly oversized panel | Sand the edges gradually until it fits |
| Rough paint finish | Dust contamination | Sand lightly and apply another thin coat |
| Drawer sticks | Slide alignment | Loosen, adjust, and retighten the slides |
| Small gaps | Minor assembly movement | Fill with wood filler before finishing |
Remember, almost every woodworking problem has a solution.
Very few mistakes are permanent.
Habits Worth Carrying Into Every Project
As your skills grow, you’ll notice that experienced woodworkers share certain habits.
They don’t rush.
They don’t assume.
They check their work constantly.
Some of the best habits you can develop include:
- Measuring twice before every cut.
- Labeling parts immediately.
- Dry-fitting before gluing.
- Checking for square throughout assembly.
- Cleaning glue squeeze-out right away.
- Sanding patiently.
- Respecting drying times.
- Keeping the workspace organized.
None of these habits require expensive tools.
They simply require consistency.
And consistency is often what separates a good builder from a great one.
Every Project Leaves You Better Than the Last
By now, you’ve probably realized something interesting.
The buffet cabinet wasn’t just teaching you how to build a cabinet.
It was quietly teaching you how to think like a woodworker.
To slow down.
To solve problems.
To notice details.
To trust the process.
Those lessons will stay with you long after this project is finished.
The next time you look at a piece of furniture, you may find yourself wondering how it was built.
And before long, another thought will naturally follow.
“I could probably build that.”
That’s the moment many hobbyists stop thinking of themselves as beginners.
Up Next: Part 9
With the hard work behind you, it’s time to make the cabinet truly yours. In Part 9: Customize Your Buffet Cabinet for Any Home Style, you’ll discover creative ways to personalize the design with different finishes, hardware, storage upgrades, trim details, and decorative touches that transform a simple buffet cabinet into a one-of-a-kind piece built specifically for your home.
Part 9: Customize Your Buffet Cabinet for Any Home Style
One of the greatest rewards of building your own furniture is realizing you’re no longer limited by what’s sitting in a showroom.
You don’t have to settle for a cabinet that’s almost the right size or almost the right color. You can build something that fits your home, your storage needs, and your personal style from the very beginning.
That’s where this project becomes especially rewarding.
The buffet cabinet you’ve built isn’t tied to one specific look. Its clean lines and simple construction make it incredibly versatile. With just a few thoughtful changes, the exact same cabinet can feel rustic and welcoming, sleek and modern, or timeless enough to blend into almost any room.
Think of the cabinet you’ve built as a blank canvas.
Now it’s time to give it character.
Start With the Room, Not the Trends
It’s easy to fall into the trap of chasing whatever style happens to be popular this year.
Instead, take a look around the room where your cabinet will live.
Ask yourself:
- Are the walls warm or cool in tone?
- Do you already have black, brass, or nickel hardware?
- Is your furniture modern or traditional?
- Does the room feel bright and airy or rich and cozy?
- Are natural wood finishes already part of the space?
The goal isn’t to make the cabinet stand out at all costs.
The goal is to make it feel like it has always belonged there.
When a piece fits naturally within a room, it quietly elevates the entire space.
Farmhouse Style: Warm, Welcoming, and Timeless
Farmhouse furniture continues to be popular because it feels relaxed without sacrificing function.
It isn’t overly decorative.
It isn’t complicated.
Instead, it focuses on simple craftsmanship, practical storage, and warm materials.
To create that look, consider:
- A painted cabinet body
- A stained natural wood top
- Matte black hardware
- Classic Shaker doors
- Soft, muted paint colors
Popular paint choices include:
- Warm white
- Antique cream
- Sage green
- Dusty blue
- Soft greige
A lightly stained oak or pine top adds just enough contrast to make the cabinet feel handcrafted rather than factory-made.
Modern Style: Clean Lines That Never Feel Busy
Modern furniture relies on restraint.
There are no unnecessary details competing for attention.
Every line serves a purpose.
If that’s the look you’re after, keep the design simple.
Choose:
- Flat or Shaker cabinet doors
- Hidden or minimal hardware
- Smooth painted surfaces
- Straight edges
- A recessed toe kick
Color palettes tend to stay neutral.
Favorites include:
- Matte black
- Crisp white
- Charcoal gray
- Navy blue
- Warm taupe
Less decoration often creates a stronger visual impact.
Scandinavian Style: Bright, Calm, and Functional
Scandinavian design proves that simple doesn’t have to mean boring.
Its focus is on natural materials, practical storage, and bright interiors that feel comfortable year-round.
To capture that aesthetic:
- Use light wood tones.
- Keep decorative elements minimal.
- Choose slim hardware.
- Consider tapered wooden legs.
- Avoid heavy moldings or ornate trim.
Oak, birch, maple, and ash all pair beautifully with this style.
The finished cabinet should feel light—even when it’s full of storage.
Rustic Style: Let the Wood Tell the Story
Rustic furniture embraces imperfections.
Knots.
Visible grain.
Natural color variation.
Instead of hiding those characteristics, it celebrates them.
To create a rustic buffet cabinet:
- Choose a rich stain.
- Leave the grain visible.
- Install black iron hardware.
- Use a thicker-looking top.
- Add decorative X-bracing if desired.
Walnut, provincial, and dark oak stains work especially well for this style.
The finished piece should feel substantial and inviting, almost as though it has been part of the home for years.
Traditional Style: Classic Without Feeling Dated
Traditional furniture leans toward elegance rather than simplicity.
That doesn’t mean it has to feel formal.
Small details can transform a straightforward cabinet into something with timeless appeal.
Consider adding:
- Crown molding
- Decorative base trim
- Raised feet
- Satin brass or antique bronze hardware
- Rich walnut or cherry stain
These finishing touches introduce character without changing the cabinet’s basic structure.
Upgrade the Cabinet Top
The top is one of the first things people notice.
Even a small upgrade here can dramatically change the cabinet’s overall appearance.
Solid Hardwood Top
Replacing the plywood top with solid hardwood instantly elevates the project.
Popular choices include:
- White oak
- Maple
- Walnut
- Cherry
A hardwood top develops character over time and can be refinished years down the road if needed.
Butcher Block
A butcher block top combines warmth with exceptional durability.
It’s an excellent option if the cabinet will double as:
- A coffee station
- A serving area
- A baking center
- A beverage station
The thicker appearance also gives the cabinet a more custom-built feel.
Create the Look of a Thick Furniture Top
You don’t necessarily need a thicker slab of wood.
By laminating an additional strip beneath the front edge, you can create the illusion of a much thicker top while keeping both cost and weight under control.
It’s a simple trick that many furniture builders use.
Change the Base, Change the Personality
One of the easiest ways to transform the cabinet is by changing what’s underneath it.
Tapered Legs
Perfect for:
- Scandinavian interiors
- Mid-century modern homes
- Contemporary spaces
They make the cabinet feel lighter and visually lift it off the floor.
Bun Feet
Rounded bun feet create a softer, more traditional appearance that’s equally at home in farmhouse or cottage-style interiors.
Metal Legs
Steel legs instantly shift the cabinet toward an industrial or modern aesthetic.
Pair them with black hardware for a clean, cohesive look.
Recessed Toe Kick
Keeping the base recessed creates the illusion of built-in cabinetry while making the cabinet more comfortable to stand in front of.
It’s a subtle feature that has a surprisingly large impact on everyday use.
Decorative Trim Makes a Big Difference
Trim doesn’t have to be elaborate to be effective.
Even simple molding can make a cabinet feel more finished.
Ideas include:
- Base molding
- Crown molding
- Door trim
- Edge molding
- Picture-frame molding
If this is your first experience working with trim, start with clean, straightforward profiles.
Neat installation always looks better than overly complicated decoration.
Improve the Storage Inside
The outside of the cabinet catches people’s attention.
The inside determines how useful it becomes.
Small upgrades can dramatically improve everyday functionality.
Adjustable Shelves
These remain one of the most practical additions you can make.
As your storage needs change, the cabinet changes with them.
Perfect for storing:
- Serving platters
- Mixing bowls
- Small appliances
- Cookbooks
Wine Storage
A simple grid insert transforms one section of the cabinet into dedicated bottle storage.
It looks impressive without requiring complicated construction.
Stemware Rack
Install a hanging rack beneath the upper shelf to store wine glasses upside down.
It’s functional, space-efficient, and gives the cabinet a more custom appearance.
Pull-Out Trays
Instead of reaching to the back of deep shelves, pull-out trays bring everything within easy reach.
They’re especially useful for heavier appliances like mixers or slow cookers.
Hidden Charging Station
Drill a discreet cable hole through the back panel and place a power strip inside the cabinet.
Suddenly your buffet becomes an organized charging station for:
- Phones
- Tablets
- Laptops
- Bluetooth speakers
- Kitchen appliances
It’s one of those upgrades you quickly wonder how you ever lived without.
Hardware Is Like Jewelry for Furniture
Changing cabinet pulls can completely alter the cabinet’s personality.
Some of the most versatile finishes include:
Matte Black
Ideal for:
- Modern
- Farmhouse
- Industrial
Brushed Nickel
A safe, timeless choice for:
- Transitional
- Contemporary
- Coastal homes
Satin Brass
Adds warmth without overpowering the design.
Beautiful in:
- Scandinavian interiors
- Mid-century spaces
- Traditional rooms
Antique Bronze
Pairs wonderfully with:
- Rustic furniture
- Cottage décor
- Vintage-inspired interiors
Hardware is relatively inexpensive compared to the cabinet itself, making it one of the easiest ways to refresh the piece years later.
Think Beyond the Dining Room
Despite the name, a buffet cabinet can work almost anywhere in the home.
Its versatility is one of its greatest strengths.
Coffee Bar
Organize:
- Coffee maker
- Grinder
- Mugs
- Syrups
- Filters
- Beans
Add floating shelves above the cabinet, and you’ve created a dedicated coffee station.
Entryway Storage
Use it to organize:
- Shoes
- Hats
- Gloves
- Dog leashes
- Keys
A mirror above the cabinet instantly creates a welcoming entrance.
Living Room Console
Hide everyday clutter while displaying books, framed photos, and decorative accents on top.
Cable management holes make it easy to store streaming devices and game consoles neatly out of sight.
Craft Cabinet
Adjustable shelving makes the cabinet perfect for organizing:
- Sewing supplies
- Paint
- Fabric
- Vinyl rolls
- Paper
- Craft tools
Everything stays accessible without taking over the room.
Home Office Storage
Instead of stacking office supplies on open shelves, keep everything neatly tucked away.
The cabinet easily accommodates:
- Printers
- Files
- Chargers
- Office supplies
- Reference books
It keeps the workspace feeling calm and organized.
Refresh the Look With the Seasons
One unexpected benefit of a buffet cabinet is how easily it becomes part of your seasonal decorating.
In spring, you might style it with fresh flowers and woven baskets.
Summer calls for greenery, coastal accents, and light-colored ceramics.
Autumn naturally welcomes candles, wood textures, and warm earthy tones.
During winter, evergreen garlands, lanterns, and holiday serving pieces can completely transform the space.
Because the cabinet offers both storage and display space, updating it throughout the year never feels like a major project.
Small Details Create Custom Furniture
Sometimes the upgrades people notice most aren’t dramatic.
They’re thoughtful.
You might add:
- Soft-close hinges
- Interior LED lighting
- Felt-lined drawers
- Decorative shelf liners
- A hidden drawer
- A personalized maker’s mark
- Matching storage baskets
None of these changes alter the cabinet’s structure.
Yet together they make it feel uniquely yours.
Leave Room for Future Ideas
One of the advantages of building your own furniture is knowing exactly how it’s assembled.
That means the cabinet doesn’t have to stay exactly as it is today.
As your woodworking skills improve, you can always revisit the project and add:
- Glass cabinet doors
- Extra drawers
- Decorative side panels
- Crown molding
- Interior lighting
- Sliding barn-style doors
- Wine bottle storage
- Adjustable feet
Instead of replacing the cabinet in a few years, you simply continue improving it.
That’s one of the quiet joys of handmade furniture.
It grows with you.
Design Checklist Before You Make Changes
Before committing to paint, hardware, or decorative details, ask yourself a few simple questions:
- ✔ Which room will this cabinet live in?
- ✔ What style already defines the space?
- ✔ Will the cabinet be a focal point or blend into the background?
- ✔ What items will it store every day?
- ✔ Do I prefer painted furniture or natural wood?
- ✔ Would upgraded hardware improve the design?
- ✔ Which future upgrades might I want to add later?
Answering these questions now helps ensure every design choice feels intentional rather than impulsive.
Up Next: Part 10
The cabinet is built, customized, and ready for everyday life. In the final chapter, Care, FAQs & Products / Tools / Resources, you’ll learn how to keep your buffet cabinet looking beautiful for years to come, find answers to the questions most first-time builders ask after completing their project, and discover the tools, materials, and accessories worth adding to your workshop for future builds.
Part 10: Care, FAQs & Products / Tools / Resources
Your buffet cabinet is finally complete.
Take a step back for a moment.
A few days ago, this project existed only as measurements on paper and a stack of lumber leaning against the workshop wall. Now it’s a piece of furniture you’ll use every day—one that carries something store-bought furniture never can: the memory of building it yourself.
The best part?
This doesn’t have to be the end of the project.
Well-built furniture continues to improve with time, and with a little care, your buffet cabinet can remain part of your home for decades. In this final chapter, you’ll learn how to protect your work, solve the questions most beginners ask after finishing their first cabinet, and discover the tools and resources that make the next project even more enjoyable.
Caring for Your Buffet Cabinet
Quality furniture doesn’t demand constant attention, but a few simple habits go a long way.
The goal isn’t to keep the cabinet looking brand new forever. It’s to help it age gracefully while protecting all the effort you’ve invested in building it.
Everyday Cleaning
Dust is inevitable, but cleaning doesn’t need to be complicated.
A soft microfiber cloth is usually all you’ll need for regular maintenance.
For fingerprints or light spills:
- Wipe with a slightly damp cloth.
- Dry the surface immediately.
- Avoid leaving standing water on the wood.
A quick wipe once a week keeps the cabinet looking fresh without wearing down the finish.
Skip Harsh Household Cleaners
Many all-purpose cleaners are designed for tile, glass, or countertops—not furniture.
Products containing strong chemicals can gradually dull painted finishes or damage protective topcoats.
Avoid cleaners that contain:
- Bleach
- Ammonia
- Acetone
- Abrasive powders
- Strong solvents
When in doubt, warm water and a microfiber cloth are often the safest option.
Protect the Cabinet Top
The top surface naturally receives the most use.
Serving dishes, coffee makers, decorative trays, and seasonal décor all spend time there.
Simple habits help preserve the finish:
- Use coasters under drinks.
- Place hot dishes on trivets.
- Add felt pads beneath decorative objects.
- Lift heavy items instead of dragging them.
These small choices prevent scratches that are difficult to remove later.
Keep Humidity Under Control
Wood continues responding to its environment long after the project is finished.
Very dry air can cause:
- Minor shrinkage
- Small cracks
- Loose joints
Excess humidity may contribute to:
- Swollen doors
- Sticking drawers
- Seasonal movement
An indoor humidity level between 35% and 55% is generally ideal for most furniture.
Protect It From Direct Sunlight
Sunlight slowly changes wood.
Paint fades.
Stain lightens.
Clear finishes age unevenly.
If possible:
- Keep the cabinet out of direct afternoon sun.
- Use curtains or blinds during the brightest hours.
- Rotate decorative items occasionally to prevent uneven fading.
These simple precautions help preserve the cabinet’s appearance for years.
Perform a Quick Annual Checkup
Furniture benefits from the occasional inspection.
Once a year, spend a few minutes checking:
- Door alignment
- Hinge screws
- Cabinet pulls
- Shelf pins
- Finish condition
- Loose fasteners
- Small scratches
Most issues are easy to correct when they’re caught early.
Touching Up Minor Damage
Life happens.
A serving tray gets dropped.
A chair bumps the cabinet.
A heavy vase leaves a scratch.
Fortunately, most minor damage is easy to repair.
For painted cabinets:
- Clean the area.
- Sand lightly if necessary.
- Apply matching paint.
- Allow it to dry completely.
For stained wood:
- Use a furniture touch-up marker.
- Apply matching stain carefully.
- Finish with a light protective coat if needed.
Small repairs done promptly are often invisible once complete.
Refreshing the Finish Years Later
One advantage of building solid furniture is that it doesn’t need to be replaced when the finish begins showing its age.
Instead, it can be renewed.
The process usually involves:
- Cleaning thoroughly.
- Light sanding.
- Repairing minor damage.
- Applying fresh paint or stain.
- Sealing with a new protective finish.
A weekend of refinishing can give the cabinet an entirely new life.
Frequently Asked Questions
Can I really build this cabinet if it’s my first furniture project?
Yes.
If you can measure carefully, work patiently, and follow each step in order, this project is completely achievable.
The design intentionally avoids complicated joinery and specialty techniques while still producing a cabinet that looks polished and professional.
Do I need a table saw?
No.
A circular saw paired with a reliable straightedge guide is more than capable of producing accurate cuts for this project.
Many woodworkers build excellent furniture for years before adding a table saw to their workshop.
How long should I expect the build to take?
If your materials are prepared ahead of time, many builders complete the cabinet over a weekend.
If you’re working evenings or allowing extra drying time between finish coats, expect the project to take four to seven days at a relaxed pace.
There’s no prize for finishing first.
Furniture almost always rewards patience.
What’s the best wood for beginners?
For most first-time builders:
- Cabinet-grade plywood for the cabinet box
- Poplar for painted face frames and doors
- Pine for budget-friendly projects
These materials are widely available, easy to work with, and forgiving while you’re learning.
Should I paint or stain the cabinet?
That depends entirely on the look you’re after.
Paint is ideal if you want:
- Farmhouse style
- Modern interiors
- Bold colors
- A finish that hides minor imperfections
Stain is a better choice if you want:
- Natural wood grain
- Traditional furniture
- Warm wood tones
- A timeless appearance
Neither option is better.
They’re simply different expressions of the same project.
What if my cabinet doors don’t line up perfectly?
That’s actually very common.
Modern concealed hinges include adjustment screws that allow you to move the doors:
- Side to side
- Up and down
- In and out
A few careful adjustments usually solve the problem in just a few minutes.
Can I change the dimensions?
Absolutely.
Once you understand the basic cabinet structure, you can adjust:
- Width
- Height
- Depth
- Shelf layout
- Door configuration
Just remember that changing one dimension often affects several others, so update your cut list before making any cuts.
What’s the next project I should build?
Once you’ve completed this cabinet, you’ll already have the skills needed for many beginner furniture projects.
Popular next builds include:
- Coffee tables
- Bookshelves
- TV stands
- Entryway benches
- Kitchen pantry cabinets
- Bathroom vanities
- Garage storage cabinets
Each project introduces new techniques while reinforcing the skills you’ve already learned.
Build Your Workshop Gradually
One of the smartest decisions you can make is allowing your workshop to grow alongside your experience.
Instead of buying everything at once, invest in tools as each project demands them.
A practical progression looks like this:
First Upgrades
- Better clamps
- Pocket-hole jig
- Random orbital sander
- Quality drill bits
Intermediate Additions
- Miter saw
- Router
- Drill press
- Shop vacuum
Long-Term Investments
- Table saw
- Thickness planer
- Jointer
- Band saw
Buying tools with purpose almost always leads to a better workshop than buying tools on impulse.
Skills You’ve Gained
Whether you realized it or not, you’ve developed a foundation that applies to nearly every future woodworking project.
You now know how to:
- Read woodworking plans
- Measure accurately
- Cut plywood safely
- Assemble a cabinet box
- Install shelves
- Build cabinet doors
- Use pocket-hole joinery
- Sand furniture properly
- Apply paint or stain
- Protect wood with a durable finish
- Install cabinet hardware
- Troubleshoot common woodworking problems
Those aren’t isolated skills.
They’re the building blocks of furniture making.
Products / Tools / Resources
If you’re planning to build more furniture, these are some of the most worthwhile additions to your workshop and finishing supplies.
Essential Tools
- 25-foot tape measure
- Speed square
- Cordless drill and impact driver
- Circular saw with a straightedge guide
- Random orbital sander
- Pocket-hole jig
- Bar clamps and spring clamps
- Quality Forstner bit set
- Combination square
Recommended Materials
- Cabinet-grade plywood
- Poplar boards for painted furniture
- White oak or maple for stained projects
- Wood glue
- Stainable wood filler
- Shelf pins
- Concealed soft-close hinges
- Cabinet pulls or knobs
Sanding Supplies
- 80-grit sandpaper
- 120-grit sandpaper
- 150-grit sandpaper
- 180-grit sandpaper
- 220-grit sandpaper
- 320-grit finishing paper
- Tack cloths
- Sanding sponges
Finishing Products
- Bonding primer
- High-quality furniture paint
- Wood stain
- Water-based polyurethane
- Oil-based polyurethane
- Foam rollers
- Premium paint brushes
- Lint-free staining cloths
Helpful Workshop Accessories
- Shop vacuum
- LED work light
- Sawhorses
- Folding workbench
- Dust collection hose
- Hearing protection
- Safety glasses
- Respirator for sanding and finishing
- Magnetic hardware trays
- Moisture meter for lumber
Learning Resources for Your Next Projects
Once you’ve enjoyed building this buffet cabinet, consider expanding your skills with projects such as:
- Farmhouse coffee tables
- Shaker-style bookcases
- Entryway storage benches
- Bathroom vanities
- TV consoles
- Pantry cabinets
- Floating shelves
- Kitchen islands
- Built-in storage cabinets
- Workshop organization projects