
There’s something deeply satisfying about building a piece of outdoor furniture that earns its place every single day. A rolling plant stand does exactly that. It isn’t just another woodworking project to check off your list—it becomes part of your gardening routine, quietly making every season a little easier.
Imagine a warm summer morning. One side of your patio is already bathed in sunlight while the other is still cool with shade. Instead of struggling to lift heavy containers one by one, you simply unlock the caster wheels and roll the entire display into the perfect spot. Later in the afternoon, when the sun becomes too intense, you move everything again in a matter of seconds.
That flexibility is what makes a rolling outdoor plant stand so valuable.
Whether you’re growing fragrant herbs beside the kitchen door, nurturing colorful flowers on a deck, or caring for large vegetable containers in the backyard, mobility changes the way you garden. Plants receive better light. Maintenance becomes easier. Even cleaning your patio no longer involves wrestling with oversized ceramic pots.
For woodworkers, this project offers another reward. It combines practical construction with clean, attractive design while requiring only fundamental woodworking skills. There are no complicated joinery techniques or expensive specialty tools. With careful planning, quality materials, and a free weekend, you can build a sturdy plant stand that looks custom-made and serves your garden for years.
Throughout this guide, you’ll learn every stage of the process—from selecting weather-resistant lumber and choosing heavy-duty caster wheels to assembling a rigid frame, protecting it against the elements, and adding thoughtful upgrades that suit your space. Along the way, you’ll discover small details that make a significant difference, such as proper drainage spacing, weight distribution, and finishing techniques that help outdoor furniture stand up to changing seasons.
Whether you’re picking up a drill for the first time or you’re already comfortable in the workshop, these rolling outdoor plant stand woodworking plans are designed to help you create something both functional and rewarding.
Table of Contents
- Why Build a Rolling Outdoor Plant Stand?
- Planning Your Project Before You Cut Lumber
- Choosing the Best Wood for Outdoor Durability
- Tools, Hardware, and Materials Checklist
- Project Dimensions and Complete Cut List
- Step-by-Step Building Instructions
- Weatherproofing and Finishing Techniques
- Custom Design Ideas and Optional Upgrades
- Common Mistakes and How to Avoid Them
- Maintenance Tips for Long-Lasting Performance
- Frequently Asked Questions
- Products / Tools / Resources
Part 1: Why Build a Rolling Outdoor Plant Stand?
At first glance, a rolling plant stand might seem like a simple convenience. In reality, it’s one of those projects that quietly solves several everyday problems at once.
Anyone who has ever tried lifting a rain-soaked planter knows how deceptively heavy containers can become. Soil absorbs water, roots expand, and decorative pots often weigh more than expected. Moving them by hand isn’t just inconvenient—it can be physically demanding and, in some cases, risky.
A sturdy mobile stand removes that challenge entirely.
Instead of carrying individual pots, you move the entire collection together. A gentle push is often all it takes to reposition herbs, flowers, or vegetables exactly where they need to be.
Gardening Becomes More Flexible
Plants don’t experience your garden the way you do.
The sunny corner that receives perfect morning light in spring may become shaded by midsummer. A patio that’s comfortable in April might become scorching in July. Seasonal weather, nearby trees, and even neighboring buildings change the amount of light your plants receive throughout the year.
A rolling stand allows you to respond to those changes without disrupting your garden.
You can easily:
- Move vegetables into full sun.
- Protect delicate flowers during heat waves.
- Shift tropical plants under cover before heavy rain.
- Bring container gardens closer to the house during colder nights.
- Rearrange displays for outdoor gatherings.
That kind of flexibility is difficult to achieve with fixed planters.
A Better Growing Environment
Healthy plants depend on more than water and fertilizer.
Good air circulation, proper drainage, and consistent sunlight all contribute to stronger growth.
By raising containers above the ground, a rolling plant stand naturally improves airflow around pots. Excess water drains more efficiently, reducing the likelihood of water pooling beneath containers. Elevated plants also dry more evenly after rain, creating conditions that are less favorable for mold and mildew.
Over time, these small improvements contribute to healthier roots and more vigorous plants.
Less Strain on Your Back
Gardening should be enjoyable—not exhausting.
One of the biggest advantages of a raised plant stand is improved ergonomics.
Instead of repeatedly bending to water, inspect, prune, or harvest, you’ll be working at a more comfortable height. For many gardeners, especially those with knee or back discomfort, this simple change makes routine maintenance noticeably easier.
Tasks like:
- Watering
- Deadheading flowers
- Harvesting herbs
- Checking for pests
- Removing damaged leaves
all become more comfortable when plants are positioned higher off the ground.
Keeping Outdoor Spaces Organized
Patios and decks often serve more than one purpose.
One day they’re a quiet place to enjoy coffee. The next they’re filled with family, friends, or outdoor furniture for a weekend barbecue.
A rolling plant stand gives you the freedom to adapt your space without heavy lifting.
Need more room?
Unlock the wheels, move the stand aside, and create additional space in seconds.
When the gathering is over, roll everything back into place just as easily.
A Rewarding Weekend Project
Some woodworking projects are beautiful but rarely used.
Others become indispensable.
A rolling outdoor plant stand belongs firmly in the second category.
It introduces essential woodworking techniques—including measuring, cutting, drilling, assembling, sanding, and finishing—while producing something you’ll use throughout the gardening season.
Most builders can complete the project over a weekend using common workshop tools, making it an approachable choice for beginners and an enjoyable build for experienced woodworkers alike.
Built to Last
Outdoor furniture faces constant challenges.
Rain, sunlight, changing temperatures, and daily use all take their toll over time.
That’s why this guide focuses on durable construction rather than quick shortcuts.
By selecting weather-resistant lumber, using corrosion-resistant hardware, installing quality locking casters, and applying a protective exterior finish, you can build a plant stand that remains reliable season after season.
With routine care, it’s a project that can serve your garden for many years while developing the character that only handcrafted outdoor furniture acquires through regular use.
Part 2: Planning Your Project Before You Cut Lumber
The excitement of starting a new woodworking project often begins with the first cut. But experienced builders know the real work starts much earlier—with a tape measure, a notebook, and a clear plan.
A rolling outdoor plant stand may look straightforward, yet the decisions you make before buying lumber will influence everything that follows. The right dimensions make it easier to move. A well-planned frame supports heavier pots without sagging. Choosing the correct wheel size can mean the difference between a stand that glides effortlessly across your patio and one that constantly catches on every crack or paver.
Spending an extra thirty minutes planning today can save hours of frustration later.
Start With the Way You Garden
Before sketching measurements, think about how this plant stand will actually fit into your daily routine.
Every garden is different.
Some people grow a collection of herbs outside the kitchen door. Others dedicate an entire patio to flowering containers. Some need a movable stand for seedlings in spring, while others want a permanent display for decorative planters all year long.
Instead of asking, “What size should I build?”, ask a better question:
“What do I want this stand to help me do?”
Your answer will shape every design decision that follows.
Consider Your Primary Purpose
Think about the role the stand will play.
Will it be used for:
- Fresh herbs near the back door?
- A colorful flower display?
- Heavy vegetable containers?
- Seed-starting trays?
- Tropical plants that move indoors during colder months?
- A combination of several different plant types?
Building for a specific purpose usually produces a more practical result than trying to accommodate every possible use.
Think About Where It Will Live
The same plant stand won’t suit every outdoor space.
Take a few measurements before deciding on the final size.
Patio
Concrete patios provide a stable, level surface and usually allow for a larger stand.
Wooden Deck
Measure carefully to ensure enough room for comfortable movement around outdoor furniture.
Balcony
Every inch matters.
A compact footprint often works better than increasing shelf space.
Greenhouse
Leave enough clearance for doors, benches, and watering equipment.
Garden Path
If the stand will travel between different areas, check the width of gates and pathways before settling on the dimensions.
A beautifully built stand isn’t much use if it can’t fit through the gate leading to your vegetable garden.
Choosing the Right Size
A common mistake is assuming that bigger is always better.
In reality, the best size balances storage capacity with mobility.
Compact Design
Approximate dimensions:
- Width: 24 inches
- Depth: 16 inches
- Height: 30 inches
Ideal for:
- Herbs
- Small flowers
- Apartment balconies
- Limited outdoor space
Standard Design
Approximate dimensions:
- Width: 36 inches
- Depth: 18 inches
- Height: 30 inches
This size comfortably holds several medium containers while remaining easy to maneuver.
For most homeowners, it offers the best balance between functionality and convenience.
Heavy-Duty Design
Approximate dimensions:
- Width: 48 inches
- Depth: 24 inches
- Height: 32 inches
Best suited for:
- Large ceramic pots
- Vegetable gardens
- Citrus trees
- Oversized decorative planters
As the footprint increases, so does the need for additional structural support.
Plan for the Weight—Not Just the Plants
One of the easiest details to overlook is how much a finished planter actually weighs.
A container that feels manageable when empty becomes much heavier once it’s filled with:
- Potting mix
- Water
- Mature roots
- Decorative gravel
- Mulch
A single large planter can easily weigh more than 100 pounds after watering.
Now imagine three or four sitting on the same shelf.
That’s why it’s important to build for the maximum load rather than the average one.
A stronger frame offers greater stability, smoother movement, and a longer service life.
Don’t Forget the Wheels
People naturally focus on the wood, yet the wheels determine how enjoyable the stand is to use.
Ask yourself:
- Will it stay on smooth concrete?
- Will it roll across decking boards?
- Does it need to cross pavers?
- Will it occasionally travel over gravel?
The rougher the surface, the larger the wheels should generally be.
Larger casters roll more easily, absorb small bumps, and place less stress on the frame.
Locking wheels are also worth considering.
Once the stand is in position, engaging the wheel locks keeps everything stable while watering, pruning, or repotting.
Think Beyond Today
It’s easy to build for the plants you own right now.
It’s smarter to build for the plants you’ll have next season.
Gardens rarely stay the same.
Collections grow.
New varieties appear.
Containers become larger.
Leaving a little extra room between plants improves airflow, makes watering easier, and reduces the need to rebuild the stand in a year’s time.
Planning for growth today often prevents frustration later.
Storage Makes Everyday Gardening Easier
The space beneath the main shelf is often overlooked.
With a little planning, it becomes valuable storage.
Instead of searching the garage every time you need a trowel or watering can, those items can stay exactly where they’re used.
A lower shelf is ideal for storing:
- Empty pots
- Hand tools
- Gardening gloves
- Potting mix
- Fertilizer
- Plant labels
- Watering equipment
Simple additions like this often become the features you’ll appreciate most after the project is finished.
Allow Water to Escape
Plants need water.
Wood does not.
That’s why drainage should be considered before construction begins.
Rather than building a solid tabletop, leave small gaps between shelf boards.
Those narrow spaces allow rainwater and excess irrigation to drain away naturally.
The benefits include:
- Faster drying after rain
- Better airflow
- Reduced moisture buildup
- Longer wood life
- Cleaner shelves
Good drainage is one of those details people rarely notice—until it’s missing.
Sketch Before You Build
You don’t need computer software or detailed architectural drawings.
Even a rough sketch can reveal problems before they become expensive mistakes.
Include:
- Overall width
- Overall depth
- Height
- Shelf locations
- Leg placement
- Wheel positions
- Cross supports
Seeing the project on paper makes it easier to visualize proportions and identify adjustments before cutting lumber.
Build With the Future in Mind
One advantage of woodworking is that projects can evolve.
While your initial design might be simple, consider whether you may want to add features later.
Leave room for possible upgrades such as:
- A second shelf
- A taller back panel
- A trellis
- Tool hooks
- Fold-down work surfaces
- Additional storage
Designing with flexibility in mind makes future modifications much easier.
Estimate Your Budget
A realistic budget helps you make informed decisions without compromising quality.
Typical expenses include:
- Lumber
- Exterior screws
- Waterproof wood glue
- Locking caster wheels
- Sandpaper
- Protective finish
- Bolts and washers
Choosing quality hardware—especially the casters—is often a better investment than spending extra on decorative details.
Strong wheels and durable fasteners contribute more to the long-term performance of the stand than cosmetic upgrades.
A Simple Planning Checklist
Before purchasing materials, take a final moment to confirm your plan.
✔ The dimensions fit your available space.
✔ The stand will fit through gates or doorways if necessary.
✔ The frame is designed to support the expected weight.
✔ Outdoor-rated lumber has been selected.
✔ Locking caster wheels match the planned load.
✔ Drainage has been considered.
✔ Storage needs have been included.
✔ A basic sketch has been completed.
Checking these points now helps ensure the construction phase goes smoothly.
A little preparation may not be the most exciting part of the project, but it’s often the reason a finished build feels solid, balanced, and effortless to use. Once the planning is complete, you can move forward with confidence, knowing every board and every measurement has a purpose.
Part 3: Choosing the Best Wood for Outdoor Durability
Walk through any lumber yard and you’ll quickly discover that not all wood is created equal. Some boards are built to thrive outdoors through years of rain, sunshine, and changing seasons. Others are better suited to indoor furniture and won’t hold up nearly as well once they’re exposed to the elements.
Your rolling outdoor plant stand will spend most of its life outside. It will support heavy pots, endure regular watering, and experience everything from summer heat to winter moisture. Choosing the right wood isn’t simply about appearance—it’s about building something that remains sturdy, attractive, and dependable long after the excitement of the project has faded.
The good news is that you don’t need the most expensive lumber on the market. You simply need wood that matches your climate, your budget, and the way you plan to use the finished stand.
What Makes a Good Outdoor Wood?
Before comparing different species, it’s helpful to understand what you’re looking for.
Outdoor lumber should offer a balance of:
- Natural resistance to moisture
- Protection against rot and decay
- Stability during seasonal weather changes
- Good structural strength
- Easy workability
- Attractive appearance
- Reasonable maintenance requirements
No single wood excels in every category, which is why choosing the right material often comes down to priorities.
Are you looking for maximum longevity?
The lowest cost?
Minimal maintenance?
Or a premium furniture-quality finish?
Knowing your priorities makes the decision much easier.
Cedar: The Favorite for Outdoor Woodworking
If experienced woodworkers had to recommend one species for this project, cedar would appear near the top of almost every list.
It offers an impressive combination of durability, beauty, and ease of construction.
Why Cedar Works So Well
Cedar naturally contains oils that help resist moisture, insects, and decay.
Unlike many other woods, it doesn’t rely on chemical treatment to perform well outdoors.
Other advantages include:
- Lightweight construction
- Excellent weather resistance
- Straight grain
- Easy cutting and sanding
- Pleasant natural aroma
- Attractive reddish-brown color
Its lighter weight is especially valuable for a rolling plant stand.
After all, the stand itself shouldn’t be unnecessarily heavy before you’ve even added the planters.
Things to Consider
Cedar is softer than many hardwoods.
It can dent if struck with heavy objects, although this is rarely a problem during normal gardening use.
If left unfinished, cedar gradually fades to an attractive silver-gray color.
Some homeowners appreciate this natural weathering, while others prefer to maintain its original color with an exterior oil or clear protective finish.
Redwood: Beautiful and Naturally Durable
Redwood has earned its reputation as one of the finest outdoor woods available.
Its rich color and distinctive grain make it a favorite for high-end garden furniture.
Advantages
- Excellent decay resistance
- Natural insect protection
- Stable in changing weather
- Smooth, attractive grain
- Easy to machine
Because of its natural beauty, many builders choose clear finishes that allow the wood to remain the focal point.
Things to Consider
Redwood generally costs more than cedar and may not be readily available in every region.
For builders seeking a premium appearance, however, it remains an excellent choice.
Pressure-Treated Pine: Practical and Affordable
Not every project requires premium lumber.
Pressure-treated pine remains one of the most economical options for outdoor woodworking.
Special preservatives help protect the wood against:
- Rot
- Fungal growth
- Insect damage
It’s widely used for decks, fences, pergolas, and other outdoor structures because of its strength and availability.
Advantages
- Budget-friendly
- Easy to find
- Strong structural performance
- Good for painted finishes
- Suitable for heavy loads
For larger rolling plant stands carrying substantial weight, pressure-treated pine provides dependable support.
Things to Consider
Fresh pressure-treated lumber often contains significant moisture.
Before staining or painting, allow it sufficient time to dry according to the supplier’s recommendations.
It’s also noticeably heavier than cedar, which increases the overall weight of the finished stand.
White Oak: Built for Strength
White oak occupies a unique place among outdoor hardwoods.
Its dense cellular structure naturally resists moisture, making it one of the few hardwoods regularly chosen for exterior furniture.
Why Builders Choose White Oak
- Outstanding durability
- Exceptional strength
- Beautiful grain
- Excellent wear resistance
- Long service life
If your goal is to create a furniture-quality plant stand capable of lasting for decades, white oak deserves serious consideration.
Things to Consider
Density comes with trade-offs.
White oak is heavier, harder to cut, and generally more expensive than softwoods.
Sharp blades, quality drill bits, and a little extra patience make working with it much easier.
Teak: The Premium Choice
Few woods enjoy the reputation of teak.
Its natural oils make it remarkably resistant to moisture, insects, and weather.
This is one reason teak has been used for generations in outdoor furniture and marine applications.
Advantages
- Outstanding weather resistance
- Extremely durable
- Rich golden color
- Minimal maintenance
- Excellent dimensional stability
Many teak projects remain in service for decades with only routine care.
Things to Consider
Price is the biggest obstacle.
For many DIY builders, teak falls outside the project budget.
Unless you’re creating heirloom-quality outdoor furniture, cedar often provides a more practical balance of cost and performance.
Cypress: A Reliable Alternative
Cypress performs particularly well in humid climates thanks to naturally occurring compounds that resist decay.
Advantages include:
- Good weather resistance
- Stable performance
- Easy machining
- Attractive appearance
Its availability depends largely on your location, but it’s well worth considering if it’s readily available in your area.
Composite Materials
Some builders wonder whether composite decking boards are suitable for plant stands.
They certainly offer advantages.
Composite materials:
- Resist rot
- Don’t splinter
- Require very little maintenance
- Never need staining
However, they’re designed primarily as decking rather than structural framing.
For this reason, composite boards work best as shelf surfaces supported by a sturdy wooden frame rather than as the main structural components.
Understanding Lumber Grades
Choosing the right species is only half the equation.
The quality of each board matters just as much.
When selecting lumber, look for boards that are:
- Straight
- Flat
- Free of excessive twisting
- Free of deep cracks
- Dry
- Consistent in thickness
Take your time while shopping.
Even boards from the same stack can vary considerably in quality.
A few extra minutes spent selecting better lumber often leads to a noticeably better finished project.
Why Moisture Content Matters
Wood naturally expands and contracts as its moisture content changes.
Using overly wet lumber can result in:
- Shrinking
- Warping
- Twisting
- Loose joints
- Cracked finishes
Whenever possible, choose kiln-dried lumber.
It tends to remain more stable during construction and produces more predictable results.
Paint, Stain, Oil, or Natural?
Once you’ve chosen your wood, it’s worth thinking ahead to the final appearance.
Each finishing approach creates a different look.
Natural
Allows the wood to weather naturally over time.
Often chosen for cedar and teak.
Exterior Oil
Enhances the grain while helping repel moisture.
Easy to maintain with periodic reapplication.
Exterior Stain
Adds color while allowing much of the natural wood texture to remain visible.
Available in transparent, semi-transparent, and solid-color options.
Exterior Paint
Provides the greatest color flexibility and excellent weather protection.
Ideal when matching existing outdoor furniture or a home’s exterior.
Comparing the Most Popular Choices
| Wood Species | Durability | Maintenance | Weight | Cost | Best For |
|---|---|---|---|---|---|
| Cedar | Excellent | Low | Light | Moderate | Most DIY projects |
| Redwood | Excellent | Low | Medium | High | Premium outdoor furniture |
| Pressure-Treated Pine | Very Good | Moderate | Heavy | Low | Budget-friendly builds |
| White Oak | Excellent | Moderate | Heavy | High | Furniture-quality projects |
| Teak | Outstanding | Very Low | Heavy | Very High | Luxury outdoor furniture |
| Cypress | Very Good | Low | Medium | Moderate | Humid climates |
Which Wood Should You Choose?
For most homeowners, cedar remains the standout choice.
It offers an exceptional combination of:
- Weather resistance
- Workability
- Attractive appearance
- Moderate cost
- Long-term durability
If you’re aiming for a premium project with a furniture-grade finish, redwood and white oak are excellent alternatives.
For those working within a tighter budget, pressure-treated pine delivers dependable strength at a lower price, provided it’s allowed to dry properly before finishing.
Ultimately, the “best” wood is the one that matches your environment, budget, and expectations. A carefully selected board, combined with thoughtful construction and regular maintenance, will reward you with a rolling outdoor plant stand that continues to serve your garden season after season—while looking just as good as the day you built it.
Part 4: Tools, Hardware, and Materials Checklist
Every satisfying woodworking project has one thing in common: when the first screw goes in, there’s no scrambling to find a missing drill bit or making an emergency trip to the hardware store.
Preparation isn’t the glamorous part of building. It rarely appears in finished project photos, yet it’s often the difference between a smooth afternoon in the workshop and a frustrating day filled with interruptions.
The rolling outdoor plant stand is a perfect example. It doesn’t require a professional shop or a garage full of expensive machinery. In fact, most DIY woodworkers already own many of the tools needed to complete this project. What matters more is choosing materials and hardware that are designed to withstand outdoor conditions year after year.
Gather everything before you begin, organize your workspace, and you’ll spend your time building instead of searching.
Lumber Shopping List
For a standard rolling outdoor plant stand measuring approximately 36 inches wide, 18 inches deep, and 30 inches tall, you’ll need a combination of structural lumber and shelf boards.
Buying quality lumber at the beginning makes every later step easier, from cutting and assembly to sanding and finishing.
2×4 Boards
These boards form the backbone of the project.
Use them for:
- Legs
- Upper frame
- Lower frame
- Structural braces
Because they carry most of the weight, inspect each board carefully before purchasing.
Choose pieces that are:
- Straight
- Dry
- Free of large cracks
- Free of excessive knots
- Minimal twisting
A straight board today saves countless adjustments during assembly.
1×4 Boards
These narrower boards create the visible shelves.
They’re ideal because they allow small drainage gaps between each board while still providing plenty of support for containers.
Use them for:
- Top shelf
- Bottom shelf
- Decorative trim
- Optional side panels
If appearance matters, spend a little extra time selecting boards with similar grain and color.
Those small details become surprisingly noticeable once the project is finished.
2×2 Boards
These smaller pieces are incredibly useful.
They’re commonly used for:
- Shelf supports
- Internal cleats
- Additional reinforcement
- Optional dividers
Although they’re not highly visible, they play an important role in the overall strength of the stand.
Estimated Lumber Quantity
For the standard design, you’ll typically need:
- 4 pieces of 2×4 × 8-foot lumber
- 6 pieces of 1×4 × 8-foot lumber
- 2 pieces of 2×2 × 8-foot lumber
If your budget allows, purchasing one additional board of each size is often worthwhile.
Mistakes happen.
A spare board also gives you material for future repairs or modifications.
Choosing the Right Fasteners
Outdoor furniture demands hardware that’s just as durable as the wood itself.
Ordinary interior screws may look identical at first glance, but exposure to moisture eventually causes rust, staining, and weakened joints.
The small savings simply aren’t worth it.
Exterior Wood Screws
For this project, use screws specifically rated for exterior applications.
Look for:
- Stainless steel
- Ceramic-coated
- Polymer-coated
These coatings resist corrosion and hold up much better in changing weather conditions.
Recommended sizes include:
- 2½-inch screws for structural framing
- 1¼-inch screws for attaching shelf boards
Keeping separate containers for each screw size makes assembly much faster.
Waterproof Wood Glue
Many beginners think screws alone provide enough strength.
In reality, waterproof wood glue creates a stronger, more rigid structure by bonding the wood surfaces together.
Apply a thin layer between mating surfaces before driving screws into place.
Avoid excessive glue.
A small amount is all that’s needed, and cleaning up excess while it’s still wet is much easier than scraping it away later.
Bolts, Washers, and Lock Nuts
The caster wheels experience constant movement.
While some manufacturers suggest attaching them with screws, through-bolting generally provides a stronger and longer-lasting connection.
A typical installation includes:
- Bolts
- Flat washers
- Lock washers
- Nylon lock nuts
This combination distributes pressure evenly and helps prevent the wheels from loosening over time.
Choosing the Best Caster Wheels
If the lumber forms the skeleton of the project, the casters are its foundation.
They determine how smoothly the stand rolls, how much weight it can support, and how stable it feels during everyday use.
Choosing quality wheels is one of the smartest investments you can make.
Locking Swivel Casters
For most outdoor plant stands, locking swivel casters provide the best combination of mobility and stability.
Useful features include:
- Full 360-degree rotation
- Foot-operated wheel locks
- Corrosion-resistant construction
- Sealed bearings
- Smooth rolling action
Once the stand is positioned, locking the wheels prevents unwanted movement while watering or pruning.
Which Wheel Size Should You Buy?
The ideal size depends on the surface where the stand will be used.
2-Inch Wheels
Suitable for:
- Indoor projects
- Decorative displays
- Lightweight containers
Not recommended for heavier outdoor use.
3-Inch Wheels
A practical option for:
- Smooth patios
- Wooden decks
- Smaller garden displays
They offer a good balance between height and maneuverability.
4-Inch Wheels
For most outdoor woodworking projects, this is the sweet spot.
Benefits include:
- Easier rolling
- Better obstacle clearance
- Higher weight capacity
- Improved stability
These wheels perform well across concrete, pavers, and decking.
5-Inch Wheels
Best suited for:
- Oversized plant stands
- Large ceramic containers
- Uneven garden paths
- Brick patios
The larger diameter allows the stand to roll over small obstacles with less effort.
Don’t Ignore Weight Ratings
Every caster has a maximum load capacity.
That rating should comfortably exceed the expected weight of the finished stand.
Remember to include:
- Lumber
- Pots
- Soil
- Water
- Mature plants
For example:
| Caster Rating | Total Capacity (4 Wheels) |
|---|---|
| 100 lbs each | 400 lbs |
| 125 lbs each | 500 lbs |
| 150 lbs each | 600 lbs |
Building with extra capacity provides additional peace of mind.
Sandpaper You’ll Need
A smooth finish begins long before stain or paint is applied.
Plan on using three sanding stages.
80 Grit
Removes rough saw marks and sharp edges.
120 Grit
Smooths the surface and prepares the wood for finishing.
220 Grit
Produces a refined surface that’s pleasant to touch and ready for exterior protection.
Fresh sanding discs or sheets work more efficiently than worn abrasives, so don’t hesitate to replace them when they lose effectiveness.
Choosing an Exterior Finish
The finish protects your hard work from weather while influencing the final appearance.
Popular choices include:
Exterior Wood Oil
Ideal for enhancing natural grain while providing moisture protection.
Spar Urethane
Offers excellent water resistance and UV protection with a clear finish.
Exterior Stain
Adds color while allowing much of the wood’s natural texture to remain visible.
Exterior Paint
Provides the widest range of colors and excellent protection, though it completely covers the wood grain.
Choosing a finish formulated specifically for outdoor use is essential.
Essential Power Tools
Most builders already own the majority of these tools.
Circular Saw
Perfect for making straight cuts in framing lumber.
Miter Saw
Speeds up repetitive crosscuts and improves consistency.
Cordless Drill and Driver
Used for:
- Drilling pilot holes
- Driving screws
- Installing hardware
- Mounting casters
A fully charged battery before starting can save unnecessary interruptions.
Orbital Sander
Produces smoother surfaces far more quickly than sanding by hand.
Hand Tools That Make the Job Easier
Power tools do the heavy work, but hand tools provide the precision.
Keep these nearby throughout the build.
Tape Measure
Accurate measuring is the foundation of every successful woodworking project.
Speed Square
Useful for:
- Marking cut lines
- Checking corners
- Confirming square joints
Combination Square
Helps transfer measurements and verify alignment during assembly.
Clamps
Good clamps often feel like an extra pair of hands.
Use them to:
- Hold joints together
- Maintain alignment
- Prevent shifting while fastening
Having four or more clamps available makes assembly noticeably easier.
Carpenter’s Pencil
Clearly label every piece before cutting.
Simple labels such as “Front Rail” or “Left Leg” reduce confusion later in the build.
Safety Equipment
No woodworking project is complete without proper safety precautions.
Before turning on any tool, make sure you have:
- Safety glasses
- Hearing protection
- Dust mask or respirator
- Work gloves for handling lumber
- Closed-toe footwear
A clean workspace and careful habits are just as important as protective equipment.
Helpful Extras
These aren’t essential, but they can make the project even more enjoyable.
Consider adding:
- Pocket hole jig
- Corner clamps
- Countersink bit
- Moisture meter
- Magnetic parts tray
- Workbench with adjustable height
Small workshop upgrades often improve accuracy while reducing fatigue during longer projects.
Before You Make the First Cut
With everything gathered, take one final look around your workspace.
Ask yourself:
- Is every board straight and free of defects?
- Are the tools ready to use?
- Is all the hardware organized?
- Are the batteries charged?
- Is the work surface clean and level?
- Is your safety equipment within easy reach?
Once those questions are answered, you’re ready to begin transforming a stack of lumber into a sturdy rolling outdoor plant stand that will serve your garden for years to come.
Part 5: Project Dimensions and Complete Cut List
This is the stage where your project shifts from an idea to something tangible.
The measurements you choose now will determine how stable the plant stand feels, how much weight it can safely carry, and how comfortably it fits into your outdoor space. A carefully prepared cut list also keeps waste to a minimum, helps you use each board efficiently, and makes the assembly process much smoother.
There’s an old saying among woodworkers: Measure twice, cut once. It’s simple advice, but it’s one of the easiest ways to avoid costly mistakes. Taking a little extra time here means fewer surprises later.
Standard Project Dimensions
The dimensions below create a versatile rolling outdoor plant stand that works well for most patios, decks, balconies, and garden spaces.
Finished Size
- Width: 36 inches
- Depth: 18 inches
- Height: 30 inches (frame only)
- Overall Height: Approximately 34 inches with 4-inch locking casters
These proportions provide enough room for multiple medium-sized containers while keeping the stand compact enough to move comfortably through most outdoor spaces.
Why These Measurements Work
A well-balanced design isn’t just about appearance. Every measurement serves a purpose.
36-Inch Width
This width provides generous shelf space without making the stand difficult to push or turn.
It comfortably accommodates:
- Three medium planters
- Several herb pots
- A combination of flowers and decorative containers
18-Inch Depth
A deeper shelf may seem appealing, but extra depth also increases weight and reduces maneuverability.
An 18-inch depth offers:
- Excellent stability
- Comfortable access to plants
- Enough room for common planter sizes
- Better balance when moving the stand
30-Inch Height
Working at ground level quickly becomes tiring.
A height of approximately 30 inches places plants within comfortable reach for:
- Watering
- Pruning
- Repotting
- Harvesting herbs
- Routine inspections
It also creates useful storage space beneath the lower shelf.
Understanding Lumber Dimensions
Before making your first cut, remember that construction lumber uses nominal dimensions, not actual measurements.
For example:
| Nominal Size | Actual Size |
|---|---|
| 2×4 | 1½” × 3½” |
| 2×2 | 1½” × 1½” |
| 1×4 | ¾” × 3½” |
Keeping these actual dimensions in mind helps prevent small measurement errors that can affect the fit of the entire project.
Complete Cut List
The following cut list is designed for the standard rolling outdoor plant stand.
Take your time marking each piece before cutting.
Labeling every component immediately after cutting helps avoid confusion during assembly.
Frame Components
Legs
Quantity: 4
Material: 2×4
Length: 30 inches
These form the primary support structure and carry the weight of the shelves, plants, and caster wheels.
Upper Front and Back Rails
Quantity: 2
Material: 2×4
Length: 36 inches
These create the front and rear of the upper frame.
Upper Side Rails
Quantity: 2
Material: 2×4
Length: 15 inches
Installed between the longer rails to achieve the finished depth of approximately 18 inches.
Lower Front and Back Rails
Quantity: 2
Material: 2×4
Length: 36 inches
These support the lower shelf while adding rigidity to the overall frame.
Lower Side Rails
Quantity: 2
Material: 2×4
Length: 15 inches
Together with the front and back rails, they create the lower rectangular frame.
Shelf Supports
The shelf supports carry the weight of the shelf boards while helping distribute loads evenly across the frame.
Side Cleats
Quantity: 4
Material: 2×2
Length: 15 inches
Front and Rear Cleats
Quantity: 4
Material: 2×2
Length: 33 inches
These supports should be installed flush and level to ensure both shelves sit evenly.
Top Shelf Boards
Quantity: 6
Material: 1×4
Length: 36 inches
These boards form the main working surface.
Leave approximately ¼ inch between each board during installation to allow proper drainage.
Lower Shelf Boards
Quantity: 5
Material: 1×4
Length: 36 inches
The lower shelf provides convenient storage while maintaining the same attractive appearance as the upper shelf.
Optional Reinforcement Pieces
If you expect to place especially heavy containers on the stand, a few extra components can significantly improve strength.
Center Cross Brace
Quantity: 1
Material: 2×4
Length: 15 inches
Installed beneath the center of the top shelf to reduce flexing under heavy loads.
Additional Shelf Support
Quantity: 1
Material: 2×2
Length: 33 inches
Provides extra support beneath the lower shelf when storing heavier supplies.
Hardware Checklist
Having all of your hardware ready before assembly keeps the build moving smoothly.
For the standard project, you’ll typically need:
- 40–50 exterior-grade 2½-inch wood screws
- 30–40 exterior-grade 1¼-inch wood screws
- Waterproof exterior wood glue
- Four locking swivel casters
- Sixteen bolts
- Sixteen flat washers
- Sixteen lock washers
- Sixteen lock nuts
Buying a few extra screws is never a bad idea. Small mistakes happen, and leftovers are always useful for future repairs.
Planning Shelf Spacing
One detail that often gets overlooked is the spacing between the shelf boards.
Rather than placing the boards tightly together, leave approximately ¼ inch between each one.
Those small gaps provide several important benefits.
They allow:
- Rainwater to drain naturally
- Better airflow beneath pots
- Faster drying after watering
- Reduced moisture buildup
- Less chance of mold or mildew developing
It’s a small design choice that has a noticeable impact on long-term durability.
Positioning the Casters
Proper wheel placement affects both stability and ease of movement.
Each caster should be mounted:
- Directly beneath a leg
- Approximately 1 inch from each outer edge
- Square with the frame
- Evenly aligned with the remaining wheels
Taking a few extra minutes to position the casters accurately helps the stand roll smoothly and reduces unnecessary strain on the frame.
Think About Weight Distribution
The strongest plant stand can still become unstable if weight isn’t distributed properly.
As you plan the layout of your containers, remember a few simple principles.
Place heavier pots:
- Near the corners
- Above structural supports
- Evenly across the shelf
Avoid concentrating all of the weight in one area.
Balanced loading improves stability and makes the stand much easier to move.
Organize Before Cutting
Many experienced woodworkers follow a simple routine before making the first cut.
Lay out all of the boards.
Mark every measurement clearly.
Label each component.
Double-check each dimension.
Only then do they begin cutting.
This organized approach reduces mistakes and speeds up assembly because every piece already has a designated place.
Account for the Saw Blade
Every saw removes a small amount of material with each cut.
This is known as the kerf.
Ignoring the kerf can leave your final pieces slightly shorter than intended.
A good habit is to:
- Mark the waste side of every cut.
- Cut just outside the measurement line.
- Trim to the exact length if necessary.
Small adjustments like these help maintain accuracy throughout the project.
Dry-Fit Everything First
Before reaching for the glue bottle or screws, assemble the entire frame without fastening anything permanently.
This dry fit allows you to:
- Confirm that every board fits correctly.
- Check the overall dimensions.
- Verify shelf placement.
- Ensure corners remain square.
- Identify any adjustments before assembly.
It’s one of the simplest ways to catch minor issues while they’re still easy to fix.
Accuracy Now Saves Time Later
By the time you’ve completed the cut list, labeled every component, and checked your measurements, the difficult part is already behind you.
The remaining work becomes far more enjoyable because every piece has been prepared with purpose.
Instead of constantly measuring during assembly, you’ll simply be putting together components that already fit as intended.
With your lumber cut, organized, and ready, you’re prepared for the most satisfying stage of the project—bringing every piece together to create a sturdy, heavy-duty rolling outdoor plant stand.
Part 6: Step-by-Step Building Instructions
Now comes the part most woodworkers look forward to.
The piles of neatly cut lumber begin to take shape, individual boards become a solid frame, and by the end of the day you’ll have something you can roll onto your patio and immediately put to use.
Resist the urge to rush.
The strongest outdoor furniture isn’t built quickly—it’s built carefully. Checking for square after each major step, drilling pilot holes before driving screws, and making small adjustments along the way will reward you with a plant stand that feels solid every time you move it.
Set aside enough time to enjoy the process. Turn on some music, clear your workbench, and work methodically. You’ll spend far less time correcting mistakes and much more time watching your project come together.
Step 1: Organize Every Piece
Before assembling anything, lay all of your cut lumber on a flat surface.
Separate the pieces into groups.
Keep together:
- Legs
- Upper frame rails
- Lower frame rails
- Shelf supports
- Shelf boards
- Hardware
- Casters
If you’ve labeled each component after cutting, finding the next piece becomes almost effortless.
This small amount of organization keeps the project moving smoothly from beginning to end.
Step 2: Build the Upper Frame
The upper frame forms the main support structure for the top shelf.
Lay the two 36-inch rails parallel to one another.
Position the two 15-inch side rails between them, creating a rectangle.
Before fastening anything, check each corner.
Use a speed square or combination square to confirm that all corners are exactly 90 degrees.
Next, measure diagonally from corner to corner.
If both diagonal measurements match, the frame is square.
Apply a thin bead of waterproof wood glue to each joint.
Pre-drill pilot holes to prevent splitting.
Drive two exterior-grade screws into every joint.
Once assembled, place the frame on a flat surface to verify that it doesn’t rock.
Step 3: Assemble the Lower Frame
Repeat the exact process for the lower frame.
Keeping both frames identical makes the remaining assembly much easier.
Again:
- Check each corner.
- Measure diagonally.
- Apply glue.
- Drill pilot holes.
- Install screws.
Don’t worry about speed.
Precision here determines how well everything aligns later.
Step 4: Attach the Legs
Turn the upper frame upside down.
Position one leg inside each corner.
The outside faces of the legs should align flush with the outside edges of the frame.
Clamp each leg before fastening.
This prevents the boards from shifting while screws are installed.
Apply waterproof wood glue where the wood surfaces meet.
Drive two screws through each side of the frame into every leg.
Repeat this process until all four legs are securely attached.
When finished, carefully turn the structure upright.
At this stage, it should resemble a sturdy table without shelves.
Step 5: Install the Lower Frame
The lower frame strengthens the entire structure while supporting the storage shelf.
Measure upward from the bottom of each leg.
A height of approximately 8 inches works well for most designs.
Mark the location on every leg.
Slide the lower frame into position.
Before fastening it permanently:
- Check that the frame is level.
- Confirm all legs remain vertical.
- Measure diagonally one final time.
Once satisfied, apply glue to each joint.
Drive two screws through the legs into each corner of the lower frame.
You’ll immediately notice how much more rigid the structure becomes.
Step 6: Install the Shelf Supports
The shelf boards need continuous support around the inside of both frames.
Attach the 2×2 cleats to the inside faces of the upper and lower frames.
Position each cleat slightly below the top edge of the surrounding rails.
This allows the shelf boards to sit flush with the frame once installed.
Apply glue before fastening.
Drive screws every 8 to 10 inches.
Use a level or straightedge to ensure opposite supports remain perfectly aligned.
Small inaccuracies here become much more noticeable once the shelves are installed.
Step 7: Install the Top Shelf
Now the project begins to look like a finished piece of furniture.
Lay the six shelf boards across the upper frame.
Instead of placing them tightly together, leave approximately ¼ inch between each board.
These narrow gaps provide important benefits.
They allow:
- Rainwater to drain away
- Better airflow around containers
- Faster drying after watering
- Reduced moisture buildup
Start by positioning the outer boards.
Then work toward the center while maintaining consistent spacing.
Once you’re satisfied with the layout:
- Drill pilot holes.
- Drive 1¼-inch exterior screws.
- Keep screw heads flush with the wood surface.
Take a step back and inspect the spacing before moving on.
Even gaps create a cleaner, more professional appearance.
Step 8: Install the Lower Shelf
Repeat the same process for the lower shelf.
Although it won’t always be the first thing people notice, this shelf quickly becomes one of the most useful parts of the stand.
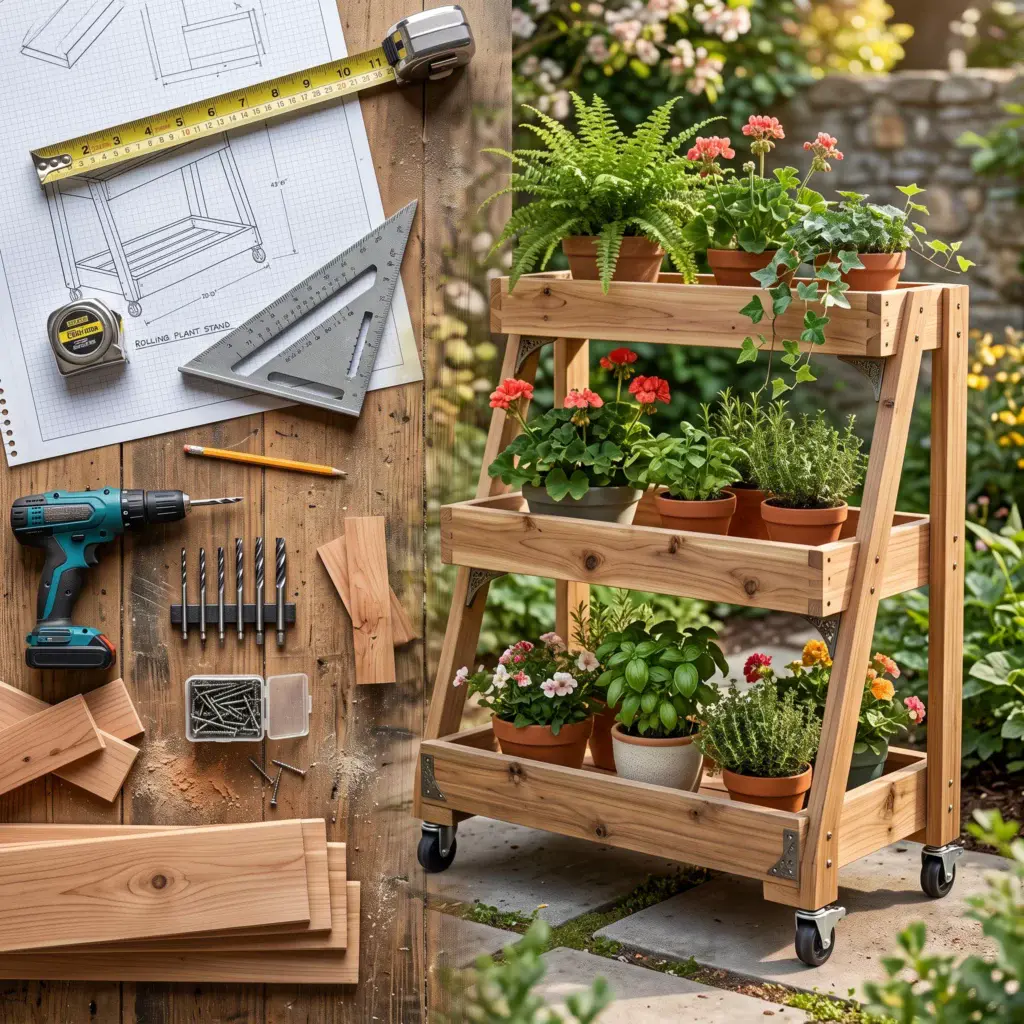
It’s perfect for storing:
- Empty pots
- Watering cans
- Gardening gloves
- Hand tools
- Potting soil
- Plant food
Maintain the same drainage spacing used on the top shelf.
Consistency improves both appearance and performance.
Step 9: Add Reinforcement (Optional)
If your plant stand will carry especially heavy containers, a few extra supports provide valuable peace of mind.
Center Cross Brace
Install a 2×4 beneath the middle of the top shelf.
This reduces shelf deflection under heavier loads.
Corner Braces
Small triangular corner braces increase rigidity and help prevent racking when rolling across uneven surfaces.
Additional Shelf Supports
Longer shelves carrying multiple heavy planters may benefit from extra support beneath the center.
These additions require very little material but can significantly increase overall strength.
Step 10: Sand Every Surface
Before installing the wheels or applying a finish, spend time smoothing the wood.
Begin with 80-grit sandpaper.
Remove:
- Saw marks
- Sharp corners
- Minor imperfections
Move to 120 grit to refine the surface.
Finish with 220 grit for a smooth, furniture-quality feel.
Pay extra attention to areas that will be handled frequently.
These include:
- Shelf edges
- Corners
- Legs
- Upper frame
- Exposed ends
Slightly easing the edges also helps finishes adhere more evenly while making the stand more comfortable to use.
After sanding, remove all dust thoroughly.
A vacuum followed by a tack cloth produces excellent results.
Step 11: Install the Locking Casters
Turn the completed stand upside down.
Position one caster beneath each leg.
Center the mounting plate carefully.
Mark every bolt hole before drilling.
For maximum strength, use bolts rather than screws.
Insert each bolt through the leg.
Install:
- Flat washer
- Lock washer
- Lock nut
Tighten the hardware evenly without overtightening.
Once all four casters are installed, engage each locking mechanism to verify smooth operation.
Quality casters should swivel freely while locking securely when needed.
Step 12: Test the Frame
Set the stand upright on a flat surface.
Roll it forward and backward.
Turn it in both directions.
Lock each wheel.
Check for:
- Wobbling
- Uneven legs
- Loose fasteners
- Shelf movement
- Wheel alignment
A properly assembled stand should feel solid without rocking or twisting.
Step 13: Perform a Load Test
Before placing valuable plants on the stand, test its strength gradually.
Use items such as:
- Bags of potting soil
- Buckets of water
- Concrete blocks
- Sandbags
Increase the weight slowly while observing the frame.
Watch for:
- Shelf sagging
- Joint movement
- Wheel flex
- Fastener loosening
If everything remains stable under the expected load, the structure is ready for everyday use.
Small Details That Make a Big Difference
Professional-looking projects are often the result of simple habits rather than advanced techniques.
Keep these tips in mind throughout the build:
- Pre-drill every screw hole near board ends.
- Wipe away excess glue before it dries.
- Recheck for square after each major assembly stage.
- Tighten screws gradually instead of all at once.
- Allow glue to cure completely before heavy use.
- Work on a flat surface whenever possible.
None of these steps takes long, yet together they dramatically improve the strength and appearance of the finished project.
The Build Is Complete
At this point, you’ve transformed a stack of lumber into a sturdy rolling outdoor plant stand designed to handle years of gardening.
The frame is solid.
The shelves are installed.
The caster wheels roll smoothly.
Structurally, the project is complete.
The next stage is all about protection—preparing the wood to withstand sun, rain, changing temperatures, and everyday use while bringing out the natural beauty of the lumber you’ve carefully selected.
Part 7: Weatherproofing and Finishing Techniques
There’s a moment in every woodworking project when the construction is finished, the tools are put away, and you finally get to see what you’ve built.
The frame is solid. The shelves are level. The casters glide smoothly across the floor.
It already looks complete.
But before you wheel it into the garden and load it with plants, there’s one final step that will have more influence on its lifespan than almost anything else: protecting the wood.
Outdoor furniture lives a hard life. One week it may sit under blazing summer sun. The next, it’s soaked by days of rain. Morning dew settles into every surface, temperatures rise and fall, and watering cans add even more moisture to the mix.
Without proper protection, even well-built furniture begins to show its age far sooner than it should.
Fortunately, finishing outdoor wood isn’t difficult. The secret lies in good preparation, choosing the right product, and applying it with patience.
Why a Protective Finish Matters
Wood is naturally porous.
It constantly absorbs and releases moisture as the weather changes.
That movement is perfectly normal, but repeated cycles of expansion and contraction eventually lead to problems such as:
- Surface cracks
- Warping
- Splitting
- Fading
- Rough grain
- Premature wear
A quality exterior finish slows those changes.
Rather than sealing the wood inside a rigid shell, the best outdoor finishes help regulate moisture while shielding the surface from sunlight and everyday exposure.
The result is a plant stand that stays attractive longer and requires less maintenance over time.
Start with Surface Preparation
The finish is only as good as the surface beneath it.
Even premium products can’t hide rough sanding marks or dried glue.
Before opening a can of stain or sealer, spend a little time preparing the wood.
Inspect Every Surface
Walk around the stand slowly.
Run your hand across each shelf and leg.
Look for:
- Rough patches
- Sharp edges
- Raised grain
- Pencil marks
- Glue residue
- Minor dents
Small imperfections are much easier to correct now than after the finish has dried.
Give the Wood One Final Sanding
Even if you’ve already sanded during assembly, a light final pass is worthwhile.
Use 220-grit sandpaper to smooth the surface without removing unnecessary material.
Focus on areas that receive the most attention, including:
- Shelf edges
- Top rails
- Corners
- Leg faces
- End grain
The goal isn’t to reshape the wood.
It’s simply to create a clean, consistent surface that accepts finish evenly.
Remove Every Trace of Dust
Dust is the enemy of a smooth finish.
Use a vacuum or soft brush to remove loose particles.
Follow with a tack cloth or a clean microfiber cloth to collect the fine dust left behind.
Take your time.
Dust hiding in corners or around screw heads has a habit of appearing just after the finish is applied.
Choosing the Right Finish
Not every outdoor finish performs the same way.
Some soak deep into the wood.
Others create a protective film across the surface.
Neither approach is automatically better.
The right choice depends on the appearance you want and how much ongoing maintenance you’re comfortable with.
Exterior Wood Oil
For many woodworkers, penetrating oil offers the perfect balance between protection and natural beauty.
Instead of forming a thick coating, it absorbs into the wood fibers.
Why It’s Popular
- Highlights natural grain
- Easy to apply
- Doesn’t peel
- Simple to refresh
- Creates a warm, natural appearance
This is a particularly good choice for cedar and redwood, where the character of the wood is part of the finished design.
Spar Urethane
Originally developed for marine environments, spar urethane remains a favorite for outdoor furniture.
Unlike ordinary polyurethane, it stays flexible enough to move with seasonal changes in the wood.
Its advantages include:
- Excellent moisture resistance
- Strong UV protection
- Clear protective coating
- Good durability
If preserving the original color of the wood is important, spar urethane deserves serious consideration.
Exterior Wood Stain
Stain offers a middle ground between natural finishes and paint.
It adds color while still allowing much of the wood grain to remain visible.
You’ll typically find three options.
Transparent
Adds only subtle color while emphasizing natural grain.
Semi-Transparent
Provides richer color without completely hiding the wood.
Solid
Offers the greatest color coverage while still penetrating the surface.
The choice comes down to personal preference and the style of your outdoor space.
Exterior Paint
Paint provides the broadest range of design possibilities.
It’s an excellent option if you want the plant stand to coordinate with existing outdoor furniture or architectural features.
Benefits include:
- Wide color selection
- Excellent moisture protection
- Consistent appearance
- Easy color matching
The trade-off is simple.
Once painted, the natural grain disappears beneath the finish.
Matching the Finish to the Wood
Different wood species respond differently to finishing products.
Here’s a practical starting point.
| Wood Species | Recommended Finish |
|---|---|
| Cedar | Exterior wood oil or clear sealer |
| Redwood | Penetrating oil or semi-transparent stain |
| Pressure-treated pine | Exterior stain or paint (after drying completely) |
| White oak | Exterior oil or spar urethane |
| Teak | Teak oil or allow to weather naturally |
Whichever option you choose, make sure it’s intended specifically for exterior use.
Indoor finishes simply aren’t designed for prolonged exposure to weather.
Applying the Finish
Good technique matters just as much as choosing the right product.
The goal is steady, even coverage—not speed.
Stir, Don’t Shake
Mix the finish thoroughly before use.
Shaking introduces air bubbles that can appear in the final surface.
A slow, careful stir creates a much smoother result.
Work with the Grain
Always apply finish in the direction of the wood grain.
This produces a more natural appearance and helps eliminate visible brush marks.
Whether you’re using a brush, cloth, or foam applicator, consistent strokes generally produce the best results.
Apply Thin Coats
One heavy coat rarely performs as well as several lighter applications.
Thin coats:
- Dry more evenly
- Reduce runs
- Improve durability
- Produce a smoother finish
Patience during this stage usually pays off.
Watch the Edges
Drips often collect along:
- Shelf edges
- Leg corners
- Undersides
- End grain
Check these areas regularly as you work.
Catching a drip while it’s still wet is far easier than sanding it away later.
Don’t Forget the End Grain
The ends of boards absorb moisture more quickly than flat surfaces.
Give these areas extra attention.
Apply an additional coat to:
- Leg bottoms
- Shelf ends
- Rail ends
- Exposed cuts
It’s a small detail that significantly improves long-term durability.
Protect the Hidden Surfaces
When people finish outdoor furniture, they often focus on the visible areas.
Unfortunately, moisture doesn’t.
Rain, humidity, and splashing water reach every part of the stand.
Be sure to finish:
- The underside of the shelves
- Lower rails
- Inside faces of the frame
- Around the caster mounting locations
Complete coverage provides more consistent protection.
Allow Time for Curing
One of the easiest mistakes is assuming that dry means fully cured.
Many finishes become dry to the touch long before they’ve reached maximum hardness.
Before placing heavy planters on the stand:
- Follow the manufacturer’s curing recommendations.
- Keep the stand in a dry, well-ventilated area.
- Avoid stacking objects on freshly finished surfaces.
A little patience now helps prevent unnecessary scratches and impressions.
Maintaining the Finish
Outdoor finishes gradually wear as they’re exposed to weather.
That’s completely normal.
Rather than waiting until the wood looks tired, inspect the stand once or twice each year.
Watch for:
- Dull areas
- Fading
- Water soaking into the surface
- Small cracks
- Worn corners
Refreshing the finish before major wear develops is much easier than refinishing the entire project.
Adjusting to Your Climate
Every climate places different demands on outdoor furniture.
Rainy Regions
Moisture is the primary concern.
Keep drainage gaps clear and inspect joints regularly.
Sunny Climates
Ultraviolet exposure gradually fades wood.
Finishes with strong UV protection generally require less frequent maintenance.
Cold Winters
Repeated freezing and thawing can stress both wood and hardware.
Check fasteners after winter and inspect the finish for any signs of damage before the growing season begins.
Common Finishing Mistakes
Even experienced builders occasionally make finishing mistakes.
Fortunately, they’re easy to avoid.
Applying Finish to Damp Wood
Moisture trapped beneath the finish can interfere with adhesion and shorten its lifespan.
Skipping Surface Preparation
Dust, glue residue, and rough sanding marks become much more noticeable after finishing.
Applying Thick Coats
Heavy applications often dry unevenly and may leave visible runs.
Several thin coats usually provide better protection and appearance.
Ignoring Drying Times
Rushing between coats can affect both the look and durability of the finish.
Allow each coat to dry according to the manufacturer’s recommendations.
A Finish That Ages Gracefully
One of the pleasures of outdoor woodworking is watching a project develop character over time.
A quality finish doesn’t stop that process—it guides it.
Instead of rapid weathering, uneven fading, or premature wear, the wood matures naturally while remaining protected against the conditions it faces every day.
By taking the time to finish your rolling outdoor plant stand properly, you’re preserving more than the wood itself.
You’re protecting every careful measurement, every precise cut, and every hour invested in building something designed to become a lasting part of your garden.
Part 8: Custom Design Ideas and Optional Upgrades
One of the greatest advantages of building your own rolling outdoor plant stand is that you’re never limited to a single design.
The version you’ve built so far is sturdy, practical, and ready for everyday use. But that’s only the starting point. As your garden grows, your woodworking skills improve, or your needs change, the same basic structure can evolve into something even more useful.
Some gardeners value extra storage. Others need additional growing space. You might want a stand that doubles as a compact potting station or one that becomes a focal point on the patio. The beauty of a DIY project is that you decide what comes next.
The upgrades below are designed to improve function without sacrificing durability or mobility.
Add a Lower Storage Shelf
If you chose the standard design with two shelves, you’re already one step ahead.
If not, a lower shelf is one of the easiest additions you can make.
Rather than leaving the space beneath the top shelf empty, turn it into organized storage for everyday gardening essentials.
It can hold:
- Watering cans
- Empty plant pots
- Hand tools
- Gardening gloves
- Bags of potting mix
- Plant food
- Seed trays
- Twine and plant ties
Keeping frequently used supplies close at hand means fewer trips back and forth to the shed or garage.
Build a Two-Tier Display
Not every garden has endless space.
A second growing level allows you to display more plants without increasing the footprint of the stand.
It’s especially useful for:
- Herbs
- Succulents
- Small flowering plants
- Seedlings
- Houseplants spending the summer outdoors
Position the upper shelf slightly toward the back so sunlight can still reach the plants below.
This staggered arrangement also creates a more interesting visual display.
Install Adjustable Shelves
Plants don’t all grow at the same pace.
Some remain compact throughout the season, while others seem to double in size every few weeks.
Fixed shelves work well, but adjustable shelves provide flexibility as your garden changes.
They allow you to:
- Raise taller plants
- Lower shorter containers
- Rearrange seasonal displays
- Create additional growing space
A simple bracket system or evenly spaced support holes makes future adjustments quick and straightforward.
Add a Wooden Trellis
Vertical gardening is an excellent way to increase growing space.
By attaching a trellis to the back of the stand, you create support for climbing plants while keeping everything mobile.
Suitable choices include:
- Sweet peas
- Clematis
- Morning glories
- Pole beans
- Cucumbers
- Decorative vines
A trellis also adds height, helping transform the stand from a practical piece of furniture into a striking garden feature.
Include a Fold-Down Work Surface
One of the most useful upgrades is surprisingly simple.
A hinged side panel creates a temporary workspace whenever you need it.
Open it for:
- Repotting plants
- Mixing potting soil
- Organizing tools
- Trimming flowers
- Starting seeds
Fold it back down when you’re finished.
It’s a practical solution that adds functionality without permanently increasing the size of the stand.
Create Dedicated Tool Storage
Garden tools have a habit of disappearing just when you need them.
Adding built-in storage keeps your most-used items exactly where they belong.
Consider including:
- Side hooks
- Small shelves
- Narrow storage compartments
- A removable tool tray
- Hanging rails for hand tools
Even a few simple hooks mounted beneath the top shelf can make daily gardening more convenient.
Add a Hose Holder
Watering is part of almost every gardening routine.
Instead of leaving a hose or watering wand on the ground, install a dedicated holder on one side of the frame.
This small feature helps keep the surrounding area tidy while making watering equipment easier to reach.
Organize Empty Pots
Every gardener eventually collects more empty containers than expected.
A dedicated storage area beneath the lower shelf helps prevent stacks of pots from taking over the patio.
Simple dividers can organize:
- Small nursery pots
- Decorative containers
- Seed trays
- Plastic growing pots
It’s one of those upgrades that doesn’t attract much attention—until you realize how often you use it.
Install Removable Drainage Trays
Although the slatted shelves allow excess water to drain naturally, removable trays beneath the containers provide extra protection for patios and decks.
They help:
- Collect excess water
- Reduce stains
- Simplify cleaning
- Protect finished outdoor surfaces
Choose trays that slide out easily for cleaning without disturbing the plants.
Upgrade the Casters
The wheels may be the smallest part of the project, but they’re responsible for one of its most important features.
If you expect to move the stand frequently, upgrading to premium outdoor casters is money well spent.
Look for features such as:
- Larger wheel diameter
- Soft rubber tread
- Sealed bearings
- Heavy-duty mounting plates
- Full swivel movement
- Reliable locking brakes
Quality casters roll more smoothly, handle uneven surfaces better, and generally require less maintenance over time.
Add Comfortable Handles
Although the stand rolls rather than lifts, handles make it easier to guide into position.
Options include:
- Recessed handholds
- Rounded cutout handles
- Decorative metal pulls
- Wooden side handles
Choose a style that feels comfortable while complementing the overall design.
Create Hidden Storage
If you prefer a cleaner appearance, consider incorporating concealed storage beneath the lower shelf.
A small enclosed compartment is ideal for storing:
- Gloves
- Plant labels
- Pruning shears
- Twine
- Fertilizer scoops
- Small hand tools
A simple weather-resistant latch keeps everything secure and protected.
Personalize the Finish
The finish is one of the easiest ways to give your project its own personality.
Different colors and treatments create completely different styles.
Natural Cedar
Warm, timeless, and perfectly suited to traditional gardens.
Deep Walnut Stain
Creates a furniture-like appearance with rich contrast.
Weathered Gray
A popular choice for coastal and contemporary outdoor spaces.
Classic White
Brightens patios and pairs beautifully with colorful flowers.
Matte Black
Clean, modern, and striking against green foliage.
Whichever finish you choose, use products designed specifically for outdoor use to ensure lasting protection.
Add Decorative Details
Small design touches often have the biggest visual impact.
Consider incorporating:
- Rounded corners
- Chamfered edges
- Decorative trim
- Tapered legs
- Contrasting wood species
- Engraved plant markers
- Simple geometric accents
These details don’t significantly increase construction time, but they can make the finished stand feel more refined and personal.
Adapt the Design to Different Spaces
The basic structure can easily be adjusted for different outdoor environments.
Balcony Gardens
Reduce the width while maintaining the same sturdy frame.
Narrow Patios
Build a longer, slimmer version that fits comfortably against a wall.
Greenhouses
Increase shelf spacing to accommodate seed trays and propagation equipment.
Small Courtyards
Build upward rather than outward by adding additional shelves.
Large Gardens
Construct several matching stands to create coordinated planting areas throughout the landscape.
Using consistent proportions and finishes helps tie everything together visually.
Keep Practicality at the Center of Every Upgrade
It’s easy to become excited about adding every possible feature.
Sometimes, however, the simplest design proves to be the most enjoyable to use.
Before adding any modification, ask yourself:
- Will this make gardening easier?
- Will it improve storage or accessibility?
- Does it affect stability?
- Is it worth the additional cost?
- Can I add it later if I change my mind?
If the answer supports the way you actually garden, it’s probably a worthwhile improvement.
Thoughtful customization isn’t about adding more—it’s about building a rolling outdoor plant stand that fits your space, your routine, and the way you enjoy spending time in the garden.
Part 9: Common Mistakes and How to Avoid Them
Every woodworking project teaches something.
Sometimes the lesson comes from a perfectly fitted joint or a flawless finish. Other times, it arrives in the form of a board cut an inch too short or a frame that’s just slightly out of square.
Fortunately, you don’t have to learn every lesson the hard way.
Most of the problems people encounter while building a rolling outdoor plant stand are surprisingly predictable. They’re rarely caused by difficult techniques or expensive tools. Instead, they’re the result of small oversights that gradually affect the strength, appearance, or longevity of the finished project.
Knowing what can go wrong—and how to prevent it—makes the entire building process smoother and far more enjoyable.
Mistake #1: Buying Lumber Without Inspecting It
One of the most common mistakes happens before construction even begins.
It’s tempting to grab the first boards from the stack and head to the checkout.
Unfortunately, construction lumber varies considerably.
One board may be perfectly straight, while the next has a noticeable twist or bow.
Building with warped lumber often leads to:
- Uneven shelves
- Difficult assembly
- Gaps at joints
- Frames that refuse to sit square
How to Avoid It
Take a few extra minutes at the lumber yard.
Sight down the length of every board.
Choose pieces that are:
- Straight
- Flat
- Dry
- Free of major cracks
- Free of loose knots
Starting with better material makes every later step easier.
Mistake #2: Underestimating the Weight of Potted Plants
Empty pots can be deceiving.
Once they’re filled with soil, thoroughly watered, and supporting mature plants, their weight increases dramatically.
Many first-time builders design for what the containers weigh today rather than what they’ll weigh in midsummer.
How to Avoid It
Always calculate for the fully loaded weight.
Include:
- Potting mix
- Water
- Mature root systems
- Decorative stone
- The container itself
Building with extra strength provides peace of mind and helps the stand remain stable for years.
Mistake #3: Choosing Cheap Casters
The wheels determine how enjoyable the stand is to use.
Low-quality casters often work adequately on the day they’re installed.
Months later, they may:
- Stick
- Squeak
- Develop flat spots
- Refuse to swivel smoothly
- Struggle under heavy loads
How to Avoid It
Choose outdoor-rated locking casters with a generous weight capacity.
Quality wheels:
- Roll more smoothly
- Last longer
- Resist corrosion
- Handle uneven surfaces more confidently
They’re one of the few upgrades you’ll appreciate every single time you use the stand.
Mistake #4: Skipping Pilot Holes
Driving screws directly into lumber can split the wood, particularly near board ends.
Even if splitting doesn’t occur immediately, internal stress may weaken the joint over time.
How to Avoid It
Drill pilot holes before inserting screws.
This simple habit:
- Reduces splitting
- Improves screw alignment
- Produces cleaner joints
- Makes driving screws easier
It’s a small investment of time with significant long-term benefits.
Mistake #5: Forgetting to Check for Square
A frame that’s only slightly out of square often doesn’t reveal the problem until much later.
Shelf boards may refuse to fit properly.
Legs may appear uneven.
The finished stand might rock despite careful assembly.
How to Avoid It
Check for square repeatedly—not just once.
After assembling each frame:
- Measure diagonally from corner to corner.
- Compare both measurements.
- Adjust before tightening the screws completely.
Those few extra minutes can prevent hours of frustration later.
Mistake #6: Tightening Every Screw Immediately
It’s natural to want every joint to feel secure as soon as it’s assembled.
However, fully tightening screws too early limits your ability to make small adjustments.
How to Avoid It
Install all screws until they’re snug.
Once the frame has been checked for square and everything aligns correctly, tighten the fasteners gradually.
This approach gives you far more flexibility during assembly.
Mistake #7: Forgetting About Drainage
Water is essential for healthy plants.
It’s far less welcome sitting on wooden shelves.
Boards installed tightly together trap moisture beneath containers.
Over time, this can encourage mildew, discoloration, and premature weathering.
How to Avoid It
Leave approximately ¼ inch between shelf boards.
Those small gaps help:
- Drain excess water
- Improve airflow
- Reduce moisture buildup
- Extend the life of the wood
It’s a simple design choice that pays dividends over the life of the project.
Mistake #8: Using Indoor Hardware Outdoors
At first glance, interior and exterior screws may appear identical.
The difference becomes obvious after months of exposure to rain and humidity.
Rust stains surrounding wood and gradually weakens fasteners.
How to Avoid It
Choose hardware designed for outdoor environments.
Good options include:
- Stainless steel screws
- Ceramic-coated screws
- Polymer-coated screws
- Galvanized bolts
- Corrosion-resistant washers
Quality hardware protects both the appearance and structural integrity of the stand.
Mistake #9: Applying Finish Too Soon
Fresh lumber isn’t always ready for stain or paint.
Pressure-treated wood, in particular, often contains excess moisture.
Applying a finish before the wood has dried properly can affect adhesion and create an uneven appearance.
How to Avoid It
Allow the wood to dry completely before finishing.
If you’re unsure, check the supplier’s recommendations or use a moisture meter.
Waiting a little longer usually produces a much better result.
Mistake #10: Applying Thick Coats of Finish
When protecting outdoor furniture, more isn’t always better.
Heavy coats tend to dry unevenly and are more likely to leave visible runs.
How to Avoid It
Apply several thin coats instead.
Thin applications:
- Dry more consistently
- Produce a smoother finish
- Improve durability
- Reduce imperfections
Patience during finishing almost always rewards you with a better-looking project.
Mistake #11: Ignoring the End Grain
The ends of boards absorb moisture much faster than flat surfaces.
They’re often the first areas to show signs of weathering.
How to Avoid It
Apply an additional coat of finish to:
- Leg bottoms
- Shelf ends
- Cut edges
- Exposed rail ends
Protecting these vulnerable areas helps extend the life of the entire project.
Mistake #12: Loading the Stand Unevenly
Even a strong frame has limits.
Placing all of the heaviest containers on one side creates unnecessary stress and can affect how the stand rolls.
How to Avoid It
Distribute weight evenly across the shelves.
Position larger planters:
- Near the corners
- Above structural supports
- Balanced from side to side
A balanced stand is safer, easier to move, and places less strain on the caster wheels.
Mistake #13: Neglecting Regular Maintenance
Outdoor furniture isn’t something you build once and forget forever.
Small issues become much larger if they’re ignored.
Loose hardware, worn finishes, and dirty wheels are all easier to address early.
How to Avoid It
Inspect the stand a few times each year.
Look for:
- Loose screws
- Worn wheels
- Fading finish
- Small cracks
- Rusting hardware
- Debris around the casters
Routine maintenance takes only a few minutes and can add years to the life of the project.
Mistake #14: Skipping a Dry Fit
Assembly goes much more smoothly when every piece has already been tested.
Without a dry fit, even small measuring errors may not become obvious until glue has been applied.
How to Avoid It
Before permanent assembly:
- Position every component.
- Confirm the measurements.
- Check shelf placement.
- Verify that the frame is square.
Think of it as a rehearsal before the final performance.
Mistake #15: Rushing the Process
Perhaps the most common mistake of all is trying to finish too quickly.
Woodworking rewards patience.
The projects people are proud of years later are rarely the ones completed in a hurry.
How to Avoid It
Work steadily rather than quickly.
Complete each stage before moving on to the next.
Allow glue to cure.
Let finishes dry properly.
Double-check measurements.
Enjoy the process.
The time invested today becomes part of the quality you’ll appreciate every season your plant stand is in use.
A Few Extra Minutes Can Save Hours Later
Most woodworking mistakes don’t happen because a project is too complicated.
They happen because one small detail is overlooked.
A rushed measurement.
A skipped pilot hole.
A board that’s “probably straight enough.”
Paying attention to those details is what separates a project that simply works from one that still feels solid, looks attractive, and rolls smoothly years after it was built.
Building carefully isn’t about perfection.
It’s about giving yourself the best possible chance of creating something that you’ll be genuinely proud to use every time you step into the garden.
Part 10: Maintenance Tips for Long-Lasting Performance
By the time you’ve finished building your rolling outdoor plant stand, it has already become more than a collection of boards and screws. It’s a practical piece of garden furniture built with your own hands, ready to support everything from spring seedlings to late-summer harvests.
Like any outdoor project, though, it will perform best with a little ongoing care.
The good news is that maintenance is neither complicated nor time-consuming. A few simple habits throughout the year can keep the wood protected, the hardware secure, and the caster wheels rolling smoothly for many seasons.
Think of maintenance as preserving the time and craftsmanship you’ve already invested.
Build a Simple Maintenance Routine
Outdoor furniture doesn’t usually fail overnight.
Most problems begin as something small:
- A loose screw
- A worn wheel
- A faded finish
- Dirt collecting around the casters
Catching these early often means a five-minute repair instead of a major rebuild.
Rather than waiting until something feels wrong, make inspection part of your seasonal gardening routine.
Monthly Maintenance Checklist
Once each month, spend a few minutes checking the stand.
A quick inspection can prevent many common issues.
Clean the Surface
Remove anything sitting on the shelves, then brush away:
- Loose soil
- Leaves
- Twigs
- Dust
- Plant debris
After brushing, wipe the wood with a damp cloth.
Keeping the surface clean not only improves appearance but also helps prevent moisture from lingering against the finish.
Inspect the Hardware
Temperature changes naturally cause wood to expand and contract.
Over time, this movement may slightly loosen fasteners.
Check:
- Structural screws
- Bolts
- Washers
- Lock nuts
- Caster mounting hardware
Tighten anything that feels loose, but avoid overtightening, which can damage the wood.
Test the Wheels
Unlock each caster and roll the stand a short distance.
The movement should feel smooth and effortless.
Watch for:
- Wheels that wobble
- Difficulty swiveling
- Flat spots
- Loose mounting plates
- Brakes that no longer lock securely
Replacing a worn caster is usually inexpensive and much easier than repairing damage caused by a failed wheel.
Seasonal Care Throughout the Year
Different seasons place different demands on outdoor furniture.
Adjusting your maintenance routine to match the weather helps maximize durability.
Spring
Spring is the ideal time for a thorough inspection.
After winter, examine the stand carefully.
Look for:
- Loose hardware
- Surface cracks
- Finish wear
- Water damage
- Wheel performance
Wash away any dirt that accumulated over winter before placing plants back on the shelves.
Summer
Long days of sunshine are wonderful for plants but demanding on outdoor wood.
During the summer months:
- Keep the shelves clean.
- Remove standing water after storms.
- Watch for fading.
- Check that drainage gaps remain clear.
If the stand receives full afternoon sun every day, inspect the finish more frequently.
Autumn
Leaves have a way of collecting in every corner.
When they stay wet for extended periods, they trap moisture against the wood.
Regularly remove:
- Fallen leaves
- Pine needles
- Dirt
- Mulch
- Organic debris
A clean surface dries faster after rain.
Winter
Winter maintenance depends largely on your climate.
If snow and freezing temperatures are common:
- Brush snow from the shelves.
- Remove standing water whenever possible.
- Check for loose hardware after repeated freeze-thaw cycles.
- Avoid allowing ice to build up around the wheels.
If practical, moving the stand beneath a covered patio or into a shed during prolonged periods of severe weather can help reduce unnecessary wear.
Cleaning the Wood Properly
Outdoor furniture doesn’t need aggressive cleaning products.
In fact, harsh chemicals may shorten the life of the finish.
A simple cleaning solution usually works best.
Use:
- Warm water
- Mild dish soap
- A soft sponge
- A microfiber cloth
Avoid abrasive scrub pads that could scratch the protective coating.
Once cleaned, allow the stand to dry thoroughly before returning plants to the shelves.
Caring for the Caster Wheels
The wheels do more work than any other part of the project.
Keeping them clean ensures the stand remains easy to move.
Remove Debris
Small stones, mulch, leaves, and twigs often become trapped around the wheel axle.
Clear away any buildup before it affects movement.
Check the Brakes
Locking mechanisms should engage easily and hold the stand firmly in place.
If they become difficult to operate, clean away dirt before assuming replacement is necessary.
Lubricate Moving Parts
If the caster manufacturer recommends lubrication, apply a small amount to the swivel mechanism.
A little goes a long way.
Too much lubricant tends to attract dust and grit.
Maintaining the Finish
The finish acts as the first line of defense against weather.
Over time, every exterior finish gradually wears.
Watch for signs such as:
- Dull areas
- Fading
- Water no longer beading on the surface
- Small scratches
- Minor peeling
Refreshing the finish before significant wear develops is much easier than refinishing the entire project.
When Should You Refinish?
The exact schedule depends on your climate and the finish you’ve chosen.
As a general guideline:
| Finish Type | Typical Maintenance Interval |
|---|---|
| Exterior wood oil | Every 12–18 months |
| Clear exterior sealer | Every 1–2 years |
| Exterior stain | Every 2–4 years |
| Exterior paint | Every 4–6 years |
Regular maintenance coats preserve the appearance of the wood while extending its overall lifespan.
Watch for Early Warning Signs
Wood often tells you when it needs attention.
Inspect the stand occasionally for:
- Surface cracks
- Soft spots
- Discoloration
- Loose joints
- Rusting hardware
- Worn wheel treads
Addressing these issues early prevents them from becoming larger repairs.
Protect the Stand During Everyday Use
Small habits make a surprising difference over time.
Whenever possible:
- Spread heavy pots evenly across the shelves.
- Avoid dragging sharp-edged containers across the wood.
- Clean spilled fertilizer promptly.
- Don’t allow standing water to remain on the shelves for long periods.
Simple care helps preserve both the finish and the structure beneath it.
Moving the Stand Correctly
Although it’s designed to roll, proper handling reduces unnecessary stress on the frame.
Before moving the stand:
- Unlock all caster brakes.
- Push rather than pull.
- Move slowly across uneven surfaces.
- Avoid striking curbs or steps.
- Lock the wheels again after positioning.
Smooth, controlled movement extends the life of both the wheels and the frame.
Replacing Individual Components
One of the advantages of building your own furniture is that repairs are straightforward.
If a component eventually wears out, you rarely need to replace the entire stand.
Common replacement items include:
- Casters
- Shelf boards
- Exterior screws
- Bolts
- Protective finish
Keeping a copy of your measurements and cut list makes future repairs much easier.
Long-Term Storage
If the stand won’t be used for an extended period, a little preparation helps preserve it.
Before storing:
- Remove all plants.
- Brush away dirt.
- Wash the surfaces.
- Allow the wood to dry completely.
- Lock the wheels to prevent movement.
If indoor storage isn’t available, placing the stand beneath a roof or using a breathable outdoor furniture cover can provide additional protection while still allowing moisture to escape.
Frequently Asked Questions
Can a rolling outdoor plant stand support large ceramic pots?
Yes. A properly built stand made from durable lumber and fitted with heavy-duty locking casters can comfortably support several large containers, provided the total weight stays within the design limits and is distributed evenly across the frame.
Which wood lasts the longest outdoors?
Teak is widely regarded as one of the most durable outdoor woods, but cedar, redwood, white oak, and cypress also offer excellent longevity when properly finished and maintained.
Do I really need locking caster wheels?
Absolutely. Locking casters prevent the stand from moving while watering, pruning, repotting, or during windy conditions. They also improve overall stability on patios and decks.
How often should I apply a new finish?
That depends on the product and your local climate. Exterior wood oils typically require maintenance every one to one and a half years, while stains and paints often last several years before needing another coat.
Is this project suitable for beginners?
Yes. The design relies on straightforward woodworking techniques such as measuring, cutting, drilling, screwing, sanding, and finishing. With careful planning and patience, it’s an excellent project for someone looking to build practical outdoor furniture.
Can I leave the plant stand outside all year?
Yes. When built from weather-resistant lumber, assembled with exterior-grade hardware, and protected with a quality outdoor finish, it can remain outdoors throughout the year. Periodic maintenance will help maximize its lifespan.
What’s the ideal size for a rolling outdoor plant stand?
A stand measuring approximately 36 inches wide, 18 inches deep, and 30 inches tall offers an excellent balance between storage capacity, stability, and ease of movement for most patios and gardens.
Products / Tools / Resources
The right materials and tools can make this project easier to build and more enjoyable to use over the long term. Consider choosing products designed specifically for outdoor woodworking to maximize durability and performance.
Lumber
- Cedar boards
- Redwood boards
- Pressure-treated pine
- White oak
- Cypress
Hardware
- Heavy-duty locking swivel casters
- Exterior-grade wood screws
- Galvanized bolts and washers
- Nylon lock nuts
- Waterproof exterior wood glue
Finishing Supplies
- Exterior wood oil
- Spar urethane
- Exterior wood stain
- Exterior paint
- Tack cloths
- Sandpaper (80, 120, and 220 grit)
Essential Tools
- Circular saw
- Miter saw
- Cordless drill and driver
- Orbital sander
- Tape measure
- Speed square
- Combination square
- Clamps
- Safety glasses
- Hearing protection
- Dust mask
Optional Workshop Upgrades
- Pocket hole jig
- Corner clamps
- Countersink drill bit
- Moisture meter
- Portable workbench
- Magnetic hardware tray
Choosing quality materials from the beginning—and maintaining them with care—helps ensure your rolling outdoor plant stand remains a dependable part of your garden for years to come.