
Some woodworking projects teach you how to use a tool. Others teach you how wood itself behaves.
Building a frame and panel door belongs firmly in the second category.
At first glance, the design appears deceptively simple—a rectangular frame surrounding a center panel. Yet beneath that simplicity is a construction method that has been refined over centuries because it solves one of woodworking’s greatest challenges: allowing solid wood to move naturally without sacrificing strength, stability, or appearance.
That’s why you’ll find frame and panel doors everywhere, from handcrafted furniture and heirloom cabinets to modern kitchens and custom built-ins. Whether the style is clean and contemporary or richly traditional, the underlying engineering remains remarkably consistent.
If you’re planning to build your own cabinet or furniture doors, understanding why this method works is just as important as learning how to build it. The techniques you’ll learn here apply to a single replacement cabinet door just as readily as they do to a complete kitchen, workshop, or custom furniture project.
This guide takes you through every stage of the process—from understanding the individual components and choosing the right lumber to machining precise joinery, assembling a square door, applying a durable finish, and making the final adjustments that give a project a professional appearance.
Whether this is your first woodworking project or one of many, you’ll gain practical techniques that can be applied again and again with confidence.
Table of Contents
- Understanding Frame and Panel Doors
- More Than Just a Cabinet Door
- What Is a Frame and Panel Door?
- Why This Design Has Endured for Centuries
- Understanding the Parts of a Frame and Panel Door
- Stiles
- Rails
- The Center Panel
- Grooves
- Joinery
- Why Floating Panels Matter
- Popular Frame and Panel Door Styles
- Shaker Doors
- Raised Panel Doors
- Recessed Panel Doors
- Glass Panel Doors
- Mission-Style Doors
- Choosing the Right Design for Your Project
- Choosing Materials, Lumber, and Door Designs
- Start with Lumber That Wants to Become a Great Door
- Choosing the Best Wood Species
- Maple
- White Oak
- Cherry
- Walnut
- Poplar
- Should You Use Softwood?
- Choosing the Right Material for the Center Panel
- Solid Wood Panels
- Cabinet-Grade Plywood
- MDF Panels
- Veneered Engineered Panels
- Understanding Why Wood Moves
- Let Lumber Adjust Before You Build
- Milling Lumber in the Right Order
- Choosing the Right Door Thickness
- Overlay or Inset? Understanding the Difference
- Overlay Doors
- Inset Doors
- Planning Accurate Door Dimensions
- Build the Cut List Before You Cut the Wood
- Don’t Overlook Grain Direction
- Plan Hardware Before the Build Begins
- Essential Tools, Joinery, and Workshop Preparation
- Build Accuracy Before You Build the Door
- Measuring Tools That Deserve a Place on Every Workbench
- Milling Tools That Create Consistent Stock
- Why the Router Table Becomes the Heart of the Project
- Getting the Most from Your Table Saw
- Clamps: The Quiet Heroes of Glue-Up
- Choosing the Right Router Bits
- Rail and Stile Router Bit Sets
- Raised Panel Router Bits
- Straight Bits and Utility Cutters
- Understanding Your Joinery Options
- Cope and Stick Joinery
- Mortise and Tenon
- Loose Tenons
- Dowel Joinery
- Pocket Hole Joinery
- Which Joinery Method Should You Choose?
- Preparing Machines for Repeatable Accuracy
- Never Skip Test Cuts
- Reducing Tear-Out Before It Happens
- Establish a Workflow That Doesn’t Change Midway
- The Value of a Dry Assembly
- A Safe Workshop Is an Accurate Workshop
- Small Habits That Prevent Big Problems
- Step-by-Step Frame and Panel Door Construction
- Step 1 – Lay Out Every Component Before Making a Cut
- Step 2 – Confirm Every Measurement One Final Time
- Step 3 – Cut the Panel Grooves
- Step 4 – Machine the Joinery
- Building with Cope and Stick Joinery
- Building with Mortise and Tenon Joinery
- Building with Loose Tenons
- Step 5 – Prepare the Center Panel
- Flat Panels
- Raised Panels
- Step 6 – Sand the Panel Before Assembly
- Step 7 – Assemble the Door Without Glue
- Step 8 – Prepare for Glue-Up
- Step 9 – Apply Glue Where It Belongs
- Step 10 – Bring the Door Together
- Step 11 – Clamp with Control, Not Force
- Step 12 – Check for Square Before the Glue Sets
- Step 13 – Clean Up Glue Squeeze-Out
- Step 14 – Give the Glue Time to Cure
- Step 15 – Sand the Completed Assembly
- Perform a Final Quality Inspection
- Finishing, Hardware Installation, and Troubleshooting
- Preparing the Surface Before Applying Finish
- Sanding for a Smooth, Professional Surface
- Dust: The Smallest Problem That Creates the Biggest Frustration
- Choosing the Right Finish
- Painted Finishes
- Stained Finishes
- Clear Protective Finishes
- Apply Thin Coats, Not Thick Ones
- Should You Finish Before or After Assembly?
- Finishing After Assembly
- Partial Pre-Finishing
- Installing Hinges with Accuracy
- Concealed Hinges
- Traditional Hinges
- Hanging the Door
- Installing Handles and Knobs
- Fine-Tuning the Fit
- Uneven Gaps Around the Door
- The Door Rubs the Cabinet
- The Door Doesn’t Close Smoothly
- Solving Common Problems
- A Door Begins to Warp
- The Center Panel Cracks
- Joints Begin to Open
- The Finish Doesn’t Look Right
- Caring for Your Doors Over Time
- Knowing When It’s Time to Refinish
- The Details That Separate Good Work from Exceptional Work
- Advanced Cabinetmaking Techniques
- Design with Proportion in Mind
- Let the Grain Tell the Story
- Book-Matched Panels
- Grain Wrapping
- Matching Color Across Multiple Doors
- Building Arched and Curved Doors
- Adding Decorative Profiles
- Ogee Profiles
- Beaded Edges
- Chamfered Edges
- Cove Profiles
- Designing Multi-Panel Doors
- Working with Glass Panels
- Improve Efficiency Through Repeatable Workflows
- Story Sticks: A Simple Tool with Lasting Value
- Shop Jigs That Save Time and Improve Accuracy
- Where CNC Fits into Modern Woodworking
- Fine-Tuning Your Joinery
- Working with Highly Figured Hardwood
- Build for the Environment
- Kitchens
- Bathrooms
- Furniture
- Workshops and Utility Spaces
- Habits That Continue Paying Dividends
- Frequently Asked Questions
- Do I Really Need a Floating Panel if the Door Isn’t Very Large?
- Which Joinery Method Is the Best Choice for a Home Workshop?
- Is Hardwood Always Better Than Softwood?
- What’s the Biggest Mistake Beginners Make?
- Should I Build One Door at a Time or All of Them Together?
- Can I Paint Hardwood Doors?
- Why Don’t My Doors Fit Perfectly Even Though My Measurements Were Correct?
- How Can I Make Several Cabinet Doors Look Like They Belong Together?
- Is It Worth Making My Own Doors Instead of Buying Them?
- Products / Tools / Resources
- Essential Measuring and Layout Tools
- Core Workshop Equipment
- Router Bits
- Clamps
- Abrasives and Surface Preparation
- Adhesives
- Finishing Supplies
- Lumber Selection
- Shop-Made Helpers
- Continuing Your Woodworking Skills
Part 1 – Understanding Frame and Panel Doors
More Than Just a Cabinet Door
Walk through almost any home and you’ll see frame and panel doors without giving them much thought.
Kitchen cabinets.
Bathroom vanities.
Dining room hutches.
Wardrobes.
Built-in storage.
The design has become so familiar that it’s easy to overlook just how ingenious it really is.
Unlike a slab door, which relies on one continuous piece of material, a frame and panel door separates the structure from the center panel. That distinction may seem small, but it’s the reason this construction method has stood the test of time.
Wood is constantly responding to the environment around it. As humidity rises, it expands. As the air dries, it contracts. Those movements are completely natural, yet they can create serious problems if they’re ignored.
Frame and panel construction embraces those changes instead of fighting them. The surrounding frame provides strength and rigidity, while the center panel is allowed enough freedom to respond to seasonal movement without placing stress on the entire assembly.
The result is a door that stays flatter, lasts longer, and performs more reliably than many alternative designs.
What Is a Frame and Panel Door?
A frame and panel door is built from two primary sections that work together as a single unit.
The first is the outer frame, made from vertical and horizontal pieces that form the structural skeleton of the door.
The second is the center panel, which fits inside grooves machined into the frame.
Rather than being glued rigidly into place, the panel is designed to “float” inside those grooves. That small amount of controlled movement protects the door from many of the problems that affect solid wood construction.
In practical terms, this means the door is far less likely to develop issues such as:
- Warping
- Splitting
- Cracked joints
- Twisting
- Distorted panels
It’s a simple idea, but one that has made frame and panel construction the preferred choice for cabinetmakers and furniture builders for generations.
Why This Design Has Endured for Centuries
Many woodworking techniques have evolved dramatically over time. Frame and panel construction, however, has changed surprisingly little.
The tools may be faster. Router bits are more precise. Modern adhesives are stronger. Yet the underlying principles remain almost identical to those used by skilled craftsmen hundreds of years ago.
The reason is straightforward.
The design works.
Instead of forcing wood to remain perfectly still—a battle no builder ultimately wins—it accommodates natural movement while preserving the strength of the finished piece.
That practical advantage is matched by another benefit: visual flexibility.
The same construction method can produce everything from understated Shaker cabinet doors to richly detailed raised-panel furniture. Change the profile, adjust the proportions, select a different wood species, and the personality of the project changes without altering the fundamental structure.
Few woodworking techniques offer that balance of engineering and design.
Understanding the Parts of a Frame and Panel Door
Before cutting lumber or setting up a router table, it’s worth becoming familiar with the individual components that make up the finished door.
Knowing what each part does makes the entire construction process easier to understand.
Stiles
Stiles are the vertical members that form the left and right edges of the door.
Although they may appear straightforward, they carry much of the structural responsibility.
They support the hinges, determine the overall height of the door, and help keep the assembly square throughout its lifetime.
Whenever possible, choose straight-grained stock for stiles. Stable material in these pieces contributes significantly to the long-term performance of the finished door.
Rails
Rails run horizontally between the stiles.
Most cabinet doors include a top rail and a bottom rail, while taller designs may include additional intermediate rails for both strength and visual balance.
Together with the stiles, the rails create the rigid framework that holds every other component in place.
The Center Panel
The panel fills the opening created by the surrounding frame.
Depending on the style you’re building, it may be:
- Flat
- Raised
- Recessed
- Veneered
- Made from plywood
- Made from MDF
- Fitted with decorative glass
If the panel is solid wood, it should normally remain free to expand and contract inside the surrounding grooves.
That freedom is one of the defining characteristics of successful frame and panel construction.
Grooves
Each rail and stile contains a groove that captures the edges of the panel.
These grooves serve several purposes at once.
They help align the frame during assembly, hold the panel securely in position, and provide the clearance needed for seasonal movement.
Although they rarely receive much attention once the project is complete, accurate grooves are essential to both the appearance and durability of the finished door.
Joinery
Where the rails meet the stiles, strong joinery holds everything together.
Several methods are commonly used, including:
- Cope and stick joints
- Mortise and tenon joints
- Loose tenons
- Dowels
Each approach has its strengths, and later sections of this guide explore how to choose the method that best matches your tools, experience, and project goals.
Why Floating Panels Matter
One of the most common mistakes made by new woodworkers is assuming that every joint should be glued.
In many projects, that’s true.
Here, it’s not.
Solid wood changes width as humidity changes. If the center panel is glued firmly into the surrounding frame, those natural movements create internal pressure that has nowhere to go.
Eventually, the wood begins to tell the story.
A crack appears across the panel.
A joint opens unexpectedly.
The frame twists slightly out of alignment.
The finish develops hairline fractures that weren’t there when the project left the bench.
None of these problems happen because the wood failed. They happen because the wood was prevented from behaving naturally.
Allowing the panel to float solves the problem before it begins.
It’s a small design decision with enormous long-term consequences.
Popular Frame and Panel Door Styles
Although the underlying construction remains largely unchanged, the appearance of the finished door can vary dramatically.
Shaker Doors
Simple, balanced, and timeless.
Shaker doors feature flat center panels surrounded by clean, square frames. Their understated design makes them equally at home in traditional farmhouses and contemporary kitchens.
Raised Panel Doors
Raised panels introduce depth and shadow by beveling the edges of the center panel.
Often associated with classic cabinetry, they create a richer, more formal appearance that complements traditional interiors.
Recessed Panel Doors
Sometimes called flat-panel doors, recessed designs create subtle visual depth without elaborate moulding.
They work particularly well in transitional, Scandinavian, and Craftsman-inspired spaces.
Glass Panel Doors
Replacing the wood panel with glass transforms both the appearance and function of a cabinet.
Whether using clear, frosted, seeded, or reeded glass, these doors are often chosen for display cabinets, dining room furniture, and upper kitchen cabinets where openness is part of the design.
Mission-Style Doors
Defined by straight lines, balanced proportions, and honest craftsmanship, Mission-style doors highlight the natural beauty of hardwood rather than relying on ornate decoration.
White oak remains one of the most popular choices for this enduring style.
Choosing the Right Design for Your Project
The most successful doors don’t simply match a cabinet—they complement the entire room.
A painted utility cabinet has different priorities than a handcrafted walnut sideboard. A modern kitchen often benefits from crisp, understated profiles, while traditional furniture may call for deeper moulding and more decorative panel treatments.
Before selecting router bits or milling lumber, take time to think about the finished piece as a whole.
Consider its surroundings.
Think about how it will be used every day.
Choose proportions that feel balanced rather than simply following trends.
Those early design decisions influence every stage of the build that follows.
In the next section, we’ll shift from design principles to practical planning by exploring lumber selection, wood movement, panel materials, door sizing, and the measurements that determine whether a door fits beautifully the first time—or requires frustrating adjustments later.
Part 2 – Choosing Materials, Lumber, and Door Designs
There’s a saying heard in many professional cabinet shops: the quality of the finished door is decided long before the first router bit touches the wood.
It’s hard to argue with that.
Even flawless joinery can’t rescue lumber that’s unstable, poorly prepared, or chosen for the wrong application. On the other hand, carefully selected material has a way of making every stage of the build feel smoother—from milling and machining to glue-up and finishing.
This is where thoughtful planning pays dividends. The choices you make now will influence not only how the door looks on installation day, but how it performs through years of changing seasons, shifting humidity, and everyday use.
Start with Lumber That Wants to Become a Great Door
Every board tells a story.
Some are straight, stable, and ready for fine work. Others hide internal stresses that only reveal themselves after they’ve been cut into smaller pieces.
Learning to recognize the difference is one of the most valuable woodworking skills you can develop.
As you sort through lumber, look for boards that are:
- Straight and flat
- Free from excessive twist or cup
- Consistent in color
- Relatively free of knots in critical areas
- Long enough to allow attractive grain placement
- Properly dried for interior use
It can be tempting to work around defects to save money, but cabinet doors reward careful material selection. Starting with quality stock usually means fewer surprises later.
Choosing the Best Wood Species
There isn’t a single “best” wood for every frame and panel door. The right choice depends on how the door will be used, how it will be finished, and the style you’re trying to achieve.
Some species excel beneath paint, while others deserve to have their natural grain take center stage.
Maple
Maple has earned its reputation as one of the most versatile hardwoods in cabinetmaking.
Its fine, closed grain creates crisp routed profiles and an exceptionally smooth painted surface. At the same time, its durability makes it an excellent option for cabinets that see daily use.
Maple is often chosen for:
- Painted kitchen cabinetry
- Modern furniture
- Bathroom vanities
- Built-in storage
Its clean appearance makes it adaptable to almost any design style.
White Oak
White oak combines strength with character.
Its distinctive grain, excellent wear resistance, and natural moisture resistance have made it a favorite for generations of furniture makers.
It’s particularly well suited to:
- Mission-style furniture
- Craftsman cabinetry
- Dining room furniture
- High-end built-ins
Finished with a clear protective coat, white oak develops remarkable depth and texture.
Cherry
Cherry offers something many woods cannot: it becomes more beautiful with age.
Freshly milled boards begin with warm reddish tones that gradually deepen over time, creating a rich patina that gives furniture a timeless appearance.
Cherry works beautifully in:
- Display cabinets
- Fine furniture
- Libraries
- Traditional interiors
Its smooth machining characteristics are an added bonus during construction.
Walnut
Few hardwoods make as immediate an impression as walnut.
Its chocolate-brown heartwood and flowing grain patterns give even simple door designs a sense of refinement.
Walnut is frequently reserved for projects where the wood itself becomes a central design element, including:
- Custom cabinetry
- Entertainment centers
- Executive office furniture
- Heirloom pieces
Because of its premium cost, careful planning helps minimize waste.
Poplar
Poplar is often overlooked, but it remains one of the smartest choices for painted cabinetry.
It machines easily, is readily available, and provides excellent value for builders who prioritize performance over dramatic grain patterns.
While softer than maple or oak, it performs admirably in many residential cabinet projects.
Should You Use Softwood?
Softwoods certainly have their place in woodworking.
Species such as pine and Douglas fir are widely available, economical, and enjoyable to work with.
They’re particularly well suited to:
- Utility cabinets
- Workshop storage
- Rustic furniture
- Farmhouse-inspired projects
For high-traffic kitchens or heirloom furniture, however, hardwoods generally offer better long-term durability and resistance to everyday wear.
Choosing the Right Material for the Center Panel
The center panel influences more than appearance.
Its material affects weight, stability, finishing techniques, and even how the door responds to seasonal humidity.
Understanding the strengths of each option helps you make an informed decision.
Solid Wood Panels
Nothing quite matches the warmth and authenticity of solid hardwood.
Natural grain, depth, and figure create a visual richness that’s difficult to replicate with manufactured materials.
Solid wood is an excellent choice for:
- Fine furniture
- Traditional cabinetry
- Statement pieces
- Natural wood finishes
Because solid wood expands and contracts across its width, it must be allowed to float freely within the frame.
Cabinet-Grade Plywood
Plywood has become a trusted material for countless cabinetmakers, and for good reason.
Its layered construction gives it exceptional dimensional stability while maintaining a clean, attractive appearance.
Benefits include:
- Minimal seasonal movement
- Lightweight construction
- Consistent thickness
- Excellent strength
- Efficient use for larger projects
When veneered with hardwood, plywood can closely match the appearance of solid lumber.
MDF Panels
Medium-density fiberboard is often associated with painted cabinetry.
Its perfectly smooth surface eliminates grain telegraphing, producing a clean finish that’s difficult to achieve with some hardwoods.
MDF performs especially well when:
- Painting cabinet doors
- Creating contemporary designs
- Building large painted kitchens
Because MDF is heavier than many wood products and less tolerant of prolonged moisture exposure, it’s important to use it where conditions are appropriate.
Veneered Engineered Panels
For projects requiring both stability and a premium appearance, veneered engineered panels offer an excellent compromise.
They combine attractive hardwood veneers with stable manufactured cores, making them popular in both residential and commercial cabinetry.
Understanding Why Wood Moves
Wood is often described as a living material.
Although the tree itself is no longer alive, the wood continues responding to the environment long after it has been milled.
As humidity increases, wood absorbs moisture and expands.
When humidity falls, it releases moisture and shrinks.
This movement happens primarily across the grain rather than along its length.
Ignoring this simple fact is one of the quickest ways to create future problems.
Doors may begin to:
- Warp
- Crack
- Develop open joints
- Bind during operation
- Show finish damage
Frame and panel construction succeeds because it works with these natural movements rather than trying to eliminate them.
Let Lumber Adjust Before You Build
One mistake that’s easy to make—especially when you’re eager to begin—is machining lumber immediately after bringing it into the workshop.
Whenever possible, allow boards time to acclimate to your shop’s environment.
During this period:
- Stack boards flat.
- Support them evenly.
- Allow air to circulate.
- Keep them away from direct heat or moisture.
Giving lumber time to stabilize often reduces unexpected movement later in the project.
Milling Lumber in the Right Order
Professional shops follow consistent milling sequences because each step builds on the previous one.
A practical workflow looks like this:
- Rough-cut boards slightly oversized.
- Joint one face until flat.
- Plane to uniform thickness.
- Joint one edge square.
- Rip to final width.
- Crosscut to finished length.
This method removes internal stresses gradually while producing accurate, repeatable parts.
Choosing the Right Door Thickness
Door thickness influences strength, hardware compatibility, and visual proportion.
For many cabinet projects, approximately 3/4-inch stock offers an ideal balance between rigidity and weight.
Larger furniture pieces or oversized pantry doors may benefit from thicker frame members that provide additional strength while maintaining pleasing proportions.
Rather than following a single rule, consider the scale of the overall project.
A delicate display cabinet and a tall utility pantry often require different solutions.
Overlay or Inset? Understanding the Difference
Before cutting any parts, decide how the completed door will relate to the cabinet itself.
Overlay Doors
Overlay doors rest over the front of the cabinet opening.
They’re popular because they:
- Simplify installation
- Hide minor cabinet inconsistencies
- Work well with concealed hinges
- Offer a clean, contemporary appearance
Both full-overlay and partial-overlay styles are widely used in modern cabinetry.
Inset Doors
Inset doors fit neatly inside the cabinet opening.
When properly installed, they create elegant, furniture-like proportions.
That precision comes at a cost.
Inset construction requires careful measurements, consistent clearances, and meticulous hinge adjustment.
The results can be stunning, but they leave very little room for error.
Planning Accurate Door Dimensions
Few mistakes are more frustrating than discovering a beautifully built door that doesn’t fit the cabinet.
Before machining any joinery, confirm every critical measurement.
Consider:
- Cabinet opening dimensions
- Overlay requirements
- Reveal spacing
- Hinge clearances
- Finished door thickness
- Panel proportions
Experienced woodworkers measure repeatedly—not because they lack confidence, but because they understand how costly even small mistakes can become later.
Build the Cut List Before You Cut the Wood
An organized cut list acts as the project’s roadmap.
It keeps every part accounted for while helping you make efficient use of your material.
Include information such as:
- Part name
- Quantity
- Length
- Width
- Thickness
- Wood species
- Grain direction
- Notes for machining
Preparing the complete cut list before switching on a machine saves time, reduces waste, and minimizes confusion throughout the build.
Don’t Overlook Grain Direction
The direction of the grain affects far more than appearance.
Thoughtful grain placement contributes to:
- Structural stability
- Cleaner machining
- Better visual flow
- More balanced finished doors
Whenever practical:
- Match grain between paired stiles.
- Keep visible grain flowing naturally.
- Reserve straight-grained material for structural components.
- Avoid weak short-grain areas near joints.
These subtle decisions often distinguish custom work from mass-produced cabinetry.
Plan Hardware Before the Build Begins
It’s surprisingly common to think about hinges and handles only after the door is complete.
By then, some important decisions have already been made.
Choosing hardware early allows you to account for:
- Hinge style
- Mounting requirements
- Stile width
- Handle placement
- Overlay dimensions
- Door clearances
Good planning ensures the construction and hardware work together instead of competing with one another.
In the next part of this guide, the focus shifts from preparation to execution. You’ll learn how to set up your workshop for repeatable accuracy, choose the joinery method that best suits your tools and experience, and prepare every machine for clean, precise cuts before the first door begins to take shape.
Part 3 – Essential Tools, Joinery, and Workshop Preparation
Every experienced woodworker has a story about a project that looked perfect on paper but went sideways because of a rushed setup.
A fence was a fraction out of alignment.
A router bit wasn’t fully seated.
A board that looked flat revealed a slight twist after milling.
Individually, these seem like small issues. Together, they can turn a straightforward cabinet door into a frustrating exercise in correction.
That’s why seasoned cabinetmakers spend so much time preparing before they ever begin cutting joinery. Good preparation doesn’t slow the project down—it prevents problems that take far longer to fix later.
This stage is about creating consistency. Once your machines are accurately set up and your workflow is organized, every rail, stile, and panel becomes easier to produce with confidence.
Build Accuracy Before You Build the Door
Precision woodworking rarely comes from making perfect cuts by instinct.
It comes from building a process that produces the same result every single time.
That process starts with reliable measuring tools, carefully adjusted machines, and a workspace where every tool has its place.
When everything is prepared in advance, you spend less time solving problems and more time enjoying the craft.
Measuring Tools That Deserve a Place on Every Workbench
The old saying “measure twice, cut once” still holds true, but experienced woodworkers often verify important dimensions even more than twice.
Not because they doubt themselves.
Because wood doesn’t forgive assumptions.
A dependable measuring kit should include:
- Tape measure
- Combination square
- Engineer’s square
- Steel rule
- Marking gauge
- Marking knife
- Digital calipers
- Sharp pencil for layout work
Using the same reference edge and measuring tools throughout the project helps eliminate small variations that can accumulate over dozens of parts.
Milling Tools That Create Consistent Stock
Before joints can fit perfectly, every board needs to share the same dimensions.
That requires properly milled lumber.
A typical workshop setup includes:
- Jointer
- Thickness planer
- Table saw
- Crosscut sled
- Miter saw
These machines work together to transform rough lumber into straight, square, consistently sized components.
If you’re working with pre-surfaced boards, don’t assume they’re perfectly flat. A quick inspection before cutting can prevent unexpected fitting issues later.
Why the Router Table Becomes the Heart of the Project
For many woodworkers, the router table is where a collection of boards begins to resemble a cabinet door.
It’s used to shape profiles, cut grooves, and create the joinery that allows every piece to fit together cleanly.
A well-built router table should provide:
- A flat, stable work surface
- An adjustable fence
- Reliable dust collection
- Featherboards for consistent pressure
- Easy access for bit changes
- Smooth workpiece support
Just as important is taking the time to dial in every adjustment before machining project parts.
The first setup is rarely the final setup.
Professional shops routinely make several test cuts before they’re satisfied.
Getting the Most from Your Table Saw
Although routers receive much of the attention in frame and panel construction, the table saw performs many of the project’s foundational tasks.
It’s commonly used to:
- Rip rails and stiles to width
- Crosscut parts accurately
- Break down sheet goods
- Trim panels
- Create grooves when using a dado blade
- Prepare stock before routing
A sharp blade and properly aligned fence contribute directly to cleaner cuts and tighter joinery.
It’s worth checking alignment before every major project rather than assuming previous settings remain accurate.
Clamps: The Quiet Heroes of Glue-Up
Ask a room full of woodworkers how many clamps are enough, and you’ll probably hear the same answer.
“Just one more.”
There’s truth behind the joke.
Having the right clamps ready before assembly keeps glue-ups calm and controlled.
Useful clamp styles include:
- Parallel clamps
- Bar clamps
- Pipe clamps
- F-style clamps
- Corner clamps
Dry-fitting your clamp arrangement before opening the glue bottle removes unnecessary pressure from one of the most time-sensitive stages of the project.
Choosing the Right Router Bits
The profiles you cut define both the appearance and the strength of the finished door.
Quality router bits produce cleaner cuts, reduce tear-out, and require less sanding afterward.
Rail and Stile Router Bit Sets
Matched rail and stile sets are designed to work together, creating joints that align accurately while producing the decorative profile around the panel opening.
These sets typically include:
- A cope cutter for the rail ends
- A sticking cutter for the inside edges
Once properly adjusted, they allow multiple doors to be produced with remarkable consistency.
Raised Panel Router Bits
If you’re building traditional raised-panel doors, these larger cutters create the bevel around the panel edges.
Because of their size, they should be used with care.
Best practice includes:
- Reducing router speed
- Making several shallow passes
- Supporting the workpiece fully
- Maintaining a steady feed rate
Taking smaller cuts often produces a cleaner profile while reducing strain on both the cutter and the router.
Straight Bits and Utility Cutters
Simple straight bits perform a surprising number of tasks.
They’re useful for:
- Cutting grooves
- Cleaning recesses
- Creating mortises
- Trimming edges
- General joinery work
A few high-quality straight bits often become some of the most frequently used tools in the workshop.
Understanding Your Joinery Options
The connection between the rails and stiles is where engineering meets craftsmanship.
Several joinery methods have proven themselves over decades of cabinetmaking, each offering its own balance of strength, efficiency, and complexity.
Cope and Stick Joinery
For many cabinet builders, cope and stick joinery strikes the ideal balance.
It’s efficient, repeatable, and produces attractive, professional-looking doors with matched router bits.
Advantages include:
- Fast production
- Accurate alignment
- Decorative profiles
- Excellent suitability for cabinet work
It’s often the first joinery method hobbyists learn because it combines reliable strength with approachable tooling.
Mortise and Tenon
Traditional doesn’t mean outdated.
Mortise and tenon joinery has earned its reputation through centuries of proven performance.
Its strengths include:
- Outstanding structural integrity
- Large glue surface
- Excellent resistance to racking forces
- Long-term durability
Although it requires more machining time, many furniture makers continue to regard it as the benchmark for fine joinery.
Loose Tenons
Loose tenon systems simplify many aspects of traditional mortise and tenon construction.
Matching mortises are cut into both components before a separate tenon joins them together.
The result is strong, accurate, and efficient.
It’s an increasingly popular choice for both professional cabinet shops and serious hobbyists.
Dowel Joinery
Modern doweling systems are capable of producing remarkably accurate joints.
When properly aligned, dowels provide excellent strength while requiring relatively modest equipment.
Success depends on careful drilling and precise layout.
Pocket Hole Joinery
Pocket hole screws are useful in many woodworking projects, particularly cabinet boxes and utility furniture.
For visible frame and panel doors, however, more traditional joinery methods generally provide cleaner aesthetics and greater long-term strength.
Which Joinery Method Should You Choose?
The answer depends less on what’s considered “best” and more on what fits your workshop and experience.
If you’re just beginning:
- Cope and stick joinery offers an approachable learning curve.
If you’ve built several projects:
- Loose tenons provide excellent strength with efficient workflow.
If your goal is heirloom furniture:
- Mortise and tenon construction remains a classic choice.
Well-executed joinery consistently outperforms complicated joinery done poorly.
Preparing Machines for Repeatable Accuracy
Before cutting any project parts, take a few moments to verify your equipment.
Check that:
- The table saw blade is parallel to the fence.
- The fence locks securely.
- Router bits are clean and sharp.
- Cutter heights are accurate.
- Featherboards provide even pressure.
- Dust collection is operating properly.
These checks may take only a few minutes, yet they can prevent hours of troubleshooting later.
Never Skip Test Cuts
One habit separates experienced woodworkers from impatient ones.
They almost never machine finished parts first.
Instead, they test every setup using scrap material of the same thickness.
Those practice cuts reveal:
- Joint fit
- Groove depth
- Profile alignment
- Cutter height
- Fence position
Making adjustments on inexpensive scrap is far preferable to discovering mistakes after routing carefully prepared hardwood.
Reducing Tear-Out Before It Happens
Some hardwoods machine beautifully.
Others require a little more patience.
To produce cleaner surfaces:
- Keep cutters sharp.
- Support end grain with backing material.
- Make multiple light passes instead of one aggressive cut.
- Feed stock smoothly and consistently.
- Avoid forcing material through the cutter.
A slower approach usually rewards you with cleaner edges and less sanding afterward.
Establish a Workflow That Doesn’t Change Midway
Professional shops rarely complete one door from start to finish before beginning the next.
Instead, they work in stages.
A typical sequence looks like this:
- Mill all lumber.
- Rip every rail and stile.
- Crosscut every component.
- Machine grooves.
- Cut joinery.
- Shape panels.
- Dry-fit every door.
- Complete glue-ups.
- Sand completed assemblies.
Repeating one operation across every identical part keeps machine settings consistent and minimizes cumulative error.
The Value of a Dry Assembly
Before glue enters the picture, every component should come together without force.
A complete dry fit allows you to confirm:
- Tight-fitting joints
- Proper panel clearance
- Square assembly
- Flush surfaces
- Correct dimensions
If something feels difficult during a dry fit, it rarely becomes easier after glue has been applied.
This stage offers one final opportunity to make adjustments while everything is still easily reversible.
A Safe Workshop Is an Accurate Workshop
Good safety habits don’t interrupt precision—they support it.
Whenever you’re working with woodworking machinery:
- Wear eye protection.
- Protect your hearing during extended machine use.
- Use push sticks where appropriate.
- Keep cutters sharp.
- Disconnect power before changing blades or router bits.
- Maintain a clean floor around machinery.
- Avoid distractions while operating equipment.
Confidence comes from preparation, not haste.
Small Habits That Prevent Big Problems
Many common woodworking mistakes have surprisingly simple causes.
Take a moment to avoid these pitfalls:
- Mixing up rails and stiles after machining.
- Forgetting to mark the front face of each component.
- Changing router settings halfway through production.
- Ignoring grain direction.
- Relying on memory instead of labels.
- Rushing because glue is already open.
Organization may not be the most exciting part of woodworking, but it’s often the difference between a smooth project and a frustrating one.
With your workshop prepared, machines calibrated, and joinery selected, you’re finally ready to begin transforming individual components into a finished door. In the next part of this guide, every step of the construction process comes together—from cutting the joints and shaping the center panel to assembling, clamping, and squaring a frame that will remain stable for years to come.
Part 4 – Step-by-Step Frame and Panel Door Construction
This is the point where planning becomes craftsmanship.
The lumber has been selected. The machines are dialed in. Every measurement has been checked, then checked again. Now the focus shifts from preparation to execution.
One of the biggest differences between an average door and one that looks like it came from a professional cabinet shop isn’t speed—it’s discipline. Experienced woodworkers resist the urge to jump ahead. They follow a sequence, trusting that each accurate step makes the next one easier.
Slow, methodical work almost always produces better results than rushing toward the finish line.
Step 1 – Lay Out Every Component Before Making a Cut
Before turning on a machine, arrange all of your parts on the workbench.
Seeing the project laid out in front of you makes it much easier to spot problems before they become permanent.
Inspect each piece for:
- Straightness
- Grain direction
- Surface defects
- Consistent thickness
- Correct length
- Clean edges
As you inspect the parts, mark them clearly.
Simple labels such as Left Stile, Right Stile, Top Rail, Bottom Rail, and Front Face help prevent confusion later, especially when several doors are being built at the same time.
This small habit can save hours of frustration.
Step 2 – Confirm Every Measurement One Final Time
Even if you’ve already verified your dimensions, take one last pass before cutting joinery.
Measure:
- Overall door width
- Overall door height
- Rail lengths
- Stile lengths
- Panel dimensions
- Groove locations
Woodworking rewards patience.
A two-minute measurement check is far easier than rebuilding a door because one rail was cut a few millimeters too short.
Step 3 – Cut the Panel Grooves
The grooves machined into the rails and stiles hold the floating panel in place while allowing it enough room to respond to seasonal changes in humidity.
Depending on your workshop, these grooves can be cut using:
- A router table
- A table saw fitted with a dado blade
- A slot-cutting router bit
- A spindle shaper
Whatever method you choose, consistency matters more than speed.
Machine every matching part using the same setup before making any adjustments.
This approach helps ensure:
- Uniform groove depth
- Consistent panel fit
- Better joint alignment
- Cleaner final assembly
Whenever possible, use featherboards or other work-holding accessories to keep pressure even throughout the cut.
Step 4 – Machine the Joinery
Now the individual parts begin fitting together.
The exact process depends on the joinery method you’ve selected, but the goal remains the same: create joints that close naturally without excessive force.
Building with Cope and Stick Joinery
If you’re using matched router bits, begin by machining the cope cuts on the ends of every rail.
Once those are complete, cut the sticking profile along the inside edges of the rails and stiles.
Before routing your project parts, test the setup on scrap material that’s the same thickness as your finished stock.
The joint should fit together cleanly.
If you need a mallet to force it closed, the setup probably needs another adjustment.
Building with Mortise and Tenon Joinery
For traditional mortise and tenon construction, start by cutting the mortises into the stiles.
Next, machine matching tenons on the rails.
Aim for a fit that’s snug without being tight.
A well-cut tenon slides into place with steady hand pressure.
If it drops in loosely, the joint may lack strength. If it requires excessive force, glue can be squeezed out during assembly, weakening the bond.
Building with Loose Tenons
Loose tenon joinery follows a similar approach.
Machine matching mortises in each mating component, then test the fit using the loose tenon before moving on to the remaining pieces.
The emphasis is always on consistency.
Every joint should feel the same.
Step 5 – Prepare the Center Panel
The center panel is more than decorative.
It completes the structure while giving the door much of its visual character.
How you prepare it depends on the style you’ve chosen.
Flat Panels
Flat panels require careful sizing so they fit comfortably inside the surrounding grooves.
Remember that solid wood needs room to expand and contract.
The panel should never be forced into place.
If it feels tight during a dry assembly, take the time to correct the fit before proceeding.
Raised Panels
Raised panels require additional shaping around the edges.
Large panel-raising bits remove a significant amount of material, so patience becomes especially important.
Rather than attempting one deep cut, remove material gradually through several lighter passes.
This produces:
- Cleaner surfaces
- Less tear-out
- Better cutter control
- Reduced strain on the router
Supporting large panels throughout the cut also improves both safety and accuracy.
Step 6 – Sand the Panel Before Assembly
Some areas of the center panel become difficult to reach once the frame is glued together.
A light sanding before assembly helps create a cleaner finished result.
There’s no need to complete every stage of surface preparation now.
Instead, remove machining marks and prepare the recessed areas while access is easy.
Final sanding will take place after the entire door has been assembled.
Step 7 – Assemble the Door Without Glue
Dry assembly is one of the most valuable quality-control steps in the entire project.
Fit every component together exactly as it will appear during the final glue-up.
Look closely at:
- Joint alignment
- Panel fit
- Overall dimensions
- Flush surfaces
- Frame squareness
Measure both diagonals.
If the measurements match, the assembly is square.
If they don’t, identify the cause now—before glue begins limiting your options.
A successful dry fit builds confidence for every step that follows.
Step 8 – Prepare for Glue-Up
Glue-up moves quickly.
Preparation slows it down in the best possible way.
Before opening the glue bottle, arrange everything you’ll need within easy reach.
That includes:
- Clamps
- Glue
- Glue brush or applicator
- Damp cloth
- Measuring square
- Wooden mallet
- Cauls if required
The goal is to eliminate unnecessary movement once adhesive has been applied.
An organized workbench creates a calmer, more controlled glue-up.
Step 9 – Apply Glue Where It Belongs
One of the easiest mistakes to avoid is also one of the most important.
Apply glue only to the structural joints.
This typically includes:
- Mortises
- Tenons
- Cope and stick joints
- Dowels
- Loose tenons
If you’re using a solid wood center panel, leave it free inside the grooves.
The floating panel is designed to move with seasonal humidity.
Gluing it in place defeats one of the fundamental advantages of frame and panel construction.
Step 10 – Bring the Door Together
With glue applied, assemble the door in a steady, deliberate sequence.
Many woodworkers find it easiest to begin with:
- One stile
- Top rail
- Bottom rail
- Center panel
- Remaining stile
As each component slides into place, resist the temptation to rush.
A few gentle taps with a wooden mallet are often all that’s needed to fully seat the joints.
Avoid striking directly with a metal hammer, which can damage carefully machined edges.
Step 11 – Clamp with Control, Not Force
Clamps should hold the joints together—not overpower them.
Apply enough pressure to close every joint evenly while maintaining the shape of the frame.
Watch for:
- Even pressure across the assembly
- Flush joints
- Minimal gaps
- Thin, consistent glue squeeze-out
Over-tightening can distort the frame just as easily as insufficient pressure can leave joints open.
Balanced clamping produces the strongest results.
Step 12 – Check for Square Before the Glue Sets
This is the moment to confirm everything came together exactly as planned.
Measure both diagonals again.
They should match.
You can also place a large framing square across each corner or set the door on a known flat work surface.
If adjustments are needed, make them while the glue is still workable.
Waiting until the adhesive cures often turns a simple correction into a much larger repair.
Step 13 – Clean Up Glue Squeeze-Out
Glue left on the surface can interfere with stain absorption and become surprisingly noticeable after finishing.
There are several approaches to cleanup.
Some woodworkers wipe away fresh squeeze-out immediately with a lightly dampened cloth.
Others allow the glue to partially cure before removing it with a plastic scraper.
Whichever method you prefer, avoid saturating the wood with water, especially around end grain.
Keeping surfaces clean now saves considerable work later.
Step 14 – Give the Glue Time to Cure
It’s tempting to remove the clamps as soon as the joints feel solid.
Resist that temptation.
Allow the adhesive to cure according to the manufacturer’s recommendations before moving on to heavy sanding or hardware installation.
Patience at this stage contributes directly to the long-term strength of the finished door.
Step 15 – Sand the Completed Assembly
Once the glue has fully cured, remove the clamps and inspect every surface carefully.
Blend the joints smoothly while preserving crisp edges and decorative profiles.
Work methodically across the entire door, paying particular attention to:
- Rail-to-stile transitions
- Profiled edges
- Panel surfaces
- End grain
- Glue residue
Rather than skipping between abrasive grits, progress gradually through finer sanding stages.
The smoother the surface now, the more rewarding the finishing process will be.
Perform a Final Quality Inspection
Before moving on, take a few quiet minutes to evaluate your work.
Check that:
- The frame remains square.
- Every joint is fully closed.
- The floating panel moves freely if it’s made from solid wood.
- Profiles are clean and consistent.
- Corners align properly.
- Surfaces feel smooth.
- No dried glue remains.
This inspection isn’t about finding flaws.
It’s about giving yourself one last opportunity to refine the work before the finish begins highlighting every detail.
At this stage, the project has transformed from a collection of individual parts into a complete frame and panel door. The structure is sound, the joinery is complete, and the craftsmanship is beginning to show.
The next stage focuses on bringing that craftsmanship to life. In Part 5, you’ll learn how to prepare the surface for finishing, choose between paint and clear finishes, install hinges and hardware with precision, solve common fitting issues, and ensure the completed door performs as beautifully as it looks for years to come.
Part 5 – Finishing, Hardware Installation, and Troubleshooting
There’s a moment in every woodworking project when the shop goes quiet.
The machines are switched off. The clamps have come off. Fine dust settles across the bench, and for the first time, you can step back and see the door as a finished piece rather than a collection of carefully machined parts.
It’s tempting to think the hard work is behind you.
In reality, the finishing stage is where craftsmanship becomes visible.
A flawless finish won’t hide poor joinery, but it will reveal the care you’ve invested in every previous step. Likewise, a rushed finish can diminish an otherwise beautifully built door. Taking your time here allows the wood to show its character while protecting it from the wear of daily life.
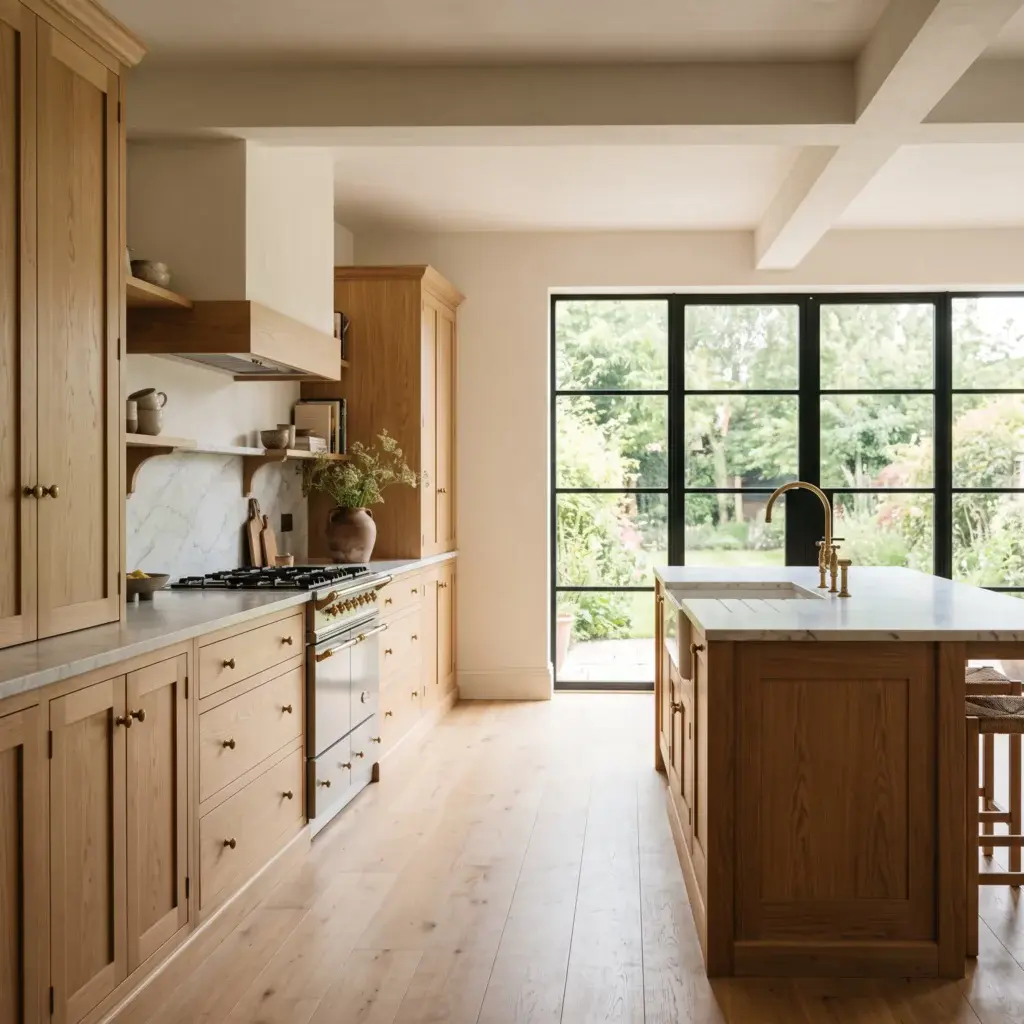
Whether your project will hang in a busy family kitchen or become part of a handcrafted piece of furniture, the goal is the same: create a finish that looks beautiful today and continues performing for years to come.
Preparing the Surface Before Applying Finish
Before opening a can of stain or paint, spend time studying the surface under good lighting.
Move the door around.
Look across it from different angles.
The light will often reveal details your eyes missed during sanding.
Pay attention to:
- Small glue spots
- Fine scratches
- Tool marks
- Tiny dents
- Uneven sanding
- Raised grain
- Sharp edges that should be softened
- Rounded details that should remain crisp
The finish will amplify these imperfections rather than conceal them.
Correcting them now is much easier than trying to repair them later.
Sanding for a Smooth, Professional Surface
Good sanding isn’t about removing as much material as possible.
It’s about creating consistency.
Work through progressively finer abrasives instead of jumping straight to a very fine grit. Each stage removes the scratches left by the previous one, producing a surface that’s smooth without becoming polished to the point where finishes struggle to bond.
Whenever possible:
- Sand with the grain.
- Keep pressure even.
- Replace worn abrasives.
- Pay special attention to end grain.
- Preserve decorative profiles rather than rounding them over.
Patience during sanding almost always shows in the finished project.
Dust: The Smallest Problem That Creates the Biggest Frustration
Dust has a remarkable ability to appear exactly where you don’t want it.
After sanding:
- Vacuum the workbench.
- Clean the door thoroughly.
- Remove dust from grooves and corners.
- Wipe the surface with a clean, lint-free cloth.
If your workspace allows, let airborne dust settle before applying the finish.
A cleaner environment reduces the chance of tiny particles becoming trapped in wet coatings.
Choosing the Right Finish
There’s no universal finish that’s perfect for every project.
The best choice depends on how the door will be used, the wood species you’ve selected, and the appearance you hope to achieve.
Painted Finishes
Paint transforms the appearance of a door while providing excellent protection.
It’s especially well suited to:
- Shaker-style cabinet doors
- Laundry rooms
- Built-in shelving
- Contemporary kitchens
- Utility cabinetry
Because paint hides much of the natural grain, consistent surface preparation becomes even more important.
Smooth surfaces produce smooth finishes.
Stained Finishes
Stain enhances the wood instead of covering it.
Rather than changing the character of the material, it brings out the grain patterns, color variation, and natural figure that make hardwood unique.
Stained finishes are often chosen for:
- Oak
- Cherry
- Walnut
- Ash
- Maple, with proper preparation
Testing stain on an offcut from the same lumber is one of the simplest ways to avoid unpleasant surprises.
Wood can behave differently than expected, even within the same species.
Clear Protective Finishes
Sometimes the wood already has everything it needs.
Clear finishes preserve its natural appearance while protecting it from moisture, wear, and everyday handling.
Common choices include:
- Polyurethane
- Water-based clear finishes
- Oil-based varnishes
- Hard wax oil
Each offers a different balance of durability, appearance, maintenance, and application method.
Choosing one often comes down to the environment in which the finished door will be used.
Apply Thin Coats, Not Thick Ones
It’s easy to assume that a heavier coat creates better protection.
In practice, the opposite is often true.
Several thin coats generally cure more evenly, produce fewer imperfections, and create a smoother finish than one heavy application.
Between coats:
- Allow adequate drying time.
- Lightly prepare the surface if recommended by the finish manufacturer.
- Remove dust before continuing.
Rushing the process rarely saves time.
More often, it creates additional work.
Should You Finish Before or After Assembly?
Ask five experienced woodworkers this question and you may hear five slightly different answers.
Both approaches have merit.
Finishing After Assembly
Completing the finish after the door is assembled offers several advantages.
It creates:
- Consistent color
- Uniform sheen
- Seamless transitions
- Simpler touch-ups
For many cabinet projects, this remains the preferred approach.
Partial Pre-Finishing
Some builders choose to seal or lightly finish the floating panel before assembly.
This approach can reduce the appearance of unfinished edges if the panel contracts slightly during dry seasons.
Care should be taken to keep finish away from glue surfaces so the joints retain their full strength.
Installing Hinges with Accuracy
Even a perfectly built door won’t perform well if the hardware isn’t installed carefully.
Take time with layout.
Measure from consistent reference points.
Verify every location before drilling.
Small differences in hinge placement can noticeably affect alignment once the door is mounted.
Concealed Hinges
Modern concealed hinges have become the standard for many cabinet projects.
They’re valued because they offer:
- Clean appearance
- Easy adjustment
- Soft-close compatibility
- Reliable long-term performance
Their ability to fine-tune alignment after installation makes them especially popular for kitchens and built-in cabinetry.
Traditional Hinges
Visible hinges continue to play an important role in furniture making and period-inspired cabinetry.
Depending on the project, they can contribute as much to the design as the wood itself.
Traditional hardware is commonly found on:
- Farmhouse furniture
- Mission-style cabinetry
- Antique reproductions
- Freestanding furniture
Choosing hardware that complements the overall style helps create a more cohesive finished piece.
Hanging the Door
Installing the completed door is often one of the most satisfying moments in the entire project.
As you position it within the cabinet opening, pay attention to:
- Even reveals
- Smooth movement
- Consistent spacing
- Proper clearance
- Comfortable operation
Small adjustments are completely normal.
Professional cabinet installation almost always includes a period of fine-tuning before every reveal appears balanced.
Installing Handles and Knobs
Hardware placement has a surprisingly large influence on how finished cabinetry feels.
Consistency matters.
Using a drilling template or shop-made jig helps ensure every handle aligns perfectly across multiple doors and drawers.
Before drilling:
- Confirm orientation.
- Double-check measurements.
- Consider how the door will be opened during everyday use.
Thoughtful placement improves both appearance and usability.
Fine-Tuning the Fit
Rarely does every door fit perfectly on the very first attempt.
Fortunately, many alignment issues require only small adjustments.
Uneven Gaps Around the Door
If one side appears wider than the other, begin by checking hinge adjustments.
Small corrections often restore even spacing without additional woodworking.
The Door Rubs the Cabinet
This may indicate:
- Slight hinge misalignment
- An out-of-square cabinet
- Insufficient clearance
- Hardware requiring adjustment
Work through each possibility methodically rather than making several changes at once.
The Door Doesn’t Close Smoothly
Possible causes include:
- Hinge adjustment
- Latch alignment
- Finish buildup
- Obstructions inside the cabinet
Changing one variable at a time makes troubleshooting far easier.
Solving Common Problems
Even carefully built doors occasionally develop issues.
Understanding why they occur helps you prevent them on future projects.
A Door Begins to Warp
Warping usually points back to one or more contributing factors.
Common causes include:
- Lumber that wasn’t fully acclimated
- Internal stresses in the wood
- Uneven moisture exposure
- Incomplete finish coverage
- Poor material selection
Finishing every exposed surface—not just the front—helps equalize moisture exchange.
The Center Panel Cracks
Most cracked panels can be traced to one mistake.
The panel was prevented from moving.
Leaving appropriate clearance inside the grooves allows the wood to respond naturally to seasonal humidity changes.
Joints Begin to Open
When joints separate, the underlying cause is often one of the following:
- Loose joinery
- Insufficient glue coverage
- Poor clamping technique
- Inaccurate machining
Careful dry fitting remains one of the best ways to prevent these problems.
The Finish Doesn’t Look Right
Runs, uneven sheen, dust particles, or blotchy stain are all common finishing challenges.
Most are minimized through:
- Careful surface preparation
- Thin, even coats
- Clean working conditions
- Adequate drying time
- Testing finishes before committing to the project
Few finishing problems are impossible to correct, but preventing them is far easier than repairing them afterward.
Caring for Your Doors Over Time
A well-built frame and panel door requires very little ongoing maintenance.
Simple habits help preserve both its appearance and performance.
Clean surfaces with products appropriate for the finish, inspect hardware occasionally, and tighten loose screws before they become larger problems.
If minor scratches or wear begin to appear, addressing them early often prevents more extensive repairs later.
With reasonable care, quality frame and panel doors can remain attractive and functional for decades.
Knowing When It’s Time to Refinish
Eventually, every finish begins to show its age.
Signs that refinishing may be worthwhile include:
- Worn protective coating
- Deep scratches
- Water damage
- Fading from sunlight
- Areas where bare wood has become exposed
One advantage of solid hardwood construction is that many doors can be refinished successfully, extending their service life without replacing the entire piece.
The Details That Separate Good Work from Exceptional Work
Experienced cabinetmakers often develop routines that seem almost invisible.
They test finishes on scrap pieces before touching the project.
They label hardware during installation.
They inspect reveals from several viewing angles.
They allow finishes to cure fully before hanging doors.
None of these habits is dramatic on its own.
Together, they create projects that feel refined, intentional, and built with care.
At this point, your frame and panel door is complete in both structure and appearance. The remaining step isn’t about learning another technique—it’s about refining the craft even further. In the next section, we’ll explore advanced methods that experienced cabinetmakers use to improve efficiency, elevate design, and create furniture-quality doors that stand apart through precision, proportion, and thoughtful detail.
Part 6 – Advanced Cabinetmaking Techniques
The first frame and panel door you build teaches you the process.
The next few teach you consistency.
Eventually, something changes. You stop thinking only about whether the joints fit and begin noticing the finer details—the way grain flows across the frame, how proportions affect the overall look, or why one door feels balanced while another, built to the same dimensions, somehow doesn’t.
That’s where craftsmanship begins to evolve.
Furniture-quality work isn’t defined by complexity alone. More often, it’s the result of dozens of thoughtful decisions that most people never consciously notice but instinctively appreciate.
This section explores those details and the habits that help transform reliable woodworking into refined cabinetmaking.
Design with Proportion in Mind
A well-made door can still look awkward if its proportions feel out of balance.
The width of the rails, the size of the stiles, and the relationship between the frame and the center panel all influence how the finished piece is perceived.
As a general approach:
- Narrow cabinet doors often benefit from slimmer frame members.
- Wider pantry doors usually require broader rails and stiles for both strength and visual balance.
- Large furniture doors may include intermediate rails that break up broad panel areas while adding structural support.
Rather than applying the same dimensions to every project, consider the scale of the cabinet, the surrounding furniture, and the room itself.
Good proportions rarely draw attention to themselves. They simply feel right.
Let the Grain Tell the Story
Wood has character long before it reaches the workshop.
The way you arrange that character can dramatically influence the finished project.
Instead of viewing every board as an individual part, try seeing the entire cabinet as a single composition.
This mindset often changes the way lumber is selected and cut.
Book-Matched Panels
When consecutive boards are opened like the pages of a book, their grain patterns mirror one another.
The result is subtle symmetry that immediately elevates the appearance of furniture and cabinetry.
Book matching is especially effective on:
- Display cabinets
- Dining room furniture
- Entertainment centers
- Statement pieces
Even simple flat-panel doors gain visual depth through thoughtful grain selection.
Grain Wrapping
Whenever possible, rails and stiles can be cut from adjoining sections of the same board.
This creates the illusion that the grain continues naturally around the frame.
It’s a detail many people won’t consciously identify, yet it contributes to the quiet sense of quality found in fine woodworking.
Matching Color Across Multiple Doors
Natural wood varies.
Even boards from the same tree can differ noticeably in tone.
Before milling, lay your lumber out side by side.
Group similar colors together.
Reserve the most distinctive boards for focal areas and use more subtle pieces where visual consistency matters.
Planning this way creates cabinetry that feels intentional rather than assembled from unrelated parts.
Building Arched and Curved Doors
Straight lines dominate many cabinet projects, but curved doors introduce an entirely different character.
An arched top can soften a room, echo architectural details, or create a focal point within a larger furniture piece.
Popular styles include:
- Cathedral arches
- Segmental arches
- Elliptical arches
- Gentle radius tops
These doors require careful layout and accurate templates.
Patience becomes even more important because small inaccuracies are often more visible along curved lines than straight ones.
Although more demanding to build, they reward careful craftsmanship with distinctive results.
Adding Decorative Profiles
Profiles influence how light interacts with a door.
Even a subtle edge treatment can create depth, shadow, and visual interest without overwhelming the design.
Common profile choices include:
Ogee Profiles
Graceful curves that suit traditional cabinetry and classic furniture.
They add elegance without appearing overly ornate.
Beaded Edges
A small rounded bead introduces texture while softening transitions between surfaces.
Beaded details work particularly well in:
- Cottage-style interiors
- Farmhouse kitchens
- Traditional built-ins
Chamfered Edges
Clean bevels create crisp lines that complement modern and contemporary designs.
Their simplicity makes them surprisingly versatile.
Cove Profiles
A gentle concave curve introduces subtle depth while maintaining an understated appearance.
Selecting a profile that complements the architecture of the room often produces a more harmonious finished project than choosing the most elaborate option available.
Designing Multi-Panel Doors
As doors become taller, a single large panel isn’t always the most attractive solution.
Adding intermediate rails allows you to divide the opening into multiple sections.
This approach offers several benefits:
- Improved visual proportion
- Greater structural rigidity
- More design flexibility
- Better alignment with surrounding cabinetry
Common layouts include:
- Two-panel doors
- Three-panel doors
- Glass-over-panel combinations
- Display cabinets with divided sections
Careful spacing helps these additional elements feel purposeful rather than crowded.
Working with Glass Panels
Replacing a wood panel with glass changes both the function and personality of a cabinet.
Glass introduces lightness, creates visual depth, and allows decorative items to become part of the design.
Popular options include:
- Clear glass
- Frosted glass
- Reeded glass
- Seeded glass
- Textured glass
Unlike solid wood, glass doesn’t expand and contract with seasonal humidity in the same way, but it should still be installed carefully to avoid unnecessary stress.
Retainers or glazing strips hold the panel securely while allowing for slight movement and easier replacement if needed.
Improve Efficiency Through Repeatable Workflows
Building one cabinet door requires precision.
Building twenty requires a system.
Professional cabinet shops rarely rely on memory.
Instead, they create workflows that produce consistent results from the first door to the last.
Useful habits include:
- Milling all stock before changing machine setups.
- Completing one machining operation across every identical part.
- Keeping matching components together.
- Labeling each door throughout production.
- Verifying dimensions before moving to the next stage.
Consistency becomes easier when every step follows a predictable sequence.
Story Sticks: A Simple Tool with Lasting Value
Not every improvement in woodworking comes from expensive equipment.
Sometimes the most useful shop aid is little more than a carefully marked strip of wood.
A story stick records important dimensions directly rather than relying on repeated measurements.
It can be used for:
- Rail locations
- Hinge placement
- Handle positioning
- Shelf spacing
- Cabinet dimensions
Once created, it reduces the chance of measurement errors while speeding up repetitive work.
Many cabinetmakers continue using story sticks throughout their careers because they’re practical, reliable, and surprisingly versatile.
Shop Jigs That Save Time and Improve Accuracy
Jigs aren’t shortcuts.
They’re consistency tools.
Well-designed jigs help produce repeatable results while reducing setup time.
Useful examples include:
Crosscut Sled
Produces clean, square crosscuts with excellent repeatability.
Router Sled
Provides stable support for larger workpieces during routing operations.
Hinge Boring Jig
Helps maintain consistent hinge placement across multiple doors.
Drilling Template
Ensures every handle or knob aligns perfectly from one cabinet to the next.
Simple shop-made jigs often become some of the most valuable tools in the workshop.
Where CNC Fits into Modern Woodworking
Computer-controlled machining has changed many aspects of cabinet production.
CNC equipment excels at repetitive tasks, including:
- Cutting panels
- Machining joinery
- Carving decorative details
- Producing identical cabinet components
Yet even with advanced machinery, the fundamentals remain unchanged.
Machines can cut accurately, but they don’t select beautiful grain, balance proportions, or decide how a finished piece should feel.
Those choices still belong to the craftsperson.
Fine-Tuning Your Joinery
As experience grows, small improvements begin to compound.
Many experienced woodworkers keep notes on successful machine settings, cutter heights, and setup dimensions rather than relying on memory.
Other useful habits include:
- Testing joints on scrap before every production run.
- Replacing dull cutters promptly.
- Keeping reference blocks for common setups.
- Inspecting joints before assembly instead of after glue-up.
These routines don’t add much time to the project, yet they often improve accuracy dramatically.
Working with Highly Figured Hardwood
Boards with dramatic grain can produce stunning cabinet doors, but they also demand greater care.
Highly figured wood is more prone to tear-out during machining.
To reduce the risk:
- Keep cutters exceptionally sharp.
- Remove material in light passes.
- Support end grain whenever possible.
- Feed stock steadily.
- Avoid forcing cuts.
Slowing down often produces cleaner results than trying to work quickly.
Build for the Environment
The location where a door will be used should influence both material selection and finishing choices.
A kitchen cabinet faces different conditions than a display cabinet in a formal dining room.
Think about how the finished project will live.
Kitchens
Choose durable finishes that tolerate frequent cleaning and everyday wear.
Bathrooms
Protect every exposed surface from changing humidity by applying finish evenly throughout the door.
Furniture
Prioritize grain selection, proportion, and visual refinement.
These projects often invite closer inspection.
Workshops and Utility Spaces
Durability and practicality may matter more than decorative detailing.
Matching construction techniques to the intended environment helps the finished project perform well for years.
Habits That Continue Paying Dividends
The most accomplished cabinetmakers rarely rely on talent alone.
Instead, they build dependable habits.
They sharpen tools before they become dull.
They record successful setups.
They inspect every component before moving forward.
They organize projects carefully.
Most importantly, they remain willing to learn from every completed piece.
Each project becomes preparation for the next one.
The techniques explored throughout this guide provide a solid foundation, but woodworking is a craft that rewards continued curiosity. Every door offers an opportunity to refine your methods, improve your efficiency, and discover new ways to combine precision with creativity.
In the final section, you’ll find answers to the questions woodworkers ask most often, along with a curated collection of products, tools, and resources that can help you tackle future frame and panel door projects with even greater confidence.
Part 7 – Frequently Asked Questions
By the time most woodworkers reach this point, the technical steps make sense—but a few practical questions almost always remain. These are the kinds of questions that tend to come up while you’re standing in the workshop, measuring a rail for the second time or wondering whether one more adjustment is really necessary.
Do I really need a floating panel if the door isn’t very large?
Yes, if you’re using a solid wood panel.
Even relatively small panels expand and contract as humidity changes throughout the year. The movement may be subtle, but it’s enough to create stress if the panel is glued tightly inside the frame.
Engineered materials such as plywood and MDF are much more dimensionally stable, but solid hardwood benefits from the freedom to move naturally.
Which joinery method is the best choice for a home workshop?
That depends on the tools you own and the kind of projects you enjoy building.
If you’re looking for an approachable method that produces attractive cabinet doors, cope-and-stick joinery paired with a quality router table is an excellent starting point.
If your focus is fine furniture and traditional craftsmanship, mortise and tenon joinery remains one of the strongest and most respected methods available.
Loose tenons offer an appealing middle ground by combining excellent strength with an efficient workflow.
Is hardwood always better than softwood?
Not necessarily.
Hardwoods generally provide greater durability and wear resistance, making them ideal for kitchens, furniture, and high-use cabinetry.
Softwoods, however, can be excellent choices for utility cabinets, workshop projects, and rustic furniture where character and affordability are priorities.
The best material is the one that suits both the project and its environment.
What’s the biggest mistake beginners make?
Rushing.
It’s rarely the router bit or the table saw that causes problems.
More often, mistakes begin with skipped test cuts, inaccurate measurements, poorly prepared stock, or trying to speed through glue-up.
Slowing down—even by a few minutes at each stage—usually produces noticeably better results.
Should I build one door at a time or all of them together?
If you’re making multiple doors, work in batches whenever practical.
Complete one machining operation across every identical part before changing machine settings.
This approach improves consistency and reduces the chance of subtle differences between doors.
Professional cabinet shops rely on this workflow because it saves time while improving accuracy.
Can I paint hardwood doors?
Absolutely.
Many hardwoods perform beautifully beneath paint.
Poplar and maple are particularly popular because they machine cleanly and produce smooth painted surfaces.
If you plan to showcase the natural grain instead, species such as cherry, walnut, and white oak are outstanding choices.
Why don’t my doors fit perfectly even though my measurements were correct?
Measurements are only one part of the equation.
Small variations can also come from:
- Machine setup
- Cutter height
- Lumber movement
- Cabinet squareness
- Hardware adjustment
- Assembly alignment
When troubleshooting, change one variable at a time rather than making several adjustments simultaneously.
This makes it much easier to identify the true source of the problem.
How can I make several cabinet doors look like they belong together?
Consistency is built into the process.
Use lumber from the same batch whenever possible.
Keep grain direction consistent.
Maintain identical machine settings.
Use the same sanding sequence, finishing schedule, and hardware placement throughout the project.
Those seemingly minor details create a cohesive appearance that’s difficult to achieve through last-minute adjustments.
Is it worth making my own doors instead of buying them?
For many woodworkers, the answer extends beyond cost.
Building your own doors allows you to choose the wood species, proportions, profiles, joinery, and finish while developing skills that transfer to countless future projects.
The first door may take time.
The second is usually easier.
By the third or fourth, you’ll often find yourself working with far greater confidence and understanding.
Products / Tools / Resources
If you’re planning to build frame and panel doors regularly, investing in reliable tools and quality materials can make the process more enjoyable and improve the consistency of your results.
Essential Measuring and Layout Tools
A dependable layout toolkit helps establish accuracy before any cutting begins.
Recommended items include:
- Tape measure
- Combination square
- Engineer’s square
- Marking gauge
- Marking knife
- Steel ruler
- Digital calipers
These tools form the foundation of precise joinery and repeatable work.
Core Workshop Equipment
For most home workshops, the following machines provide everything needed to build professional-quality cabinet and furniture doors:
- Table saw
- Router table
- Thickness planer
- Jointer
- Miter saw
- Random orbital sander
- Dust collection system
Each contributes to a smoother workflow and more consistent results.
Router Bits
Quality cutters often leave cleaner surfaces and require less sanding.
Useful additions to your collection include:
- Rail and stile router bit sets
- Raised panel bits
- Straight router bits
- Chamfer bits
- Round-over bits
- Flush trim bits
Sharp cutters not only improve cut quality but also make routing safer and more predictable.
Clamps
A successful glue-up depends on controlled, even pressure.
A well-rounded clamp collection may include:
- Parallel clamps
- Bar clamps
- Pipe clamps
- F-style clamps
- Corner clamps
Having a variety of lengths available allows you to adapt to projects of different sizes.
Abrasives and Surface Preparation
Consistent sanding plays a major role in the quality of the finished surface.
Keep a range of sanding grits on hand, along with:
- Sanding blocks
- Random orbital sander discs
- Detail sanding pads
- Soft brushes or lint-free cloths for dust removal
Replacing worn abrasives regularly helps maintain a cleaner finish.
Adhesives
Choose a wood glue that’s appropriate for interior woodworking and follow the manufacturer’s recommendations for application and curing time.
Using fresh adhesive and applying it only where structural joints require bonding helps create strong, durable assemblies.
Finishing Supplies
A small collection of finishing materials can cover most cabinet projects.
Consider keeping:
- Primer for painted work
- Interior paint suitable for cabinetry
- Wood stain
- Clear protective finish
- High-quality brushes
- Foam applicators
- Clean lint-free cloths
- Stir sticks
- Mixing containers
Testing finishes on offcuts before applying them to the project remains one of the most valuable habits you can develop.
Lumber Selection
Whenever possible, purchase lumber from suppliers known for well-dried, furniture-grade stock.
Popular hardwood choices include:
- Maple
- White oak
- Cherry
- Walnut
- Poplar
Choosing stable, straight boards from the beginning simplifies every stage of construction.
Shop-Made Helpers
Some of the most valuable workshop accessories cost very little to build.
Examples include:
- Story sticks
- Crosscut sleds
- Hinge drilling jigs
- Assembly cauls
- Hardware drilling templates
- Router setup blocks
Simple shop-made aids often improve repeatability as much as expensive equipment.
Continuing Your Woodworking Skills
Every completed door builds experience.
As your confidence grows, consider exploring:
- Traditional mortise and tenon joinery
- Decorative panel profiles
- Arched door construction
- Furniture-grade finishing techniques
- Grain matching methods
- Advanced jig building
Developing one new skill with each project is a practical way to expand your capabilities without becoming overwhelmed.