
There is a certain kind of furniture that seems to settle into a room rather than simply occupy it.
You notice the weight of the wood. The grain catches the light differently from one board to the next. A knot breaks the surface. One edge feels slightly softer than another, as if a hand has passed over it a thousand times.
That is the charm of rustic woodworking furniture.
It does not need to look flawless. In fact, flawless is often the wrong goal.
A beautiful rustic dining table can carry saw marks, subtle dents, darker patches around knots, and small irregularities that would look out of place on polished factory furniture. Yet none of those details excuse poor construction. The table still needs to stand square. The joints still need to hold. The tabletop still needs to account for seasonal wood movement.
That tension is what makes rustic furniture interesting.
It looks relaxed, but the best pieces are anything but careless.
They are built with enough precision to last, then given enough freedom to age gracefully.
And when they do age, something unusual happens.
They often get better.
What Rustic Woodworking Furniture Really Is
Rustic woodworking furniture is solid-wood furniture that celebrates the natural character of timber through visible grain, knots, texture, traditional forms, honest joinery, and finishes that enhance rather than hide the material.
You will often see some combination of:
- Solid wood construction
- Visible grain and knots
- Rough-sawn or textured surfaces
- Reclaimed lumber
- Substantial proportions
- Traditional or exposed joinery
- Earthy stains and natural finishes
- Hand-worked details
- Metal or old-style hardware
- Farmhouse, cabin, lodge, country, or modern-rustic influences
But there is one distinction worth understanding from the start.
Rustic does not mean unfinished.
Nor does it mean crude.
A badly fitted joint is not character. A twisted tabletop is not charm. Splinters are not authenticity.
What makes rustic furniture work is intention.
A worn edge should feel as though it belongs there. A knot should look celebrated rather than accidentally tolerated. Distressing should suggest years of use, not an afternoon spent attacking a board with a hammer.
That is the line between rustic and sloppy.
And once you see it, you start noticing it everywhere.
Why Rustic Furniture Has Such Lasting Appeal
Furniture trends move quickly.
Colors change. Styles come and go. One year everything is pale and minimal; the next, dark woods and heavier textures are back.
Solid wood operates on a different timeline.
It ages visibly.
A cheap laminate surface usually looks worse after years of wear. Once it chips, the illusion is broken. Plastic scratches. Thin veneers can be difficult to repair.
Solid wood can often be sanded, refinished, touched up, or simply allowed to keep the scar.
That changes the emotional life of the furniture.
A rustic dining table does not have to remain frozen in showroom condition. It can absorb evidence of daily life.
A coffee mug leaves a faint ring.
Someone drags a bowl across the top.
A child taps a fork against the edge.
Years later, the surface tells a story that no factory can reproduce.
That is why well-built rustic furniture can feel more valuable with time rather than less.
It develops history.
Rustic, Farmhouse, Country, and Modern Rustic: Where the Styles Divide
These terms are often used interchangeably, but they are not quite the same.
Understanding the difference helps you choose the look you actually want before you start cutting lumber.
Rustic Furniture
Rustic furniture puts the material first.
The wood is allowed to look like wood.
Common traits include:
- Visible grain
- Knots
- Rough texture
- Thick components
- Traditional joinery
- Reclaimed timber
- Natural finishes
- Hand-worked surfaces
The design often feels grounded, sturdy, and direct.
Farmhouse Furniture
Farmhouse furniture usually borrows from practical rural furniture.
You will often see:
- Trestle tables
- Cross-braced bases
- Painted legs
- Natural wood tops
- Simple benches
- Functional storage
- Warm, uncomplicated forms
A farmhouse table may be rustic, but rustic furniture can extend far beyond the farmhouse look.
Country Furniture
Country furniture tends to feel softer and more traditional.
Think:
- Turned legs
- Painted cabinets
- Warm-toned woods
- Cottage details
- Traditional moldings
- Simple decorative touches
It can overlap with rustic design while leaning more domestic and decorative.
Modern Rustic Furniture
Modern rustic strips away much of the traditional decoration.
The forms become cleaner.
You might see:
- Natural oak
- Thick wood slabs
- Black steel
- Straight lines
- Minimal hardware
- Open bases
- Simple geometry
The contrast is often the whole point.
Warm, irregular wood against cold, precise metal.
A rough grain beside a perfectly straight steel frame.
It feels contemporary without losing the character of the material.
Choosing the Best Wood for Rustic Furniture
There is no single perfect species for rustic woodworking furniture.
The right choice depends on what you are building, how much wear it will receive, what tools you own, how much you want to spend, and the kind of character you want the finished piece to carry.
Some woods make the process easier. Others make the result feel more refined.
And sometimes the board with the biggest knot is the one that ends up becoming the centerpiece.
Pine: Affordable, Forgiving, and Full of Character
Pine is one of the easiest places to start.
It is widely available, relatively inexpensive, easy to cut, and naturally suited to rustic work.
It works especially well for:
- Coffee tables
- Benches
- Console tables
- Shelving
- Nightstands
- Farmhouse tables
- Storage chests
Pine is soft, which means it dents more easily than hardwood.
In polished furniture, that can be frustrating.
In rustic furniture, a small dent may disappear into the overall character.
The bigger challenge is stain.
Pine can absorb stain unevenly, leaving dark patches and blotches. Careful sanding, test pieces, pre-stain products, or alternative finishes can help.
Never trust the color on the front of a stain can.
Test it on the actual wood.
The difference can be dramatic.
Oak: Strength You Can See
Oak brings a completely different feeling.
The grain is bold. The wood is strong. The finished piece often feels substantial before you even touch it.
That makes oak ideal for:
- Dining tables
- Desks
- Benches
- Cabinets
- Bed frames
- Heavily used furniture
Oak responds beautifully to many stains because the grain remains visible even after the color deepens.
Where pine can feel casual and relaxed, oak often feels permanent.
It is the kind of wood that suits furniture you expect to keep for decades.
Cedar: Warm Character for Indoor and Outdoor Pieces
Cedar has a distinct look, smell, and feel.
Certain cedar species are naturally resistant to decay, which makes them popular for outdoor and cabin-style projects.
Cedar can work well for:
- Garden benches
- Porch furniture
- Outdoor tables
- Chests
- Cabin interiors
It is relatively soft, though.
That makes project selection important.
A cedar bench on a covered porch is one thing.
A heavily abused workshop table is another.
Choose the wood for the life the furniture will actually live.
Recommended reading: The Complete Cedar Outdoor Furniture Woodworking Plans Guide: Build Weatherproof Patio Furniture That Lasts 20+ Years
Maple: A Cleaner Kind of Rustic
Maple is not the first wood most people associate with rustic furniture.
That is exactly why it can be interesting.
Its cleaner grain can give rustic furniture a quieter, more modern feel.
Pair maple with:
- Thick tops
- Simple forms
- Black hardware
- Oil finishes
- Minimalist joinery
The result can feel warm without looking heavy.
This is especially effective in Scandinavian rustic and modern rustic interiors.
Reclaimed Wood: History Built Into the Board
Reclaimed lumber is difficult to imitate because the wear is real.
Old barn boards and structural timbers may carry:
- Nail holes
- Saw marks
- Weathering
- Oxidation
- Color variation
- Tiny cracks
- Surface texture
Those details were not designed.
They happened.
That is why reclaimed wood can make even a simple piece of furniture feel instantly established.
But old lumber also comes with risks.
It may contain:
- Nails
- Staples
- Screws
- Dirt
- Insect damage
- Rot
- Unknown paint
- Contaminants
A hidden nail can destroy planer blades in seconds.
Old coatings may also be unsafe to sand or machine without knowing what they contain.
Inspect reclaimed lumber carefully before bringing it anywhere near your tools.
Learn more: Woodworking Crafts with Reclaimed Wood: 35 Stunning Projects That Turn Old Lumber Into Handmade Treasures
Rough-Sawn or Planed? You Do Not Have to Choose One
Many beginners assume rustic furniture should remain rough.
That is not quite right.
Some surfaces need precision.
Some surfaces can keep texture.
A tabletop should sit flat. Joinery surfaces should fit correctly. Legs should stand square. Drawer components need accuracy.
But the outside of an apron, the face of a stretcher, or the underside of a shelf might retain more texture.
This creates one of the most useful rules in rustic furniture making:
Refine the wood where function demands it. Preserve character where appearance allows it.
You do not need to machine every surface until the original board has disappeared.
The goal is not to erase the lumber.
It is to control it.
Moisture Content: The Problem You Cannot See Until It Is Too Late
Wood keeps moving long after the tree has been cut.
It absorbs moisture.
It releases moisture.
It expands.
It shrinks.
Most of that movement happens across the grain, which is why wide solid-wood panels deserve special attention.
If the lumber is too wet when you build with it, the finished furniture may later:
- Warp
- Twist
- Crack
- Open at the joints
- Pull fasteners loose
- Distort
This is especially important with:
- Dining tables
- Desks
- Cabinet doors
- Benches
- Solid-wood panels
- Chests
- Beds
Rustic furniture may look relaxed, but wood movement still follows the same rules of physics.
No style choice overrides that.
Allow lumber to acclimate to its intended environment when appropriate, and consider checking moisture content before committing valuable stock to a major furniture build.
A few minutes here can save months of frustration later.
The Tools You Actually Need
Rustic furniture has a nice quality for beginners: you can do a lot before your workshop looks anything like a professional cabinet shop.
A practical starting collection may include:
- Tape measure
- Combination square
- Pencil or marking knife
- Circular saw or miter saw
- Drill/driver
- Drill bits
- Countersink bit
- Random-orbit sander
- Sandpaper
- Clamps
- Chisels
- Safety glasses
- Hearing protection
That is enough to build far more than many beginners realize.
The temptation is to think you need every tool before you start.
You do not.
You need the right tools for the project in front of you.
Circular Saw, Miter Saw, or Table Saw?
Each tool solves a different problem.
A circular saw is versatile, portable, and capable of accurate work when used with a proper guide.
A miter saw is excellent for fast, repeatable crosscuts.
A table saw opens up far more control over ripping, dimensioning, and repeatable cuts, but it requires more space, more money, and careful safety habits.
Do not build an imaginary future workshop before you have built your first real piece of furniture.
Start with what the project actually requires.
Then grow from there.
Clamps: The Tool You Always Need Five Minutes Too Late
Woodworkers joke about never having enough clamps.
It stops being a joke when glue is on the joint and you realize the one clamp you need is already holding something else together.
Clamps are useful for:
- Glue-ups
- Keeping frames square
- Edge joining
- Holding parts during drilling
- Temporary positioning
- Repairs
- Dry fitting
Before assembly, think through the process.
Where will the clamps go?
Can you reach the screws?
Will the parts shift?
Do you have enough pressure in the right places?
That short mental rehearsal often makes the difference between a calm assembly and a frantic one.
Rustic Furniture Joinery: Simple, Strong, or Traditional?
There is no single correct way to join rustic furniture.
The right method depends on the load, the type of piece, the tools available, your skill level, and whether you want the joint to be seen.
The beauty of rustic design is that even exposed joinery can become part of the look.
Screws and Butt Joints
For simple furniture, screws can be perfectly appropriate.
They work well in:
- Utility furniture
- Beginner projects
- Outdoor builds
- Shelves
- Simple farmhouse designs
But a screw is not magic.
If the joint is poorly designed, adding more fasteners does not automatically solve the problem.
Think about the direction of force.
Think about leverage.
Think about how the furniture will be used.
Pocket-Hole Joinery
Pocket holes are popular because they allow beginners to create strong, neat assemblies with relatively little setup.
They work particularly well for:
- Table aprons
- Face frames
- Benches
- Cabinet frames
- Simple furniture bases
The fasteners can often be hidden underneath or inside the piece.
Pocket holes are not a substitute for every traditional joint, but they are a practical way to start building real furniture before you have mastered advanced joinery.
Dowels
Dowels create hidden joints with no visible screw heads.
With careful layout or a good jig, they can produce strong and tidy connections.
They are an excellent step between basic screw construction and more demanding traditional joinery.
Half-Lap Joints
Half-laps are particularly suited to rustic furniture because they can look good even when the joint remains visible.
The overlapping geometry feels structural and honest.
Half-laps work well in:
- Frames
- Cross braces
- Benches
- Table bases
- Stretchers
A clean half-lap looks simple.
Making one cleanly teaches plenty.
Mortise-and-Tenon Joinery
This is where woodworking starts to feel old in the best possible way.
Mortise-and-tenon joints have been used for centuries because they are strong, logical, and well suited to furniture.
They are especially useful for:
- Tables
- Chairs
- Beds
- Benches
- Frames
- Heirloom pieces
And rustic furniture gives you a wonderful option.
You do not always have to hide them.
A through-tenon, wedge, or wooden peg can become part of the design.
The joint stops being something beneath the surface.
It becomes part of the story.
15 Rustic Woodworking Furniture Projects Worth Building
At some point, theory has to give way to sawdust.
These projects range from forgiving beginner builds to more serious furniture work.
Each one teaches something different.
1. Rustic Farmhouse Dining Table
The farmhouse table is almost a rite of passage.
It combines:
- A large solid-wood top
- Legs
- Aprons
- Stretchers or braces
- Joinery
- Finishing
- Wood movement
There is nowhere to hide.
If the base is not square, you will know.
If the top moves incorrectly, you will know later.
But when it works, the result can become the piece everyone gathers around for years.
2. Solid-Wood Coffee Table
A coffee table is smaller, more manageable, and ideal for experimentation.
Try:
- Thick tops
- Reclaimed boards
- Lower shelves
- Cross braces
- Black hardware
- Distressed edges
It is one of the best places to learn without committing to a room-sized project.
3. Entryway Bench
A bench introduces load.
That changes everything.
Now the furniture must do more than look good.
You need to think about:
- Racking
- Joint strength
- Stability
- Comfortable height
- Seat depth
Add storage underneath and the project becomes even more useful.
4. Rustic Bookshelf
Bookshelves force you to think vertically.
A tall piece has different problems:
- Sagging shelves
- Racking
- Weight distribution
- Back support
- Wall anchoring
A rustic bookshelf may look simple, but good case construction teaches precision quickly.
5. Farmhouse Nightstand
Nightstands are deceptively useful training projects.
They are small enough to stay manageable, yet they can include:
- Drawers
- Doors
- Shelves
- Face frames
- Hardware
Build a pair and another lesson appears.
Repeatability.
The second one has to match the first.
That is where small inaccuracies suddenly become very visible.
6. Rustic Wooden Bed Frame
A bed carries serious weight and constant movement.
Good construction matters.
Pay attention to:
- Rail attachment
- Slat support
- Center support
- Racking resistance
- Joinery
- Disassembly
Furniture this large must also fit through doors and around corners.
Think ahead before permanently joining anything.
7. Console Table
A console table is a good project when you want elegance without a huge material bill.
It can sit behind a sofa, in an entryway, or along a narrow hall.
Because the piece is relatively small, it can also be a good place to experiment with higher-quality hardwood.
8. Storage Bench
A storage bench adds moving parts.
Now you have to think about:
- Hinges
- Lid weight
- Finger safety
- Interior clearance
- Structural strength
A heavy wooden lid can be dangerous if it drops unexpectedly.
Hardware choices matter.
9. Rustic Desk
A desk can be almost anything.
At its simplest, it is a top and a base.
At its most complex, it includes:
- Drawers
- Shelving
- Cable routing
- Equipment storage
- Hidden power access
Modern rustic desks look especially good when solid wood is paired with black metal or restrained hardware.
10. Kitchen Island
A freestanding kitchen island can dominate a room visually.
Possible features include:
- Thick wood top
- Shelves
- Drawers
- Seating overhang
- Towel rails
- Cabinets
Kitchen furniture also sees water, heat, spills, and repeated cleaning.
Finish selection becomes far more important here than on a decorative hallway table.
11. Outdoor Chair
Outdoor furniture faces a different world.
Rain finds every horizontal surface.
Water collects in joints.
Fasteners corrode.
Sunlight breaks down finishes.
Design for drainage and choose suitable materials.
12. Outdoor Dining Table
Outdoor tables can age beautifully.
Gray weathering, soft edges, and surface changes may add to the rustic look.
But only if the structure survives.
Avoid trapping water, use suitable hardware, and think carefully about how the piece will dry after rain.
13. Rustic TV Stand
A TV stand mixes old materials with modern technology.
That means accounting for:
- Cables
- Ventilation
- Equipment depth
- Shelf loading
- Access
The best design does not pretend cords and electronics do not exist.
It simply hides or manages them gracefully.
14. Blanket Chest
A wooden chest feels almost timeless.
It teaches:
- Panel construction
- Case assembly
- Hinges
- Lid design
- Wood movement
- Interior finishing
A well-built chest can easily become one of those pieces that stays in a family longer than anyone expected.
15. Farmhouse Side Table
Small projects deserve more respect than they get.
A side table teaches:
- Accurate cutting
- Joinery
- Squareness
- Sanding
- Finishing
It is also a smart test bed for new techniques before you try them on a full dining table.
How to Make New Wood Look Old Without Making It Look Fake
This is where restraint becomes a skill.
A common mistake is to build a beautiful piece and then assault it with chains, hammers, bolts, and nails until every square inch looks damaged.
The wood is distressed.
But it does not look old.
Natural wear follows patterns.
Think about where hands touch furniture.
Where shoes strike it.
Where chairs bump into it.
Where drawers are pulled open.
Where elbows rest.
That is where age appears first.
Distress the Places That Would Actually Wear
Before making a mark, ask:
Could this really have happened?
Focus on:
- Corners
- Edges
- Feet
- Handles
- High-touch surfaces
Leave quieter areas alone.
A little unevenness creates history.
Too much creates noise.
Wire-Brushing and Grain Texture
Wire brushing can bring out the difference between harder and softer parts of the grain.
Used carefully, the effect can resemble years of natural erosion.
The important word is carefully.
Brush with the grain.
Let the wood guide the texture.
Do not try to force every board into the same pattern.
Do Not Sand the Life Out of the Wood
There is a strange temptation in woodworking.
You buy rough, interesting lumber because it has character.
Then you sand it until it looks like every board at a furniture store.
Some surfaces should be smooth.
Dining tables need to be comfortable and easy to clean.
Armrests should feel good beneath a hand.
But not every surface needs identical preparation.
The side of an apron can carry more texture.
A stretcher can retain saw marks.
The underside of a shelf does not need the same refinement as a tabletop.
Let function decide how far you go.
Rustic Furniture Finishes: Where the Wood Finally Comes Alive
Finishing is one of those moments when the entire piece changes in minutes.
The grain deepens.
Color appears.
Knots become darker.
Texture starts to catch the light.
This is also where a bad choice can undo weeks of work.
Always test first.
Natural Oil Finishes
Oil finishes can create a warm, tactile surface that suits rustic furniture beautifully.
Rather than burying the wood under a thick film, many oil-based systems allow the grain and texture to remain visually present.
They are particularly attractive when you want the piece to feel like wood rather than coated material.
Follow the manufacturer’s instructions for application, curing, compatibility, and maintenance.
Wood Stain
Stain can transform inexpensive lumber.
Common rustic tones include:
- Walnut
- Warm brown
- Oak-inspired shades
- Weathered gray
- Dark brown
- Amber
The same stain may look completely different on pine and oak.
That is why scrap testing is not optional if color matters.
A ten-minute test can prevent a ten-hour repair.
Whitewashing and Color Washing
A translucent light finish can soften the wood without hiding it.
This works especially well for:
- Farmhouse interiors
- Cottage furniture
- Scandinavian rustic styles
- Lighter rooms
The grain should still have a voice.
If the paint completely covers the material, you lose part of what made the wood interesting in the first place.
Milk Paint and Chalk-Style Finishes
Painted bases and natural tops are a classic combination.
Popular pairings include:
- White base with natural top
- Black base with oak top
- Cream with dark walnut stain
- Muted green with warm pine
Selective wear can reveal layers underneath.
Do not overdo it.
The best aged paint looks like it wore away.
Not like someone sanded every corner because a tutorial said to.
Wax Finishes
Wax can create a soft, low-sheen surface with a pleasant tactile quality.
It works well on some decorative or lightly used furniture.
But a waxed console table and a dining table live very different lives.
Think about spills, heat, cleaning, and wear before choosing purely by appearance.
Protective Topcoats for Hard-Working Furniture
Dining tables, desks, kitchen furniture, and other heavily used pieces may need more protection.
Depending on the project, appropriate options might include:
- Polyurethane
- Varnish
- Hardwax oil
- Other furniture-grade protective finishes
Check the product specifications carefully.
Durability, cure time, maintenance, and compatibility all matter.
Rustic furniture should look relaxed.
It should not be fragile.
Rustic Does Not Mean Chunky Everything
This is one of the easiest design traps.
A thick tabletop looks good.
So you add thick legs.
Then thick aprons.
Then thick braces.
Then thick shelves.
Soon the table looks capable of surviving a small earthquake but not especially graceful.
Good rustic furniture needs contrast.
If the top is heavy, let the base breathe.
If the legs are substantial, reduce visual weight elsewhere.
If the base is dark and dense, consider more open space above it.
Furniture is not just a collection of dimensions.
It has rhythm.
Understanding Visual Weight
Two pieces of wood with the same dimensions can feel completely different.
Why?
Because visual weight is influenced by:
- Color
- Grain
- Shadow
- Edge treatment
- Position
- Surrounding space
Dark wood often feels heavier.
Solid panels feel heavier than open frames.
Square legs feel heavier than tapered ones.
A little empty space can make a large piece feel lighter.
Learning to see that difference is one of the biggest steps from simply building furniture to designing it.
Mixing Wood and Metal Without Losing the Rustic Feel
Wood and metal work together because they are opposites.
Wood is warm, irregular, and organic.
Steel is cool, straight, and exact.
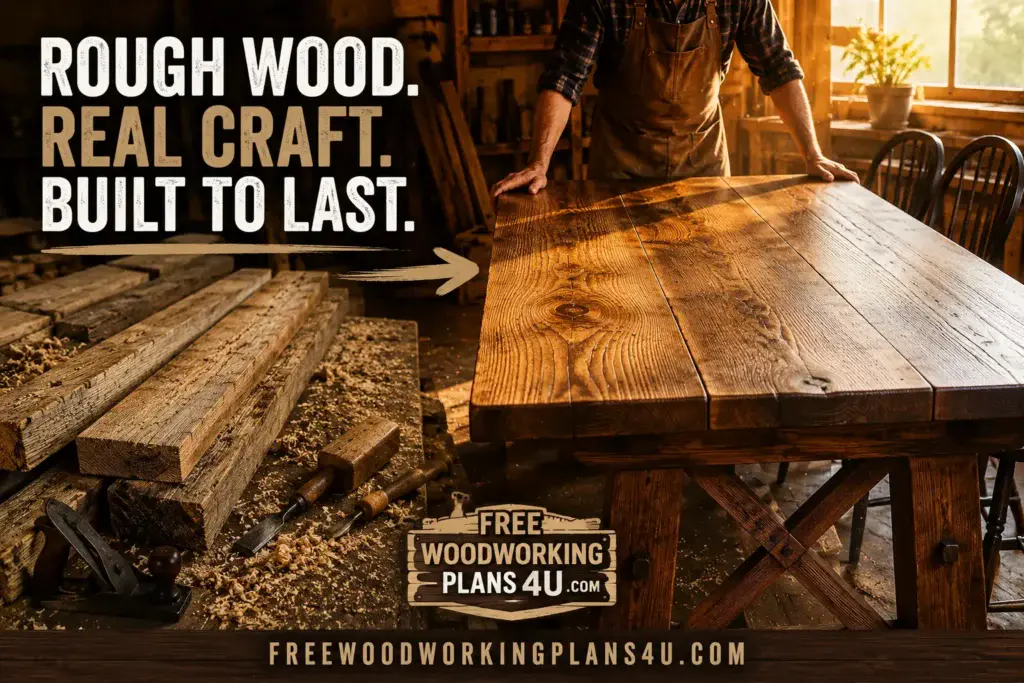
Put them together and each makes the other more noticeable.
Common combinations include:
- Wood tops with steel legs
- Black brackets with pine shelves
- Iron handles with reclaimed wood
- Metal stretchers with timber bases
This works especially well in industrial rustic and modern rustic furniture.
Just keep the hardware deliberate.
If metal appears random, it looks added.
If it supports the structure and design, it looks integrated.
Mistakes That Can Ruin Rustic Furniture
Rustic design forgives small visual imperfections.
It does not forgive poor engineering.
Some mistakes remain mistakes no matter how charming the grain looks.
Building With Wet Wood
Furniture built from wet or unstable lumber can change shape after construction.
It may twist, crack, cup, or open at joints.
The problem may not appear immediately.
That is what makes it dangerous.
Ignoring Seasonal Wood Movement
Wide solid-wood tops need room to move across the grain.
If you lock them rigidly to a base, something eventually has to give.
Sometimes the wood cracks.
Sometimes the fasteners fail.
Sometimes the base distorts.
Understand movement before attaching large solid panels.
Distressing Every Inch
Age is uneven.
Real furniture wears in specific places.
If every surface is equally distressed, the effect becomes theatrical.
One subtle mark can suggest history.
A hundred random marks can destroy it.
Leaving Too Many Visible Screws
Visible hardware can work beautifully in rustic furniture.
But it should look intentional.
Random screw heads everywhere often make furniture feel unfinished.
Decide in advance what you want the viewer to see.
Sanding Everything Identically
Different surfaces have different jobs.
A dining surface needs comfort and cleanability.
The back of a stretcher does not.
Do not erase character merely because the sander is already in your hand.
Choosing Style Over Strength
Furniture gets abused.
People lean on tables.
Children climb on benches.
Beds move.
Chairs tip.
Desks are dragged across floors.
Build for the real world, not the photograph.
What Does Rustic Furniture Cost to Build?
The answer depends heavily on the project.
A small pine side table and a large oak dining table live in entirely different budgets.
Still, most projects fall into four broad cost categories.
Lumber
This is usually the largest direct expense.
Softwoods may keep costs relatively low.
Thick hardwood can raise the price quickly.
Hardware
Do not forget the small things.
You may need:
- Screws
- Bolts
- Hinges
- Handles
- Drawer slides
- Brackets
- Tabletop fasteners
They rarely look expensive one at a time.
Together, they can become a meaningful part of the budget.
Learn more: 25 Best Woodworking Hardware Products Every Serious Woodworker Should Own (Ranked by Performance)
Glue, Sandpaper, and Finishing Supplies
Consumables matter too.
Budget for:
- Wood glue
- Abrasives
- Stain
- Oil
- Paint
- Brushes
- Rags
- Topcoat
A project is not finished when the last screw goes in.
Tools
Tools can make a first project appear expensive.
A new saw or sander may cost more than the lumber itself.
But tools are not consumed by one project.
If woodworking becomes a long-term hobby, that initial investment spreads across everything you build afterward.
Is Building Rustic Furniture Cheaper Than Buying It?
Sometimes.
Not always.
If you compare your handmade table with flat-pack furniture, building it yourself may not look like a bargain.
But that is not always a fair comparison.
Compare instead with solid-wood furniture of similar size, materials, construction, and customization.
Then the numbers change.
And cost is only part of the equation.
Building gives you control over:
- Dimensions
- Wood species
- Finish
- Hardware
- Joinery
- Repairability
- Style
You are not choosing from what happens to be available.
You are deciding exactly what should exist.
That is a different kind of value.
Can You Sell Handmade Rustic Furniture?
Yes, and rustic furniture has one advantage mass production struggles with:
customization.
Someone needs a dining table exactly 84 inches long.
Someone else has a narrow hallway where standard furniture will not fit.
Another customer wants a coffee table made from reclaimed wood that matches an existing room.
That is where custom woodworking becomes more than fabrication.
It becomes problem solving.
Rustic Furniture That Works Well for Local Sales
Possible products include:
- Dining tables
- Coffee tables
- Benches
- Console tables
- Nightstands
- Desks
- Outdoor furniture
- Shelves
- Storage chests
Large pieces are awkward to ship, which can make local sales particularly attractive.
Pickup or local delivery avoids the cost and complexity of packaging a massive solid-wood table for freight.
Learn more: 15 Most Profitable Woodworking Projects: What to Build, What It Costs, and What You Could Sell It For
Pricing Handmade Rustic Furniture Without Undervaluing Your Time
Do not look at $150 worth of lumber and assume you built a $200 table.
A realistic price needs to consider:
Materials + consumables + labor + overhead + selling costs + profit
That includes more than boards.
Think about:
- Electricity
- Tool wear
- Sandpaper
- Finishing supplies
- Shop space
- Delivery
- Packaging
- Administrative time
- Failed materials
Furniture making is skilled work.
Price it like skilled work.
A Straightforward Rustic Furniture Building Process
If you want the entire process stripped down to its essentials, it looks something like this.
Step 1: Decide What You Are Building
Know where the furniture will live and what it needs to do.
Step 2: Choose the Wood
Match the species to your budget, style, durability needs, and environment.
Step 3: Inspect the Lumber
Look for defects, instability, moisture issues, and hidden metal in reclaimed stock.
Step 4: Plan the Joinery
Choose joints based on structural demands rather than appearance alone.
Step 5: Mill and Cut the Components
Create accurate surfaces where the furniture needs them.
Step 6: Dry-Fit Before Glue
Catch problems while they are still easy to fix.
Step 7: Assemble Carefully
Use appropriate glue, fasteners, clamps, and squaring methods.
Step 8: Add Rustic Character
Preserve texture or add restrained distressing where it makes sense.
Step 9: Prepare the Surface
Sand according to how each part will actually be touched and used.
Step 10: Finish for the Life the Furniture Will Live
A decorative table and a kitchen island should not automatically receive the same finish.
Before You Call It Finished
Run your hands over the piece.
Look at it from across the room.
Sit on it if it is meant to hold people.
Open every drawer.
Check every joint.
Then ask:
- Is the furniture stable?
- Is the assembly square where necessary?
- Are the joints secure?
- Can solid wood move seasonally?
- Are the edges comfortable?
- Are there splinters?
- Does the distressing feel believable?
- Is the finish suitable for the intended use?
- Is the hardware secure?
- Is the piece safe under realistic loads?
- Does every visible detail feel intentional?
That last question often tells you more than all the others.
Rustic Woodworking Furniture FAQ
I am a beginner. Is rustic furniture actually a good place to start?
Yes.
In fact, rustic furniture is one of the friendliest places to begin because the designs often use straightforward shapes and relatively forgiving materials.
Start with a side table, shelf, bench, or coffee table.
You will learn measuring, cutting, drilling, assembly, squaring, sanding, and finishing without immediately dealing with difficult chair geometry or complicated cabinetry.
What wood should I use if I want that classic rustic look?
Pine, oak, cedar, maple, and reclaimed lumber can all work.
Pine is affordable and easy to work.
Oak is strong and has pronounced grain.
Cedar suits many outdoor and cabin-style pieces.
Maple creates a cleaner modern-rustic feel.
Reclaimed lumber brings naturally aged character.
The best choice depends on how the furniture will be used.
Is pine really strong enough for furniture?
For many projects, yes.
Pine can work well for tables, benches, shelves, beds, and storage furniture when the design and joinery are appropriate.
It dents more easily than many hardwoods, but that softness can blend naturally into rustic furniture over time.
Do I need reclaimed wood to make furniture look authentic?
No.
New lumber can make excellent rustic furniture.
Authenticity comes from the entire design:
- Proportion
- Joinery
- Texture
- Hardware
- Finish
- Wood selection
Old wood helps, but it is not mandatory.
How do I make new wood look rustic without ruining it?
Use subtle techniques.
Soften edges.
Add texture selectively.
Wire-brush the grain.
Distress only the areas that would naturally wear.
Then use a finish that enhances depth rather than hiding the wood.
The secret is not doing more.
It is knowing when to stop.
Should rustic furniture feel rough?
Not where people touch it.
A tabletop should feel pleasant beneath your hand.
A chair arm should not splinter.
A bench seat should be comfortable.
Other less-touched areas can retain more texture.
Rustic should feel natural, not unfinished.
What is the best finish for rustic furniture?
There is no universal best finish.
Oils and hardwax-style finishes can preserve a natural appearance.
Film-forming finishes may offer more protection on heavily used surfaces.
Choose based on:
- Wood species
- Wear
- Moisture exposure
- Desired sheen
- Maintenance
- Intended use
Always follow the product manufacturer’s instructions.
Can I build rustic furniture from 2×4 lumber?
Yes.
Construction lumber can work well for certain tables, benches, outdoor pieces, and chunky farmhouse projects.
Choose the boards carefully.
Allow them to acclimate where appropriate.
Watch for twisting, bowing, and moisture.
And remember that construction lumber may need extra preparation if you want a more refined furniture-quality result.
How do I stop a solid-wood tabletop from cracking?
The key is allowing seasonal movement.
Solid wood expands and contracts across the grain.
Your attachment method should hold the top securely while still allowing that movement.
Ignoring this is one of the most common causes of cracks, splits, and distorted table bases.
Is homemade rustic furniture actually worth building?
That depends on what you value.
If your only goal is the cheapest possible furniture, mass-produced products may win.
If you care about solid wood, custom dimensions, repairability, craftsmanship, and creating something that may still be useful decades from now, the calculation changes.
For many woodworkers, that is the entire reason to build.
Products / Tools / Resources
You do not need a workshop full of machines to start building rustic woodworking furniture. A few reliable tools will take you a long way, and you can add more as your projects become more ambitious.
Measuring and Layout Tools
A good tape measure, combination square, straightedge, pencils, and marking tools are not glamorous purchases, but they are the foundation of accurate furniture.
Rustic style does not rescue poor layout.
If the marks are wrong, the cuts will be wrong too.
Circular Saw or Miter Saw
A circular saw is one of the most versatile tools you can own and becomes far more accurate with a good cutting guide.
A miter saw is excellent if you frequently work with dimensional lumber and want fast, repeatable crosscuts.
Choose based on the work you actually do.
Drill / Driver
A dependable drill/driver handles drilling, fastening, countersinking, hardware installation, and many beginner joinery methods.
It will probably be one of the most frequently used tools in your shop.
Pocket-Hole Jig
For beginners who want clean furniture joints without immediately learning traditional mortise-and-tenon construction, a pocket-hole jig can be extremely useful.
It is particularly good for table aprons, benches, frames, and cabinet components.
Clamps
Buy clamps gradually, but keep buying them.
Useful types include:
- F-style clamps
- Bar clamps
- Parallel clamps
- Pipe clamps
- Small utility clamps
The project determines which ones matter most.
Random-Orbit Sander
A random-orbit sander speeds up surface preparation considerably while still leaving room for hand sanding and intentional texture.
For rustic work, the goal is control rather than making every surface glass-smooth.
Moisture Meter
A moisture meter can help you understand the condition of lumber before you commit it to a large solid-wood project.
It is particularly useful for hardwoods, reclaimed lumber, and expensive table builds where unexpected movement could become costly.
Woodworking Chisels
Even in a power-tool shop, chisels remain useful.
They help with:
- Cleaning joints
- Adjusting mortises
- Fitting hardware
- Trimming small areas
- Refining details
A few sharp chisels are more useful than a large collection of dull ones.
Furniture-Grade Wood Glue
Use adhesive appropriate for the wood, joint, environment, and assembly.
Outdoor furniture may have different requirements from an indoor nightstand.
Stains, Oils, Paints, and Protective Finishes
Keep small test boards whenever possible.
They let you experiment with:
- Stain color
- Oil
- Wax
- Paint
- Whitewash
- Topcoats
before touching the actual furniture.
That habit alone can save an enormous amount of frustration.
Reclaimed Lumber Preparation Tools
If you work with reclaimed timber, consider tools and supplies that help inspect and prepare it safely, including appropriate metal-detection methods, stiff brushes, scrapers, and protective equipment.
Old wood can be beautiful.
It can also hide surprises.