
A hexagon shelf has a little more presence than a plain box, yet this one stays compact enough for a small wall. Its six sides form a neat display cubby; the clean outline comes from a simple discipline: mark every piece from the same edge, and let the measurements do the work.
This plan makes one regular hexagon with a flat top and bottom. The outside measures 12 inches from point to point, and the shelf cavity reaches 3½ inches from the back panel to the front.
Quick answer: Cut six equal 1×4 sides to 6 inches from outside long point to outside long point, with opposing 30° miters at both ends. Together, the sides make a regular hexagon about 12 inches across its points and 10.4 inches across its flats. Add a ¾-inch plywood back and choose wall fasteners to suit the wall and the weight you intend to display.
Start With the Wall: Hexagon Shelf Dimensions
This is a small display cubby. The 1×4’s 3½-inch width gives the shelf its depth; its actual ¾-inch thickness forms the rim around the opening.
| Measurement | Inches | Metric |
|---|---|---|
| Side length, outside long point to outside long point | 6 in | 152 mm |
| Outside width, point to point | 12 in | 305 mm |
| Outside height, flat to flat | 10.4 in | 264 mm |
| Approximate clear opening, point to point | 10.3 in | 261 mm |
| Approximate clear opening, flat to flat | 8.9 in | 226 mm |
| Shelf cavity depth | 3½ in | 89 mm |
| Projection from wall with ¾-in back panel | About 4¼ in | About 108 mm |
Treat the opening measurements as a close guide, not a promise to the nearest fraction. Lumber varies, and a small error at a miter can change the fit. Assemble the frame dry first, then use the real frame to size the plywood back.
Make the Size Fit Your Wall
Before you reach for a saw, decide how much wall the shelf should occupy. A regular hexagon can be measured across its opposite points or across its opposite flat sides; those are different dimensions, so write down which one you are using.
Let s stand for the length of one side:
- Outside width across opposite points = 2 × s
- Outside height across the flats = 1.732 × s
- In this plan, s = 6 inches, so the outside measures 12 inches point to point and about 10.4 inches flat to flat.
Want a 16-inch-wide shelf instead? Divide 16 by two: each side should measure 8 inches at its outside long points. That gives you a height of about 13.9 inches across the flats.
The wood’s ¾-inch thickness also takes up space inside the frame. On the 12-inch version, expect a clear opening of about 10.3 inches point to point and 8.9 inches flat to flat. If the shelf needs to fit a particular spot, include room for its mounting hardware and the objects you plan to display.
The 30° Miter That Makes the Corners Meet
The number on the saw is 30 degrees, measured from a square cut. When two of those miters meet, the sides change direction by 60 degrees. The inside corner of the completed hexagon is 120 degrees.
There’s one measurement detail that can save a whole set of boards: measure each side from outside long point to outside long point. The short points along the inner edge will be closer together. Don’t use them as the cut-length reference.
Make a test joint with scrap before cutting the project pieces. If the two ends don’t meet cleanly, adjust the setup now. It’s much easier to correct one test cut than to explain six stubborn corners to a clamp.
Recommended guide: How to Read Exploded View Woodworking Diagrams Like a Pro: Decode Hidden Parts, Joinery, Hardware, and Build Sequence
The Cut List: Six Sides and One Back
Straight, dry stock makes the joints easier to fit. A standard 1×4 is typically about ¾ inch thick by 3½ inches wide after milling. Measure your board anyway; use its actual size when checking clearances.
| Part | Quantity | Material and cut |
|---|---|---|
| Hexagon sides | 6 | 1×4 lumber, 6 in long point to long point; 30° miter at both ends |
| Back panel blank | 1 | ¾-in plywood, at least 14×14 in; trace and trim to fit the assembled frame |
| Wall fasteners | 2 or more | Choose for the wall, mounting layout, and intended load |
| Assembly supplies | As needed | Wood glue, masking tape or a band clamp, and suitable panel fasteners |
One 8-foot 1×4 leaves ample room for six side blanks, saw kerfs, and a test cut. Rough-cut the sides a little long—about 6½ to 7 inches—then trim each one to the 6-inch long-point measurement. A 14-inch square of ¾-inch plywood gives you space to trace the frame and trim the back to fit.
Pine or poplar is straightforward to work with for a light display shelf. Look for straight pieces without large knots near the miter ends. Paint-grade stock suits an opaque finish; if you want clear finish, choose boards whose grain you’ll enjoy seeing every day.
Recommended guide: How to Buy the Right Lumber for Any Woodworking Project: Choose the Species, Grade, Thickness, and Quantity
Before the First Cut: Tools and a Safe Setup
Set out a tape measure, pencil, combination square, clamps or a band clamp, drill and bits, jigsaw for the back panel, sandpaper, and a secure saw setup for the 30° miters.
These sides need to be held securely while you cut. Depending on your saw and the shelf’s orientation, you may need to stand each board on its ¾-inch edge in a purpose-built support jig.
Check that the saw can cut the stock in that position and that the board can be clamped firmly against the fence. Never hold the board upright by hand while cutting. If your saw cannot support the cut securely, have a woodworking shop make the miters or use a setup designed for this job.
Wear eye and hearing protection, keep your hands outside the blade path, and follow the saw manufacturer’s instructions. Make a test cut and fit a test joint before working on the finished pieces.
Recommended guide: Beginner Woodworking Safety Checklist: 47 Things to Check Before You Make Your First Cut
Cut Six Matching Sides Without Losing Your Reference Edge
- Choose the outside edge. Mark the narrow edge of each board that will form the shelf’s outside rim. Keep that reference visible through the cuts.
- Rough-cut six blanks. Leave each one about 6½ to 7 inches long for trimming.
- Set the saw to 30°. Check the setting on scrap. Each board needs opposing miters so its outside long points land at the finished 6-inch length.
- Trim to length. Cut the first miter, measure 6 inches along the outside reference edge, mark the other long point, and cut the opposite miter. Once the first side fits, use a stop block for the other five.
- Number the pieces and dry-fit. Lay the sides out in order as a hexagon. Check that the joints meet and the frame sits flat.
Consistency matters more than speed here. Use the same reference edge and saw setup on all six boards. If the first test joint opens at the corner, stop and correct the setup. Don’t pull a bad angle closed by force; the tension can leave the frame twisted.
Close the Frame, One Corner at a Time
Arrange the six sides on a flat work surface, keeping their outside edges aligned. Masking tape across the joints or a band clamp can hold the dry-fitted shape together. Check that the top and bottom sides are level and the opposite points line up.
When the fit looks even, open one joint at a time and spread a thin layer of wood glue over the mating faces. Bring the sides back together, then tighten the band clamp gradually so pressure travels around the frame rather than crushing one corner first.
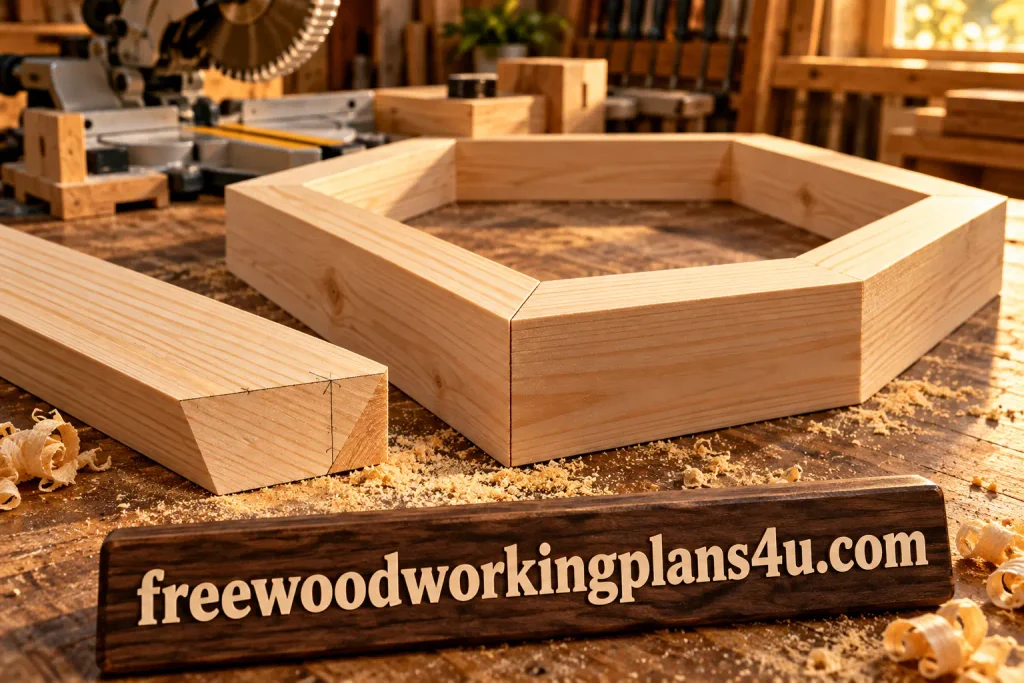
Wipe away glue squeeze-out if the glue maker’s instructions allow it. Leave the frame clamped for the time stated on the label. As it sets, make sure the shelf stays flat; if one edge lifts, ease the clamp and correct the alignment before the glue hardens.
The Back Panel Turns a Frame Into a Shelf
Once the frame is dry, place it on the ¾-inch plywood and trace around its outside. Cut just beyond the line with a jigsaw, then sand the panel until it sits flush with the frame’s rear edge. Test the fit before adding glue.
Apply glue where the panel meets the frame and fasten it with appropriately sized brads or screws. Keep every fastener within the wood and check both the front and inside surfaces for a protruding point. The back closes the cubby, helps keep the hexagon square, and gives you a broad surface for planning the wall attachment.
A corner that overlaps or leaves a small gap is a cue to adjust the panel, not to force the frame out of shape. Once the adhesive has cured, sand the outside edge flush.
Mount It for the Wall You Actually Have
Hold the shelf where you want it, check that it is level, and mark the mounting points. Locate the framing with a stud finder or another reliable method. Check for hidden wiring or plumbing before drilling.
Where the layout permits, use at least two suitable fasteners through the plywood back and into framing. Choose fasteners long enough to pass through the back and engage the framing as directed by the fastener manufacturer. If the framing doesn’t line up with your preferred holes, adjust the shelf position or use a mounting system rated for your wall material and intended load. An ordinary drywall anchor has no universal weight capacity.
This is a compact display cubby, not a load-tested bookcase. Keep the contents light unless the shelf, joints, fasteners, and wall attachment have been designed and tested for heavier items. If screw heads show inside the cubby, cover them with matching plugs or a finish that suits the design.
Recommended guide: Free Woodworking Shelf Plans: 25 Easy DIY Shelf Projects You Can Build This Weekend
Let the Finish Bring Out the Shape
Sand the frame and back panel until the surfaces feel smooth. Remove dried glue, but don’t round the miter corners so much that the crisp outline disappears. Start with a grit suited to the wood’s condition and move finer before finishing.
For paint, fill small surface flaws with paintable filler and use a primer recommended for your wood and paint. For a clear finish, test on an offcut first; even boards from the same stack can take stain differently. Follow the finish label and let it cure before mounting the shelf or placing anything inside.
Learn more: Woodworking Finishing Supplies for Beginners: 17 Essentials for a Smooth, Durable Finish
Questions That Come Up While Planning a Hexagon Shelf
What angle should I set for the corners?
Set each end to 30 degrees from a square crosscut. Two adjoining cuts make a 60-degree turn, leaving a 120-degree inside corner.
Do I measure from the long points or the short points?
For this plan, measure each side from outside long point to outside long point. The finished measurement is 6 inches, producing an outside width of about 12 inches across opposite points.
How deep will the shelf be?
The 1×4 is about 3½ inches wide, which makes the cavity about 3½ inches deep. The ¾-inch back panel adds roughly another ¾ inch to the distance the shelf projects from the wall.
What if my wall needs a wider shelf?
Divide your desired point-to-point width by two to get the side length. Keep the 30-degree miters, recalculate the cut list, and make sure both the larger shelf and its mounting layout suit the wall and the items you intend to display.
Is it safe for books or heavier objects?
There’s no single weight rating for this plan. The capacity depends on the lumber, joints, back-panel attachment, fasteners, wall, and installation. Use it for lightweight display items unless the complete shelf and mounting arrangement have been properly tested for more.
Can I make it without a miter saw?
Yes, if you use another saw setup designed to hold the stock securely at 30 degrees. A woodworking shop can also cut the miters. Whichever route you choose, accurate repeatable cuts matter; don’t attempt an unstable freehand cut.
Products / Tools / Resources
For this build, you’ll need one straight 8-foot 1×4, a ¾-inch plywood offcut at least 14×14 inches, wood glue, clamps or a band clamp, and panel fasteners suited to your assembly. Gather a tape measure, square, drill, jigsaw, sandpaper, and a secure setup for repeatable 30° cuts.