
Featured Snippet
Woodworking and carpentry are built on far more than tools and technique. They combine material knowledge, precision, design, problem-solving, and patience into a skill set that develops over time. Whether your goal is building your first shelf, crafting heirloom furniture, or pursuing a professional career, this roadmap walks you through every stage—from understanding wood and mastering essential tools to advanced joinery, finishing, workshop organization, and business development.
Table of Contents
Introduction
Part 1: Understanding Woodworking & Carpentry Skills
- What Is Woodworking?
- Woodworking vs. Carpentry
- Types of Woodworking
- Core Skills Every Woodworker Needs
- Why Fundamentals Matter
Part 2: Building the Craftsman’s Mindset
- Why Mindset Shapes Every Skill
- The Four Stages of Learning
- Patience, Practice, and Persistence
- Building Habits That Lead to Mastery
- Lifelong Learning
Part 3: Essential Workshop Safety Fundamentals
- Building a Safety-First Mindset
- Personal Protective Equipment (PPE)
- Safe Hand Tool and Power Tool Practices
- Workshop Organization
- Dust Collection and Fire Safety
- Developing Safe Habits
Part 4: Learning Wood as a Material
- Understanding Hardwood vs. Softwood
- Wood Grain and Figure
- Moisture Content and Wood Movement
- Natural Defects and Lumber Selection
- Preparing Wood for Projects
- Sustainable Woodworking
Part 5: Measuring, Marking, and Layout Mastery
- Why Precision Matters
- Essential Measuring and Layout Tools
- Reference Faces and Story Sticks
- Accurate Marking Techniques
- Common Measuring Mistakes
Part 6: Hand Tools Every Beginner Should Master
- Essential Hand Tools
- Hammers, Chisels, and Hand Saws
- Hand Planes
- Clamps, Files, and Layout Tools
- Sharpening and Tool Maintenance
Part 7: Power Tool Skills That Transform Productivity
- Choosing the Right Power Tools
- Table Saw Fundamentals
- Miter Saw, Circular Saw, and Jigsaw
- Routers and Router Bits
- Drills, Sanders, Jointers, and Planers
- Dust Collection and Shop Efficiency
Part 8: Joinery Techniques—The Foundation of Strong Projects
- Why Joinery Matters
- Butt, Miter, Rabbet, and Dado Joints
- Tongue and Groove
- Mortise and Tenon
- Dovetails and Box Joints
- Dowels, Biscuits, and Pocket-Hole Joinery
- Dry Fitting and Clamping
Part 9: Sanding, Surface Preparation, and Wood Finishing
- The Importance of Surface Preparation
- Understanding Sandpaper Grits
- Hand Sanding vs. Power Sanding
- Preparing Wood for Finish
- Choosing the Right Finish
- Applying Professional-Quality Finishes
- Surface Inspection and Final Refinement
Part 10: Furniture Construction and Project Planning
- Designing for Purpose
- Sketches and Working Drawings
- Understanding Proportion
- Material Selection
- Planning for Wood Movement
- Cut Lists and Workflow
- Dry Assembly
- Designing for Strength and Longevity
Part 11: Intermediate Skills That Separate Hobbyists from Craftsmen
- Building Precision Through Habit
- Reading Wood Grain
- Consistency Over Perfection
- Workflow Optimization
- Machine Setup
- Repeatability
- Problem Solving and Corrections
- Developing Your Personal Style
Part 12: Advanced Techniques Used by Professionals
- Advanced Joinery
- Veneering and Grain Matching
- Steam Bending and Bent Laminations
- Kerf Bending
- Inlay and Decorative Techniques
- Carving
- Complex Furniture Construction
- Professional Surface Preparation
- Precision Glue-Ups
Part 13: Workshop Organization, Maintenance, and Efficiency
- Designing an Efficient Workshop
- Functional Work Zones
- Building the Ideal Workbench
- Tool and Lumber Storage
- Shop Furniture
- Tool Maintenance
- Sharpening
- Dust Collection
- Lighting and Climate Control
- Workshop Checklists
Part 14: Turning Your Woodworking Skills into a Career or Business
- Deciding When You’re Ready
- Choosing a Woodworking Niche
- Building a Professional Portfolio
- Pricing Your Work
- Finding and Retaining Clients
- Marketing Your Craft
- Managing Projects and Customer Expectations
- Growing a Sustainable Woodworking Business
Part 15: Continuing Your Journey Toward Master Craftsmanship
- Building Consistently
- Challenging Yourself With Every Project
- Learning From Great Craftspeople
- Investing in Knowledge
- Learning From Mistakes
- Building Furniture That Matters
- Developing Patience
- Preserving the Craft
- Never Stop Building
Frequently Asked Questions (FAQ)
Recommended Products, Tools, and Learning Resources
Bonus #1: The 90-Day Woodworking Skill Accelerator
- Week-by-Week Learning Plan
- Practice Schedule
- Progressive Skill Development
- Recommended Projects
Bonus #2: The Professional Woodworker’s Master Checklists Collection
- Project Planning Checklist
- Milling Checklist
- Assembly Checklist
- Surface Preparation Checklist
- Finishing Checklist
- Workshop Maintenance Checklist
Bonus #3: The Ultimate Woodworking Project Progression Roadmap
- Stage 1: Beginner Projects
- Stage 2: Beginner-Intermediate Projects
- Stage 3: Intermediate Furniture Builds
- Stage 4: Advanced Furniture Making
- Stage 5: Professional-Level Projects
- Complete Skills Mastery Checklist
- Your Long-Term Woodworking Journey
Introduction
Every remarkable piece of woodworking begins long before a saw touches timber.
It begins with an idea.
Sometimes that idea arrives quietly—a simple bookshelf for an empty wall, a dining table built for family gatherings, or a workbench sturdy enough to support years of future projects. Other times, it’s sparked by admiration. You watch an experienced craftsperson shape rough lumber into something elegant and enduring, and a thought settles in: I’d love to learn how to do that.
That single thought has launched countless woodworking journeys.
At first, the craft can seem overwhelming. There are unfamiliar tools, endless wood species, confusing joinery methods, and techniques that appear impossibly precise. It’s easy to believe that skilled woodworkers possess some hidden talent reserved for a fortunate few.
The truth is far more encouraging.
Professional craftsmanship is rarely built on natural ability alone. It’s built on repetition, curiosity, careful observation, and a willingness to improve one project at a time. Every experienced furniture maker once struggled with uneven cuts, joints that refused to fit, and measurements that somehow went wrong despite being checked twice.
Progress doesn’t happen in dramatic leaps.
It happens through hundreds of small victories that slowly reshape the way you work—and eventually, the way you think.
This guide is designed to help you follow that same path.
Rather than throwing techniques at random, it follows the natural progression that experienced woodworkers develop over years in the workshop. You’ll start with the foundations, learn why wood behaves the way it does, master the tools that matter most, and gradually build toward advanced furniture making, refined finishing, efficient workshop systems, and even the realities of earning a living through your craft.
Whether you’re setting up your first workspace or refining skills you’ve practiced for years, the goal remains the same: build knowledge that lasts as long as the projects you create.
Wood has a way of rewarding patience.
It remembers every careful measurement, every sharp tool, every thoughtful design choice, and every lesson learned from a mistake. Over time, those lessons become instinct, and the work begins to feel less like following instructions and more like having a conversation with the material itself.
That’s when woodworking becomes more than a hobby.
It becomes a lifelong craft.
Part 1: Understanding Woodworking & Carpentry Skills
Every Great Craft Begins With Understanding
Ask ten people what woodworking means, and you’ll probably hear ten different answers.
Some picture handcrafted dining tables that become family heirlooms.
Others imagine framing a house, restoring antique furniture, carving intricate details into hardwood, or building custom kitchen cabinets that fit a space perfectly.
All of those answers are correct.
Woodworking is not a single skill. It’s a collection of interconnected disciplines that blend technical precision with creativity. Every project—whether it’s a simple storage box or a bespoke piece of furniture—draws from the same core foundations.
Understanding those foundations is the first step toward lasting improvement.
Without them, every new project feels like starting from scratch.
With them, each project becomes another layer of experience that strengthens the one before it.
Woodworking vs. Carpentry: What’s the Difference?
The terms are often used interchangeably, yet they describe different areas of expertise.
Woodworking typically focuses on creating objects from wood with an emphasis on craftsmanship, precision, and finish. Furniture making, cabinetry, woodturning, carving, and decorative joinery all fall within this category.
Carpentry, by contrast, is generally associated with construction. Carpenters build the structural framework of buildings, install doors and trim, construct staircases, fit roofing systems, and complete countless tasks that shape homes and commercial spaces.
The distinction isn’t rigid.
Many professionals move comfortably between both disciplines, borrowing techniques and knowledge from each. A cabinetmaker may use carpentry principles for installation, while a finish carpenter often relies on fine woodworking skills to achieve seamless results.
What connects them is a shared respect for accuracy, durability, and thoughtful workmanship.
The Core Skills Every Woodworker Builds
Although projects vary widely, nearly every successful woodworker develops the same essential abilities.
Understanding the Material
Wood is unlike steel, plastic, or concrete.
It expands and contracts with seasonal humidity, varies from one board to the next, and rewards those who learn to read its grain, density, and natural movement.
The better you understand the material, the fewer surprises you’ll encounter during construction.
Measuring and Layout
Experienced craftspeople often say that most mistakes happen before the first cut.
Accurate measuring, careful marking, and thoughtful layout create the foundation for every successful project. When dimensions are consistent from the beginning, assembly becomes smoother, joinery fits more naturally, and finishing requires fewer corrections.
Precision starts with planning.
Tool Mastery
Every tool tells the wood to behave in a particular way.
Learning how to guide a hand plane, tune a chisel, or safely control a table saw is about more than operating equipment. It’s about understanding what each tool does best—and recognizing when another approach might produce a cleaner, safer, or more accurate result.
Mastery comes from deliberate practice rather than speed.
Joinery
Woodworking isn’t simply about cutting individual boards.
It’s about bringing those boards together into something stronger than their individual parts.
Strong joinery provides structure.
Well-executed joinery also creates visual harmony, allowing the craftsmanship to feel effortless even when the techniques behind it are anything but simple.
Surface Preparation and Finishing
The final appearance of a project is shaped long before stain or finish is applied.
Careful sanding, clean surfaces, crisp edges, and patient preparation allow finishes to enhance the wood rather than disguise flaws.
A beautiful finish begins with disciplined preparation.
Design and Planning
Good furniture solves problems.
It supports weight, fits its surroundings, accommodates natural wood movement, and remains functional for years.
Every successful project reflects thoughtful planning before construction ever begins.
Professionals don’t simply build.
They design with intention.
Why Learning in the Right Order Matters
One of the most common frustrations beginners experience is trying to learn everything at once.
New tools appear exciting.
Advanced joinery looks impressive.
Complex furniture projects are inspiring.
Yet without a solid foundation, those ambitions often lead to discouragement rather than progress.
Learning woodworking is much like constructing a building.
No one begins with the roof.
Each skill strengthens the next.
Understanding wood improves your joinery.
Better measuring improves your accuracy.
Cleaner tool control produces stronger assemblies.
Thoughtful planning makes finishing easier.
Progress isn’t random.
It’s cumulative.
Craftsmanship Is More Than Technical Skill
Spend enough time around experienced woodworkers and you’ll notice something interesting.
They don’t just approach projects differently.
They approach problems differently.
Instead of asking, “How quickly can I finish this?”, they ask, “What’s the best way to build this well?”
That subtle shift changes everything.
Craftsmanship is expressed in the details most people never notice: a perfectly fitted joint hidden inside a cabinet, grain selected to flow naturally across adjoining panels, or a surface prepared so carefully that light glides across it without interruption.
Those choices rarely happen by accident.
They grow from habits developed over months and years of careful work.
And those habits begin long before advanced techniques enter the picture.
They begin with the mindset of someone willing to learn patiently, improve consistently, and respect both the material and the process.
That mindset will shape every skill you build from this point forward.
Next up (Part 2): Building the Craftsman’s Mindset — discover why patience, deliberate practice, problem-solving, and disciplined habits often matter more than expensive tools, and how adopting a professional way of thinking accelerates every stage of your woodworking journey.
Part 2: Building the Craftsman’s Mindset
Before you learn to cut a perfect dovetail or flatten a tabletop to flawless precision, there’s something even more important to build.
Your mindset.
It’s easy to believe that woodworking is mostly about techniques, tools, or natural talent. Spend enough time around experienced craftspeople, however, and you’ll notice a different pattern. The people who produce consistently exceptional work aren’t necessarily the ones with the largest workshops or the most expensive machinery.
They’re the ones who think differently.
They slow down when accuracy matters.
They stay curious when something goes wrong.
They see mistakes as feedback instead of failure.
Most importantly, they understand that craftsmanship isn’t a destination you eventually reach—it’s a way of approaching every project, no matter how simple or ambitious.
Long before your hands become more skilled, your thinking must become more intentional.
That’s where lasting progress begins.
Why Mindset Shapes Every Skill You Build
Imagine two beginners building the exact same wooden bench.
Both own similar tools.
Both follow the same plan.
Both have access to the same materials.
The first rushes through measurements, hoping small inaccuracies won’t matter.
The second pauses frequently, checks each step, and willingly remakes a part that doesn’t meet their standards.
Months later, their projects—and their abilities—look very different.
The difference wasn’t talent.
It was the quality of the decisions made along the way.
Every successful woodworker develops habits that quietly improve every future project. Those habits eventually become automatic, but they always begin as conscious choices.
Stop Chasing Perfection—Start Chasing Progress
One of the fastest ways to lose confidence is believing every project should look professional.
It won’t.
And it doesn’t need to.
The first box you build may have uneven corners.
Your first cabinet door might not close perfectly.
The finish on your first tabletop may reveal scratches you didn’t notice before applying it.
That’s normal.
In fact, those early imperfections often become your greatest teachers.
Each one points directly toward the next skill worth improving.
Instead of asking:
“Why isn’t this perfect?”
Ask:
“What did this project teach me that the previous one couldn’t?”
That simple shift keeps motivation alive because every build becomes valuable—even the frustrating ones.
The Four Stages Every Craftsperson Experiences
Skill development rarely happens in a straight line.
Most woodworkers move through four recognizable stages.
Stage One: You Don’t Yet Know What You Don’t Know
Everything feels exciting because nearly every technique is new.
Confidence often grows faster than experience.
This stage is enjoyable—but also where many avoid learning the fundamentals because the possibilities seem endless.
Stay curious, but stay humble.
Stage Two: Reality Arrives
Eventually, you begin noticing the gap between what you imagine and what you’re able to build.
This stage can feel discouraging.
Ironically, it’s also where real learning begins.
You’re finally seeing details that once went unnoticed.
That awareness is evidence of growth—not failure.
Stage Three: Skill Through Deliberate Practice
Projects become more consistent.
Measurements improve.
Joinery fits better.
Mistakes still happen, but they’re easier to diagnose and correct.
You’re no longer guessing as often.
You’re making informed decisions.
This stage rewards patience more than speed.
Stage Four: Confidence Without Complacency
Years of repetition transform many skills into instinct.
Experienced woodworkers often work calmly because basic operations no longer consume their attention.
That mental space allows them to focus on design, refinement, and problem-solving.
Interestingly, the most accomplished craftspeople rarely claim they’ve mastered everything.
The more they learn, the more opportunities for improvement they discover.
Patience Is a Competitive Advantage
Modern life rewards speed.
Woodworking rewards patience.
Glue cures on its own schedule.
Wood adjusts to humidity at its own pace.
Finishes dry when they’re ready—not when you’re impatient.
Trying to rush these processes almost always creates more work later.
Patience isn’t wasted time.
It’s part of the build.
Every hour spent allowing materials to behave naturally often saves several hours of repair.
Professionals understand this instinctively.
They don’t fight the material.
They work with it.
Learn to Fall in Love With Repetition
Repetition has an unfair reputation.
People often associate it with boredom.
Craftspeople experience it differently.
Every repeated cut teaches your hands a little more.
Every sharpened chisel improves your touch.
Every carefully fitted joint develops muscle memory that no book or video can replace.
Excellence isn’t created by occasional inspiration.
It’s built through thousands of thoughtful repetitions that slowly become effortless.
The projects may change.
The principles remain the same.
Curiosity Will Take You Further Than Confidence
Confidence helps you begin.
Curiosity keeps you improving.
Ask questions constantly.
Why did that board warp?
Why did this finish absorb unevenly?
Why does this joint feel stronger?
Why did this cut produce tear-out?
Professional woodworkers rarely stop asking “why.”
Every answer deepens their understanding of the craft.
Curiosity transforms mistakes into lessons and ordinary projects into opportunities for discovery.
Learn to Observe Before You Act
One of the least appreciated woodworking skills has nothing to do with tools.
It’s observation.
Experienced craftspeople spend surprising amounts of time simply looking.
They study:
- Grain direction before cutting.
- Light reflecting across a surface.
- How clamps influence alignment.
- Tiny gaps in joinery.
- The way finishes change color as they cure.
These observations allow them to solve problems before those problems become permanent.
The best woodworkers don’t react quickly.
They notice early.
Your Tools Reflect Your Habits
It’s tempting to believe that buying better tools automatically produces better furniture.
Every experienced woodworker knows otherwise.
A premium hand plane performs poorly if it’s neglected.
An expensive table saw cannot compensate for inaccurate measuring.
The value of a tool depends largely on the habits of the person using it.
Develop routines such as:
- Returning tools after every use.
- Sharpening before performance declines.
- Cleaning equipment regularly.
- Checking machine alignment before important cuts.
- Respecting every tool, regardless of price.
Good habits elevate ordinary tools.
Poor habits limit exceptional ones.
Build Systems Instead of Relying on Memory
Beginners often trust memory.
Professionals trust systems.
Simple examples include:
- Labeling every project component.
- Using consistent reference faces.
- Creating cut lists before milling lumber.
- Preparing clamps before glue-ups.
- Keeping frequently used measuring tools in fixed locations.
Systems reduce mental fatigue.
When your workshop handles routine decisions automatically, your attention stays focused on craftsmanship.
That’s one reason experienced woodworkers often appear calm, even during complex projects.
Preparation removes unnecessary pressure.
Don’t Compare Your Beginning to Someone Else’s Middle
Social media and online galleries make it easy to forget how much experience lies behind a flawless piece of furniture.
You’re often seeing the result of thousands of hours of practice—not someone’s first attempt.
Comparison can become discouraging if you focus only on outcomes.
A healthier approach is to compare today’s work with your own previous projects.
Ask yourself:
- Are my measurements improving?
- Are my joints fitting more consistently?
- Am I making fewer repeated mistakes?
- Do I understand the material better than I did six months ago?
If the answer is yes, you’re already moving forward.
Progress deserves recognition.
Build Confidence Through Finished Projects
Many beginners abandon projects the moment they encounter difficulty.
Resist that temptation whenever possible.
Finished projects teach lessons unfinished ones cannot.
Completion reveals:
- What worked.
- What didn’t.
- Which techniques deserve more practice.
- Which mistakes matter—and which barely affect the final result.
Not every project needs to become a masterpiece.
Every project needs to become a teacher.
Respect the Material
Wood has been growing for decades before it reaches your workshop.
Every board carries a unique pattern, texture, and history.
Some pieces reveal dramatic grain.
Others remain quiet and understated.
Some stay remarkably stable.
Others challenge your understanding of movement and moisture.
The more respect you develop for the material, the more naturally your decisions begin aligning with its strengths rather than fighting its limitations.
Great craftsmanship begins with listening before shaping.
The Best Woodworkers Never Really Finish Learning
One of the most inspiring aspects of woodworking is that there is always another skill waiting just beyond your current abilities.
A cabinetmaker may decide to learn chair making.
A furniture builder might begin exploring carving.
A carpenter may discover traditional hand-tool techniques after decades of machine work.
The learning never ends.
And that’s precisely what keeps the craft endlessly rewarding.
No matter how experienced you become, another challenge will always invite you to improve—not because you aren’t good enough, but because woodworking is rich enough to keep offering new lessons for a lifetime.
Next up (Part 3): Essential Workshop Safety Fundamentals — you’ll learn the professional safety habits, protective equipment, workshop layouts, and risk-management techniques that allow skilled woodworkers to work confidently, efficiently, and safely for decades.
Bonus Sections Coming in Part 15
In addition to the complete FAQ and the Products / Tools / Resources section, the end of this guide will include three exclusive, practical bonuses:
Bonus #1: The 90-Day Woodworking Skill Accelerator – a week-by-week learning plan that tells you exactly what to practice, what projects to build, and which skills to master first for the fastest improvement.
Bonus #2: The Professional Woodworker’s Master Checklists Collection – printable pre-cut, glue-up, finishing, workshop maintenance, and project completion checklists that help reduce mistakes, improve consistency, and build professional-level habits on every project.
Bonus #3: The Ultimate Woodworking Project Progression Roadmap – a step-by-step project path that takes you from simple beginner builds to heirloom-quality furniture, showing exactly which projects to tackle next, the skills you’ll develop at each stage, and a comprehensive mastery checklist to help you track your progress from novice to professional.
Part 3: Essential Workshop Safety Fundamentals
Every experienced woodworker has a story.
Sometimes it’s about a project that came together beautifully after weeks of careful work.
Sometimes it’s about an old tool that has been trusted for decades.
And sometimes—spoken more quietly—it’s about a mistake that could have ended very differently.
Those stories matter because they remind us of something every beginner eventually learns:
Safety isn’t a rulebook. It’s a skill.
The best craftspeople don’t work safely because they’re afraid of their tools.
They work safely because they respect them.
That respect allows them to work with confidence instead of hesitation, focus instead of distraction, and consistency instead of luck.
A workshop should be a place where creativity thrives, not where unnecessary risks are taken. Long before you master advanced joinery or produce furniture worthy of passing down through generations, you must first learn how to protect the one tool that can never be replaced:
Yourself.
Why Safety Is the First Professional Skill
Ask a seasoned woodworker what the most important tool in the shop is, and many won’t point to a table saw or a premium hand plane.
They’ll point to the habits they’ve developed over years of careful work.
Professional safety isn’t built around fear.
It’s built around preparation.
When safety becomes second nature, your mind is free to focus on craftsmanship rather than worrying about avoidable mistakes.
Good habits reduce stress.
They improve accuracy.
They increase confidence.
And perhaps most importantly, they make it possible to enjoy woodworking for decades rather than seasons.
The Four Pillars of Workshop Safety
Every safe workshop rests on four interconnected foundations.
Ignore one, and the others become less effective.
Master all four, and they support nearly every task you’ll perform.
Personal Safety
This begins with protecting your body.
No project is important enough to justify unnecessary risk.
Professional woodworkers prepare themselves before they prepare their materials.
Tool Safety
Every tool has a proper purpose.
Understanding how it works—and how it can fail—is just as important as learning how to use it.
Workspace Safety
A well-organized workshop prevents countless accidents before they have a chance to happen.
Good layout is a safety feature, not just a convenience.
Mental Safety
Perhaps the most overlooked pillar of all.
Your focus, energy, and decision-making directly affect every cut you make.
Even the safest machine becomes dangerous when operated by someone who is tired, distracted, frustrated, or rushing.
Personal Protective Equipment: Small Habits, Lifelong Benefits
Protective equipment often feels unnecessary—right up until the moment it’s needed.
Experienced craftspeople wear it automatically because they’ve learned an important truth:
You rarely get a second chance with your eyesight or hearing.
Eye Protection
Wood chips, dust, broken blades, and flying debris can travel faster than your reflexes.
Quality safety glasses should become as routine as picking up a measuring tape.
Wear them before the machine starts.
Not afterward.
Hearing Protection
Many woodworking machines generate sound levels capable of damaging hearing over time.
Unlike a cut or bruise, hearing loss happens gradually.
You usually don’t notice it until it’s permanent.
Whether you choose earmuffs or properly fitted earplugs, protecting your hearing today helps preserve it for years of future projects.
Respiratory Protection
Wood dust is more than a cleaning problem.
Fine airborne particles can remain suspended long after the machine stops running.
Over time, repeated exposure may affect respiratory health, especially when working with certain wood species or manufactured wood products.
Whenever dust cannot be controlled at the source, appropriate respiratory protection becomes essential.
Clean air is just as important as clean cuts.
Appropriate Clothing
Loose sleeves, dangling jewelry, scarves, or untied long hair can become hazards around rotating machinery.
Professional workshop clothing is surprisingly simple.
Wear clothing that allows comfortable movement while eliminating anything that could become caught in moving parts.
Secure footwear also provides stability when handling heavy materials or standing for long periods.
Safe Tool Use Starts Before the Switch Is Turned On
Many accidents occur before a cut is ever made.
Develop the habit of asking a few simple questions before using any tool:
- Is the blade sharp?
- Is the fence properly aligned?
- Is the material stable?
- Do I understand exactly where my hands will be?
- Have I planned the entire cut from start to finish?
If any answer is uncertain, pause.
A few extra seconds of preparation often prevent hours—or far worse—of regret.
Sharp Tools Are Safer Than Dull Ones
This idea surprises many beginners.
Intuitively, a sharper blade seems more dangerous.
In reality, dull tools often require greater force, increasing the chance of slipping or losing control.
Sharp tools:
- Cut predictably.
- Require less pressure.
- Produce cleaner results.
- Reduce fatigue.
- Improve accuracy.
Routine sharpening isn’t only about better craftsmanship.
It’s one of the simplest ways to improve workshop safety.
Keep Your Hands Out of the Danger Zone
Every woodworking operation should begin with a clear understanding of where your hands will travel.
Professional woodworkers constantly think several seconds ahead.
Before making a cut, they visualize:
- Where the workpiece will move.
- Where the blade will end.
- Where their hands will remain.
- What could happen if the material shifts unexpectedly.
That habit creates a margin of safety that experience alone cannot replace.
Whenever practical, use push sticks, push blocks, featherboards, clamps, or other work-holding devices to increase the distance between your hands and cutting edges.
Distance creates protection.
Respect Kickback—Even If You’ve Never Experienced It
Among the most serious hazards in woodworking is kickback.
It happens when a workpiece is unexpectedly caught by a rotating blade and thrown back toward the operator with tremendous force.
Kickback often occurs because of:
- Improper fence setup.
- Twisting material.
- Internal wood stress.
- Incorrect feed direction.
- Attempting unsafe cuts.
Understanding why kickback happens is far more valuable than simply memorizing rules.
The goal isn’t to fear machines.
The goal is to understand how they behave.
Knowledge builds confidence.
Build a Workshop That Supports Safe Decisions
Safety isn’t created by equipment alone.
It’s also shaped by the environment around you.
A thoughtful workshop includes:
- Clear walking paths.
- Stable work surfaces.
- Good lighting.
- Accessible electrical outlets.
- Adequate material support.
- Organized storage.
- Easy access to frequently used tools.
When everything has a place, your attention stays on the project rather than searching for equipment.
An organized shop reduces distractions—and distractions often lead to mistakes.
Lighting Is a Safety Tool
Poor lighting doesn’t simply make woodworking less enjoyable.
It makes it less accurate.
And inaccurate work frequently creates unsafe situations.
Quality lighting helps you see:
- Layout lines.
- Blade position.
- Grain direction.
- Surface defects.
- Clamp placement.
- Small obstacles.
Whenever possible, combine bright overhead lighting with focused task lighting at benches and machines.
You should never need to guess where a cut begins or ends.
Dust Collection Protects More Than Cleanliness
Walk into a professional workshop and you’ll notice something almost immediately.
The air feels different.
Effective dust collection serves several purposes at once.
It:
- Improves visibility.
- Protects your lungs.
- Reduces cleanup.
- Helps finishes remain cleaner.
- Extends machine life.
Even small workshops benefit from capturing dust as close to its source as possible.
Clean air is part of professional craftsmanship.
Fire Safety Is Part of Good Workshop Design
Wood, sawdust, solvents, finishes, and electrical equipment all exist in close proximity.
That combination deserves respect.
Simple precautions include:
- Store finishing products according to their instructions.
- Keep oily rags in appropriate containers to reduce fire risk.
- Avoid overloading electrical circuits.
- Maintain clean machine motors and ventilation.
- Keep an appropriate fire extinguisher within easy reach and know how to use it.
Fire prevention is far easier than fire response.
Lift Smart, Not Just Strong
Woodworking isn’t only about precision.
It’s also physical work.
Large sheet goods, hardwood slabs, and completed furniture can weigh far more than expected.
Whenever moving heavy materials:
- Plan your route first.
- Remove obstacles.
- Lift with your legs rather than your back.
- Ask for assistance when needed.
- Use carts or supports whenever practical.
Protecting your body today helps ensure you’ll still enjoy woodworking years from now.
Know When Not to Work
This may be the most valuable safety lesson of all.
Don’t work when you’re:
- Extremely tired.
- Angry.
- Distracted.
- Rushing to meet an unrealistic deadline.
- Under the influence of alcohol or impairing substances.
- Unable to concentrate fully.
Woodworking rewards clear thinking.
Even experienced professionals recognize when today’s best decision is simply to continue tomorrow.
There is always another day to finish a project.
There isn’t another opportunity to undo a serious injury.
Turn Safety Into a Habit, Not a Checklist
Beginners often think about safety only when someone reminds them.
Professionals rarely need reminders because safe behavior has become automatic.
They put on eye protection without thinking.
They check blade alignment before important cuts.
They clean the floor at the end of the day.
They return tools to their proper places.
They pause when something feels wrong.
These habits don’t slow them down.
Ironically, they make them faster.
When your workshop is organized, your tools are maintained, and your attention stays focused, every task flows more naturally.
Safety becomes invisible because it’s woven into every decision you make.
The Best Woodworkers Respect Every Tool—Every Time
Familiarity can create confidence.
It can also create complacency.
The table saw you’ve used a thousand times deserves the same respect it did on the first day.
The sharp chisel still demands careful handling.
The router doesn’t become less powerful simply because you’ve grown comfortable using it.
Experienced craftspeople understand this balance.
They work confidently without becoming careless.
They move efficiently without rushing.
They trust their skills without ignoring the risks.
That quiet discipline is one of the defining characteristics of professional craftsmanship.
Because in the end, the safest workshop isn’t the one with the most expensive equipment.
It’s the one where every decision reflects preparation, awareness, and respect.
Those habits protect more than your projects.
They protect every future project you’ll ever build.
Next up (Part 4): Learning Wood as a Material — discover why wood is unlike any other building material, how grain, moisture, density, and seasonal movement influence every project, and how understanding the nature of wood transforms ordinary construction into lasting craftsmanship.
Part 4: Learning Wood as a Material
Every woodworker remembers the first time they realized that wood has a mind of its own.
You measure carefully.
You make a perfect cut.
Everything fits beautifully.
Then, weeks later, a panel develops a slight gap, a tabletop moves with the seasons, or a cabinet door no longer closes quite the way it did on the day you installed it.
At first, it feels confusing.
Later, you understand something that every experienced craftsperson eventually learns:
Wood is never completely still.
Unlike metal, plastic, or manufactured materials, wood is alive in a different sense. Long after the tree has been harvested, the fibers continue responding to changes in temperature and humidity. They expand, contract, absorb moisture, release moisture, and reveal characteristics that make every board unique.
This unpredictability isn’t a flaw.
It’s part of what makes woodworking so rewarding.
The more you understand the material, the less you fight it—and the more naturally your projects stand the test of time.
Professional craftsmanship begins the moment you stop seeing lumber as a collection of boards and start seeing it as a living material with its own personality.
Wood Is More Than a Building Material
Walk through a lumberyard and you’ll notice something fascinating.
No two boards are truly identical.
Even boards cut from the same tree can differ in:
- Grain pattern
- Color
- Density
- Figure
- Moisture content
- Stability
- Strength
Each one tells part of the tree’s story.
Some grew quickly.
Others slowly.
Some developed striking patterns after years of changing seasons.
Others remained remarkably straight and consistent.
Learning to recognize those differences allows you to choose the right board for the right purpose instead of hoping every piece behaves the same way.
Wood rewards observation.
Hardwood vs. Softwood: Looking Beyond the Names
One of the first misconceptions beginners encounter is the idea that hardwood is always hard and softwood is always soft.
The names actually refer to the type of tree rather than the physical hardness of the wood.
Hardwoods
Hardwoods generally come from deciduous trees that lose their leaves seasonally.
Many are prized for:
- Strength
- Durability
- Attractive grain
- Furniture making
- Cabinetry
- Fine woodworking
They often machine cleanly and offer excellent long-term stability when properly selected and prepared.
Softwoods
Softwoods typically come from evergreen conifers.
They’re widely used for:
- Construction framing
- Trim work
- Outdoor structures
- Utility projects
- General carpentry
Many softwoods are lightweight, readily available, and easier to machine, making them excellent choices for beginners developing foundational skills.
Neither category is inherently better.
The best choice depends entirely on the project you’re building.
Understanding Grain: The Language of Wood
If wood could speak, grain would be its language.
Grain reveals how a tree grew, how it should be cut, and often how it wants to behave during construction.
Ignoring grain is one of the quickest ways to create unnecessary problems.
Learning to read it transforms nearly every woodworking operation.
Straight Grain
Straight-grained lumber is often the easiest to work with.
It planes smoothly, cuts predictably, and provides reliable strength for structural components and furniture alike.
When consistency matters most, straight grain is frequently the preferred choice.
Figured Grain
Some boards display dramatic visual patterns created by unusual growth.
These may include:
- Curl
- Flame
- Bird’s-eye
- Quilting
- Spalting
Highly figured wood can become the visual centerpiece of a project, but it often requires greater care during machining because changing grain directions increase the likelihood of tear-out.
Beauty sometimes asks for patience.
End Grain
End grain behaves differently from face grain.
It absorbs finishes differently.
It glues differently.
It cuts differently.
Recognizing those differences helps produce stronger joints and cleaner surfaces.
Every experienced woodworker learns to treat end grain with extra care.
Moisture Content: The Invisible Variable
One board may look perfectly dry.
Another may feel exactly the same.
Yet internally, they can contain very different amounts of moisture.
That hidden difference influences nearly everything.
Wood naturally exchanges moisture with the surrounding environment until it reaches equilibrium.
As humidity rises, wood absorbs moisture and expands.
As humidity falls, it releases moisture and contracts.
Ignoring this process often leads to:
- Warping
- Cracks
- Loose joints
- Binding drawers
- Misaligned doors
- Split panels
Understanding moisture isn’t optional.
It’s one of the foundations of durable woodworking.
Seasonal Wood Movement: Expect It, Don’t Fight It
Every solid wood project continues changing after it’s completed.
A tabletop built during a dry winter may become slightly wider during a humid summer.
A cabinet door may shift just enough to require a minor adjustment.
These changes aren’t signs of poor craftsmanship.
They’re signs that wood is behaving exactly as nature intended.
Professional designs account for movement by incorporating features such as:
- Floating panels
- Elongated screw holes
- Specialized tabletop fasteners
- Proper grain orientation
- Expansion allowances
Instead of trying to stop movement, experienced woodworkers design around it.
That’s the difference between forcing wood to behave and allowing it to behave naturally.
Understanding Wood Density
Not all wood responds to tools in the same way.
Some species cut effortlessly.
Others demand slower feed rates, sharper blades, and greater patience.
Density influences:
- Weight
- Machining characteristics
- Strength
- Fastener holding ability
- Surface durability
- Finishing behavior
Learning how different woods respond helps you choose suitable techniques before problems arise.
Over time, you’ll begin recognizing the feel of different species almost as quickly as you recognize their appearance.
Recognizing Natural Defects
Every board deserves careful inspection before becoming part of a project.
Some characteristics add beauty.
Others introduce structural concerns.
Understanding the difference is an essential woodworking skill.
Knots
Knots are remnants of branches within the tree.
Some create attractive rustic character.
Others weaken structural integrity or complicate joinery.
Whether a knot is desirable depends entirely on the project’s purpose.
Checks and Splits
These cracks often develop as wood dries.
Minor surface checks may be manageable.
Deep splits, however, can compromise strength and should be evaluated carefully before use.
Bow
A bowed board curves along its length.
Depending on the project, slight bowing may be corrected during milling or avoided altogether.
Cup
Cupping causes the board to curve across its width.
This affects flatness and often requires careful preparation before construction.
Twist
Twisted boards rotate from one end to the other, making accurate joinery significantly more difficult.
Recognizing twist early prevents wasted effort later.
Warp
Warp is a broad term describing unwanted distortion caused by moisture changes, growth stresses, or improper storage.
Some warped boards can be milled successfully.
Others are better reserved for smaller components or discarded.
Good wood selection saves considerable time before the first cut is made.
Grain Direction Changes Everything
Before making almost any cut, experienced woodworkers naturally ask:
“Which direction is the grain running?”
That single question influences:
- Planing quality
- Chisel control
- Saw performance
- Routing results
- Sanding strategy
- Finish appearance
Working with the grain often produces smooth, clean surfaces.
Working against it increases the chance of tear-out, roughness, and unnecessary frustration.
Learning to read grain becomes almost instinctive with practice.
Choosing the Right Board for the Right Job
Professionals rarely select lumber randomly.
Instead, they evaluate every board according to its intended purpose.
For example:
A straight, stable board may become a table leg where strength is critical.
A beautifully figured board may become the tabletop where appearance matters most.
Less attractive stock often serves hidden structural components without affecting overall quality.
Every board has strengths.
The skill lies in matching those strengths to the project.
Preparing Lumber Before Construction
Raw lumber rarely arrives ready for immediate use.
Proper preparation often includes:
- Inspecting for defects.
- Flattening one face.
- Squaring an edge.
- Bringing material to final thickness.
- Cutting components to manageable dimensions.
- Allowing time for acclimation when appropriate.
Skipping careful preparation frequently creates problems that become increasingly difficult to correct later.
Professional projects begin with professional preparation.
Sustainability Is Part of Modern Craftsmanship
Woodworking connects us directly with a natural resource that may take decades—or even centuries—to mature.
Responsible craftspeople understand the importance of using that resource thoughtfully.
Simple practices make a meaningful difference:
- Plan cuts carefully to reduce waste.
- Use offcuts for smaller projects or practice pieces.
- Repair quality furniture instead of replacing it unnecessarily.
- Choose responsibly sourced lumber whenever possible.
- Build durable pieces designed to last.
Well-made furniture often remains useful for generations.
That longevity is one of woodworking’s greatest contributions to sustainability.
Let the Wood Guide the Design
One of the most satisfying moments in woodworking comes when you stop forcing every board to match your original vision and begin allowing the material itself to influence the final design.
A striking grain pattern might deserve center stage instead of being hidden.
A gentle curve in the grain may inspire a softer furniture line.
A beautifully figured board might become the feature that defines the entire project.
Experienced craftspeople don’t simply shape wood.
They collaborate with it.
They understand that every board offers possibilities waiting to be discovered by someone patient enough to look closely.
The wood has already spent decades becoming what it is.
Your role isn’t to erase that character.
It’s to reveal it.
And once you begin seeing wood this way—not as raw material, but as a partner in the creative process—your projects take on a depth that can’t be achieved through technique alone.
They begin to carry the quiet authenticity that makes handcrafted work feel truly alive.
Next up (Part 5): Measuring, Marking, and Layout Mastery — discover why precision begins long before the first cut, how professional woodworkers eliminate costly mistakes through careful layout, and the measuring habits that quietly separate consistently accurate craftsmanship from frustrating trial and error.
Part 5: Measuring, Marking, and Layout Mastery
Ask an experienced woodworker to point out the most important cut in a project, and you may get an unexpected answer.
They’ll often say it wasn’t a cut at all.
It was the measurement that came before it.
Woodworking has a way of magnifying small inaccuracies. A pencil line that’s barely off, a tape measure read in a hurry, or a reference mark placed on the wrong face can quietly travel through an entire project. By the time you notice something isn’t square, the real mistake may be several steps behind you.
That’s why seasoned craftspeople rarely obsess over cutting faster.
They obsess over laying out the work correctly.
A perfect cut cannot rescue an inaccurate measurement.
A careful layout, however, makes almost every operation that follows easier, cleaner, and more predictable.
Precision isn’t created at the saw.
It begins with the first mark you place on the wood.
Why Precision Is the Quiet Foundation of Great Work
People often admire the visible parts of a finished piece—a seamless joint, a perfectly aligned drawer, or the smooth reflection across a polished tabletop.
What they don’t see are the dozens of careful measurements that made those details possible.
Accuracy is cumulative.
One precise measurement leads to another.
Those measurements produce cleaner cuts.
Cleaner cuts produce tighter joinery.
Better joinery creates easier assembly.
And easier assembly leads to furniture that feels balanced, solid, and intentional.
Every stage supports the next.
That’s why professionals protect their measuring process with almost the same care they give to their finest tools.
The Rule You’ll Hear for the Rest of Your Life
There is one phrase every woodworker encounters sooner or later:
Measure twice. Cut once.
Simple as it sounds, the idea reaches far beyond checking a number one extra time.
It encourages a slower, more thoughtful rhythm.
Before every important cut, ask yourself:
- Am I measuring from the correct reference point?
- Is the tape hooked properly?
- Have I accounted for the saw blade?
- Is this the final dimension or a rough cut?
- Does the measurement still match my plan?
Those few moments of verification often save expensive material—and even more valuable time.
Measuring Isn’t About Numbers Alone
Many beginners believe measuring means reading a tape measure accurately.
That’s only part of the process.
Professional measuring also involves consistency.
Whenever possible, rely on the same reference point throughout the project rather than measuring each component independently.
This approach dramatically reduces the chance of small errors accumulating over multiple parts.
Experienced woodworkers often “transfer” dimensions directly from one component to another instead of repeatedly reaching for a tape measure.
Less measuring can sometimes produce greater accuracy.
Essential Measuring Tools Every Workshop Needs
You don’t need dozens of measuring tools.
You need a few reliable ones that you trust completely.
Tape Measure
The tape measure is usually the first tool every woodworker buys—and one of the most frequently used.
It excels at:
- Breaking down rough lumber.
- Measuring overall dimensions.
- Planning layouts.
- Estimating material requirements.
Choose one that’s easy to read and comfortable to use.
More importantly, become familiar with it.
Consistency matters more than brand names.
Combination Square
If one measuring tool deserves permanent space on your bench, it’s the combination square.
It helps with:
- Checking ninety-degree angles.
- Marking consistent lines.
- Measuring depth.
- Setting machine heights.
- Verifying alignment.
Many professionals reach for it dozens of times during a single project.
Its versatility makes it one of the workshop’s true essentials.
Speed Square
Often associated with carpentry, the speed square is equally valuable in many woodworking tasks.
It allows quick layout of:
- Perpendicular lines.
- Common angles.
- Crosscuts.
- Machine setup references.
Its simplicity makes it surprisingly powerful.
Marking Gauge
Unlike a pencil, a marking gauge creates crisp, repeatable layout lines by scoring the wood’s surface.
These fine lines improve precision while helping guide chisels and saws with remarkable accuracy.
Many traditional woodworkers consider it indispensable for fine joinery.
Straightedge
Whenever flatness or long layout lines matter, a reliable straightedge becomes invaluable.
It helps reveal subtle irregularities that are difficult to detect by eye alone.
Calipers
When precision reaches fractions of a millimeter or thousandths of an inch, calipers become indispensable.
They’re ideal for:
- Checking material thickness.
- Measuring joinery.
- Verifying drill bit diameters.
- Comparing repeated components.
They reduce guesswork while improving repeatability.
Work From Reference Faces and Reference Edges
One of the most important habits you’ll ever develop is choosing a single reference face and a single reference edge for every workpiece.
Every measurement should originate from those same surfaces.
Why?
Because even perfectly milled lumber contains tiny variations.
If measurements are taken from different faces throughout the project, those variations accumulate.
Working from consistent references keeps every part aligned with the same baseline.
It’s one of those invisible habits that separates dependable craftsmanship from frustrating inconsistency.
Pencil or Knife? Knowing When Each Matters
Not all layout marks serve the same purpose.
Pencil Lines
Pencils are fast, forgiving, and ideal for:
- General layout.
- Rough dimensioning.
- Construction projects.
- Temporary reference marks.
Choose a sharp pencil whenever accuracy matters.
A thick, dull line introduces uncertainty before the cut even begins.
Marking Knives
For fine woodworking and precision joinery, a marking knife offers distinct advantages.
A knife line:
- Is thinner than pencil graphite.
- Defines the exact cut location.
- Reduces tear-out.
- Provides a physical guide for chisels and saws.
Small improvements like this often make a noticeable difference in joinery quality.
Label Everything Before It Becomes Confusing
Imagine building a cabinet with twelve nearly identical panels.
At first, their positions seem obvious.
Half an hour later, they don’t.
Professionals avoid unnecessary confusion by labeling parts early.
Simple markings can identify:
- Top.
- Bottom.
- Front.
- Back.
- Inside.
- Outside.
- Left.
- Right.
- Reference faces.
Those few pencil marks disappear during finishing.
The mistakes they prevent may save an entire project.
Understand the Kerf Before You Cut
Every saw blade removes material.
That missing material is known as the kerf.
Beginners often measure carefully but forget that the blade itself occupies space.
The result?
Parts end up slightly too short.
Professional woodworkers decide in advance which side of the layout line the blade should follow.
Then they cut consistently.
Understanding kerf transforms accurate measurements into accurate components.
Story Sticks: One of Woodworking’s Best-Kept Secrets
Many master furniture makers rely less on rulers than you might expect.
Instead, they use story sticks.
A story stick is simply a reference board marked with important project dimensions.
Rather than measuring repeatedly, you transfer those dimensions directly to your workpieces.
The benefits are remarkable:
- Faster layout.
- Fewer calculation errors.
- Better consistency.
- Perfect spacing across multiple components.
It’s a centuries-old technique that’s still one of the smartest ways to improve accuracy.
Lay Everything Out Before Making the First Cut
Professional workshops often appear unusually calm before cutting begins.
That’s because experienced woodworkers spend time visualizing the entire process.
Before turning on a machine, they ask:
- Does every dimension make sense?
- Are grain directions correct?
- Is material being used efficiently?
- Have defects been avoided?
- Will offcuts remain useful?
Planning reduces hesitation later.
Thoughtful preparation almost always produces smoother execution.
Dry Layout Helps You Catch Hidden Problems
Before glue, before fasteners, and sometimes even before cutting every part to final size, professionals often arrange components exactly as they’ll appear in the finished project.
This practice reveals issues that drawings rarely do.
You may notice:
- Awkward grain flow.
- Uneven proportions.
- Alignment concerns.
- Better board orientation.
- Design improvements.
Sometimes moving one board transforms the appearance of an entire piece.
Good design often emerges during this stage.
Common Measuring Mistakes Beginners Make
Even careful woodworkers occasionally fall into familiar traps.
Recognizing them early makes improvement much faster.
Measuring From Different Reference Points
Small inconsistencies accumulate quickly.
Choose one reference and stay with it.
Using Multiple Tape Measures
Not all measuring tapes are perfectly identical.
Switching between them can introduce slight but meaningful variations.
Whenever possible, complete a project using the same primary measuring tools.
Forgetting Blade Thickness
Every cut removes material.
Always account for the kerf before cutting valuable stock.
Rushing Layout
Fast measurements often become slow corrections.
Taking an extra minute before cutting frequently saves an hour later.
Ignoring Machine Calibration
Even perfect layout cannot compensate for an improperly adjusted saw or fence.
Measurement and machine accuracy work together.
Train Your Eyes Alongside Your Hands
Precision isn’t only measured.
It’s observed.
Experienced craftspeople naturally notice when something feels slightly off.
A reveal appears uneven.
A drawer gap catches the light differently.
A tabletop overhang seems unbalanced.
This visual awareness develops through repeated exposure to well-designed furniture and careful inspection of your own work.
The more thoughtfully you observe, the more instinctive good proportions become.
Your eyes eventually become another measuring tool.
Accuracy Is an Act of Respect
Every carefully placed layout line is a quiet promise.
A promise to the material.
A promise to the project.
And, ultimately, a promise to yourself.
It says that this piece deserves your full attention before a single shaving falls to the floor.
That mindset changes everything.
Measurements stop feeling like routine preparation and become part of the craft itself.
The tape measure becomes more than a tool.
The combination square becomes more than a guide.
Every mark you place becomes the blueprint for every decision that follows.
Over time, something remarkable happens.
You stop thinking of precision as slowing you down.
You begin to realize that precision is what allows you to work confidently, solve problems calmly, and build projects that fit together almost effortlessly.
That’s the quiet power of accurate measuring.
Long before anyone admires your finished work, precision has already shaped every inch of it.
Next up (Part 6): Hand Tools Every Beginner Should Master — discover why traditional hand tools remain at the heart of professional craftsmanship, how they teach control and precision, and which essential tools deserve a permanent place in every woodworking workshop, regardless of budget or experience.
Part 6: Hand Tools Every Beginner Should Master
Long before electricity found its way into workshops, extraordinary furniture was already being built.
Master cabinetmakers created elegant dining tables, intricate cabinets, perfectly fitted doors, and heirloom-quality chests using little more than sharpened steel, skilled hands, and years of patient practice.
Many of those pieces still exist today.
They’ve survived generations of daily use, changing homes, and changing tastes—not because their makers owned powerful machinery, but because they understood their tools completely.
Modern power tools have transformed woodworking, making many tasks faster and more efficient.
But speed and skill are not the same thing.
Ask almost any experienced woodworker which tools taught them the most about precision, grain direction, and control, and many will point toward their hand tools.
Hand tools slow the process just enough for you to truly understand what’s happening.
You feel the resistance of the wood.
You hear subtle changes in the cut.
You notice grain direction before tear-out happens instead of after.
That kind of feedback is difficult to replicate with machines.
If power tools accelerate production, hand tools build craftsmanship.
And no matter how advanced your workshop becomes, they’ll remain some of the most valuable tools you own.
Why Every Woodworker Should Learn Hand Tools First
It can be tempting to believe that woodworking begins with buying machines.
A table saw.
A router.
A planer.
A jointer.
While each has its place, none of them can replace the understanding gained from working directly with hand tools.
Hand tools teach you:
- Patience.
- Accuracy.
- Tool control.
- Grain awareness.
- Problem-solving.
- Surface quality.
- Joinery fundamentals.
Perhaps most importantly, they teach you to rely on technique rather than horsepower.
Once those skills develop, every power tool becomes easier—and safer—to use.
Quality Beats Quantity
One mistake many beginners make is buying dozens of inexpensive tools all at once.
The excitement is understandable.
A workshop filled with equipment feels like progress.
In reality, a handful of dependable, well-maintained tools will serve you far better than drawers full of poorly made ones.
Start with the essentials.
Learn them thoroughly.
Expand only when your projects genuinely require something new.
Professionals often own impressive collections, but almost every one of them still reaches for the same trusted core tools day after day.
The Claw Hammer: More Than Driving Nails
The hammer is often the first woodworking tool anyone owns.
Yet mastering it involves far more than striking nails.
A quality hammer helps with:
- Driving fasteners.
- Light assembly.
- Adjusting joints.
- Removing nails.
- Minor workshop tasks.
Accuracy matters more than force.
Experienced woodworkers allow the hammer’s weight to perform much of the work rather than relying on brute strength.
Controlled blows leave cleaner results and reduce fatigue.
Wooden Mallets: Gentle Strength
Whenever chisels enter the picture, the wooden mallet becomes indispensable.
Unlike a metal hammer, it delivers force without damaging tool handles.
A well-balanced mallet excels at:
- Chisel work.
- Joinery assembly.
- Fine adjustments.
- Seating joints during glue-ups.
The goal isn’t maximum force.
It’s controlled force.
That’s an important distinction throughout woodworking.
Chisels: Among the Most Versatile Tools You’ll Ever Own
Few tools demonstrate craftsmanship more clearly than a sharp chisel.
A beginner may see it as a carving tool.
An experienced woodworker sees dozens of possibilities.
Chisels are used for:
- Cleaning joints.
- Trimming tenons.
- Adjusting joinery.
- Removing waste.
- Creating recesses.
- Refining details.
- Squaring routed corners.
Sharpness transforms everything.
A properly sharpened chisel slices cleanly through wood fibers with surprising ease.
A dull one crushes, tears, and demands unnecessary force.
One of the greatest investments you can make isn’t buying more chisels.
It’s learning how to sharpen the ones you already own.
Hand Saws: Learning to Cut With Precision
Machines may dominate modern workshops, but hand saws remain invaluable.
They offer unmatched control for many operations while teaching proper cutting technique.
Different saws serve different purposes.
Crosscut Saws
Designed to cut across the grain.
They produce clean, efficient crosscuts while minimizing fiber damage.
Rip Saws
Built for cutting along the grain.
Their tooth geometry efficiently separates wood fibers in the direction they naturally grow.
Dovetail and Joinery Saws
These smaller backsaws excel at precise joinery where accuracy matters more than speed.
Many furniture makers rely on them daily.
Learning to guide a saw accurately develops hand-eye coordination that benefits every future woodworking skill.
Hand Planes: The Sound of Precision
Few workshop experiences are as satisfying as watching a hand plane produce a continuous, whisper-thin shaving.
The sound changes.
The surface brightens.
The wood begins revealing its natural beauty.
Hand planes serve many purposes:
- Flattening boards.
- Smoothing surfaces.
- Trimming edges.
- Fitting joinery.
- Removing machine marks.
- Chamfering corners.
More importantly, they teach grain direction.
When the plane glides effortlessly, you’re likely working with the grain.
When resistance increases, the wood is telling you something.
Learning to listen makes all the difference.
Block Planes: Small Tool, Big Impact
Compact and versatile, the block plane often becomes one of the busiest tools in any workshop.
It’s ideal for:
- Breaking sharp edges.
- Trimming end grain.
- Fine fitting.
- Removing tiny imperfections.
- Quick adjustments during assembly.
Many woodworkers reach for a block plane before considering larger machinery.
Its simplicity encourages thoughtful craftsmanship.
Marking and Layout Tools Deserve Equal Respect
Before any cutting begins, layout determines success.
Essential marking tools include:
- Marking knives.
- Marking gauges.
- Combination squares.
- Sliding bevels.
- Dividers.
- Compass tools.
These aren’t glamorous purchases.
They’re accuracy tools.
And accuracy defines craftsmanship.
Clamps: The Silent Helpers
There’s an old woodworking saying:
“You can never have too many clamps.”
While often said with humor, there’s truth behind it.
Clamps perform tasks your hands simply cannot.
They:
- Hold work securely.
- Maintain alignment.
- Apply glue-up pressure.
- Improve safety.
- Increase precision.
Different projects call for different clamp styles.
Among the most useful are:
- Bar clamps.
- Pipe clamps.
- Parallel clamps.
- Spring clamps.
- F-style clamps.
- Corner clamps.
Think of clamps as temporary assistants that never become tired.
Files and Rasps: Refinement Tools
Some shapes simply can’t be achieved cleanly with saws or planes alone.
Files and rasps allow controlled material removal while refining curves, contours, and small details.
They’re especially valuable when building:
- Chairs.
- Curved furniture.
- Decorative work.
- Carvings.
- Custom handles.
These tools reward patience rather than speed.
Measuring With Your Hands
An unexpected lesson arrives after enough hours in the workshop.
You begin developing a physical sense for dimensions.
You can feel when an edge is square.
You notice slight ridges before seeing them.
You recognize subtle differences in surface smoothness with your fingertips.
Professional woodworkers constantly combine measurement with touch.
Their hands become sensitive measuring instruments developed through repetition.
Machines cannot teach that.
Only experience can.
Sharpening Is a Skill, Not a Chore
Many beginners postpone sharpening until a tool becomes frustrating to use.
Professionals rarely wait that long.
Sharp tools:
- Require less effort.
- Produce cleaner cuts.
- Improve accuracy.
- Reduce tear-out.
- Increase safety.
- Create more enjoyable woodworking.
Learning to sharpen may feel intimidating initially.
Soon it becomes one of the most valuable workshop habits you’ll ever develop.
A modest collection of razor-sharp tools consistently outperforms an expensive collection of neglected ones.
Care for Your Tools and They’ll Care for Your Work
Good tools appreciate attention.
Simple maintenance routines extend their life dramatically.
After each project:
- Remove dust.
- Wipe away moisture.
- Protect steel from rust.
- Store tools properly.
- Inspect cutting edges.
- Sharpen when necessary.
These habits take only minutes.
The rewards last for decades.
Many professional woodworkers still use hand tools inherited from previous generations because someone cared for them properly.
Practice Before Precision
Every hand tool has its own rhythm.
A chisel feels different from a plane.
A backsaw behaves differently from a rip saw.
Don’t expect mastery after a few hours.
Instead, dedicate practice sessions entirely to skill development.
Plane scrap boards.
Saw along layout lines repeatedly.
Pare shallow cuts with chisels.
Flatten rough lumber simply for experience.
These exercises remove the pressure of producing a finished project while dramatically improving your control.
The goal isn’t creating something beautiful.
The goal is becoming someone who can.
Hand Tools Build Confidence That Machines Can’t
Power tools can produce remarkably accurate results.
But hand tools teach something deeper.
They teach judgment.
They force you to understand grain before cutting.
They reveal how wood reacts under pressure.
They encourage patience over speed and precision over shortcuts.
As those lessons accumulate, something subtle begins to happen.
You stop relying on tools to solve every problem.
Instead, you begin relying on your own understanding.
That shift marks an important milestone in every woodworker’s journey.
Because true craftsmanship isn’t measured by the number of machines in your shop.
It’s measured by how confidently you can shape wood with knowledge, skill, and intention.
Hand tools don’t simply prepare you for woodworking.
They prepare you to become a craftsperson.
And once those foundations are in place, every machine you add becomes an extension of your abilities—not a substitute for them.
Next up (Part 7): Power Tool Skills That Transform Productivity — learn how to use essential woodworking machines safely and effectively, discover when power tools outperform hand tools, and understand how professionals combine both approaches to produce faster, cleaner, and more consistent results without sacrificing craftsmanship.
Part 7: Power Tool Skills That Transform Productivity
There comes a moment in nearly every woodworker’s journey when hand tools alone are no longer enough.
Perhaps you’re building a dining table with dozens of identical parts.
Maybe you’re milling rough lumber for an entire kitchen of cabinets.
Or you’re producing furniture often enough that spending hours flattening boards by hand no longer makes practical sense.
This is where power tools earn their place.
Not because they replace craftsmanship.
Because they amplify it.
A machine can cut faster than any person. It can produce dozens of identical parts with remarkable consistency. It can reduce hours of labor to minutes.
But there’s a catch.
Power tools don’t forgive poor planning.
They simply make mistakes happen faster.
The woodworker—not the machine—is still responsible for every measurement, every setup, every adjustment, and every decision.
Professionals understand this better than anyone.
They don’t use machines to avoid learning woodworking.
They use machines to spend more time where craftsmanship matters most: refining, fitting, designing, and finishing.
When used thoughtfully, power tools become partners in precision rather than shortcuts around it.
Machines Increase Speed—Skill Creates Accuracy
A common misconception is that buying better machines automatically produces better furniture.
It doesn’t.
A perfectly calibrated table saw still requires accurate layout.
An expensive router cannot fix poor joinery.
A premium planer won’t improve boards that were selected poorly from the beginning.
Machines multiply the quality of your technique.
If your habits are consistent, they increase productivity dramatically.
If your habits are careless, they simply allow mistakes to happen more quickly.
That’s why experienced woodworkers master process before production.
Choosing the Right Power Tool at the Right Time
One of the biggest improvements you can make isn’t buying more equipment.
It’s learning which machine is best suited for each task.
Professional workshops rarely force one tool to perform every operation.
Each machine has a purpose.
Knowing that purpose improves both efficiency and quality.
The Table Saw: The Heart of Many Workshops
For countless woodworkers, the table saw becomes the centerpiece of the shop.
Its versatility makes it invaluable for countless operations.
It excels at:
- Ripping lumber.
- Crosscutting with sleds.
- Cutting dados.
- Creating grooves.
- Producing repeatable dimensions.
- Preparing joinery.
- Breaking down larger components.
What separates experienced users from beginners isn’t speed.
It’s setup.
Professionals spend significant time adjusting fences, checking blade alignment, verifying measurements, and planning every cut before switching on the motor.
Preparation creates precision.
Developing Safe Table Saw Habits
Few woodworking machines command more respect than the table saw.
Every operation should begin with a clear plan.
Professional habits include:
- Standing slightly out of the line of potential kickback.
- Using push sticks and push blocks whenever appropriate.
- Supporting long boards properly.
- Maintaining sharp blades.
- Never reaching over a spinning blade.
- Waiting for the blade to stop completely before removing offcuts.
- Keeping attention focused solely on the cut.
Confidence grows from discipline—not familiarity.
The Miter Saw: Speed Meets Repeatability
When multiple parts must share identical lengths, few machines are as efficient as the miter saw.
It’s especially valuable for:
- Crosscutting boards.
- Trim work.
- Framing.
- Picture frames.
- Furniture components.
- Repetitive production.
Adding stop blocks transforms the miter saw into a highly accurate production tool capable of producing dozens of identical pieces with remarkable consistency.
Professionals rely heavily on repeatability.
The Circular Saw: Portable Versatility
Not every project happens inside a dedicated workshop.
The circular saw brings precision wherever the work takes place.
With proper guides, it can accurately:
- Break down plywood.
- Cut sheet goods.
- Trim lumber.
- Build outdoor projects.
- Handle construction tasks.
Combined with a straightedge or guide rail, many woodworkers achieve impressively accurate results even without large stationary equipment.
Portability often becomes its greatest strength.
The Router: One Machine, Endless Possibilities
Few tools match the versatility of the router.
Its applications continue expanding as your skills develop.
A router can:
- Create decorative edges.
- Cut dados.
- Form rabbets.
- Produce mortises.
- Trim laminate.
- Flush-trim templates.
- Shape joinery.
- Make signs.
- Produce intricate profiles.
With router tables and jigs, its capabilities become even greater.
Many experienced furniture makers consider it one of the most valuable machines in the shop.
Router Bits Matter as Much as the Router
Beginners often focus entirely on the machine itself.
Professionals know the cutting bit determines much of the final quality.
Quality bits:
- Stay sharper longer.
- Produce smoother surfaces.
- Reduce burning.
- Minimize tear-out.
- Improve safety through predictable cutting.
Investing in fewer high-quality bits usually provides better long-term value than buying large inexpensive sets.
The Drill and Driver: Everyday Essentials
No workshop functions efficiently without dependable drilling tools.
Cordless drills and impact drivers simplify tasks such as:
- Drilling pilot holes.
- Driving screws.
- Installing hardware.
- Building jigs.
- Assembly work.
- Workshop maintenance.
While they may seem ordinary compared to larger machines, they’re among the most frequently used power tools in woodworking.
Reliability matters more than complexity.
The Random Orbital Sander: More Than Convenience
Hand sanding develops sensitivity.
Power sanding develops efficiency.
A quality random orbital sander removes material evenly while reducing visible scratch patterns.
Its greatest strengths include:
- Surface preparation.
- Finish removal.
- Final smoothing.
- Between-coat sanding.
- Large panel work.
However, professionals understand an important principle.
The machine performs the motion.
You control the pressure.
Forcing the sander rarely improves results.
Gentle, consistent movement produces flatter, cleaner surfaces.
The Jigsaw: Precision in Curves
Straight cuts dominate many woodworking projects.
Eventually, however, you’ll encounter shapes that demand flexibility.
The jigsaw excels at:
- Curved cuts.
- Interior openings.
- Templates.
- Decorative shapes.
- Custom furniture components.
Choosing the correct blade greatly influences the quality of every cut.
Blade selection matters almost as much as machine control.
Thickness Planers: Revealing Hidden Beauty
Few woodworking experiences feel as satisfying as feeding rough lumber into a planer and watching smooth, clean grain emerge on the opposite side.
Thickness planers help:
- Produce uniform board thickness.
- Improve glue joints.
- Flatten prepared faces.
- Prepare stock for furniture making.
They don’t replace proper board preparation.
Instead, they refine it.
Professionals understand that planers work best after establishing one reliable reference face.
Jointers: Creating Flat Foundations
A jointer performs one critical job exceptionally well.
It creates flat reference surfaces.
That simple capability influences nearly every later stage of construction.
Jointed lumber provides:
- Straighter glue joints.
- Better panel alignment.
- Improved accuracy.
- Easier assembly.
Many woodworking frustrations disappear when projects begin with properly prepared material.
Dust Collection Isn’t Optional
Every machine creates debris.
Some create enormous amounts.
Professional workshops prioritize dust collection not simply for cleanliness but for health, visibility, and machine longevity.
Effective dust collection:
- Improves air quality.
- Extends equipment life.
- Increases visibility.
- Reduces cleanup.
- Produces cleaner finishes.
Even modest systems provide significant long-term benefits.
The cleaner the environment, the more enjoyable the workshop becomes.
Build Jigs Before Buying More Machines
Here’s a lesson many beginners don’t expect.
Some of the most accurate woodworking solutions aren’t expensive machines.
They’re homemade jigs.
A well-designed jig improves:
- Repeatability.
- Safety.
- Accuracy.
- Speed.
- Confidence.
Examples include:
- Crosscut sleds.
- Tapering jigs.
- Dovetail templates.
- Router guides.
- Circle-cutting jigs.
- Drill guides.
- Clamping fixtures.
Professional shops often contain dozens of custom jigs built specifically for recurring tasks.
Simple solutions frequently outperform expensive upgrades.
Machine Setup Determines Project Quality
Many woodworking mistakes happen before the wood even touches the blade.
Experienced woodworkers routinely check:
- Fence alignment.
- Blade sharpness.
- Blade height.
- Table cleanliness.
- Dust collection.
- Material support.
- Measurement accuracy.
These routines may seem repetitive.
They are.
That’s precisely why they work.
Consistency creates reliability.
Know When to Use Hand Tools Instead
Ironically, mastering power tools often teaches you when not to use them.
A block plane may trim an edge more quickly than resetting a table saw.
A sharp chisel can adjust a joint with greater precision than a router.
A handsaw may solve a problem faster than changing machine setups.
Professionals choose tools based on efficiency—not habit.
Sometimes the quietest tool in the workshop is also the smartest choice.
Avoid the “More Power” Trap
One of the easiest mistakes for beginners is believing that larger, faster, or more powerful tools automatically produce better work.
They don’t.
Power only increases capability.
It doesn’t replace judgment.
An expensive machine cannot compensate for poor measurements.
It cannot select attractive grain.
It cannot sharpen a dull chisel.
And it certainly cannot decide whether a project is truly finished.
Those decisions still belong to the craftsperson.
Machines Should Expand Your Creativity, Not Limit It
The purpose of power tools has never been simply to make woodworking faster.
Their real value lies in giving you more freedom.
Freedom to build larger projects.
Freedom to experiment with new designs.
Freedom to spend less time on repetitive labor and more time refining details that make handcrafted furniture special.
That’s why experienced woodworkers rarely argue about hand tools versus power tools.
They understand that the two complement one another.
Machines provide efficiency.
Hand tools provide refinement.
Together, they create a workflow that balances productivity with craftsmanship.
The goal has never been to replace one with the other.
The goal is to know exactly when each serves the work best.
Because true mastery isn’t measured by how many machines fill your workshop.
It’s measured by how naturally you can combine technology, technique, and thoughtful decision-making into projects that are accurate, durable, and deeply satisfying to build.
And once you reach that point, your tools no longer define your craftsmanship.
They simply help you express it.
Next up (Part 8): Joinery Techniques: The Foundation of Strong Projects — you’ll learn the principles behind professional-quality joints, when to use each type, how to achieve precise fits, and why exceptional joinery is the invisible backbone of furniture that lasts for generations.
Part 8: Joinery Techniques—The Foundation of Strong Projects
If woodworking had a hidden language, joinery would be its grammar.
Every chair that supports generations of family dinners, every cabinet that opens smoothly after decades of use, and every handcrafted table that becomes the center of a home owes its strength to something most people never notice.
The joints.
They’re tucked inside corners, hidden beneath tabletops, concealed behind drawer fronts, and buried within frames. Visitors admire the finished piece, but experienced woodworkers immediately begin wondering how it was assembled.
Because they know an important truth:
Beautiful wood deserves beautiful joinery.
A flawless finish may catch someone’s eye.
A well-designed joint earns their respect.
Joinery isn’t simply about connecting two pieces of wood. It’s about understanding how forces travel through a project, how wood naturally expands and contracts, and how precision transforms separate boards into a single, unified structure.
Master this skill, and your projects won’t just look better.
They’ll last longer.
Why Joinery Is the Heart of Woodworking
Imagine trying to build a house without nails, screws, or fasteners.
Every component would need to support another through careful design alone.
Traditional woodworking often follows the same philosophy.
For centuries, master craftspeople created furniture that has survived hundreds of years using little more than carefully fitted wooden joints and glue.
That longevity wasn’t accidental.
It was engineered.
Good joinery accomplishes several goals simultaneously.
It provides:
- Structural strength.
- Long-term durability.
- Accurate alignment.
- Resistance to movement.
- Visual elegance.
- Efficient assembly.
The strongest furniture isn’t always built from the thickest lumber.
It’s built with the smartest joints.
The Three Principles Behind Every Strong Joint
Although dozens of joinery methods exist, nearly every successful joint follows three essential principles.
Surface Contact
Glue becomes significantly stronger when more wood fibers meet one another.
Well-designed joints maximize contact without creating unnecessary complexity.
Mechanical Strength
Some joints naturally resist pulling apart, twisting, or shifting under load.
Their geometry contributes to their strength—not just the adhesive.
Precision
Even the strongest joint design performs poorly if it’s loose.
Professional joinery depends on accurate measuring, careful cutting, and patient fitting.
A joint should feel intentional.
Not forced.
The Butt Joint: Simple but Useful
The butt joint is often the first joint beginners encounter.
One board simply meets another.
Its simplicity makes it ideal for:
- Practice projects.
- Utility furniture.
- Temporary structures.
- Shop fixtures.
By itself, however, the butt joint offers limited mechanical strength.
It benefits greatly from reinforcement through:
- Screws.
- Dowels.
- Biscuits.
- Pocket-hole joinery.
- Splines.
- Mechanical fasteners.
Simple doesn’t mean ineffective.
It simply means understanding its limitations.
The Miter Joint: Where Precision Becomes Visible
A miter joint joins two pieces at an angle, most commonly forty-five degrees.
When executed well, it creates clean, continuous corners that conceal end grain.
It’s commonly used for:
- Picture frames.
- Decorative boxes.
- Trim work.
- Furniture details.
- Cabinet moldings.
Miters reward careful setup.
Even slight inaccuracies become immediately visible.
Patience is often the difference between elegant corners and distracting gaps.
The Rabbet Joint: Stronger Than It Looks
A rabbet removes material along the edge of a board, allowing another piece to nest securely inside.
This increases:
- Glue surface.
- Alignment.
- Assembly strength.
Rabbet joints frequently appear in:
- Cabinet backs.
- Drawer construction.
- Shelving.
- Casework.
They’re simple enough for beginners while offering meaningful improvements over basic butt joints.
The Dado Joint: Built for Shelves
Whenever one board needs to support another across its width, the dado becomes an excellent solution.
A groove is cut into one workpiece, allowing the second board to fit securely inside.
This joint naturally improves:
- Alignment.
- Load distribution.
- Assembly strength.
Bookcases, cabinets, and shelving systems rely heavily on dado joints because they reduce stress on fasteners while increasing structural rigidity.
Tongue-and-Groove Joinery: Strength With Flexibility
This classic joint allows one board’s tongue to fit precisely into another board’s groove.
It’s especially valuable where seasonal wood movement must be accommodated.
Common applications include:
- Flooring.
- Wall paneling.
- Tabletops.
- Cabinet backs.
- Decorative paneling.
The joint maintains alignment while allowing the wood to behave naturally over time.
Mortise and Tenon: The Gold Standard
Ask experienced furniture makers to name the most respected woodworking joint, and many will answer without hesitation.
The mortise and tenon.
For centuries, it has formed the backbone of chairs, tables, doors, and timber framing.
The joint consists of:
- A mortise: a carefully shaped cavity.
- A tenon: a matching projection that fits inside.
When properly fitted, the result is remarkably strong.
Its strength comes from:
- Large glue surface.
- Excellent mechanical resistance.
- Outstanding long-term durability.
- Efficient load transfer.
Many heirloom-quality furniture pieces owe their longevity to this timeless joint.
What Makes a Good Mortise and Tenon?
Professionals strive for a fit that’s firm without requiring excessive force.
Too loose, and the joint weakens.
Too tight, and assembly becomes difficult while risking damage.
The ideal fit slides together with steady hand pressure and remains aligned before clamping.
Precision matters more than speed.
Dovetail Joints: Where Function Meets Beauty
Few woodworking joints inspire admiration quite like the dovetail.
Its interlocking shape naturally resists pulling apart, making it exceptionally strong even before glue is applied.
Dovetails are commonly found in:
- Drawers.
- Fine boxes.
- Cabinetry.
- Premium furniture.
Beyond strength, dovetails communicate craftsmanship.
They’re often left visible because they’re beautiful enough to become part of the design.
Well-cut dovetails quietly tell the viewer that careful hands built the piece.
Box Joints: Simple Geometry, Impressive Strength
Sometimes called finger joints, box joints consist of evenly spaced interlocking fingers.
Compared with dovetails, they’re easier to machine while still providing excellent glue surface.
They’re popular for:
- Storage boxes.
- Drawer construction.
- Decorative cases.
- Shop projects.
Their repeating pattern creates both visual rhythm and structural reliability.
Dowel Joinery: Precision Through Alignment
Dowels replace traditional tenons with cylindrical wooden pins.
When accurately positioned, they provide:
- Excellent alignment.
- Increased glue area.
- Hidden reinforcement.
- Clean appearance.
Modern doweling jigs make this technique accessible even for beginners while producing surprisingly durable results.
Accuracy remains the deciding factor.
Biscuit Joinery: Fast and Reliable Alignment
Biscuits are compressed wooden inserts placed into matching slots cut by a biscuit joiner.
As glue introduces moisture, the biscuits expand slightly.
This helps:
- Align panels.
- Reinforce glue joints.
- Simplify assembly.
While biscuits contribute some strength, their greatest advantage lies in keeping large glue-ups perfectly aligned during clamping.
Pocket-Hole Joinery: Speed Without Sacrificing Quality
Pocket-hole systems have become extremely popular for furniture construction.
Angled screws pull components tightly together while allowing fast assembly.
They’re particularly useful for:
- Cabinets.
- Face frames.
- Shop furniture.
- Utility projects.
- Beginner builds.
Although not appropriate for every application, pocket holes offer an excellent balance of simplicity, strength, and efficiency.
Professional woodworkers often combine them with traditional techniques depending on the project.
Choosing the Right Joint for the Job
No single joint excels everywhere.
Professionals evaluate several questions before deciding.
What forces will this joint experience?
Will it carry weight?
Will it remain visible?
Will the wood move seasonally?
How quickly must it be assembled?
Can future repairs become necessary?
The answers determine the best solution.
Skill isn’t knowing every joint.
It’s knowing when each one belongs.
Dry Fitting: The Habit That Prevents Heartbreak
Glue has a way of making simple tasks feel urgent.
That’s why experienced woodworkers almost always assemble projects without glue first.
Dry fitting allows you to check:
- Alignment.
- Joint fit.
- Clamp placement.
- Assembly sequence.
- Hidden interference.
- Necessary adjustments.
Those few extra minutes often prevent stressful glue-ups and costly mistakes.
Professionals rehearse success before committing to it.
Glue Doesn’t Replace Good Joinery
One of the biggest misconceptions among beginners is believing stronger glue solves weak joints.
It doesn’t.
Glue performs best when:
- Surfaces fit accurately.
- Clamping pressure is appropriate.
- Grain orientation is considered.
- Joint design supports the load.
Even the finest adhesive cannot compensate for poor craftsmanship.
The joint creates the strength.
The glue supports it.
Clamping: The Final Stage of Joinery
Clamps deserve as much attention as the joint itself.
Too little pressure leaves gaps.
Too much pressure can squeeze out excessive glue or distort alignment.
Good clamping involves:
- Even pressure.
- Proper positioning.
- Flat reference surfaces.
- Protective pads when necessary.
- Sufficient curing time.
Professionals prepare clamps before mixing glue because smooth assembly depends on thoughtful preparation.
Invisible Precision Creates Visible Quality
Most people will never inspect the inside of your drawer.
They may never notice the perfectly fitted mortise hidden beneath a chair rail.
They probably won’t see the carefully aligned dowels inside a cabinet.
Yet those unseen details shape everything they experience.
The drawer slides smoothly because the joints remain square.
The chair feels solid because its joinery distributes force correctly.
The table doesn’t wobble because every connection was built with intention.
That’s the quiet beauty of exceptional joinery.
It performs its work silently, year after year, without asking for attention.
As your skills grow, you’ll begin seeing joints differently.
No longer as individual techniques.
But as thoughtful solutions to structural challenges.
Each joint becomes another sentence in the language of craftsmanship.
And eventually, without realizing it, you’ll stop asking, “How do I connect these boards?”
You’ll begin asking something far more important:
“What’s the smartest way to connect them so they’ll still be strong twenty years from now?”
That’s the question professional woodworkers carry into every project.
And it’s one of the questions that transforms good builders into exceptional craftspeople.
Next up (Part 9): Sanding, Surface Preparation, and Wood Finishing — discover how professional woodworkers transform ordinary lumber into furniture-quality surfaces, eliminate common finishing mistakes, choose the right finishes for every project, and create beautiful results that protect wood for decades.
Part 9: Sanding, Surface Preparation, and Wood Finishing
There’s a moment in every woodworking project when construction ends and transformation begins.
The joints are tight.
The parts fit together.
The piece stands exactly as you imagined.
Yet something still feels unfinished.
Run your hand across the surface, and you’ll notice tiny imperfections your eyes overlooked. A faint milling mark catches the light. A sharp edge interrupts an otherwise elegant line. Perhaps there’s a glue spot hiding quietly, waiting to reveal itself the instant stain touches the wood.
This is where many projects quietly succeed—or quietly fail.
Because no finish, no matter how expensive or expertly applied, can disguise poor surface preparation.
Professional woodworkers understand a simple truth:
Finishing doesn’t improve bad preparation. It magnifies it.
That’s why some of the finest craftspeople spend almost as much time preparing a surface as they do building the project itself.
To an outsider, sanding may seem repetitive.
To a woodworker, it’s where rough construction becomes refined craftsmanship.
Why Surface Preparation Matters More Than the Finish Itself
People often ask which finish creates the most beautiful furniture.
The better question is:
How well was the surface prepared before the finish ever touched the wood?
A perfectly prepared board allows the natural character of the wood to shine.
A poorly prepared one reveals:
- Scratches.
- Glue residue.
- Uneven color.
- Swirl marks.
- Dents.
- Rough grain.
- Inconsistent sheen.
Finishing products don’t create beauty.
They reveal what’s already there.
That’s why experienced woodworkers never rush this stage.
Sanding Is About Refinement, Not Material Removal
Many beginners think sanding means aggressively removing wood until everything feels smooth.
Professionals approach it differently.
Each sanding step has a specific purpose:
- Removing machine marks.
- Eliminating scratches from previous grits.
- Leveling joints.
- Softening sharp edges.
- Preparing wood for finishing.
The goal isn’t simply smoothness.
The goal is consistency.
A perfectly even surface reflects light evenly, absorbs finish uniformly, and feels natural under your fingertips.
Understanding Sandpaper Grits
Sandpaper isn’t better because it’s rougher or finer.
Each grit belongs to a sequence.
Skipping that sequence often creates unnecessary work.
Coarse Grits (40–80)
Used for:
- Removing significant material.
- Flattening rough lumber.
- Eliminating heavy machine marks.
- Stripping old finishes.
These grits work quickly but leave deep scratches that require further refinement.
Medium Grits (100–150)
Ideal for:
- General smoothing.
- Preparing assembled projects.
- Removing previous sanding scratches.
- Creating a uniform surface.
For many woodworking projects, this is where true refinement begins.
Fine Grits (180–220)
These grits prepare most furniture for finishing.
They:
- Refine the surface.
- Remove subtle imperfections.
- Improve finish consistency.
- Enhance tactile smoothness.
For many hardwoods, sanding beyond this range before applying certain finishes offers little additional benefit.
Extra Fine Grits (320 and Above)
Typically reserved for:
- Between finish coats.
- High-gloss finishes.
- Specialty polishing.
- Delicate finishing work.
They refine the finish itself rather than the raw wood.
Sand With the Grain—Always
One of the earliest lessons every woodworker learns remains one of the most important.
Sand with the grain.
Cross-grain scratches may seem invisible before finishing.
Once stain or clear coat is applied, however, they often become impossible to ignore.
The grain naturally guides both your tools and your sanding.
Following it creates surfaces that feel intentional rather than mechanically processed.
Let the Sandpaper Do the Work
Pushing harder rarely improves sanding.
In fact, excessive pressure often creates:
- Uneven surfaces.
- Swirl marks.
- Premature sandpaper wear.
- Heat buildup.
- Rounded edges.
Professional woodworkers apply consistent, moderate pressure while allowing the abrasive to cut naturally.
Patience consistently outperforms force.
Hand Sanding vs. Power Sanding
Both methods have valuable roles.
The smartest woodworkers understand when each is most appropriate.
Hand Sanding
Hand sanding provides exceptional control.
It’s ideal for:
- Delicate details.
- Profiles.
- Curves.
- Final touch-ups.
- Edges.
- Between finish coats.
It also develops your sensitivity to surface quality.
Your fingertips often detect imperfections long before your eyes do.
Random Orbital Sanders
These machines dramatically improve efficiency on large, flat surfaces.
They’re excellent for:
- Tabletops.
- Cabinet panels.
- Doors.
- Shelves.
- General furniture preparation.
However, movement matters.
Keep the sander moving steadily.
Stopping in one place can create uneven surfaces.
Raise the Grain Before the Finish Does
Water-based finishes naturally raise wood fibers.
Experienced woodworkers often prepare for this intentionally.
After final sanding:
- Lightly dampen the surface.
- Allow it to dry completely.
- Sand gently with a fine grit.
When the actual finish is later applied, fewer fibers rise unexpectedly.
It’s a simple step that noticeably improves the final feel.
Remove Every Trace of Dust
Dust is the invisible enemy of beautiful finishes.
It settles into wet coatings, dulls clarity, and creates rough textures that require additional work.
Before finishing:
- Vacuum thoroughly.
- Clean the workbench.
- Remove sanding residue.
- Wipe surfaces carefully.
- Allow airborne dust to settle when possible.
A spotless workspace often produces dramatically better finishing results.
Glue Squeeze-Out: The Hidden Problem
Even tiny amounts of dried glue can prevent stains and finishes from penetrating the wood evenly.
The result?
Bright patches that immediately stand out after finishing.
Inspect joints carefully before sanding.
Remove squeeze-out while it’s still manageable.
A few overlooked spots can distract from an otherwise outstanding project.
Breaking Sharp Edges
Perfectly sharp corners rarely stay sharp.
They’re easily damaged during handling and finishing.
Professionals often soften edges slightly using:
- Fine sandpaper.
- Block planes.
- Small chamfers.
- Light round-overs.
These subtle changes improve both durability and comfort while creating furniture that feels more inviting to touch.
Understanding Wood Finishes
A finish serves two equally important purposes.
It protects.
And it enhances.
Different projects demand different levels of protection, appearance, and maintenance.
Choosing wisely matters.
Oil Finishes
Oil penetrates into the wood rather than forming a thick surface layer.
Advantages include:
- Rich natural appearance.
- Easy application.
- Simple repair.
- Pleasant tactile feel.
Oil finishes highlight grain beautifully while maintaining a close connection to the wood itself.
Varnish
Varnish forms a durable protective film.
It’s an excellent choice for:
- Dining tables.
- Frequently used furniture.
- Interior woodwork.
- Surfaces exposed to moisture.
Its durability makes it a favorite for projects requiring long-term protection.
Polyurethane
Known for exceptional toughness, polyurethane resists:
- Scratches.
- Moisture.
- Wear.
- Household chemicals.
It’s commonly selected for high-use furniture where durability takes priority.
Available in both oil-based and water-based formulations, it offers flexibility for different applications.
Shellac
Used for centuries, shellac provides:
- Warm appearance.
- Fast drying.
- Excellent clarity.
- Easy repair.
Although less resistant to heat and moisture than some modern finishes, it remains highly respected in fine furniture restoration and traditional woodworking.
Lacquer
Favored in professional production environments, lacquer dries quickly while producing exceptionally smooth finishes.
Its speed makes it ideal for furniture shops where efficiency and consistent quality are essential.
Staining: Enhancing, Not Hiding
A common misconception is that stain improves poor wood.
It doesn’t.
Stain emphasizes the character already present.
Beautiful grain becomes more dramatic.
Uneven sanding becomes more obvious.
Glue residue becomes impossible to ignore.
Successful staining begins long before opening the can.
Preparation determines the outcome.
Apply Thin Coats, Not Thick Ones
More finish isn’t necessarily better.
Heavy coats often create:
- Runs.
- Drips.
- Longer drying times.
- Uneven curing.
- Dust contamination.
Professionals generally build protection gradually through multiple thin coats.
Thin applications cure more consistently while producing cleaner, more refined results.
Sand Between Coats
Each cured layer provides an opportunity for improvement.
Light sanding between coats:
- Removes dust nibs.
- Improves adhesion.
- Levels minor imperfections.
- Creates smoother final finishes.
Only minimal pressure is needed.
The objective is refinement—not removing the previous coat.
Learn to Read Reflected Light
One of the simplest professional techniques costs nothing.
Position your project so light reflects across the surface at a low angle.
Imperfections suddenly become visible.
You’ll notice:
- Scratches.
- Uneven sanding.
- Glue residue.
- Dust particles.
- Finish inconsistencies.
Many flaws invisible from above become obvious under reflected light.
Professionals inspect constantly.
Patience Creates Beautiful Finishes
Perhaps no stage in woodworking tests patience more than finishing.
Everything appears complete.
The temptation to hurry becomes almost overwhelming.
But finishes cure according to chemistry—not enthusiasm.
Rushing often leads to:
- Fingerprints.
- Surface damage.
- Dust contamination.
- Poor adhesion.
- Cloudy appearance.
Professional-looking finishes almost always belong to people willing to wait.
Your Hands Are the Final Quality Control
Long after the last coat dries, long after the brushes have been cleaned and the workshop swept, one simple test remains.
Run your hand slowly across the wood.
Close your eyes if you have to.
Can you feel a ridge where two boards meet?
Does one corner feel sharper than the others?
Is the surface consistently smooth from edge to edge?
Your fingertips detect details your eyes often miss.
That’s why experienced woodworkers rely on both.
They inspect with their vision.
They verify with their touch.
Because furniture isn’t only meant to be seen.
It’s meant to be used.
Hands glide across tabletops.
Children trace the edges of chairs.
Families rest their arms on desks built years earlier.
The experience of touching a handcrafted piece is every bit as important as looking at it.
A flawless finish isn’t merely glossy.
It feels welcoming.
It invites interaction.
It encourages people to slow down, appreciate the grain beneath their fingertips, and notice the quiet care that went into every inch of the work.
That’s the true purpose of finishing.
Not to hide the craftsmanship beneath it.
But to celebrate it.
Next up (Part 10): Furniture Construction and Project Planning — learn how experienced woodworkers transform ideas into successful builds, develop efficient project plans, avoid costly mistakes before construction begins, and create furniture that balances beauty, strength, function, and lasting craftsmanship.
Part 10: Furniture Construction and Project Planning
Every beautiful piece of furniture exists twice.
The first version lives in the imagination.
The second exists in wood.
The distance between those two versions is where craftsmanship truly reveals itself.
A table isn’t simply a collection of legs, rails, and a top.
A cabinet isn’t merely a series of panels assembled together.
Every successful project is the result of hundreds of decisions made long before the first board is cut.
Experienced woodworkers understand this instinctively.
They spend surprising amounts of time thinking before building.
They sketch ideas, study proportions, evaluate materials, anticipate problems, and mentally rehearse every stage of construction.
To someone watching from the outside, it may seem as though very little is happening.
In reality, some of the most important woodworking is taking place.
Planning doesn’t slow a project down.
It prevents unnecessary detours.
The more thoroughly you think through a project before entering the workshop, the more confidently you’ll build once the work begins.
Professional furniture rarely happens by accident.
It’s designed that way.
Every Great Project Begins With a Purpose
Before choosing lumber or sharpening tools, ask one question:
What is this piece meant to do?
Function should always guide design.
A coffee table built for everyday family life faces different demands than a decorative display table.
A dining chair must support years of movement and weight.
A bookshelf should resist sagging while complementing the room around it.
Understanding the purpose helps determine:
- Dimensions.
- Material selection.
- Joinery.
- Finish.
- Hardware.
- Overall design.
When purpose becomes clear, many design decisions become much easier.
Build for the Person Who Will Use It
Beautiful furniture is enjoyable to admire.
Comfortable, practical furniture is enjoyable to live with.
Think carefully about the people who will interact with your work.
Consider:
- Height.
- Reach.
- Comfort.
- Accessibility.
- Daily habits.
- Available space.
- Future needs.
A desk designed for long hours should prioritize ergonomics.
A storage cabinet should simplify organization.
A dining table should encourage conversation as much as it supports meals.
Furniture serves people.
Never lose sight of that relationship.
Start With Simple Sketches
Many beginners assume every project requires advanced design software.
Not at all.
Some of the best ideas begin with a pencil and a blank sheet of paper.
Your initial sketch doesn’t need artistic perfection.
It needs clarity.
Sketching allows you to explore:
- Overall proportions.
- Component relationships.
- Design variations.
- Visual balance.
- Construction ideas.
Even rough drawings often reveal improvements before expensive materials are involved.
Ideas evolve more easily on paper than in hardwood.
Create Detailed Working Drawings
Once the concept feels right, develop more accurate plans.
Working drawings become your roadmap throughout construction.
Include:
- Overall dimensions.
- Individual component sizes.
- Joinery locations.
- Material thicknesses.
- Hardware placement.
- Assembly sequence.
The clearer the drawing, the fewer decisions you’ll need to make during construction.
Planning removes uncertainty.
Learn the Importance of Proportion
Some furniture simply feels right the moment you see it.
Often, the reason isn’t decoration.
It’s proportion.
Balanced relationships between width, height, thickness, and spacing create harmony almost subconsciously.
Experienced designers constantly evaluate questions like:
- Are the legs too heavy?
- Is the tabletop too thick?
- Does the cabinet appear visually balanced?
- Are drawer sizes pleasing to the eye?
Good proportions make furniture feel timeless.
Poor proportions make even flawless craftsmanship appear awkward.
Material Selection Shapes Everything
Choosing wood isn’t only about appearance.
Different projects demand different characteristics.
Consider:
- Strength.
- Stability.
- Grain pattern.
- Workability.
- Durability.
- Availability.
- Budget.
For example:
A workbench values strength above decorative grain.
A dining table often balances beauty with durability.
A painted cabinet may prioritize stability over dramatic figure.
Every material choice influences later decisions.
Think About Wood Movement Before Building
By now you’ve learned that wood naturally expands and contracts.
Furniture design must respect that reality.
Professional projects account for seasonal movement through thoughtful construction techniques.
Examples include:
- Floating panels.
- Expansion gaps.
- Specialized fasteners.
- Grain orientation.
- Proper joinery selection.
Ignoring wood movement doesn’t stop it.
It simply guarantees future problems.
Smart design embraces nature instead of resisting it.
Break Large Projects Into Smaller Systems
Looking at an entire wardrobe or dining table can feel overwhelming.
Professionals rarely think about the whole project all at once.
Instead, they divide it into manageable sections.
For example:
A cabinet becomes:
- Base.
- Side panels.
- Shelves.
- Doors.
- Drawers.
- Face frame.
- Back panel.
- Hardware.
Completing one system at a time creates steady progress while reducing complexity.
Large accomplishments often result from many small victories.
Build a Cut List Before Touching Lumber
One of the simplest habits that separates experienced woodworkers from beginners is creating a detailed cut list.
A good cut list includes:
- Part names.
- Quantities.
- Final dimensions.
- Material thickness.
- Wood species.
- Grain direction.
- Special notes.
Working from a cut list reduces waste while ensuring nothing is overlooked.
It also makes lumber purchasing significantly easier.
Plan for Efficiency
Professional workshops rarely move randomly.
Every step follows a logical order.
A typical workflow might include:
- Material selection.
- Rough cutting.
- Milling.
- Final dimensioning.
- Joinery.
- Dry fitting.
- Sanding.
- Assembly.
- Final surface preparation.
- Finishing.
Changing this order unnecessarily often creates extra work.
Good planning saves energy.
Dry Assembly Is Worth Every Minute
Before reaching for glue, assemble everything first.
Dry fitting reveals:
- Alignment issues.
- Missing components.
- Tight joints.
- Loose joints.
- Clamp requirements.
- Assembly challenges.
Think of it as a rehearsal.
The more familiar the process becomes before glue enters the picture, the smoother final assembly will be.
Professionals rarely improvise during glue-ups.
They prepare.
Design for Strength, Not Just Appearance
Beautiful furniture should also survive daily life.
Every project experiences forces.
People lean.
Sit.
Pull.
Lift.
Open.
Close.
Good design anticipates those forces.
Questions worth asking include:
- Which joints experience the greatest stress?
- Where should reinforcement be added?
- Does weight distribute evenly?
- Are shelves adequately supported?
- Will hardware remain accessible for maintenance?
Furniture should perform as well as it looks.
Hardware Matters More Than Many Beginners Realize
Quality hardware quietly improves the entire experience of using furniture.
Consider:
- Drawer slides.
- Hinges.
- Pulls.
- Knobs.
- Shelf supports.
- Adjustable feet.
- Fasteners.
Cheap hardware often becomes the weakest part of an otherwise excellent project.
Reliable hardware complements careful craftsmanship rather than distracting from it.
Build Test Pieces Before Expensive Projects
One of the smartest habits professionals develop is making prototypes.
These may include:
- Joinery samples.
- Finish samples.
- Scale models.
- Mock-ups.
- Hardware tests.
Small experiments answer important questions before expensive lumber is involved.
Testing builds confidence while reducing costly surprises.
Leave Room for Improvement
Every completed project teaches something.
Perhaps the joinery could become cleaner.
Maybe the proportions deserve refinement.
Perhaps a different finish would better suit the design.
Rather than viewing these observations as disappointments, experienced woodworkers collect them as lessons for future work.
Every finished project becomes a teacher for the next one.
That’s how craftsmanship evolves.
Build a Portfolio From the Beginning
Take photographs of every completed project.
Even simple early work deserves documentation.
Record:
- Overall views.
- Joinery details.
- Finish quality.
- Construction stages.
- Lessons learned.
Months later, those images reveal progress that daily practice often hides.
A portfolio isn’t only valuable for clients.
It’s powerful motivation for yourself.
Know When to Stop Adding Features
Beginners sometimes believe every project should demonstrate every skill they’ve learned.
Professionals understand restraint.
A clean, elegant table often creates greater impact than one overloaded with unnecessary decoration.
Ask yourself:
Does this feature improve the furniture?
Or does it simply make the project more complicated?
Simplicity executed exceptionally well often becomes timeless.
Complexity without purpose rarely does.
Time Is One of Your Most Valuable Materials
Wood is replaceable.
Glue can be purchased again.
Even tools can eventually be upgraded.
Time cannot.
Plan realistically.
Allow extra time for:
- Milling.
- Glue drying.
- Sanding.
- Finishing.
- Unexpected corrections.
Projects almost always take longer than expected.
Accepting that reality makes the experience far more enjoyable.
Furniture Is More Than an Object
When most people look at a finished table, they see a place to eat.
When they see a chair, they think about sitting.
When they open a cabinet, they think about storage.
A woodworker sees something different.
They remember selecting each board.
They remember adjusting a joint until it fit perfectly.
They remember changing a design halfway through because the grain deserved a better place.
Every piece of furniture carries those invisible decisions inside it.
That’s what makes handcrafted work different from mass production.
Furniture isn’t merely assembled.
It’s considered.
Every proportion, every joint, every finish choice reflects someone’s willingness to solve problems thoughtfully instead of accepting convenient solutions.
Years from now, people may never know how many sketches you made before building a cabinet.
They won’t see the prototype joint you cut and discarded.
They’ll never notice the hours spent refining proportions before the first board reached the saw.
But they’ll experience the result.
The drawer that closes effortlessly.
The chair that feels comfortable for hours.
The table that becomes part of family celebrations for decades.
That’s the quiet power of thoughtful project planning.
Good furniture doesn’t simply occupy space.
It improves the way people live within it.
And every truly memorable piece begins the same way.
With a craftsperson willing to think carefully before picking up a tool.
Next up (Part 11): Intermediate Skills That Separate Hobbyists from Craftsmen — discover the advanced habits, precision techniques, workflow improvements, and problem-solving abilities that elevate woodworking from competent project building to consistently professional-quality craftsmanship.
Part 11: Intermediate Skills That Separate Hobbyists from Craftsmen
There comes a point in every woodworker’s journey when the obvious milestones begin to fade.
You’ve learned how to measure accurately.
You understand your tools.
Your joints fit well.
Your projects look increasingly polished.
From the outside, it might seem as though you’ve arrived.
But inside the workshop, something changes.
You begin noticing details that once escaped your attention.
A drawer gap that is half a millimeter wider on one side.
A tabletop that feels perfectly flat until reflected light reveals the slightest dip.
A finish that looks beautiful from across the room but shows subtle inconsistencies when viewed up close.
This isn’t discouraging.
It’s one of the clearest signs that you’re improving.
As your skills grow, so does your ability to recognize opportunities for refinement.
The transition from hobbyist to craftsperson rarely happens because of one revolutionary technique.
It happens because hundreds of small habits become second nature.
You stop thinking only about building furniture.
You begin thinking about building it better.
That’s the stage where true craftsmanship starts to take shape.
The Difference Between Completing Projects and Mastering the Craft
A beginner often measures success by asking:
“Did I finish the project?”
An intermediate woodworker asks:
“What would I improve if I built it again?”
That single question changes everything.
Completion becomes only one milestone.
Continuous improvement becomes the goal.
Every project becomes both a finished piece and a lesson for the next one.
Professionals never stop evaluating their work because refinement is part of the craft—not evidence that something went wrong.
Precision Becomes a Habit Instead of an Effort
When you first learned woodworking, accuracy required complete concentration.
Every measurement demanded careful thought.
Every cut felt deliberate.
With experience, precision gradually becomes automatic.
You naturally:
- Check reference faces before measuring.
- Verify machine settings before cutting.
- Inspect grain direction instinctively.
- Test joint fit before applying glue.
- Anticipate problems before they develop.
These routines no longer feel like extra work.
They’re simply how you work.
That’s one of the defining characteristics of experienced craftspeople.
Learn to Read Wood Before Cutting It
Intermediate woodworkers stop seeing lumber as identical boards.
Instead, they begin reading each piece individually.
Before making the first cut, they study:
- Grain direction.
- Figure.
- Growth rings.
- Natural defects.
- Color variation.
- Stability.
- Moisture behavior.
Those observations influence nearly every decision that follows.
Sometimes rotating a board completely changes the appearance of a tabletop.
Sometimes moving one knot transforms an ordinary cabinet door into a striking design feature.
The wood often tells you how it wants to be used.
You simply have to learn how to listen.
Consistency Matters More Than Perfection
Perfect projects rarely exist.
Consistent projects do.
Professional furniture feels refined because every detail follows the same standard.
If one edge receives a gentle chamfer, every matching edge receives the same treatment.
If drawer gaps measure evenly on one side, they remain even throughout the piece.
Consistency creates harmony.
The human eye naturally notices irregularity long before it notices perfection.
Maintaining consistent quality often has a greater visual impact than pursuing impossible flawlessness.
Develop an Eye for Fine Details
Intermediate woodworkers begin seeing things most people never notice.
They observe:
- Symmetrical reveals.
- Grain continuity.
- Hardware alignment.
- Finish consistency.
- Shadow lines.
- Surface reflections.
- Joinery transitions.
These details rarely attract attention individually.
Together, they create furniture that feels exceptionally well made.
Quality often lives in the smallest decisions.
Workflow Becomes More Organized
At first, woodworking often feels reactive.
You solve problems as they appear.
With experience, your workflow becomes increasingly intentional.
You naturally prepare:
- Tools before beginning.
- Clamps before glue-ups.
- Hardware before assembly.
- Finishing supplies before sanding.
- Cut lists before milling lumber.
Preparation replaces improvisation.
As a result, projects become calmer, smoother, and more enjoyable.
Machine Setup Receives More Attention Than Machine Operation
Beginners spend most of their energy using machines.
Professionals spend surprising amounts of time preparing them.
Before an important operation, experienced woodworkers routinely verify:
- Fence alignment.
- Blade condition.
- Blade height.
- Miter gauge accuracy.
- Dust collection.
- Feed direction.
- Material support.
Those few minutes of setup often eliminate hours of correction later.
Precision begins before the switch is turned on.
Master Repeatability
Building one excellent drawer is satisfying.
Building twelve identical drawers is a different challenge entirely.
Repeatability separates casual woodworking from professional production.
Achieve consistency by using:
- Story sticks.
- Stop blocks.
- Setup blocks.
- Dedicated jigs.
- Reliable reference surfaces.
- Standardized workflows.
Every system reduces variation.
Professionals trust systems because systems produce dependable results.
Improve Your Glue-Up Strategy
Glue-ups often intimidate beginners because they introduce time pressure.
Intermediate woodworkers remove much of that pressure through preparation.
Before opening the glue bottle, they already know:
- Clamp locations.
- Assembly order.
- Joint orientation.
- Cleanup strategy.
- Required tools.
- Working time.
Nothing is left to chance.
A calm glue-up almost always produces cleaner work.
Learn the Art of Correction
No project unfolds exactly as planned.
What distinguishes experienced woodworkers isn’t avoiding mistakes.
It’s correcting them gracefully.
They know how to:
- Adjust tight joints.
- Repair small gaps.
- Blend finish imperfections.
- Replace damaged components.
- Modify designs without compromising quality.
Problem-solving becomes one of the most valuable woodworking skills you’ll ever develop.
Sometimes the repair is invisible.
Sometimes it improves the project.
Moisture Awareness Becomes Second Nature
At this stage, you stop thinking about wood movement only when problems appear.
You anticipate it from the beginning.
You naturally consider:
- Seasonal humidity.
- Lumber acclimation.
- Grain orientation.
- Expansion space.
- Panel construction.
Furniture built with these principles remains stable long after completion.
Nature isn’t an obstacle.
It’s part of the design process.
Learn to Balance Speed With Accuracy
Intermediate woodworkers gradually become faster.
Interestingly, they rarely feel rushed.
Efficiency grows because unnecessary movement disappears.
Tools remain organized.
Measurements become deliberate.
Machine adjustments become familiar.
Experience reduces hesitation.
The goal isn’t working quickly.
The goal is eliminating wasted effort.
True efficiency feels calm.
Improve Your Surface Evaluation
Sanding eventually becomes more than following grit numbers.
You begin evaluating surfaces using:
- Reflected light.
- Fingertips.
- Edge transitions.
- Grain clarity.
- Finish absorption.
Small imperfections become easier to detect before finishing reveals them permanently.
Surface preparation evolves from routine to craftsmanship.
Design Begins to Influence Construction
Earlier projects often follow existing plans closely.
As your confidence grows, you’ll begin making thoughtful design decisions.
Perhaps you’ll:
- Adjust proportions.
- Modify joinery.
- Change wood selection.
- Improve storage.
- Simplify construction.
- Refine decorative details.
Rather than merely following plans, you begin collaborating with them.
Creativity develops naturally from understanding.
Build Furniture That Can Be Repaired
One hallmark of quality craftsmanship is serviceability.
Consider future maintenance while designing.
Can damaged hardware be replaced?
Will panels move safely with the seasons?
Can drawers be adjusted years later?
Can finishes be renewed without rebuilding the entire piece?
Furniture designed for longevity reflects thoughtful craftsmanship long after the workshop lights are turned off.
Develop Your Personal Style
One of the most rewarding transitions occurs when your work begins looking unmistakably yours.
Perhaps you’re drawn to:
- Clean contemporary lines.
- Traditional joinery.
- Scandinavian simplicity.
- Rustic textures.
- Shaker-inspired restraint.
- Japanese woodworking principles.
- Arts and Crafts proportions.
Style cannot be rushed.
It develops naturally through experience, curiosity, and repeated choices.
The goal isn’t copying another craftsperson forever.
It’s discovering your own voice.
Learn From Every Finished Project
Professional growth rarely happens during success alone.
Often, your greatest lessons come from asking difficult questions afterward.
Keep a notebook or digital journal recording:
- What worked exceptionally well.
- Which tools performed best.
- Unexpected challenges.
- Design improvements.
- Material observations.
- Finishing results.
- Ideas for future builds.
Over years, those notes become one of your most valuable woodworking resources.
Experience is most useful when it’s remembered.
The Craft Begins to Change You
At some point, woodworking stops being something you do on weekends.
It begins influencing the way you see the world.
You notice furniture differently.
You admire grain patterns in old doors.
You instinctively examine joinery beneath restaurant tables.
You pause in antique shops, wondering how a cabinet was built generations ago.
More importantly, your relationship with time changes.
You become comfortable working slowly when quality demands it.
You understand that rushing rarely saves time in the long run.
You begin valuing objects that are built to last rather than built to be replaced.
Those lessons extend far beyond the workshop.
Woodworking teaches patience.
It teaches observation.
It teaches humility because every new project presents another opportunity to learn.
It teaches confidence because every completed build proves you’re capable of solving problems that once seemed overwhelming.
And perhaps most importantly, it teaches respect.
Respect for the material.
Respect for the tools.
Respect for the people who will one day use what you’ve created.
That’s the quiet transformation happening beneath every intermediate skill.
You’re no longer just improving your furniture.
You’re refining the way you think.
And that’s what ultimately separates someone who simply builds projects from someone who truly practices the craft.
Next up (Part 12): Advanced Techniques Used by Professionals — explore the methods, precision workflows, advanced joinery, veneering, bending, inlay, complex furniture construction, and fine craftsmanship techniques that distinguish master woodworkers from everyone else.
Part 12: Advanced Techniques Used by Professionals
Walk into the workshop of a master woodworker, and something feels different almost immediately.
It isn’t necessarily the size of the space.
It isn’t always the cost of the tools.
And it certainly isn’t because every project is more complicated.
The difference lies in the details.
A drawer glides with effortless precision.
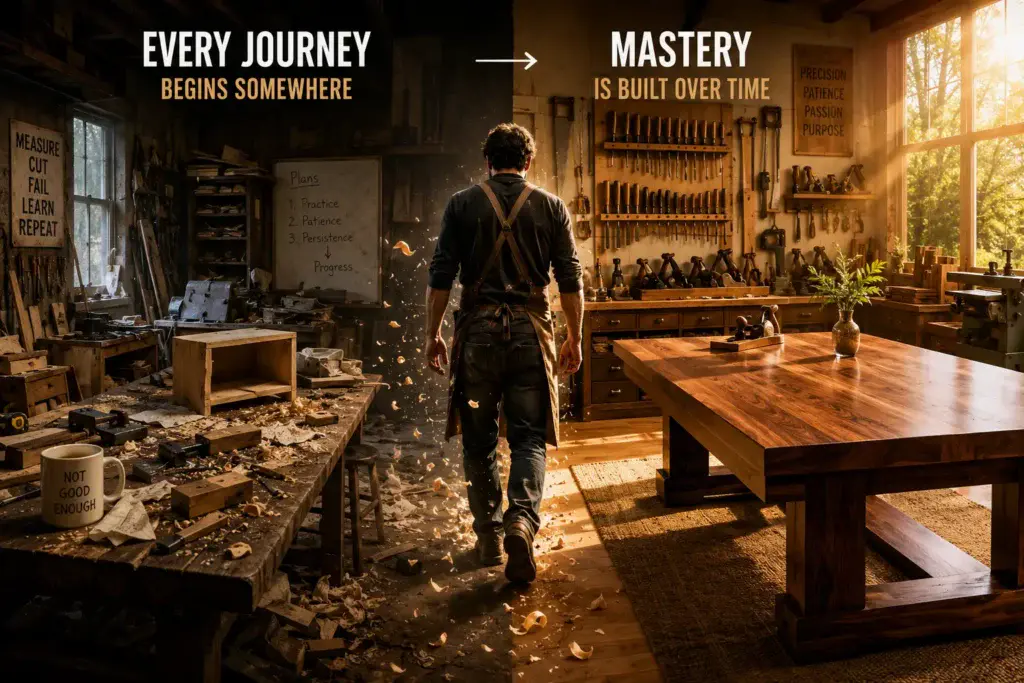
A tabletop appears to float even though it’s incredibly strong.
Grain flows seamlessly across doors and drawers as if the entire cabinet were carved from a single tree.
Complex joints disappear into the design.
Curved components feel graceful instead of forced.
Nothing demands attention.
Everything earns it.
That level of craftsmanship isn’t achieved through secret techniques.
It’s the result of years spent refining fundamentals until advanced methods become natural extensions of them.
Professionals don’t abandon the basics.
They build upon them.
The techniques in this chapter represent that next step.
Not because they’re flashy.
But because they solve problems with remarkable precision while elevating both the strength and beauty of the finished work.
Mastery Begins With Process, Not Complexity
Many beginners assume advanced woodworking means learning increasingly difficult joints.
While technical skills certainly matter, professionals know that complexity alone never creates quality.
In fact, advanced woodworking often looks surprisingly simple.
Why?
Because every decision has been carefully considered before construction begins.
Master craftspeople focus on:
- Precision.
- Repeatability.
- Efficiency.
- Material behavior.
- Long-term durability.
- Elegant problem-solving.
The goal isn’t to prove how difficult something was to build.
The goal is to make exceptional craftsmanship appear effortless.
Advanced Joinery: Strength Hidden Inside Beauty
As projects become more demanding, joinery evolves beyond simple connections.
Each joint is selected for specific structural and visual reasons.
Professionals often combine multiple joinery methods within a single project to balance strength, movement, appearance, and efficiency.
Through and Half-Blind Dovetails
Once basic dovetails become comfortable, advanced variations open new design possibilities.
Through dovetails proudly display the joint on both sides, celebrating craftsmanship as part of the furniture’s appearance.
Half-blind dovetails, often found in premium drawers, conceal the joint from the front while maintaining exceptional strength.
Both require remarkable precision, rewarding careful layout and patient fitting.
Twin and Haunched Mortise-and-Tenon Joints
When a standard mortise and tenon isn’t sufficient, more advanced versions distribute forces more effectively.
These variations are commonly used in:
- Large doors.
- Heavy tables.
- Architectural woodworking.
- Traditional furniture.
Their additional complexity serves a purpose.
Every extra shoulder and tenon improves structural performance rather than adding unnecessary difficulty.
Bridle Joints
A bridle joint resembles an open mortise and tenon.
Because both components remain visible during fitting, achieving accurate alignment becomes easier.
Professionals frequently use bridle joints for:
- Frames.
- Workbenches.
- Structural furniture.
- Cabinet components.
They’re admired for combining strength with relatively straightforward construction.
Veneering: Creating Beauty Beyond Solid Wood
Many people mistakenly believe veneer is a modern shortcut.
In reality, fine veneer work has been used by master furniture makers for centuries.
High-quality veneer offers remarkable advantages.
It allows you to:
- Showcase rare figured wood.
- Create symmetrical grain patterns.
- Increase dimensional stability.
- Reduce material waste.
- Produce intricate decorative surfaces.
The finest veneer work often appears indistinguishable from solid wood until examined closely.
Bookmatching and Slip Matching
Professionals frequently arrange veneer leaves to create dramatic visual effects.
Bookmatching mirrors adjacent sheets, producing symmetrical grain patterns similar to opening a book.
Slip matching places consecutive sheets side by side, preserving consistent grain flow.
Both techniques require thoughtful planning before a single sheet is glued.
The result transforms ordinary panels into works of art.
Bent Wood: Giving Furniture Graceful Movement
Straight lines dominate many beginner projects.
Curves introduce an entirely new level of sophistication.
Professionals use several techniques to bend wood successfully.
Steam Bending
Steam softens wood fibers, allowing boards to bend around carefully prepared forms.
After cooling and drying, the wood largely retains its new shape.
Steam bending appears in:
- Chairs.
- Rockers.
- Boat building.
- Architectural details.
- Decorative furniture.
The process demands patience, but the results possess an elegance difficult to achieve any other way.
Bent Laminations
Instead of forcing thick lumber into shape, thin strips are glued together over curved forms.
The finished component becomes remarkably stable while maintaining graceful curves.
This method offers excellent control and repeatability.
Kerf Bending
Strategically spaced cuts allow wood to flex along predetermined lines.
Although not suitable for every structural application, kerf bending provides creative possibilities for cabinetry, decorative work, and interior design.
Inlay and Decorative Details
Advanced woodworking isn’t only about structure.
It’s also about refinement.
Inlay introduces contrasting materials into precisely cut recesses.
Common materials include:
- Exotic hardwoods.
- Brass.
- Copper.
- Mother-of-pearl.
- Stone.
- Resin.
Executed well, inlay feels integrated rather than decorative for its own sake.
Subtle details often produce the greatest visual impact.
Carving: Adding Dimension by Hand
Even in modern workshops filled with machines, carving remains uniquely expressive.
It allows furniture to develop character beyond straight lines and flat surfaces.
Professional carving may include:
- Relief carving.
- Chip carving.
- Decorative moldings.
- Sculptural details.
- Organic textures.
Unlike machine-produced ornamentation, hand carving reflects the personality of its maker.
Every tool mark contributes to the final story.
Complex Furniture Construction
Large furniture demands far more than simply scaling up smaller projects.
As dimensions increase, so do structural challenges.
Professionals carefully plan:
- Load distribution.
- Seasonal movement.
- Assembly sequence.
- Transportation.
- Installation.
- Future maintenance.
A large dining table, for example, must remain flat despite years of humidity changes while supporting significant weight without sagging.
Complexity requires foresight.
Building Invisible Strength
One hallmark of professional furniture is that its structural solutions rarely attract attention.
Reinforcement may include:
- Hidden steel supports.
- Floating panels.
- Sliding dovetails.
- Internal web frames.
- Expansion hardware.
- Specialized fasteners.
The furniture feels effortlessly strong because thoughtful engineering disappears into the design.
Mastering Precision Glue-Ups
As projects become larger and more intricate, glue-ups demand military-level preparation.
Professionals rehearse repeatedly before opening adhesive.
They prepare:
- Every clamp.
- Every caul.
- Every protective pad.
- Every assembly sequence.
- Every cleanup tool.
Nothing is left to memory.
When glue begins curing, preparation becomes invaluable.
Smooth glue-ups are rarely lucky.
They’re rehearsed.
Advanced Surface Preparation
Master woodworkers often spend extraordinary amounts of time refining surfaces before finishing.
Beyond ordinary sanding, techniques may include:
- Card scraping.
- Cabinet scraping.
- Hand planing for final smoothing.
- Burnishing.
- Grain enhancement.
- Careful edge refinement.
These methods produce surfaces with remarkable clarity and tactile warmth.
Sometimes a hand-planed surface reflects light differently than sanded wood.
Experienced eyes immediately recognize the difference.
Color Matching and Grain Selection
Professionals think beyond individual boards.
They think about entire compositions.
Before assembly, they arrange components carefully to achieve:
- Continuous grain flow.
- Balanced color.
- Visual symmetry.
- Natural movement.
- Pleasant figure distribution.
A cabinet may require dozens of adjustments before the arrangement feels right.
Those invisible decisions create furniture that appears effortlessly harmonious.
Build Specialized Jigs for Specialized Work
As skills develop, custom jigs become increasingly valuable.
Professionals often create dedicated fixtures for recurring operations such as:
- Tapering legs.
- Sliding dovetails.
- Box joints.
- Dovetails.
- Repetitive drilling.
- Curved templates.
- Mortising.
Well-designed jigs improve:
- Accuracy.
- Safety.
- Speed.
- Repeatability.
In many workshops, the jig collection becomes almost as valuable as the machines themselves.
Sharpening Becomes an Obsession
At the advanced level, sharp tools aren’t merely preferred.
They’re expected.
Professionals inspect cutting edges constantly.
They sharpen proactively rather than reactively.
Why?
Because razor-sharp tools produce:
- Cleaner joinery.
- Better surfaces.
- Less fatigue.
- Greater control.
- Improved safety.
Tool maintenance becomes inseparable from craftsmanship itself.
Design With Negative Space
Advanced furniture isn’t defined solely by what you build.
It’s also defined by what you intentionally leave empty.
Negative space influences:
- Visual balance.
- Elegance.
- Lightness.
- Comfort.
- Perceived proportions.
Removing unnecessary elements often improves furniture more than adding decorative features.
Sophisticated design frequently results from thoughtful restraint.
Develop an Intuitive Workflow
Eventually, your workshop begins operating almost like a conversation.
Each step naturally leads into the next.
You instinctively know:
- Which board to prepare first.
- Which joint should be cut before another.
- When to sharpen.
- When to stop.
- When to rethink a design.
Experience quietly eliminates hesitation.
The process feels fluid because years of repetition have transformed conscious effort into instinct.
Teach Others to Deepen Your Own Understanding
One surprising characteristic of many master craftspeople is their willingness to teach.
Explaining techniques forces you to clarify your own thinking.
Whether mentoring a friend, helping a family member, or demonstrating a skill at a woodworking club, teaching often reveals subtle insights you hadn’t previously noticed.
Knowledge grows when it’s shared.
That’s one reason traditional woodworking has survived for centuries.
Each generation passes both techniques and values to the next.
The Highest Level of Craftsmanship Is Invisible
People often assume advanced woodworking is about producing increasingly elaborate furniture.
Sometimes it is.
More often, it’s about removing distractions until only excellence remains.
A perfectly fitted drawer doesn’t announce itself.
It simply works.
A tabletop appears perfectly balanced without anyone consciously noticing why.
A chair supports the body so naturally that comfort feels effortless.
These qualities aren’t accidents.
They’re the result of thousands of thoughtful decisions made long before the furniture reached someone’s home.
That’s the paradox of mastery.
The better your craftsmanship becomes, the less attention it calls to itself.
Instead of noticing the technique, people experience the outcome.
They trust the drawer because it slides smoothly.
They admire the cabinet because it feels balanced.
They return to the dining table year after year because it has quietly become part of their lives.
That is the true purpose of advanced woodworking.
Not to impress people with complicated methods.
But to create objects so thoughtfully designed and carefully built that they become almost invisible in daily life—reliable companions that serve beautifully for generations.
When your work reaches that point, you’ve achieved something far greater than technical skill.
You’ve created craftsmanship that speaks softly, lasts long, and never needs to explain itself.
Next up (Part 13): Workshop Organization, Maintenance, and Efficiency — discover how professional woodworkers design workshops that maximize safety, productivity, and creativity, while learning the maintenance routines that keep tools performing at their absolute best for decades.
Part 13: Workshop Organization, Maintenance, and Efficiency
A workshop has a personality.
Walk into one, and you’ll often know within seconds how its owner approaches the craft.
Some shops feel chaotic. Tools disappear beneath piles of offcuts, extension cords snake across the floor, and every new project begins with a frustrating search for equipment that was “just here a minute ago.”
Others feel different.
They’re calm.
Not because they’re spotless or filled with expensive cabinets, but because everything has a purpose. Tools are easy to reach. Lumber is stored thoughtfully. Workflows feel natural. Even in the middle of a complex build, the space seems to support the craft instead of competing with it.
That difference isn’t luck.
It’s design.
Professional woodworkers understand something that beginners often discover only after years of frustration:
A well-organized workshop doesn’t just save time. It improves the quality of your work.
When your environment works with you instead of against you, your attention stays where it belongs—on the project.
A better workshop doesn’t necessarily require more square footage.
It requires better thinking.
Your Workshop Is Another Tool
Most people think of tools as objects they hold in their hands.
Experienced woodworkers think more broadly.
They view the entire workshop as one integrated system.
Every storage solution, workbench, machine location, and lighting decision influences:
- Productivity.
- Accuracy.
- Safety.
- Creativity.
- Physical comfort.
The workshop itself becomes a tool that either supports craftsmanship or quietly undermines it.
Design it intentionally.
Start With Workflow, Not Furniture
One of the most common mistakes is buying storage cabinets before understanding how you actually work.
Instead, observe your natural workflow.
Ask yourself:
- Where does lumber enter the shop?
- Where is it milled?
- Where does joinery happen?
- Where are projects assembled?
- Where do finishing tasks take place?
When these stages flow logically from one to another, unnecessary walking, lifting, and searching begin to disappear.
Efficiency is rarely about moving faster.
It’s about moving less.
Divide Your Workshop Into Functional Zones
Professional shops often organize work into dedicated areas.
Even small workshops benefit from this approach.
Lumber Storage Area
Raw material should remain organized, dry, and easily accessible.
Store lumber:
- Off the floor.
- Properly supported.
- By species when practical.
- With airflow around boards.
- Protected from excessive moisture.
Well-stored lumber remains more stable and easier to inspect.
Milling Zone
This area typically includes machines used to prepare stock.
Examples include:
- Jointer.
- Thickness planer.
- Table saw.
- Bandsaw.
Allow enough space for long boards entering and leaving each machine safely.
Planning for material movement is just as important as machine placement.
Bench Work Area
The workbench becomes the center of hand-tool operations.
This is where many precision tasks occur:
- Layout.
- Chiseling.
- Hand planing.
- Joinery.
- Fitting.
- Small assemblies.
Keep frequently used tools within comfortable reach.
Every unnecessary step interrupts concentration.
Assembly Area
Large projects need room.
Attempting glue-ups in cramped spaces increases stress and mistakes.
Whenever possible, reserve an uncluttered area specifically for:
- Dry fitting.
- Glue-ups.
- Clamping.
- Final assembly.
Preparation becomes much easier when space is available.
Finishing Area
Dust and wet finishes rarely cooperate.
A dedicated finishing space minimizes contamination while improving results.
Good lighting and cleanliness become especially valuable here.
The Workbench: The True Center of the Shop
Machines perform remarkable tasks.
But the workbench remains where craftsmanship often feels most personal.
A quality workbench should provide:
- Stability.
- Comfortable height.
- Reliable work holding.
- Durable construction.
- Accessible storage nearby.
It doesn’t need elaborate features.
It needs to support the way you work.
Many experienced woodworkers still consider their bench the most important “tool” they own.
Store Tools Where You Naturally Reach for Them
Observe yourself during projects.
Which tools leave your hands constantly?
Those deserve prime storage locations.
Frequently used tools might include:
- Combination squares.
- Marking knives.
- Tape measures.
- Chisels.
- Block planes.
- Clamps.
- Pencils.
Store them where your hands expect to find them.
Consistency reduces mental fatigue.
Searching wastes creative energy.
Vertical Space Is Often Underused
Small workshops benefit enormously from thinking upward.
Walls provide valuable storage opportunities.
Consider:
- French cleat systems.
- Pegboards.
- Wall cabinets.
- Clamp racks.
- Magnetic holders.
- Shelving.
Using vertical space keeps work surfaces clear while increasing accessibility.
A clean bench encourages productive work.
Lumber Storage Is More Important Than Most Beginners Realize
Improperly stored lumber can:
- Warp.
- Twist.
- Cup.
- Develop moisture problems.
Support boards evenly.
Allow airflow.
Avoid leaning valuable material for long periods.
Good storage protects both your investment and your future projects.
Build Shop Furniture That Solves Problems
Some of the most rewarding woodworking projects aren’t for clients.
They’re for your own workshop.
Examples include:
- Tool cabinets.
- Clamp carts.
- Mobile machine bases.
- Router tables.
- Sharpening stations.
- Assembly tables.
- Hardware organizers.
Every improvement makes future projects more enjoyable.
Your workshop evolves alongside your skills.
Label Everything
Memory is unreliable.
Labels are not.
Clearly identify:
- Hardware.
- Screws.
- Router bits.
- Sandpaper.
- Finishing supplies.
- Electrical accessories.
- Measuring tools.
- Small components.
Professionals rarely rely on remembering where something belongs.
Their systems remember for them.
Tool Maintenance Is Part of the Craft
Well-maintained tools perform better.
They also last dramatically longer.
Create regular maintenance routines.
Inspect:
- Blade sharpness.
- Fence alignment.
- Machine lubrication.
- Rust prevention.
- Electrical cords.
- Dust collection systems.
- Bearings.
- Fasteners.
Small maintenance tasks prevent major repairs.
Consistency protects your investment.
Sharpen Before You Need To
Waiting until a tool becomes frustrating often means you’ve waited too long.
Develop a habit of touching up edges regularly.
Sharp tools:
- Produce cleaner cuts.
- Improve safety.
- Require less effort.
- Reduce tear-out.
- Increase enjoyment.
Professional workshops rarely contain neglected cutting edges.
Dust Collection Is an Investment in Your Future
Wood dust affects far more than housekeeping.
It influences:
- Respiratory health.
- Machine performance.
- Surface preparation.
- Finishing quality.
- Workshop comfort.
Capture dust as close to its source as possible.
Supplement machine collection with routine cleaning.
A cleaner shop supports clearer thinking.
Lighting Shapes Accuracy
Poor lighting hides problems.
Good lighting reveals them before they become permanent.
Aim for bright, even illumination throughout the workshop.
Then add focused task lighting where detailed work occurs.
Quality lighting improves:
- Measuring.
- Joinery.
- Surface inspection.
- Finishing.
- Safety.
If you struggle to see clearly, your craftsmanship suffers quietly.
Climate Control Protects More Than Comfort
Temperature and humidity influence both wood and woodworkers.
Stable conditions help:
- Reduce lumber movement.
- Improve finishing.
- Protect tools from rust.
- Increase comfort.
- Extend working sessions.
While perfect climate control isn’t always possible, reducing extreme fluctuations benefits nearly every project.
Inventory Saves Money
Many woodworkers unknowingly purchase materials they already own.
Simple inventory systems prevent unnecessary spending.
Track:
- Lumber.
- Hardware.
- Finishes.
- Sandpaper.
- Glue.
- Router bits.
- Replacement blades.
Knowing what you have improves project planning while reducing waste.
Build Checklists for Repeating Tasks
Professionals trust routines because routines reduce mistakes.
Useful workshop checklists might include:
Before Milling
- Inspect lumber.
- Check moisture.
- Verify machine setup.
- Plan grain orientation.
Before Glue-Up
- Dry fit complete.
- Clamps prepared.
- Glue ready.
- Cleanup supplies nearby.
Before Finishing
- Final sanding complete.
- Dust removed.
- Lighting checked.
- Finish tested.
These simple habits improve consistency across every project.
Keep Learning From Your Workshop
Your shop should never become static.
Pay attention to recurring frustrations.
Ask yourself:
- Which tool always feels too far away?
- Which workflow creates unnecessary walking?
- Which storage system never stays organized?
- Which machine needs better support?
Each annoyance points toward an improvement.
Professional workshops evolve continuously.
Efficiency Isn’t About Working Faster
One of the biggest misconceptions in woodworking is equating efficiency with speed.
Experienced craftspeople know better.
Real efficiency means:
- Fewer mistakes.
- Less wasted movement.
- Better preparation.
- Smarter organization.
- Consistent routines.
The workshop feels peaceful because unnecessary decisions have already been removed.
Energy goes into building rather than searching, cleaning, or correcting preventable problems.
Your Workshop Should Inspire You to Begin
There will be days when motivation feels low.
Projects become challenging.
Life becomes busy.
During those moments, your workshop matters more than ever.
A clean bench invites another hour of work.
Sharp tools encourage another careful cut.
Organized storage makes starting feel effortless instead of overwhelming.
The space itself begins removing resistance.
Over months and years, something remarkable happens.
The workshop grows alongside you.
The storage cabinet you built becomes filled with better tools.
The workbench gathers honest marks from countless successful projects.
The walls display jigs created to solve problems you once struggled with.
Nothing remains exactly as it was.
Because neither do you.
A workshop isn’t simply where woodworking happens.
It’s where skills mature.
It’s where patience becomes habit.
It’s where ideas become objects that outlive their makers.
Treat that space with the same care you give your finest projects.
Because every future piece you build will begin there.
And when your workshop supports your craftsmanship instead of slowing it down, you’ll spend less time managing the space—and more time doing what brought you there in the first place:
Creating work you’re genuinely proud to put your name on.
Next up (Part 14): Turning Your Woodworking Skills into a Career or Business — discover how experienced woodworkers transition from passionate hobbyists to successful professionals, attract clients, price projects confidently, market their craftsmanship, and build a rewarding woodworking business that stands the test of time.
Part 15: Continuing Your Journey Toward Master Craftsmanship
The most remarkable thing about woodworking is that you never truly finish learning it.
You may build your first successful bookshelf and feel an incredible sense of accomplishment.
Years later, you’ll build another bookshelf—and realize how much your understanding has grown.
Another decade passes, and you’ll likely see opportunities to improve it again.
That isn’t a sign that your earlier work lacked value.
It’s proof that craftsmanship is a lifelong pursuit.
Every experienced woodworker can point to projects they once considered their finest work but would approach differently today.
Not because those projects were failures.
Because the craft continued teaching them.
That’s one of woodworking’s greatest rewards.
The destination keeps moving.
And that’s exactly what keeps the journey exciting.
Build Consistently Rather Than Occasionally
Many people wait until they have an entire free weekend before entering the workshop.
Professionals—and serious hobbyists alike—often take a different approach.
Consistency almost always outperforms intensity.
Even thirty focused minutes spent:
- Sharpening tools
- Practicing joinery
- Planning a future project
- Sanding components
- Learning a new technique
will compound into meaningful progress over months and years.
Craftsmanship grows through repetition.
Not occasional bursts of inspiration.
Challenge Yourself With Every Project
If every project requires the exact same skills, improvement eventually slows.
Aim to include one new challenge each time you build.
Perhaps you’ll try:
- A new wood species
- An unfamiliar joint
- A different finish
- Curved components
- Better grain matching
- Hand-cut joinery
- Advanced hardware installation
One new skill at a time keeps learning enjoyable while avoiding unnecessary frustration.
Small improvements accumulate into major expertise.
Study the Work of Great Craftspeople
Every generation of woodworkers has learned from those who came before.
Pay attention to exceptional furniture.
Visit:
- Museums
- Historic homes
- Fine furniture galleries
- Local woodworking exhibitions
- Artisan markets
Study:
- Proportions
- Joinery
- Surface quality
- Grain selection
- Hardware choices
- Overall design
Don’t simply admire beautiful furniture.
Ask yourself why it works so well.
Observation is one of the fastest ways to develop design intuition.
Invest in Knowledge Before Expensive Tools
One of the biggest misconceptions in woodworking is that better tools automatically produce better furniture.
While quality tools certainly matter, they cannot replace understanding.
Before purchasing another machine, consider investing in:
- Books
- Courses
- Workshops
- Demonstrations
- Mentorship
- Historical references
Knowledge improves every tool you already own.
The reverse isn’t always true.
Learn From Every Mistake
Mistakes are unavoidable.
Even master furniture makers occasionally cut the wrong board, misread a measurement, or rethink a design halfway through construction.
The difference lies in their response.
Rather than asking:
“How did I ruin this?”
They ask:
“What can this teach me?”
Every mistake reveals:
- A habit to improve
- A process to refine
- A shortcut to avoid
- A better workflow
- A stronger solution
Growth begins when frustration turns into curiosity.
Build Furniture That Matters
Some projects exist simply to practice techniques.
Others become part of people’s lives.
A dining table hosts family celebrations.
A cradle welcomes a new child.
A bookcase displays treasured memories.
A workbench supports decades of future craftsmanship.
Those pieces become more than furniture.
They become part of someone’s story.
Remember that whenever you build.
Your work may outlast you.
Develop Patience as a Competitive Advantage
Modern life rewards speed.
Woodworking rewards patience.
Allow glue to cure completely.
Let finishes dry naturally.
Practice difficult joints until they become reliable.
Resist the temptation to skip preparation.
Patience often produces results no expensive tool can replicate.
The finest furniture rarely comes from rushing.
Preserve the Craft
Woodworking has survived for thousands of years because knowledge has always been shared.
Help beginners.
Answer questions.
Demonstrate techniques.
Teach safe habits.
Encourage curiosity.
Every lesson you pass along strengthens the future of the craft.
A thriving woodworking community benefits everyone.
Never Stop Building
There will always be another technique to learn.
Another design to explore.
Another challenge to overcome.
Another project waiting patiently in the corner of your notebook.
That’s the beauty of craftsmanship.
There is always another opportunity to improve.
Not because perfection is possible.
But because learning never ends.
The workshop remains one of the few places where every completed project quietly whispers the same invitation:
“Build another.”
And with each new piece, your confidence, judgment, and creativity grow a little stronger.
Frequently Asked Questions (FAQ)
How long does it take to become good at woodworking?
Most beginners become comfortable with basic tools and simple furniture projects within 6–12 months of consistent practice. Developing advanced craftsmanship typically takes several years of regular building, but improvement continues throughout a lifetime.
What is the best woodworking project for beginners?
Start with projects that teach core skills without unnecessary complexity, such as:
- Cutting boards
- Small shelves
- Wooden boxes
- Step stools
- Picture frames
- Simple benches
These projects help you practice measuring, cutting, assembly, sanding, and finishing.
Which wood is easiest for beginners?
Softwoods like pine are affordable and easy to work with, while hardwoods such as poplar are forgiving and stable for furniture projects. As your skills improve, you can explore woods like maple, walnut, cherry, white oak, and ash.
Should I learn hand tools before power tools?
Ideally, yes.
Learning hand tools develops accuracy, patience, and a better understanding of wood behavior. Power tools dramatically improve efficiency, but hand-tool skills make you a more complete woodworker.
How much should I spend on my first woodworking tools?
Focus on buying reliable essentials rather than filling your workshop immediately.
A modest collection of quality measuring tools, hand tools, a drill, circular saw, random orbital sander, and clamps is enough to complete many excellent projects.
Upgrade only when your current tools genuinely limit your work.
What’s the biggest mistake beginners make?
The most common mistakes include:
- Rushing projects
- Ignoring safety
- Skipping surface preparation
- Buying too many tools too soon
- Neglecting sharp tool maintenance
- Failing to plan before cutting
Patience and preparation solve most beginner problems.
Can woodworking become a full-time career?
Absolutely.
Many professionals earn a living through:
- Custom furniture
- Cabinetmaking
- Home renovations
- Architectural woodworking
- Furniture restoration
- Teaching
- Content creation
- Product design
Success depends on both craftsmanship and strong business skills.
How do I improve my woodworking faster?
Practice intentionally.
Instead of constantly starting new projects, spend time improving specific skills like:
- Joinery
- Hand-planing
- Sharpening
- Layout
- Finishing
- Design
- Machine setup
Focused practice accelerates improvement far more than repetition alone.
Recommended Products, Tools, and Learning Resources
As your woodworking skills develop, investing in dependable tools and high-quality educational resources becomes increasingly valuable. You don’t need to buy everything at once. Instead, build your workshop gradually, choosing tools that match the projects you actually build.
Essential Hand Tools
A solid foundation includes:
- Tape measure
- Combination square
- Marking knife
- Chisels
- Wooden mallet
- Block plane
- Jack plane
- Hand saw
- Clamps
- Card scraper
Buy the best quality you can reasonably afford. Well-made hand tools can last a lifetime with proper care.
Essential Power Tools
As your projects become more ambitious, these tools dramatically improve productivity:
- Circular saw
- Cordless drill/driver
- Random orbital sander
- Router
- Jigsaw
- Miter saw
- Table saw
- Thickness planer
- Shop vacuum or dust collector
Choose tools based on the type of work you enjoy most rather than buying every machine immediately.
Workshop Essentials
Don’t overlook the accessories that make every project easier:
- Sharpening stones or systems
- Quality glue
- Sandpaper assortment
- Push sticks
- Safety glasses
- Hearing protection
- Respirator
- Good work lighting
- Moisture meter
- Layout squares
Small investments here often improve both safety and project quality.
Recommended Books
Expand your understanding through trusted woodworking literature covering:
- Furniture design
- Joinery
- Wood technology
- Finishing
- Hand-tool techniques
- Workshop planning
- Historical craftsmanship
A small library can provide decades of reference material.
Online Learning Resources
Supplement hands-on practice with:
- Video tutorials
- Online woodworking schools
- Guild memberships
- Community forums
- Local woodworking clubs
- Manufacturer training courses
Learning from multiple experienced craftspeople exposes you to different techniques and problem-solving approaches.
Build a Personal Reference Collection
Over time, create your own woodworking archive containing:
- Sketchbooks
- Project notebooks
- Cut lists
- Finish samples
- Joinery samples
- Wood species references
- Supplier contacts
- Tool maintenance schedules
These personal resources become increasingly valuable as your experience grows.
Bonus #1: 90-Day Woodworking Skill Accelerator
If you’re unsure what to practice next, follow this simple 90-day roadmap to build steady momentum.
Weeks 1–2: Master the Basics
Focus on:
- Measuring and marking
- Straight cuts
- Tool safety
- Basic sanding
- Simple glue-ups
Goal: Build confidence with fundamental skills.
Weeks 3–4: Learn Joinery
Practice:
- Butt joints
- Rabbets
- Dados
- Mortise and tenon
- Dovetails (practice pieces)
Goal: Improve accuracy and joint quality.
Weeks 5–8: Complete Small Projects
Examples include:
- Wooden box
- Small shelf
- Step stool
- Picture frame
- Serving tray
Goal: Combine multiple skills into finished projects.
Weeks 9–10: Improve Finishing
Experiment with:
- Oil finishes
- Polyurethane
- Shellac
- Surface preparation
- Between-coat sanding
Goal: Produce consistently attractive surfaces.
Weeks 11–13: Build Furniture
Complete one larger project such as:
- Coffee table
- Entry bench
- Bookshelf
- Side table
Goal: Apply planning, joinery, finishing, and assembly together.
By the end of 90 days, you’ll have a strong foundation—and, more importantly, a repeatable learning routine you can continue long after the program ends.
Bonus #2: Professional Woodworker’s Master Checklists Collection
Use these checklists before every project to reduce mistakes and improve consistency.
Project Planning Checklist
✔ Define the project’s purpose
✔ Create sketches and dimensions
✔ Prepare a cut list
✔ Select suitable lumber
✔ Plan joinery
✔ Choose the finish
✔ Review safety requirements
Milling Checklist
✔ Inspect lumber
✔ Check moisture content
✔ Flatten one face
✔ Square one edge
✔ Plane to thickness
✔ Cut to final dimensions
Assembly Checklist
✔ Dry fit all parts
✔ Prepare clamps
✔ Apply glue evenly
✔ Check for square
✔ Remove squeeze-out
✔ Allow full curing time
Surface Preparation Checklist
✔ Remove milling marks
✔ Sand progressively
✔ Inspect under reflected light
✔ Break sharp edges
✔ Remove dust completely
Finishing Checklist
✔ Test finish on scrap wood
✔ Apply thin coats
✔ Allow proper drying time
✔ Sand lightly between coats
✔ Inspect the final surface
Workshop Maintenance Checklist
✔ Sharpen cutting tools
✔ Clean machines
✔ Empty dust collection
✔ Lubricate moving parts
✔ Organize tools
✔ Restock consumables
✔ Inspect safety equipment
Bonus #3: The Ultimate Woodworking Project Progression Roadmap
One of the biggest challenges for new woodworkers isn’t learning individual skills—it’s knowing what to build next.
This roadmap takes you from your very first project to advanced furniture, ensuring each build teaches new techniques without becoming overwhelming.
Stage 1: Beginner Projects (Build Confidence)
Skills Learned:
- Measuring and marking
- Straight cuts
- Basic assembly
- Sanding
- Applying simple finishes
Recommended Projects:
- Cutting board
- Rustic shelf
- Wooden serving tray
- Small storage box
- Picture frame
- Phone stand
Goal: Learn accuracy and become comfortable using both hand and power tools.
Stage 2: Beginner-Intermediate Projects (Improve Precision)
Skills Learned:
- Rabbets and dados
- Pocket-hole joinery
- Edge gluing
- Clamping techniques
- Squaring assemblies
Recommended Projects:
- Floating shelves
- Nightstand
- Entry bench
- Small bookcase
- Blanket chest
- Wall cabinet
Goal: Build confidence while producing furniture that’s both attractive and functional.
Stage 3: Intermediate Projects (Develop Craftsmanship)
Skills Learned:
- Mortise-and-tenon joints
- Drawer construction
- Face frames
- Raised panels
- Better finishing techniques
Recommended Projects:
- Coffee table
- TV stand
- Dining bench
- End table
- Kitchen island cart
- Hallway console table
Goal: Begin producing furniture with professional-level construction methods.
Stage 4: Advanced Projects (Master Furniture Making)
Skills Learned:
- Hand-cut dovetails
- Complex glue-ups
- Frame-and-panel construction
- Curved components
- Advanced hardware installation
Recommended Projects:
- Dining table
- Chest of drawers
- Writing desk
- Display cabinet
- Rocking chair
- Large wardrobe
Goal: Build heirloom-quality furniture capable of lasting generations.
Stage 5: Professional-Level Projects
Skills Learned:
- Design from scratch
- Veneering
- Bent laminations
- Decorative inlay
- Complex project management
- Client-focused customization
Recommended Projects:
- Custom built-in cabinetry
- Executive desk
- Library shelving
- Kitchen cabinetry
- Fine display furniture
- Commissioned custom pieces
Goal: Combine technical excellence with thoughtful design and efficient workflow.
Skills Mastery Checklist
As you progress, work toward mastering each of the following:
Core Skills
☐ Safe workshop practices
☐ Accurate measuring and layout
☐ Hand-tool proficiency
☐ Power-tool confidence
☐ Surface preparation
☐ Finishing techniques
Joinery Skills
☐ Butt joints
☐ Rabbets
☐ Dados
☐ Box joints
☐ Dowels
☐ Pocket holes
☐ Mortise and tenon
☐ Dovetails
Professional Skills
☐ Furniture design
☐ Wood movement planning
☐ Grain matching
☐ Project planning
☐ Workflow efficiency
☐ Shop organization
☐ Tool maintenance
☐ Problem-solving and repairs
Your Long-Term Goal
Don’t measure success by how many tools you own or how quickly you finish projects.
Measure it by questions like these:
- Are your cuts becoming more accurate?
- Are your joints fitting with less adjustment?
- Do your finishes look smoother than they did six months ago?
- Are you making fewer mistakes because you’re planning better?
- Are your projects becoming more enjoyable to build?
If the answer to those questions is “yes,” you’re making real progress.
Woodworking isn’t a race to complete the biggest project.
It’s a lifelong journey of building better skills, making smarter decisions, and creating furniture you’ll be proud to pass on for generations.
Mastering woodworking isn’t about reaching a finish line—it’s about continually refining your skills, deepening your understanding, and taking pride in creating objects that are useful, beautiful, and built to last. Every project, whether simple or ambitious, becomes another opportunity to practice the timeless principles of thoughtful design, careful execution, and lifelong learning. With patience, curiosity, and consistent effort, you’ll not only become a better woodworker—you’ll become a better craftsperson.