
Quick Answer
The secret to building premium-looking furniture isn’t owning a professional workshop or mastering advanced joinery. It’s understanding the details people subconsciously associate with quality. Clean lines, thoughtful proportions, seamless construction, carefully chosen wood, and a flawless finish can transform even the simplest woodworking project into something that looks custom-made. Whether you’re building your first shelf or your tenth coffee table, these projects prove that simple craftsmanship can create a luxury feel.
Simple Woodworking Builds That Look Premium: Why Less Often Looks Like More
There comes a moment in nearly every woodworker’s journey when something clicks.
It usually happens while wandering through a furniture showroom or scrolling past handcrafted pieces online. You pause at a table with crisp edges, a bench with perfect proportions, or a floating shelf that somehow looks effortlessly expensive.
Then you look closer.
No elaborate carvings.
No impossible joinery.
No decorative flourishes competing for attention.
Just clean lines, beautiful wood, and craftsmanship that quietly speaks for itself.
That’s the moment many beginners realize they’ve been chasing the wrong goal.
The furniture that leaves the strongest impression isn’t always the hardest to build. More often than not, it’s the furniture that knows exactly when to stop.
That realization changes everything.
Instead of measuring progress by how many complex techniques you’ve learned, you begin measuring it by how precisely you can execute the fundamentals. Straight cuts become more important than complicated cuts. Smooth surfaces matter more than decorative trim. Patience starts outperforming expensive tools.
The result?
Projects that look as though they belong in a designer furniture showroom—even if they were built over a single weekend in a garage.
This guide is built around that philosophy.
Inside, you’ll discover twenty-one woodworking projects chosen not because they’re difficult, but because they deliver extraordinary visual impact with approachable techniques. Along the way, you’ll learn why certain woods instantly feel luxurious, how professional-looking finishes are created, which beginner mistakes quietly undermine beautiful work, and the subtle design decisions that make people assume a piece cost far more than it actually did.
If you’ve ever looked at handcrafted furniture and thought, I’d love to build something like that someday, that someday starts here.
Table of Contents
- Why Some DIY Projects Feel Expensive Before You Even Touch Them
- The Five Principles Behind Premium Woodworking
- Beginner Tools That Deliver Professional Results
- Choosing Wood That Elevates Every Project
- 21 Simple Woodworking Builds That Look High-End
- Finishing Techniques That Separate Amateur Work from Professional Craftsmanship
- Common Mistakes That Instantly Cheapen a Build
- Questions Every Beginner Eventually Asks
- Products, Tools, and Resources
Why Some DIY Projects Look Expensive (And Others Never Quite Do)
Have you ever noticed that people can tell whether a piece of furniture feels “high-end” within seconds?
Most couldn’t explain why.
They simply know.
That’s because our brains are remarkably good at spotting visual consistency. Before we notice construction techniques or wood species, we register something much simpler: harmony.
Balanced proportions.
Consistent spacing.
Smooth surfaces.
Edges that catch light softly instead of sharply.
Grain that flows naturally from one surface to the next.
These details create an immediate emotional response. They signal care. Precision. Confidence.
Ironically, none of them require years of woodworking experience.
In fact, many beginner projects fail not because the builder lacked skill, but because attention drifted away from these small, almost invisible details. A hurried sanding session. Slightly uneven reveals. Hardware that draws attention instead of disappearing. Individually, they’re minor. Together, they quietly tell the eye that something feels unfinished.
Premium furniture works differently.
Rather than asking the viewer to admire complexity, it invites them to appreciate restraint.
That’s why Scandinavian interiors, Japanese-inspired woodworking, and modern minimalist furniture continue to feel timeless. Their beauty comes from proportion, texture, and craftsmanship instead of ornament.
As a beginner, that’s incredibly encouraging.
It means you don’t need advanced joinery to build something beautiful.
You need consistency.
And consistency is a skill anyone can develop.
The Premium Build Formula
Luxury furniture isn’t defined by price.
It’s defined by intention.
Spend enough time studying custom furniture makers, and patterns begin to emerge. Regardless of style, the best pieces share a surprisingly small set of principles.
Master these, and almost every project you build will begin to look more refined.
1. Start with Simplicity, Then Refine Every Detail
One of the biggest misconceptions in woodworking is believing that more detail automatically equals better craftsmanship.
The opposite is often true.
Simple furniture leaves nowhere to hide.
A floating shelf with perfectly crisp edges demands greater precision than a heavily decorated cabinet because every tiny imperfection becomes visible.
That’s why experienced furniture makers often gravitate toward minimalist designs. They allow the wood itself to become the centerpiece.
When choosing your next project, look for shapes that rely on proportion rather than decoration.
Think:
- Floating shelves
- Clean-lined coffee tables
- Scandinavian benches
- Modern nightstands
- Slatted planter boxes
- Minimal console tables
These projects remain approachable for beginners while delivering the polished appearance people associate with custom furniture.
And perhaps the best part?
They’re remarkably timeless.
Design trends come and go, but furniture built around simple geometry rarely feels outdated.
2. Hide What Doesn’t Need to Be Seen
One of the easiest ways to make a project look professionally built is surprisingly simple:
Stop drawing attention to how it’s assembled.
Professional furniture rarely invites your eye toward screws, brackets, or fasteners. Instead, the construction quietly disappears, allowing the design to take center stage.
That doesn’t mean every screw must vanish completely.
It means every visible detail should feel intentional.
Pocket-hole joinery placed on hidden faces, concealed brackets beneath floating shelves, carefully positioned fasteners underneath tabletops, and well-matched wood plugs all help preserve clean visual lines.
Think of hardware the way architects think about structural supports.
Essential?
Absolutely.
But rarely the star of the design.
As you build more projects, you’ll begin noticing something interesting: the furniture that feels the most expensive often reveals the least about how it was put together.
That quiet confidence is part of its appeal.
3. Sand Like You Mean It—Because This Is Where “Homemade” Becomes “Handcrafted”
Ask experienced woodworkers where beginners usually rush, and you’ll hear the same answer again and again:
The sanding.
It’s understandable. By the time you’ve measured, cut, assembled, and watched your project finally take shape, all you want to do is wipe on a finish and admire the result.
But that’s exactly where the biggest transformation happens.
Think about the last time you ran your hand across an expensive dining table in a furniture store. You probably weren’t studying the joinery. You were responding to something much simpler—the surface. It felt soft. Consistent. Almost effortless.
That feeling isn’t accidental.
It’s the product of patience.
Professional furniture makers often spend as much time refining surfaces as they do building the piece itself. Every sanding pass removes tiny imperfections your eyes may never consciously notice but your hands certainly will.
Instead of treating sanding as the final chore, think of it as shaping light.
A well-sanded surface reflects light evenly. Sharp scratches disappear. Edges soften just enough to feel inviting without looking rounded over. Grain begins to reveal its natural depth long before any finish is applied.
For most beginner projects, a gradual progression works best:
- 80 grit to flatten rough lumber
- 120 grit to remove milling marks
- 150 grit for general smoothing
- 180 grit before finishing hardwoods
- 220 grit for the final pass on most furniture
The temptation is always there to skip a grit and save time.
Don’t.
Each step removes the scratches left by the previous one. Miss a stage, and those hidden scratches often become dramatically more visible the moment oil, stain, or polyurethane touches the wood.
Here’s another habit worth adopting early: inspect your work under angled light.
A flashlight or shop light held low across the surface reveals imperfections that overhead lighting hides. What looks flawless under bright workshop lights can suddenly reveal swirl marks, glue residue, or uneven sanding when viewed from the side.
Those extra ten minutes now can mean the difference between a project that simply looks “good” and one that feels professionally crafted.
4. Let the Wood Do the Talking
One of the easiest mistakes beginners make is trying to force ordinary materials into something they’re not.
Dark stains meant to imitate walnut.
Heavy gloss finishes that mask the grain.
Decorative trim added simply because the project feels too plain.
Ironically, these choices often make a piece look less expensive rather than more.
Luxury furniture rarely relies on disguise.
Instead, it celebrates the natural character of the wood.
The subtle movement of grain across a tabletop.
The gentle contrast between heartwood and sapwood.
The warmth that develops as natural oil deepens the color over time.
These details create authenticity, and authenticity is something people instinctively recognize.
If your budget allows, a few species consistently produce premium-looking results.
White Oak
White oak has become a favorite in modern interiors for good reason.
Its straight grain, soft color palette, and understated texture complement everything from Scandinavian-inspired homes to contemporary spaces.
It accepts hardwax oils beautifully, developing a warm matte appearance that feels both natural and refined.
Perfect for:
- Floating shelves
- Dining tables
- Benches
- Media consoles
- Built-in storage
Walnut
Few woods create the same immediate visual impact as walnut.
Its rich chocolate tones and flowing grain give even the simplest projects an unmistakably luxurious presence.
The beauty of walnut is that it rarely needs stain. A quality oil finish is often enough to highlight everything that makes the wood special.
It’s especially suited to:
- Coffee tables
- Side tables
- Serving boards
- Office furniture
- Floating desks
Because the wood already carries so much visual interest, clean minimalist designs work exceptionally well.
Maple
If walnut is dramatic, maple is quietly elegant.
Its fine grain and pale appearance make it ideal for minimalist furniture where precision becomes the focal point.
Maple also machines exceptionally cleanly, making it an excellent choice for beginners looking to achieve crisp edges and smooth surfaces.
You’ll often see it used for:
- Nightstands
- Shelving
- Desk accessories
- Cutting boards
- Cabinet fronts
Ash
Ash often flies under the radar, but many furniture makers consider it one of the best values available.
Its bold grain offers more visual movement than maple while remaining considerably more affordable than walnut.
The result is furniture that feels substantial without stretching the budget.
Ash performs beautifully in:
- Console tables
- Benches
- Plant stands
- Dining furniture
- Storage cabinets
Can Budget Lumber Still Look Premium?
Absolutely.
In fact, some of the most impressive DIY furniture online starts with surprisingly affordable materials.
The difference isn’t the price of the lumber.
It’s how thoughtfully it’s selected and prepared.
When buying pine or construction lumber, look beyond the stack itself.
Search for boards with:
- Straight grain
- Minimal knots
- Little or no twist
- Consistent color
- Tight growth rings
Taking an extra fifteen minutes at the lumber rack often saves hours of frustration later.
Cabinet-grade plywood is another excellent option.
Modern plywood with hardwood veneer can produce clean, contemporary furniture while offering outstanding stability. Add solid wood edging, finish it carefully, and most people will never realize they’re looking at plywood rather than solid hardwood.
Good design has a remarkable ability to elevate humble materials.
That’s one of the quiet joys of woodworking.
You’re not simply assembling pieces of wood.
You’re learning to see potential where others only see raw lumber.
Beginner Tools That Deliver Professional Results
Walk through the workshop of a master furniture maker, and you’ll certainly find impressive machinery.
But here’s something that surprises many newcomers:
Most beautiful furniture isn’t created because someone owns expensive tools.
It’s created because they know how to use a handful of reliable ones exceptionally well.
That should be encouraging.
Building premium-looking woodworking projects doesn’t require filling your garage with industrial equipment before making your first cut.
In fact, limiting yourself to a small collection of quality tools often teaches better habits than relying on machines to compensate for inexperience.
Start With the Essentials
If you’re building your first workshop, focus on versatility rather than quantity.
A strong beginner setup includes:
- Circular saw
- Cordless drill and driver
- Random orbital sander
- Tape measure
- Combination square
- Speed square
- Quality clamps
- Pocket-hole jig
With this toolkit alone, you can confidently complete many of the projects featured later in this guide.
More importantly, you’ll develop skills that transfer naturally as your workshop grows.
Upgrade Only When Your Projects Demand It
There’s always another tool to buy.
Woodworking catalogs have a way of convincing us that the next machine will suddenly make everything easier.
Sometimes it will.
Often, it won’t.
Instead of upgrading out of excitement, upgrade because your work has outgrown your current setup.
A track saw becomes valuable when sheet goods become a regular part of your builds.
A router earns its place when edge profiles and joinery become central to your projects.
A table saw shines when efficiency and repeatable accuracy start mattering more than portability.
Each addition should solve a problem you’re already experiencing—not one you imagine having someday.
That mindset keeps your workshop intentional, your spending focused, and your attention exactly where it belongs: on building furniture you’ll be proud to live with.
21 Simple Woodworking Projects That Look Premium
Every woodworker has that one project.
The one friends ask about when they visit. The one that quietly earns compliments without demanding attention. Sometimes it’s a coffee table. Sometimes it’s a simple shelf. What makes it memorable usually isn’t the complexity—it’s the feeling that the piece belongs exactly where it is.
That’s the common thread running through the projects below.
Each one was chosen because it strikes a balance between approachable construction and elevated design. None require years of experience, yet every one has the potential to look like custom furniture when built with care.
As you read through them, don’t feel pressured to build them in order. Choose the project that solves a problem in your home or sparks genuine excitement. Motivation is one of the most underrated tools in any workshop.
1. Floating Shelves
Difficulty: Beginner
Estimated Time: 2–4 hours
There’s a reason floating shelves appear in everything from modern apartments to luxury kitchens—they create the illusion that wood is effortlessly suspended in space.
That visual simplicity is what makes them feel expensive.
With hidden brackets and carefully finished hardwood, a floating shelf can completely transform an empty wall without overwhelming the room.
They’re equally at home displaying books, ceramics, framed photographs, or plants, making them one of the most versatile projects a beginner can tackle.
Why It Looks Premium
- No visible hardware
- Clean horizontal lines
- Beautiful grain remains the focal point
- Works with nearly every interior style
Pro Tip
Choose thicker material than you think you need. A shelf around 1½ to 2 inches thick creates a more substantial, custom-built appearance.
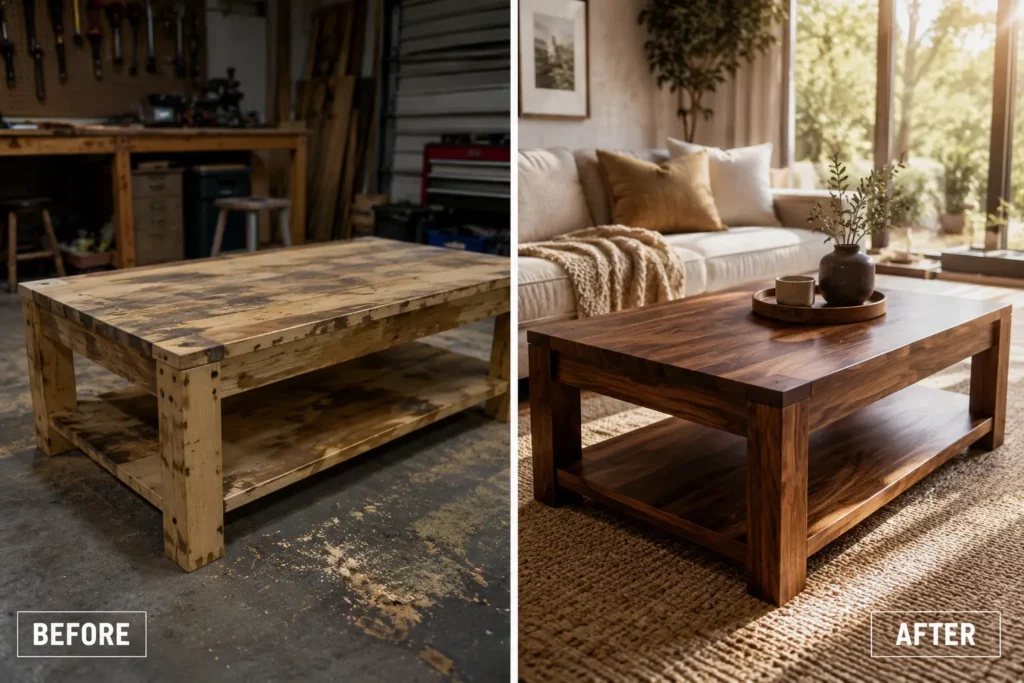
2. Modern Coffee Table
Difficulty: Beginner to Intermediate
Estimated Time: One weekend
Few pieces of furniture anchor a room like a coffee table.
It’s also one of the easiest ways to introduce handcrafted furniture into your home.
Instead of ornate legs or decorative trim, focus on simple geometry—a rectangular top, balanced proportions, and strong joinery. The cleaner the design, the more every detail matters.
A solid wood top finished with hardwax oil develops character over time, making the piece look better with age rather than worse.
Why It Looks Premium
- Large uninterrupted wood grain
- Timeless proportions
- Minimal visual clutter
- Everyday functionality
Design Insight
Slightly oversized tabletops often feel more luxurious because they create stronger visual presence without adding complexity.
3. Entryway Bench
Difficulty: Beginner
Estimated Time: One day
An entryway bench quietly changes how a home feels.
It provides a place to sit while putting on shoes, catches bags before they end up on the floor, and instantly makes an entrance feel intentional.
The best designs keep things simple.
Straight legs.
A thick seat.
Open space underneath.
Nothing unnecessary.
Why It Looks Premium
- Thick hardwood seat
- Balanced proportions
- Clean leg design
- Open, airy appearance
Style Upgrade
Pair natural wood with matte black hardware nearby—coat hooks, mirrors, or lighting—to create a cohesive designer look.
4. Minimalist Nightstand
Difficulty: Beginner to Intermediate
Estimated Time: Weekend project
A nightstand doesn’t need ornate drawers or decorative moulding to feel luxurious.
In fact, restraint often creates a stronger impression.
One drawer.
One open shelf.
Slim lines.
Quality wood.
That’s enough.
Whether placed beside a platform bed or used as a compact side table, minimalist nightstands fit effortlessly into modern interiors.
Why It Looks Premium
- Clean silhouette
- Functional without excess
- Easy to personalize with different wood species
Builder’s Tip
Use soft-close drawer slides if your budget allows. Small upgrades like this subtly elevate the overall experience of using the furniture.
5. Slatted Planter Box
Difficulty: Beginner
Estimated Time: 3–5 hours
Plants already bring warmth into a space.
A handcrafted planter box makes them feel like part of the design rather than an afterthought.
Vertical slats create depth and shadow, giving even inexpensive lumber a refined architectural quality.
Because the construction is repetitive, it’s also excellent practice for measuring and spacing consistently.
Why It Looks Premium
- Architectural texture
- Strong vertical rhythm
- Contemporary appearance
- Suitable for indoor or covered outdoor spaces
Material Choice
Cedar naturally resists moisture, while white oak offers a more refined indoor appearance.
6. Hardwood Serving Board
Difficulty: Beginner
Estimated Time: 2–3 hours
Sometimes the smallest projects teach the biggest lessons.
A serving board introduces essential woodworking skills—accurate cutting, careful sanding, edge shaping, and food-safe finishing—without requiring a large investment of time or material.
Despite its simplicity, a beautifully crafted board often becomes one of the most frequently used pieces in a home.
Why It Looks Premium
- Rich hardwood grain
- Smooth tactile finish
- Elegant organic shapes
- Practical everyday use
Design Idea
Combine contrasting species like walnut and maple to create subtle visual interest without adding unnecessary complexity.
7. Wine Rack
Difficulty: Beginner
Estimated Time: Half day
A wine rack is proof that functional storage can also become décor.
Whether mounted on a wall or placed on a countertop, a simple geometric design keeps the focus on both the bottles and the craftsmanship.
Avoid overcomplicated layouts.
A straightforward design with evenly spaced openings often looks far more sophisticated.
Why It Looks Premium
- Symmetrical layout
- Precision spacing
- Compact footprint
- Easy customization
Builder’s Note
Round over exposed edges lightly to create a comfortable feel without softening the crisp design.
8. Picture Ledges
Difficulty: Beginner
Estimated Time: 2 hours
Picture ledges have quietly replaced traditional shelving in many contemporary homes.
Their appeal lies in flexibility.
Artwork, framed photographs, books, and decorative objects can all be rearranged without putting new holes in the wall.
The ledge itself almost disappears, allowing whatever sits on it to become the focal point.
Why It Looks Premium
- Minimal visual weight
- Hidden mounting options
- Adaptable styling
- Perfect for gallery walls
Style Tip
Install two or three ledges at varying heights to create layered displays that evolve over time.
9. Console Table
Difficulty: Intermediate Beginner
Estimated Time: Weekend
Long and narrow, a console table fills awkward spaces with surprising elegance.
Behind a sofa.
Inside an entryway.
Along a hallway.
Its proportions naturally draw the eye, making accuracy especially important.
Straight lines, square corners, and consistent overhangs create the impression of bespoke furniture.
Why It Looks Premium
- Balanced proportions
- Strong horizontal lines
- Excellent grain visibility
- Versatile placement
Finish Recommendation
A satin or matte hardwax oil enhances the wood while maintaining a natural, furniture-grade appearance.
10. Wall-Mounted Coat Rack
Difficulty: Beginner
Estimated Time: 2–3 hours
Some of the best woodworking projects solve everyday problems beautifully.
A wall-mounted coat rack keeps jackets, hats, bags, and scarves organized while becoming a subtle design feature in its own right.
The combination of warm wood and thoughtfully chosen hardware creates an understated elegance that’s difficult to achieve with mass-produced alternatives.
Why It Looks Premium
- Combines natural materials with metal accents
- Functional without visual clutter
- Easy to customize for any space
Designer Detail
Space hooks evenly and align them with the wood grain whenever possible. Small details like symmetry are often what separate handmade furniture from handcrafted furniture.
Continue Building Your Skills
If these first ten projects have something in common, it’s this:
They’re not trying to impress through complexity.
Instead, they rely on thoughtful proportions, quality materials, and careful execution.
That’s a pattern you’ll notice throughout high-end furniture design. Luxury isn’t usually louder—it’s quieter. More deliberate. More confident.
And as your skills grow, you’ll discover that confidence doesn’t come from building more complicated pieces.
It comes from building simple ones exceptionally well.
21 Simple Woodworking Projects That Look Premium (Continued)
By now, you’ve probably noticed a pattern.
The projects that leave the biggest impression aren’t necessarily the largest or the most technically demanding. They’re the ones that solve everyday problems while looking as though they were designed specifically for the space they occupy.
That’s the quiet power of thoughtful woodworking.
The next eleven projects continue that philosophy. Some can be completed in an afternoon. Others might take a weekend. All of them have one thing in common: when they’re built with care, they look far more expensive than their material cost would suggest.
11. Modern Plant Stand
Difficulty: Beginner
Estimated Time: 2–3 hours
A healthy houseplant already brings life into a room. Elevate it—literally—and it becomes part of the architecture.
A simple wooden plant stand adds height, balance, and visual rhythm to a space without competing for attention. The clean silhouette allows the plant and the wood to complement one another.
Whether you build one or a matching set in different heights, the result feels intentional rather than improvised.
Why It Looks Premium
- Slim, elegant proportions
- Architectural simplicity
- Natural materials paired with greenery
- Works in modern, Scandinavian, Japandi, and minimalist interiors
Design Tip
Tapering the legs slightly creates a lighter visual profile without adding much complexity to the build.
12. Blanket Ladder
Difficulty: Beginner
Estimated Time: 3–4 hours
Blanket ladders are wonderfully honest pieces of furniture.
They don’t hide behind complicated construction. They simply lean against a wall and invite texture into the room.
Soft throws, linen blankets, or woven textiles instantly soften the clean geometry of the wood, making this project feel warm without becoming rustic.
Because the joinery is straightforward, it’s an ideal opportunity to practice accurate spacing and clean assembly.
Why It Looks Premium
- Vertical lines create visual height
- Blends function with décor
- Requires very little material
- Fits almost any living space
Builder’s Tip
A matte hardwax oil finish enhances the natural grain while maintaining a soft, furniture-quality appearance.
13. Floating Desk
Difficulty: Intermediate Beginner
Estimated Time: Weekend project
As more people work from home, the demand for compact, beautiful workspaces continues to grow.
A floating desk answers that need without overwhelming the room.
Mounted directly to the wall with concealed supports, it creates an airy feeling while providing plenty of usable workspace. In smaller homes or apartments, that sense of openness is invaluable.
Simple doesn’t mean plain here.
The uninterrupted grain running across the desktop becomes the centerpiece.
Why It Looks Premium
- Hidden supports
- Clean, uninterrupted surface
- Space-saving design
- Modern architectural appearance
Style Upgrade
Add a floating shelf above the desk using the same wood species to create a cohesive built-in look.
14. Shoe Storage Bench
Difficulty: Intermediate Beginner
Estimated Time: Weekend
The best furniture quietly solves problems.
A shoe storage bench turns everyday clutter into organized simplicity while adding warmth to an entryway.
Open cubbies, a thick hardwood seat, and balanced proportions create a piece that feels custom-built rather than mass-produced.
Unlike plastic storage solutions, wood ages gracefully. Minor dents and wear often add character instead of diminishing the piece.
Why It Looks Premium
- Combines seating with storage
- Thick top creates visual weight
- Open design prevents clutter from feeling overwhelming
- Practical for busy households
Design Insight
Leave a little breathing room around each storage compartment. Furniture often looks more expensive when it isn’t visually crowded.
15. Wooden Monitor Stand
Difficulty: Beginner
Estimated Time: 2–3 hours
Some of the most satisfying woodworking projects improve everyday life in subtle ways.
A monitor stand raises your screen to a more comfortable height while creating valuable storage underneath for notebooks, keyboards, or accessories.
It’s a small project, but one you’ll interact with every single day.
That makes attention to detail even more worthwhile.
Why It Looks Premium
- Clean desktop organization
- Visible hardwood grain
- Minimalist design
- Practical functionality
Builder’s Tip
Round over the front edge just slightly. The gentle curve feels more comfortable during everyday use while maintaining crisp overall lines.
16. Record Storage Crate
Difficulty: Beginner
Estimated Time: Half day
Vinyl records deserve better than cardboard boxes.
A handcrafted storage crate transforms a practical necessity into a design feature.
Even if you don’t collect records yourself, the same construction works beautifully for magazines, books, children’s toys, or firewood beside a fireplace.
It’s proof that thoughtful proportions can elevate even the simplest storage.
Why It Looks Premium
- Exposed wood grain
- Clean joinery
- Functional display piece
- Easy to personalize
Material Choice
Baltic birch plywood finished with hardwood edging creates an exceptionally clean modern appearance.
17. Side Table
Difficulty: Beginner
Estimated Time: One day
Every living room eventually needs another place to set down a cup of coffee or a favorite book.
That’s where a well-designed side table quietly earns its place.
Because it’s relatively small, it’s also forgiving for beginners. Less material means lower cost, and smaller dimensions make accuracy easier to maintain.
Simple square legs paired with a thick top create a timeless design that works in nearly any room.
Why It Looks Premium
- Strong proportions
- Clean geometry
- Easy to customize
- Suitable for many wood species
Designer Detail
Aim for visual balance rather than unnecessary decoration. A side table should support the room, not dominate it.
18. Magazine Rack
Difficulty: Beginner
Estimated Time: 3 hours
Digital media may dominate our lives, but printed books and magazines still deserve a thoughtful place in the home.
A wooden magazine rack keeps reading materials organized while adding texture and warmth.
Open-frame designs feel especially contemporary because they avoid visual heaviness.
Why It Looks Premium
- Airy construction
- Visible craftsmanship
- Combines function with décor
- Great use of hardwood offcuts
Style Suggestion
Pair contrasting materials like walnut and black steel rods for a refined contemporary look.
19. Wall Shelf with Leather Straps
Difficulty: Beginner
Estimated Time: 2 hours
Sometimes introducing a second material changes everything.
Leather straps paired with natural wood create warmth, texture, and visual contrast that feels intentionally designed rather than purely functional.
It’s an excellent project for displaying books, trailing plants, or framed artwork.
Why It Looks Premium
- Mixed materials create visual interest
- Simple installation
- Minimal hardware
- Boutique-inspired aesthetic
Builder’s Tip
Choose high-quality full-grain leather whenever possible. As it ages, it develops character that complements the wood beautifully.
20. Wooden Charging Station
Difficulty: Beginner
Estimated Time: Half day
Modern homes come with one unavoidable challenge:
Charging cables seem to multiply overnight.
A handcrafted charging station keeps phones, tablets, smartwatches, and earbuds neatly organized while hiding much of the visual clutter.
It’s a practical reminder that woodworking doesn’t always have to produce large furniture to improve daily life.
Why It Looks Premium
- Concealed cable management
- Clean desktop organization
- Compact footprint
- Excellent gift project
Design Tip
Include ventilation openings underneath if devices will remain plugged in for extended periods.
21. Entryway Catch-All Tray
Difficulty: Beginner
Estimated Time: 1–2 hours
Every home has that place where keys, wallets, sunglasses, loose change, and earbuds seem to collect.
Instead of fighting the habit, design for it.
A handcrafted catch-all tray turns everyday clutter into something intentional.
It’s one of the quickest projects on this list, yet it offers endless opportunities to practice precision. Perfect miters, crisp corners, smooth sanding, and a flawless finish become the focus.
And because it sits in plain sight, those small details never go unnoticed.
Why It Looks Premium
- Elegant simplicity
- Everyday usefulness
- Beautiful grain on display
- Excellent beginner project
Personal Touch
Add a subtle chamfer around the top edge or engrave initials to create a piece that feels uniquely yours.
Choosing Your First Project
Looking at twenty-one ideas can feel exciting—and a little overwhelming.
If you’re just getting started, resist the urge to build the most ambitious piece first.
Instead, choose the project that matches both your current skills and the amount of time you realistically have available.
If you’ve never built furniture before, start with something that teaches the fundamentals:
- Floating shelves
- Serving board
- Picture ledges
- Coat rack
- Catch-all tray
These projects build confidence while introducing the habits that matter most: measuring accurately, cutting cleanly, sanding patiently, and finishing carefully.
Once those skills begin to feel natural, moving on to coffee tables, benches, or console tables becomes much less intimidating.
Woodworking has a remarkable way of rewarding patience.
Every project teaches something the previous one couldn’t.
The shelf teaches accuracy.
The serving board teaches finishing.
The side table teaches proportion.
The bench teaches structure.
Over time, those individual lessons quietly come together.
One day you’ll build a piece, step back, and realize it no longer looks like a beginner project at all.
It simply looks like beautiful furniture.
The Finishing Details That Make Simple Woodworking Look Truly Premium
There’s a quiet moment that every woodworker remembers.
The project is assembled. The clamps come off. You brush away the last layer of sawdust and step back.
For the first time, it actually looks like furniture.
But it’s not finished yet.
In many ways, you’ve only reached the halfway point.
The difference between a project that feels homemade and one that looks like it belongs in a custom furniture showroom almost always comes down to what happens after the build is complete. The finish, the edges, the hardware, the tiny details most people never consciously notice—these are the elements that shape first impressions.
It’s why two people can build the exact same coffee table from the same plans and end up with results that feel worlds apart.
One looks like a weekend project.
The other looks like it belongs in a designer home.
The difference isn’t talent.
It’s attention.
Choosing Wood That Naturally Looks Expensive
Before you ever pick up a sander or open a can of finish, your material choice has already begun telling a story.
Every species has its own personality.
Some feel bold.
Others feel warm.
Some project quiet elegance, while others bring a rustic honesty that’s equally appealing in the right setting.
The key isn’t choosing the most expensive wood available.
It’s choosing one that complements the design you’re building.
White Oak: The Modern Classic
Spend a few minutes browsing contemporary interior design magazines and you’ll quickly notice one material appearing again and again.
White oak.
Its appeal isn’t dramatic.
It’s subtle.
Straight grain.
Soft golden undertones.
A texture that catches light beautifully without demanding attention.
Those qualities make white oak incredibly versatile. It feels equally at home in Scandinavian interiors, modern farmhouses, minimalist apartments, and custom-built homes.
If you’re investing in hardwood for a statement piece, white oak is one of the safest choices you can make.
Best suited for:
- Dining tables
- Floating shelves
- Entryway benches
- Built-in cabinetry
- Console tables
Walnut: Rich Without Trying Too Hard
Walnut has a way of making even the simplest project feel special.
Its deep chocolate tones and flowing grain create instant warmth. Unlike many woods, walnut rarely benefits from stain because its natural color already provides remarkable depth.
That’s part of what makes it so timeless.
Instead of covering the wood, quality finishes simply enhance what’s already there.
Walnut works particularly well in projects where broad surfaces allow the grain to become part of the design.
Think coffee tables.
Floating desks.
Nightstands.
Serving boards.
The wood itself becomes the decoration.
Maple: Quiet Sophistication
Maple rarely steals the spotlight.
Instead, it creates furniture that feels effortlessly refined.
Its smooth, even grain is ideal for contemporary pieces where precision matters more than dramatic texture. If your design relies on crisp edges and flawless surfaces, maple rewards careful craftsmanship.
It also wears exceptionally well, making it a practical choice for furniture used every day.
Ash: Exceptional Value
Ash deserves far more attention than it receives.
Strong, durable, and visually striking, it offers a grain pattern that feels more expressive than maple while remaining noticeably more affordable than walnut.
For beginners looking to maximize both beauty and budget, ash is difficult to overlook.
It performs beautifully in:
- Benches
- Side tables
- Plant stands
- Dining furniture
- Storage pieces
Can Pine Look High-End?
Absolutely.
In fact, many beautifully designed homes include furniture built from pine.
The misconception isn’t that pine looks cheap.
It’s that poorly selected pine looks cheap.
When shopping for lumber, take your time.
Look for boards that are:
- Straight
- Free from excessive knots
- Consistent in color
- Relatively free of twisting or cupping
Then let thoughtful design do the rest.
Simple forms, clean joinery, and an excellent finish will always outperform decorative details trying to disguise mediocre craftsmanship.
The Finish Is Where the Transformation Happens
Raw wood has potential.
Finish reveals it.
The first coat often feels almost magical.
Grain suddenly deepens.
Color becomes richer.
Tiny details hidden beneath sanding dust begin to emerge.
But beautiful finishes don’t happen because of the product alone.
They happen because of preparation.
Step One: Sand Until the Surface Feels Effortless
Run your fingertips across the wood.
Close your eyes.
You should feel consistency—not scratches, ridges, or rough patches.
A careful sanding progression creates that result.
For most furniture projects, work through progressively finer grits rather than jumping directly to the smoothest paper.
Each stage removes the marks left by the previous one.
Skipping steps almost always leaves evidence behind once finish is applied.
Step Two: Remove Every Trace of Dust
Dust is surprisingly unforgiving.
Tiny particles trapped beneath a finish create bumps that immediately reduce the quality of the final result.
Before applying any oil, stain, or polyurethane:
- Vacuum thoroughly
- Wipe with a microfiber cloth
- Finish with a tack cloth if available
Take your time.
Five extra minutes of cleaning can save hours of refinishing later.
Step Three: Thin Coats Beat Thick Ones
This is one lesson nearly every experienced furniture maker learns the hard way.
More finish doesn’t produce better results.
It simply creates longer drying times, uneven sheen, and a greater chance of runs or brush marks.
Instead, think in layers.
Apply one thin coat.
Allow it to cure completely.
Lightly sand if needed.
Then repeat.
The finish builds gradually, producing depth instead of heaviness.
Step Four: Choose the Right Sheen
One of the biggest giveaways of inexpensive furniture is excessive gloss.
Highly reflective finishes often emphasize imperfections rather than hide them.
Modern premium furniture tends to favor:
- Matte
- Low sheen
- Satin
These finishes allow the wood—not the reflection—to become the focal point.
The result feels warmer, softer, and considerably more sophisticated.
Hardware: The Detail People Notice Without Realizing It
Imagine spending hours building a beautiful walnut console table…
…then installing shiny chrome handles that don’t suit the design.
The eye notices the mismatch immediately.
Hardware should support the furniture rather than compete with it.
Popular choices include:
- Matte black pulls
- Brushed brass hardware
- Solid wood knobs
- Stainless steel accents
- Leather drawer pulls
Consistency matters just as much as style.
Repeating the same finish throughout a room helps furniture feel intentionally designed rather than individually assembled.
Small Design Decisions That Create a Luxury Feel
Professional furniture makers understand something subtle:
People rarely remember individual details.
They remember how a piece made them feel.
That feeling is often created by a collection of small decisions working together.
Consider incorporating:
- Slightly softened edges instead of razor-sharp corners
- Consistent spacing between slats
- Thick tabletops with slimmer legs
- Continuous grain whenever possible
- Hidden fasteners
- Balanced proportions
- Negative space that allows the design to breathe
None of these choices are difficult.
Yet together, they elevate a project in ways that expensive materials alone never could.
The most impressive furniture isn’t trying to prove anything.
It simply feels resolved.
As though every decision was made with purpose.
And that’s exactly what people associate with quality.
The Mistakes That Quietly Make Good Projects Look Cheap
Most woodworking mistakes aren’t dramatic.
A table doesn’t suddenly collapse because one edge wasn’t sanded enough. A floating shelf won’t fall off the wall because you chose satin instead of matte finish.
Instead, the difference shows up in subtler ways.
Something feels slightly off.
You can’t always explain it, but you notice it every time you walk past the piece.
Interestingly, these small imperfections are exactly what separate furniture that looks handmade from furniture that looks handcrafted.
The good news?
Nearly all of them are easy to avoid once you know where to look.
Rushing the Build Instead of Enjoying It
There’s a point in every project where excitement turns into impatience.
The cuts are finished.
Assembly is complete.
You can already picture the furniture in your home.
That’s usually when people start rushing.
They skip the final sanding.
They install hardware without checking alignment one last time.
They apply finish before the glue has fully cured.
The irony is that the last ten percent of the project often creates ninety percent of the visual quality.
Slow down when you’re closest to the finish line.
That’s where craftsmanship lives.
Ignoring the Importance of Lumber Selection
Many beginners assume woodworking begins when the first cut is made.
Experienced builders know it starts at the lumber rack.
Choosing straight boards saves countless hours later.
Warped material forces joints out of alignment, creates uneven gaps, and turns simple assembly into unnecessary frustration.
Take your time when selecting lumber.
Sight down each board.
Check for twisting, bowing, and excessive knots.
Those extra few minutes at the store can prevent hours of correction in the workshop.
Measuring Once Instead of Twice
Every woodworker has a story about cutting a board just a little too short.
Usually, it only happens once.
Accurate measuring isn’t about perfection.
It’s about creating habits that make mistakes increasingly rare.
Measure carefully.
Mark clearly.
Confirm your measurements before every cut.
Then cut with confidence.
Simple routines produce remarkably consistent results over time.
Overlooking Grain Direction
Wood isn’t a uniform material.
Its grain influences both appearance and behavior.
Paying attention to grain direction can dramatically improve the finished look of a project.
Whenever possible:
- Match grain across adjoining pieces.
- Keep visible surfaces flowing in the same direction.
- Position attractive grain where it naturally catches the eye.
- Reserve less interesting boards for hidden components.
These choices require almost no extra effort, yet they create a level of visual continuity that people instinctively associate with custom furniture.
Choosing Hardware as an Afterthought
Hardware should feel like part of the design, not the final item on a shopping list.
Drawer pulls, knobs, hooks, hinges, and screws all contribute to the personality of a piece.
Imagine a beautifully built white oak nightstand fitted with inexpensive plastic knobs.
Technically, it functions.
Visually, something feels disconnected.
Instead, choose hardware with the same care you give to wood selection.
Small details often carry surprising influence.
Applying Finish Too Quickly
Wood finish rewards patience.
One heavy coat rarely produces the result people hope for.
Thin coats, proper drying times, and light sanding between applications almost always create a richer, more durable surface.
It’s tempting to speed things along.
Resist the urge.
The finish is the first thing people notice up close and the last thing they’ll remember after using the piece for years.
Questions You Might Be Asking Right Now
Every beginner eventually reaches the same crossroads.
The excitement of building something beautiful is often accompanied by uncertainty.
That’s completely normal.
Here are the questions that tend to come up most often—and the answers that can help you move forward with confidence.
“Do I need expensive tools before I can build furniture that looks premium?”
Not at all.
A small collection of dependable tools can take you much further than a garage filled with machines you don’t yet know how to use.
Focus first on accuracy rather than quantity.
A circular saw, drill, random orbital sander, quality measuring tools, and a few reliable clamps are enough to build many of the projects featured in this guide.
As your skills develop, you’ll naturally discover which upgrades make sense for the kind of work you enjoy most.
“Which project should I build first if I’ve never made furniture before?”
Start with something you can realistically finish.
Confidence grows much faster from completing a simple project well than abandoning an ambitious one halfway through.
Excellent first projects include:
- Floating shelves
- Serving boards
- Picture ledges
- Entryway catch-all trays
- Wall-mounted coat racks
Each introduces essential woodworking skills while producing something genuinely useful.
“Is hardwood really worth the extra cost?”
Sometimes.
Not always.
If you’re building a dining table that will become a centerpiece for years, investing in hardwood often makes sense.
For utility projects, workshop furniture, or pieces where painted finishes are planned, carefully selected softwoods or cabinet-grade plywood can perform exceptionally well.
Good design consistently matters more than expensive materials.
“How do professionals get such smooth finishes?”
There’s no hidden trick.
Professionals simply refuse to rush the process.
They sand patiently.
They remove dust carefully.
They apply multiple thin coats.
And they allow each coat to cure properly before moving on.
Those habits, repeated consistently, create finishes that feel as beautiful as they look.
“Can I sell beginner woodworking projects?”
Absolutely.
Many successful woodworking businesses began with simple designs.
Floating shelves.
Serving boards.
Plant stands.
Coffee tables.
Picture ledges.
These projects remain popular because they’re practical, attractive, and relatively affordable.
If you’re considering selling your work, consistency becomes just as important as craftsmanship.
Customers remember reliability as much as design.
“What matters more—design or technique?”
The two work together, but thoughtful design often has the greater impact.
A beautifully proportioned side table built with solid beginner techniques will usually feel more expensive than an overly complicated project with inconsistent details.
Master the fundamentals first.
Sophisticated craftsmanship grows naturally from there.
Continue Exploring Your Woodworking Skills
If this guide has sparked ideas for your next project, there’s plenty more to discover.
As your confidence grows, you’ll naturally want to explore techniques that build on the fundamentals you’ve learned here.
You might enjoy diving deeper into topics such as:
- Choosing the best wood finishes for different furniture styles
- White oak versus walnut for modern furniture
- Beginner-friendly workshop tools worth buying first
- Pocket-hole joinery and when to use it
- Building furniture for small spaces
- Simple woodworking gifts you can complete in a weekend
- Understanding wood movement before building tables and cabinets
- Furniture design principles that never go out of style
Each subject builds on the same core idea:
Beautiful woodworking isn’t created by chasing complexity.
It’s created by understanding the small details that make simple designs feel exceptional.
Those details become easier to recognize with every project you complete.
Eventually, you’ll find yourself noticing proportions in café tables, grain direction in restaurant booths, edge profiles in hotel furniture, and finish quality in stores.
That’s one of the unexpected rewards of woodworking.
It changes the way you see the world around you.
Products / Tools / Resources
Whether you’re building your very first floating shelf or planning an entire room of custom furniture, the right materials and tools make the process smoother—and the finished piece noticeably better. You don’t need to buy everything at once. Build your workshop the same way you build your skills: one thoughtful investment at a time.
Essential Beginner Tools
If you’re starting from scratch, these tools will comfortably handle the vast majority of projects in this guide.
Measuring & Layout
- 25-foot tape measure
- Combination square
- Speed square
- Marking knife or quality carpenter’s pencil
- Long straightedge
- Digital angle gauge (optional but helpful)
Cutting
- Circular saw
- Guide rail or straightedge guide
- Miter saw (recommended for furniture)
- Jigsaw for curved cuts
Assembly
- Cordless drill/driver
- Pocket-hole jig
- Wood glue
- Bar clamps
- Corner clamps
- Brad nailer (optional)
Surface Preparation
- Random orbital sander
- Sandpaper assortment (80, 120, 150, 180, and 220 grit)
- Sanding block
- Tack cloths
- Microfiber cloths
Recommended Woods for Premium-Looking Furniture
Different woods create different moods. Matching the species to the style of your project makes a remarkable difference.
| Wood Species | Best For | Appearance |
|---|---|---|
| White Oak | Benches, shelves, dining tables | Modern, warm, timeless |
| Walnut | Coffee tables, nightstands, desks | Rich, luxurious, dramatic |
| Maple | Contemporary furniture | Clean, bright, refined |
| Ash | Console tables, plant stands | Bold grain, excellent value |
| Cherry | Cabinets, accent furniture | Warm tones that deepen beautifully with age |
| Birch Plywood | Cabinets, shelving | Clean modern appearance |
| Pine | Beginner furniture and décor | Affordable, versatile, easy to work with |
Finishes Worth Keeping on the Shelf
A quality finish protects your work while bringing out the natural beauty of the wood.
For furniture that looks handcrafted rather than factory coated, consider keeping these options on hand:
- Hardwax oil for a natural matte appearance
- Danish oil for highlighting grain
- Water-based polyurethane for clear, durable protection
- Wipe-on polyurethane for beginner-friendly application
- Furniture wax for occasional maintenance
- Food-safe mineral oil for cutting boards and serving trays
Remember that the finish should enhance the wood—not hide it.
Helpful Workshop Accessories
These inexpensive additions often improve accuracy more than another power tool.
- Bench dogs
- Sawhorses
- Shop vacuum
- Dust mask or respirator
- Hearing protection
- Safety glasses
- LED work light
- Moisture meter
- Magnetic parts tray
- Sharpening supplies for hand tools
A clean, organized workspace usually produces cleaner, more consistent work.
Books Worth Reading
The internet is a fantastic place to learn techniques, but well-written woodworking books remain invaluable references.
Consider adding titles that cover:
- Furniture design fundamentals
- Joinery techniques
- Wood movement and seasonal expansion
- Finishing methods
- Workshop safety
- Scandinavian and Japanese woodworking aesthetics
The deeper your understanding becomes, the easier it is to adapt plans instead of simply following them.
Online Learning Resources
As your confidence grows, you’ll likely want to explore topics beyond beginner projects.
Some worthwhile areas of study include:
- Furniture design principles
- Cabinetmaking basics
- Hand tool woodworking
- Router techniques
- Table saw safety
- Wood finishing workshops
- SketchUp or CAD for furniture planning
- Interior design fundamentals for furniture makers
Developing both design knowledge and technical skills leads to furniture that not only functions well but also feels intentional within a space.