
There’s something deeply satisfying about furniture that earns its place in a home. A well-built Murphy bed does exactly that. It disappears when you need open space, unfolds when guests arrive, and quietly solves one of the biggest challenges in modern living: making every square foot work harder without sacrificing comfort or style.
Custom Murphy beds are undeniably beautiful, but they often come with a price tag that rivals a full room renovation. The encouraging news is that you don’t need a custom furniture budget to enjoy a custom furniture result. With the right woodworking plans, carefully selected materials, and thoughtful craftsmanship, it’s entirely possible to build a Murphy bed that looks like it came from a high-end cabinet shop.
This guide explores 25 DIY Murphy bed woodworking plans for every experience level—from clean, beginner-friendly projects to sophisticated built-ins with shelving, hidden storage, and designer details. Along the way, you’ll learn how to choose quality hardware, select furniture-grade materials, avoid common mistakes, and apply finishing techniques that give your project a polished, professional appearance.
Whether you’re transforming a guest room, maximizing a home office, or creating a multifunctional space in a small apartment, these ideas will help you build furniture that’s practical today and beautiful for years to come.
Table of Contents
- Part 1. Why a DIY Murphy Bed Is One of the Best Woodworking Projects You Can Build
- Part 2. Planning Your Murphy Bed Project and Choosing the Right Materials
- Part 3. 25 DIY Murphy Bed Woodworking Plans That Look Like They Belong in a Custom Home
- Part 4. (Plans 1–15)DIY Murphy Bed Plans 16–25: Premium Designs with a Custom Furniture Feel
- Part 5. Designer Details That Make a DIY Murphy Bed Look Like Custom Furniture
- Part 6. Common Murphy Bed Building Mistakes (and the Small Habits That Prevent Big Problems)
- Part 7. Professional Finishing Techniques That Give a DIY Murphy Bed a Custom Furniture Look
- Part 8. Murphy Bed Maintenance: Keeping Your Custom Build Beautiful for Years
- Part 9. Frequently Asked Questions About DIY Murphy Bed Woodworking Plans
- Part 10. Choosing the Right DIY Murphy Bed Plan for Your Home, Budget, and Lifestyle
- Part 11. Products / Tools / Resources
Part 1 — Why a DIY Murphy Bed Is One of the Best Woodworking Projects You Can Build
More Than a Bed: A Smarter Way to Use Your Space
Some furniture fills a room.
A Murphy bed transforms it.
Folded away, it gives you back valuable floor space. Pulled down, it provides the comfort of a full-size bed without demanding a permanent footprint. That simple movement changes how a room feels and functions, allowing one space to serve multiple purposes throughout the day.
A spare bedroom can become a productive home office. A craft room can welcome overnight guests. Even a compact apartment feels noticeably more open when the bed isn’t the first thing you see.
That’s why Murphy beds have remained popular for generations. They’re not just clever pieces of furniture—they’re practical solutions to everyday living.
Why Build One Instead of Buying One?
Walk through any furniture showroom and you’ll find Murphy beds in a wide range of styles and prices.
At first glance, buying one seems like the easier choice.
Then you notice the compromises.
The dimensions aren’t quite right. The finish doesn’t match your existing cabinetry. The storage isn’t arranged the way you need it. And the price climbs rapidly once you start looking at higher-quality models.
Building your own Murphy bed changes that equation.
Instead of adapting your room to fit someone else’s design, you create furniture that fits your room perfectly.
That freedom opens the door to countless possibilities.
You decide:
- The overall dimensions
- The cabinet style
- The type of wood
- The finish
- The storage layout
- The trim details
- The hardware
- The final appearance
Every decision reflects your home rather than a manufacturer’s catalog.
The Value Goes Beyond Saving Money
Cost savings are often the reason people begin researching DIY Murphy bed woodworking plans.
They rarely remain the biggest benefit.
There’s something uniquely rewarding about building furniture you’ll use every day.
Each carefully measured panel, each smooth-opening mechanism, each perfectly aligned cabinet door becomes a reminder of the time and skill invested in the project.
Unlike decorative woodworking pieces that are admired from a distance, a Murphy bed becomes part of daily life. It opens for visiting family, creates room for hobbies, and quietly improves the way your home works.
That’s difficult to measure in dollars alone.
A Project That Grows With Your Skills
Murphy beds sit in an interesting place within woodworking.
They’re ambitious enough to teach valuable furniture-building techniques, yet approachable enough that many determined DIY builders complete them successfully on their first attempt.
Along the way you’ll gain experience with:
- Cabinet construction
- Accurate layout
- Sheet-goods handling
- Precision measuring
- Structural assembly
- Hardware installation
- Surface preparation
- Furniture finishing
By the time the project is complete, you’ll likely feel more confident tackling future built-ins, entertainment centers, wardrobes, and other large furniture projects.
Which Homes Benefit Most from a Murphy Bed?
The beauty of a Murphy bed lies in its versatility.
Rather than serving one type of homeowner, it adapts to almost any living situation.
Small Apartments
When square footage is limited, every piece of furniture has to justify the space it occupies.
A Murphy bed allows the room to function as a living area during the day and a comfortable bedroom at night without feeling cramped.
Guest Rooms
Many guest bedrooms remain empty for months at a time.
Installing a Murphy bed transforms that unused space into a room you can actually enjoy every day.
It might become:
- A reading room
- A home office
- A fitness space
- A hobby room
- A music studio
- A children’s play area
Then, when visitors arrive, it quickly returns to its original purpose.
Home Offices
Remote work has changed how many people use their homes.
Rooms now need to support productivity without losing flexibility.
A Murphy bed makes that balance possible, allowing a dedicated office to become a welcoming guest room in just a few moments.
Many builders also incorporate shelving, lighting, and fold-down desks to maximize functionality.
Tiny Homes
Every inch counts in a tiny house.
Furniture that serves multiple purposes isn’t just convenient—it’s essential.
Murphy beds free up valuable floor space while maintaining the comfort of a traditional bed, making them one of the most practical choices for compact living.
Vacation Rentals
For property owners, versatility can translate into increased appeal.
A thoughtfully designed Murphy bed creates additional sleeping space while preserving an open, inviting layout that photographs well and accommodates different guest needs.
Is Building a Murphy Bed Really That Difficult?
It’s one of the first questions people ask, and the honest answer surprises many of them.
A Murphy bed isn’t difficult because of complicated joinery.
It’s challenging because it rewards precision.
Accurate measurements, square cabinet construction, careful hardware installation, and patient assembly all contribute to smooth operation.
Modern hardware kits simplify much of the engineering, allowing builders to focus on craftsmanship rather than designing lifting mechanisms from scratch.
Taken one step at a time, the project becomes far less intimidating than it first appears.
What Makes One Murphy Bed Look Custom Built While Another Looks Homemade?
The answer often has very little to do with expensive materials.
Professional-looking furniture comes from a collection of thoughtful details that work together.
These include:
- Even reveal lines
- Balanced proportions
- Clean joinery
- Consistent grain direction
- Quality edge treatment
- Hidden fasteners
- Well-chosen hardware
- Smooth finishes
- Integrated lighting
- Architectural trim
None of these details is dramatic on its own.
Together, they create the quiet confidence associated with handcrafted furniture.
That’s good news for DIY builders because many of the upgrades that make the biggest visual difference require careful planning rather than a significantly larger budget.
Before You Buy the First Sheet of Plywood
Excitement can make it tempting to head straight to the lumberyard.
Resist the urge—for just a little while.
The strongest Murphy bed projects begin with careful planning, not cutting.
Choosing the right design, understanding your available space, selecting compatible hardware, and preparing an accurate material list will make every stage that follows smoother, faster, and far more enjoyable.
In the next part, we’ll move from inspiration to preparation by exploring how to plan your project, compare Murphy bed hardware systems, and choose materials that deliver the strength, durability, and refined appearance of professionally built furniture.
Part 2 — Planning Your Murphy Bed Project and Choosing the Right Materials
Building a Murphy bed is a little like setting the foundation for a house. If the planning is solid, everything that follows feels smoother. If the early decisions are rushed, you’ll spend the rest of the project correcting problems that could have been avoided.
Experienced woodworkers know this instinctively. They don’t start by cutting plywood—they start by asking questions.
How will the room be used?
What size mattress makes the most sense?
Will the bed be opened every day or only when guests visit?
The answers shape every decision that follows, from hardware selection to cabinet depth, storage options, and finishing details.
The planning stage isn’t the least exciting part of the project. It’s the stage that quietly determines how successful the finished Murphy bed will be.
Designing Around the Room Instead of Around the Bed
It’s easy to become focused on the furniture itself.
Take a step back.
Walk into the room and imagine how it feels on a normal day.
If the bed is folded away, what should the room become?
A quiet office?
A reading space filled with books?
A home gym?
A hobby workshop?
A family room?
The Murphy bed should support that primary purpose rather than compete with it.
When the room works beautifully both open and closed, you’ve designed more than a piece of furniture—you’ve improved the way the home functions.
Start with the Right Mattress Size
The mattress determines much more than sleeping comfort.
It influences:
- Cabinet dimensions
- Hardware selection
- Wall clearance
- Overall weight
- Opening direction
- Storage opportunities
Choose the mattress first.
Then build everything else around it.
For most homes, the most common choices include:
Twin
Ideal for:
- Children’s rooms
- Small guest rooms
- Home offices
- Tiny homes
Full
A practical balance between sleeping space and cabinet size.
Suitable for:
- Guest bedrooms
- Compact apartments
- Multipurpose rooms
Queen
The most popular option for homeowners.
It offers generous comfort while remaining manageable for most spaces.
Many Murphy bed hardware systems are designed specifically with queen mattresses in mind.
King
Perfect for larger rooms.
However, remember that increased mattress size also means:
- More cabinet weight
- Larger hardware
- Greater wall space
- More demanding installation
Only choose a king if the room comfortably supports it.
Vertical or Horizontal? Choosing the Best Orientation
This decision affects both appearance and usability.
Vertical Murphy Beds
The mattress stores upright inside a tall cabinet.
Advantages include:
- Traditional appearance
- Smaller wall footprint
- Better for taller ceilings
- Excellent for queen and king mattresses
This is the style most people imagine when they think of a Murphy bed.
Horizontal Murphy Beds
The mattress folds sideways into a lower, wider cabinet.
They’re particularly useful when:
- Ceiling height is limited
- The room has unusual proportions
- Children will use the bed
- You want shelving above the cabinet
Horizontal designs often feel less imposing in compact rooms.
Measure More Than the Wall
Many first-time builders measure only the width of the available wall.
Professionals measure everything surrounding it.
Take note of:
- Ceiling height
- Baseboards
- Crown molding
- Windows
- Door swings
- HVAC vents
- Electrical outlets
- Light switches
- Existing furniture
- Walking paths
A Murphy bed should fit naturally into the room without creating awkward obstacles.
Don’t Forget Clearance Space
One of the most common planning mistakes is overlooking the space needed when the bed is fully open.
Think beyond the cabinet itself.
Consider:
- Walking room around the mattress
- Clearance for bedside furniture
- Space for opening closet doors
- Comfortable movement through the room
A Murphy bed should improve the room—not create a maze.
Understanding Murphy Bed Hardware
If lumber forms the body of the project, the lift mechanism is its heartbeat.
It’s what makes the bed feel balanced, safe, and effortless to use.
High-quality hardware transforms a heavy mattress into something that glides smoothly with surprisingly little effort.
This is one area where experienced builders rarely recommend cutting corners.
Spring Lift Systems
Spring systems have been used successfully for decades.
They’re dependable, widely available, and often cost less than newer alternatives.
Benefits include:
- Proven performance
- Affordable pricing
- Readily available replacement parts
- Strong lifting assistance
Like many mechanical systems, they may occasionally require adjustment after years of regular use.
Gas Piston Lift Systems
Gas pistons provide a noticeably smoother experience.
Instead of relying on large springs, they use pressurized cylinders to balance the weight of the bed.
Many homeowners appreciate them because they offer:
- Quiet operation
- Smooth opening and closing
- Minimal maintenance
- Consistent movement
- Refined feel
They typically cost more, but many builders consider them a worthwhile investment for furniture that’s used frequently.
Match the Hardware to the Mattress
This is one of the most important planning decisions you’ll make.
Every Murphy bed mechanism is engineered for a specific weight range.
A mattress that’s too heavy can strain the lift system.
A mattress that’s too light may prevent the bed from operating correctly.
Before purchasing hardware, confirm:
- Mattress weight
- Mattress thickness
- Recommended dimensions
- Supported weight range
Following the manufacturer’s specifications is essential for safe operation.
Choosing Materials That Feel Like Fine Furniture
The materials you select influence more than strength.
They affect how the finished project looks, feels, ages, and responds to everyday use.
Professional cabinetmakers often combine different materials strategically rather than relying on a single wood species throughout the project.
Why Furniture-Grade Plywood Is the Preferred Choice
Some DIY builders assume solid hardwood should be used everywhere.
In reality, premium plywood is often the smarter option for cabinet construction.
It offers:
- Excellent dimensional stability
- Strong screw holding
- Smooth surfaces
- Consistent thickness
- Reduced seasonal movement
For painted Murphy beds, high-quality birch plywood is a popular and reliable choice.
Where Hardwood Makes the Biggest Difference
Rather than using hardwood for every component, many furniture makers reserve it for highly visible details.
Examples include:
- Face frames
- Shelf edges
- Decorative trim
- Base molding
- Crown molding
- Exposed shelving
- Accent panels
This approach creates a premium appearance while keeping costs under control.
Comparing Popular Wood Species
Every wood brings its own personality.
Choosing one isn’t simply about color—it’s about the mood you want the finished furniture to create.
White Oak
Known for its clean grain and exceptional durability, white oak fits beautifully in modern, Scandinavian, and contemporary homes.
Maple
Smooth, bright, and incredibly versatile, maple works well whether you’re painting or applying a clear finish.
Its subtle grain creates a refined appearance.
Walnut
Few woods communicate luxury as effortlessly as walnut.
Its rich tones and dramatic grain patterns make it a favorite for statement furniture.
Cherry
Cherry develops deeper color over time, giving furniture a warm, timeless character that many woodworkers love.
Birch
Affordable, durable, and easy to finish, birch offers excellent value while still producing attractive results.
Choosing the Right Fasteners
A Murphy bed experiences repeated movement throughout its lifetime.
Strong joinery matters.
Quality fasteners help ensure the cabinet remains rigid and dependable year after year.
Many builders rely on combinations of:
- Structural screws
- Pocket-hole screws
- Confirmat screws
- Hardwood dowels
- High-quality wood glue
Each fastening method contributes to overall strength when used appropriately.
Selecting a Finish Before You Start Building
Many people wait until construction is complete before thinking about the finish.
Professionals often make that decision much earlier.
Why?
Because the finish influences material selection, trim details, edge treatments, and even joinery.
Some of the most popular choices include:
Natural Clear Finish
Perfect for showcasing beautiful hardwood grain while protecting the wood from everyday wear.
Painted Finish
Ideal for:
- Built-in cabinetry
- Farmhouse interiors
- Coastal homes
- Modern spaces
Paint can help the Murphy bed blend seamlessly with the surrounding room.
Stain and Protective Topcoat
A stain enhances natural grain, while a durable topcoat protects against scratches, moisture, and daily use.
The combination produces depth and richness that many homeowners prefer.
Create a Complete Shopping List Before Visiting the Lumberyard
One of the simplest ways to avoid delays is to prepare a detailed materials list.
Include everything you’ll need, such as:
- Sheet goods
- Hardwood
- Edge banding
- Murphy bed hardware
- Fasteners
- Adhesives
- Sandpaper
- Primer
- Paint or stain
- Protective finish
- Cabinet pulls
- Lighting components, if included
Buying materials thoughtfully helps ensure consistency in color, grain, and quality throughout the project.
Good Planning Is Invisible—but You’ll Feel It Every Step of the Way
The most successful woodworking projects often appear effortless in hindsight.
That’s because the difficult decisions were made before the first board was cut.
Careful planning reduces waste, minimizes frustration, and allows the build to progress with confidence instead of guesswork.
It’s the quiet work that no one sees—but it’s also the reason the finished Murphy bed opens smoothly, fits perfectly, and feels like it truly belongs in the room.
In the next part, we’ll shift from planning to inspiration as we begin exploring the first collection of DIY Murphy bed woodworking plans, including beginner-friendly builds, timeless Shaker designs, sleek modern styles, and multifunctional layouts that bring together craftsmanship and smart space-saving design.
Part 3 — 25 DIY Murphy Bed Woodworking Plans That Look Like They Belong in a Custom Home
Every Murphy bed solves the same basic problem.
It creates more space.
But the best designs do something more subtle. They make the room feel intentional, as though the furniture was always meant to be there. When the bed is closed, guests see beautiful cabinetry instead of hidden mechanics. When it’s open, the room becomes warm, practical, and inviting.
That’s the difference between building a Murphy bed and designing one.
The following collection includes twenty-five woodworking plan ideas that span a wide range of styles, budgets, and skill levels. Some emphasize simplicity. Others lean into craftsmanship with architectural details, integrated storage, or premium hardwoods.
Rather than chasing trends, think about how each design fits the way you actually live.
Plan 1 — The Clean Weekend Build
Best for: First-time furniture builders
Some projects earn their appeal through simplicity.
This Murphy bed strips away unnecessary complexity and focuses on solid construction, clean proportions, and reliable functionality.
With mostly straight cuts and uncomplicated cabinet assembly, it’s approachable without feeling basic.
Why You’ll Like It
- Easy-to-follow construction
- Minimal trim work
- Affordable material list
- Smooth painted or stained finish
- Standard hardware compatibility
What Makes It Feel Premium
Consistency.
Straight lines, crisp corners, and even spacing often create a stronger impression than elaborate decoration.
Plan 2 — Timeless Shaker Style
Best for: Traditional homes
Some furniture never falls out of style.
Shaker design has remained popular for generations because it values balance over ornament.
Simple frame-and-panel construction creates depth without feeling heavy.
Signature Details
- Recessed panels
- Clean rails and stiles
- Modest trim profiles
- Balanced cabinet proportions
Finished in white, soft gray, or natural maple, this style blends comfortably into almost any home.
Plan 3 — Contemporary Minimalist Murphy Bed
Best for: Modern interiors
Modern furniture doesn’t hide mistakes.
Without decorative trim or ornate moldings, every joint becomes visible.
That’s precisely what gives minimalist furniture its quiet confidence.
Design Features
- Flush cabinet faces
- Hidden handles
- Slab-style doors
- Matte finishes
- Continuous grain patterns
This plan pairs especially well with white oak or walnut veneer.
Plan 4 — Modern Farmhouse Murphy Bed
Best for: Cozy family homes
Farmhouse style continues to resonate because it feels welcoming without appearing formal.
This design combines practical storage with warm materials and familiar architectural details.
Common features include:
- Board-and-batten styling
- Decorative crossbucks
- Black hardware
- Painted cabinetry
- Natural wood accents
The overall effect feels comfortable rather than decorative.
Plan 5 — Murphy Bed with Built-In Bookshelves
Best for: Readers and collectors
A wall of books instantly changes the atmosphere of a room.
By adding shelving on either side of the Murphy bed cabinet, the furniture begins to resemble custom library cabinetry rather than a hidden bed.
Shelving works beautifully for displaying:
- Books
- Plants
- Framed photographs
- Artwork
- Decorative ceramics
- Storage baskets
It’s a design that remains useful every day—not just when guests arrive.
Plan 6 — Home Office Murphy Bed with Fold-Down Desk
Best for: Remote work
The modern home office often needs to serve two very different purposes.
During the week it’s a workspace.
On weekends or holidays it may become a guest room.
This Murphy bed accommodates both without compromise.
Features often include:
- Integrated desk
- Floating shelves
- Cable management
- Drawer storage
- Charging outlets
The transition from office to bedroom takes only a few moments.
Plan 7 — Murphy Bed with Floating Nightstands
Best for: Boutique hotel style
Floating nightstands instantly create a cleaner, more intentional look.
Instead of placing separate bedside tables beside the bed, they’re incorporated directly into the cabinetry.
Benefits include:
- Better floor space
- Hidden cable routing
- Contemporary appearance
- Easier cleaning
Optional additions include reading lights or wireless charging.
Plan 8 — Hidden Storage Murphy Bed
Best for: Organized living
Storage is one of the greatest advantages of custom woodworking.
Instead of wasting the space surrounding the cabinet, this design incorporates practical storage solutions.
Ideas include:
- Blanket cabinets
- Deep drawers
- Adjustable shelving
- Hidden compartments
- Linen storage
When designed thoughtfully, the storage becomes just as valuable as the bed itself.
Plan 9 — Scandinavian-Inspired Murphy Bed
Best for: Bright, minimalist interiors
Scandinavian furniture embraces calm.
Natural materials, soft colors, and simple forms create rooms that feel light and uncluttered.
Key design characteristics include:
- White oak
- Birch plywood
- Rounded edges
- Minimal hardware
- Soft matte finishes
The result feels modern without becoming cold.
Plan 10 — Mid-Century Modern Murphy Bed
Best for: Vintage-inspired spaces
Mid-century furniture continues to influence contemporary interiors because of its timeless proportions.
Rather than relying on decorative trim, it emphasizes elegant geometry and carefully selected materials.
Common elements include:
- Walnut veneer
- Horizontal grain
- Tapered legs
- Warm wood finishes
- Clean silhouettes
A Murphy bed built in this style easily becomes the centerpiece of the room.
Plan 11 — Industrial Murphy Bed
Best for: Loft apartments and urban homes
Industrial furniture celebrates structure rather than hiding it.
Wood and steel work together to create bold visual contrast.
Popular design details include:
- Black steel accents
- Open shelving
- Exposed hardware
- Dark wood finishes
- Metal brackets
Although the aesthetic appears rugged, successful execution still depends on precise craftsmanship.
Plan 12 — Wall-to-Wall Built-In Murphy Bed
Best for: Seamless custom cabinetry
This design extends beyond the bed itself.
Instead of a single cabinet, the Murphy bed becomes the center of a complete storage wall.
Possible additions include:
- Full-height wardrobes
- Display shelving
- Closed cabinets
- Decorative niches
- Accent lighting
When finished carefully, it resembles permanent architectural millwork.
Plan 13 — Murphy Bed with a Window Seat
Best for: Reading rooms and guest suites
Windows often become overlooked spaces.
This plan turns them into a feature.
By connecting the Murphy bed cabinetry with a built-in window seat, the entire room feels cohesive.
Additional options include:
- Storage beneath the bench
- Bookshelves
- Cushioned seating
- Decorative paneling
It’s a design that encourages people to stay in the room even when the bed is folded away.
Plan 14 — Entertainment Center Murphy Bed
Best for: Multifunctional living rooms
In apartments and smaller homes, one room may serve several purposes.
This design combines a Murphy bed with entertainment storage.
It can accommodate:
- Television
- Sound system
- Media storage
- Decorative shelving
- Cable management
When the bed is closed, nothing suggests the room doubles as a bedroom.
Plan 15 — Luxury Guest Suite Murphy Bed
Best for: High-end guest accommodations
Some Murphy beds disappear into the background.
This one becomes the focal point.
Inspired by boutique hotels, it often includes:
- Upholstered headboard
- Integrated lighting
- Floating shelving
- Premium molding
- Soft-close cabinetry
- Hidden charging stations
Guests notice the comfort immediately, but they remember the thoughtful details long after they leave.
A Pattern Begins to Emerge
Looking across these first fifteen plans, something becomes clear.
The most impressive Murphy beds aren’t necessarily the most elaborate.
They’re the ones where every feature feels purposeful.
A bookshelf isn’t added simply because there’s space for one.
It’s there because someone genuinely uses books.
A desk isn’t included to impress visitors.
It’s there because the room functions as an office every weekday.
The best woodworking projects reflect real life.
They solve everyday problems while quietly making the room more enjoyable to use.
That’s what gives custom furniture its lasting appeal.
In the next part, we’ll continue with Plans 16 through 25, exploring premium built-ins, luxury wall systems, children’s room solutions, tiny-home designs, hidden wardrobes, and multifunctional layouts that combine practical living with furniture-grade craftsmanship.
Part 4 — DIY Murphy Bed Plans 16–25: Premium Designs with a Custom Furniture Feel
By now, you’ve probably noticed a pattern.
The Murphy beds that leave the strongest impression aren’t always the biggest or the most expensive. They’re the ones that feel like they belong in the room—as though the architecture and the furniture were designed together from the beginning.
The next ten plans lean into that philosophy. They go beyond simply hiding a bed and begin shaping the entire space around it. Some introduce integrated wardrobes. Others combine seating, storage, or display cabinetry. A few are ambitious enough to become full-room focal points.
If you’re looking for inspiration that balances craftsmanship with everyday practicality, these ideas are worth exploring.
Plan 16 — Library Wall Murphy Bed
Best for: Home libraries, studies, and reading rooms
There’s something timeless about a wall lined with books.
It creates warmth before anyone even sits down.
This design wraps the Murphy bed in floor-to-ceiling shelving, turning what could have been a large cabinet into a feature that feels permanent and inviting.
Popular additions include:
- Adjustable bookshelves
- Decorative lighting
- Closed lower cabinets
- Display niches
- Hardwood face frames
When the bed is folded away, visitors see a thoughtfully designed library—not multifunctional furniture.
Plan 17 — White Oak Contemporary Wall Bed
Best for: Modern homes
White oak has quietly become one of the defining materials of contemporary interior design.
Its subtle grain adds texture without overwhelming the room, making it an excellent choice for minimalist cabinetry.
This plan emphasizes restraint.
Expect features such as:
- Flat slab doors
- Continuous grain matching
- Flush panels
- Minimal hardware
- Soft matte finish
Rather than drawing attention through decoration, it relies on proportion and precision.
Plan 18 — Murphy Bed with Hidden Wardrobe
Best for: Guest rooms with limited closet space
A guest room becomes significantly more useful when visitors have somewhere to unpack.
Instead of placing a wardrobe elsewhere in the room, this design incorporates one directly into the Murphy bed cabinet.
Possible storage includes:
- Hanging clothes
- Shelving
- Extra pillows
- Folded blankets
- Luggage storage
It’s a practical solution that keeps everything organized without adding extra furniture.
Plan 19 — Sliding Barn Door Murphy Bed
Best for: Farmhouse and transitional interiors
Sliding barn doors bring character long before the Murphy bed is ever opened.
When closed, the cabinet resembles a decorative feature wall.
When opened, the doors glide aside to reveal the bed behind them.
Design elements often include:
- Hardwood barn doors
- Black steel track hardware
- Decorative crossbuck panels
- Reclaimed wood accents
- Soft-close sliding systems
The contrast between rustic texture and modern functionality gives this design broad appeal.
Plan 20 — Murphy Bed for Tiny Homes
Best for: Compact living
Tiny homes leave little room for wasted space.
Every decision has to earn its place.
This design focuses on efficiency without sacrificing comfort.
Common features include:
- Slim cabinet profile
- Lightweight construction
- Integrated shelving
- Fold-away table
- Compact storage solutions
The finished project feels surprisingly spacious despite its modest footprint.
Plan 21 — Children’s Murphy Bed
Best for: Growing families
Children’s rooms rarely stay the same for long.
A Murphy bed offers flexibility as their needs evolve.
This design often includes:
- Toy storage
- Book cubbies
- Rounded corners
- Durable painted finish
- Accessible shelving
As children grow, the room can adapt without requiring a complete redesign.
Plan 22 — Murphy Bunk Bed
Best for: Shared bedrooms and vacation homes
When sleeping capacity matters, bunk-style Murphy beds provide an impressive solution.
Although more mechanically complex, they create two sleeping spaces while preserving valuable floor area during the day.
Ideal for:
- Cabins
- Vacation rentals
- Family cottages
- Shared children’s bedrooms
Because of the additional weight, premium hardware and careful installation are especially important.
Plan 23 — Murphy Bed with Integrated Sofa
Best for: Studio apartments
This design has become increasingly popular in urban living.
A sofa remains in place while the bed folds down above or behind it, allowing the room to function comfortably throughout the day.
Benefits include:
- Comfortable seating
- Efficient use of space
- Apartment-friendly layout
- Simple room transitions
Instead of choosing between a living room and a bedroom, you enjoy both.
Plan 24 — Decorative Paneled Murphy Bed
Best for: Traditional homes
Architectural paneling has a remarkable ability to make cabinetry feel permanent.
Raised or recessed panels introduce depth without overwhelming the design.
Popular options include:
- Picture-frame molding
- Shaker panels
- Beadboard inserts
- Applied trim
- Full-height wall paneling
Painted to match surrounding walls, the cabinet almost disappears until it’s needed.
Plan 25 — Complete Wall System
Best for: Long-term homes
This is less a Murphy bed than an entire furniture installation.
The bed becomes one element within a carefully designed wall of cabinetry.
Additional features may include:
- Wardrobes
- Open shelving
- Display cabinets
- Desk space
- Filing drawers
- Entertainment storage
- Decorative lighting
- Hidden compartments
It’s the closest a DIY builder can come to high-end bespoke furniture without commissioning a custom cabinet shop.
Which Plan Fits Your Lifestyle?
Choosing between twenty-five designs can feel overwhelming.
Instead of asking which plan looks best, ask which one solves your biggest everyday challenge.
If You’re New to Woodworking
Focus on projects with:
- Straightforward cabinetry
- Standard hardware
- Minimal trim
- Painted finishes
- Simple storage
The goal is to build confidence while producing excellent results.
If Storage Is Your Priority
Look for designs that include:
- Shelving
- Wardrobes
- Hidden cabinets
- Drawers
- Multipurpose furniture
The additional functionality often proves just as valuable as the Murphy bed itself.
If You Want a Luxury Appearance
Choose plans emphasizing:
- Hardwood face frames
- Grain matching
- Premium hardware
- Integrated lighting
- Architectural moldings
- Refined finishes
These details create the polished look associated with professionally built furniture.
If You’re Working with Limited Space
Compact homes benefit from plans that combine several functions within one installation.
Features worth considering include:
- Fold-down desks
- Floating shelves
- Slim cabinets
- Built-in seating
- Flexible storage
The best small-space furniture doesn’t merely fit—it makes the room feel larger.
Designing for the Way You Actually Live
One mistake many homeowners make is designing for rare occasions rather than everyday life.
It’s tempting to imagine the perfect guest room.
It’s even more valuable to create a room that serves you well every single day.
Before selecting a plan, consider:
- How often will guests stay?
- Will the room mainly be an office?
- Do you need extra storage?
- Do children use the space?
- Will the furniture need to adapt in the future?
The answers often reveal which design will continue feeling right years after the project is complete.
Custom Furniture Is Built One Detail at a Time
Luxury furniture rarely relies on one dramatic feature.
Its strength comes from dozens of thoughtful decisions working together.
Consistent proportions.
Carefully selected materials.
Balanced lighting.
Smooth hardware.
Clean reveals.
Quality finishes.
None of these details demands attention.
Together, they quietly communicate craftsmanship.
That’s exactly what makes a well-built Murphy bed feel less like a DIY project and more like furniture that has always belonged in the room.
In the next part, we’ll explore the designer touches that elevate a Murphy bed from functional cabinetry to something that genuinely resembles custom-built furniture—without dramatically increasing the project budget.
Part 5 — Designer Details That Make a DIY Murphy Bed Look Like Custom Furniture
There’s a moment that every woodworker hopes for.
A friend walks into the room, looks around for a second, and asks:
“Wait… you built this?”
Not because the project is oversized or overly elaborate.
Because it looks like it belongs.
That reaction rarely comes from expensive materials alone. It comes from dozens of thoughtful decisions layered together—details that most people never consciously notice but immediately respond to.
Professional cabinetmakers understand this instinctively. They know luxury isn’t loud. It’s subtle. It’s the way the light catches a perfectly aligned panel, the way a cabinet door closes without effort, or how every proportion feels balanced without drawing attention to itself.
Fortunately, many of those details are well within reach of a DIY builder.
Design the Entire Wall, Not Just the Bed
One of the easiest ways to elevate a Murphy bed is to stop thinking about it as a standalone piece of furniture.
Instead, think of it as part of the room’s architecture.
When the cabinet visually connects with the surrounding space, everything feels more intentional.
Simple additions can make a dramatic difference:
- Matching baseboards
- Crown molding
- Side shelving
- Built-in cabinets
- Window-seat integration
- Decorative wall panels
The goal isn’t to make the Murphy bed larger.
It’s to make it feel permanent.
Let Symmetry Do the Heavy Lifting
Human beings naturally respond to symmetry.
Even if we can’t explain why, balanced spaces feel calmer, more organized, and more expensive.
Before cutting any trim, stand back and study the overall layout.
Look for opportunities to create balance through:
- Equal shelf spacing
- Matching cabinet widths
- Centered hardware
- Consistent reveal lines
- Even lighting placement
- Mirrored storage layouts
These aren’t dramatic upgrades, but together they create visual harmony that immediately suggests professional craftsmanship.
Upgrade the Face Frame
The face frame is one of the first things people notice, even if they don’t realize it.
A carefully built hardwood face frame adds depth, durability, and character to an otherwise simple cabinet.
Consider subtle refinements like:
- Slightly eased edges
- Crisp inside corners
- Flush joints
- Consistent rail widths
- Clean transitions into surrounding trim
Small refinements often have a greater visual impact than adding more decorative elements.
Crown Molding Changes Everything
Few details transform cabinetry as effectively as crown molding.
It creates a visual connection between the furniture and the room, making the installation feel less like something that was added later and more like part of the original architecture.
The style should complement the rest of the home.
For example:
- Clean square profiles suit modern interiors.
- Layered molding works well in traditional spaces.
- Simple stepped trim bridges transitional styles.
Matching existing room trim helps create a seamless appearance.
Build a Better Base
People tend to focus on eye-level details, but the lower portion of the cabinet deserves equal attention.
Professional installations often include:
- Recessed toe kicks
- Matching baseboards
- Decorative plinth blocks
- Continuous trim around adjoining cabinetry
These details help anchor the cabinet visually while improving the built-in illusion.
Hide the Hardware Whenever Possible
One characteristic shared by premium furniture is restraint.
Visible screws, oversized brackets, and exposed fasteners interrupt clean surfaces and distract from the craftsmanship.
Whenever practical:
- Install screws from concealed locations.
- Use matching wood plugs.
- Hide structural hardware behind trim.
- Keep mechanical components out of sight.
The less attention the hardware demands, the more attention the craftsmanship receives.
Pay Attention to Grain Direction
Wood tells a story through its grain.
Professional furniture makers treat that grain almost like a pattern in fabric.
They think about how it flows across neighboring panels.
Whenever possible:
- Keep grain running consistently.
- Match adjacent pieces.
- Plan veneer layouts before cutting.
- Label panels during preparation.
These extra minutes during layout often create one of the strongest visual differences between average cabinetry and exceptional furniture.
Add Lighting with Purpose
Lighting isn’t simply functional.
It shapes how people experience a room.
Warm accent lighting creates depth while highlighting craftsmanship that might otherwise go unnoticed.
Popular locations include:
- Open shelving
- Reading niches
- Floating nightstands
- Display cabinets
- Interior storage compartments
A softly illuminated bookshelf beside a Murphy bed immediately changes the atmosphere of the room.
Floating Nightstands Create Visual Space
Traditional bedside tables occupy valuable floor area.
Floating nightstands solve that problem while making the entire installation feel lighter.
They also provide opportunities to conceal:
- Charging cables
- Power outlets
- Reading lights
- Small storage drawers
Simple details like these improve both appearance and everyday convenience.
Plan for Modern Technology
Today’s bedrooms support far more than sleeping.
Phones, tablets, laptops, smart watches, and wireless headphones all need power.
Rather than adding extension cords later, build technology into the design from the beginning.
Ideas include:
- USB charging ports
- Hidden power strips
- Cable channels
- Wireless charging shelves
- Accessible service panels
The room stays clean because the technology disappears into the furniture.
Choose Hardware Like You Would Jewelry
Cabinet hardware may occupy only a small portion of the project, yet it has a surprising influence on the final appearance.
Choose finishes that complement the room rather than competing with it.
Popular options include:
- Matte black
- Satin brass
- Brushed nickel
- Oil-rubbed bronze
- Antique brass
Whatever you choose, maintain consistency across handles, hinges, lighting, and nearby fixtures.
Small inconsistencies often create visual clutter without anyone realizing why.
Add Texture Without Adding Clutter
Luxury interiors rarely rely on excessive decoration.
Instead, they layer materials thoughtfully.
You might introduce texture through:
- Natural wood grain
- Upholstered headboards
- Fluted wood panels
- Woven baskets
- Soft fabric inserts
- Decorative wall paneling
These elements make the room feel richer without overwhelming the design.
Think Beyond Visible Storage
Good storage solves obvious problems.
Great storage anticipates the ones you haven’t thought about yet.
Hidden compartments can hold:
- Spare bedding
- Seasonal blankets
- Important documents
- Jewelry
- Electronic accessories
Because they’re concealed, they add functionality without increasing visual clutter.
Adjustable Shelving Keeps the Furniture Relevant
Life changes.
Books become decorations.
Decorations become storage baskets.
Children’s rooms become guest rooms.
Fixed shelves limit flexibility.
Adjustable shelving allows the furniture to evolve without requiring major modifications.
It’s a simple addition that extends the usefulness of the project for years.
Create Layers Instead of Flat Surfaces
Flat cabinetry serves a purpose.
Layered cabinetry creates presence.
Professional furniture often incorporates subtle variations in depth through:
- Recessed panels
- Applied molding
- Shadow gaps
- Decorative trim
- Contrasting materials
These small shifts catch light differently throughout the day, making the furniture feel more dynamic.
Edit the Design Before You Build
One of the most valuable habits professional designers develop is knowing when to stop adding.
Before finalizing your plans, ask:
“If I removed this feature, would the furniture actually become worse?”
If the answer is no, leave it out.
Restraint often produces stronger design than excess.
A clean, carefully proportioned Murphy bed tends to age far more gracefully than one overloaded with decorative elements.
Luxury Lives in the Details
People often assume expensive furniture is defined by rare materials or intricate carvings.
In reality, luxury is usually quieter than that.
It’s revealed in:
- Tight joinery
- Smooth edges
- Consistent spacing
- Balanced proportions
- Silent hardware
- Thoughtful lighting
- Durable finishes
- Careful craftsmanship
These details don’t compete for attention.
They work together to create confidence.
The kind of confidence that makes handcrafted furniture feel timeless.
Before You Pick Up a Saw
It’s easy to become excited by trim profiles, lighting, and premium finishes.
But remember: every designer detail rests on a solid foundation.
No amount of decorative molding can hide a cabinet that’s out of square.
No luxury hardware can compensate for inaccurate measurements.
Build the structure carefully first.
Then let these finishing touches elevate it into something extraordinary.
In the next part, we’ll look at the mistakes that catch even experienced builders off guard—and the practical habits that help you avoid them, saving time, materials, and frustration while producing a Murphy bed that performs as beautifully as it looks.
Part 6 — Common Murphy Bed Building Mistakes (and the Small Habits That Prevent Big Problems)
Every memorable woodworking project has two stories.
The first is the one people see—a beautifully finished piece of furniture that fits the room perfectly.
The second is the one nobody notices.
It’s the careful measuring, the extra dry fit, the decision to remake one panel because it was off by a fraction, or the patience to wait another day before applying the final coat of finish.
That’s where great projects are really built.
Murphy beds have very little tolerance for rushed decisions. Because the project combines cabinetry, moving hardware, and structural installation, small inaccuracies tend to multiply as the build progresses.
The encouraging part?
Most mistakes aren’t caused by a lack of skill. They’re caused by skipping simple steps.
Knowing where builders commonly run into trouble makes it much easier to avoid those same problems yourself.
Mistake 1 — Getting Excited Before Making a Plan
Every woodworker knows the feeling.
You find the perfect Murphy bed design, head to the lumberyard, load the truck, and can’t wait to start cutting.
Then halfway through the build you realize the cabinet interferes with a light switch—or the mattress you’ve already purchased isn’t compatible with the lift hardware.
Momentum is exciting.
Planning is valuable.
Before buying materials, answer a few practical questions:
- How often will the bed be used?
- Which wall offers the strongest structural support?
- Is the room better suited to a vertical or horizontal design?
- Will shelving or storage be part of the project?
- What mattress will the hardware support?
Those answers become the foundation for every decision that follows.
Mistake 2 — Buying Hardware as an Afterthought
Many builders spend weeks comparing lumber and finishes, then purchase the lift mechanism almost as an afterthought.
In reality, the hardware should influence the design from the beginning.
The lift system determines:
- Cabinet dimensions
- Bed frame size
- Mattress weight range
- Mounting locations
- Required clearances
Trying to adapt the cabinet to unsuitable hardware often creates unnecessary frustration.
Choose the hardware first.
Build around it.
Mistake 3 — Trying to Save Money in the Wrong Places
Every project has a budget.
Smart budgeting isn’t about buying the cheapest materials—it’s about investing where quality matters most.
Areas worth prioritizing include:
- Lift hardware
- Furniture-grade plywood
- Structural fasteners
- Durable finishes
Decorative details can always be added later.
Structural quality cannot.
Mistake 4 — Forgetting That Wood Is Always Moving
Wood may look solid, but it responds constantly to changes in humidity.
Season after season, it expands and contracts in tiny amounts.
Professional furniture builders respect that movement rather than fighting it.
Good design allows materials to behave naturally without creating stress inside the cabinet.
Choosing stable sheet goods for large panels and using solid hardwood strategically helps maintain long-term performance.
Mistake 5 — Accepting “Close Enough”
Murphy beds reward precision.
An opening that’s just slightly out of square may seem insignificant during assembly.
Later, it can affect:
- Door alignment
- Hardware operation
- Reveal lines
- Trim installation
- Overall appearance
Experienced builders check for square repeatedly throughout the project—not just once at the end.
It takes only a few moments and prevents hours of correction later.
Mistake 6 — Underestimating Wall Installation
Unlike a freestanding dresser or bookcase, a Murphy bed becomes part of the building itself.
The cabinet depends on secure attachment to structural framing.
Never assume drywall alone can support the installation.
Take time to:
- Locate framing accurately
- Confirm fastener locations
- Follow hardware instructions
- Verify structural support before mounting
This isn’t simply a finishing step.
It’s one of the most important parts of the entire project.
Mistake 7 — Measuring Once
Woodworkers repeat an old saying for good reason:
Measure twice. Cut once.
Many experienced builders quietly add another step.
Measure again.
When working with expensive plywood or hardwood, spending another minute verifying dimensions is almost always worthwhile.
Develop habits such as:
- Labeling each panel
- Marking orientation
- Checking reference edges
- Confirming dimensions before every major cut
Those small routines dramatically reduce costly mistakes.
Mistake 8 — Cutting Every Piece at the Beginning
Preparing every component before assembly may sound efficient.
In practice, it often removes flexibility.
Minor adjustments become difficult once every board has already been cut.
Many cabinetmakers prefer to work in stages.
They complete the cabinet structure first.
Then they verify dimensions.
Only after that do they prepare trim, moldings, and decorative components.
The process feels slower.
Ironically, it often finishes faster.
Mistake 9 — Skipping the Dry Fit
A dry fit is one of the simplest quality-control steps available.
Without glue or permanent fasteners, temporarily assemble major components.
Check:
- Overall dimensions
- Joint alignment
- Hardware clearance
- Door operation
- Shelf placement
Finding a problem now is far easier than discovering it after the glue has cured.
Mistake 10 — Treating Surface Preparation as an Afterthought
Beautiful finishes don’t begin with paint or stain.
They begin with preparation.
Before applying any finish, inspect every surface carefully.
Look for:
- Milling marks
- Glue residue
- Minor dents
- Scratches
- Uneven edges
- Pencil lines
Many flaws become even more visible after stain or clear finish is applied.
Removing them beforehand produces noticeably cleaner results.
Mistake 11 — Rushing the Finish
After weeks of building, it’s natural to want the project finished.
This is exactly when patience matters most.
Professional-looking finishes come from:
- Thin coats
- Proper drying time
- Light sanding between coats
- Dust-free application
- Careful inspection
The final finish is the first thing everyone notices.
Give it the attention it deserves.
Mistake 12 — Ignoring How the Furniture Will Actually Be Used
It’s easy to become focused on construction details and overlook everyday practicality.
Before final assembly, imagine using the Murphy bed regularly.
Ask yourself:
- Can the bed open without moving furniture?
- Is there enough walking space?
- Are shelves easy to reach?
- Can guests access charging outlets?
- Is bedding stored conveniently?
The answers often inspire small improvements that greatly enhance daily use.
Mistake 13 — Forgetting About Future Maintenance
Even the best lift systems benefit from occasional inspection.
During construction, think ahead.
Can hardware be accessed later if adjustments become necessary?
Are electrical components serviceable?
Can trim be removed without damaging surrounding cabinetry?
Building with maintenance in mind makes future ownership far easier.
Habits Worth Borrowing from Professional Cabinetmakers
Exceptional furniture rarely comes from extraordinary talent alone.
It comes from consistent habits.
Simple practices like these make a remarkable difference:
Work from Reference Surfaces
Choose one consistent edge for measuring and layout.
This reduces cumulative errors throughout the project.
Label Every Component
Temporary markings prevent confusion during assembly.
A few seconds with a pencil can save hours of unnecessary disassembly later.
Clean as You Build
An organized workspace isn’t just more pleasant.
It’s safer, more efficient, and makes it easier to notice potential problems before they become serious.
Pause Between Major Stages
Before moving forward, stop and inspect your work.
Check:
- Alignment
- Square
- Level
- Fastener tightness
- Surface quality
Small corrections become increasingly difficult once the next stage begins.
A Builder’s Mindset Matters More Than Perfect Tools
Many first-time builders assume professionals achieve better results because they own better equipment.
While quality tools certainly help, they’re only part of the equation.
Experienced furniture makers develop something even more valuable.
They slow down.
They inspect constantly.
They expect small adjustments.
They don’t view corrections as failures.
They see them as part of the process.
That mindset is often the biggest difference between frustration and satisfaction.
The Best Projects Rarely Feel Rushed
Think back to the furniture you’ve admired most.
Chances are, it doesn’t feel hurried.
Every edge looks intentional.
Every panel aligns naturally.
Every detail appears considered.
That’s not luck.
It’s the result of hundreds of careful decisions made one after another.
Your Murphy bed deserves that same level of attention.
Because once it’s installed, it won’t simply be another woodworking project.
It will become part of the rhythm of your home.
In the next part, we’ll focus on one of the most transformative stages of the entire build: professional finishing techniques that give DIY Murphy beds the depth, durability, and refined appearance of high-end custom furniture.
Part 7 — Professional Finishing Techniques That Give a DIY Murphy Bed a Custom Furniture Look
There comes a point in every woodworking project when the tools get quieter.
The cabinet is assembled.
The hardware fits.
The doors are aligned.
From a distance, the Murphy bed already looks complete.
But anyone who has built furniture before knows the truth.
This is where the real transformation begins.
The finish isn’t simply protection. It’s personality. It’s the moment raw materials become furniture that feels refined, intentional, and inviting. A carefully applied finish highlights craftsmanship in ways that expensive lumber alone never can.
It’s also the stage that separates projects people describe as “homemade” from those they assume came from a professional cabinet shop.
A Great Finish Starts Long Before Paint or Stain
Walk through a custom furniture studio and you’ll notice something interesting.
The finishing room is quiet.
There’s very little rushing.
That’s because experienced builders understand a simple principle:
The quality of the finish is determined long before the first coat is applied.
Surface preparation deserves just as much attention as construction.
Run your hand across every panel.
Look closely under bright light.
You’ll often discover details your eyes missed during assembly:
- Fine scratches
- Glue residue
- Small dents
- Pencil marks
- Tiny gaps
- Mill marks
- Raised wood fibers
Correcting these imperfections now is far easier than trying to disguise them later.
Sanding Is About Consistency, Not Speed
Many people think sanding simply makes wood smooth.
In reality, it prepares every surface to receive finish evenly.
Uneven sanding often reveals itself only after stain or paint has been applied.
That’s why professionals work methodically rather than aggressively.
A consistent sanding progression creates:
- Better stain absorption
- More uniform paint coverage
- Smoother touch
- Cleaner reflections under light
One overlooked habit makes a noticeable difference:
Whenever possible, make your final sanding passes in the direction of the wood grain.
It’s a subtle detail, but one that contributes to a cleaner, more natural appearance.
Choosing the Right Finish for Your Style
The finish should support the overall design rather than compete with it.
Think of it as the final chapter of the furniture’s story.
Clear Natural Finish
A clear finish celebrates the wood itself.
It allows grain patterns, color variation, and natural texture to remain the focus.
This approach works beautifully with:
- White oak
- Walnut
- Cherry
- Maple
If you’ve invested in attractive hardwood, a clear finish often lets the material speak for itself.
Painted Finish
Paint changes the personality of a Murphy bed completely.
Instead of highlighting the wood, it emphasizes shape, proportion, and architectural detail.
Painted cabinetry works particularly well when you want the Murphy bed to feel like part of the room rather than a separate piece of furniture.
Popular color directions include:
- Warm white
- Soft gray
- Deep navy
- Sage green
- Charcoal
- Greige
Choosing timeless colors helps the furniture remain relevant as decorating styles evolve.
Stain with a Protective Topcoat
Staining adds richness while preserving the natural character of the wood.
When followed by a durable protective finish, it creates furniture that is both beautiful and practical.
Before committing to a color, test it on leftover material from the project.
Wood species absorb stain differently, and small samples often prevent disappointing surprises.
Thin Coats Create Better Results
One of the most common finishing mistakes is trying to achieve full coverage too quickly.
Heavy coats take longer to dry, are more prone to imperfections, and often hide the crisp details you’ve worked so hard to create.
Professional finishers prefer patience.
Several thin coats generally produce:
- Better clarity
- More even sheen
- Improved durability
- Cleaner surface texture
The process takes longer, but the difference is immediately visible.
Let the Grain Become Part of the Design
Wood has movement.
Every board carries its own subtle patterns.
Instead of trying to overpower that character, let it contribute to the overall design.
Products that enhance natural grain often create a finish that feels warmer and more authentic than heavily built-up coatings.
Especially with hardwoods, the goal isn’t to hide the material.
It’s to celebrate it.
Don’t Neglect the Edges
Sharp edges chip more easily.
They also feel less comfortable during everyday use.
Professional furniture typically includes lightly eased edges.
The change is almost invisible.
Yet when someone runs a hand across the cabinet, the difference becomes immediately apparent.
Furniture should invite touch, not discourage it.
The Small Gaps People Always Notice
Visitors rarely inspect joinery closely.
Yet somehow, the eye immediately catches uneven spacing.
Before applying the final finish, look carefully at:
- Door reveals
- Face frame joints
- Molding transitions
- Shelf alignment
- Corner intersections
These tiny details quietly communicate craftsmanship.
Hardware Should Complement, Not Compete
Think about the role hardware plays.
Its purpose is to support the design—not dominate it.
Whether you choose matte black, brushed nickel, satin brass, or another finish, consistency is more important than trendiness.
When cabinet pulls, lighting, hinges, and decorative accents share a common visual language, the entire installation feels more cohesive.
Light Can Change Everything
Lighting affects how every finish is perceived.
Natural daylight, evening light, and artificial lighting all reveal different qualities in wood and paint.
Before making final color decisions:
View finish samples during different times of the day.
A stain that feels warm in morning sunlight may appear much darker under evening lighting.
This simple step often prevents disappointment after installation.
Layer the Design with Texture
Luxury furniture rarely depends on decoration alone.
Instead, it combines materials that contrast gently with one another.
Texture can come from:
- Wood grain
- Upholstered panels
- Fluted trim
- Matte paint
- Woven storage baskets
- Linen fabrics
- Decorative wall paneling
These subtle variations create visual depth without overwhelming the room.
Protect the Furniture You’ll Use Every Day
Murphy beds aren’t display pieces.
They’re designed to become part of everyday life.
A durable finish should withstand:
- Frequent handling
- Seasonal humidity changes
- Light cleaning
- Everyday wear
Choosing quality finishing products now reduces maintenance later.
It’s an investment in longevity as much as appearance.
Step Back Before Calling It Finished
When you’ve looked at a project for weeks, it’s easy to stop noticing small details.
Before installation, pause.
Walk away for a while.
Then return with fresh eyes.
Stand across the room.
Look from different angles.
Ask yourself:
- Do the proportions feel balanced?
- Are gaps consistent?
- Does the finish look uniform?
- Does anything immediately draw attention for the wrong reason?
Those final observations often inspire small adjustments that dramatically improve the finished result.
Furniture That Feels Effortless
The finest furniture has an interesting quality.
Nothing asks for attention.
Nothing feels forced.
Instead, every element quietly supports the whole.
The finish feels smooth.
The hardware operates naturally.
The proportions feel balanced.
The craftsmanship disappears into the experience of using the furniture.
That’s ultimately what you’re aiming for—not perfection for its own sake, but a Murphy bed that feels so well considered it simply belongs in the room.
Time Is the Ingredient You Can’t Buy
Premium hardwood can be purchased.
High-quality hardware can be ordered.
Professional tools can be rented.
The one ingredient that can’t be bought is patience.
Every extra minute spent preparing a surface, adjusting a reveal, or allowing a finish to cure properly becomes part of the furniture itself.
Years from now, no one will remember how long the project took.
They’ll simply notice how well it was built.
And that’s exactly the kind of impression fine woodworking should leave.
In the next part, we’ll turn our attention to caring for your completed Murphy bed—covering practical maintenance, routine inspections, and simple habits that help preserve its appearance and performance for many years to come.
Part 8 — Murphy Bed Maintenance: Keeping Your Custom Build Beautiful for Years
The day your Murphy bed is installed feels like the finish line.
In reality, it’s the beginning of the furniture’s life inside your home.
Unlike a bookshelf that rarely moves or a dining table that stays in one place, a Murphy bed becomes part of your daily routine. It opens. It closes. It carries weight. It supports guests, adapts to changing seasons, and quietly helps your home function more efficiently.
That constant use is exactly why a little maintenance goes such a long way.
The good news is that keeping a Murphy bed in excellent condition doesn’t require specialized skills or hours of work. A few thoughtful habits, practiced consistently, are usually enough to preserve both its appearance and smooth operation for many years.
Build Once, Maintain Lightly
One of the biggest advantages of a well-built Murphy bed is that it doesn’t ask much from its owner.
If quality materials were used and the installation was completed carefully, maintenance becomes less about repairs and more about routine observation.
Think of it the same way you would care for a handcrafted dining table or custom cabinetry.
Small checkups prevent larger problems.
The Five-Minute Monthly Inspection
Once each month, take a few minutes to look over the bed before using it.
You aren’t searching for major damage.
You’re simply noticing whether anything has changed.
Pay attention to:
- How smoothly the bed opens
- Whether it closes evenly
- Any unusual sounds
- Small changes in alignment
- Loose hardware
- Cabinet movement
Most issues begin subtly.
Catching them early usually makes correction simple.
Listen as Much as You Look
Furniture often tells you when something needs attention.
A Murphy bed that once moved quietly but now squeaks or feels different isn’t necessarily failing.
It’s communicating.
Listen for sounds like:
- Squeaking
- Clicking
- Rubbing
- Grinding
- Sudden resistance
These changes often point toward minor adjustments rather than major repairs.
Ignoring them rarely makes them disappear.
Check the Hardware Without Overthinking It
The lift mechanism does most of the heavy work every time the bed moves.
Fortunately, it usually requires very little attention.
During routine inspections, look for:
- Secure mounting points
- Smooth movement
- Loose fasteners
- Visible wear
- Hardware that appears out of alignment
Avoid making unnecessary adjustments if everything operates normally.
Sometimes the best maintenance is simply confirming that nothing needs to change.
Make Sure the Cabinet Still Feels Solid
The cabinet itself should feel stable every time the bed is opened.
If you notice movement between the cabinet and the wall, stop using the bed until you’ve identified the cause.
Check for:
- Gaps behind the cabinet
- Loose wall fasteners
- Shifting trim
- Separation at joints
A Murphy bed depends on proper structural attachment, so stability should never be taken for granted.
Wood Changes with the Seasons
One of the beautiful things about wood is that it’s alive in a subtle way.
It responds to the environment around it.
During humid months it may expand slightly.
In drier seasons it may contract.
Small seasonal changes are completely normal.
You might notice:
- Tiny reveal differences
- Slight door adjustments
- Minor changes in drawer movement
These are usually signs of natural wood movement rather than construction problems.
Keep Indoor Humidity Consistent
Stable indoor conditions benefit both your furniture and your home.
A comfortable humidity range helps reduce unnecessary movement in solid wood components and contributes to the long-term appearance of painted or stained finishes.
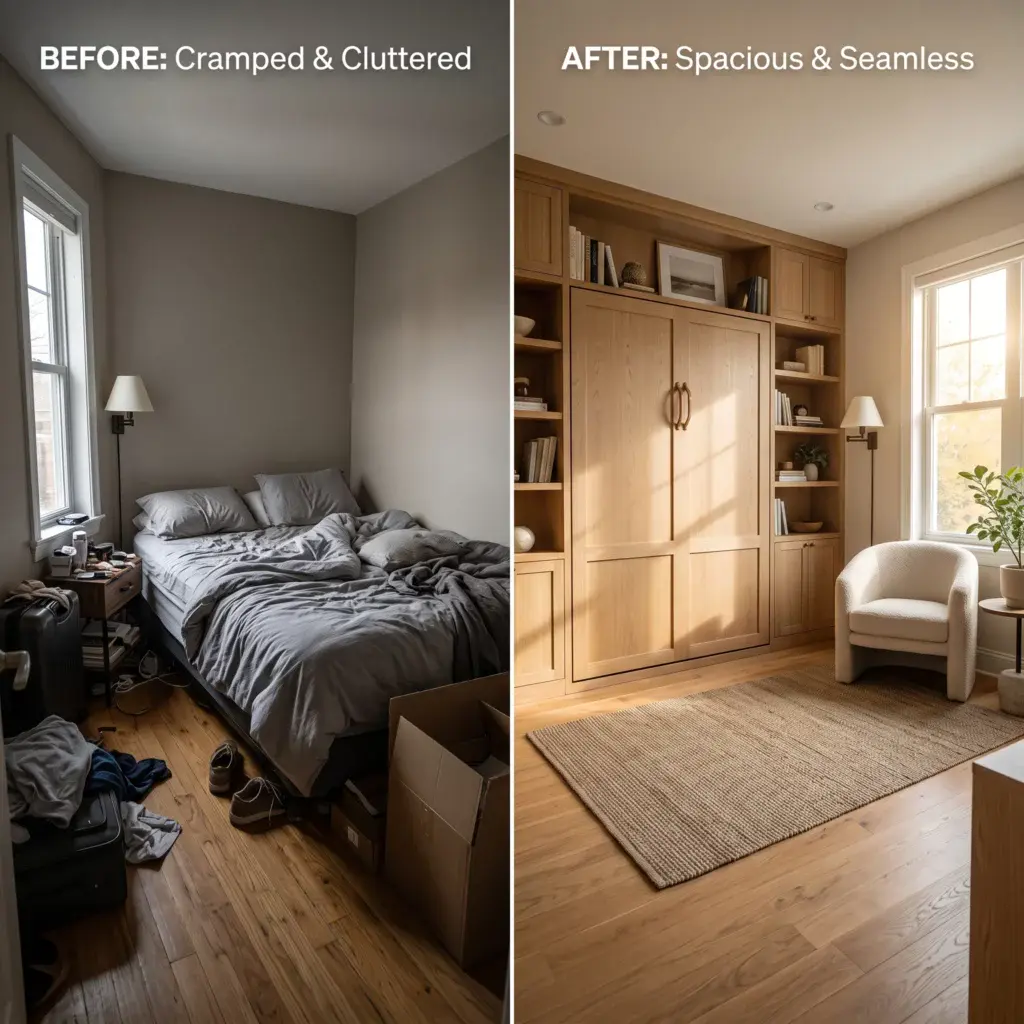
While exact conditions vary by climate, avoiding extreme swings is generally more important than chasing a specific number.
Consistent conditions help wood remain stable over time.
Cleaning Without Damaging the Finish
The finish protects the furniture.
Your cleaning routine should protect the finish.
For regular care, a soft microfiber cloth is usually enough.
When additional cleaning is needed:
- Use a mild soap solution.
- Wipe with a damp—not soaking—cloth.
- Dry the surface afterward.
Avoid harsh household cleaners designed for kitchens or bathrooms.
Many contain chemicals that gradually dull furniture finishes.
Looking After Painted Murphy Beds
Painted cabinetry has its own maintenance routine.
Everyday fingerprints, especially around handles and edges, are completely normal.
Regular gentle cleaning keeps painted surfaces looking fresh.
If minor chips appear over time, keeping a small amount of leftover paint from the original project makes touch-ups simple and nearly invisible.
Caring for Natural Wood Finishes
Natural wood rewards gentle care.
Dust regularly using a soft cloth and avoid leaving moisture on the surface for long periods.
If the Murphy bed receives direct sunlight each day, remember that some hardwoods naturally change color over time.
This gradual aging is part of the character many woodworkers appreciate.
Rather than seeing it as wear, think of it as the furniture developing its own history.
Don’t Forget the Mattress
The Murphy bed is only one part of the sleeping experience.
The mattress deserves attention too.
Periodically check for:
- Even support
- Signs of sagging
- Retaining straps in good condition
- Moisture buildup
- General cleanliness
A well-maintained mattress not only improves comfort but also helps the lift system perform as intended.
A Simple Maintenance Schedule
Keeping things organized doesn’t require a complicated checklist.
Every Month
Take a quick look at:
- Lift mechanism
- Cabinet stability
- Visible hardware
- General operation
Every Six Months
Spend a little more time checking:
- Door alignment
- Shelf supports
- Decorative trim
- Lighting, if installed
- Interior storage areas
Once a Year
Perform a more complete inspection.
Review:
- Structural fasteners
- Wall attachment
- Lift system
- Finish condition
- Overall cabinet alignment
These annual inspections help preserve the furniture before wear becomes noticeable.
Solving Small Problems Early
Most Murphy bed issues begin as tiny inconveniences.
Perhaps the bed feels slightly heavier.
Maybe a cabinet door doesn’t align quite as perfectly as before.
A small squeak appears.
These aren’t reasons to panic.
They’re reminders that furniture, like any well-used object, benefits from occasional attention.
Addressing minor concerns promptly usually prevents them from becoming expensive repairs later.
If Something Doesn’t Feel Right
Trust your instincts.
If the bed suddenly operates differently than it always has, pause before continuing to use it.
Look carefully.
Compare both sides of the mechanism.
Inspect fasteners.
Review the installation instructions for your hardware system if necessary.
Most importantly, never force the bed to operate if something clearly feels wrong.
Smooth movement is one of the defining characteristics of a properly functioning Murphy bed.
Protect the Finish During Everyday Use
Daily habits have a greater impact than occasional deep cleaning.
Simple practices make a noticeable difference.
For example:
- Lift objects instead of dragging them across shelves.
- Clean spills promptly.
- Avoid placing wet items directly on wood surfaces.
- Use felt pads beneath decorative accessories.
- Keep sharp objects away from finished edges.
These habits become second nature and help preserve the appearance you’ve worked so hard to achieve.
Your Murphy Bed Can Grow with Your Home
One advantage of custom woodworking is flexibility.
Years from now, your needs may be different.
Fortunately, many Murphy beds can evolve alongside them.
Possible upgrades include:
- New cabinet hardware
- Additional shelving
- Integrated lighting
- Charging stations
- Decorative moldings
- Updated paint or stain
- Interior storage accessories
Thoughtful improvements allow the furniture to remain useful without starting over.
Furniture That Earns Its Place
The best furniture doesn’t constantly demand attention.
It quietly supports everyday life.
A Murphy bed should become so dependable that you stop thinking about it altogether.
It simply opens when you need it.
Closes when you don’t.
Creates room where there wasn’t any before.
That’s the mark of successful design—not constant admiration, but effortless usefulness.
Caring for the Craftsmanship
Every project carries a memory.
You’ll remember measuring those first sheets of plywood.
Adjusting the cabinet until it was perfectly square.
Waiting impatiently for the final finish to cure.
Those moments become part of the furniture just as much as the wood itself.
Taking a little time to maintain the Murphy bed is also a way of respecting the craftsmanship that went into building it.
Because well-made furniture isn’t disposable.
It’s meant to be lived with.
Sometimes for decades.
Sometimes for generations.
In the next part, we’ll answer the questions that almost every builder asks before starting—from choosing the right mattress and hardware to understanding costs, safety, customization, and what to expect from a DIY Murphy bed project.
Part 9 — Frequently Asked Questions About DIY Murphy Bed Woodworking Plans
No matter how much planning you do, a few questions almost always linger before you begin a project like this.
That’s completely normal.
A Murphy bed is more than another woodworking build. It’s furniture with moving parts, structural considerations, and a daily purpose inside your home. Naturally, people want to know they’re making the right decisions before investing their time and materials.
The questions below reflect the conversations many builders have with themselves long before the first sheet of plywood reaches the workshop.
“Is This Really a Project I Can Build Myself?”
If you’ve built a few cabinets, shelves, or pieces of furniture, the answer is probably yes.
Even if you’re relatively new to woodworking, don’t let the size of the project intimidate you.
Most Murphy beds are built from straightforward cabinet construction techniques.
The challenge isn’t advanced joinery.
It’s consistency.
Take your time.
Measure carefully.
Work through the project one stage at a time instead of thinking about the finished bed all at once.
Many first-time builders are surprised by how manageable the process becomes once it’s broken into smaller tasks.
“How Much Money Can I Actually Save?”
This is often the question that starts the entire journey.
Custom-built Murphy beds can be expensive because you’re paying for:
- Design
- Materials
- Cabinetmaking
- Installation
- Finishing
- Labor
Building your own shifts much of that investment into your own craftsmanship.
Your total budget will depend on choices such as:
- Lumber quality
- Hardware system
- Cabinet size
- Finish
- Storage features
- Decorative upgrades
The beauty of a DIY build is flexibility.
You decide where to invest and where to keep things simple.
“How Long Does a Murphy Bed Take to Build?”
There’s no universal answer.
Some builders spread the project over several weekends.
Others enjoy working steadily over a few weeks.
Instead of measuring progress by days, think in stages.
Each completed milestone builds confidence:
- Planning
- Material preparation
- Cabinet assembly
- Bed frame construction
- Hardware installation
- Finishing
- Final installation
Watching those stages come together is one of the most satisfying parts of the entire project.
“What Tools Do I Need?”
You don’t need a commercial cabinet shop.
Many successful Murphy beds have been built with a carefully chosen collection of common woodworking tools.
Depending on your plans, you may use:
- Table saw or circular saw
- Miter saw
- Drill and driver
- Router
- Pocket-hole jig
- Orbital sander
- Clamps
- Combination square
- Tape measure
- Level
More important than owning every tool is knowing how to use the tools you already have accurately and safely.
“Can I Use Any Mattress?”
Not quite.
The mattress and lift mechanism work together as a system.
Before purchasing a mattress, confirm that it matches the weight and thickness recommendations provided with your Murphy bed hardware.
Choosing compatible components helps ensure smooth operation and balanced movement.
“Are Memory Foam Mattresses Suitable?”
In many cases, yes.
The important consideration isn’t whether the mattress is memory foam, hybrid, or innerspring.
It’s whether the total weight falls within the operating range of the lift hardware.
Always verify compatibility before final assembly.
“Will a Murphy Bed Damage My Wall?”
When installed correctly, no.
A Murphy bed is designed to be securely attached to structural framing.
Proper installation distributes weight safely and keeps the cabinet stable throughout years of use.
Problems generally arise only when installation instructions are ignored or appropriate structural attachment isn’t achieved.
“Are Murphy Beds Safe?”
This question deserves careful attention.
Modern Murphy bed hardware is engineered with safety in mind.
When properly assembled and installed according to the manufacturer’s instructions, a Murphy bed can provide reliable, everyday use.
As with any furniture that contains moving parts, routine inspections and periodic maintenance help ensure continued safe operation.
“Should I Choose a Vertical or Horizontal Murphy Bed?”
There isn’t a universally correct answer.
The room usually decides.
A vertical Murphy bed often suits:
- Standard bedrooms
- Guest rooms
- Larger mattresses
- Higher ceilings
A horizontal Murphy bed may be a better choice for:
- Children’s rooms
- Rooms with lower ceilings
- Compact spaces
- Unusual wall layouts
Choosing the orientation that complements your room typically leads to a more natural finished design.
“Can I Add Storage?”
Absolutely.
One of the biggest advantages of building your own Murphy bed is the freedom to customize.
Popular additions include:
- Bookshelves
- Drawers
- Wardrobes
- Floating shelves
- Fold-down desks
- Hidden compartments
- Blanket storage
- Display cabinets
Many homeowners discover they value the surrounding storage just as much as the bed itself.
“Should I Paint or Stain the Murphy Bed?”
Both approaches can produce beautiful results.
The better choice depends on the style of your home.
Paint works especially well when you want the Murphy bed to resemble built-in cabinetry.
Stain highlights natural wood grain and showcases hardwood species with distinctive character.
Neither option is inherently better.
The goal is simply to create furniture that feels at home in the space.
“Which Wood Should I Choose?”
Several materials consistently perform well.
Furniture-grade plywood is widely used for cabinet construction because it remains stable over time.
Visible trim and face frames are often made from hardwoods such as:
- White oak
- Maple
- Walnut
- Cherry
- Birch
Combining plywood with hardwood accents offers an excellent balance between strength, appearance, and cost.
“Can a Murphy Bed Increase the Appeal of My Home?”
While every property is different, thoughtfully designed built-in furniture often makes a positive impression.
People appreciate rooms that feel flexible.
A guest room that also functions as an office.
A small bedroom that suddenly feels spacious.
A wall of cabinetry that offers storage as well as sleeping space.
Good design rarely goes unnoticed.
“Will I Need a Building Permit?”
Requirements vary depending on where you live and the scope of your project.
If your Murphy bed installation involves additional work—such as electrical modifications or structural alterations—it’s wise to confirm local requirements before you begin.
Planning ahead avoids unnecessary surprises later.
“Can I Move It If I Relocate?”
Many Murphy beds can be disassembled, especially if that possibility is considered during construction.
Helpful habits include:
- Labeling components
- Organizing hardware
- Photographing assembly
- Keeping installation documentation
Those small steps make future relocation much more straightforward.
“What Makes One Murphy Bed Look More Expensive Than Another?”
This may be the most interesting question of all.
The answer usually isn’t rare hardwood.
Or elaborate carving.
Or expensive accessories.
The difference is almost always found in the fundamentals.
Clean proportions.
Consistent spacing.
Thoughtful lighting.
Careful finishing.
Balanced design.
Quiet confidence.
That’s what people recognize—even if they can’t immediately explain why.
“Is Building One Actually Worth It?”
Only you can answer that.
But consider what the project creates.
Not just a bed.
A more flexible room.
Additional storage.
A new woodworking skill set.
A piece of furniture designed specifically for your home.
And perhaps something even more meaningful.
Years from now, you’ll probably remember building it.
You’ll remember fitting the first cabinet panels together.
Adjusting the hardware until the bed opened effortlessly.
Standing back after the final coat of finish dried.
Those memories become part of the furniture itself.
Mass-produced furniture rarely carries that kind of story.
Questions You’ll Be Glad You Asked
The best projects aren’t built by people who never have questions.
They’re built by people who ask the right questions before making permanent decisions.
Every answer brings a little more confidence.
Every measurement becomes more intentional.
Every stage feels less uncertain.
That’s exactly how successful woodworking projects come together—not through rushing toward the finish line, but through understanding the process one decision at a time.
In the next part, we’ll shift from answering questions to bringing everything together, helping you confidently choose the Murphy bed plan that best fits your space, your budget, your woodworking experience, and the way you want your home to function.
Part 10 — Choosing the Right DIY Murphy Bed Plan for Your Home, Budget, and Lifestyle
After exploring twenty-five Murphy bed woodworking plans, comparing hardware systems, selecting materials, and learning the techniques that give furniture a custom-built appearance, one final decision remains.
Which plan should you actually build?
It’s surprisingly easy to get caught between dozens of great ideas.
One design offers beautiful built-in shelving.
Another includes a fold-down desk.
A third showcases striking hardwood details.
Before long, every option starts to feel equally appealing.
The solution isn’t finding the “best” Murphy bed.
It’s finding the one that fits your home as naturally as if it had always belonged there.
Begin with the Way You Live
Every successful furniture project starts with a simple observation.
Your home already has a rhythm.
Some rooms are busy from morning until night.
Others are used only occasionally.
The Murphy bed should support that rhythm instead of interrupting it.
Spend a few minutes imagining an ordinary weekday.
What happens in the room from breakfast until bedtime?
If the answer is “mostly work,” your priorities will be different from someone creating a guest suite used only a handful of weekends each year.
Design around your life, not around an idea.
Let Function Guide Every Decision
Beautiful furniture earns admiration.
Useful furniture earns daily appreciation.
Before choosing a plan, think carefully about what you need the room to accomplish.
Perhaps you need:
- A productive workspace during the day
- Comfortable accommodations for overnight guests
- Extra storage for seasonal items
- A reading room
- A hobby space
- A quiet retreat
The Murphy bed should quietly support those goals without demanding attention.
When the furniture adapts to your routines, the room becomes noticeably easier to enjoy.
Match the Project to Your Experience
One of the smartest decisions any woodworker can make is choosing a project that builds confidence instead of frustration.
If You’re Building Your First Murphy Bed
Look for designs that emphasize:
- Straightforward cabinetry
- Standard lift hardware
- Limited decorative trim
- Painted finishes
- Simple shelving
Completing a clean, well-built project is far more rewarding than abandoning an overly ambitious one halfway through.
If You Have Some Furniture-Building Experience
You may enjoy adding features such as:
- Face-frame cabinetry
- Hardwood trim
- Integrated storage
- Decorative moldings
- Floating nightstands
- Built-in lighting
These upgrades introduce new techniques while remaining manageable.
If You’re an Experienced Woodworker
This is where larger ideas become realistic.
Consider projects featuring:
- Full wall systems
- Hidden wardrobes
- Entertainment centers
- Grain-matched veneer
- Architectural paneling
- Luxury built-ins
These designs require more planning but offer remarkable opportunities for craftsmanship.
Create a Budget That Reflects Your Priorities
A thoughtful budget isn’t about spending as little as possible.
It’s about spending wisely.
Separate the project into categories.
Structural Components
- Furniture-grade plywood
- Hardwood
- Cabinet backing
- Edge banding
Hardware
- Murphy bed lift mechanism
- Cabinet pulls
- Hinges
- Structural fasteners
Finishing Supplies
- Primer
- Paint or stain
- Protective finish
- Sandpaper
- Application tools
Optional Upgrades
- LED lighting
- Decorative trim
- Upholstered panels
- Floating shelves
- Charging stations
- Soft-close hardware
This approach makes it easier to decide where premium materials will have the greatest impact.
Build in Stages Instead of Chasing the Finish Line
Large projects become much less intimidating when viewed as a series of manageable milestones.
Rather than thinking about the completed Murphy bed, focus on the next logical step.
For example:
Stage One
Planning and measuring
Stage Two
Preparing materials
Stage Three
Building the cabinet
Stage Four
Constructing the bed frame
Stage Five
Installing the lift hardware
Stage Six
Surface preparation and finishing
Stage Seven
Final installation and adjustment
Progress feels much more satisfying when every stage has a clear purpose.
Give the Final Details the Time They Deserve
There’s a temptation near the end of every woodworking project.
The furniture already looks complete.
The urge to finish becomes stronger.
Ironically, this is the stage where patience often has the greatest payoff.
Take another look at:
- Cabinet reveals
- Hardware alignment
- Shelf spacing
- Finish consistency
- Door operation
- Lighting placement
- Trim joints
These details influence the overall impression far more than most people realize.
Design for the Future, Not Just Today
Homes evolve.
Children grow.
Guest rooms become offices.
Offices become hobby rooms.
The most satisfying furniture continues serving you through those changes.
As you compare Murphy bed plans, ask yourself:
Will this design still feel useful five years from now?
Ten years?
Timeless layouts, flexible storage, and adaptable shelving often age better than highly specialized designs.
Why Simplicity Often Wins
It’s easy to assume that adding more features automatically creates better furniture.
Professional designers frequently reach the opposite conclusion.
Instead of asking,
“What else can I include?”
they ask,
“What can I remove without sacrificing usefulness?”
This approach produces cleaner lines, calmer rooms, and furniture that remains appealing long after trends change.
Well-edited design almost always outlasts overdesigned furniture.
The Quiet Satisfaction of Building Something Yourself
Long after the sawdust has been swept away, something unexpected remains.
Every time you lower the bed for a guest, you’ll remember building it.
You’ll remember adjusting the cabinet until it was perfectly square.
You’ll remember carefully sanding every exposed edge.
You’ll remember standing back after installation and seeing the room transformed.
Those memories become woven into the furniture itself.
That’s something no showroom purchase can replicate.
A Murphy Bed Is More Than a Woodworking Project
On paper, it’s a cabinet with a folding bed.
In everyday life, it becomes much more.
It creates flexibility.
It encourages better use of space.
It allows one room to serve several purposes without compromise.
In many homes, it quietly changes how people live.
That’s a remarkable outcome for a woodworking project.
Build for Quality, Not Speed
If there’s one principle worth carrying through every stage of this build, it’s this:
Slow projects often become the best projects.
Taking an extra evening to verify measurements.
Waiting another day before applying the next finish coat.
Checking one more time that every panel is perfectly aligned.
These moments rarely feel dramatic.
Yet together they create furniture that continues to perform beautifully long after the project is finished.
A Murphy bed isn’t something you build every weekend.
Treat it like a piece of heirloom furniture from the very beginning.
In the final part, we’ll replace the traditional conclusion with a practical Products / Tools / Resources section, offering carefully selected materials, woodworking essentials, finishing supplies, and project-planning resources that naturally support a successful Murphy bed build from start to finish.
Part 11 — Products / Tools / Resources
A successful Murphy bed isn’t built around one perfect tool or one premium material.
It’s the result of good decisions made consistently—from choosing reliable hardware to investing in quality plywood, taking accurate measurements, and applying a durable finish.
The resources below aren’t meant to encourage unnecessary spending. Instead, they’re the items that experienced woodworkers repeatedly rely on because they improve accuracy, efficiency, and the overall quality of the finished project.
Use this section as a planning checklist before your build begins.
Murphy Bed Hardware
The lift mechanism is the heart of the project.
It’s responsible for balancing the weight of the mattress, controlling movement, and ensuring the bed operates smoothly over years of regular use.
When comparing hardware kits, look for features such as:
- Weight compatibility with your mattress
- Clear installation instructions
- Durable steel components
- Smooth operating action
- Replacement part availability
- Strong mounting brackets
- Long-term reliability
Buying quality hardware from the start is one of the best investments you can make.
Furniture-Grade Sheet Goods
For most cabinet components, furniture-grade plywood offers an ideal balance of strength, stability, and finish quality.
Consider using:
- Birch plywood
- Maple plywood
- Oak veneer plywood
- Walnut veneer plywood
Look for panels with:
- Flat surfaces
- Minimal voids
- Consistent veneer quality
- Reliable core construction
Good sheet goods make assembly easier and produce cleaner finished results.
Hardwood for Visible Details
Hardwood adds warmth, durability, and a furniture-quality appearance to exposed areas.
Excellent choices include:
- White oak
- Maple
- Walnut
- Cherry
- Birch
These species work particularly well for:
- Face frames
- Trim
- Shelf edging
- Decorative moldings
- Floating shelves
- Accent panels
Combining hardwood accents with plywood cabinetry often provides the best balance between appearance and cost.
Essential Measuring and Layout Tools
Accuracy begins long before assembly.
Reliable measuring tools help eliminate cumulative errors throughout the project.
Useful items include:
- Tape measure
- Combination square
- Speed square
- Framing square
- Digital angle finder
- Marking knife
- Mechanical pencil
- Long straightedge
Clear, consistent layout work saves considerable time later.
Cutting and Assembly Tools
Most DIY Murphy bed plans can be completed using commonly available woodworking equipment.
Core tools often include:
- Table saw
- Circular saw with guide track
- Miter saw
- Router
- Drill and driver
- Random orbital sander
- Pocket-hole jig
- Clamps
- Countersink bits
- Flush-trim router bit
Well-maintained tools generally produce more accurate work than simply owning more tools.
Clamps You’ll Use Throughout the Build
It’s difficult to have too many clamps during cabinet construction.
A varied collection is especially useful.
Consider keeping:
- Parallel clamps
- Bar clamps
- F-style clamps
- Corner clamps
- Spring clamps
Clamps help maintain alignment while glue cures and improve overall assembly accuracy.
Fasteners and Adhesives
Quality joinery depends on selecting the appropriate fastening method for each part of the project.
Helpful supplies include:
- Structural wood screws
- Pocket-hole screws
- Confirmat screws
- Hardwood dowels
- Cabinet screws
- High-quality interior wood glue
Organizing fasteners into labeled containers before assembly helps streamline the build.
Sanding Supplies
Professional-looking finishes begin with consistent surface preparation.
Keep several sanding grits available so you can work progressively through each stage.
Useful supplies include:
- Sandpaper discs
- Sanding blocks
- Detail sanding sponges
- Tack cloths
- Dust extraction vacuum
- Shop brushes
Dust control becomes increasingly important as the project nears completion.
Paint, Stain, and Protective Finishes
Choose finishing products based on both appearance and durability.
Common options include:
Painted Finish
Ideal for:
- Modern interiors
- Built-in cabinetry
- Farmhouse styles
- Coastal homes
Clear Finish
Best for highlighting:
- White oak
- Walnut
- Cherry
- Maple
Stain with Protective Topcoat
Suitable when you want to emphasize natural grain while improving resistance to everyday wear.
Always test the finish on offcuts before applying it to visible components.
Cabinet Hardware
Although relatively small, cabinet hardware has a noticeable influence on the overall appearance.
Popular finish choices include:
- Matte black
- Brushed nickel
- Satin brass
- Oil-rubbed bronze
- Antique brass
Keeping hardware finishes consistent throughout the room creates a more cohesive design.
Lighting Accessories
Thoughtfully placed lighting improves both function and atmosphere.
Popular additions include:
- LED strip lighting
- Reading sconces
- Motion-activated cabinet lights
- Shelf lighting
- Under-cabinet lighting
Warm lighting generally creates a softer, more inviting environment.
Storage Accessories
If your Murphy bed includes cabinetry, a few interior accessories can make it significantly more practical.
Ideas include:
- Adjustable shelf pins
- Pull-out baskets
- Drawer organizers
- Blanket dividers
- Soft-close drawer slides
- Interior hooks
- Cable management clips
These small additions often improve everyday usability more than decorative upgrades.
Safety Equipment
Woodworking is most enjoyable when safety remains part of every step.
Keep these essentials nearby:
- Safety glasses
- Hearing protection
- Dust mask or respirator
- Work gloves for material handling
- Push sticks
- First-aid kit
- Fire extinguisher
- Good workshop lighting
Safe habits are every bit as important as accurate cuts.
Helpful Project Resources
Before starting your build, gather all of your planning materials in one place.
This might include:
- Printed woodworking plans
- Hardware installation guide
- Material cut list
- Lumber shopping checklist
- Room measurements
- Sketches and layout drawings
- Finish samples
- Notebook for project notes
Having everything organized from the beginning makes the build more enjoyable and reduces unnecessary interruptions.
Before You Make the First Cut
Take one final walk through the room where the Murphy bed will live.
Picture how it will look when it’s closed.
Imagine how the space will feel when it’s open.
Think about where guests will set a book, charge a phone, or store an overnight bag. Consider how natural light moves through the room and how the cabinetry will fit alongside the features already there.
Those quiet observations often shape the best design decisions.
The woodworking itself is important, but the goal reaches beyond building a bed.
You’re creating a piece of furniture that becomes part of everyday life—something that works effortlessly, looks intentional, and continues to serve your home long after the last coat of finish has cured.