
The Backyard You Keep Imagining Is Probably Closer Than You Think
There’s a moment that happens almost every spring.
You step outside with a cup of coffee, look around the backyard, and start mentally redesigning the space. Maybe it’s a bare patio. Maybe the furniture is faded, mismatched, or hanging on by a few loose screws. Whatever the situation, the picture in your head always looks better than what’s actually sitting outside.
Then you start browsing outdoor furniture online.
A chair costs more than expected.
A small table costs even more.
By the time you’ve added a loveseat, coffee table, and a few matching pieces to your cart, the total feels less like a backyard upgrade and more like a second mortgage.
That’s usually where the idea ends.
But here’s what surprises most people: the gap between “I wish I had better patio furniture” and “I built this myself” is much smaller than it looks.
The rise of easy outdoor furniture woodworking plans for beginners has changed the equation entirely. Today, first-time builders with basic tools and a free weekend can create furniture that looks custom-made, survives the elements, and costs a fraction of comparable retail pieces.
Not because the work is easy.
Because the process is simpler than most people have been led to believe.
Quick Answer: Can Beginners Build Outdoor Furniture?
Yes—and in many cases, beginners are actually better positioned than they think.
The easiest outdoor furniture woodworking plans for beginners focus on straightforward construction techniques, minimal tool requirements, and forgiving materials that allow room for learning.
Popular beginner-friendly projects include:
- Outdoor side tables
- Patio coffee tables
- Garden benches
- Adirondack chairs
- Outdoor sofas
- Storage benches
- Picnic tables
Most require only a handful of tools:
- Circular saw
- Drill and driver
- Measuring tape
- Speed square
- Orbital sander
With the right plan, even a complete novice can build functional outdoor furniture that looks polished, feels sturdy, and lasts for years.
Why Store-Bought Outdoor Furniture Feels So Expensive
Most people assume outdoor furniture costs what it costs because of the materials.
That’s rarely the full story.
Walk through any showroom and you’ll find patio chairs priced at several hundred dollars each. Outdoor sectionals routinely climb into the thousands. Dining sets can easily reach the cost of a vacation.
Yet when you break down the actual components—wood, fasteners, finish, cushions—the numbers tell a very different story.
The reality is that you’re paying for far more than lumber.
The Hidden Layers Behind the Price Tag
Before furniture reaches your patio, it often passes through multiple stages:
Manufacturer.
Distributor.
Warehouse.
Retailer.
Each step adds margin.
Each layer adds cost.
By the time a chair reaches the showroom floor, the final price may bear little resemblance to the value of the raw materials used to build it.
Branding Has a Price of Its Own
A recognizable outdoor furniture brand can add hundreds of dollars to a product without improving durability, comfort, or lifespan.
You’re often paying for:
- Design positioning
- Marketing
- Packaging
- Retail presentation
The chair may be attractive.
But the premium isn’t always attached to craftsmanship.
Shipping Changes Everything
Outdoor furniture is large, heavy, and expensive to move.
Whether it’s cedar, teak, redwood, or pressure-treated lumber, transportation costs become part of the purchase price.
When you build your own furniture, that burden disappears.
You buy materials.
You build locally.
The economics shift immediately.
The Beginner’s Blueprint for a Complete Patio Furniture Set
One of the biggest mistakes new woodworkers make is building random pieces without a larger vision.
A side table here.
A chair there.
Months later, nothing matches.
A better approach is to think like a furniture designer from the start.
Instead of building individual projects, build a system.
A complete patio furniture collection creates visual consistency, improves material efficiency, and gives your outdoor space a finished, intentional feel.
1. Start with an Outdoor Coffee Table
Every skill has an entry point.
For outdoor woodworking, the coffee table is often the perfect first build.
It teaches fundamental skills without overwhelming complexity.
You’ll learn:
- Measuring accurately
- Cutting lumber cleanly
- Keeping assemblies square
- Installing fasteners correctly
More importantly, you’ll finish with something useful.
That matters.
Early wins build confidence faster than any tutorial ever could.
Typical Build Time
4–6 hours
Estimated Cost
$40–$90
2. Add Matching Side Tables
Once you’ve completed a coffee table, side tables become surprisingly easy.
The dimensions are smaller.
The material requirements are lighter.
And because the design language often mirrors the coffee table, you’re reinforcing skills you’ve already practiced.
For beginners, repetition creates consistency.
For furniture, consistency creates professionalism.
Estimated Cost
$20–$60 each
Why Side Tables Matter
They’re often the pieces people use most.
A place for drinks.
Books.
Garden tools.
Morning coffee.
Their simplicity makes them easy to overlook, but they quietly anchor an entire patio layout.
3. Build a Patio Bench
If there is a classic beginner woodworking project, it’s the outdoor bench.
Simple enough to approach confidently.
Substantial enough to feel like a real accomplishment.
A well-built bench introduces concepts that become important later:
- Structural support
- Weight distribution
- Leg assembly
- Long-span stability
And unlike smaller projects, a bench immediately changes how a space feels.
An empty corner becomes a destination.
A plain garden becomes a place to sit.
Estimated Cost
$60–$150
4. Take on the Adirondack Chair
Few outdoor furniture designs have achieved the staying power of the Adirondack chair.
More than a century after its creation, it remains one of the most recognizable pieces of outdoor furniture in the world.
There’s a reason for that.
The wide armrests.
The deep recline.
The relaxed silhouette.
Everything about the design invites you to stay a little longer.
For beginner woodworkers, it represents a satisfying challenge—not because it’s complicated, but because it teaches precision.
The angles matter.
The curves matter.
The details matter.
And when it’s finished, you don’t just have a chair.
You have a piece that immediately elevates the entire backyard.
Estimated Cost
$80–$200 per chair
5. Build an Outdoor Sofa Frame
This is often the point where beginners realize something important.
Furniture construction isn’t magic.
It’s simply a collection of smaller skills layered together.
By the time you’ve completed tables, benches, and chairs, a sofa frame feels far less intimidating than it once did.
Most beginner-friendly outdoor sofa plans rely on:
- Straight cuts
- Pocket-hole joinery
- Exterior screws
- Simple framing techniques
Add weather-resistant cushions and the result rivals furniture that sells for several times the cost.
Estimated Cost
$150–$400
6. Finish with a Storage Bench
The best outdoor furniture serves more than one purpose.
A storage bench does exactly that.
It creates seating while solving one of the most common backyard frustrations: clutter.
Inside, you can store:
- Outdoor cushions
- Gardening supplies
- Pool accessories
- Children’s toys
- Seasonal décor
Outside, it looks like a premium furniture piece.
The combination of function and simplicity makes it one of the smartest projects in any beginner patio collection.
Estimated Cost
$80–$200
What You’ll Notice After Completing the First Few Projects
Something subtle begins to happen after the first successful build.
You stop looking at furniture as something other people make.
You start noticing joinery.
Construction details.
Wood species.
Design decisions.
The backyard changes, but so does the way you see the world around you.
And that’s where choosing the right materials becomes just as important as choosing the right plans.
Best Wood for Outdoor Furniture: The Decision That Determines Everything
A beautifully designed chair can fail in two seasons if it’s built from the wrong material.
On the other hand, a simple bench built from the right wood can sit through years of rain, summer heat, frost, and changing seasons while looking better with age.
This is where many beginners make an expensive mistake.
They focus on the project before they focus on the material.
In reality, wood selection influences nearly everything:
- Longevity
- Maintenance requirements
- Structural stability
- Appearance
- Total project cost
The good news is that you don’t need to become a lumber expert to make a smart decision.
You only need to understand a few key options.
Cedar: The Sweet Spot for Most Beginners
If outdoor woodworking had a default recommendation, cedar would be it.
Walk through woodworking forums, builder communities, or DIY project groups and you’ll see cedar recommended repeatedly—and for good reason.
It strikes an unusually balanced combination of qualities.
It’s naturally resistant to rot.
It handles moisture well.
It’s lightweight enough for beginners to work with comfortably.
And perhaps most importantly, it looks beautiful even before finish is applied.
Fresh cedar carries warm tones that instantly make outdoor furniture feel custom-built.
Why Beginners Love Cedar
- Naturally weather resistant
- Easy to cut and shape
- Lightweight compared to hardwoods
- Attractive grain patterns
- Lower maintenance requirements
Best Projects for Cedar
- Adirondack chairs
- Outdoor benches
- Side tables
- Coffee tables
- Patio seating
For many first-time builders, cedar delivers the best balance between durability, appearance, and affordability.
Redwood: Built for Longevity and Visual Impact
There’s something unmistakable about redwood.
Its rich color immediately stands apart from common construction lumber.
More importantly, its natural resistance to insects, moisture, and decay makes it one of the strongest outdoor furniture woods available.
Many premium outdoor furniture manufacturers use redwood for precisely this reason.
It performs.
And it ages gracefully.
Advantages of Redwood
- Exceptional durability
- Strong resistance to weather
- Premium appearance
- Long service life
The Trade-Off
Cost.
Redwood often commands higher prices than cedar or pressure-treated lumber.
For beginners working with strict budgets, that premium can influence project choices.
Still, for furniture intended to become a permanent backyard centerpiece, many builders consider the investment worthwhile.
Pressure-Treated Lumber: The Budget-Friendly Workhorse
Not every outdoor furniture project requires premium lumber.
Sometimes practicality wins.
Pressure-treated pine remains one of the most accessible and affordable materials available for outdoor woodworking.
Modern treatment processes significantly improve resistance to:
- Moisture
- Rot
- Insects
- Ground contact exposure
For larger projects where material costs add up quickly, pressure-treated lumber can dramatically reduce expenses.
Ideal Uses
- Picnic tables
- Garden benches
- Utility furniture
- Large outdoor seating projects
Things to Know
Pressure-treated lumber often requires additional drying time before staining or sealing.
Patience here pays off.
Rushing the finishing process usually creates more work later.
Teak: The Gold Standard
Every industry has its benchmark.
For outdoor furniture, teak is often that benchmark.
Its reputation comes from naturally occurring oils that help protect the wood from water, insects, and environmental wear.
Luxury resorts, coastal properties, and high-end outdoor furniture brands frequently rely on teak because of its extraordinary durability.
Why Teak Is So Respected
- Extremely weather resistant
- Minimal maintenance
- Exceptional lifespan
- Elegant appearance
The Obvious Drawback
Price.
Teak is often several times more expensive than beginner-friendly alternatives.
For many first projects, cedar offers better value.
But understanding teak helps you recognize why premium outdoor furniture commands such high prices.
Essential Tools Every Beginner Actually Needs
One of the biggest myths in woodworking is that you need a workshop full of expensive equipment before building anything worthwhile.
You don’t.
In fact, most beginner outdoor furniture projects can be completed with a surprisingly small collection of tools.
The goal isn’t to own everything.
The goal is to own the right things.
Circular Saw: The Foundation of Most Beginner Builds
If you could only purchase one major cutting tool, a circular saw would likely provide the greatest value.
It’s versatile.
Portable.
Affordable.
And capable of handling nearly every straight cut required by beginner outdoor furniture plans.
Used properly, a circular saw can produce clean, accurate cuts that rival far more expensive equipment.
Common Uses
- Cutting boards to length
- Breaking down lumber
- Trimming framing components
- Furniture panel preparation
For many DIY woodworkers, this tool becomes the center of the entire workshop.
Drill and Driver: The Most Frequently Used Tool You’ll Own
If the saw creates the pieces, the drill brings them together.
A quality drill and driver combination handles:
- Pilot holes
- Screw installation
- Hardware assembly
- Pocket-hole construction
Most outdoor furniture projects rely heavily on screws, making this tool indispensable.
A good drill doesn’t simply save time.
It improves accuracy and reduces frustration.
Orbital Sander: The Difference Between DIY and Professional
Many beginners assume furniture quality comes from construction.
Professionals know better.
The finish often determines how a project is perceived.
An orbital sander transforms rough lumber into smooth, touchable surfaces that feel intentional and refined.
It’s one of the fastest ways to elevate a beginner project.
Why Sanding Matters
Good sanding improves:
- Appearance
- Paint adhesion
- Stain absorption
- User comfort
Most people notice poor sanding immediately—even if they don’t know why.
Measuring Tape: Small Tool, Massive Impact
Ask experienced woodworkers where most mistakes begin.
The answer is usually the same.
Measurement errors.
A fraction of an inch can become a major issue several steps later.
Accurate measuring isn’t glamorous, but it’s foundational.
Every successful project begins here.
Speed Square: The Tool Beginners Wish They Bought Earlier
Simple.
Inexpensive.
Remarkably useful.
A speed square helps ensure:
- Accurate layout lines
- Consistent angles
- Straight cuts
- Proper assembly alignment
Many beginners discover its value only after struggling without one.
Once you use it, it’s difficult to imagine building without it.
Outdoor Furniture Cost Breakdown: DIY vs Retail
This is the section that often changes people’s minds.
Because once the numbers are laid out clearly, the economics become difficult to ignore.
Most homeowners underestimate how large the gap has become between DIY furniture costs and retail pricing.
The difference isn’t hundreds of dollars.
It’s often thousands.
Adirondack Chair
DIY Build Cost
Approximately $100
Retail Equivalent
Approximately $400
Potential savings:
$300 per chair
Build two and you’ve already saved enough to fund several additional projects.
Outdoor Side Table
DIY Build Cost
Approximately $35
Retail Equivalent
Approximately $150
Potential savings:
$115
A simple weekend project often replaces a purchase that would otherwise feel surprisingly expensive.
Outdoor Coffee Table
DIY Build Cost
Approximately $70
Retail Equivalent
Approximately $300
Potential savings:
$230
And unlike many retail options, you control dimensions, finish, and design details.
Outdoor Bench
DIY Build Cost
Approximately $120
Retail Equivalent
Approximately $500
Potential savings:
$380
This is where woodworking begins to feel less like a hobby and more like a practical investment.
Outdoor Sofa Frame
DIY Build Cost
Approximately $250
Retail Equivalent
Approximately $1,500
Potential savings:
$1,250
Few projects illustrate the value of DIY furniture more clearly.
Storage Bench
DIY Build Cost
Approximately $150
Retail Equivalent
Approximately $600
Potential savings:
$450
Functionality and savings rarely align this perfectly.
The Real Numbers
Let’s look at the patio set as a whole.
Complete DIY Patio Collection
Approximately $725
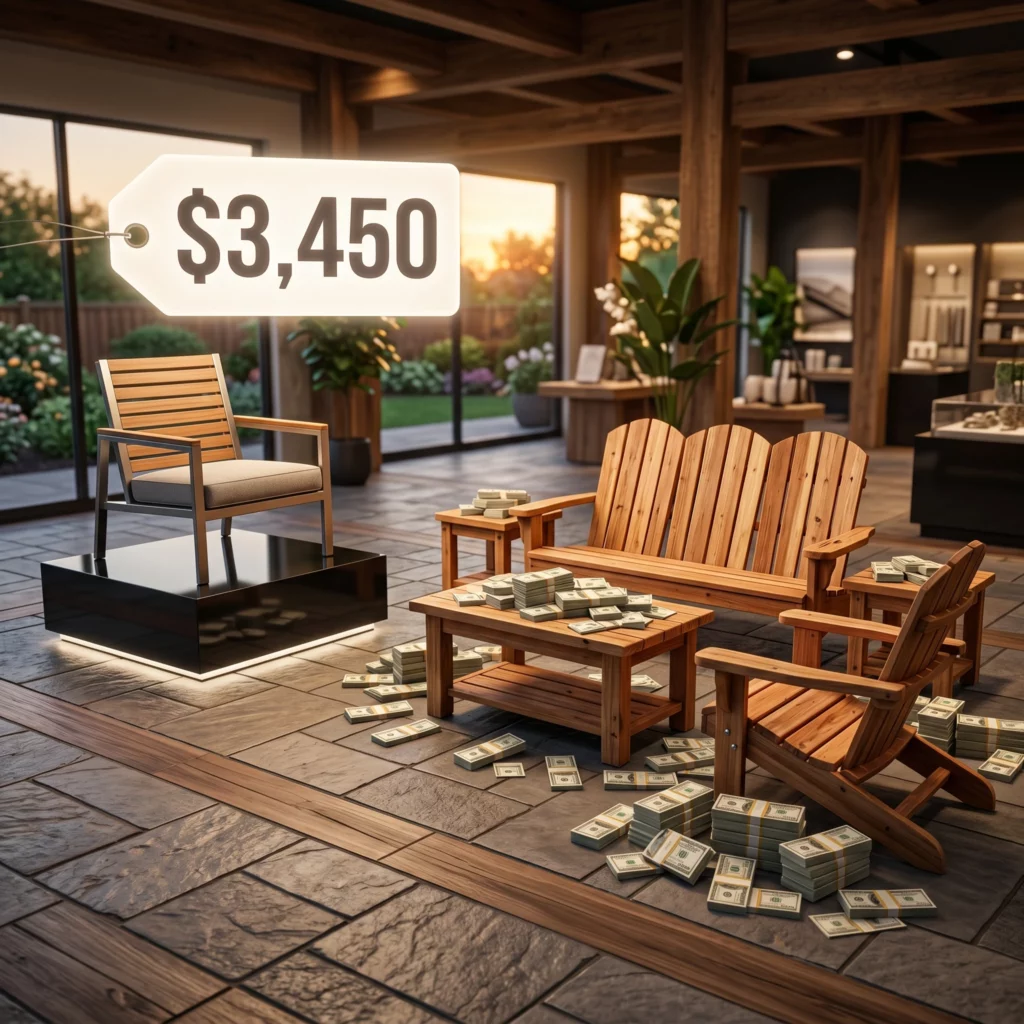
Comparable Retail Collection
Approximately $3,450
Potential Savings
More than $2,700
And that’s before considering customization, repairability, and long-term maintenance advantages.
The financial argument is compelling.
But money isn’t usually what keeps people building.
Something else happens once the projects start accumulating.
The furniture begins to carry stories.
The coffee table reminds you of the first successful build.
The bench reminds you of the mistakes you learned from.
The Adirondack chair becomes the place where guests always seem to sit first.
And that’s where the conversation shifts from cost to craftsmanship.
Unfortunately, that’s also where many beginners encounter avoidable mistakes that can shorten the life of otherwise beautiful furniture.
The Mistakes That Ruin Outdoor Furniture Long Before Weather Does
Most outdoor furniture doesn’t fail because of rain.
It doesn’t fail because of snow, direct sunlight, humidity, or changing seasons.
Those things simply expose mistakes that were already there.
That’s an important distinction.
When beginners look at a warped bench or a deteriorating chair, they often blame the environment. In reality, the environment is usually revealing a decision made weeks—or even months—earlier during construction.
The good news?
Most of those mistakes are completely preventable.
Using Indoor Lumber Outdoors
This is probably the most common mistake new builders make.
The logic seems reasonable at first.
Wood is wood.
A board is a board.
Why spend extra money on outdoor-rated lumber?
Because outdoor furniture lives in conditions indoor furniture never experiences.
Morning dew.
Heavy rain.
Direct UV exposure.
Seasonal expansion and contraction.
Humidity fluctuations.
Without natural resistance or proper treatment, indoor lumber absorbs moisture, swells, twists, cracks, and deteriorates much faster than expected.
That’s why cedar, redwood, pressure-treated lumber, and teak consistently appear in professional outdoor furniture construction.
The material itself becomes part of the protection system.
Skipping the Protective Finish
Many first-time builders fall in love with freshly cut wood.
And honestly, that’s understandable.
New cedar has warmth.
Fresh redwood has depth.
Even pressure-treated lumber can look surprisingly attractive after sanding.
The temptation is to leave it exactly as it is.
Then the weather arrives.
Moisture works its way into the grain.
Sunlight begins breaking down exposed fibers.
Color starts fading.
Small surface issues become larger structural issues.
Protective finishes exist for a reason.
Popular options include:
- Exterior stain
- Outdoor polyurethane
- Marine-grade sealer
- UV-resistant wood protection systems
The goal isn’t simply appearance.
The goal is preservation.
Ignoring Wood Movement
Wood never stops moving.
Even after it’s cut, assembled, and finished.
Temperature changes affect it.
Moisture affects it.
Seasonal conditions affect it.
Furniture that appears perfectly stable during construction may expand or contract slightly throughout the year.
Experienced builders expect this.
Beginners often fight it.
That’s why woodworking plans frequently include spacing recommendations, expansion allowances, and specific assembly methods.
Those details aren’t optional.
They’re engineering.
Rushing Through Sanding
Few mistakes are more visible.
And few mistakes are more frustrating.
You’ve spent hours measuring, cutting, assembling, and checking alignment.
The project finally looks complete.
Then comes sanding.
At that point, many people simply want to be finished.
So they rush.
The result usually shows immediately.
Sharp edges.
Visible scratches.
Uneven stain absorption.
Rough surfaces that never quite feel right.
Professional-looking furniture often isn’t the result of extraordinary craftsmanship.
It’s the result of patience during preparation.
The sanding stage is where ordinary projects begin to look intentional.
How to Make Beginner Furniture Look Professionally Built
There is a fascinating moment that happens after someone completes their first truly polished project.
Friends assume it was purchased.
Visitors ask where it came from.
People are surprised when they hear it was built at home.
That reaction rarely comes from complicated joinery or advanced woodworking techniques.
More often, it comes from a handful of finishing details.
The small things.
The things many beginners overlook.
Soften the Edges
Furniture with sharp edges often feels unfinished.
Even if the construction is solid.
A simple edge treatment immediately changes how a piece looks and feels.
Softened corners create visual comfort.
They catch light differently.
They feel better under your hands.
And they subtly communicate quality.
It’s one of the easiest upgrades available.
Hide What Doesn’t Need to Be Seen
One of the fastest ways to elevate outdoor furniture is reducing visible hardware.
This doesn’t mean avoiding screws.
It means using them strategically.
Techniques such as:
- Pocket-hole joinery
- Hidden fasteners
- Wood plugs
- Concealed brackets
create cleaner surfaces and more refined lines.
The effect isn’t dramatic.
It’s something better.
It feels natural.
The furniture simply looks complete.
Sand Like the Finish Matters
Because it does.
Professional builders rarely jump from rough lumber directly to finish.
Instead, they move gradually.
Typical sanding progression:
- 80 grit
- 120 grit
- 180 grit
- 220 grit
Each step removes scratches left behind by the previous one.
The process isn’t exciting.
But the final result absolutely is.
Build the Finish in Layers
Many beginners assume a thick coat provides better protection.
The opposite is usually true.
Thin, controlled applications create stronger, more consistent coverage.
Whether you’re using stain, sealer, or polyurethane, multiple coats generally outperform a single heavy application.
Furniture finished this way doesn’t just last longer.
It looks better.
Outdoor Furniture Maintenance: Keeping Your Work Looking Its Best
One of the advantages of building your own furniture is understanding exactly how it’s constructed.
That knowledge makes maintenance easier.
And maintenance matters.
Even the best materials benefit from periodic care.
Think of it less as repair and more as preservation.
Spring: The Inspection Season
As temperatures rise, take a few minutes to evaluate each piece.
Look for:
- Loose fasteners
- Surface wear
- Finish degradation
- Moisture damage
Most issues caught early require only minor corrections.
Summer: Protect Against Constant Exposure
Summer introduces intense UV exposure and prolonged outdoor use.
During this season:
- Clean surfaces regularly
- Inspect high-contact areas
- Monitor protective finishes
- Wash outdoor cushions
A small amount of attention prevents larger problems later.
Fall: Prepare Before Weather Changes
Leaves, moisture, and debris often collect in hidden areas.
Before winter arrives:
- Remove organic buildup
- Clean furniture thoroughly
- Touch up worn finishes
- Check storage compartments
This preparation significantly extends furniture lifespan.
Winter: Reduce Unnecessary Stress
Furniture designed for outdoor use can survive winter.
That doesn’t mean it should endure avoidable abuse.
Whenever possible:
- Store cushions indoors
- Use breathable furniture covers
- Elevate furniture away from standing water
- Remove excessive snow accumulation
A little protection goes a long way.
Questions People Usually Ask Right Before Starting
“What’s the easiest outdoor furniture project if I’ve never built anything before?”
Start with a side table.
Not because it’s the most impressive project.
Because it teaches nearly every foundational skill you’ll use later.
Measuring.
Cutting.
Assembly.
Finishing.
The learning curve feels manageable, and the payoff arrives quickly.
“What wood should I buy if I want something durable without spending a fortune?”
For most beginners, cedar is difficult to beat.
It offers an excellent balance of weather resistance, appearance, workability, and cost.
It’s forgiving enough for first projects while producing results that still look impressive years later.
“Will I actually save money building my own furniture?”
In most cases, yes.
Often a substantial amount.
Many DIY outdoor furniture projects cost 40–70% less than comparable retail pieces.
Larger projects like outdoor sofas and complete patio sets frequently generate the biggest savings.
“How long does outdoor furniture usually last?”
That depends on materials, construction quality, and maintenance.
Well-built cedar or redwood furniture can easily last 15 to 30 years.
Sometimes longer.
Proper finishing and routine care dramatically influence longevity.
“Do I need a workshop full of expensive tools?”
Not even close.
Most beginner outdoor furniture woodworking plans can be completed using:
- Circular saw
- Drill and driver
- Measuring tape
- Speed square
- Orbital sander
Skill develops long before tool collections do.
“What if I make mistakes?”
You will.
Everyone does.
The difference between experienced woodworkers and beginners isn’t perfection.
It’s repetition.
Every project teaches something.
Every mistake becomes information.
And every build improves the next one.
Products / Tools / Resources
If you’re preparing to build your first outdoor furniture project, these are the items worth prioritizing before anything else.
Essential Beginner Tools
Circular Saw
The most versatile cutting tool for beginner outdoor furniture projects. Ideal for breaking down lumber and making accurate straight cuts.
Cordless Drill and Driver
Used on virtually every project. Handles pilot holes, screw installation, hardware assembly, and general construction.
Orbital Sander
One of the fastest ways to improve furniture appearance and finish quality.
Speed Square
Inexpensive, highly accurate, and useful for layout, measuring, marking, and cut alignment.
Measuring Tape
A dependable tape measure prevents countless mistakes and improves overall build quality.
Recommended Outdoor Lumber
Cedar
Best overall choice for beginners seeking durability, beauty, and ease of use.
Redwood
Excellent for premium outdoor furniture with long-term weather resistance.
Pressure-Treated Lumber
Ideal for budget-conscious builders creating benches, picnic tables, and larger structural projects.
Teak
Premium material for luxury outdoor furniture and maximum longevity.
Hardware Worth Using
Exterior Wood Screws
Designed to resist corrosion and weather exposure.
Galvanized Fasteners
Help prevent rust and staining over time.
Exterior Wood Glue
Adds strength to furniture joints exposed to outdoor conditions.
Pocket-Hole Screws
Useful for cleaner assembly and hidden joinery.
Protective Finishes
Exterior Stain
Enhances wood grain while providing weather protection.
Marine-Grade Sealer
Offers strong moisture resistance in demanding climates.
Outdoor Polyurethane
Adds a durable protective layer for frequently used furniture.
UV-Protective Finish Systems
Help reduce fading and sun-related deterioration.
Beginner Project Progression Path
- Outdoor Side Table
- Coffee Table
- Garden Bench
- Adirondack Chair
- Storage Bench
- Outdoor Sofa
- Complete Patio Furniture Set
Following this progression allows skills to build naturally while creating a cohesive outdoor furniture collection.