
There is something satisfying about reclaiming a blank stretch of wall.
A surface that once did nothing becomes a writing station, a laptop desk, a homework corner, or a quiet place to sort through the day.
Because the desk has no legs, the floor remains open beneath it. The room feels lighter. Smaller spaces become more useful without becoming more crowded.
That clean appearance, however, depends on careful planning. A floating desk still carries weight.
The desktop, support frame, brackets, screws, and wall structure all have to work together. A few inches of error can turn an elegant project into a frustrating one.
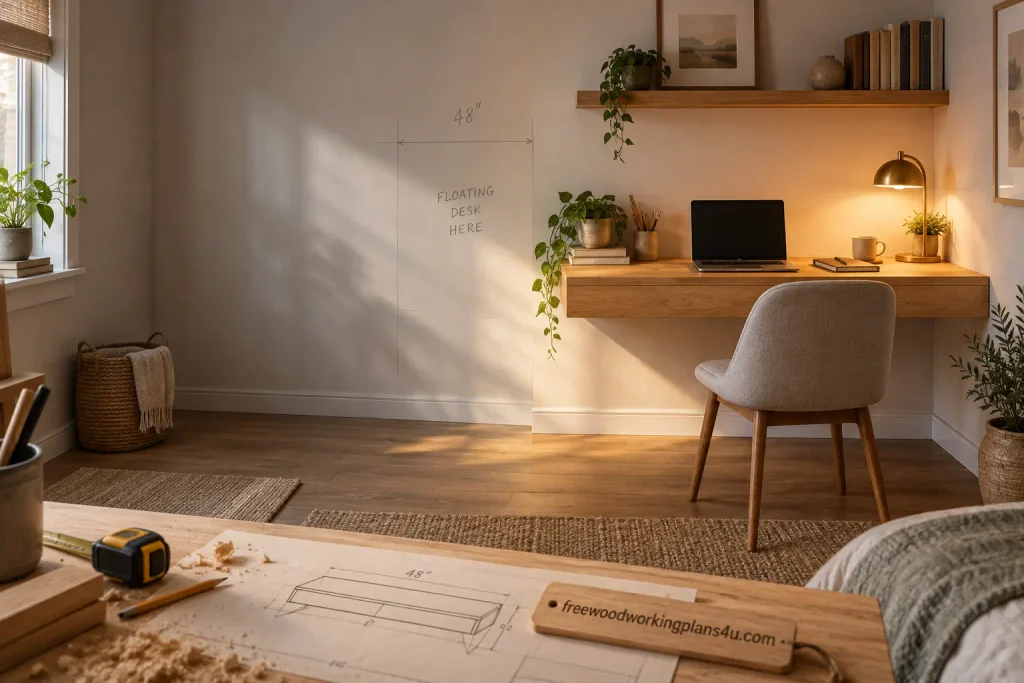
These free woodworking plans for a floating desk are designed for a beginner who wants a practical 48-by-20-inch desk, a clear cut list, sensible measurements, and a secure wall-mounting process.
Quick answer: Build the desk from a 48-by-20-inch desktop, add a shallow support apron beneath it, locate the wall studs, attach the support system with structural screws, and fasten the desktop from below. The desk should be supported by studs or properly engineered masonry fasteners—not drywall alone.
Free Floating Desk Plans at a Glance
This plan creates a compact floating desk for one person. It works well for a laptop, a single monitor, writing, studying, crafting, or a modest home-office setup.
| Feature | Finished specification |
|---|---|
| Desktop width | 48 inches |
| Desktop depth | 20 inches |
| Desktop thickness | ¾ inch |
| Finished working height | Approximately 29½–30 inches |
| Skill level | Beginner to confident beginner |
| Primary material | ¾-inch plywood or a prepared solid-wood panel |
| Support style | Hidden or low-profile wall brackets with a wooden apron |
| Visible legs | None |
| Intended use | Light to moderate everyday desk work |
The dimensions are a starting point, not a commandment. Your chair, wall width, outlets, trim, and equipment should have the final say.
A 48-inch desk is large enough to feel useful without demanding an oversized room. At 20 inches deep, it leaves enough space for a keyboard and monitor while avoiding the heavy, blocky look of a full-size office desk.
Why a Floating Desk Works So Well in a Small Room
Traditional desks occupy the floor twice: once with the desktop and again with their legs, drawers, and lower frame. A floating desk occupies the wall instead.
That difference matters in a bedroom, apartment, hallway, guest room, or compact home office. You can slide a chair beneath it when needed and move the chair away when the room needs to serve another purpose.
The visual effect of an open floor
The eye can travel beneath a floating desk. That uninterrupted floor line makes the room feel less crowded, even when the desk provides the same working surface as a conventional piece of furniture.
The effect becomes stronger when the desktop color relates to the wall, floor, or nearby shelving. A pale finish can keep a small room visually quiet. A darker wood can turn the desk into a deliberate focal point.
The practical advantage
A wall-mounted desk also makes cleaning easier. There are fewer legs to work around, fewer corners where dust gathers, and no bulky lower cabinet blocking the floor.
There is a psychological benefit, too. A defined workspace can make it easier to begin a task. The desk tells the room—and your mind—what the space is for.
When a floating desk may not be the right choice
A floating desk is not automatically the best choice for every situation. Think carefully if:
- The wall has no accessible structural framing.
- You need deep drawers or large storage cabinets.
- The desk will carry unusually heavy equipment.
- The wall is badly damaged or unstable.
- You expect to move the desk frequently.
- The user needs a highly adjustable work surface.
When the wall can support the design and the intended load is reasonable, a floating desk is an efficient and attractive project.
Floating Desk Dimensions That Feel Comfortable
The right measurements are the difference between a desk that looks good in a photograph and one that feels good after an hour of actual use.
Desktop width: 48 inches
A 48-inch width gives you room for:
- A laptop and notebook
- A monitor and keyboard
- A lamp and writing materials
- A small desktop computer
- A compact crafting or study setup
If you plan to use two monitors, large speakers, or heavy equipment, do not simply make the desk wider and assume the original support system will be enough. A wider span may need additional brackets, a thicker top, or a stronger apron.
Desktop depth: 20 inches
Twenty inches is a useful middle ground.
A 16-inch desk can be enough for a laptop. An 18-inch desk works for a compact writing station. Twenty inches gives the user a little breathing room without projecting too far into the room.
A 24-inch desk offers more working space, but it also creates greater leverage against the wall. The farther the front edge extends, the more carefully the support system must be designed.
Desk height: approximately 30 inches
A conventional seated desk often places the top around 29½ to 30 inches above the floor. That range is only a starting point.
Sit in the chair you will actually use. Place your hands as though you were typing. Your shoulders should feel relaxed, and your knees should not press against the underside.
For a child’s desk, the height may need to be lower. For a taller adult, it may need to be higher. Comfort is more important than copying a number from a plan.
Desktop thickness: ¾ inch
A ¾-inch panel is practical for this compact design when the supports are properly spaced and secured.
Thinner material may flex more easily. A thicker solid-wood desktop can be beautiful and sturdy, but it also weighs more. More weight increases the demands on the brackets, screws, ledger, and wall.
Materials and Hardware for the Floating Desk
A beginner-friendly build becomes much easier when the materials are chosen before the first cut.
Desktop material
You can use:
- ¾-inch furniture-grade plywood
- A glued-up solid-wood panel
- A prefinished countertop panel
- Carefully joined hardwood boards
Plywood is often the simplest option. It is dimensionally stable, available in large sheets, and easy to cut into a clean rectangle. Its exposed edges can be covered, rounded over, painted, or intentionally left visible.
Solid wood brings warmth and character, but inspect it carefully for cupping, twisting, cracks, and loose knots.
Apron and frame material
Straight 1-by-4 boards work well for the shallow support apron. The actual finished size of typical 1-by-4 lumber is approximately ¾ inch thick by 3½ inches wide.
Choose boards that are:
- Straight when viewed along the edge
- Free from major splits
- Dry and stable
- Not severely cupped or twisted
- Suitable for the planned finish
Mounting hardware
The project may require:
- Heavy-duty floating-desk brackets
- Structural screws for stud attachment
- Wood screws for the desktop and apron
- A rear ledger or cleat
- Pilot drill bits
- A level
- A stud finder
- Clamps
- Sandpaper
- Wood glue
- Finish or paint
The exact bracket depends on the wall and expected load. Read the manufacturer’s requirements before buying. Pay attention to the bracket’s load rating, required screw size, recommended spacing, and minimum wall attachment conditions.
Recommended reading: Woodworking Hardware Installation: The No-Guesswork Guide to Perfect Hinges, Drawer Slides, Knobs and Pulls
Important: Drywall alone should not be treated as the structural support for a desk. Fasten the mounting system into wall studs or use an appropriate masonry attachment system.
Free Floating Desk Cut List
This cut list is based on a 48-by-20-inch desktop and a shallow apron beneath it.
| Part | Quantity | Finished size |
|---|---|---|
| Desktop | 1 | 48 × 20 × ¾ inches |
| Front apron | 1 | 46½ × 3½ × ¾ inches |
| Rear ledger/apron | 1 | 46½ × 3½ × ¾ inches |
| Side aprons | 2 | 18½ × 3½ × ¾ inches |
| Optional center stiffener | 1 | 18½ × 3½ × ¾ inches |
| Optional French cleat | 2 | Approximately 46½ × 4 × ¾ inches |
The exact apron lengths depend on how you assemble the frame. In this version, the side pieces fit between the front and rear members.
Measure your actual material before making final cuts. A nominal lumber label is not the same thing as a finished measurement, and plywood thickness can vary slightly from one product to another.
Why the apron matters
The apron is more than decoration. It can:
- Reduce visible bracket exposure
- Stiffen the front edge
- Give the desktop a more substantial appearance
- Provide extra fastening points
- Help conceal cable-management features
- Reduce flex across the desktop
It does not replace proper wall mounting. The apron strengthens the desk assembly; the wall support transfers the load into the wall structure.
How to Read These Floating Desk Plans
Plans become much less intimidating when you know what each measurement is trying to tell you.
Finished dimensions
A finished dimension describes the size of a component after cutting, sanding, and assembly.
If the desktop is listed as 48 by 20 inches, that is the final panel size—not necessarily the size of the rough material before trimming.
Material dimensions
Material dimensions describe the thickness and width of the stock being used.
A plan based on ¾-inch plywood may not assemble correctly with ½-inch plywood. The change affects the apron, screw length, support position, and sometimes the final desk height.
Assembly dimensions
Assembly dimensions show how pieces relate to one another. They may indicate:
- A setback from the edge
- An overlap
- A recess
- A gap
- A support position
- A joint location
A simple top view can hide important information. Study the plan from above, in front, from the side, and from underneath.
Draw the design full-size first
Before cutting expensive material, draw the desk on cardboard, scrap plywood, or the floor.
Mark the:
- Wall edge
- Front edge of the desk
- Bracket locations
- Apron position
- Cable holes
- Monitor footprint
- Chair position
- Knee clearance
A full-size layout turns an abstract drawing into something you can stand beside. It often exposes an uncomfortable height or an inconvenient outlet before the project reaches the workshop.
Check the Plan Before You Cut Any Wood
This is the quiet stage that saves the most frustration.
Measure the wall more than once
Check the wall width at the top, middle, and bottom. If the desk fits between two walls, the opening may not be perfectly square.
Look for:
- Baseboards
- Door and window trim
- Electrical outlets
- Light switches
- Heating vents
- Uneven corners
- Damaged drywall
- Existing shelves or brackets
Confirm the material thickness
Write down the actual thickness of your desktop panel and frame stock. Do not rely only on the label.
A small difference can change the way the apron fits and whether a screw is safely contained inside the material.
Mark the support locations
Locate the studs and mark their centerlines. Compare those marks with the intended bracket locations.
If the desired bracket spacing does not match the wall framing, adjust the design before cutting. Do not assume an anchor will solve every structural problem.
Follow the load path
Ask yourself where the weight goes:
- From the desktop into the apron and brackets
- From the brackets into the screws
- From the screws into the studs or masonry
- From the wall attachment into the building structure
If one of those steps ends at drywall alone, the support system needs another solution.
Build the Floating Desk Step by Step
Prepare the desktop material
Lay the desktop panel on a flat surface. Look across it from several angles. A board that appears flat at first may reveal a slight bow when viewed along its length.
Choose the best face for the top. Mark the underside and front edge with pencil so you do not lose track of the orientation during assembly.
If you are using plywood, inspect the face veneer for voids, splinters, and damaged corners. If you are using solid wood, give it time to acclimate and avoid building with visibly unstable boards.
Cut the desktop
Mark the 48-by-20-inch rectangle from a consistent reference edge. Use a straightedge or guide rail to help make a clean cut.
After cutting, compare the two diagonals. If they match, the panel is likely square. If they differ noticeably, correct the panel before building the frame around it.
Lightly ease the sharp edges with sandpaper. A tiny amount of rounding makes the desk more comfortable against your wrists and less vulnerable to chipped corners.
Cut and label the apron pieces
Cut the front apron, rear ledger, side aprons, and optional center stiffener.
Label each piece immediately:
- F for front
- R for rear
- L for left
- S for right
- C for center
It seems almost too simple to matter. It matters. Clear labels prevent reversed parts and reduce the mental load of assembling a project while several similar boards are lying on the bench.
Dry-fit the frame
Place the apron components beneath the desktop without glue or screws.
Check that:
- The front apron runs parallel to the front edge.
- The rear ledger sits on the wall side.
- The side aprons fit cleanly.
- The frame is centered.
- The brackets will not collide with the apron.
- Your legs will have enough room beneath the desk.
- Cable holes will not weaken the structure.
This is the point where the project is still forgiving. Make changes now.
Assemble the wooden apron
Apply wood glue to the mating surfaces if your joint design calls for it. Clamp the pieces square and drill pilot holes before driving the screws.
Pilot holes are especially important near the ends of boards, where a screw can split the material and turn a clean joint into a repair job.
If the desk will be painted, you can fill exposed screw holes later. If the wood will be clear-finished, countersink the fasteners neatly and decide whether you want visible screws or wooden plugs.
Add the center stiffener
The optional center stiffener can reduce flex across the desktop. Position it so it supports the top without stealing valuable knee space.
It should connect securely to the front and rear aprons and remain clear of the bracket hardware and cable path.
Attach the apron to the desktop
Place the frame on the underside of the desktop. Measure the setback from the edges so it sits evenly.
Clamp the frame in place. Drill pilot holes from underneath into the desktop, making sure the screws will not break through the finished top.
Use screws long enough to hold the frame securely without penetrating the visible surface.
Mount the Floating Desk to the Wall
This is the stage where appearance gives way to structure.
Find the wall studs
Use a stud finder, then confirm the locations with small test holes or another discreet method.
Mark the center of each stud with a vertical pencil line. A fastener near the edge of a stud is not the same as a fastener centered in it, so take the time to find the center as accurately as possible.
Wood-framed walls often follow regular spacing, but never rely on a pattern without verification.
Establish the desk height
Measure from the floor to the top of the finished desktop.
If the desired finished height is 30 inches and the desktop is ¾ inch thick, the top of the wall support will generally sit below that finished height. The exact amount depends on the bracket and apron design.
Test the height using your actual chair. A wall-mounted desk is difficult to adjust after the holes are drilled.
Install the rear ledger or cleat
Hold the rear ledger against the wall at the planned height. Check it with a level.
Mark the stud positions through the ledger. Drill pilot holes suitable for the structural screws, then fasten the ledger into the studs.
Keep the first screw slightly loose until the ledger has been checked again. Walls, boards, and pencil marks can all deceive you by a fraction of an inch.
Install the brackets
Position the brackets according to their instructions. For a 48-inch desk carrying light equipment, two supports may be appropriate if they are properly rated and securely attached. A heavier desk, deeper top, or wider span may require three or more.
Keep the supports clear of:
- Your knees
- Chair arms
- Cable channels
- Drawers
- Electrical outlets
- Any weak or damaged part of the wall
The brackets should be fastened into studs wherever possible.
Test the support before installing the top
Place a straight board across the supports. Check it in both directions with a level.
Look for:
- Side-to-side slope
- Front-to-back slope
- Bracket movement
- Gaps against the wall
- Loose screws
- Uneven support heights
A small correction is easy now. Once the desktop is attached, the same correction becomes awkward.
Attach the desktop
With help, lift the assembled desktop onto the support system. A 48-inch panel is manageable, but holding it level while aligning fasteners is much easier with a second pair of hands.
Check that the top is:
- Level
- Centered
- Clear of trim
- Properly aligned with the wall
- Comfortable for the intended chair
Fasten the desktop to the brackets and ledger from below. Drill pilot holes first, and confirm the screw length before driving each fastener.
Load the desk gradually
Do not test the desk by sitting on it or leaning your full weight against the front edge.
Instead:
- Place a light object near the center.
- Watch for movement.
- Add normal equipment.
- Inspect the brackets and wall connection.
- Check the front edge for sagging.
If the desk shifts, creaks sharply, pulls away from the wall, or visibly bends, remove the load and correct the support system.
Modify the Free Floating Desk Plan Safely
One of the pleasures of woodworking plans is adapting them to your own room. The danger is changing a structural dimension without noticing what else it affects.
Recommended reading: How to Modify Woodworking Plan Dimensions Safely: What You Can Resize, What Must Stay Fixed, and How to Rebuild the Cut List
Change the width carefully
Reducing the width may reduce the span, but the new size still has to align with the wall studs and bracket positions.
Increasing the width may require:
- More brackets
- A center support
- A deeper apron
- A thicker desktop
- Additional stud connections
Change the depth carefully
Depth has a powerful effect on wall stress. A deeper desktop acts like a longer lever, placing more force on the brackets and screws.
If you increase the depth, reassess:
- Bracket projection
- Bracket rating
- Screw length
- Stud attachment
- Front-edge sagging
- Knee clearance
Change the height around the user
The height should fit the chair and the person using the desk. A beautiful workspace becomes a daily irritation when the shoulders remain raised or the knees collide with the frame.
Avoid reducing important supports
Do not shrink the rear ledger, cleats, bracket attachment areas, or load-bearing apron simply to save material.
The parts that carry the load deserve more attention, not less.
Rebuild the Cut List After Resizing
Write the original size beside the new size before making any cuts.
Start with the finished desktop
For example:
- Original desktop: 48 × 20 inches
- Modified desktop: 42 × 18 inches
Recalculate the side aprons
If the side aprons fit between the front and rear aprons, subtract the thickness of those members from the new depth.
With ¾-inch material:
- New desktop depth: 18 inches
- Two apron thicknesses: 1½ inches
- Approximate side-apron length: 16½ inches
Confirm the result against your actual assembly method. Calculations are useful, but the physical layout is the final authority.
Separate rough cuts from final cuts
Make rough cuts slightly oversized when appropriate. Bring parts to final size after checking the first assembly.
This is especially useful when a desk must fit between two walls or around uneven trim.
Add waste allowance
A small material allowance gives you room to remove damaged sections, correct an inaccurate cut, or orient the grain more attractively.
It is cheaper to have a little extra material than to discover one unusable board after the sawdust has settled.
Give the Desk a Finish That Suits the Room
Clear finishes
A clear finish allows the grain to remain the main character. Water-based polyurethane keeps the color relatively light, while oil-based finishes often deepen the warmth of the wood.
Hardwax oil and wiping varnish can also provide a pleasant hand feel, but every finish should be applied according to its product instructions.
Painted finishes
Paint turns the desk into part of the room’s architecture. White can make it recede into the wall. Deep green, charcoal, muted blue, or warm black can make it feel intentional and substantial.
Plywood edges usually need careful sanding and a suitable primer.
Treat the plywood edges
The layered edge of plywood can look modern when finished well. If you prefer a more traditional appearance, use:
- Iron-on edge banding
- A solid-wood edge strip
- A slight round-over
- Wood filler and paint
- Careful sanding and clear finish
The front edge deserves particular attention because it is the part your wrists and forearms will touch most often.
Let the finish cure
A surface can feel dry before it is fully cured. Avoid loading the desk heavily or placing delicate equipment on it until the finish has hardened according to the manufacturer’s guidance.
Keep Cables From Undoing the Clean Design
A floating desk can look almost architectural until a tangle of cables falls beneath it.
Plan the cable route first
Before drilling a hole, decide where the monitor, lamp, charger, and power strip will sit.
Mark cable openings on the full-size layout. Keep them away from narrow edges and areas where they could weaken the desktop.
Hide the power strip beneath the desk
A power strip can be secured beneath the desktop or placed inside a shallow cable-management channel. Leave it accessible enough to switch off or unplug.
Leave ventilation around adapters
Do not seal power adapters into a tight, unventilated compartment. Electrical components need appropriate airflow, and cables should not be sharply bent or crushed.
Mistakes That Make Floating Desks Frustrating
Relying on drywall alone
This is the most serious error. A desk experiences downward force, leverage, vibration, and occasional accidental pressure. Drywall anchors may be suitable for some light-duty applications, but they should not be treated as the only structural support for a working desk.
Forgetting the baseboard
A ledger that stops against the baseboard may sit away from the wall. That gap can weaken the connection and make the desk difficult to level.
The support may need to be notched, spaced, or designed around the trim.
Choosing the wrong screw length
A screw that is too short may not hold securely in the stud. One that is too long may encounter wiring or plumbing.
Select fasteners for the wall construction and inspect the area carefully before drilling.
Confusing nominal and actual dimensions
A “1-by-4” does not usually measure exactly 1 by 4 inches. A plan based on ¾-inch stock may not fit correctly when built from a different thickness.
Cutting before measuring the wall
The wall may be narrower than expected. An outlet may sit exactly where a bracket needs to go. The corners may not be square.
Measure the room before you commit to the cut list.
Making the desk too high
A desk can look perfectly proportioned on an empty wall and feel uncomfortable once the chair arrives. Test the height first.
Increasing depth without increasing support
More depth means more leverage. Treat a deeper desk as a changed structural design, not a cosmetic adjustment.
Skipping the dry fit
Dry-fitting is where mistakes are still inexpensive. Use it.
Floating Desk Quality-Control Checklist
Before cutting
- Measure the wall at the top, middle, and bottom.
- Locate and mark the wall studs.
- Test the desk height with the actual chair.
- Mark outlets, switches, vents, trim, and baseboards.
- Confirm the thickness of every material.
- Check the bracket load rating and mounting instructions.
- Compare the cut list with the plan views.
During assembly
- Confirm the desktop is square.
- Label the apron components.
- Dry-fit the frame.
- Drill pilot holes.
- Keep the frame square while fastening.
- Check knee clearance.
- Keep cable openings away from weak edges.
During wall mounting
- Confirm the ledger is level.
- Fasten into studs or approved masonry attachment points.
- Align the brackets.
- Check level from side to side.
- Check level from front to back.
- Tighten all mounting screws.
- Test the support before adding the desktop.
Before daily use
- Check for visible sagging.
- Check for movement at the wall.
- Inspect screw holes for splitting.
- Confirm the finish has cured.
- Route cables safely.
- Keep heavier items over properly supported areas.
The Questions Most Beginners Ask Before Building
“Can I really build a floating desk as a beginner?”
Yes, provided you are comfortable taking careful measurements, making straight cuts, drilling pilot holes, and following the mounting instructions for your hardware.
The desk itself is not complicated. The wall connection deserves patience and careful checking.
“How deep should my desk be?”
For a compact workspace, 16 to 20 inches is usually practical. Twenty inches gives you enough room for a keyboard and monitor without dominating the room.
Go deeper only after reassessing the brackets and wall attachment.
“How wide can I make it?”
There is no single safe maximum width. The answer depends on the desktop material, thickness, support spacing, wall structure, and intended load.
A wider desk generally needs more support.
“Can I attach it to drywall?”
Do not rely on drywall alone for a desk. Fasten the support system into studs, or use a mounting method specifically engineered for the wall construction and expected load.
“Is a French cleat strong enough?”
A properly built French cleat can be part of a strong mounting system when it is made from suitable material and securely fastened into structural framing.
Its strength depends on the cleat design, width, angle, fasteners, stud placement, and how the desk transfers weight into it.
“How do I stop the front edge from sagging?”
Use a sufficiently thick desktop, keep the support span reasonable, install correctly rated brackets, and distribute the supports across the width.
A deeper or heavier desktop may require additional reinforcement.
“Can I use reclaimed wood?”
Yes, if it is dry, stable, and structurally sound. Remove old fasteners and inspect the boards carefully for hidden metal, severe cracks, rot, and insect damage.
Reclaimed lumber may also need flattening before it is suitable for a desk surface.
“What is the best wood for this project?”
Plywood, pine, poplar, oak, maple, and other stable furniture woods can all work.
For a first project, straight ¾-inch plywood is often forgiving and predictable. Solid wood offers more character but may require more preparation.
“Can I add drawers?”
You can, but drawers add weight and alter the support requirements. They also reduce knee clearance and may interfere with hidden brackets.
A shallow drawer or small under-desk storage box is easier to accommodate than a heavy bank of drawers.
“How do I make the desk look built in?”
Conceal the brackets behind an apron, manage the cables, match the finish to the room, and fit the desk carefully around trim and adjacent walls.
Small details—especially the front edge and the wall gap—often determine whether the project looks homemade or deliberately built in.
Products / Tools / Resources
Measuring and layout tools
- Tape measure
- Combination square
- Long level
- Straightedge
- Stud finder
- Pencil or marking knife
- Chalk line
Cutting and drilling tools
- Circular saw with a straightedge guide
- Jigsaw for cable openings
- Drill and driver
- Pilot drill bits
- Countersink bit
- Clamps
- Random-orbit sander or sanding block
Materials
- ¾-inch plywood or solid-wood panel
- Straight 1-by-4 boards for the apron
- Wood glue
- Structural screws
- Wood screws
- Heavy-duty floating-desk brackets or an engineered cleat system
- Sandpaper
- Wood filler or edge banding
- Protective finish or paint
Planning resources
- Full-size cardboard layout
- Printed cut list
- Wall-stud map
- Chair-height test setup
- Bracket load-rating instructions
- Project notebook for recording actual dimensions