
A workbench can be the heart of a shop. It can also be the thing you have to move every time the garage needs to work as a garage.
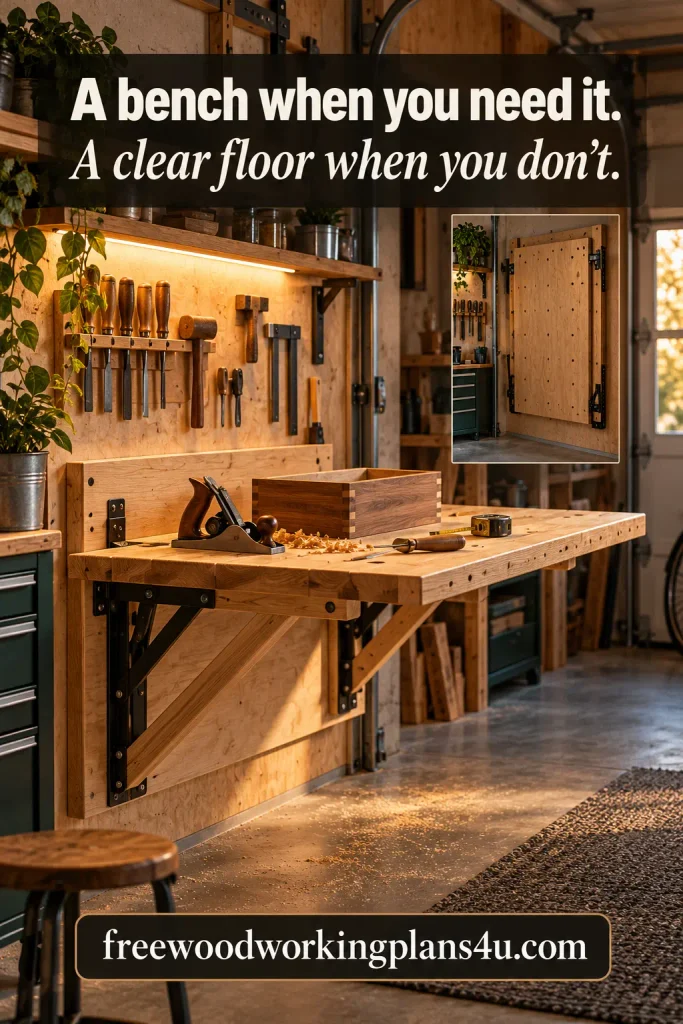
That is the small-shop puzzle: you want a surface that feels steady when a project is underway, but you cannot give up the floor forever. A wall-mounted bench offers a neat answer. Open it, make a little room for the work, then fold the top upright when the floor needs to clear.
This guide lays out a 40-by-24-inch example (1,016 by 610 mm), with a simple plywood top, an optional front stiffener, and a matched pair of folding wall-worktop brackets. The dimensions are a starting plan. The wall, brackets, fasteners, and the kind of work you do determine what the finished bench can safely handle.
Quick answer: To build a space saving woodworking workbench that folds away, make a flat 40-by-24-inch (1,016-by-610-mm) top and attach it to a pair of folding wall-worktop brackets sized for that surface. Mount the brackets only to a wall structure and with fasteners approved by their manufacturer. Check the open and folded clearances before cutting, and follow the hardware maker’s instructions for installation and load limits.
This is a wall-mounted design: the top stays with the room and folds toward the wall. A portable bench with separate folding trestles works differently. If you want a surface you can carry to another room, the site’s portable woodworking workbench plan for small spaces is the closer fit.
What this wall-mounted fold-down workbench is made for
Picture the moment the project ends. The clamps come off, the pencil goes back on its hook, and the top swings up. Instead of a bench standing in the middle of the room, there is a clear patch of floor again.
That trade is the point of this design. The 40-by-24-inch surface can handle many small assembly jobs, layout work, hand sanding, repairs, and other light shop tasks. It stays close to the wall, so the work area returns to the room when you are finished.
It is not a compact version of a heavy cabinetmaker’s bench. This example is not a tested design for forceful hand-planing, pounding, a permanent vise, or a mounted power tool. Those tasks can twist or shove a work surface; a straight-down load figure does not necessarily describe how a bracket system behaves under them. If those are the jobs you need the bench for, choose a system designed and installed for those forces.
A wall-mounted bench also asks something of the wall. The bracket example later in this guide is specified for wooden studs. If your wall is masonry, metal-stud construction, damaged, or difficult to identify, the installation needs hardware approved for that wall type.
If wheels and built-in storage suit your workflow better, the site’s woodworking workbench plans with storage comparison can help you compare bench types. A mobile bench rolls into the work zone; this wall bench stays put, then gets out of the way by folding up.
Fold-down workbench dimensions at a glance
The sample top is 40 inches wide and 24 inches deep. It gives you a useful rectangle for small projects without reaching far into a shared garage or basement. Still, measure your own room before treating those numbers as a cut list.
| Part or measurement | Example size | Planning note |
|---|---|---|
| Worktop width | 40 in (1,016 mm) | Stay within the width allowed by the selected brackets. |
| Worktop depth | 24 in (610 mm) | Stay within the bracket maker’s maximum depth. |
| Worktop panel | 3/4 in (about 19 mm) plywood | Check that the hardware accepts this panel and fastening method. |
| Front stiffener | 1 × 3 × 40 in (about 19 × 64 × 1,016 mm actual) | Optional; confirm it will not block the support hardware. |
| Finished work height | Set to suit the user and task | Mock up the height before drilling the wall. |
| Wall support | One matched pair of locking fold-down brackets | Check top size, wall type, installation directions, and intended use. |
A flat 3/4-inch plywood panel is a straightforward top for this compact bench. A front stiffener can help protect the edge and make the work surface feel more substantial. A thicker top or a different material may also be possible, but first check the bracket instructions. More material means more weight, and changing the top changes the load on the wall supports.
For a concrete hardware example, Rockler’s Rock-Steady folding wall bracket pair is listed for a top up to 24 inches deep by 40 inches wide and wooden studs spaced up to 32 inches apart.
Rockler lists a maximum capacity for that particular pair, including the top. That figure belongs to that product and its specified installation; it is not a general rating for other brackets, walls, or woodworking jobs. Read the current product instructions before designing around any hardware.
Before the first cut, measure the room and the wall
A rectangle on paper is reassuring. The real test is whether you can stand in front of it, reach your tools, move a board, and fold the top without knocking into something.
Mark a 40-by-24-inch outline with painter’s tape. If the bench will sit above a counter or another fixed object, mark the proposed height too. A piece of cardboard cut to the top’s dimensions makes a useful template: hold it against the wall and move it through the fold-up path.
Take a few minutes with each of these checks:
- Open depth: Is there room for you to stand and work in front of the bench?
- Folded profile: Will the raised top clear cabinets, shelves, doors, windows, switches, and stored items?
- Walking route: Can someone pass the bench without squeezing through a narrow gap or stepping over cords?
- Workpiece movement: Can the boards or panels you expect to use sit on the bench without colliding with a car, wall, or machine?
- Wall construction: Can you identify the structural members and confirm that their spacing suits the bracket system?
- Working height: Does the mock-up feel right for marking, assembly, sanding, and clamping?
Do not settle the height by copying another person’s bench. Stand at a temporary surface and try the motions you expect to make. A height that feels comfortable for careful assembly may not suit every task. Decide before drilling; moving a wall-mounted bench later means filling the old holes and laying out the installation again.
The bench is only one part of a small shop. If the garage still has to hold a car, tools, and long stock, the site’s small-garage woodworking layout guide can help you test the wider arrangement before anything is anchored in place.
Materials and tools for the example build
This list assumes a 40-by-24-inch top, an optional front stiffener, and a matched pair of folding wall-worktop brackets. The bracket maker’s current instructions should determine the wall fasteners and how the top attaches to the support arms. Ordinary drywall anchors are not a substitute for structural mounting hardware.
| Material or tool | Quantity | Notes |
|---|---|---|
| Flat 3/4-inch plywood | 1 panel | Cut to 40 × 24 in (1,016 × 610 mm), or ask the supplier to cut it. |
| 1 × 3 lumber | 1 piece, 40 in long | Optional front stiffener; measure the actual stock. |
| Folding wall-worktop brackets | 1 matched pair | Must be approved for the chosen top size and wall type. |
| Bracket-to-wall fasteners | As supplied or specified | Follow the bracket maker’s installation directions. |
| Top-to-bracket fasteners | As specified | Check length, head type, and location in the instructions. |
| Glue and suitable screws | As needed | For the optional stiffener; test screw length on an offcut. |
| Tape measure, square, pencil, and level | 1 each | For accurate layout and alignment. |
| Stud finder or suitable wall locator | 1 | Use a method appropriate to the wall. |
| Drill/driver and bits | 1 | Match the bits to the bracket instructions. |
| Saw and clamps | As needed | A supplier can cut the panel if you lack a suitable saw. |
| Eye and hearing protection | As needed | Follow the instructions for your tools and materials. |
Choose a panel that lies flat and has sound edges. Plywood is practical here; it is not the only material that can work. Avoid a panel that is warped, swollen, delaminated, or too thin for the fasteners specified by the bracket manufacturer.
If you add the front stiffener, use straight stock and fit it beneath the front edge. Clamp it in place first and check the folding hardware’s path. Predrill where needed, keep the rail flush, and test the screw length on scrap. A screw point that breaks through the top can catch a workpiece or a tool.
Build the worktop one calm step at a time
1. Cut the plywood and check the corners
Cut the panel to 40 inches wide by 24 inches deep, or have the supplier do it. Measure the finished piece and check that the corners are square. Sand away splinters and sharp edges, especially where your hands will grip the panel as it folds.
If the bracket system you choose allows a different size, do not assume this sample can simply grow. Keep the top within the product’s stated limits. A wider or deeper surface changes the leverage on the supports and the wall.
2. Fit the front stiffener, if you are using one
Center the 1-by-3 rail under the front edge. Clamp it there and check that the panel remains flat. Attach it with a suitable combination of glue and screws, with every fastener below the working surface.
The rail is optional. It must not cover bracket mounting holes, obstruct the support arms, or catch against the wall as the top folds upright. If the hardware instructions call for another fastening arrangement, follow those instead of adapting the rail by guesswork.
3. Smooth the surface and decide on a finish
A little sanding is enough to remove rough spots. You can leave the plywood bare or apply a shop-appropriate finish and let it cure fully before use. A slick surface can send small parts sliding, so think about the work you do before choosing a glossy coating.
A replaceable hardboard or sacrificial panel can be useful if glue, paint, or scratches are part of your routine. Keep the surface simple at first. A top that folds freely is more useful than one crowded with accessories that make it heavy or awkward to lift.
Install the folding brackets where the wall can support them
The connection between bracket and wall is the part to take slowly. A neat top cannot make up for hardware installed into the wrong structure. The product example linked above is specified for wooden studs; other bracket systems may have different spacing, fasteners, or wall requirements.
1. Locate the structural mounting points
Find the studs or other structural members required by the bracket maker. Confirm that their spacing falls within the hardware’s allowed range and that the wall is sound. Do not rely on drywall alone.
A stud finder can help, but verify the locations using a method suited to your wall before drilling. Check for wiring or plumbing where relevant. If the wall is masonry, metal-stud construction, damaged, or hard to identify, stop and choose hardware approved for that wall or consult a qualified installer.
2. Mark the height and bracket positions
Use the cardboard template or temporary surface to confirm the working height one last time. Then use the dimensions or template supplied by the bracket maker to mark the bracket locations. A level helps you establish a straight line.
Do not position the brackets by eye. A small difference in height can leave the top crooked, cause it to bind while folding, or put uneven pressure on the supports.
3. Fasten the brackets according to their instructions
Use the fasteners supplied with the bracket pair, or replacements expressly specified by its manufacturer. Follow the required pilot-hole size, embedment, tightening method, and attachment points. Hardware designed for one wall is not automatically suitable for another.
Do not substitute short screws because they are easier to install, and do not skip mounting points unless the instructions allow it. Once installed, check that both brackets are secure, aligned, and able to lock and release as described in the manual.
4. Attach the worktop to the support arms
Set the panel on the bracket arms and align it with the wall and support plates. Use the fasteners and locations specified by the bracket maker. Check screw length before driving anything into the top; no tip should protrude through the working surface.
Keep glue, finish, and sawdust away from moving joints and release mechanisms. Raise and lower the top slowly while checking every clearance point. Confirm that the supports lock in the open position and that the panel folds without hitting the wall, stiffener, or nearby storage. Keep your fingers clear of the bracket joints.
Give the bench a careful first check
A manufacturer’s capacity figure belongs to a specific product installed as directed. It does not automatically describe sideways force, impact, hard clamping, hand-planing, a vise, or a power tool. Those motions can push or twist a work surface in ways a straight-down load figure may not cover.
For example, Rockler’s listing for its bracket pair states a 500-pound maximum capacity, including the worktop. That does not make every wall or installation safe at 500 pounds, and it is not a rating for other brackets. Stud condition, fasteners, bracket position, top dimensions, and the direction of force all matter. Check the current instructions and choose a different bench design if the work you intend to do exceeds what the hardware maker approves.
Before the first project:
- Clear the area under and around the open bench.
- Lower the top according to the bracket instructions and confirm that both supports lock.
- Look for loose fasteners, rocking, uneven support, or visible movement.
- Apply gentle hand pressure in several places while watching the wall and brackets.
- Clamp a scrap board in the way you expect to work and test the actual motion.
- Stop if the bench shifts, flexes unexpectedly, or makes a sound that suggests movement at the wall or hardware.
Do not sit, stand, or climb on the surface unless the bracket maker explicitly approves that use. Do not mount a saw, planer, or other power tool unless the complete support system is designed for it. For forceful planing, pounding, heavy clamping, or a permanent vise, use a workbench designed for those forces and installed accordingly.
Add workholding and storage without blocking the fold-up path
The useful tools are the ones you can reach without burying the work surface. A shallow rail beside the bench can hold a tape measure, square, pencil, or small clamps. Keep it shallow enough that the top can move freely.
Clamps are a flexible place to start. Choose ones that fit the panel and suit your workpiece, and make sure they cannot slip off the edge. A removable bench hook or clamping guide can be easier to store than a permanent fixture.
Pause before drilling dog holes or installing a vise. Both change the top; a vise can also introduce substantial twisting force. Confirm that the complete bracket-and-wall system is intended for that use before adding either. For more options, see the site’s woodworking bench accessories and upgrades guide.
The wall behind the bench can help with organization, but every shelf, hook, and clamp has to clear the moving top. Test the full fold path, not just the open position. And before raising the worktop, clear it. A loose drill, clamp, or offcut has nowhere to go but down.
Mistakes that can turn a space-saving bench into a space problem
Buying the panel before checking the brackets
The 40-by-24-inch top is an example, not a universal size. Check maximum width and depth, panel requirements, bracket spacing, fasteners, and wall type before you buy lumber.
Mounting to drywall instead of the required structure
A bracket’s stated capacity assumes the mounting conditions its maker specifies. Drywall anchors are not a substitute for structural studs when the hardware requires studs. If the wall does not match the instructions, choose another support or get qualified advice.
Treating a capacity number as approval for every task
A product figure does not mean the bench suits every kind of force. A vise, plane, hammer, or power tool can create sideways or repeated forces unlike a straight downward load. Match the work to the complete support system.
Forgetting the folded outline
The bracket mechanism may sit close to the wall, but the top, front stiffener, handles, and nearby shelves all affect the finished profile. Use a template and check the entire motion before drilling.
Folding the bench with tools still on it
A surface that feels steady when open can send a clamp or drill tumbling when raised. Clear the top each time and store tools beside it, away from hinges and release levers.
Adding upgrades before testing the basic bench
It is tempting to start with a vise, drawers, dog holes, and a tool rack. First install the plain top and use it for work the support system is intended to handle. Add only features the manufacturer permits.
Questions woodworkers ask before installing a fold-down bench
“Will a 40-by-24-inch top fit my small shop?”
It may, but measure the open and folded clearances before you cut. The example measures 40 by 24 inches (1,016 by 610 mm), and the bracket system must permit those dimensions. Check your walking route, workpiece movement, wall, and nearby storage too.
“How much weight can this fold-down workbench actually hold?”
There is no single number for every folding workbench. Use the rating for the exact bracket pair and installation, including the weight of the top. Rockler’s listing for its particular pair gives a 500-pound maximum including the worktop. That number does not apply to different brackets or walls, and it does not establish that the bench is suitable for every woodworking force.
“Could I make the top wider than 40 inches?”
Only if the chosen support system is designed for the larger top and the manufacturer permits it. A wider panel changes the leverage on the supports and may need different mounting points or reinforcement. Do not extend this example based on appearance alone.
“My wall is masonry or metal studs. Can I still use this plan?”
Only with a bracket and fastening system approved for that wall construction. The product example in this guide is specified for wooden studs. Its mounting hardware and listed capacity should not be carried over to masonry, metal studs, or another wall assembly.
“Is this steady enough for hand-planing?”
That depends on the complete installation and the hardware’s intended use. Hand-planing can push the bench sideways; a downward capacity rating alone does not answer the question. Test carefully, and use a more rigid bench for forceful work if the wall bench moves.
“Can I bolt a vise to the top?”
Only if the top, brackets, wall, and installation are approved for the vise and the forces it creates. A vise can twist the panel and support arms. Edge clamps or removable workholding are a better starting point for many compact wall benches.
“How high should I mount the worktop?”
There is no perfect height for everyone. Mock up the surface before drilling and try the standing tasks you expect to do. The height should suit your body and projects, while the brackets still need to be installed exactly as their instructions specify.
“Can I leave tools on the bench when I fold it up?”
Clear the worktop first. A tool can fall as the surface moves upright. Store clamps and hand tools on a separate shelf or rail, and make sure they stay out of the folding path.
Products / Tools / Resources
- Flat 3/4-inch plywood: One 40-by-24-inch panel makes the example top. Choose a flat piece with sound edges; have it cut at the supplier if needed.
- A matched pair of folding wall-worktop brackets: Compare the allowed top size, stud spacing, wall type, fasteners, release mechanism, and intended use. Rockler’s Rock-Steady pair is one product example, not a universal specification.
- 1 × 3 lumber for the front stiffener: Optional. Measure the actual board and check the bracket clearance before attaching it.
- Layout and installation tools: Tape measure, square, pencil, level, and a wall locator suited to the construction.
- Build tools: Drill/driver and the correct bits, saw, clamps, and sandpaper. Use a supplier’s cutting service if you do not have a suitable saw.
- Safety essentials: Eye and hearing protection for the operations you perform, plus dust control appropriate to the tools and materials. Follow each tool and product’s instructions.
- More workshop ideas: The small-garage woodworking layout guide, portable workbench plan, workbench plans comparison, and bench accessories guide cover related decisions.