
A dollhouse has a way of turning a few boards into a whole little world. It can also look like a daunting first woodworking project: tiny details, tricky angles, and a plan full of measurements you’re afraid to get wrong.
This beginner design keeps the first build simple. It has an open front, two roomy floors, straight cuts, and a plywood back that helps hold the house square. You can finish the main structure first, then decide how much detail to add.
Quick answer: These wooden dollhouse plans make an open-front house about 20 inches wide, 20 inches high, and 8 inches deep. The cut list uses ¾-inch nominal plywood for the sides and floors, plus a ¼-inch plywood back. Check the fit against your dolls and furniture before cutting.
The plan at a glance
| Feature | Plan details |
|---|---|
| Finished size | About 20 in wide × 20 in high × 8 in deep (508 × 508 × 203 mm) |
| Layout | Two floors, one open room on each floor |
| Intended scale | Small dolls and miniatures; measure yours before building |
| Main material | ¾-inch nominal plywood |
| Back panel | ¼-inch nominal plywood |
| Joinery | Pocket-hole screws and wood glue; the back panel helps keep the house square |
| Front | Open for easy access to both floors |
These dimensions are a starting point, not a guarantee that every doll or furniture set will fit. Products vary, as does plywood thickness. A few minutes with a ruler now can save a frustrating recut later.
First, make sure the scale fits your dolls
Scale determines whether the rooms, furniture, and dolls feel right together. In 1:12 scale, one inch in the miniature represents one foot in a full-size room.
Still, labels and product sizes can vary, so measure the dolls and furniture you plan to use.
This design suits smaller dolls and miniatures. It is not sized for 18-inch dolls. Those need a larger house with wider rooms and taller openings.
Before you buy or cut lumber, check:
- The tallest doll, including hair or accessories
- The widest piece of furniture
- The shelf or floor space available for the finished house
- Whether you want to add dividers or furniture later
The front is open, so there’s no doorway to squeeze a doll through. But the dolls and furnishings still need to fit inside the rooms.
Learn more: How to Buy the Right Lumber for Any Woodworking Project: Choose the Species, Grade, Thickness, and Quantity
Materials and tools for the build
Materials
- One ¾-inch nominal plywood panel, at least 24 × 48 inches, for the sides and floor panels
- One ¼-inch nominal plywood panel large enough for a 20 × 20-inch back
- Wood glue
- Pocket-hole screws suited to your plywood thickness and jig
- Short brad nails or finish nails for securing the back panel
- Sandpaper
- Paint or finish labeled for the intended use
Nominal plywood thickness is not always its actual thickness. Measure your sheet before cutting the horizontal panels; their width depends on the thickness of the two side panels.
Tools
- Tape measure and pencil
- Framing square
- Saw with a straightedge or cutting guide
- Drill and pocket-hole jig
- Clamps
- Brad nailer or hammer
- Sanding block or sander
Secure the plywood before cutting, follow the tool maker’s instructions, and wear suitable eye and hearing protection. If this is your first time using a saw, ask the lumberyard to make the long, straight cuts.
Wooden dollhouse cut list
The side panels determine the outside width. The top, middle, and bottom panels fit between them.
| Part | Quantity | Stock | Cut size |
|---|---|---|---|
| Side panels | 2 | ¾-in nominal plywood | 20 × 7¾ in (508 × 197 mm) |
| Top, middle floor, and bottom | 3 | ¾-in nominal plywood | 7¾ in deep × (20 in − 2 × actual plywood thickness) wide |
| Back panel | 1 | ¼-in nominal plywood | 20 × 20 in (508 × 508 mm) |
If your ¾-inch nominal plywood measures 23/32 inch thick, cut each horizontal panel to 18 9/16 × 7¾ inches (about 472 × 197 mm). If it measures something different, use this formula:
Horizontal panel width = 20 inches − twice the measured thickness of the side panels
For example, if your plywood actually measures ¾ inch thick, the horizontal pieces should be 18½ inches wide. Measure the sheet, calculate the width, and test one fit before cutting all three pieces.
A 24 × 48-inch panel can provide the five main pieces with a suitable layout. Saw kerf and panel dimensions affect the fit, so plan the cuts first or ask the lumberyard to cut the plywood to size.
Recommended guide: How to Read Woodworking Blueprints: A Beginner’s 10-Step Guide From Symbols to First Cut
Build the house one square edge at a time
1. Cut and label the panels
Cut the two sides, then the top, middle floor, and bottom. Keep the edges square, and label each piece as you go. It’s a small habit that prevents a lot of second-guessing when all the panels look alike on the workbench.
Dry-fit the three horizontal panels between the sides. The top and bottom should sit flush with the edges. The middle floor should land level on both sides. If a panel binds or leaves a wide gap, adjust it before applying glue.
2. Mark the middle floor
Set the middle floor so the clear space on both levels is about the same. Use this formula to locate its lower edge:
Distance from the bottom of the sides to the lower edge of the middle floor = (overall height − actual panel thickness) ÷ 2
With 20-inch sides and ¾-inch plywood, that works out to about 9⅝ inches. Because plywood thickness varies, use your measured stock for the most accurate placement.
Mark the position on the inside of both side panels with a framing square. Matching marks make it easier to keep the floor level.
3. Drill the pocket holes
Set the pocket-hole jig for the actual plywood thickness and follow the jig maker’s guidance for screw length. Drill holes at the ends of each horizontal panel, on the underside where they’ll be less visible.
Drill from the underside of the bottom and middle panels. For the top panel, drill on its underside too. The screws will pull the panels into the sides while leaving the outside faces clean.
4. Assemble the frame
Lay one side panel flat on a protected work surface. Apply a thin line of wood glue to the ends of the bottom, middle, and top panels. Set them against your marks, clamp them, and check that the joints are square.
Drive the pocket-hole screws, then attach the second side in the same way. Keep the frame clamped for the time specified on the glue label. Before the glue sets, check the front and back edges for a twist. A small adjustment is easy now; it’s much harder after the back goes on.
5. Attach the back panel
Turn the frame face down and align the back panel with the rear edges. The back helps keep the house square, so take a moment to line up all four corners.
Apply glue along the rear edges of the sides and floors. Secure the back with short brad nails or finish nails. Choose fasteners that won’t pass through to the room interiors, and check the alignment as you work.
6. Sand and finish
Sand the edges and corners until they feel smooth. Fill visible pocket holes or small gaps if you like, then sand again once the filler has dried.
If you paint or seal the house, follow the finish maker’s instructions. For a dollhouse intended for children, choose products labeled for the intended use, allow the finish to cure fully, and inspect the house before play.
Add the details after the structure is done
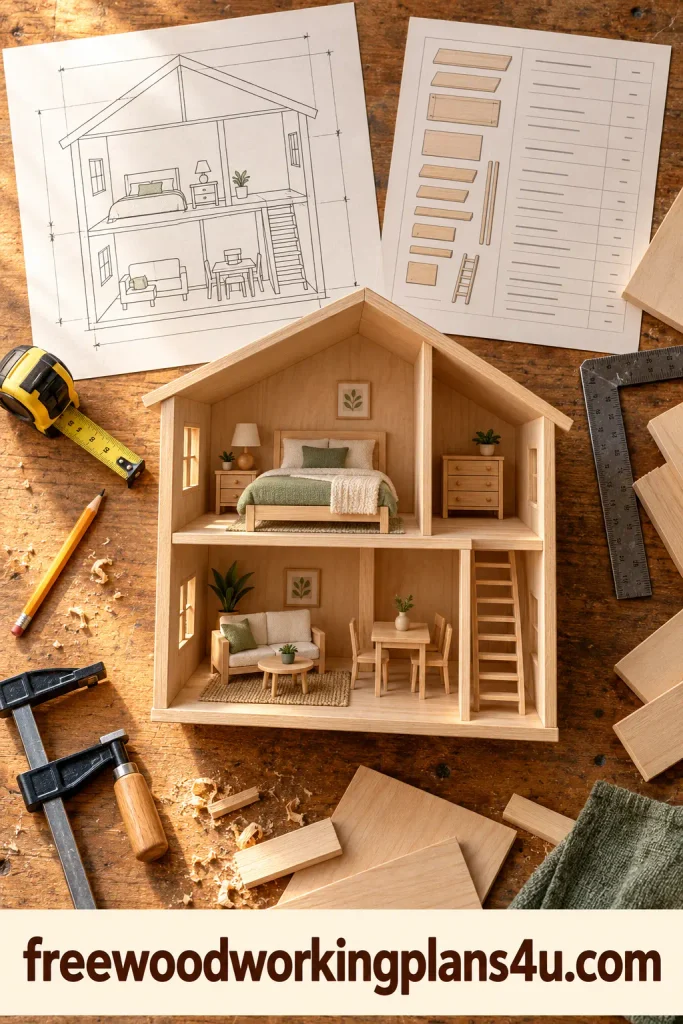
The two open rooms are ready for simple furniture, removable dividers, or a little color. Measure the openings after assembly before making dividers; the actual plywood thickness affects the final fit.
You could paint each floor a different color, add removable trim, use paper or fabric as wallpaper, or make furniture from leftover plywood. A small porch or front step can come later. The basic house doesn’t need every detail on day one.
Small mistakes that are easy to prevent
Cutting all the panels before checking the plywood
Plywood’s stated thickness and its measured thickness may differ. Since the horizontal panels fit between the sides, measure first and use the cut-width formula.
Skipping the dry fit
A dry fit shows whether the pieces sit squarely and whether the middle floor lines up. Assemble everything without glue, make any small adjustments, then take it apart and begin the final assembly.
Assuming a doll will fit because it looks small
A house can appear roomy in a photo and still be too small for a particular doll or furniture set. Measure the pieces you’ll use before choosing dimensions.
Fastening a crooked back panel
A misaligned back can leave the house twisted. Line up the corners and check the frame before fastening the panel.
Adding too much detail too soon
Stairs, balconies, windows, and built-in furniture can turn a simple first project into a long one. Finish the basic structure first. You can always add more later.
Questions you may have before cutting
Is this plan suitable for a complete beginner?
It can work as a first build if you can arrange straight cuts, drill pocket holes, clamp panels, and check that the frame is square. If you haven’t used a saw before, ask the lumberyard to cut the panels or get help from an experienced adult.
Will the house fit 18-inch dolls?
No. These dimensions are for smaller dolls and miniatures. An 18-inch doll needs a larger house with taller openings and deeper rooms.
Can I use solid wood instead of plywood?
You can, but this cut list is designed for plywood. Solid wood can move as humidity changes, and its actual dimensions may differ from the stated size. Recalculate the panel widths and test the joints before building.
Can I add room dividers?
Yes. Build the house first, then measure the opening on each floor. Cut dividers to fit and attach them with suitable glue and fasteners.
How do I keep the house square?
Use a framing square during assembly and recheck the corners before attaching the back panel. The back should align with the sides and the rear edges of the floors.
Is this dollhouse safe for young children?
This is a woodworking plan, not a certified toy design. An adult should build and inspect the house. Consider the child’s age and play habits, avoid loose small parts for children who may mouth them, and secure the house against tipping if it could be pulled or climbed on.
Products / Tools / Resources
- Plywood: ¾-inch nominal plywood for the sides and floors, plus ¼-inch nominal plywood for the back. Measure the actual thickness before cutting.
- Measuring and layout tools: A tape measure, pencil, and framing square help keep the panels aligned.
- Assembly tools: A drill, pocket-hole jig, suitable screws, clamps, wood glue, and short brad or finish nails.
- Cutting and sanding tools: A saw with a straightedge or cutting guide, plus sandpaper or a sander.
- Finishing supplies: Paint or finish labeled for the intended use; follow the maker’s application and curing instructions.