
A litter tray can be practical and still feel out of place in a tidy room. This cabinet hides it behind simple doors, gives your cat an entrance on the side, and leaves the tray easy to pull out for cleaning.
These free woodworking plans use a plywood cabinet measuring 36 inches wide by 24 inches high by 22 inches deep. That’s a starting size, not a rule: measure your litter tray and your cat before you cut.
The quick plan
Build a plywood box with a side entrance, a framed front, and two doors. The cabinet body is 36″ W × 24″ H × 22″ D. With ¾″ plywood sides, top, and bottom, the interior is about 34½″ W × 22½″ H × 21¾″ D. Add ventilation, and check that your litter tray can pass through the front opening.
| Feature | Starting plan |
|---|---|
| Cabinet body | 36″ W × 24″ H × 22″ D |
| Approximate interior clearance | 34½″ W × 22½″ H × 21¾″ D |
| Front access | Double doors |
| Cat entrance | Opening on one side, sized to your cat |
| Main material | ¾″ plywood |
| Skill level | Beginner-friendly with basic measuring and cutting skills |
The measurements assume the ¼″ back panel is attached over the rear of the cabinet. It adds ¼″ to the total depth. A front frame narrows the opening, so don’t rely on the interior dimensions alone when checking whether the tray will fit.
Measure first; it’s easier than rebuilding
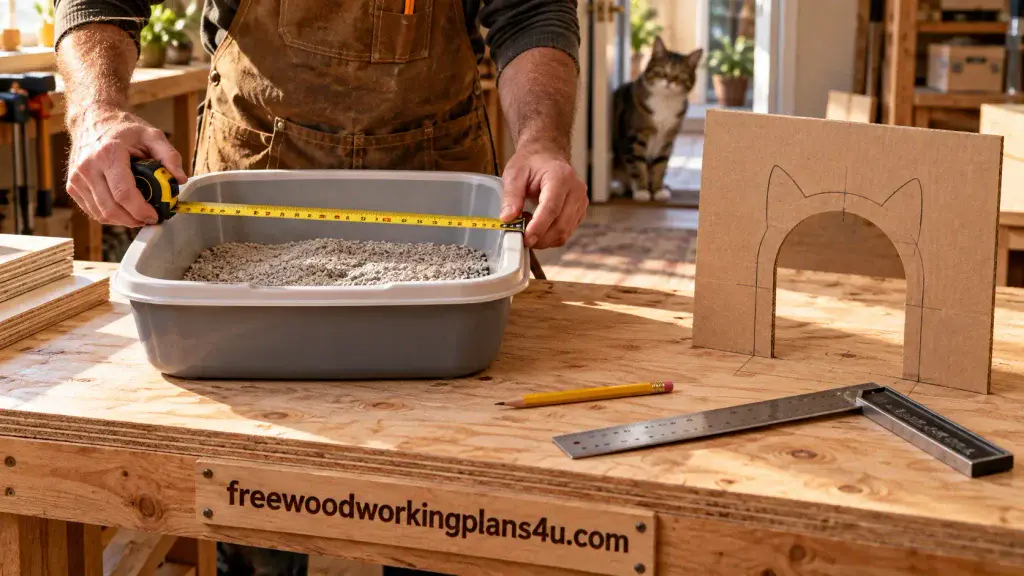
Start with the litter tray. Measure its outside length and width, including any rim or handles. Then check the space where you want the cabinet to sit. Leave enough room for the front doors to swing open and for you to reach in comfortably.
The cabinet has about 34½ inches of interior width and 21¾ inches of usable depth. Its front frame opening is about 33 inches wide by 21 inches high. A tray might fit inside and still be difficult to get through that front opening.
A cardboard template can save you a frustrating afternoon. Cut one to the size of the front opening and use it to test how the tray will pass through. If it catches, you can widen the opening by changing the frame before any plywood is cut.
Now check the entrance. An 8″ × 8″ opening is only a starting point; cats vary in size and mobility. Make a cardboard template and see whether your cat can step through comfortably. A larger or less mobile cat may need a wider or lower opening.
Finally, decide which side will face open space. Your cat needs a clear approach, and the entrance shouldn’t open into a wall or a busy walkway.
Materials and tools
Materials
- One 4′ × 8′ sheet of ¾″ plywood for the cabinet and door blanks
- One ¼″ plywood panel for the back
- Two 8′ lengths of 1-by-2 for the front frame
- Wood glue
- 1¼″ wood screws for the cabinet carcass
- Short fasteners suitable for attaching the back
- Hinges matched to the door size and weight
- Two door pulls and a suitable catch
- Edge banding or trim for exposed plywood edges
- Sandpaper
- Interior furniture finish, if desired
Choose a finish intended for indoor furniture. Follow the product directions and keep your cat away from the cabinet until the finish has fully cured as directed.
Tools
- Tape measure, pencil, and framing square
- Circular saw or track saw
- Jigsaw
- Drill and countersink bit
- Clamps
- Sanding block or sander
- Safety glasses and hearing protection
If you’re new to cutting plywood, have the supplier make the long, straight cuts. You can handle the smaller cuts and the entrance opening at home.
Cut list for the hidden litter box cabinet
All measurements are in inches. Check them against your actual plywood thickness and litter tray before cutting.
¾″ plywood
| Part | Quantity | Starting size |
|---|---|---|
| Side panels | 2 | 24 × 22 |
| Top panel | 1 | 34½ × 22 |
| Bottom panel | 1 | 34½ × 22 |
| Door blanks | 2 | About 17¾ × 23¾; fit to your hinges |
¼″ plywood
| Part | Quantity | Starting size |
|---|---|---|
| Back panel | 1 | 36 × 24 |
1-by-2 front frame
A 1-by-2 is typically about ¾″ thick by 1½″ wide.
| Part | Quantity | Starting length |
|---|---|---|
| Side stiles | 2 | 24 |
| Top and bottom rails | 2 | 33 |
The assembled frame measures about 36″ × 24″ on the outside and leaves a clear opening of roughly 33″ × 21″. Door dimensions depend on the hinges and the gaps you want, so choose the hinges before making the final cuts.
Build the cabinet, step by step
1. Mark the entrance
Choose which side panel will face open space. Mark an entrance that suits your cat and the location of the tray. For a first layout, you could try an 8″ × 8″ opening with its lower edge about 3″ to 4″ above the cabinet floor.
Adjust that size or height if your cat needs more room or a lower step. Leave enough material around the opening to keep the panel strong. Before cutting, check that the tray won’t sit directly in the entrance path.
2. Cut the entrance and ventilation openings
Clamp the side panel firmly to a stable work surface. Drill a starter hole inside the entrance outline, then use a jigsaw to cut along the marked line. Sand the edges smooth and cover exposed plywood edges with trim or edge banding.
Add several ventilation openings high on the back panel or on the side opposite the entrance. Keep them away from the panel edges and sand them smooth. The cabinet shouldn’t be airtight, and its vents need to stay clear.
3. Assemble the cabinet carcass
Lay one side panel flat. Apply a thin line of glue to the ends of the top and bottom panels, then position them between the side panels. Align the outside edges of the top and bottom with the front and back edges of the sides.
Pre-drill the screw holes to help prevent the plywood from splitting. Fasten the panels to the sides, check the corners with a square, and make sure the carcass is square before the glue sets. Wipe away any excess glue.
4. Attach the back
Set the ¼″ back panel over the rear of the cabinet and line up its edges with the carcass. Fasten it with suitable short fasteners. As you work, check that the cabinet remains square; the back helps hold the whole box in shape.
5. Build and attach the front frame
Lay the two 24″ stiles parallel to one another. Fit the 33″ top and bottom rails between them to make a rectangular frame about 36″ wide by 24″ high.
Check the outside measurements and the corners. Then attach the frame to the front of the cabinet, keeping its edges flush with the body. It gives the doors a solid mounting surface and creates an opening about 33″ wide by 21″ high.
6. Fit the doors
Hold the door blanks against the frame and check the gaps at the sides, top, bottom, and center. Trim the blanks only after you’ve confirmed the hinge placement and spacing.
Install the hinges according to their instructions. Hang both doors and open them fully to make sure they don’t rub against each other or the frame. Add the pulls and a catch so the doors stay closed during everyday use.
7. Sand and finish
Sand the exposed surfaces and edges until they feel smooth. Run your hand carefully over the inside, too; check for splinters, sharp edges, or screw points that could snag the tray or hurt your cat.
Apply finish if you want a painted or sealed surface. Follow the product directions for drying and curing, and air out the cabinet as instructed before putting it into use.
Adjust the plan to fit your home
If the tray is too large, increase the cabinet’s width, depth, or both. With the same ¾″ plywood, estimate the inside width by subtracting 1½″ from the outside width. Do the same for the height. For usable depth, subtract the ¼″ back panel from the cabinet-body depth.
If you use plywood of a different thickness, recalculate those clearances. And after changing the cabinet size, check the front opening again: the frame affects the tray’s route in and out, even when the tray fits on the cabinet floor.
In a narrow room, put the entrance on the end that faces open space. For a larger tray, make the cabinet deeper or wider before assembly. Avoid adding shelves or storage if they take away your cat’s room or make the tray harder to lift out.
Keep everyday cleaning simple
The doors should open wide enough for you to slide the tray out without twisting or lifting it awkwardly. Keep the cabinet floor smooth. A washable mat near the entrance can catch some of the litter that gets tracked out.
The enclosure hides the tray, but it doesn’t replace regular litter care. Keep the ventilation openings clear, clean the tray and cabinet regularly, and check for tracked litter near the entrance. If odor builds up or your cat avoids the cabinet, leave the doors open while you reconsider the fit, airflow, or location.
Let your cat inspect the new cabinet at its own pace. Keep the entrance and exit clear, and make a change if the opening seems awkward to use.
A few problems you can head off
The tray fits inside, but won’t come out
Check the front opening as well as the interior dimensions. Widen the opening by adjusting the frame, or change the cabinet layout to give the tray a clearer path out.
The cabinet feels cramped
Measure the tray again, including its rim. Check the room around it, too. If you need more space, increase the cabinet size before cutting rather than squeezing the tray into the example dimensions.
The entrance is awkward for my cat
Try a larger or lower cardboard template and check its position relative to the tray. Once you’ve settled on a comfortable opening, cut it and smooth or cover its edges.
The cabinet holds onto odor
Make sure the vents aren’t blocked, and clean the litter tray and cabinet regularly. A hidden litter box cabinet conceals the tray; it can’t replace routine cleaning.
Questions that come up before the first cut
Can I change the dimensions?
Yes. Measure the tray and the room, then adjust the width or depth before cutting. Recheck the interior clearance and front opening after every change.
How large should the cat entrance be?
There isn’t one size that suits every cat. Make a cardboard template and check that your cat can step through comfortably. A larger or less mobile cat may need more width or a lower opening.
Will the cabinet get rid of litter-box odor?
No. It hides the tray, but odor still depends on cleaning, litter, airflow, and your cat’s use of the box. Keep the cabinet ventilated and the tray easy to reach.
Can I use a different kind of plywood?
Yes, but account for the panel thickness when you recalculate the interior dimensions. Choose sturdy plywood for the cabinet and smooth or cover the exposed edges.
Should I add a shelf or storage?
Only if there’s still plenty of usable room for your cat and tray, and the shelf won’t block ventilation or cleaning access. For this project, a simple interior is usually easier to maintain.
Products / Tools / Resources
- ¾″ plywood: For the top, bottom, sides, and door blanks. Have the long cuts made at the store if that makes handling easier.
- ¼″ plywood: A lighter panel for the cabinet back.
- 1-by-2 boards: For the front frame stiles and rails.
- Hinges and pulls: Choose hinges that suit the finished doors; pick them before trimming the door blanks.
- Circular saw or track saw: For straight plywood cuts.
- Jigsaw: For the side entrance and any shaped cuts.
- Drill, square, and clamps: For pre-drilling, keeping corners square, and holding parts steady during assembly.
- Sandpaper, edge banding, and finish: For smoothing and protecting exposed surfaces. Follow the finish label and allow the full cure time before use.