
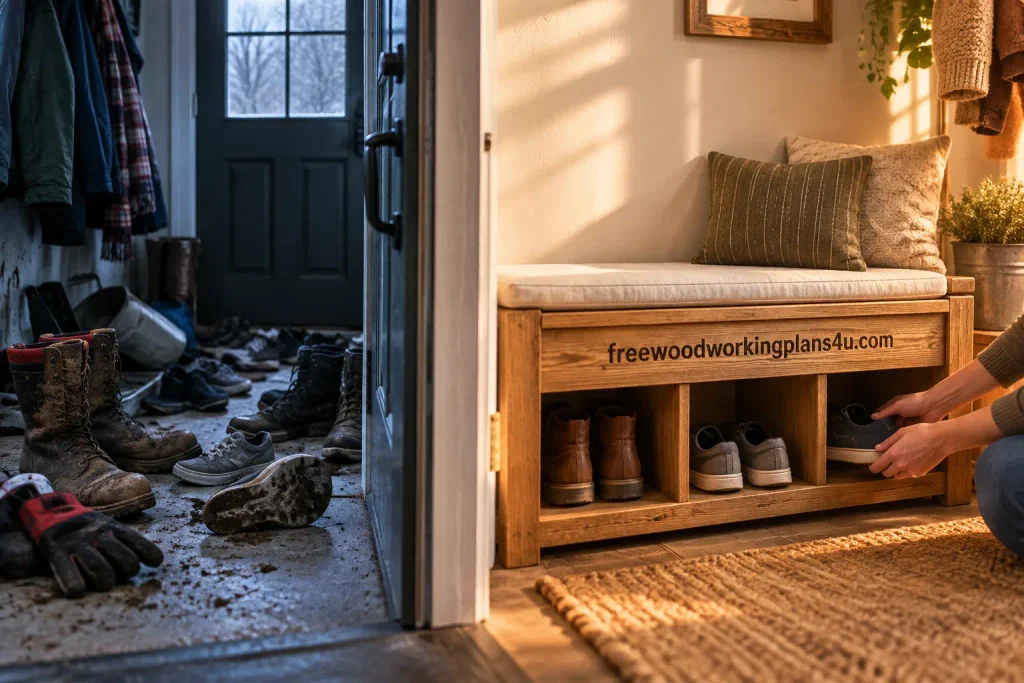
By the time the last person comes through the door, the entryway usually tells the whole story. Shoes have been kicked off at different angles. A pair of boots is leaning against the wall.
Someone’s gloves are on the radiator, and the one place that should feel like a calm arrival point has quietly turned into a traffic jam.
A shoe storage bench changes that rhythm. It gives people somewhere to sit, somewhere to put their shoes, and—just as importantly—a clear boundary between the outside world and the room beyond it.
These free woodworking plans for a shoe storage bench cover three different ways to create that boundary: a clean open-cubby bench, a softer basket-style bench, and a lift-top design with hidden storage.
The construction principles are deliberately practical. You will find finished dimensions, reference cut lists, material choices, tool requirements, build sequences, safety checks, and sensible ways to customize each design.
The open-cubby version is the most forgiving first project. The basket bench is a good choice when you want shoes contained but still within easy reach. The lift-top version takes more care, especially around the hinges, but rewards you with a seat that conceals the less attractive parts of daily life.
The dimensions are reference points. Measure your own entryway, shoes, boots, baskets, doors, and baseboards before cutting.
A careful ten-minute measurement is cheaper than a beautifully assembled bench that cannot open the front door.
Quick Answer: Which Shoe Storage Bench Fits Your Home?
If you want the shortest route from lumber to a useful piece of furniture, build Design 1. It has three open compartments and no moving hardware. Choose Design 2 when visual calm matters as much as quick access; the baskets hide the everyday jumble. Choose Design 3 when you need a place for winter accessories, shoe-care supplies, or occasional footwear to disappear beneath the seat.
| Design | Approximate finished size | Storage style | Skill level | Best fit |
|---|---|---|---|---|
| Design 1 | 48 in W × 18 in D × 19 in H | Three open cubbies | Beginner | Daily shoes and a simple, dependable build |
| Design 2 | 48 in W × 17 in D × 19 in H | Two basket bays | Beginner to intermediate | A tidy farmhouse, cottage, or family entryway |
| Design 3 | 42 in W × 18 in D × 20 in H | Lift-top compartment plus lower shoe shelf | Intermediate | Concealed storage and a furniture-style finish |
For most adults, an 18- to 20-inch finished seat height is a comfortable starting range. A 16- to 18-inch depth usually gives a useful seat without taking over the hallway. Cubby width is less universal, so let your largest pair of shoes—not a generic diagram—make that decision.
Before You Cut: Let the Space Dictate the Plan
The temptation with any free woodworking plan is to start at the cut list. Resist it. The room comes first, then the footwear, then the furniture.
Measure the footprint and the things around it
Measure the available wall width and the distance from the wall to the nearest door, stair, radiator, or opposing piece of furniture. Mark the proposed footprint on the floor with painter’s tape. Walk past it. Open the door. Stand where someone would sit.
That small rehearsal often catches problems a tape measure misses. A bench can fit on paper and still make a narrow entryway feel pinched. If a door swings toward the bench, leave enough room for the handle and the full arc of the door.
Baseboards deserve attention too. You can notch the back of the bench, leave a controlled gap, or build a recessed rear section. A recessed back is usually the least fussy solution: the bench stays square, and the wall trim has somewhere to go.
Measure the footwear that will live inside it
Sneakers, sandals, children’s shoes, and work boots do not occupy the same amount of space. Measure the longest shoe, the widest shoe, and the tallest boot. Add enough clearance that a person can reach in without scraping knuckles against the opening.
If baskets are part of the plan, choose them before building the openings. Measure the basket at its widest point, including handles. Give it a little breathing room on every side. Storage that requires two hands and a careful angle every morning will eventually be abandoned.
Decide what the seat is expected to endure
An occasional perch needs a sound top and reliable supports. A family bench that gets used every morning needs more: a square carcass, a front rail, a rear rail or stretcher, and enough support beneath the seat to prevent flexing.
If you are adding upholstery, count the cushion thickness as part of the finished height. A two-inch cushion can turn a comfortable 19-inch frame into a surprisingly tall seat.
Useful planning formula: Finished height = frame height + seat thickness + feet or plinth height. Interior width = outside width − the thickness of both side panels.
Tools, Materials, and the Quiet Parts of a Good Build
All three designs can be made with common workshop materials. Three-quarter-inch plywood keeps the dimensions predictable and makes efficient use of sheet goods. Pine is accessible and easy to shape. Hardwood edging or a hardwood face frame adds refinement where it will be seen and touched.
Tools you will actually use
- Tape measure, combination square, pencil, and marking knife
- Circular saw with a straightedge or a table saw
- Drill and driver with bits matched to your fasteners
- Clamps long enough to hold the carcass square
- Random-orbit sander or sanding block
- Countersink bit
- Level and a long straightedge
Recommended guide: Best Woodworking Tools for Beginners: Build Your First 10 Projects With These Tools and Nothing More
A pocket-hole jig is convenient, particularly for hidden connections, but it is not a requirement. Screws, dowels, biscuits, or traditional joinery can all work. The method matters less than accurate layout, a clean glue surface, and an assembly that is checked for square before the fasteners are fully tightened.
Materials for a durable entryway bench
- 3/4-inch plywood, pine, or hardwood panels
- 1/4-inch plywood for an optional back or dust panel
- Wood glue
- Fasteners suited to the thickness and type of material
- Sandpaper in approximately 80-, 120-, and 180-grit ranges
- Paint, stain, hardwax oil, or a water-based clear finish
- Rubber feet, furniture glides, or material for a recessed plinth
- Optional baskets, hinges, lid stays, cushion, hooks, and shoe trays
Safety belongs beside the saw, not at the end of the article
Support sheet goods properly so an offcut cannot pinch the blade. Wear eye and hearing protection, control dust with extraction or ventilation, and keep the work area clear enough that you can move without catching a cord. When fatigue starts turning a careful cut into a rushed one, stop for the day.
Disconnect the saw or drill before changing a blade, bit, or adjustment. Test-fit parts before applying glue. A dry assembly gives you permission to discover a mistake while it is still only a pencil mark.
Recommended reading: How to Read Woodworking Plans: A Beginner’s Guide to Symbols, Cut Lists and Diagrams
Design 1: The Open-Cubby Bench That Earns Its Place Every Morning
This is the practical workhorse. Three open cubbies keep shoes visible and accessible, while the broad top gives people a comfortable place to sit. There are no hinges to align and no decorative details that need to be perfect before the structure is sound.
What this design does well
- Finished size: approximately 48 inches wide, 18 inches deep, and 19 inches high
- Storage: three open cubbies
- Construction: plywood or solid-wood panels joined with glue and mechanical fasteners
- Best for: a first furniture project, busy households, and shoes that need to be reached quickly
The open arrangement also makes the bench easy to adapt. One divider can move to create a wider boot bay. A tray can be added to the bottom. A row of hooks above the seat can turn the bench into a small entryway station.
Reference cut list for the open-cubby plan
The following sizes assume 3/4-inch material and a top that rests over the side panels. Treat them as a reference cut list. If your actual plywood measures differently, recalculate the inside parts before making the final cuts.
| Part | Quantity | Reference size |
|---|---|---|
| Seat top | 1 | 48 in × 18 in |
| Side panels | 2 | 18 1/4 in × 17 1/4 in |
| Bottom shelf | 1 | 46 1/2 in × 16 1/2 in |
| Interior dividers | 2 | 17 1/2 in × 16 1/2 in |
| Front and rear stretchers | 2 | 46 1/2 in × 3 in |
| Optional back panel | 1 | Cut to fit from 1/4-inch plywood |
With a 48-inch outside width, the space between two 3/4-inch side panels is roughly 46 1/2 inches. After the two dividers take their share, each opening will be close to 15 inches wide. Dry-fit the parts and measure the actual openings before you commit to the final divider positions.
Build the open-cubby frame without losing the square
Step 1: Cut, mark, and keep the parts oriented
Cut the top, sides, shelf, dividers, and stretchers. Put a small pencil mark on every front edge. Mark the good face of each visible panel too. It takes seconds, and it prevents the peculiar frustration of assembling a correct part backward.
Step 2: Deal with the edges while they are easy to reach
Plywood edges can be left visible for a deliberately modern look, covered with edge banding, or capped with thin solid wood. If the bench will be painted, filler and primer can hide a great deal. If it will be stained, edging is usually worth the extra effort because the layered plywood edge will remain part of the design.
Lightly break the sharp edges now. The front of a cubby receives shoes, hands, and cleaning cloths; a small eased edge will survive that contact better than a crisp corner.
Step 3: Assemble the sides, shelf, and stretchers
Position the bottom shelf between the side panels. Apply glue to the mating surfaces, add your chosen fasteners, and use a square before tightening everything fully. Fit a front stretcher beneath the seat and a rear stretcher near the back. These rails are not decoration. They stop the bench from wriggling diagonally and help distribute weight from the seat.
Check the diagonals of the carcass. Measure from one front corner to the opposite rear corner, then repeat in the other direction. If the measurements differ, shift the frame gently until they match. A few minutes here can save an entire afternoon of trying to persuade a crooked seat into place.
Step 4: Place the dividers around real footwear
Divide the interior width into three openings, or make one of them wider for boots. Mark the positions on both the bottom shelf and the underside of the top. Dry-fit the dividers, slide in the largest shoes, and look at the clearance from the front.
Once the arrangement feels right, attach the dividers with glue and fasteners. Keep them plumb. A divider that leans only slightly can make a straight shoe appear too large for its own compartment.
Step 5: Attach the seat and soften its front edge
Set the top in place and check the overhang from every side. An even overhang looks intentional; an uneven one looks like a measurement error even when the bench is structurally sound.
Fasten the top from below when possible. Round over or carefully sand the front corners, especially if children will use the bench. A soft edge is kinder to legs, clothing, and the wood itself.
Step 6: Sand in stages, then finish
Sand the surfaces progressively rather than jumping straight to a very fine grit. Remove glue squeeze-out before it dries completely, but do not smear it across the face of the wood. Vacuum the bench carefully before applying paint, stain, or clear finish.
Give the cubby fronts and seat edge special attention. Those are the places where roughness will be felt first.
Small changes that make Design 1 feel custom
For wet climates, set removable shoe trays on the bottom shelf. For a lighter visual footprint, raise the carcass on short feet or use a recessed plinth. For a family bench, one wider cubby can hold boots while the smaller compartments handle everyday shoes.
The structure should remain the same. Add features only when they preserve the bench’s main job: making it easier to sit down and put shoes away.
Design 2: The Basket Bench for a Calmer, Softer Entryway
Open cubbies are wonderfully honest. They show you exactly what needs to be put away. That is also their weakness. When several people use the entryway, a basket bench can provide the same storage capacity with less visual noise.
Design 2 keeps the basic carcass straightforward, then adds a face frame and basket bays. The style can lean farmhouse, cottage, Scandinavian, or clean modern depending on the trim and finish.
What to decide before building
- Finished size: approximately 48 inches wide, 17 inches deep, and 19 inches high
- Storage: two large basket bays
- Construction: structural carcass with a face frame or decorative front trim
- Best for: families, shared entryways, and anyone who prefers contained storage
The important choice is not the paint color. It is the basket. A basket selected after the bench is built may be too wide, too tall, or awkwardly deep. Measure the basket—including handles—and design the opening around it.
Reference cut list for the basket version
| Part | Quantity | Reference size |
|---|---|---|
| Seat top | 1 | 48 in × 17 in |
| Side panels | 2 | 18 1/4 in × 16 1/4 in |
| Bottom shelf | 1 | 46 1/2 in × 15 1/2 in |
| Center divider | 1 | 17 1/2 in × 15 1/2 in |
| Front face-frame rails | 2 | Cut to suit the chosen trim width |
| Front face-frame stiles | As needed | Cut around the basket openings |
| Optional back panel | 1 | Cut to fit from 1/4-inch plywood |
The face-frame parts are intentionally cut to fit after the carcass is assembled. This avoids guessing how much of the opening your chosen trim will cover. Leave enough clearance for the baskets to slide out without catching on the rails or stiles.
Build the basket bench one layer at a time
Step 1: Make the carcass square before styling it
Assemble the side panels, bottom shelf, center divider, and seat supports using the same sequence as Design 1. Check the diagonals. Check the level. Confirm that the divider is plumb.
The baskets will not hide a crooked structure. They will make it harder to diagnose because the trim draws attention away from the frame until the drawers refuse to move smoothly.
Step 2: Dry-fit the baskets and build the face frame around them
Place the baskets in the open bays. Mark the clearance you want at the top, sides, and bottom. Then cut the front rails and stiles. A square frame produces a restrained modern look. Wider rails and a shallow bevel create a more traditional farmhouse character.
Attach the face frame with glue and brad nails, screws from the inside, or another joinery method you can control. Fill visible holes before painting. Keep the trim flush and let the baskets remain the moving parts.
Step 3: Give the bench a deliberate base
A shallow plinth lifts the bottom shelf away from dirt and gives the bench a grounded appearance. Tapered legs make it feel lighter. Simple block feet are fast and sturdy.
Whichever base you choose, set the bench on a flat surface and test it before finishing. A bench that rocks will be noticed every time someone sits down, no matter how beautiful the paintwork is.
Step 4: Let the finish support the design
Paint is a useful equalizer when the carcass is plywood and the face frame is pine. For a stained finish, test an offcut first. Pine and plywood can absorb stain differently, and a sample board is a much better predictor than the color printed on a label.
A single color makes the baskets the quiet texture beneath the seat. A painted base with a natural wood top creates more contrast. Neither is automatically better; the right combination is the one that suits the room and still looks good after shoes have been kicked into the baskets for a month.
Give each basket a job
Storage works when the household can understand it without a meeting. One basket might hold children’s shoes. Another might take gloves, hats, or outdoor accessories. Seasonal footwear can have its own place, but leave some empty space so the basket can still be lifted easily.
Design 3: The Lift-Top Bench That Hides the Mess Beneath It
There are shoes that need to be reached every day, and there are the things that seem to migrate into the entryway because nobody has decided where else they belong. Gloves. Hats. Shoe polish. The spare laces. The winter accessories that are used often enough to stay near the door but not often enough to look tidy.
Design 3 gives those items a concealed compartment beneath a hinged seat. A lower shelf keeps daily shoes accessible, so the hidden storage does not become a black hole.
What makes the lift-top version different
- Finished size: approximately 42 inches wide, 18 inches deep, and 20 inches high
- Storage: concealed compartment under the seat plus an open lower shoe shelf
- Construction: side panels, enclosed box, hinged lid, support cleats, and a rear stretcher or brace
- Best for: a more finished furniture look and entryways where visible clutter is the real problem
The moving lid changes the build. A fixed seat can tolerate a little inconvenience during assembly. A hinged seat cannot. The frame must be square, the clearances consistent, and the hardware properly supported.
Reference cut list for the hidden-storage bench
This design requires careful dry fitting because the lid, hinges, and compartment must move without rubbing.
| Part | Quantity | Reference size |
|---|---|---|
| Hinged seat lid | 1 | 42 in × 18 in |
| Side panels | 2 | 19 1/4 in × 17 1/4 in |
| Hidden compartment front and back | 2 | Approximately 40 1/2 in × 8 in |
| Hidden compartment bottom | 1 | Approximately 40 1/2 in × 16 1/2 in |
| Lower shoe shelf | 1 | Approximately 40 1/2 in × 16 1/2 in |
| Lid cleats or support rails | 2 | Approximately 40 1/2 in × 2 in |
| Optional end braces | As needed | Cut to fit after dry assembly |
The compartment height can change, but do not remove so much structure beneath the seat that the top begins to flex. If you add a thick cushion, reduce the wood frame height by the cushion thickness if you want to keep the finished bench near 20 inches.
Build the box before you trust the lid
Step 1: Assemble the lower support structure
Start with the side panels and lower shoe shelf. Add a rear stretcher or partial back. The lift-top will be opened and closed repeatedly, and that movement places more stress on the carcass than a fixed bench experiences.
Check the frame from the front and above. If it twists now, the lid will reveal the problem every time it closes.
Step 2: Form the concealed compartment
Install the compartment front, back, and bottom between the sides. Support the compartment bottom with cleats or interior rails so the load does not depend only on screws driven into end grain.
Leave a small, even clearance around the lid. If the compartment will hold damp shoes or wet outdoor gear, use a removable tray or add ventilation openings. Wood and trapped moisture are not a forgiving combination.
Step 3: Test-fit the lid before installing hinges
Place the lid on the frame and inspect the overhang on all four sides. Open it by hand, even though there are no hinges yet. Look for rubbing, tight corners, or a gap that changes from one end to the other.
Correct the frame before adding hardware. Hinges can guide movement, but they cannot rescue an out-of-square box.
Step 4: Install hinges and lid stays with care
Two sturdy butt hinges can work well; a continuous piano hinge spreads the load along the rear edge. Add lid stays or controlled-close hardware so the lid cannot fall unexpectedly.
During the first tests, keep your fingers away from the hinge line. Confirm that the screws grip securely without passing through the seat. Open and close the lid repeatedly, then inspect the hardware for movement before putting anything inside the compartment.
Step 5: Make the top pleasant to sit on
A removable cushion gives the hidden-storage design a softer, more comfortable character. Use durable fabric and a cover that can be cleaned. Ties, hook-and-loop fastener, or a nonslip layer can keep the cushion from sliding.
For a bare wood seat, round over the front edge and apply a finish that can tolerate hands, clothing, and repeated contact.
Give hidden storage boundaries
The compartment should hide clutter, not encourage it. Use small bins or dividers for shoe-care supplies, gloves, hats, and seasonal items. Leave some empty room so the lid closes without being forced.
The Details That Make a Homemade Bench Feel Like Furniture
The difference is rarely an expensive species of wood. It is the edge that does not cut into your leg, the lid that closes without a bang, the carcass that remains steady when someone sits down, and the finish that still looks considered after a season of muddy shoes.
Soften the edges people touch
Ease the front corners, seat edge, and cubby openings. A small round-over is enough. If you are working by hand, a few patient sanding passes can create the same comfort without adding another router setup.
Give the seat a clear load path
The weight on the seat should travel through the top, rails, dividers, side panels, and floor. Do not leave a long span unsupported simply because the top looks thick. Add a front rail, rear rail, cleat, or center support where the width demands it.
Control how heavy the bench looks
In a narrow hallway, a deep solid block can feel imposing. A recessed base, open lower gap, lighter finish, or modest trim can make the bench appear less bulky. In a large mudroom, thicker edging and a substantial top may be exactly what keeps it from looking undersized.
Protect the wood from the entryway’s worst habits
Grit scratches. Salt leaves a pale ring. Wet footwear leaves moisture where you least want it. Removable trays, washable mats, and a durable finish protect the bench without turning it into a sealed plastic box.
What Will It Cost and Where Is the Time Really Spent?
The plans are free, but the project still consumes material and attention. Design 1 usually uses the fewest parts and least hardware. Design 2 adds baskets and a face frame. Design 3 adds hinges, lid stays, and a more enclosed structure.
The largest time savings come from planning rather than rushing. Cut efficiently from the sheet goods available to you. Use offcuts for stretchers, cleats, or dividers when they are structurally suitable. Reserve hardwood for the edges that will be handled or seen.
Spend the extra effort on the parts that cannot be hidden later: the seat support, the square of the carcass, the fit of the baskets, the movement of the lid, and the final sanding.
Mistakes That Look Small Until You Live With Them
Building around an imaginary collection of shoes
Measure the shoes and boots that exist. A plan that fits three neat pairs of identical sneakers may fail the moment a pair of work boots arrives.
Forgetting the real thickness of the material
“Three-quarter-inch plywood” is a useful label, not a guarantee of exact thickness. Measure the sheet. Recalculate the interior width. Two panels that look correct on a sketch can steal more space than expected when assembled.
Making the bench deeper because extra storage sounds useful
Every extra inch takes space from the walking path. Mark the footprint on the floor before cutting and live with it for a few minutes.
Installing decorative trim before testing the opening
Face frames and rails are capable of stealing the clearance that the basket needs. Dry-fit the basket first, then build the trim around the real opening.
Leaving the back completely unsupported
An open back may be convenient around baseboards, but the bench still needs resistance to racking. Use a rear stretcher, partial back, or another sound brace.
Treating the finish as cosmetic
The finish is part of the bench’s working surface. Sand the difficult areas before final assembly, remove dust, and let each coat cure properly. A rushed finish will show every time a shoe catches the edge.
Recommended guide: 15 Common Woodworking Mistakes Beginners Make (And the Simple Fixes That Save Time, Money, and Fingers)
Final Pre-Use Checklist
Before moving the finished bench into the entryway, check the following:
- The width and depth fit the measured space.
- Doors, baskets, and the lift-top open without interference.
- The bench sits level and does not rock.
- The seat is supported and does not flex excessively.
- Exposed screws are countersunk, concealed, or safely covered.
- The corners and cubby edges are smooth.
- The finish is dry and fully cured.
- Hinges and lid stays are secure on the lift-top model.
- Damp footwear has a tray, mat, or other practical place to drain.
- The bench is anchored if its position or use makes anchoring necessary.
Questions People Ask Before Building a Shoe Storage Bench
Will an 18-inch bench really feel comfortable?
For many adults, 18 to 20 inches is a comfortable starting range. Measure from the floor to the top of any cushion, not just to the wood frame. If children will use the bench, a lower seat may be helpful, but remember that adults may use it too.
How deep can the bench be before it crowds the hallway?
Many entryways work well with a bench between 16 and 18 inches deep. The correct limit is the space in front of it. Mark the footprint, open nearby doors, and walk past it before you settle on the depth.
What if my shoes do not fit the cubbies in the plan?
Change the opening dimensions before changing the outside width. Measure the largest footwear, allow clearance, and divide the remaining interior space around those needs. One wider boot compartment is often more useful than three perfectly equal openings.
How wide should each shoe cubby be?
Fourteen to 16 inches is a practical starting range for many adult shoes, but it is not a rule. Wide shoes, boots, and shoes stored at an angle can require more room. Measure first.
Is 3/4-inch plywood strong enough for a bench seat?
It can be, provided the seat is supported properly and the carcass resists racking. Add rails, cleats, dividers, or a center support where the span requires it. Solid-wood edging or a face frame can also protect exposed plywood edges.
Can I make the free woodworking plans narrower?
Yes. Recalculate the interior width and confirm that the shoes or baskets still fit. If you make the bench wider, consider an additional divider or center support so the seat does not develop an uncomfortable flex.
Are baskets better than open cubbies?
Open cubbies win on speed and visibility. Baskets win on visual calm and category control. Choose open storage when people need to grab shoes instantly; choose baskets when the entryway looks untidy even after the shoes are technically stored.
How do I keep a lift-top bench from slamming shut?
Use lid stays or controlled-close hardware designed for the lid’s size and weight. Install them securely, test the movement slowly, and keep fingers clear of the hinge line during adjustment.
Should I anchor the shoe bench to the wall?
Anchor it when it could slide, tip, or be climbed on, especially in a household with children. A rear stretcher improves rigidity, but it is not a substitute for anchoring when anchoring is appropriate.
What finish holds up best in an entryway?
Paint, polyurethane, and hardwax oil can all work when the wood is properly prepared. Choose according to the appearance you want and the amount of moisture and abrasion the bench will receive. Always test the finish on scrap first.
Can I add a cushion after the bench is finished?
Yes. Cut foam to the seat size, wrap it in durable fabric, and use a removable cover if possible. Ties, hook-and-loop fastener, or a nonslip layer can stop the cushion from drifting when people sit down.
Do I need a back panel?
No, but you do need some method of resisting side-to-side movement. A partial back or rear stretcher keeps an open design lighter while providing useful rigidity. A full back gives more support and a more enclosed appearance.
Products / Tools / Resources
Measuring and cutting tools
- Tape measure and combination square for reliable layout
- Long straightedge for breaking down sheet goods
- Circular saw or table saw for clean, controlled cuts
- Drill and driver with a countersink bit
- Clamps that can hold the carcass while glue sets
Sanding and finishing supplies
- 80-, 120-, and 180-grit sandpaper
- Wood filler for visible screw holes and small imperfections
- Edge banding or thin solid-wood strips for plywood edges
- Primer and paint for a durable painted finish
- Stain, hardwax oil, or water-based clear coat for a natural look
- Dust mask or respirator appropriate for the finish and workshop conditions
- Learn more: Woodworking Finishing Supplies for Beginners: 17 Essentials for a Smooth, Durable Finish
Useful construction materials
- 3/4-inch plywood, pine, or hardwood panels
- 1/4-inch plywood for a rear panel or dust barrier
- Wood glue and suitable structural screws
- Pine or hardwood for face frames and trim
- Rubber feet, furniture glides, or material for a recessed plinth
- Removable shoe trays for wet or muddy footwear
Hardware for the hidden-storage design
- Two sturdy butt hinges or a continuous piano hinge
- Lid stays or controlled-close support hardware
- Optional handle, magnetic catch, or interior divider
- Upholstery foam and durable fabric for a removable cushion
- Learn more: 25 Best Woodworking Hardware Products Every Serious Woodworker Should Own (Ranked by Performance)