
A small entryway doesn’t need another bulky piece of furniture. This narrow shoe shelf is about 30 inches wide, 24 inches tall, and 11¼ inches deep, with three levels for everyday footwear. The free cut list uses ¾-inch plywood and basic 1×2 lumber, and the steps are manageable for a beginner with a saw, drill, and a little patience.
The shelf boards themselves are 10½ inches deep. A front rail adds the remaining ¾ inch. To make the most of that shallow footprint, place shoes sideways, with their toes pointing along the shelf. Before cutting, though, try the layout with your own shoes. If you prefer to store them toe-forward, you’ll need a deeper shelf.
The plan at a glance
| Detail | Measurement or recommendation |
|---|---|
| Finished size | 30″ W × 24″ H × 11¼″ D |
| Storage levels | 3 |
| Main material | ¾″ plywood |
| Skill level | Beginner |
| Shoe orientation | Sideways for a shallower shelf |
| Approximate capacity | Around 3–6 pairs, depending on shoe size and spacing |
Treat the capacity as a starting estimate, not a promise. A pair of large shoes takes more room than a pair of children’s shoes, and you’ll want enough space to pull them out comfortably.
First, make sure your shoes will fit
Depth is the decision that shapes this whole project. With shoes facing forward, the shelf needs to be at least as deep as your longest shoe, with a little extra room at the front and back. Many adult shoes are longer than the 10½-inch shelf board in this plan.
For a compact fit, turn each shoe so its length runs parallel to the shelf front. Place one shoe toward the wall and its mate closer to the front.
This uses less depth, but the shoes need enough width across the shelf.
Before you start cutting:
- Measure the narrowest part of the spot where the shelf will stand.
- Check the door swing, baseboards, trim, and the space people need to walk past it.
- Measure your longest and widest shoes.
- Arrange a pair sideways on the floor and measure how much room it takes.
- Adjust the shelf width or depth if the pair feels cramped.
There are 28½ inches of shelf width between the side panels. That may fit two pairs per level for smaller shoes or a single pair for larger footwear. A quick test with your own shoes will tell you more than any general capacity estimate.
Free cut list and materials
The measurements below are in inches. The three shelf boards fit between the two ¾-inch side panels.
| Part | Quantity | Material | Cut size |
|---|---|---|---|
| Side panels | 2 | ¾″ plywood | 24″ × 11¼″ |
| Shelf boards | 3 | ¾″ plywood | 28½″ × 10½″ |
| Shelf support cleats | 6 | 1×2 lumber | 9¾″ long |
| Front stiffening rails | 3 | 1×2 lumber | 28½″ long |
A 1×2 normally measures ¾ inch by 1½ inches. Allow for the saw kerf when buying the lumber, and leave a little extra for a test cut.
You’ll also need 1¼-inch wood screws, wood glue, sandpaper in 120- and 180-grit, and paint or a suitable clear finish. Edge banding is optional if you’d like a smoother look on exposed plywood edges.
Tools to have ready
Gather a tape measure, pencil, square, saw, drill or driver, drill bits for pilot holes, and clamps. A circular saw with a straightedge can handle the plywood; a table saw works too if you have one.
Wear eye and hearing protection while cutting and sanding. Plywood edges can be rough, so keep your hands clear of the blade and take time to support each panel as you cut.
Build the shelf, one steady step at a time
1. Cut and label the pieces
Cut the two side panels, three shelf boards, six cleats, and three front rails to size. Check matching pieces against each other before moving on. A small difference in length can make the frame harder to square.
Set the shelf boards between the side panels for a dry fit. They should fill the 28½-inch inside width without needing to be forced into place.
2. Mark where the shelves will sit
Lay the side panels beside each other with their inside faces up. Measure from the bottom edge of each panel and mark the cleat positions:
- Bottom cleat top: ¾ inch
- Middle cleat top: 12 inches
- Upper cleat top: 23¼ inches
Use a square to carry each mark across both panels. Each line marks the top edge of a cleat. When the shelf boards rest on the cleats, these positions create three usable levels.
3. Attach the cleats
Set a cleat on each marked line. Run its length from the back toward the front of the shelf, and align its top edge with the mark. The shelf board will sit on the cleat.
Drill pilot holes through the side panels first; that small bit of care helps prevent the plywood from splitting. Add a little wood glue, fasten each cleat with screws, and check that the left and right cleats for each shelf line up.
4. Fit the front rails
Each front rail stiffens a shelf and protects its front edge. Place one against the front of each shelf board, with the rail’s top edge flush with the shelf surface. Clamp it in position, then pre-drill and fasten it.
The rail adds ¾ inch to the shelf board’s 10½-inch depth, bringing the overall depth to 11¼ inches. Check that the shelf-and-rail combination matches the side panel depth.
5. Set the shelves in place
Stand the side panels upright and lower each shelf board onto its matching cleats. Align the back edge of each shelf board with the back edge of the side panels. The front rails should finish flush with the front of the sides.
Drive screws down through each shelf into the cleats. Keep checking that the frame is square as you work. One simple check: measure diagonally across the frame in both directions. Equal measurements mean the frame is square.
6. Sand and finish
Sand the rough edges and plywood faces, then wipe away the dust. Apply paint or a clear finish according to its instructions. Pay extra attention to the exposed plywood edges if the shelf will sit near wet shoes or an entryway mat.
Let the finish dry fully before loading the shelf. A little patience here saves you from marks and tacky spots later.
Recommended guide: Woodworking Finishing Supplies for Beginners: 17 Essentials for a Smooth, Durable Finish
Check the fit and stability
Put the shelf in its intended place and try the shoes you measured earlier. They should slide in and out without catching on the rails, wall, or trim. If the fit is tight, store fewer pairs on each level or adjust the plan before building another version.
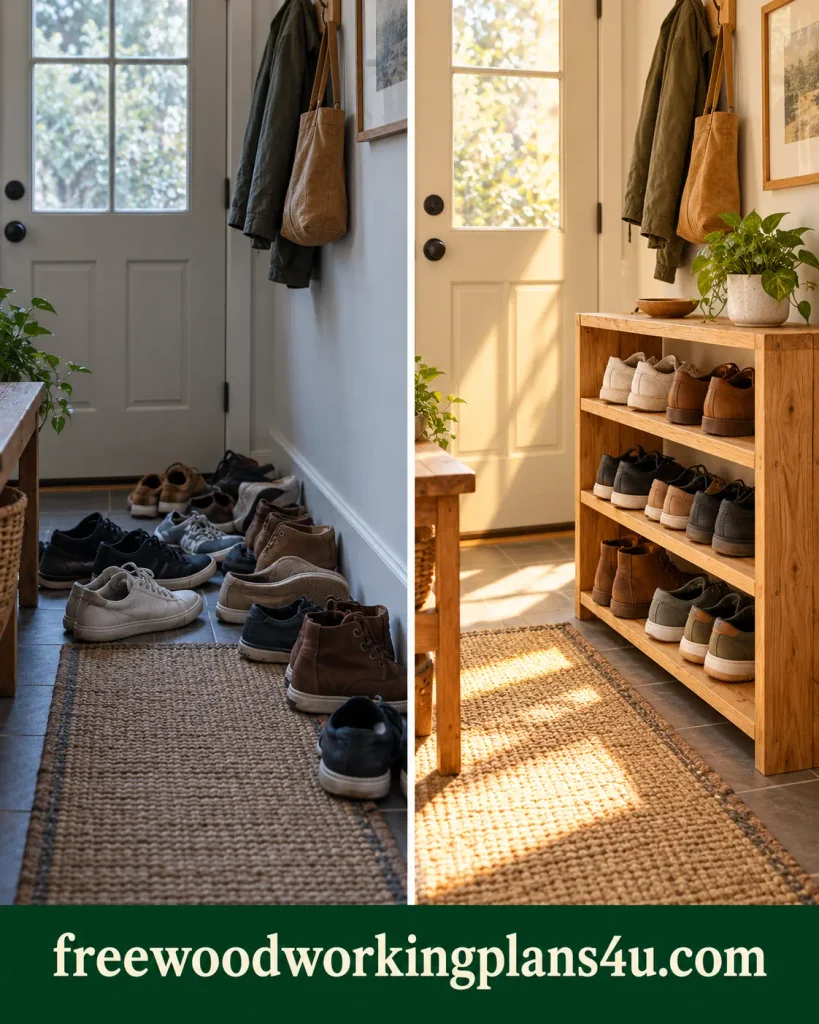
The shelf should sit level and feel steady. If it could be bumped, pulled on by a child, or tipped, secure it to suitable wall framing with appropriate hardware. It is a shoe shelf, not a seat or step.
Small mistakes that can spoil a good fit
- Cutting before measuring your shoes: Shoe shapes vary. Try the sideways arrangement with an actual pair first.
- Assuming 10½ inches works for toe-forward storage: Many shoes need more depth when stored lengthwise.
- Skipping pilot holes: Screws near plywood edges can split the material.
- Forgetting the front rails: They add ¾ inch to the shelf’s overall depth.
- Ignoring the space around the shelf: Check door clearance, baseboards, and the walking path.
- Putting shoes on before the finish has cured: Follow the finish maker’s drying and curing instructions.
Questions you might have before you build
Will 10½ inches be deep enough for my shoes?
It depends on how you arrange them. If they face forward, measure the longest shoe and add clearance. Turning them sideways can reduce the depth needed, but the shelf still has to fit the pair across its depth and width.
How many pairs can I fit on a 30-inch-wide shelf?
This plan may fit one or two pairs per level when shoes are turned sideways. Larger shoes or extra spacing may reduce that to one pair. Try the arrangement on the floor before deciding how many pairs to plan for.
Can I change the shelf dimensions?
Yes. For a different finished width, subtract the thickness of both side panels from the outside width to get the shelf-board width. Increase the depth if your shoes need more room, and check the entryway measurements again before cutting.
Could I make it from solid wood instead of plywood?
Yes. Use straight, stable boards and keep the finished dimensions the same. Plywood makes broad shelf panels convenient; solid wood can work well too, but it needs suitable joinery and room for seasonal movement.
Should I attach the shelf to the wall?
Consider anchoring it if it could be bumped, pulled on, or climbed on. Choose hardware appropriate for the wall and fasten it to a suitable support.
Products / Tools / Resources
Materials: ¾-inch plywood for the sides and shelves; 1×2 lumber for the cleats and front rails; 1¼-inch wood screws; wood glue; paint or clear finish.
Tools: Tape measure, pencil, square, saw, drill or driver, pilot-hole bits, clamps, sandpaper, and eye and hearing protection.
Resources: Your shoe measurements, a clear measurement of the intended entryway space, and related guides to plywood selection, beginner tools, reading plans, and shoe-storage projects.