
A first cabinet project can feel like a pile of separate measurements until the box begins to take shape. This plan keeps the cuts square and the joinery manageable: a plywood cabinet, a simple pine face frame, adjustable shelves, and two doors with applied trim for a farmhouse look.
The finished cupboard measures 30 inches wide, about 17¼ inches deep, and 41½ inches tall, before the pulls are added. The cut list assumes nominal ¾-inch plywood. Check the actual thickness of your sheets and the fitting instructions for your hinges before cutting.
The plan at a glance
| Feature | Specification |
|---|---|
| Overall size | 30 in. W × about 17¼ in. D × 41½ in. H, excluding pulls |
| Cabinet box | 28½ in. W × 15½ in. D × 38 in. H |
| Base | 28½ in. W × 15½ in. D × 3½ in. H |
| Storage | One fixed shelf and two adjustable shelves |
| Doors | Two ¾-in. plywood overlay doors with applied trim |
| Main materials | ¾-in. plywood, ¼-in. plywood, pine boards |
| Skill level | Beginner; measuring, drilling, clamping, and careful assembly |
The dimensions are in inches. Approximate metric equivalents are 762 × 438 × 1054 mm overall. Pick one system and use it throughout the project; mixing rounded metric and inch measurements can introduce small errors.
What to gather before you start
Materials
- Two 4 × 8-foot sheets of ¾-inch plywood: one for the cabinet box and shelves, and one for the doors and decorative trim
- One ¼-inch plywood panel at least 28½ × 38 inches for the back
- Two 8-foot 1×2 pine boards for the face frame
- One 8-foot 1×4 pine board for the base
- Eight ¼-inch shelf pins, plus a few extras
- Six face-frame overlay cabinet hinges suited to the door fit
- Two cabinet pulls
- 1¼-inch pocket-hole screws, 2-inch wood screws, and ¾-inch brads or staples
- Wood glue, filler, sandpaper, primer, and your chosen finish
Plywood is sold by its nominal thickness, but the sheet in your hands may be thinner than ¾ inch. Measure it first. The top, bottom, and fixed shelf fit between the sides, so their width depends on the actual thickness of your plywood.
Tools
You can cut the sheet goods with a circular saw and straightedge guide or a track saw. A home-center panel-cutting service is another option for the large pieces. Add a drill and driver, tape measure, square, clamps, sander, and a shelf-pin jig or template.
A pocket-hole jig makes assembly straightforward, though another suitable joining method will work. If you use a table saw, keep the blade guard in place, use the fence or a guide, and reach for a push stick on narrow pieces. OSHA’s woodworking guidance describes these precautions. www.osha.gov
Farmhouse cupboard woodworking plans: cut list
These dimensions assume plywood exactly ¾ inch thick and 1× boards with actual dimensions of ¾ × 1½ inches or ¾ × 3½ inches. Measure your stock and test-fit the first pieces before cutting duplicates.
¾-inch plywood
| Part | Quantity | Cut size |
|---|---|---|
| Cabinet sides | 2 | 38 × 15½ in. |
| Top and bottom panels | 2 | 27 × 15½ in. |
| Fixed shelf | 1 | 27 × 15½ in. |
| Adjustable shelves | 2 | 26⅞ × 15¼ in. |
| Upper anti-tip cleat | 1 | 27 × 3 in. |
| Door blanks | 2 | 14⅞ × 37¾ in. |
| Door trim verticals, from offcuts | 4 | 33¾ × 1½ in. |
| Door trim rails, from offcuts | 4 | 13⅞ × 1½ in. |
The sides make the box 28½ inches wide. With true ¾-inch plywood, the top, bottom, and fixed shelf are each 27 inches wide. If your plywood is a different thickness, use this formula instead:
Inside width = 28½ inches − twice the actual side thickness.
The adjustable shelves are a little narrower than the cabinet opening so they can sit on shelf pins without binding. The 27 × 3-inch cleat fits inside the cabinet near the top and gives an anti-tip bracket a solid place to attach.
¼-inch plywood
| Part | Quantity | Cut size |
|---|---|---|
| Cabinet back | 1 | 28½ × 38 in. |
Pine boards
| Part | Quantity | Cut size |
|---|---|---|
| Face-frame stiles | 2 | 38 in. |
| Face-frame rails | 2 | 27 in. |
| Base front and back rails | 2 | 28½ in. |
| Base side rails | 2 | 14 in. |
The 14-inch side rails fit between the front and back rails. With ¾-inch stock, the assembled base will be 15½ inches deep.
Before the first cut
Take a moment to check the cupboard’s final location. Measure the available space, including baseboards, nearby doors, and any uneven flooring. The cabinet back adds ¼ inch to the box depth; the face frame and doors add another 1½ inches at the front. The pulls will extend beyond that.
Lay the cut list over the plywood before you begin. Mark each part clearly—left side, right side, top, bottom, shelf—and mark its front edge. Those labels seem small until two pieces look almost identical on the workbench.
Building the cupboard
1. Make the base
Set the two 28½-inch rails parallel to one another. Fit the two 14-inch rails between them to create a rectangle measuring 28½ × 15½ inches on the outside.
Join the corners with pocket-hole screws or another suitable method. Check that the frame is flat and square by measuring its diagonals. If they differ, ease the frame into alignment before tightening the joints.
2. Assemble the cabinet box
Place the cabinet sides on a flat surface. Fit a top panel between them at the upper ends and a bottom panel at the lower ends. Keep the front and back edges flush.
Apply glue to the joints and secure the panels with 1¼-inch pocket-hole screws. If you use a different joining method, select fasteners that won’t break through the plywood faces. Check the box diagonally before moving on. A little care here saves time when you fit the doors later.
3. Add the fixed shelf and cleat
On the inside of each side panel, mark a centerline 19 inches up from the cabinet body’s outside bottom edge. These marks should line up. Fit the fixed shelf between the sides on that line and secure it.
Place the 27 × 3-inch cleat between the sides near the top, with its rear edge flush with the cabinet’s rear edges. Secure it through the sides. The back panel will cover the cleat’s rear edge, leaving solid material behind it for an anti-tip bracket.
4. Square the box and fit the back
Lay the cabinet front-side down on a flat surface. Measure from corner to corner in both directions. Adjust the box until the diagonal measurements match.
Set the ¼-inch back panel over the rear edges. Check the diagonals once more, then fasten the panel around its perimeter and across the fixed shelf and upper cleat. The back helps keep the cabinet square; it shouldn’t have to pull a twisted box into shape.
5. Attach the base and face frame
Center the box on the base. From inside the cabinet, drive 2-inch screws through the bottom panel into the base rails. Keep the screws away from the edges.
Now assemble the face frame. Fit the two 27-inch rails between the two 38-inch stiles. The finished frame should measure 30 inches wide and 38 inches tall. Use glue and pocket-hole screws, then check it for square.
Center the frame on the cabinet front. It extends ¾ inch past each side of the 28½-inch box. Clamp it in place, align the top and bottom edges, and secure it with glue and suitable brads or screws.
6. Drill for shelf pins
Use a shelf-pin jig to drill matching rows of ¼-inch holes in both sides, above and below the fixed shelf. Keep each row parallel to the front edge and far enough back that the face frame won’t interfere.
Test the holes with shelf pins before fitting the adjustable shelves. Set one shelf in each section. If either shelf catches, check the pin rows and the shelf dimensions before forcing it into place.
7. Give the doors their farmhouse detail
Each door blank measures 14⅞ × 37¾ inches. Positioned on the 30 × 38-inch face frame, the pair leaves a ⅛-inch center gap, small side gaps, and ⅛ inch of clearance at the top and bottom.
Choose the hinges before drilling. Face-frame overlay hinges vary, so compare the hinge instructions with the door size and reveal. If your chosen hardware calls for different door clearances, adjust the blanks before applying the trim.
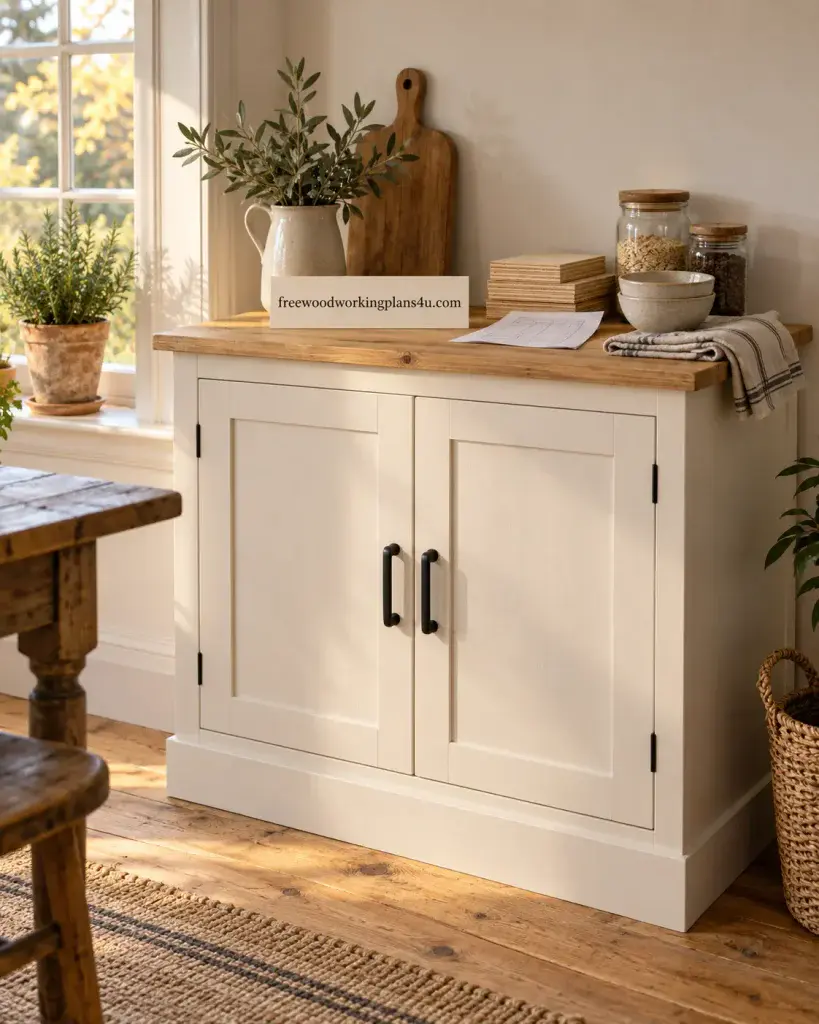
For the door detail, place a 33¾-inch vertical strip and a 13⅞-inch rail at the top and bottom of each door. Center the pieces on the door face so they leave a ½-inch margin all around. The vertical strips fit between the top and bottom rails. This creates a simple framed-panel look without routing grooves or building separate frame-and-panel doors.
Glue and pin the strips in place. Fill the exposed plywood edges before painting.
8. Hang the doors and add the pulls
Use temporary spacers to position the doors and keep their gaps even. Install three face-frame overlay hinges per door, following the hinge maker’s instructions and template. Test the doors before adding the pulls.
If they don’t sit evenly, adjust the hinges in small increments. If they bind, check that the cabinet is square and level before trimming any wood. A small correction to the cabinet’s position may be all that’s needed.
9. Sand, finish, and anchor it
Fill the visible holes and sand the cabinet, face frame, and door trim. Ease sharp corners lightly. Apply primer and paint, or another finish suited to the room, and follow the manufacturer’s drying and curing instructions.
The plywood cabinet and doors provide stable, broad panels. For the pine face frame, use dry, conditioned boards. Wood changes dimension as moisture conditions change; the USDA Forest Products Laboratory explains this movement in its Wood Handbook. www.fpl.fs.usda.gov
Once the cupboard is in place, level it with suitable shims if needed. Attach an anti-tip bracket through the upper cleat and into a wall stud, following the bracket instructions. The CPSC recommends anchoring furniture to help prevent tip-overs. www.cpsc.gov
A few snags worth avoiding
Cutting every matching piece at once
Cut and test-fit one side and one crosspiece first. If your plywood is thinner than nominal, adjust the remaining crosspieces before repeating the cut.
Trusting a box that only looks square
A cabinet can appear square and still be slightly out of alignment. Compare the diagonals before fastening the back, then check again before fitting the doors.
Drilling hinge holes before choosing the hardware
Overlay hinges don’t all mount in the same way. Pick your hinges first and size the door gaps to their instructions.
Rushing the finish
Paint and topcoats need time to dry and cure. Follow the product directions before installing hardware or loading the shelves, so the finish has a chance to harden properly.
Questions that come up during the build
Could I build this as my first cabinet?
Yes, if you’re comfortable measuring, drilling, clamping, and checking for square. The box uses rectangular plywood panels, and the applied door trim avoids the more demanding joinery required for traditional frame-and-panel doors.
Do I need a table saw?
No. A circular saw with a straightedge guide can handle the plywood cuts. Support the sheet fully and clamp the guide. If cutting large panels feels awkward, ask a lumberyard or home center to make the initial cuts.
Recommended guide: Woodworking Without a Table Saw: 9 Better Alternatives for Every Cut, Project, and Workshop
Can I make the cupboard wider or taller?
Yes, but recalculate the crosspieces and door sizes together. For a different box width, subtract twice the actual plywood thickness from the new outside width to size the top, bottom, and fixed shelf. Then check the face frame and door gaps before cutting.
Recommended guide: How to Modify Woodworking Plan Dimensions Safely: What You Can Resize, What Must Stay Fixed, and How to Rebuild the Cut List
Why does the plan use both a back panel and an upper cleat?
The back panel helps hold the cabinet square. The cleat gives an anti-tip bracket solid material to attach to. Fasten the bracket to a wall stud; don’t rely on the thin back panel alone.
What finish gives it a farmhouse look?
Paint works well with the plain framed doors and face frame. Light distressing can add a worn look, but test it on scrap first so you can see how the primer, paint, and topcoat behave together.
How much weight can the shelves carry?
That depends on the plywood, the shelf span, the support, and how the weight is distributed. Keep heavy items low, avoid overloading the shelves, and add support if you plan to store unusually heavy objects.
Products / Tools / Resources
Materials: ¾-inch cabinet-grade plywood for the box and doors, ¼-inch plywood for the back, pine 1×2 and 1×4 boards, shelf pins, overlay hinges, pulls, glue, and finish.
Tools: Circular saw with a straightedge guide or track saw, drill/driver, square, clamps, sander, and shelf-pin jig. A pocket-hole jig is useful but optional.
Resources: Use your hinge maker’s fitting template before drilling. For sheet goods, a panel-cutting service can make the first cuts easier to handle. For furniture anchoring, follow the bracket maker’s instructions and the CPSC’s furniture tip-over guidance.