
Storage trouble rarely arrives as one dramatic event. It gathers quietly.
Shoes form a small, stubborn hill by the front door. The kitchen counter becomes the place where mail, batteries, and unopened packets go to disappear.
A bedroom has plenty of floor space on paper, yet nowhere for spare bedding. In the garage, the tool you need is always behind three other tools.
That is where woodworking for homeowners who want to build practical storage becomes more than a weekend hobby. A well-designed shelf, bench, cabinet, or drawer does not merely hold things. It changes the way a room behaves.
This guide covers 21 practical woodworking storage projects for homeowners, from quick beginner builds to more ambitious cabinets and built-ins.
You will find ideas for every major room, advice on choosing the right first project, guidance on materials and tools, and the small design decisions that determine whether storage stays useful—or quietly becomes another place for clutter to collect.
Quick answer: Which practical storage project should you build first?
If you are new to woodworking, start with the repeated annoyance you can see every day. A wall-mounted shelf with hooks is a strong choice when small objects have no home. A shoe-storage bench works when the entryway is crowded.
A simple tool wall can change a garage almost overnight. The best first project is the one that offers a clear improvement without demanding more tools, time, or precision than you currently have.
| Project | Best for | Difficulty | Main benefit |
|---|---|---|---|
| Wall shelf with hooks | Entryways and kitchens | Beginner | Uses vertical space quickly |
| Shoe-storage bench | Entryways | Beginner | Combines seating and storage |
| Narrow console | Hallways | Beginner | Adds a useful surface without blocking traffic |
| Open kitchen shelves | Kitchens | Beginner | Makes everyday items easy to reach |
| Rolling storage cart | Kitchens, offices, workshops | Beginner | Adds flexible storage where needed |
| Utility shelf with hooks | Kitchens and laundry rooms | Beginner | Organizes narrow repeat-use items |
| Mudroom cubbies | Family entryways | Intermediate | Gives every person a defined place |
| Window-seat bench | Bedrooms and living rooms | Intermediate | Creates seating and concealed storage |
| Under-bed drawers | Bedrooms | Intermediate | Uses space that is normally wasted |
| Closet organizer | Bedrooms and hallways | Intermediate | Improves visibility and capacity |
| Pull-out pantry | Kitchens | Intermediate | Turns a narrow gap into useful storage |
| Between-stud cabinet | Bathrooms and hallways | Intermediate | Creates shallow hidden storage |
| Toe-kick drawers | Kitchens | Intermediate | Uses low space that is usually ignored |
| French-cleat tool wall | Garages and workshops | Intermediate | Keeps tools visible and movable |
| Rolling tool cart | Workshops | Intermediate | Brings tools to the work area |
| Fold-down workbench | Small garages and utility rooms | Intermediate | Provides a work surface without permanent floor space |
| Garage utility cabinet | Garages and laundry rooms | Intermediate | Controls dust and visual clutter |
| Lumber rack | Workshops and garages | Intermediate | Stores long material safely |
| Under-stair cabinet | Hallways and living areas | Advanced | Converts irregular space into storage |
| Platform bed with drawers | Bedrooms | Advanced | Combines furniture and high-capacity storage |
| Modular cabinet system | Any room | Advanced | Expands as household needs change |
The table is a starting point, not a test. You do not have to begin with the easiest project if another one is clearly more valuable. You simply want the first build to teach you something and reward you quickly enough that you want to make the next one.
The real test of practical storage is what happens on an ordinary day
Good storage is easy to use when you are tired, carrying groceries, leaving for work, or trying to tidy a room in five minutes. It does not depend on a perfect household routine. It quietly supports the routine you already have.
Practical storage begins with a real household friction point
The most useful projects usually start with an honest sentence:
- “We need somewhere to sit while putting on shoes.”
- “The pantry has a narrow gap beside the refrigerator.”
- “The tools are spread across three boxes.”
- “The children cannot reach the storage we already have.”
- “There is no room for another cabinet in the bedroom.”
That sentence is more valuable than a beautiful picture of a piece of furniture. It tells you what the project has to accomplish. It also protects you from building something impressive that does not improve the room.
The right depth can make a room feel larger
Depth is easy to overlook because width and height are more visible in a sketch. Yet an extra few inches can change a comfortable hallway into an obstacle course. A shallow shelf may be perfect for keys, books, spices, or folded towels. A deeper cabinet may be necessary for appliances, boots, bedding, or power tools.
Measure the largest object that must fit, then leave enough clearance to remove it without scraping your knuckles or emptying the shelf first. More capacity is not always better. Storage that is too deep can hide objects and invite a second, forgotten layer behind the first.
Strength and access belong in the design from the beginning
A shelf for postcards and a shelf for cast-iron cookware may look similar on paper. They are not the same project. Load, span, fasteners, wall structure, drawer hardware, and balance all matter.
If the project touches structural framing, electrical wiring, plumbing, heat sources, or a damp area, stop and investigate before cutting or fastening. A practical build should remove a problem from the room, not trade it for a more expensive one.
Before choosing a project, notice where the clutter keeps landing
The room often tells you what to build before you do. Watch what happens for a day or two. Which objects are repeatedly placed on the nearest flat surface? Which things are moved out of the way every evening? What do people carry from room to room because there is no convenient place to leave it?
Start with the room that causes the most friction
Clutter near the front door points toward a bench, console, cubby, or hook rail. A crowded counter may need a rolling cart, wall shelf, or pull-out pantry. A garage floor covered with equipment may need a French-cleat wall, lumber rack, or rolling tool cart.
The location is a clue. Follow it before looking at plans.
Match the project to your current skill level
Beginner-friendly storage often relies on straight cuts, screws, glue, brackets, and predictable materials. Intermediate work adds drawers, doors, adjustable shelves, edge treatment, and wall-mounted systems. Advanced projects bring in built-ins, changing angles, large assemblies, or several types of hardware.
There is no prize for starting with the project most likely to stall in the middle. A shelf or bench can teach you accurate measuring, square assembly, sanding, and finishing—the same fundamentals a large cabinet needs, with less material and emotional risk.
Be honest about the time you have
A project that fits one focused afternoon is often more valuable than an ambitious build that occupies the corner of the garage for a season. Break the work into measuring, planning, buying, cutting, assembling, finishing, and installing. If your available time comes in short bursts, choose a design that can pause neatly between those stages.
Let your tools shape the method, not the ambition
You can build useful home storage with a drill, measuring tape, combination square, clamps, level, sander, and suitable saw. A table saw, router, pocket-hole jig, or track saw can make the work faster, but precision still begins with measuring and marking.
If you do not have a way to cut large panels accurately, have the supplier make the first cuts. That is not cheating. It is a sensible way to get a square cabinet without buying an entire workshop before you know how much woodworking you will do.
21 practical woodworking storage projects for homeowners
The projects below follow the problems they solve rather than a single style. Some are small enough for a first weekend. Others deserve a careful drawing, a material list, and a little patience. All of them can be adapted to the dimensions and character of your home.
1. Wall-mounted shelf with hooks
Best for: entryways, kitchens, bathrooms, and home offices
There is a particular kind of clutter that appears when small objects have nowhere obvious to land. Keys, bags, mail, headphones, brushes, and bottles drift toward the nearest counter. A wall-mounted shelf with hooks gives those objects a place without asking the floor to surrender another few inches.
Build it as a simple board with a back rail or side supports. The rail helps position the shelf and gives you a more substantial surface for fastening. Keep the depth modest in an entryway so coats and bags do not push into the walking path. In a kitchen, set the height around the things you reach for most.
The result is modest but surprisingly powerful. The room feels quieter because the loose objects are no longer negotiating for space.
Helpful guide: 3 Woodworking Plans for a Microwave Shelf: Countertop, Wall-Mounted, and Storage Stand Options
2. Shoe-storage bench
Best for: entryways and family homes
The shoe-storage bench earns its keep twice. It gives people somewhere to sit, and it gives shoes a boundary.
The simplest version is a strong top, two side panels, and an open compartment below for shoes or baskets. You can add dividers, drawers, doors, or a row of hooks above it later. Measure the shoes that actually live in your home, including boots if they are common. Leave enough depth to store them without turning the doorway into a bottleneck.
Softened front edges make the bench more comfortable in a busy passage. A seat height that feels natural matters too; this is furniture people will use with their whole body, not merely look at.
The first time someone sits down to put on shoes instead of balancing against the wall, the project explains itself.
Recommended guide: Free Woodworking Plans for a Shoe Storage Bench: 3 Stylish Designs With Open Cubbies, Hidden Storage, and a Comfortable Seat
3. Narrow entryway console
Best for: hallways, apartments, and small entrances
A narrow console creates a landing place for keys, wallets, mail, and the objects that tend to leave the house with you. Add a lower shelf for baskets or a shallow drawer for the things you would rather not see.
Restraint is the whole game. A console that is too deep makes a hallway uncomfortable. One that is too narrow may look elegant while failing to hold the clutter that caused the problem. Use painter’s tape on the floor to test the footprint before buying wood. Walk past it. Carry something past it. Open the nearby door.
For a built-in feel, relate the console to the trim or finish already in the room. It does not need to match everything. It needs to look as though it belongs there.
Recommended reading: Free Woodworking Plans for a Narrow Entryway Bench: 3 Custom-Fit Designs for Small Hallways
4. Open kitchen shelves
Best for: kitchens, dining areas, and coffee stations
Open shelves can make a kitchen feel lighter, but their real strength is speed. Mugs, plates, jars, and cooking ingredients are visible before you open a door.
Design the shelves around the load. Dishes and cookware are heavier than decorations, so thickness and support spacing matter. Use a finish suited to the room, protect the surface from moisture, and avoid placing shelves where steam and grease will turn every object into a maintenance project.
There is a small bargain hidden in open storage: you gain access, but you also agree to be selective. The shelf works best when it holds the things you use or genuinely enjoy seeing—not every object that needs somewhere to go.
5. Rolling storage cart
Best for: kitchens, home offices, craft rooms, and workshops
A rolling cart changes the question from “Where can I store this?” to “Where will I use this?” Pantry supplies, printer paper, craft materials, cleaning products, and hand tools can move with the task.
Build the cart around its contents. Shallow shelves make small items visible. Deeper shelves hold containers and appliances. A raised lip keeps things from sliding during movement, while locking casters let the cart become still when it arrives at the work area.
A cart is also a useful experiment. It lets you try a storage arrangement before committing to a fixed cabinet. If the arrangement works, the cart can remain mobile—or become the prototype for something more permanent.
6. Wall-mounted kitchen or utility shelf
Best for: small kitchens, laundry rooms, and cleaning stations
This is the shelf for narrow, repeat-use objects: cleaning bottles, brushes, jars, small appliances, folded cloths, or coffee supplies. A rail, dowel, or row of hooks underneath adds capacity without making the shelf deeper.
Give the shelf a job. A coffee station should not gradually become a battery station, mail station, and collection point for loose screws. When related objects stay together, the storage remains easier to maintain because the next action is obvious.
Choose moisture-resistant materials or a durable finish in laundry and utility rooms. Keep the shelf clear of valves, outlets, vents, and appliance access.
7. Mudroom cubby organizer
Best for: families, shared entryways, and busy households
Cubbies work because they create boundaries. Each person, activity, or category gets a place: shoes below, bags at hand, hats above, sports equipment in a larger compartment.
Start with the objects, not a standard cubby diagram. A child’s section may need to sit lower. Boots may need more height than shoes. Baskets can soften the visual noise, while open compartments make daily items easier to put away.
Tall units need secure anchoring. If the wall allows it, add a seat or a top shelf, but do not let the extra features make the organizer difficult to use. The best family storage is storage that every family member can reach without asking for help.
8. Window-seat storage bench
Best for: bedrooms, living rooms, reading corners, and children’s rooms
An empty strip beneath a window can become a place to read, sit, nap, and hide blankets or toys. The storage may use a lift-up lid, drawers, removable baskets, or hinged compartments.
Measure the window, trim, heating elements, and surrounding wall before drawing the bench. A radiator or register must continue to breathe. A hinged lid needs room to open without hitting the window or the furniture beside it.
Design the woodwork before choosing the cushion. A cushion should fit the finished opening; otherwise a soft furnishing can quietly dictate the whole structure.
This project changes the emotional temperature of a room. A forgotten strip beside the window becomes somewhere people want to be.
9. Under-bed storage drawers
Best for: bedrooms, guest rooms, and small homes
The space beneath a bed is often full of boxes no one wants to pull out. Purpose-built drawers make the same space legible and reachable.
Measure the clear height beneath the bed, including floor irregularities and center supports. Use sturdy bottoms and reliable casters or drawer hardware. Keep the drawers low enough to pull out without catching on the frame, and decide which categories deserve the easiest access.
Labels help more than people expect. Hidden storage is only useful when you can remember what is inside. Bedding, winter clothes, shoes, and toys each deserve a clear home rather than one large mystery drawer.
10. Closet organizer
Best for: bedrooms, linen closets, and hallways
A closet organizer can add capacity without changing the room’s footprint. Combine hanging space, shelves, drawers, and open compartments according to the way the closet is actually used.
Empty the closet before measuring. Group what remains by function. Measure the width at several points because walls are not always square, then note the door swing, trim, baseboards, vents, and existing shelves that must remain.
The most useful organizer is not the one with the most compartments. It is the one that makes the usual action—hanging, folding, reaching, or putting away—feel effortless enough to repeat.
11. Pull-out pantry
Best for: narrow gaps beside cabinets or appliances
The narrow gap beside a cabinet often looks too small to matter. A pull-out pantry proves otherwise. It can hold bottles, cans, spices, baking supplies, or cleaning products in a tall column that slides into view.
The hardware is the heart of this project. The frame must remain square, the slides must support the loaded weight, and the finished unit must clear nearby doors and handles. Measure the gap at the top, middle, and bottom; narrow spaces are not always the same width from floor to ceiling.
For very narrow openings, a purpose-built slide system may be safer and more predictable than improvised hardware. The wooden cabinet can still be custom-made around it.
12. Between-stud cabinet
Best for: bathrooms, hallways, bedrooms, and shallow storage
Between-stud storage disappears into the wall and gives shallow objects a home without taking space from the room. It can hold toiletries, medicine, books, small tools, or household supplies.
This is not the place to guess. Confirm the wall cavity, plumbing, wiring, insulation, and structural conditions before opening the wall. In bathrooms, choose materials and finishes that can tolerate moisture and protect the contents.
The cabinet should stay as shallow as the objects require. A recess is not automatically better if it becomes a deep box that is difficult to reach.
13. Toe-kick drawers
Best for: kitchens, bathrooms, and built-in cabinets
The low strip beneath a cabinet is easy to ignore because it is already visually quiet. Toe-kick drawers turn it into a place for baking trays, cutting boards, placemats, pet supplies, or cleaning tools.
Space is tight, so measure twice and choose hardware that fits the available height. The drawer front should align with neighboring cabinet lines, and the drawer must clear flooring, leveling feet, and adjacent units.
It is a small improvement with an unusually satisfying finish. When the drawer closes flush, the kitchen seems to have gained intelligence without gaining bulk.
14. French-cleat tool wall
Best for: garages, workshops, and craft rooms
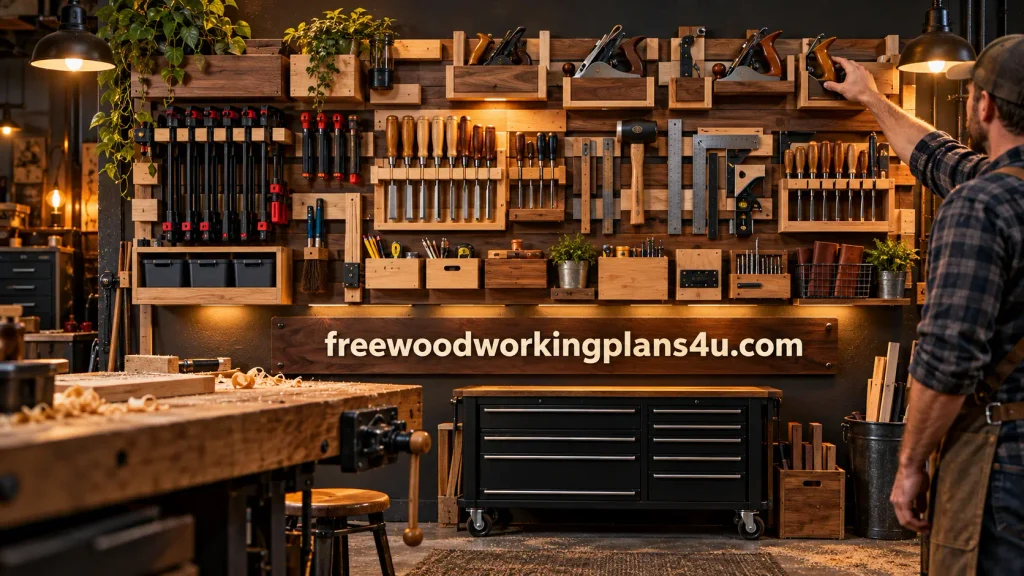
A French-cleat wall turns a blank wall into a storage system that can change with you. Boxes, shelves, tool holders, and cabinets hang from angled mounting strips and can be moved when your projects change.
Do not mount everything wherever there happens to be room. Plan the wall as a working landscape. Keep frequently used tools between shoulder and waist height, heavy items low, and the easiest positions for the tools you reach for constantly.
Build a few modules first. Live with them. You will learn more from a week of using the wall than from trying to design the final arrangement in one sitting.
15. Rolling tool cart
Best for: workshops, garages, and shared work areas
A rolling tool cart reduces the small, draining walks that interrupt a project. It can hold hand tools, clamps, fasteners, sanding supplies, or a portable power-tool setup and bring them close to the work.
Organize it around workflow. Measuring and marking tools belong where they can be seen. Heavy equipment belongs low. Shallow trays are better for small hardware than one deep drawer where everything disappears.
Add a handle or protected edge, choose casters for the fully loaded weight, and test the cart before trusting it beside a moving saw or workpiece. Mobility is useful only when the cart remains stable and easy to control.
Recommended reading: Heavy-Duty Free Woodworking Plans for a Rolling Tool Cart: Build a Stable, Lockable Mobile Cabinet for Power Tools
16. Fold-down workbench with storage
Best for: small garages, balconies, utility rooms, and compact workshops
A fold-down workbench lets a small space become a workshop for an hour, then become a passage, vehicle bay, or utility area again. Shallow storage above or behind it can hold clamps, hand tools, and frequently used materials.
The wall attachment and folding hardware must handle the real forces created by sanding, drilling, and assembling—not just the weight of the tabletop. The support mechanism should lock securely in both positions.
Measure the surrounding clearance as carefully as the bench itself. A workbench that folds down but blocks a doorway, vehicle, appliance, or emergency route has only moved the problem.
Recommended guide: Free Woodworking Plans for a Folding Workbench: Build a Sturdy Space-Saving Bench With a Printable Cut List
17. Garage utility cabinet
Best for: garages, laundry rooms, and cleaning supplies
Some storage earns its value by becoming invisible. A utility cabinet can hide bottles, tools, rags, and awkward supplies while keeping them out of dust and away from the floor.
Adjustable shelves make the cabinet easier to live with because the interior can change. Use durable materials and a finish suitable for the environment. Keep chemicals, sharp tools, and heavy items organized safely, especially where children or pets may enter.
Consider a narrow side compartment for brooms, mops, or long-handled tools. A cabinet designed around actual equipment can replace several unstable piles at once.
18. Lumber rack
Best for: workshops and garages
A lumber rack is not glamorous, but it improves every project that follows. Boards, dowels, trim, and sheet material stay off the floor, visible, and less likely to be damaged.
Design for the length and weight of the material. Long boards create leverage, so wall attachment and support spacing matter. Keep heavy stock low, prevent pieces from sliding forward, and leave enough room to remove one board without unloading the entire rack.
Good material storage changes the workshop’s mood. You can see what you own. You stop buying the same board twice. Starting the next project takes less effort.
19. Under-stair cabinet storage
Best for: hallways, entryways, and homes with unused stair space
The space beneath stairs rarely offers one clean rectangle. That is precisely why it is valuable. Low sections can hold drawers or pull-out bins, while taller sections can store coats, sports equipment, books, or long objects.
Break the area into zones instead of forcing one cabinet shape into an uneven space. Keep access to building services, and confirm that the work does not interfere with the stair structure.
This is an advanced project because every wall, angle, and trim line may differ. Make templates before committing expensive material. A piece of cardboard can reveal a bad assumption much more cheaply than a sheet of plywood.
20. Platform bed with drawers
Best for: bedrooms, guest rooms, and small homes
A platform bed with drawers makes one of the largest objects in a bedroom do more work. The drawers can hold clothing, bedding, shoes, luggage, or seasonal items without adding another visible cabinet.
The structure must be strong, square, and well-supported. Plan mattress height, center support, drawer clearance, ventilation, and access from both sides of the bed. Use reliable drawer hardware or carefully designed rolling bases, and consider how the finished unit will be moved or serviced.
Because this project combines furniture construction and storage design, it is best attempted after you have built smaller boxes, drawers, or cabinets. The reward is considerable: more capacity, no additional footprint.
Recommended reading: 3 Full Size Bed Woodworking Plans: Simple Platform, Storage and Farmhouse Designs
21. Modular storage cabinet system
Best for: homeowners who want storage that can grow over time
Modular storage is a quiet promise to your future self. Instead of betting everything on one large built-in, you create repeatable boxes or frames that can be stacked, joined, moved, and adapted.
The crucial decision is the module size. Keep widths and depths consistent so later additions look deliberate rather than improvised. Use adjustable shelves and interchangeable fronts wherever practical.
Start with one unit and let it teach you. Notice how light falls on it, how far you reach, which objects migrate, and whether the proportions feel right. A modular system protects your budget because the next decision is informed by the first one.
Materials and tools for practical storage woodworking
You do not need a workshop that looks like a magazine spread. You need a small set of tools that help you measure, hold, cut, join, and finish accurately.
Essential tools
- A measuring tape you trust and a reliable combination square
- A pencil, marking knife, or another clear marking method
- A drill and suitable driver bits
- Clamps for keeping parts still while you work
- A level and stud finder for wall-mounted projects
- A saw appropriate to your material and workspace
- A sanding block or power sander
- Safety glasses, hearing protection, and sensible dust control
Useful upgrades
A track saw, table saw, pocket-hole jig, router, brad nailer, or larger workbench can make storage construction faster and cleaner. None of them can rescue a measurement that was wrong from the start. The best upgrade is often the one that makes accurate work easier, not the one with the most impressive name.
Choosing wood and sheet goods
Plywood is a practical choice for cabinets, drawers, shelves, and modular boxes because it comes in broad panels and holds predictable dimensions. Solid wood brings warmth and can be beautiful on visible edges, but it moves with changes in moisture and may ask more of your joinery and finishing.
Pine and other softwoods are accessible for many beginner projects. Hardwoods make sense where appearance, wear resistance, or an exposed edge matters. Choose according to the job: a garage cabinet may need durability first, while a living-room shelf may need a finish that feels good every time you see it.
Edge banding, trim, paint, stain, and clear finishes can change the character of economical material without changing the underlying structure.
How to estimate project cost without underestimating it
The boards are only the beginning. Include fasteners, brackets, drawer slides, hinges, casters, handles, finish, sandpaper, replacement blades, and any delivery or cutting charges. Hardware can quietly become the most expensive part of a small project.
Low-cost projects
Shelves, simple benches, hook rails, and small rolling carts can often be built from a limited amount of material. They are useful when you want a visible improvement without making a large purchase.
Moderate projects
Cubbies, closet organizers, tool walls, cabinets, and under-bed drawers need more material and more hardware. Their value comes from solving a larger problem, so accurate measuring matters before you buy anything.
Higher-investment projects
Built-ins, platform beds, pull-out pantries, and under-stair cabinets may require expensive hardware, templates, finishing, and installation time. Build a small prototype or one module first whenever you can. It is much easier to change a small box than an entire wall.
A reliable build sequence for any storage project
1. Write the storage brief before you draw the furniture
Record the room, the objects, how often they are used, the available space, the desired appearance, and the restrictions. A short brief keeps the design connected to real life when attractive ideas begin pulling it elsewhere.
2. Measure more than once
Measure width, height, depth, trim, floor level, wall irregularities, doors, vents, and nearby furniture. For narrow gaps, measure at several points. Draw the space before you draw the cabinet.
3. Create a cut list that another person could understand
List each part, its finished dimensions, material thickness, quantity, and grain or face direction where relevant. A clear cut list reduces waste and makes it easier to stop for the evening without losing your place.
4. Cut and label every part
When several pieces look alike, a small pencil mark saves a surprising amount of time. Keep the cut edges organized and check critical dimensions before moving on to the next part.
5. Dry-fit before final assembly
Bring the main parts together without glue or permanent fastening when possible. Check the room, the doors, the drawers, the walking clearance, and the square of the unit. This is where an idea becomes honest.
6. Assemble square and reinforce appropriately
Use a square, clamps, glue, screws, dowels, biscuits, or another suitable method. The strongest joint is not automatically the right joint if it makes the project unnecessarily difficult. A simple joint assembled accurately is a very respectable piece of woodworking.
7. Sand and finish for the environment
Ease sharp edges and prepare the surface for paint, oil, stain, or clear finish. Kitchens, bathrooms, laundry rooms, and utility areas may need more protection than a dry bedroom.
Learn more: Woodworking Finishing Supplies for Beginners: 17 Essentials for a Smooth, Durable Finish
8. Anchor, load, and test
Secure wall-mounted and tall units appropriately. Add the intended contents gradually. Open the doors, pull the drawers, move the cart, sit on the bench, and look for movement before the project becomes part of daily life.
Common mistakes homeowners should avoid
Building before measuring the objects
Storage dimensions should come from the items being stored and the space available. A standard online plan may need adjustment for your containers, footwear, appliances, tools, or bedding.
Making every shelf the same depth
Uniform dimensions are convenient to build, but objects rarely arrive in one convenient size. A mix of shallow and deep sections can use a room more intelligently.
Ignoring future access
Leave room to remove a basket, open a drawer, lift a lid, or reach a valve. Storage that technically fits but cannot be used comfortably will become clutter again.
Hoping the finish will hide poor assembly
Paint and stain can make a good build beautiful. They cannot make an out-of-square cabinet square or a weak shelf strong. Spend the care on measuring and assembly first.
Forgetting how the piece enters the room
Large cabinets may not pass through doors, stairwells, or tight turns when fully assembled. Design large projects in modules when possible.
Treating anchoring as an optional detail
Tall, heavy, or wall-mounted storage should be secured according to the wall and load. Stability belongs in the design, not in the hopeful final minutes of installation.
How to make DIY storage look intentional
Practical does not have to look temporary. A few quiet design decisions can make basic storage feel as though it has always belonged in the room.
Repeat proportions
Related shelf thicknesses, reveal sizes, trim widths, or module dimensions make separate pieces feel like one system.
Limit the finish palette
One or two finishes are usually easier to live with than a different treatment for every project. Match existing trim, repeat a stain tone, or use one paint color across connected storage.
Use hardware consistently
Handles, hooks, hinges, and drawer pulls support the visual language of the room. They are small, but inconsistent hardware can make a storage wall feel accidental.
Design for maintenance
Leave removable backs, accessible fasteners, adjustable shelves, or replaceable baskets where practical. Storage that can be repaired or reconfigured is more likely to remain useful when the household changes.
Frequently asked questions about woodworking storage
What is the easiest woodworking storage project for a beginner?
If you are still finding your way around a saw and a square, start with a simple wall-mounted shelf, narrow console, or basic shoe bench. These projects use relatively few parts and offer immediate daily value. Straight cuts and simple assembly are more important than an impressive design.
Is it cheaper to build storage than buy it?
Sometimes. Building can make financial sense when the space is unusual or you already own the tools. Compare the complete cost, though: hardware, finish, time, and mistakes all count. The strongest reason to build is often a better fit and a more useful result—not merely the lowest price.
What wood is best for practical storage?
Plywood is versatile for cabinets, shelves, drawers, and modular units. Softwood is approachable for many beginner projects, while hardwood can offer a more refined appearance and greater wear resistance. Choose according to the load, moisture, finish, budget, and how visible the finished surfaces will be.
How deep should a storage shelf be?
Deep enough for the intended objects and comfortable clearance, but not so deep that things vanish behind one another or the room feels crowded. Measure the largest item first. Frequently used objects usually benefit from shallower shelves because visibility and reach matter more than maximum capacity.
How do I stop wooden shelves from sagging?
Reduce the unsupported span, increase material thickness, add a front edge or supporting divider, and distribute heavy objects sensibly. Shelf strength depends on material, span, thickness, support, and load. A center support is often a simpler, safer answer than asking one long shelf to do everything.
Can I build storage without a table saw?
Yes. A circular saw, jigsaw, handsaw, or accurately cut panels from a supplier can handle many projects. Safe cutting, a straight guide where needed, accurate marking, and careful checking before assembly matter more than owning one particular machine.
Recommended reading: Woodworking Without a Table Saw: 9 Better Alternatives for Every Cut, Project, and Workshop
How do I anchor a tall storage unit?
Use an anchoring method suited to the wall material and the unit’s load. Locate framing where possible, use appropriate hardware, and follow the instructions for the fastener. If the wall may contain wiring, plumbing, or unusual construction, investigate before drilling.
Should I build a cabinet or use open shelves?
Choose open shelves when visibility and quick access matter most. Choose cabinets when you want to control dust, conceal visual clutter, or protect the contents. Many homes benefit from both: open storage for daily objects and closed storage for everything less attractive or less frequently used.
What is the best storage project for a small home?
Look for space that is currently wasted without blocking movement. Strong candidates include vertical shelves, under-bed drawers, pull-out pantry units, window-seat benches, fold-down workbenches, between-stud cabinets, and modular storage that can change as the household changes.
Products / Tools / Resources
You do not need to buy everything at once. A thoughtful starter kit is more useful than a crowded workshop full of tools you have not learned to trust.
Tools worth having first
- A dependable tape measure and combination square: Accurate storage begins with accurate marks.
- A cordless drill/driver: Useful for pilot holes, screws, hardware, and almost every project in this guide.
- A small set of clamps: Even inexpensive clamps make assembly calmer and more accurate.
- A circular saw with a straightedge guide: A practical way to break down plywood when a table saw is not available.
- A random-orbit sander or sanding block: Smooth edges make storage safer to touch and easier to finish.
- A level and stud finder: Essential for shelves, cabinets, tool walls, and anything that must meet a wall.
- Safety glasses, hearing protection, and dust control: The least exciting items in the workshop are often the ones you are most grateful to have.
Hardware that changes what storage can do
- Shelf brackets and structural screws for strong wall-mounted shelves
- Drawer slides for closets, cabinets, pull-out pantries, and toe-kick drawers
- Locking casters for carts and mobile workstations
- Hinges, catches, and handles for cabinets, benches, and lift-top storage
- Wall anchors suited to the wall type for safe installation
- Edge banding, trim, and durable finishes for a cleaner appearance and longer service
Materials to keep in mind
Cabinet-grade plywood is a flexible starting point for boxes, shelves, drawers, and modular units. Solid wood is useful for visible edges, trim, and furniture details. Baskets and labeled bins can make open compartments easier to maintain, especially in entryways, bedrooms, and family storage.
Helpful resources to build around this guide
- A beginner’s woodworking tool guide
- A storage-measurement checklist
- A shelf-span and sagging reference
- Shoe-storage bench plans
- Pull-out pantry cabinet plans
- French-cleat storage wall plans
- Fold-down workbench plans
- Between-stud storage planning and safety guidance
- Basic woodworking safety instructions
The most useful resource is the one that answers the question waiting for you at the workbench: how to measure this space, how to support that load, or how to make the next cut with confidence.