
The first time you look inside a serious woodworking shop, it can feel like entering another world.
There are machines you have never used, walls covered with clamps, rows of chisels, neatly stacked lumber, dust collection hoses, and benches that look as though they were built to last for generations.
It is easy to assume that woodworking begins with a large financial commitment.
It does not.
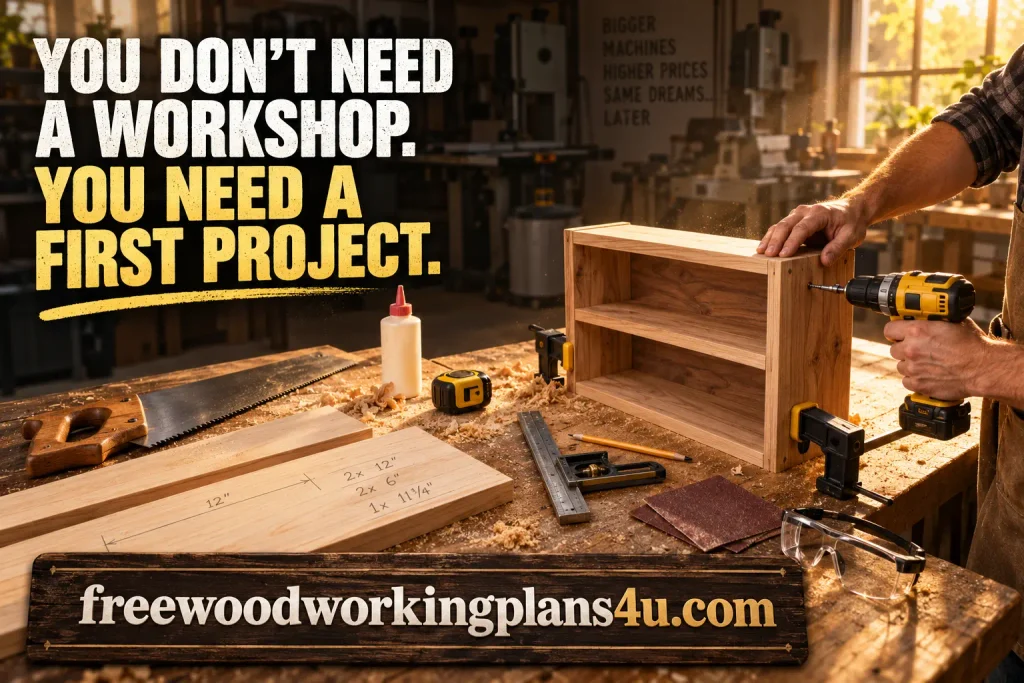
You do not need to build a complete workshop before you build your first project.
You need a safe way to measure, cut, join, and finish something simple enough to match your current skills.
You can start woodworking for approximately $100–$250 with a project-first setup, borrowed equipment, or carefully chosen used tools. A practical beginner setup often costs $300–$700. A capable home setup may cost $800–$1,500, while a dedicated workshop can exceed $2,000.
These are planning ranges in U.S. dollars, not fixed price quotes. Costs vary according to your location, the tools you already own, the kind of wood you use, the size of your first project, and whether you buy new, used, borrowed, or rented equipment.
Part 1 — How Much Does It Cost to Start Woodworking?
The honest answer is that starting woodworking can cost anywhere from about $100 to several thousand dollars.
The wide range exists because “starting woodworking” can mean two very different things:
- Buying enough tools to complete one small project
- Building a permanent workshop capable of handling almost anything
Those are not the same investment.
A person who already owns a drill, tape measure, screwdriver, and sturdy table may need only a few additional items. Someone beginning with no tools, no workspace, and plans to build large furniture will need a much larger budget.
A simple way to think about the cost is:
Woodworking startup cost = essential tools + safety equipment + work surface + first-project materials + contingency
A lean beginner may spend roughly:
| Starting approach | Approximate budget |
|---|---|
| Borrowed or mostly existing tools | $100–$250 |
| Practical beginner setup | $300–$700 |
| Capable home workshop | $800–$1,500 |
| Dedicated workshop | $2,000–$5,000+ |
The most important number is not the amount you can spend.
It is the amount you can spend without buying equipment that will sit unused.
Part 2 — Why Woodworking Startup Cost Is Not One Universal Number
Two people can begin woodworking in the same month and spend completely different amounts.
One may build a small shelf in an apartment using a handsaw and folding table. Another may begin with a garage, power tools, hardwood lumber, and plans for a dining table.
Both are starting woodworking. Their budgets simply belong to different realities.
Your first project determines your first tools
A small box may require:
- Accurate measuring
- Simple cuts
- Drilling
- Glue
- A few clamps
- Sanding
A cabinet may require:
- More precise layout
- Larger cutting capacity
- Additional clamps
- More sanding
- Hinges or drawer hardware
- A larger assembly area
- More finishing supplies
The project creates the operations. The operations determine the tools.
That is why general advice such as “buy every essential woodworking tool” can become expensive very quickly. A tool may be essential for one type of woodworking and completely unnecessary for another.
Recommended reading: Woodworking Equipment for Beginners: Choose Your First Project, Then Buy These Tools
What you already own changes the starting line
Look around your home before shopping.
You may already have:
- A tape measure
- A pencil
- A screwdriver
- A drill
- A level
- A utility knife
- Sandpaper
- A sturdy table
- Sawhorses
- A vacuum
- Storage containers
These items may not form a complete workshop, but they can lower your first-project cost considerably.
The smartest beginner does not ask, “What does a woodworker own?”
The better question is, “What does this project require, and which of those requirements have already been solved?”
The workspace can be temporary or permanent
You might work in:
- A garage
- A basement
- A spare room
- A patio
- A balcony
- A shared workshop
- A makerspace
- A temporary setup using sawhorses
A permanent workshop usually costs more because it requires storage, lighting, dust control, electrical access, and a dedicated workbench.
A temporary setup costs less, but it may demand more effort each time you begin and finish a project.
Lumber prices can change the entire budget
A project made from construction pine will usually have a different material cost from one made from walnut, maple, oak, or another premium hardwood.
Plywood, reclaimed lumber, sheet goods, and specialty boards all bring their own price considerations.
The cut list matters, too. Buying lumber without knowing the required dimensions often leads to waste, wrong-sized boards, and extra trips to the store.
Recommended reading: How to Estimate Lumber From Woodworking Plans When There Is No Cut List: Reverse-Engineer Any Project With Confidence
New, used, borrowed, and rented tools create different economics
A new tool is convenient and often comes with a warranty.
A used tool may cost less but require inspection, cleaning, calibration, or replacement parts.
Borrowing lowers the upfront cost but depends on availability. Renting can make sense when a specialized tool is needed for one project but would otherwise spend most of its life in storage.
There is no single best purchasing method. The right choice depends on frequency of use, safety, storage, and how important the tool is to your current project.
Learn more: What Woodworking Tools Can You Buy for $250, $500, or $1,000? Three Complete Beginner Setups
Part 3 — Four Realistic Beginner Woodworking Budgets
The following budget levels are designed to help you picture what each stage can realistically provide.
The project-first setup: approximately $100–$250
This is the leanest practical route.
It works best when you:
- Choose a small project
- Already own some household tools
- Borrow a drill or saw
- Purchase selected tools used
- Use an existing table or inexpensive work surface
- Buy only the lumber required for the first build
This budget may be enough for a small box, planter, shelf, sign, organizer, or similar project.
The limitation is not necessarily the quality of the result. The limitation is the number of different projects you can tackle immediately.
The practical beginner setup: approximately $300–$700
This is often the most comfortable entry point for someone who wants to keep woodworking as a regular hobby.
It may include:
- Measuring and marking tools
- A drill or drill/driver
- One suitable cutting tool
- Sanding equipment or supplies
- Several clamps
- Basic safety equipment
- A simple workbench or work surface
- Lumber, hardware, glue, and finish
This setup offers enough flexibility to build shelves, planters, boxes, organizers, simple benches, and small furniture.
It still requires restraint. A $700 budget can disappear quickly if every interesting tool finds its way into the shopping cart.
The capable home setup: approximately $800–$1,500
At this level, woodworking becomes more convenient and less improvised.
You may be able to add:
- Better-quality core tools
- A sturdier workbench
- More clamps
- Improved storage
- Better lighting
- Dust collection
- Additional layout tools
- More capable sanding equipment
- Materials for several projects
This is where many people begin to feel that they have a real workshop, even if the space is still modest.
The best purchases at this stage are the ones that remove repeated frustrations: unstable workholding, poor dust control, slow sanding, inadequate storage, or inaccurate layout.
The dedicated workshop: approximately $2,000–$5,000 or more
A dedicated workshop can become a major long-term project in its own right.
Potential costs include:
- Stationary machinery
- A permanent workbench
- Dust collection
- Lumber storage
- Tool cabinets
- Electrical improvements
- Lighting
- Ventilation
- Heating
- Jigs and fixtures
- Maintenance supplies
- Safety equipment
A dedicated workshop may be deeply satisfying, but it is usually better built gradually.
After several projects, you will know which tools you use, which operations slow you down, and which upgrades genuinely improve your work.
Part 4 — How Much Do Beginner Woodworking Tools Cost?
Tool prices vary by brand, quality, power source, and location. For a beginner, capability matters more than owning the most recognizable name.
Measuring and marking tools
Accurate work starts long before the blade touches the wood.
A basic layout kit may include:
- Tape measure
- Combination square
- Straightedge
- Pencil
- Marking tool
- Level
- Fine marking knife for more precise work
A reasonable planning range is $20–$75.
A trustworthy square is particularly important. If your layout is inaccurate, an expensive saw will not rescue the project.
Cutting tools
You do not need every type of saw.
Choose a cutting method that fits your first projects:
- Handsaw
- Circular saw
- Jigsaw
- Pull saw
- Coping saw
- Miter box and handsaw
A planning range of $20–$200 covers many beginner possibilities, depending on whether you choose hand tools, powered equipment, used tools, or new tools with accessories.
The right starting saw is the one that can perform the cuts your plan actually requires.
Drilling and fastening tools
A drill or drill/driver can handle a surprising number of beginner tasks:
- Pilot holes
- Screws
- Hardware installation
- Countersinking
- Assembly
- Small shop fixtures
You may also need:
- Drill bits
- Driver bits
- Countersink bit
- Screwdriver
- Clamps
A reasonable planning range is $40–$250.
If you already own a household drill, test its suitability before replacing it. It may be perfectly adequate for your first project.
Sanding equipment
Sanding is one of those jobs that looks simple until you are still doing it an hour later.
You can begin with:
- Sandpaper
- Sanding block
- Random orbital sander
- Dust mask or suitable respirator
- Vacuum or dust-collection connection
Plan on approximately $10–$150.
Hand sanding costs less financially but more in time. A power sander can make work faster, but it also creates more dust and increases the importance of hearing and respiratory protection.
Clamps and workholding
Clamps keep pieces from shifting while you drill, assemble, or wait for glue to dry.
Useful beginner options include:
- Spring clamps
- Quick-grip clamps
- Bar clamps
- Corner clamps
- Bench vise
- Assembly square
A beginner clamp collection may cost approximately $20–$150.
You do not need dozens of clamps before making anything. Start with the sizes required by your chosen project.
Learn more: 7 Woodworking Clamps Every Serious Builder Owns (And Why Cheap Clamps Cost More)
Safety equipment
Safety equipment belongs in the first budget, not the “maybe later” pile.
Consider:
- Eye protection
- Hearing protection
- Dust protection
- Appropriate clothing
- Non-slip footwear
- Adequate lighting
- Ventilation
- Dust collection
- A basic first-aid kit
A planning range of $25–$150 is reasonable, depending on what you already own and how much cutting or sanding you plan to do.
Learn more: Build a Safer Workshop: The Ultimate Beginner-to-Pro Woodworking Safety Equipment Roadmap
Sharpening and hand-tool maintenance
A hand-tool approach can be rewarding, quiet, and economical in a small space.
It also requires maintenance.
Possible costs include:
- Sharpening stones
- Honing guide
- Strop
- Tool oil
- Rust prevention
- Replacement blades
A basic sharpening system may cost $20–$150.
Recommended reading: 15 Basic Woodworking Skills for Beginners—Master These Before Your First Serious Build
Part 5 — Lumber, Hardware, and Finishing Costs
The tool collection gets attention because it is visible.
The material budget is where many projects quietly become more expensive.
Start with the cut list
A cut list tells you:
- What pieces are required
- How many pieces are needed
- The length and width of each piece
- The material thickness
- Which boards can share cuts
- Where waste is likely to occur
Without a cut list, it is easy to buy too little, buy the wrong dimensions, or purchase more wood than the project needs.
The cut list is the bridge between a plan and a shopping list.
Choose lumber according to the project
Different materials bring different costs and working characteristics.
Softwood
Construction lumber can be a practical choice for benches, shelves, planters, utility furniture, and early practice projects.
It may be less expensive, but boards can be warped, wet, dented, or inconsistent.
Plywood
Plywood works well for many shelves, cabinets, organizers, and utility projects.
Price depends on thickness, grade, veneer, and local availability.
Hardwood
Hardwood can produce beautiful furniture, but it typically demands more careful planning and can raise the material cost significantly.
Reclaimed lumber
Reclaimed wood can sometimes reduce material costs, although it may require:
- Nail and screw removal
- Cleaning
- Flattening
- Cutting around defects
- Additional sanding
- Moisture inspection
Hardware adds up faster than expected
A project may require:
- Screws
- Nails
- Hinges
- Handles
- Brackets
- Drawer slides
- Shelf pins
- Dowels
- Threaded inserts
- Casters
- Specialty fasteners
A small box may need only glue and a few screws. A cabinet can require several different types of hardware before it is ready for finishing.
Recommended reading: 25 Best Woodworking Hardware Products Every Serious Woodworker Should Own (Ranked by Performance)
Glue, finish, and consumables
Do not forget:
- Wood glue
- Sandpaper
- Stain
- Paint
- Oil
- Wax
- Clear coat
- Brushes
- Rags
- Gloves
- Masking tape
- Mixing containers
The finish should match the project and the environment where it will be used. Testing on scrap wood can prevent an expensive disappointment at the final stage.
A simple material-cost formula
Use this calculation:
Material cost = lumber + hardware + glue + finish + abrasives + waste allowance
The waste allowance is not an admission that you will work carelessly. It recognizes that beginners sometimes cut incorrectly, encounter defects, or need extra material for testing.
Recommended reading: How to Buy the Right Lumber for Any Woodworking Project: Choose the Species, Grade, Thickness, and Quantity
Part 6 — How Much Does Workshop Space Cost?
You can begin woodworking without owning a workshop.
What you need is enough space to work safely, control dust, store your equipment, and clean up properly.
A temporary work area
A temporary setup may use:
- A sturdy table
- Portable sawhorses
- Folding supports
- A bench hook
- Storage bins
- A portable light
- A vacuum
If you already own some of these items, the additional cost may be close to zero. Otherwise, plan on approximately $0–$150.
The tradeoff is setup time. You may need to assemble and dismantle your workspace every time you work.
Apartment and small-space woodworking
Small-space woodworking requires extra attention to:
- Noise
- Dust
- Ventilation
- Storage
- Cutting clearance
- Cleanup
- Neighbors
- Safe tool placement
Hand tools and small projects are often easier to manage in compact spaces. Portable tools can work too, provided you have a safe area for cutting and a sensible way to control dust.
A small workspace may save money on equipment while costing more in organization and preparation.
Garage and basement setups
A garage or basement gives you more room for:
- A workbench
- Lumber storage
- Tool storage
- Assembly
- Dust collection
- Larger projects
Potential costs include:
- Lighting
- Extension cords
- Shelving
- Storage cabinets
- Ventilation
- Floor protection
- Dust-control equipment
- Heating or cooling
A large room does not automatically make a good workshop. The space still needs clear walkways, stable surfaces, and a layout that prevents tools and lumber from becoming hazards.
Shared workshops and makerspaces
A shared workshop can give you access to equipment that would be expensive to purchase immediately.
Benefits may include:
- Larger machines
- Dust collection
- Workbenches
- Expert advice
- Storage
- A community of other makers
The tradeoffs include membership fees, travel, scheduling, and facility rules.
Learn more: How to Prevent Woodworking Injuries by Building a Safer Workshop: Layout, Tools, PPE, and Daily Habits
Part 7 — How Much Does a First Woodworking Project Cost?
Your first project has its own budget, separate from the cost of building your tool collection.
The following ranges are useful for planning:
| Project type | Approximate material cost |
|---|---|
| Small box or planter | $20–$60 |
| Simple shelf | $30–$100 |
| Organizer | $30–$120 |
| Basic workbench | $75–$250 |
| Side table or cabinet | $100–$350 |
| Larger furniture project | $250–$800+ |
These figures may include lumber, hardware, glue, finish, and basic consumables, but not every tool you might need.
Small boxes, planters, and organizers
These projects are attractive starting points because they are:
- Relatively inexpensive
- Easy to store
- Fast to complete
- Useful around the home
- Suitable for practicing basic operations
You can learn measuring, cutting, drilling, fastening, sanding, and finishing without committing to a large amount of material.
Shelves and wall storage
Shelves seem simple, but they teach important lessons about:
- Accurate dimensions
- Squareness
- Bracket placement
- Wall fastening
- Leveling
- Load capacity
- Edge treatment
A shelf can be inexpensive to build, but it still needs to be installed responsibly.
Workbenches and utility furniture
A workbench may cost more in lumber than a small box, but it can improve every future project.
A good workbench provides:
- Stability
- Better working height
- A place to clamp parts
- Storage
- A dependable assembly surface
The value of a workbench is connected to how often you use it. A simple bench used weekly may be more valuable than an impressive bench that occupies space untouched.
Cabinets and furniture
Furniture projects often cost more because they involve:
- More lumber
- More precise cuts
- More sanding
- More hardware
- More finishing
- More opportunities for mistakes
They can still be worthwhile, especially when building a piece that would be expensive to buy. But the first furniture project should match your current skills rather than your most ambitious imagination.
Tool cost versus project cost
A useful distinction is:
Project cost = materials and consumables
Startup cost = project cost + tools + safety equipment + workspace
If you buy a drill for a $50 project, the project did not require only $50 from your bank account. The drill may become more economical with every later project, but it remains part of the initial investment.
Recommended reading: 27 Free Beginner Woodworking Plans Anyone Can Build This Weekend (Even If You’ve Never Touched a Saw)
Part 8 — Hand Tools, Power Tools, Used Tools, and Rentals
There is more than one honest way to begin woodworking.
Is hand-tool woodworking cheaper?
It can be.
Hand tools offer several advantages:
- Low noise
- Minimal dust
- Easy storage
- No batteries
- No electrical cords
- Greater suitability for small spaces
- A slower, more deliberate working rhythm
They also bring tradeoffs:
- More physical effort
- More time
- A need for sharpening
- A learning curve for accurate cutting
- More preparation when working with rough lumber
A hand-tool collection can also become expensive if you begin purchasing premium planes, chisels, saws, and sharpening equipment without a clear project in mind.
Are power tools worth the money?
Power tools can make certain jobs faster and less tiring.
A drill/driver, circular saw, or sander may be useful across many beginner projects.
Power equipment also bring additional costs:
- Blades
- Bits
- Sanding discs
- Batteries
- Chargers
- Hearing protection
- Dust collection
- Maintenance
- Safe operating space
The most useful question is not, “Which power tool is the best?”
Ask instead:
Which tool will solve a problem I expect to encounter repeatedly?
When should you buy used?
Used tools can be excellent value when you can inspect them carefully.
Look for:
- Cracked housings
- Damaged cords
- Missing guards
- Excessive wobble
- Burn marks
- Weak batteries
- Unusual noise
- Bent bases
- Missing safety components
- Unavailable replacement parts
A cheap tool that cannot be used safely is not a bargain.
When should you borrow or rent?
Borrowing is sensible when:
- You need a tool for one project
- Someone you trust owns it
- You can learn how to use it properly
- You do not have room to store it
Renting is useful when:
- The tool is specialized
- You need it only briefly
- Buying it would consume too much of your budget
- Future use is uncertain
Borrowing and renting can also help you discover which tools deserve a permanent place in your workshop.
Part 9 — Hidden Woodworking Costs Beginners Often Miss
The first receipt rarely tells the whole story.
Consumables
Consumables disappear gradually:
- Sandpaper
- Saw blades
- Drill bits
- Glue
- Finish
- Brushes
- Rags
- Gloves
- Dust bags
- Vacuum filters
- Cleaning supplies
Each purchase may seem minor. Together, they become part of the ongoing cost of woodworking.
Mistakes and wasted lumber
Beginners commonly lose material through:
- Incorrect measurements
- Misread plans
- Wrong cuts
- Warped boards
- Poor layout
- Drilling in the wrong location
- Damaged finished surfaces
- Forgetting the thickness of a saw blade
Careful planning does not eliminate every mistake, but it reduces the expensive ones.
Storage
Tools need a home.
Possible storage costs include:
- Shelving
- Pegboards
- Toolboxes
- Bins
- Lumber racks
- Wall hooks
- Small-parts organizers
Poor storage creates another form of waste: time. Searching for a square, clamp, bit, or blade can turn a short project into an irritating afternoon.
Dust and cleanup
Dust control may require:
- Shop vacuum
- Dust separator
- Hose adapters
- Filters
- Dust bags
- Air filtration
- Better ventilation
- Cleanup brushes
Dust affects visibility, cleanup, tool maintenance, and the comfort of the entire workspace.
Maintenance
Tools remain useful only when they remain serviceable.
Maintenance may involve:
- Blade replacement
- Sharpening
- Lubrication
- Rust prevention
- Battery replacement
- Filter replacement
- Calibration
- Professional cord repair
A practical budget should leave room for maintaining the tools you already own.
A small contingency fund
Many beginners choose to reserve approximately 10–20% of the planned project budget for unexpected material, replacement consumables, or mistakes.
The precise percentage is not sacred.
The important thing is accepting that the first estimate may not be the final cost.
Part 10 — Three Sample Beginner Woodworking Budgets
These examples show how different starting strategies affect the total.
A project-first budget of approximately $150
This example assumes access to a borrowed cutting tool and an existing work surface.
| Category | Example allocation |
|---|---|
| Measuring and marking | $25 |
| Safety equipment | $25 |
| Clamps and adhesive | $30 |
| Sandpaper and finishing supplies | $20 |
| Lumber and hardware | $50 |
| Estimated total | $150 |
This budget may support a small box, planter, shelf, sign, or organizer.
The project must be chosen around the tools available.
A practical beginner budget of approximately $450
| Category | Example allocation |
|---|---|
| Measuring and marking tools | $40 |
| Drill/driver and bits | $100 |
| Cutting tool | $100 |
| Sanding equipment and abrasives | $50 |
| Clamps and work surface | $60 |
| Safety and dust control | $40 |
| Lumber and hardware | $60 |
| Estimated total | $450 |
This gives a beginner more independence and supports a broader range of projects.
The total could be reduced by buying selected tools used, borrowing a saw, or postponing the purchase of a power sander.
A capable home setup of approximately $1,200
| Category | Example allocation |
|---|---|
| Measuring and cutting tools | $300 |
| Drill, bits, and sanding equipment | $200 |
| Workbench and storage | $200 |
| Clamps and assembly tools | $100 |
| Dust control and cleanup | $150 |
| Safety and lighting | $150 |
| Initial project materials | $100 |
| Estimated total | $1,200 |
This setup offers significantly more comfort and flexibility, but it is still not a fully equipped professional workshop.
At this level, the biggest danger is buying equipment because it looks impressive rather than because it solves a recurring problem.
Part 11 — How to Start Woodworking Without Overspending
Choose the project before the tools
A project gives every purchase a reason.
Ask:
- What do I want to build?
- What cuts are required?
- What material thickness is needed?
- How will the pieces be joined?
- How much sanding is involved?
- What finish will be used?
- Which tools do I already have?
- Which tools can I borrow?
This approach turns shopping into a practical decision instead of an emotional reaction to a long tool list.
Use three purchasing categories
Buy now
These are the tools and materials required to complete the current project safely.
Buy later
These are tools that may save time or improve comfort during future projects.
Do not buy yet
These are specialized tools, machines, or accessories without a clear near-term purpose.
That last category matters. Beginners often overspend not because they buy poor tools, but because they buy excellent tools too early.
Upgrade according to recurring problems
If every project is difficult because your work surface moves, improve the workbench.
If sanding consumes hours, consider better sanding equipment.
If dust makes the workspace unpleasant, improve dust control.
If cuts are inaccurate, improve measuring, marking, and workholding before buying a larger machine.
The right upgrade is the one connected to a problem you have actually experienced.
Do not confuse inspiration with preparation
Watching experienced woodworkers use specialized machinery can make those machines feel essential.
Sometimes they are.
Often they are simply appropriate for that person’s volume of work, project type, or professional workflow.
Your starting setup should reflect your actual work—not someone else’s finished workshop.
Part 12 — A 30-Day Woodworking Spending Plan
Week one: inventory your starting position
Write down every tool and material you already own.
Then identify:
- Missing safety equipment
- Available work surfaces
- Storage limitations
- Noise restrictions
- Dust-control needs
- Tools you can borrow
- Tools available through a shared workshop
Do not begin by browsing expensive equipment.
Begin by understanding what you already have.
Week two: choose a realistic project
Study the plan carefully.
Look for:
- Finished dimensions
- Cut list
- Material thickness
- Joinery method
- Required tools
- Finishing process
- Likely waste points
- Workspace requirements
If a project requires several tools you do not own, choosing a simpler project may be wiser than expanding your budget immediately.
Week three: source tools and materials
Compare:
- New and used options
- Buying and borrowing
- Corded and cordless tools
- Basic and premium models
- Local pickup and delivery
- One-project usefulness and long-term usefulness
Keep the first purchase list narrow.
Week four: build and track the real cost
Complete the project carefully.
Record:
- Lumber
- Hardware
- Consumables
- Finish
- Tool purchases
- Borrowed tools
- Wasted material
- Unexpected problems
- Time spent
The first project teaches you more than woodworking technique. It reveals how you personally spend money, where you lose time, and which tools genuinely deserve an upgrade.
A simple rule for future purchases
Do not buy a tool merely because experienced woodworkers use it.
Buy it because your own work has shown you why you need it.
Part 13 — Valuable Bonus: The First-Project Budget Worksheet
Use this worksheet before making your first purchase.
Project identity
- Project name:
- Finished dimensions:
- Skill level:
- Available workspace:
- Target completion date:
Required operations
- Measuring:
- Marking:
- Cutting:
- Drilling:
- Joinery:
- Clamping:
- Sanding:
- Finishing:
- Installation:
Tools already owned
Tools available to borrow or rent
Tools to purchase
| Tool | Why it is needed | Buy, borrow, or rent | Estimated cost |
|---|---|---|---|
Materials budget
| Material | Quantity | Estimated cost |
|---|---|---|
| Lumber or sheet goods | ||
| Hardware | ||
| Glue or adhesive | ||
| Finish | ||
| Sandpaper or abrasives | ||
| Other consumables |
Final calculation
Tools purchased: $_____
Lumber: $_____
Hardware: $_____
Finish and consumables: $_____
Workspace and storage: $_____
Contingency: $_____
Estimated total: $_____
Three spending stop rules
- Do not buy a tool unless the project plan identifies a real use for it.
- Do not buy a specialty machine for one operation if borrowing or renting is practical.
- Do not upgrade the workshop before completing enough projects to identify a recurring limitation.
Part 14 — Questions Beginners Ask Before They Buy Anything
“How much does it cost to start woodworking from scratch?”
A practical beginner setup often costs approximately $300–$700. You may spend less by choosing a small project, borrowing tools, buying used equipment, and using an existing work surface.
“Can I really start woodworking with $100?”
Possibly, especially if you already own a drill, tape measure, screwdriver, or work surface. You may also need to borrow the main cutting tool and choose a small project with inexpensive materials.
“What is the cheapest responsible way to begin?”
Choose one simple project, inventory what you already own, borrow or rent occasional-use tools, and buy only the equipment required to work safely.
“Do I need a workshop before I begin?”
No. A temporary setup can be enough for small projects. You still need a stable work surface, adequate lighting, safe clearance, and a sensible way to manage dust and cleanup.
“How much do beginner woodworking tools cost?”
A lean collection may cost about $100–$250 when it includes used, borrowed, or already-owned tools. A more independent beginner collection commonly falls between $300 and $700.
“Is hand-tool woodworking actually cheaper?”
It can be, particularly in a small or quiet workspace. However, hand tools require more time and may involve additional sharpening and maintenance equipment.
“Should I buy a drill first?”
A drill or drill/driver is useful for many beginner projects, but the best first tool depends on the plan you have chosen. Measuring accurately and cutting safely may be more urgent for one project than drilling.
“How much should I budget for lumber?”
The answer depends on project size, wood species, material thickness, local prices, and expected waste. A cut list will give you a more reliable estimate than guessing from the finished dimensions.
“Is hardwood too expensive for a beginner?”
Not necessarily, but hardwood can increase the material cost and may demand more careful preparation. Softwood, plywood, and reclaimed lumber can provide less expensive ways to practice.
“Should I buy new or used tools?”
Buy used when you can inspect the tool, confirm that its safety features are present, and locate replacement parts. Buy new when reliability, warranty, battery condition, or safety is especially important.
“When does renting make more sense than buying?”
Renting can make sense when a tool is specialized, expensive, difficult to store, or needed for only one project.
“How much does a woodworking workbench cost?”
A temporary work surface may cost nothing if you already have a sturdy table or sawhorses. A simple purpose-built workbench may cost approximately $75–$300 in materials.
“What woodworking projects cost the least?”
Small boxes, planters, shelves, signs, organizers, and simple utility projects are often affordable because they require less lumber and fewer complex operations.
“How do I stop myself from overspending?”
Choose the project first. Then separate purchases into “buy now,” “buy later,” and “do not buy yet.” Never let a general tool list make the purchasing decision for you.
“Does woodworking become cheaper over time?”
It can become more economical as durable tools are used across multiple projects. Lumber, finish, abrasives, replacement blades, maintenance, and other consumables will remain ongoing costs.
“Can I start woodworking in an apartment?”
Yes, with the right type of project and careful attention to noise, dust, storage, and ventilation. Small projects and hand tools are often easier to manage than large cutting operations.
Products / Tools / Resources
Products
Choose equipment according to the problem it solves:
- Tape measure for length
- Combination square for checking and marking
- Drill or drill/driver for pilot holes and fastening
- Handsaw or circular saw for basic cutting
- Sanding block or random orbital sander for surface preparation
- Clamps for holding pieces during assembly
- Workbench, sawhorses, or stable work surface
- Eye, hearing, and dust protection
- Storage bins for tools, hardware, and abrasives
- Shop vacuum or dust-control equipment
Tools
Useful planning tools include:
- A project cut list
- Lumber-estimation worksheet
- First-project budget worksheet
- Used-tool inspection checklist
- Project-cost log
- Buy, borrow, rent, or wait decision list
- Scrap wood for testing cuts, finishes, and techniques