
The best quick projects don’t begin with a complicated plan. They begin with a small problem you can solve before the day gets away from you: keys scattered by the door, tools with nowhere to rest, or a bare corner that could use a shelf.
A modest build can be satisfying precisely because it has an end in sight. Choose the right one and you’ll spend more time making something useful than setting up a full workshop or wrestling with fussy joinery.
The 15 quick woodworking projects below are ranked by estimated hands-on shop time. These ranges are practical planning estimates, not stopwatch-tested results. They assume you have suitable lumber and common tools ready. Glue-up, paint, and finish curing take additional time; follow each product label. Your experience, setup, wood condition, and finish will affect the total.
Quick answer: Quick woodworking projects are small builds with few parts, simple cuts, and straightforward assembly. Good first choices include wooden plant markers, a sanding block, a phone rest, coasters, a bench hook, a key rail, and a small tray. The estimates below range from about 15 minutes to a few hours of hands-on work, with glue and finish curing counted separately.
In this guide
- Quick woodworking projects at a glance
- 15 useful projects ranked by shop time
- Choose a project for the time you have
- Basic tools
- A simple build workflow
- Common mistakes and safety
- Questions woodworkers often ask
- Products, tools, and resources
Quick woodworking projects at a glance
| Rank | Project | Estimated hands-on time | Skill | A good fit when you want… |
|---|---|---|---|---|
| 1 | Wooden plant markers | 15–25 minutes | Beginner | A very small garden project |
| 2 | Sanding block | 15–30 minutes | Beginner | A useful shop tool from an offcut |
| 3 | Phone rest | 25–45 minutes | Beginner | A compact desk accessory |
| 4 | Coaster set | 30–50 minutes | Beginner | A simple handmade gift |
| 5 | Bench hook | 30–60 minutes | Beginner | A steadier way to hand-saw small stock |
| 6 | Pair of bookends | 40–60 minutes | Beginner | A practical project with basic right-angle assembly |
| 7 | Key rail | 45–75 minutes | Beginner | A small entryway organizer |
| 8 | Catchall tray | 45–75 minutes | Beginner | A place for everyday small items |
| 9 | Picture ledge | 60–90 minutes | Beginner | A narrow display shelf |
| 10 | Desktop organizer | 60–100 minutes | Beginner | A simple way to sort stationery |
| 11 | Serving tray | 60–100 minutes | Beginner | A useful gift with a little more shaping |
| 12 | Wall-mounted tool rack | 75–120 minutes | Beginner | A tidier workshop wall |
| 13 | Small planter box | 90–150 minutes | Beginner | A straightforward outdoor build |
| 14 | Two-tier shoe shelf | 120–180 minutes | Beginner | Practical storage from a few boards |
| 15 | Small hardwood cutting board | 120–180 minutes | Beginner to intermediate | A compact glue-up project |
The clock here measures shop work: measuring, cutting, assembly, and basic sanding. It does not include a trip to buy lumber, major machine setup, a redesign halfway through, or waiting for glue and finish to cure. If you’re new to the tools, allow yourself more time. A careful first build is a better quick project than a rushed one.
1. Wooden plant markers
Estimated hands-on time: 15–25 minutes. Materials: six clean, untreated wood strips around ¾ × ¾ × 6 inches (19 × 19 × 152 mm), or suitable offcuts. Tools: pencil, square, hand saw, and sandpaper.
A few labeled markers bring order to a garden bed almost as quickly as you can decide what to plant. Cut the strips to equal lengths, mark one end, and smooth the edges. Write the plant names with a garden marker or another labeling method suited to your local weather.
A pointed end is optional. If you add one, secure each piece and shape it with a hand tool; don’t hold a tiny blank near a powered blade. Since the pieces are nearly identical, this is a low-cost way to practice marking and repeatable cuts.
2. Sanding block
Estimated hands-on time: 15–30 minutes. Materials: one hardwood or plywood blank about ¾ × 2½ × 5 inches (19 × 64 × 127 mm), plus optional cork or a grip layer. Tools: saw, square, sandpaper, and optional glue.
This may be the smallest project on the list, but it earns its place in the workshop. Cut the blank square, ease the corners, and wrap sandpaper around it to check the fit. If you add cork, trim it to size and attach it with an adhesive suitable for the materials.
A flat block spreads hand pressure more evenly than a loose fold of sandpaper. Make the edges comfortable to hold; that little detail is what makes a simple scrap feel like a tool you’ll reach for again.
3. Phone rest
Estimated hands-on time: 25–45 minutes. Materials: one dry wood blank around 1½ × 3 × 6 inches (38 × 76 × 152 mm). Tools: hand saw, chisel, marking gauge or pencil, clamps, and sandpaper.
The idea is simple: cut a sloping groove across the top, wide enough for your phone and its case. Test the width and angle on scrap first. Then saw two angled kerfs to define the groove, remove the waste carefully with a chisel, and smooth its bottom.
Keep the groove shallow enough for the phone to sit securely without making the stand unstable. Clamp the blank before working on it. Small pieces are awkward to hold, and there’s no time saved by taking a risk with a sharp tool.
4. Coaster set
Estimated hands-on time: 30–50 minutes, plus any finish curing. Materials: one piece of dry wood at least ¾ × 3½ × 14 inches (19 × 89 × 356 mm), cut into four squares; optional cork pads. Tools: saw, square, sanding block, and finish appropriate for the intended use.
Four matching coasters make a satisfying set and a useful handmade gift. Cut four equal squares, check their dimensions against one another, then sand the faces and edges. A slight roundover feels nicer in the hand. Cork pads can help protect a table and reduce sliding.
For a clean result, mark all the pieces from the same reference edge and sand them together. If you apply finish, let it cure fully according to its label before using the coasters.
5. Bench hook
Estimated hands-on time: 30–60 minutes. Materials: a base about ¾ × 7 × 10 inches (19 × 178 × 254 mm) and two cleats about ¾ × 1½ × 7 inches (19 × 38 × 178 mm). Tools: saw, drill/driver, square, clamps, and screws.
A bench hook is a practical first build because you can use it on the next one. Fasten one cleat across the underside near the back edge, where it can catch the workbench. Attach the second cleat across the top near the front; it will stop the workpiece while you make hand-saw cuts.
Check that both cleats are square, and choose screws that hold securely without breaking through the working surface. The hook helps steady small stock for hand-sawing; it is not a replacement for safe workholding or a proper setup for powered tools.
6. Pair of bookends
Estimated hands-on time: 40–60 minutes, plus glue curing if used. Materials: two bases around ¾ × 5 × 6 inches (19 × 127 × 152 mm), two upright pieces around ¾ × 5 × 4 inches (19 × 127 × 102 mm), and small braces from scrap. Tools: saw, drill/driver, square, clamps, and sandpaper.
Join one base and one upright at a right angle to make each L-shaped bookend. Add a small triangular brace inside each corner. Before tightening the fasteners or letting the glue cure, check that both pieces sit flat and stand at the same height.
The square check matters more than decoration here. Bookends that lean can let books slide. Make the pair from the same stock, compare them before finishing, and add felt or cork beneath each base to protect the shelf.
7. Key rail
Estimated hands-on time: 45–75 minutes. Materials: one board around ¾ × 3½ × 16 inches (19 × 89 × 406 mm) and three or four hooks. Tools: saw, drill/driver, tape measure, square, and sandpaper.
A key rail gives every set of keys a place by the door. Cut the board to length, mark the hook positions with even spacing, and drill pilot holes if the hook maker recommends them. Sand the face and edges, then attach the hooks.
Choose a mounting method that suits the wall and the rail’s intended use. A fixing that works in solid timber framing may not be right for masonry or a hollow wall. The small visual detail is the spacing: lay out the hooks before drilling so the finished rail looks deliberate.
8. Catchall tray
Estimated hands-on time: 45–75 minutes, plus glue or finish curing. Materials: a ¼-inch (6 mm) plywood base around 6 × 9 inches (152 × 229 mm) and four side strips about 1½ inches (38 mm) high. Tools: saw, square, clamps, glue, and sandpaper.
This little tray can gather keys, coins, pencils, or the things that otherwise drift across a desk. Cut the two long sides to match the base and the two short sides to fit between them. Dry-fit everything before gluing, then clamp the sides around the base and check the corners for square.
Ease the edges and apply a finish suited to where the tray will live. The dry fit takes only a minute, but it can reveal a gap or a wrong length before glue makes a correction difficult.
9. Picture ledge
Estimated hands-on time: 60–90 minutes, plus finish curing. Materials: one 1 × 4 board around 24 inches (610 mm) long for the shelf, one 1 × 3 board of the same length for the back, and a narrow front lip. Tools: saw, drill/driver, square, clamps, and sandpaper.
A picture ledge turns a few straight boards into a narrow place for frames and small displays. Fasten the shelf board to the back at a right angle, then attach the lip along the front edge to help keep frames from sliding. Check the assembly for square and smooth the exposed edges.
Mount it with fixings suitable for the wall and the items you plan to display. There isn’t one screw or anchor that fits every wall and load. If you change the length or depth, revisit the fixing plan before you start cutting.
10. Desktop organizer
Estimated hands-on time: 60–100 minutes, plus glue or finish curing. Materials: ½-inch (12 mm) plywood for a base around 5 × 8 inches (127 × 203 mm), two side panels, a back, and one or two dividers. Tools: saw, drill/driver, square, clamps, and sandpaper.
Before cutting, put the objects you want to organize on the bench. A compartment that fits pens may not fit a charger or a stack of index cards. Measure what you actually use, then choose where the dividers should go.
Cut the base, back, sides, and dividers. Dry-fit them around your items, assemble the outer box first, and check it for square before adding the dividers. Sand the edges; add finish if you want a more polished surface.
11. Serving tray
Estimated hands-on time: 60–100 minutes, plus finish curing. Materials: a base around 10 × 16 inches (254 × 406 mm), side rails around 1½ inches (38 mm) high, and optional handles. Tools: saw, drill/driver, square, clamps, and sandpaper; a jigsaw is useful for cutout handles.
Start with the base and side rails. Dry-fit the frame, join the sides squarely, and make sure the tray sits flat. Handles can be simple cutouts or suitable installed hardware, but add them only if you can make them cleanly and securely.
Ease the edges and pick a finish appropriate for a tray that may touch dishes or food packaging. Follow the finish maker’s directions for use and curing. The extra shaping can be satisfying, but it comes after the square frame—not before.
12. Wall-mounted tool rack
Estimated hands-on time: 75–120 minutes. Materials: a backboard around ¾ × 3½ × 24 inches (19 × 89 × 610 mm), plus pegs, dowels, or hooks sized for the tools. Tools: drill/driver, bits, tape measure, square, and sandpaper.
Before drilling, lay the tools across the board. Handles need room; hooks should be easy to reach. Mark the positions, drill pilot holes where needed, and install the pegs or hooks. Sand the board, then mount it using fixings suited to the wall and the tools’ weight.
The layout is the work that makes the rack useful. Give the tools enough space to come off and go back without catching one another. Check that each tool sits securely, and keep the rack where a falling tool won’t land on someone.
13. Small planter box
Estimated hands-on time: 90–150 minutes. Materials: two long side boards around 5½ × 16 inches (140 × 406 mm), two end boards around 5½ × 7 inches (140 × 178 mm), and spaced bottom slats. Tools: saw, drill/driver, square, clamps, and exterior-appropriate fasteners.
Assemble the four sides into a rectangle and check the corners for square. Attach bottom slats with small gaps for drainage. Sand any splinter-prone edges, and choose materials and finishes for outdoor exposure and the plants’ intended use.
Keep the first version modest. Soil becomes heavy when wet, so a larger planter needs stronger construction and a suitable place to sit. Leave room for drainage and for the box to dry between uses; standing water is hard on wood.
14. Two-tier shoe shelf
Estimated hands-on time: 120–180 minutes. Materials: two side panels around ¾ × 10 × 24 inches (19 × 254 × 610 mm) and two shelf boards around ¾ × 9¼ × 24 inches (19 × 235 × 610 mm). Tools: saw, drill/driver, square, clamps, and sandpaper.
Mark both side panels together so the shelf positions line up. Fasten the shelves between the sides, checking the unit for square before fully tightening the screws. Add a back rail or other bracing if the design needs help resisting racking.
Sand the edges and set the shelf on a level surface. Anchor it if its height, location, or use creates a tip-over concern. It’s a storage shelf, not a bench or step; keep the intended use clear.
15. Small hardwood cutting board
Estimated hands-on time: 120–180 minutes, plus glue and finish curing. Materials: three or four straight-grained hardwood strips, each about ¾ × 2¾ × 12 inches (19 × 70 × 305 mm), with adhesive and finish whose labels support the intended food-contact use. Tools: square, clamps, saw, sanding tools, and a way to flatten the glued panel safely.
Lay out the strips until the grain and color feel balanced, then mark their order. Apply adhesive according to its instructions, clamp the pieces evenly, and let the glue cure for the stated time. Trim the panel, flatten it carefully, and sand it through progressively finer grits. Finish it with a suitable product and wait for the full cure before use.
This one takes longer on the calendar than it does at the bench. That’s the nature of glue-up work. It’s a good next step once you’ve practiced accurate cuts and sanding on a simpler build.
Recommended reading: Woodworking Cutting Board: How to Build a Beautiful Hardwood Board From Scratch
How to choose the right project for the time you have
With about half an hour, plant markers, a sanding block, or a phone rest are sensible choices. Have the material ready and keep the finish simple.
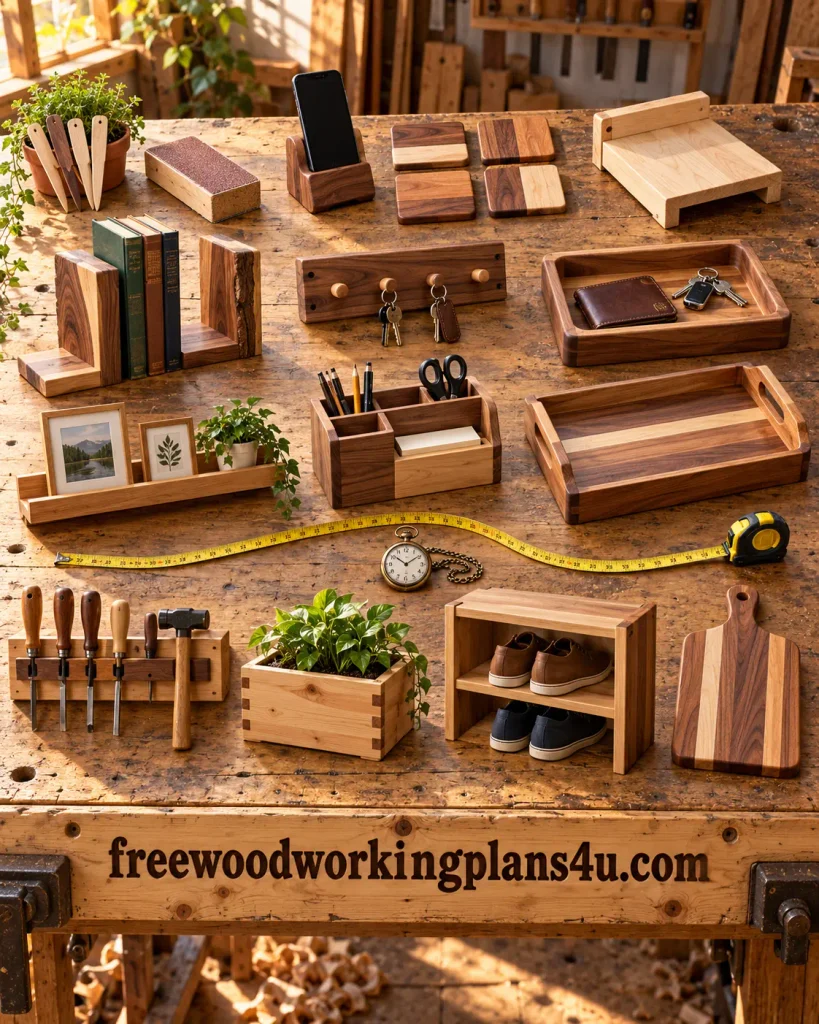
With about an hour, try coasters, a bench hook, bookends, a key rail, or a catchall tray. These projects are small, but they reward careful measuring and square assembly.
With a longer afternoon, consider a picture ledge, organizer, serving tray, tool rack, planter box, or shoe shelf. Each has more parts to lay out and dry-fit, even though the individual cuts are straightforward.
If you’re choosing by skill, think about what you want to practice. The bench hook supports hand-sawing. The tray teaches square assembly. The phone rest uses a controlled groove. The cutting board gives you a first glued panel.
Before you start, ask yourself: Do I have the tools? Is the stock straight and suitable? Can I make the cuts safely? Will the finished object work for its intended use? A project that fits your workshop and your afternoon has a better chance of feeling quick once the sawdust starts to fall.
Basic tools for quick woodworking projects
Most of these builds can be made with a tape measure, pencil, combination square, hand saw or guided circular saw, drill/driver, clamps, and sandpaper. A stable work surface and a way to secure the stock matter just as much as the cutting tool.
You don’t need to buy a full workshop before starting. Choose tools around the kinds of work you expect to repeat. For one simple build, hand tools—or having stock cut to length—may be enough. When using a power tool, read its manual, keep guards and safety devices in place, and use a setup suited to the cut.
Recommended reading: Beginner Woodworking Safety Checklist: 47 Things to Check Before You Make Your First Cut
A simple workflow that keeps the build moving
- Read the plan before picking up a tool. Find the finished dimensions, material thickness, and assembly order.
- Measure the board you actually have. Nominal lumber sizes and finished sizes can differ. Confirm the stock before calculating cuts.
- Mark from one reference edge. It helps small measuring errors stay small across a batch of parts.
- Cut matching pieces with a safe setup. Use a stop or clear marks for repeated lengths. Never hold a small piece by hand near a powered blade.
- Dry-fit before glue. Check the corners, alignment, and fit while the parts are still easy to adjust.
- Sand the surfaces that need it. Remove splinters and saw marks without rounding edges that need to meet flush.
- Finish once the fit is right. Follow the product label for ventilation, application, and cure time.
Recommended reading: What Is Saw Kerf in Woodworking? The Hidden Width Behind Every Cut
Common mistakes that make a quick build take longer
Starting before checking the board
Warped, damp, split, or inaccurately sized stock can turn a straightforward build into a string of corrections. Inspect the lumber. Measure its real thickness and width before committing to the cut list.
Rushing the first cut
A quick build still needs a steady workpiece, a visible cut line, and the right tool for the task. Clamp small parts or use a suitable jig. Keep your hands away from the cutting edge, and don’t disable a guard to save a few minutes.
Treating glue and finish as instant
The hands-on work may take an hour. The adhesive or finish may need longer before the project can be handled or used. Follow the maker’s instructions for conditions and curing; a time estimate is never a reason to shorten them.
Skipping dust and personal protection
Wear eye protection and use dust controls suited to the work. Keep loose clothing and jewelry away from rotating machinery. CCOHS advises against gloves near rotating blades or machine parts because they can catch. Follow the tool manual, and disconnect power before adjustments or blade changes. Wood dust and finishing products can also present health hazards; use appropriate extraction, ventilation, and protection for the material and process. See the OSHA woodworking safety guide.
Choosing a project that outmatches your setup
Small does not always mean easy. Precise miters, hidden fasteners, heavy loads, or unfamiliar machines can demand more skill than a project’s size suggests. Choose a first version with simple cuts and an assembly sequence you can follow.
Quick woodworking project questions
“I only have half an hour. What should I make?”
Try plant markers or a sanding block. Both use few parts and simple shaping. If you’d rather make something for the workshop, a bench hook is another quick build you can put to use on later projects.
“Can I really finish a project in under an hour?”
Several projects here may fit within an hour of hands-on work, depending on your tools and preparation: plant markers, a sanding block, phone rest, coaster set, bench hook, bookends, key rail, or catchall tray. Glue and finish curing can extend the elapsed time.
“Do I need a table saw for these projects?”
No. Many small builds can be made with a hand saw, a guided circular saw, or stock cut to size before assembly. Choose a plan that suits the tools you can use safely and accurately.
Recommended reading: Woodworking Without a Table Saw: 9 Better Alternatives for Every Cut, Project, and Workshop
“What wood is easiest to start with?”
It depends on the build. Straight, dry, defect-free pine or poplar can suit many beginner projects. Plywood can work well for organizers and trays. A cutting board needs material, adhesive, and finish appropriate for its intended food-contact use. Check the plan and product labels before substituting materials.
“How do I make a simple project look polished?”
Make matching parts the same size. Check that the assembly is square. Remove splinters, sand evenly, and choose a finish that fits the object. Clean layout and tidy edges usually do more for the final look than extra decoration.
“Could I sell the things I make?”
Some small projects may suit gifts or local sales, but a short build time doesn’t guarantee profit. Count material waste, sanding, finish, packaging, selling fees, and time spent communicating with buyers. Make one repeatable prototype and check for local demand before producing a batch.
Recommended reading: 15 Woodworking Projects Everyone Sells—And 12 High-Profit Niches Most Makers Completely Ignore
Products / Tools / Resources
You can complete many of these builds with a modest set of tools. Choose what fits the project and your workshop, then add more only when a later build calls for it.
- Tape measure, pencil, and combination square
- Hand saw or a guided circular saw for suitable cuts
- Drill/driver, bits, and clamps
- Sanding block or random-orbit sander with appropriate dust control
- Suitable lumber, plywood, fasteners, adhesive, and finish for the selected project