
The first thing a small room teaches you is restraint. There is no spare corner for a workbench that sits untouched, no endless wall for tools you rarely reach for, and no easy place to leave yesterday’s project spread across the floor.
That does not mean woodworking has to stay outside your life. It means the furniture and workshop equipment have to earn their space. A folding bench can appear for an afternoon and vanish before dinner. A rolling cart can carry the tools to the project instead of forcing the project into a permanent workshop. A vertical rack can hold boards in the sliver of space beside a door.
This guide gathers 21 practical plans for apartments, spare rooms, one-car garages, balconies, closets, and compact workshops. You will find starting dimensions, useful construction details, suitable skill levels, and the small design decisions that determine whether a project feels clever—or becomes one more object in the way.
Quick Answer: The Best Small-Space Woodworking Projects
If you have one clear wall, start with a wall-mounted folding workbench, a French cleat tool wall, or a fold-open cabinet. If your floor space is available only temporarily, a rolling tool cart or folding sawhorses will give you a working area that can leave just as quickly. For furniture, narrow benches, floating shelves, drop-leaf tables, and under-bed drawers make the strongest use of limited room.
| # | Project | Typical starting footprint | Best use | Difficulty |
|---|---|---|---|---|
| 1 | Wall-mounted folding workbench | 36–48 in. wide × 20–24 in. deep when open | Temporary work surface | Beginner to intermediate |
| 2 | Fold-down assembly table | 32–40 in. wide × 20–24 in. deep | Glue-ups and assembly | Beginner |
| 3 | Folding sawhorses | Fold flat when stored | Cutting support | Beginner |
| 4 | Folding laptop or craft desk | 30–42 in. wide × 16–20 in. deep | Work, study, or light assembly | Beginner |
| 5 | Fold-away finishing rack | Narrow wall-mounted frame | Drying small parts | Beginner |
| 6 | French cleat tool wall | Depends on wall width | Modular tool storage | Beginner to intermediate |
| 7 | Narrow floating shelves | 6–10 in. deep | Books, tools, and small items | Beginner |
| 8 | Vertical lumber rack | About 8–12 in. deep | Long boards and offcuts | Beginner |
| 9 | Wall-mounted clamp rack | About 6–10 in. deep | Clamps and hand tools | Beginner |
| 10 | Fold-open tool cabinet | 12–18 in. deep when closed | Dust-protected tool storage | Intermediate |
| 11 | Wall-mounted scrap organizer | Narrow vertical bins | Short offcuts and dowels | Beginner |
| 12 | Rolling tool cart | 20–24 in. wide × 16–20 in. deep | Mobile tool storage | Beginner |
| 13 | Slim scrap-wood cart | 10–14 in. deep | Sorting usable offcuts | Beginner |
| 14 | Narrow entryway bench | 36–48 in. wide × 12–14 in. deep | Seating and shoe storage | Beginner |
| 15 | Corner shelf | Sized to the unused corner | Dead-space storage | Beginner |
| 16 | Nesting stools | Smallest stool footprint | Seating that stacks | Beginner |
| 17 | Stackable storage crates | Modular box dimensions | Flexible shelving | Beginner |
| 18 | Under-bed storage drawers | Sized to bed clearance | Hidden storage | Beginner |
| 19 | Folding plant stand | Narrow vertical footprint | Plants and display | Beginner |
| 20 | Wall-mounted drop-leaf table | 24–36 in. wide × 16–20 in. deep | Dining or temporary workspace | Beginner to intermediate |
| 21 | Mobile flip-top work center | About 24–30 in. wide × 20–24 in. deep | A flexible mini workshop | Intermediate |
Those dimensions are sensible places to begin, not promises that every room will accept the same object. Measure the doorway, the storage location, the open working position, and the path between them before cutting your first board.
What Makes a Woodworking Project Suitable for a Small Space?
A compact project is not simply a full-size project squeezed until it becomes uncomfortable. It is a design that understands what happens after the last screw is driven.
The strongest small-space ideas usually do at least one of these things:
- fold flat against a wall;
- roll away on locking casters;
- hang vertically instead of claiming floor space;
- nest inside another object;
- perform more than one job;
- break down into pieces that one person can carry; or
- make use of a corner, the back of a door, or the space beneath furniture.
That distinction matters. A smaller permanent workbench may still dominate the room. A folding bench with a secure frame may offer less surface area but give you much more freedom because the floor becomes available again when the work is over.
The useful question is not, “How do I force a full workshop into this room?” Ask instead: “Which surface, tool, or storage system can move, disappear, or do double duty?”
How to Measure Your Space Before Choosing a Plan
Most small-space frustrations begin with a measurement that was never taken. The tabletop fits. The door does not open. The cart rolls into the room but cannot make the turn. The folded bench clears the wall but blocks the radiator.
Measure the room as a working environment, not as an empty rectangle.
Measure four different spaces
Write down these four measurements before choosing a project:
- Storage footprint: where the project will live when it is folded, rolled, stacked, or put away.
- Working footprint: the open project plus enough room to stand, turn, clamp, and handle material.
- Transport path: the width of doors, hallways, stairways, elevators, and closet openings.
- Mounting area: the usable wall width, stud positions, baseboards, outlets, windows, radiators, and door swings.
The transport path is easy to overlook. A cabinet can be perfectly sized for a wall and still be impossible to carry through the hallway. A long board can fit on a rack but make the route to that rack awkward or unsafe.
Use a cardboard mock-up before cutting wood
This is one of the least glamorous and most useful steps in the entire process. Cut cardboard to the proposed tabletop or cabinet size. Tape it to the wall, mark the folded and open positions, and then move around it as if you were carrying a board or reaching for a clamp.
Try opening the nearby drawer. Walk through the doorway. Pretend to use a hand saw. If your hip catches the corner of the mock-up, the finished project will not be kinder.
A cardboard test often exposes details that look harmless on paper:
- a work surface blocks a heating vent;
- a folding leg strikes the baseboard;
- a cabinet door opens into the project;
- a tall lumber rack covers a window;
- clamps or tools sit just beyond a comfortable reach.
Choose a storage mode before choosing a project
Start with the kind of space you actually have, then choose the project that belongs there.
| Available storage mode | Best project types |
|---|---|
| One empty wall | Folding bench, French cleat wall, tool cabinet |
| One narrow corner | Corner shelf, vertical lumber rack, slim cart |
| Closet or cabinet | Folding sawhorses, nesting stools, portable tools |
| Under-bed space | Drawers, flat storage boxes, short offcuts |
| Open garage floor | Rolling cart, mobile work center, foldable bench |
| Balcony or covered outdoor area | Plant stand, storage box, portable assembly surface |
21 Free Woodworking Plans for Small Spaces
1. Wall-Mounted Folding Workbench
A wall-mounted folding workbench is often the moment a room starts to feel like a workshop. One minute there is an empty wall; the next, there is a surface for measuring, clamping, drilling, or assembling a project.
A practical starting size is 36 to 48 inches wide and 20 to 24 inches deep when open. The folded depth depends on the frame, hinge arrangement, and supports. Build the top from a stable panel, add a wall ledger or cleat, and support the open surface with properly rated folding brackets, hinged legs, or both.
A replaceable sacrificial top is worth considering. It lets you drill, glue, and mark without treating a finished furniture surface like a disposable workbench.
The wall connection deserves more attention than the tabletop. Drywall alone should not be assumed to carry a bench, tools, and a project. Locate suitable framing or use an anchoring method made for the wall construction and expected load. A bench intended for hand-tool work is not automatically suitable for a heavy stationary machine.
Small-space advantage: You get a genuine work surface without surrendering the wall and floor to a permanent bench.
Useful modification: Add shallow dog holes or a removable clamping board instead of making the entire top thicker and harder to fold.
Recommended guide: Free Woodworking Plans for a Folding Workbench: Build a Sturdy Space-Saving Bench With a Printable Cut List
2. Fold-Down Assembly Table
A fold-down assembly table is quieter and gentler than a heavy workbench. Its job is to give you a level place for layout, glue-ups, sanding, and joining, then get out of the way.
A top around 32 to 40 inches wide and 20 to 24 inches deep is large enough for many beginner projects while remaining realistic in a small room. Use a flat panel, a hinged wall connection, and supports that lock positively when the table is open. A narrow front lip can keep small parts from drifting away, but it should not interfere with clamps.
The wall above the table can hold glue bottles, small clamps, squares, and pencils. That little bit of vertical organization is what turns a folding surface into an assembly station rather than an isolated board that still leaves you searching for every tool.
Small-space advantage: It gives you a clean, temporary surface without assigning an entire corner to a bench.
Common mistake: Decorative hinges and weak folding supports may look fine until a wet glue-up is sitting on the table. Select the hardware and attachment points for the real load, not the empty tabletop.
3. Folding Sawhorses
Folding sawhorses are wonderfully honest tools. They do one job, do it well, and disappear when you are finished. A matching pair can live behind a door, under a bed, or in the narrow space beside a cabinet.
Build them with stable legs, positive bracing, and a replaceable top rail. They should be light enough to carry without becoming so narrow or delicate that a sheet of plywood makes them wobble.
Add a lower stretcher only if it does not prevent the horses from folding flat. The point is not to build the heaviest sawhorse in the neighborhood. The point is to create a stable temporary platform that your room can absorb.
Small-space advantage: A temporary work platform appears without a permanent bench.
Safety detail: Both horses must sit level and remain stable under the intended load. Do not use a folding sawhorse as a ladder, and do not exceed what the construction and hardware can safely support.
4. Folding Laptop or Craft Desk
A folding desk can live two lives. During the day it may hold a laptop, notebook, or cup of coffee. On a project day, it can become a light assembly station or a place to sand small parts.
A 30- to 42-inch-wide surface with a depth of 16 to 20 inches is a useful starting range. Use a wall-mounted frame, folding brackets, or hinged legs. If the desk stays in a living area, a small cable opening keeps the finished piece from looking like workshop equipment.
When the same surface will be used for woodworking, protect it with a replaceable panel. It is easier to replace a marked work layer than to repair a finished desktop every time a drill bit slips.
Small-space advantage: One surface supports ordinary life and occasional making.
Design choice: Keep the desk shallow enough to preserve the walking path, but not so shallow that a square, clamp, or laptop becomes awkward to use.
5. Fold-Away Finishing Rack
Wet shelves, doors, frames, and trim pieces have an irritating habit of needing somewhere to rest just when every table is already occupied. A fold-away finishing rack solves that problem with a narrow wall frame and removable dowels, arms, or slotted supports.
Space the supports around the pieces you actually build. If most of your projects are small boxes, the rack does not need to behave like a cabinetmaker’s drying room. If you regularly finish doors or shelves, allow enough room for air to move around them without creating a crowded stack.
Make the supports easy to wipe clean. When the rack is empty, it should sit almost flush to the wall; when opened, it should provide a shallow, organized drying station.
Small-space advantage: It uses wall height instead of the one table you need for everything else.
Important limitation: Finishes, solvents, and sawdust demand sensible ventilation and storage. Do not place wet work where it blocks an exit, touches a heat source, or exposes people in the home to unnecessary fumes.
6. French Cleat Tool Wall
A French cleat wall earns its keep because it can change with you. A beveled cleat fixed to the wall accepts matching holders for tools, clamps, shelves, and small bins. When your work changes, the holders can be lifted off and rearranged instead of forcing you to rebuild the entire wall.
Several horizontal cleats are often more useful than one oversized panel. Create zones for measuring, cutting, drilling, clamping, sanding, and finishing. The arrangement begins to tell the story of the work, and that makes missing tools much easier to notice.
Small-space advantage: The wall carries the storage while the floor stays open.
Structural detail: The cleat is only as reliable as the wall behind it. Mount it securely, keep heavier tools lower, and do not confuse a strong-looking storage system with a wall attachment that has not been sized for the load.
Recommended guide: DIY French Cleat Tool Wall Woodworking Plans: Build a Modular Wall That Grows With Your Shop
7. Narrow Floating Shelves
Narrow floating shelves are useful in places where a full cabinet would feel intrusive: the strip of wall beside a door, the space above a desk, or the edge of a compact workshop.
A depth of 6 to 10 inches is often enough for hand tools, small bins, books, finishing supplies, or display pieces. The support system should reflect the load. A shelf holding a few paperbacks is not engineered the same way as one holding clamps or jars of hardware.
Use a concealed cleat or bracket system suited to the wall and the intended weight. If the room may change later, make the shelves removable or modular.
Small-space advantage: A narrow wall becomes useful without stealing the walking space below it.
8. Vertical Lumber Rack
Long boards are difficult to store because they refuse to behave like small objects. Lay them down and they occupy the floor. Lean them in a corner and they become easy to trip over. A vertical lumber rack gives them a narrow, deliberate home.
Separate the rack into compartments for long boards, shorter pieces, dowels, and thin strips. Add a low retaining rail so pieces cannot slide outward. Keep heavier stock low and secure tall pieces against tipping.
Small-space advantage: A slim vertical footprint can hold material that would otherwise spread across the room.
Common mistake: Storing too much weight too high. A rack should make lumber easier to control, not turn the corner into a falling-object hazard.
9. Wall-Mounted Clamp Rack
Clamps take up more space than their weight suggests. Their bars project, their handles tangle, and once they land on the floor they seem to attract every other tool in the room.
A wall-mounted clamp rack brings them back into view. Build a horizontal backboard with evenly spaced supports, dowels, or slots. Give bar clamps, spring clamps, pipe clamps, and small hand clamps their own sections where practical.
Mount the rack close to the assembly area, but high enough to preserve comfortable working clearance.
Small-space advantage: A messy pile becomes a vertical row that is easy to reach and easy to put away.
Practical improvement: Leave room for the next clamp. A rack that is full on its first day is already planning its own replacement.
10. Fold-Open Tool Cabinet
A fold-open tool cabinet is a good answer when you want the room to look like a room again. Closed, it has a shallow footprint. Open, it reveals a carefully organized set of hand tools, measuring equipment, drill accessories, and hardware.
A compact version may be 12 to 18 inches deep when closed. Pegboard, French cleats, or shallow shelves inside the doors turn otherwise wasted vertical space into usable storage.
Small-space advantage: One cabinet can replace several loose boxes while keeping visual clutter and dust under control.
Structural detail: The cabinet grows heavier as tools go inside it. Use an appropriate back, mounting rail, and wall attachment. Before installation, test the full door swing against nearby furniture, walls, and the person standing in front of it.
11. Wall-Mounted Scrap Organizer
Small offcuts are useful for test cuts, jigs, blocks, and little projects. They are also easy to lose in a mixed pile until the one piece you need is buried beneath everything else.
A wall-mounted scrap organizer with narrow bins can sort pieces by length, width, dowel size, or material. Open fronts keep the contents visible. A slightly angled bottom helps short pieces stay toward the front instead of disappearing into the back of a box.
Place the organizer near the cutting area, but away from sparks, heat, and finishing chemicals.
Small-space advantage: Scraps become a visible resource library instead of a low wooden tide across the floor.
Rule of discipline: Keep only pieces that are genuinely useful. Building more bins is not the same as solving the habit of saving everything.
12. Rolling Tool Cart
A rolling tool cart is perfect for a workshop that has to appear and disappear. It can wait against a wall, roll beside the project, and retreat again when the room needs to become a hallway, kitchen, or living area.
A cart about 20 to 24 inches wide and 16 to 20 inches deep can hold a drill, measuring tools, clamps, bits, sanding supplies, and project hardware. Use multiple levels, a solid top, and locking casters. Keep heavy tools low and frequently used items near the top.
A handle makes the cart easier to move, but it also changes the balance. Place it so the cart does not become eager to tip when pulled.
Small-space advantage: The tools travel to the work instead of requiring the work to live beside a permanent bench.
Useful modification: Add a replaceable top. Glue, scratches, and drill marks then become part of a replaceable work layer rather than damage to the entire cart.
Recommended guide: Heavy-Duty Free Woodworking Plans for a Rolling Tool Cart: Build a Stable, Lockable Mobile Cabinet for Power Tools
13. Slim Scrap-Wood Cart
A slim scrap cart has a narrower mission than a general tool cart: it keeps offcuts upright, sorted, and available without claiming a large section of floor.
A depth of 10 to 14 inches works well in a garage edge, hallway, or beside a bench. Add dividers for long boards, medium pieces, thin strips, and plywood remnants. Put the largest pieces at the back and use locking casters if the cart must move often.
Small-space advantage: A narrow strip of floor becomes a controlled material store.
Common mistake: Making the cart too tall and too narrow. Maximum storage is not a victory if the cart is unstable when a board is removed.
14. Narrow Entryway Bench
A narrow entryway bench is one of those projects that feels useful before it is even finished. It offers a place to sit, a lower shelf for shoes, and a chance to practice building furniture that has to survive daily handling.
A starting size of 36 to 48 inches wide and 12 to 14 inches deep can provide seating without choking a hallway. Keep the lower shelf or cubbies open enough to clean. Soften exposed edges, especially if children will use the bench.
Pocket-hole joinery, dowels, or traditional mortise-and-tenon joints can all work when the joints are sized for the load and assembled accurately.
Small-space advantage: One piece provides seating, storage, and a finished furniture project.
Recommended guide: Free Woodworking Plans for a Narrow Entryway Bench: 3 Custom-Fit Designs for Small Hallways
15. Corner Shelf
Corners are often full of space that ordinary furniture cannot reach. A triangular, quarter-circle, or stepped shelf can turn that dead zone into a place for tools, books, plants, or small bins.
Measure both walls, the baseboard, and the trim before cutting. A shelf that meets two walls may need a notch or spacer to sit cleanly. If the shelf is tall, include a way to prevent tipping.
Small-space advantage: It adds storage without narrowing the room’s main path.
Design improvement: Make the shelves removable. A corner that holds workshop supplies today may need to hold something entirely different later.
16. Nesting Stools
Nesting stools give you several seats with the footprint of one. Build them in graduated sizes so one slides beneath another, then use them as seating, low assembly surfaces, or temporary places to hold a project.
Keep the proportions stable and make sure each stool rests squarely on the floor. Choose a durable finish for the amount of handling the stools will receive.
Do not treat a stool as a step ladder unless it has specifically been designed, tested, and labeled for that job.
Small-space advantage: Several useful seats store as one compact group.
17. Stackable Storage Crates
Stackable wooden crates are simple, adaptable, and forgiving enough for a beginner’s first real project. They can hold tools, books, fabric, toys, shoes, or project parts. If every crate shares the same outside dimensions, the storage can be rearranged as the room changes.
Add hand openings, reinforce the corners, and sand every edge that will be handled. When crates are stacked high, include an anti-tip strategy and keep heavy contents low.
Small-space advantage: Storage grows upward and can be reconfigured without committing to one large cabinet.
Material strategy: Standardized crate dimensions reduce measuring errors and make it easier to plan efficient cuts from your material.
18. Under-Bed Storage Drawers
The space beneath a bed is easy to forget because it is out of sight. That is precisely why it can be valuable. Low drawers can hold flat tools, plans, clamps, sandpaper, hardware, or finished parts without taking another visible corner of the room.
Measure the lowest clearance under the bed, including the frame and any uneven points, before choosing the drawer height. Use a low box, smooth runners or heavy-duty casters, and a front handle that will not catch on bedding.
Shallow containers inside the drawer are easier to search than one deep compartment where everything disappears.
Small-space advantage: It converts hidden space into storage without changing the room’s footprint.
Common mistake: Building the drawer so tall that it cannot be removed, or so wide that the bed frame prevents it from opening fully.
19. Folding Plant Stand
A folding plant stand is a small furniture project with a satisfying visual payoff. It lifts plants into a vertical arrangement, opens a little living display, and folds away when the floor needs cleaning or the room needs to change.
Use stable feet and protection appropriate to the location. The shelves must carry the combined weight of pots, soil, and water—not merely the empty pots sitting in your sketch.
Outdoor versions need materials and finishes suited to the actual exposure. A label that says “weatherproof” does not replace a design that can handle the place where it will live.
Small-space advantage: More display area rises upward instead of spreading across every available surface.
20. Wall-Mounted Drop-Leaf Table
A drop-leaf table can be a dining surface in the morning, a writing desk in the afternoon, and a temporary assembly table when a project demands it. It is especially useful in kitchens, hallways, studio apartments, and compact workshops.
A top around 24 to 36 inches wide and 16 to 20 inches deep is a practical starting range. Support the open leaf with a hinged leg, folding brackets, or a properly designed support frame. The open position must lock securely, particularly if the table will carry a hot meal, a laptop, or a clamped project.
Small-space advantage: The table exists when needed and becomes a shallow wall feature when closed.
Design distinction: A desk is usually shaped around a seated user and cable access. A drop-leaf table should be designed around its intended load and the movement of its supports.
21. Mobile Flip-Top Work Center
A mobile flip-top work center is the most ambitious plan here. It combines a compact rolling base with a top that rotates or changes function. One side may hold a small tool; the other may become a clean assembly surface or storage platform.
Keep the center of gravity low. Use locking casters, and design the rotating or hinged mechanism so it cannot shift unexpectedly while the surface is in use. A counterbalanced top may help, but the hardware must be selected for the finished weight, not the empty frame.
Small-space advantage: One compact footprint can support several stages of a project.
Best for: A builder who has already gained confidence with joinery, accurate measurement, hardware installation, and safe load management.
Materials for Compact Woodworking Projects
Making a project smaller does not make weak joints or unsuitable materials less important. In a cramped room, a poorly chosen panel or a loose hinge can be more frustrating because there is nowhere else for the problem to go.
Plywood
Plywood works well for folding tables, cabinets, carts, shelves, and storage boxes because it offers broad panels and good dimensional stability when supported correctly. Choose the thickness according to span, load, edge treatment, and hardware—not just according to what is easiest to carry through the door.
Protect exposed edges when the project will be handled often. A solid-wood edge strip can improve durability and appearance, but it also changes the dimensions and may introduce movement considerations.
Recommended reading: The Ultimate Plywood Woodworking Project Plans Library: 37 Beginner-to-Pro Builds with Cut Lists, Plans & Expert Tips
Dimensional lumber
Dimensional lumber is useful for frames, legs, cleats, braces, stretchers, and bench structures. Look over each board before it enters the project. Excessive twist, cup, cracks, or moisture problems are disproportionately annoying in a small build because there is less tolerance for parts that refuse to meet.
Hardware
Small-space designs commonly rely on:
- folding brackets;
- hinges;
- locking casters;
- wall cleats;
- threaded inserts;
- screws and pocket-hole screws;
- dowels;
- drawer pulls;
- shelf pins; and
- corner braces.
Choose hardware for the load, movement, wall type, and frequency of use. Decorative hardware may look perfect in a photograph and still be the wrong choice for a table that must hold weight or a hinge that will cycle every day.
Adhesives and finishes
Wood glue is useful for many indoor joints when the surfaces fit properly and are clamped correctly. Choose a finish for the project’s actual exposure, handling, moisture, cleaning, and ventilation conditions.
Give a freshly finished project adequate drying and curing time before bringing it into a small living area. A beautiful object is not improved by filling the room with avoidable fumes.
Recommended guide: Woodworking Finishing Supplies for Beginners: 17 Essentials for a Smooth, Durable Finish
Tools for Woodworking in a Small Room
You do not need a full-size shop to begin. You do need tools that suit the material, the project, and the room where the work will happen.
Minimum hand-tool setup
A practical starting group includes:
- tape measure;
- combination square;
- pencil or marking knife;
- clamps;
- hand saw;
- drill and suitable bits;
- screwdrivers or driver bits;
- sanding block; and
- a stable surface for supporting the work.
Hand tools create less noise than many power tools and are easier to store. They also slow the work down in a useful way. You notice grain direction, the fit of a joint, and the difference between a measurement that is exact and one that is merely close.
Compact power-tool setup
Where the space and noise conditions allow, a drill/driver, circular saw with a guide, jigsaw, and random-orbit sander can handle many beginner projects. Use each tool according to the manufacturer’s instructions, with suitable eye and hearing protection and a stable method of supporting the material.
Let the project determine the tool. Choose the build first, identify the operations it requires, and then decide whether the work can be done safely with the equipment and space available.
Recommended guide: Hand Tools vs Power Tools Cost for Woodworking: Which Setup Saves Beginners More Money?
How to Work Safely in an Apartment or Tiny Workshop
Small rooms leave less margin for error. There is less room to set down a hot tool, less space for a long board to move, and less air to dilute dust or finish. Organization is not decoration here; it is part of the safety system.
Anchor wall-mounted projects correctly
Identify the wall construction before mounting a bench, cabinet, shelf, or lumber rack. Attach structural components to suitable framing or use an anchoring method matched to the wall and expected load.
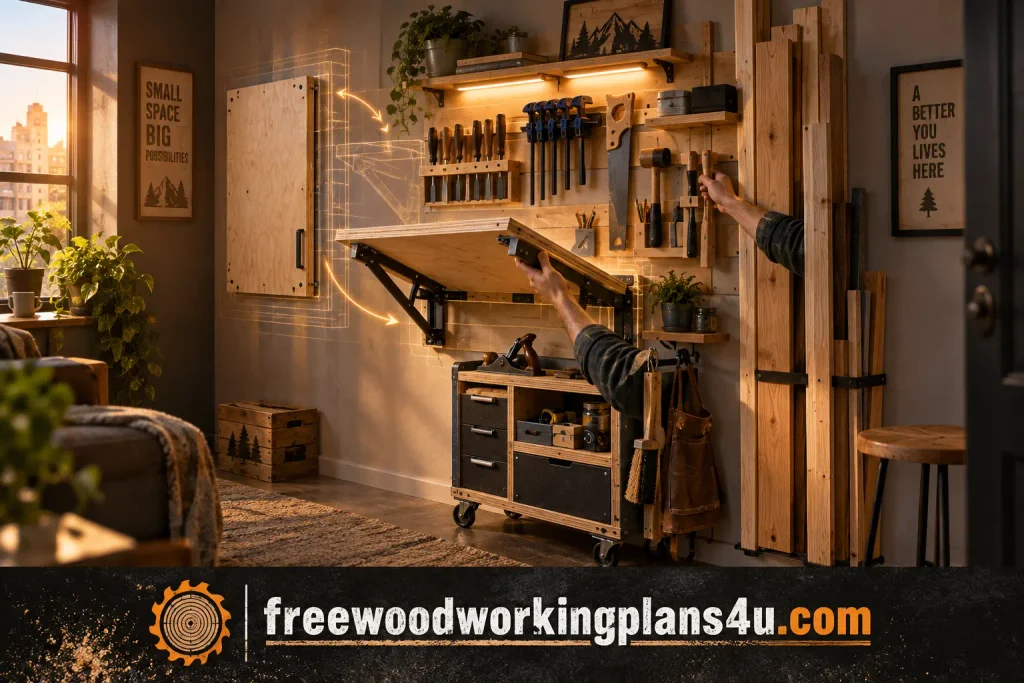
If you cannot verify the wall’s capacity, choose a freestanding or mobile design. A project that is technically compact but poorly attached is not a successful small-space solution.
Control dust at the source
Sharp blades, close-to-the-work dust collection, and careful cleanup make a noticeable difference. Clean before particles have time to migrate through the home. A small room should not be treated like a sealed box where fine dust can accumulate without consequence.
Ventilation, suitable respiratory protection, and a sensible work schedule become more important as the room gets smaller.
Reduce noise and vibration
Hand tools, pre-cut panels, and short work sessions can make woodworking more workable around neighbors and family members. A vibration-damping mat may reduce movement beneath a small machine, but it cannot turn an unstable or unsafe setup into a safe one.
Store finishes and flammable materials responsibly
Keep finishing products in their original labeled containers and away from heat, sparks, and ignition sources. Follow the product label for ventilation, storage, disposal, and drying.
Never assume that a small quantity is automatically harmless in a poorly ventilated room.
Keep the exit clear
Check every folding table, rack, cabinet, and cart against the room’s exit path. If a project blocks a door, stairway, or emergency route, it has solved the wrong problem.
How to Follow a Small-Space Woodworking Plan Step by Step
Compact projects reward accuracy because a small dimensional error has fewer places to hide.
1. Read the entire plan first
Before cutting, identify the finished dimensions, material thickness, joint type, hardware, and required tools. Look for operations that must happen before assembly, such as drilling shelf-pin holes or cutting a hinge recess.
Recommended reading: How to Follow Woodworking Plans Step by Step Without Wasting Lumber: 10 Accuracy Checkpoints
2. Confirm the finished footprint
Compare the plan with the actual room. A project may fit perfectly on paper and still fail at the doorway, beside the bed, or in its folded position.
3. Separate the cut list from the materials list
The materials list tells you what to buy. The cut list tells you what to make from those materials. Keep the two lists separate, and verify the thickness of every panel before calculating the final dimensions.
4. Account for saw kerf
Every saw removes a small strip of material. When several pieces come from one board or panel, those strips add up. Mark the cut sequence and include the blade’s kerf when planning multiple parts from limited stock.
Recommended reading: Saw Kerf Allowance in Woodworking: The Exact Formula, Examples, and Cut-List Method
5. Make a dry assembly
Set the parts together without glue. Check that the corners are square, the doors and leaves open, the casters clear the frame, and the hardware lands where the drawing says it should.
This is the stage for discovering that a screw head will interfere with a hinge—not after the finish has dried.
6. Test the movement
Folding and mobile projects should be moved through their complete range before finishing. Open and close the table. Roll the cart. Remove the drawer. Rotate the work center.
Movement problems are much easier to correct while every joint and fastener is still accessible.
7. Finish for the actual environment
A living-room table, a covered balcony rack, and a workshop cart do not face the same conditions. Choose surface protection around moisture, handling, cleaning, and ventilation rather than choosing by appearance alone.
How to Adapt These Plans to Different Small Spaces
Apartment or studio
Favor designs that fold, roll, stay quiet, and can be removed or relocated. A wall-mounted project may require permission or careful anchoring; if the wall is uncertain, a rolling cart or portable sawhorse may be the better answer.
Keep dust-producing operations short and decide where material will be cut before bringing it indoors. The smartest apartment project is often the one that reduces the amount of cutting and sanding that has to happen inside.
Closet workshop
Use shallow vertical storage, folding supports, and removable bins. Tools should come out without requiring you to unload the whole closet first.
Keep the door, ventilation, and exit path functional. A closet that stores tools beautifully but cannot be entered safely is not an efficient workshop.
One-car garage
Prioritize mobility. A rolling workbench, mobile flip-top center, and vertical lumber rack can share the same floor area at different times. Leave enough clearance to move a vehicle, open its doors, and carry long material without twisting through obstacles.
Balcony or covered outdoor area
Protect projects from moisture, direct sun, and wind. Use stable bases, secure loose material, and choose finishes suitable for the real exposure.
A balcony is not automatically an appropriate place for sawing, sanding, or storing chemicals. Building rules, property policies, neighbors, and ventilation still matter.
Choosing the Best First Project
The best first project is usually the one that removes the obstacle currently keeping you from building. It should solve a real space problem and teach a skill you will use again.
| Your main problem | Best starting project |
|---|---|
| No work surface | Folding workbench or fold-down assembly table |
| Tools everywhere | French cleat wall or fold-open tool cabinet |
| Lumber has no home | Vertical lumber rack |
| Clamps are difficult to store | Wall-mounted clamp rack |
| No permanent workshop | Rolling tool cart or folding sawhorses |
| Narrow hallway | Entryway bench or narrow floating shelves |
| Dead corner | Corner shelf |
| Not enough hidden storage | Under-bed drawers or stackable crates |
| Need several functions in one object | Mobile flip-top work center |
Build one project, use it for a while, and let the next project answer what you learned. A compact workshop becomes efficient through small adjustments—not through buying or building everything at once.
Frequently Asked Questions
I do not have a garage. Can I still do woodworking?
Yes. Many small projects can be built with hand tools, folding sawhorses, a temporary work surface, or a rolling tool cart. The real limits are noise, dust, material handling, ventilation, and safe storage. Large machinery and long stock may need to be prepared somewhere else, but a lack of garage space does not end the possibility of making useful things.
What would you build first in a tiny room?
A wall-mounted folding workbench is often the most useful first build because it creates a real work surface without permanently consuming the floor. If wall mounting is unsuitable, folding sawhorses with a removable top or a compact rolling cart are practical alternatives.
How much room does a small woodworking bench really need?
The bench itself may be only 20 to 24 inches deep, but the working area is larger. You need space to stand, reach, handle material, and move without catching yourself on a corner. Measure the open position—not just the folded one—and test it with a cardboard mock-up.
Learn more: DIY Woodworking Bench Plans with Exact Dimensions: Professional Plans Anyone Can Build in One Weekend
Is it safe to mount a workbench to drywall?
Do not rely on drywall alone for a workbench carrying tools or a project. Identify suitable framing or use an anchoring method designed for the wall construction and expected load. If the wall cannot be verified, a freestanding or mobile design is the safer direction.
What wood works best for compact projects?
Plywood is useful for stable panels, cabinets, carts, and folding surfaces. Dimensional lumber is useful for frames, legs, stretchers, and cleats. The right material depends on the span, load, moisture exposure, appearance, and tools available for the build.
How can I control sawdust in an apartment?
Reduce dust at the source, use hand tools or pre-cut material when practical, support the work securely, and clean before particles spread. Plan cutting and sanding around ventilation and suitable protective equipment. A small room does not have unlimited airflow simply because the workpiece is small.
Are folding workbenches actually strong enough?
Some are, and some are not. Strength depends on the top, frame, hinges, brackets, wall attachment, and intended load. A bench designed for measuring, assembly, or light hand-planing may not be appropriate for heavy machinery or aggressive lateral force. Build and use it within its actual design limits.
What is the least awkward way to store lumber in a small space?
A vertical lumber rack is usually more efficient than laying boards across the floor. Sort pieces by length and size, keep heavy stock low, prevent tall boards from tipping, and discard unusable scraps regularly. Storage works best when you can see and reach the material you intend to use.
Which tools should a beginner buy first?
Start with measuring and marking tools, clamps, a drill or hand drill, a suitable saw, screw-driving tools, and sanding supplies. Add power tools when a planned project actually requires them and the workspace can support their safe use.
Learn more: Best Woodworking Tools for Beginners: Build Your First 10 Projects With These Tools and Nothing More
Should I build storage or a workbench first?
Look at what is stopping you today. If tools and materials are scattered everywhere, a simple storage project may improve the room immediately. If there is no stable surface for accurate work, begin with a modest folding bench or sawhorse system.
Can I resize these plans to fit my room?
Yes, but change one dimension at a time and preserve the design’s structural logic. When you alter width, depth, height, hardware position, or material thickness, recheck stability, load, joint placement, door movement, and wall attachment.
Products / Tools / Resources
The right supplies for a compact project are the ones that help the work stay controlled and the room stay usable.
- Measuring: tape measure, combination square, straightedge, pencil, and marking knife.
- Holding: clamps that fit the project, a stable temporary work surface, and non-slip protection.
- Cutting: a suitable hand saw or power saw with safe material support.
- Assembly: drill/driver, bits, screw-driving tools, glue, and the correct fasteners.
- Storage: locking casters, wall cleats, bins, shelf supports, and labels.
- Surface preparation: sanding blocks or a sander, dust control, and suitable cleanup supplies.
- Safety: eye protection, hearing protection when required, appropriate respiratory protection, ventilation, and a clear exit path.
- Planning: a cardboard mock-up, a verified cut list, a materials list, and a written hardware checklist.
Get 50 FREE Woodworking Plans + The 440-Page Guide Book
Once you have chosen a compact project, the next challenge is often finding the right build for the next piece of wood on your list. Enter your email to receive 50 free woodworking plans plus The Art of Woodworking, a 440-page guide book.
Free to request. No credit card required.